Turkey Tetrazzini Takeover!

For When You're Left With A Ton Of Turkey After Thanksgiving And Don't Know What To Do With It.

Welcome back to another recipe of the week!  We almost always end up with leftovers after Thanksgiving of some sort, and you need to use them up without burning out. This week we're taking your turkey and turning it into a medley of flavors with this Turkey Tetrazzini. While the first version is a very traditional mix,  we also have a Southwest style in the notes afterward if you're looking for something wildly different. For now, let's grab that turkey and dive in! 


Ingredients:

1 lb of dried pasta 

3 Tbsp butter

4 garlic cloves

1lb onions 

3 1/2  oz of button mushrooms

1 cup white wine

2 C chicken stock

1/2 C all-purpose flour

1 C turkey stock  (can be substituted for more chicken stock if you don't have any)

1/2 C heavy cream

1 C milk 

14oz cooked turkey

1 tsp ground nutmeg

10 oz Cheddar cheese

3 1/2 oz Parmesan cheese

8 oz frozen peas

salt 

fresh ground black pepper

1 lemon 

1 C panko bread crumbs 


Recipe: 

Start by gathering up your garlic, onions, mushrooms, turkey, cheddar cheese, and your lemon. Each of them needs to be prepped in different ways, so you're also going to need your chef's knife, a pair of forks, a juicer, and a cutting board, as well as dishes for each ingredient.

Start by crushing your garlic cloves with the side of your knife and thoroughly smashing them.  Then take your onions, remove the tops and bottoms of them and chop the rest into 1/2 inch pieces. 

Next up is the mushrooms, for those, you'll want to slice them into 1/4-inch slices. These are thick enough not to melt but thin enough to cook easily.  When you're done with those, take your turkey and shred it. You can even go so far as to chop the shredded pieces after so that nothing is longer than bite size if you like, but the shredding is the important part here. 

For the cheddar, you're going to want to shred that all and set it aside in the fridge for the time being. Lastly, grab your lemon. Roll it firmly across the counter with your palm and then cut it in half, making sure to get out as much of the juice as you can from both halves.

Once you've prepped all of your materials, set a pot of water on the stove, add 1/4 c salt to the water and bring it to a roiling boil. Toss in the pasta and cook it until cooked but still firm. This is so that you don't get pasta-flavored mush later on.  Drain the pasta and set it aside. 

-Add the butter to a large frying pan and allow it to melt. When done, add in your garlic and onions and saute for 7 minutes or until the onions are tender.  Stir in your mushrooms and cook for an additional 5 minutes stirring frequently. 

-Stir your wine and 2 cups of chicken stock into the pan and reduce the heat to a simmer. Allow the mixture to reduce for 10 minutes. Next, add in the flour and mix thoroughly to incorporate. When you don't have any clumps left, stir in the turkey stock a little at a time. (Or the third cup of chicken stock if you went with that.)  Whisk it all together to form a sauce. 

-Reduce your heat to medium-low and stir in the cream, milk, turkey, nutmeg and both types of cheese.   Season it well with salt and pepper, mixing to incorporate. Allow it to simmer for 15-20 minutes. Finally, add in the pasta and the peas while you preheat your oven to 350*F. 

-Remove the pan from the heat and mix in your lemon juice. 

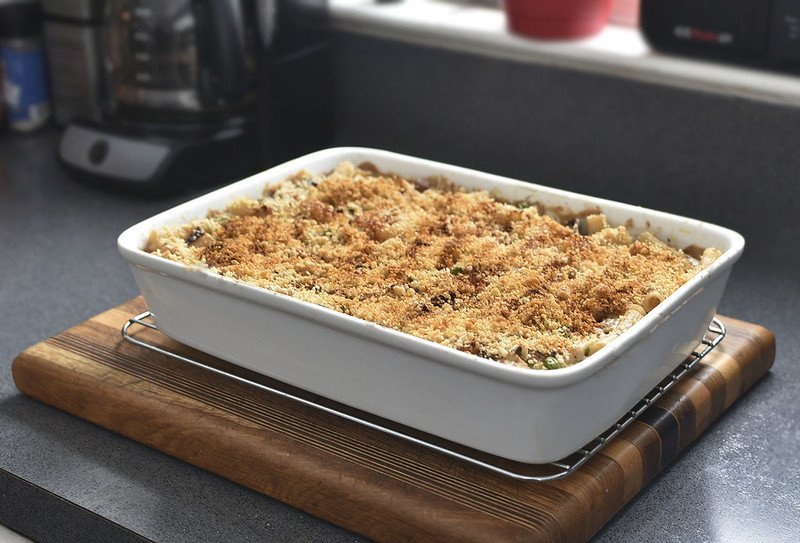
-Transfer the mixture to a casserole dish and coat the top with your panko.  Bake the casserole for 25 minutes or until the top, is golden brown and bubbling. 

For a tasty variation, you can sub out the cheddar cheese for cream cheese and the Parmesan for a little bit of Monterey Jack. 

Remove the peas and add in fresh red and green bell peppers instead. We would say two of each type, diced and sauteed, prior to adding in. 

Finally, add in 2 tsp of chili powder,1 tsp of smoked paprika, and 1/4 tsp of cayenne pepper. 

Follow all of the directions otherwise and enjoy a delicious southwestern-style tetrazzini. 


With that wrapped up, that is our recipe for this week! Let us know how yours turned out or any variations you've tried in the comments below or over on our Facebook page. 


If you wound up here because your appliances are malfunctioning after Thanksgiving, give us a ring! You can reach out to us via phone at (214) 599-0055) or by going to our contact page. Wherever you are in the Dallas Metro area, Appliance Rescue Service is here to help. Whether you're in Coppell, Allen or Plano, we'll work with you to get your home running smoothly again.

What is the Most Energy Efficient Clothes Dryer?

The Top Energy Star Rated Dryer And 4 Others That Come Close!

We're back at it again, looking to find the most energy-efficient appliances for your home! This time we're looking at your dryer and seeing what we can come up with. We'll walk through the different types of dryers first, then what makes them efficient, followed by five of the most energy-efficient dryers on the market for 2022, and wrap up with tips for purchasing a new dryer or making your current one more efficient. 


Categories of Dryer 

Vented Dryers

Vented Dryers can be broken down into either gas or electric dryers, with both types working mostly the same.  Both contain a heating element that raises the temperature of the air inside the dryer drum. The moisture that then evaporates from the clothes is vented out through aluminum ducts. 


Ventless Dryers 

These dryers are better for smaller spaces like apartments and tiny homes. Instead of having built-in ducts, They contain all of the heat and moisture inside of the machine. The water can be drained out of a reservoir later and should be done between loads for best use. 


Condenser

A condenser dryer is different from both of the previous models in that it pumps out the water.  It starts by pulling air in from outside the machine and over the heating elements, which then gets pumped into the drum of the dryer. The air is then pulled back out as cooled air, which gets condensed further into water and is pumped out. This process is repeated until the end of the process. 


Heat Pump Condenser

Our final variety of dryer is a heat pump condenser. These are even more efficient than any of the previous options using about 1/2 of the energy that they require.  A heat pump condenser is different because it uses a refrigerant system with both hot and cold coils. Instead of consistently drawing in air the way a condenser does, it keeps the air internal and constantly heats and cools It as needed to remove moisture from the air.  That water is then drained into a holding tank in the dryer that you empty as needed. 


For people who wash a lot of laundry and have high electricity rates, a heat pump condenser is a great choice because of how energy efficient it is. 


Ratings according to Energy Star 

How do you tell, though, when something is efficient vs. when it's not? When it comes to clothes dryers, you're going to be looking at a term we've seen in one of our other articles, Combined Energy Factor. CEF is a measure of energy efficiency based on a couple of different factors, which, combined together, show how much the dryer is going to be affecting your energy bill. The higher the CEF, the more efficient the dryer is. 


Top 5 Energy-Efficient Dryers According to Energy Star for 2022

1- Beko - HPD24414W 

Electric Standard Ventless - Heat Pump

Combined Energy Factor (CEF)Field details:11.0

Drum Capacity (cu-ft):4.5

Estimated Annual Energy Use (kWh/yr):217

Optisense Technology

Internal smart sensors allow you to choose how dry you want your clothes and will stop the dryer when that level of dryness is detected

16 Programs

Unique drying cycles that include: Permanent Press, Delicates, Gentle Care, Express 45, Wools, Jeans, Silent, Super Quick 30, and even Baby Sanitize


2- Blomberg - DHP24404W

Electric Standard Ventless - Heat Pump

Combined Energy Factor (CEF): 11.0

Drum Capacity (cu-ft): 4.5

Estimated Annual Energy Use (kWh/yr): 217

Anti-Creasing Option

The gentle drum action of a Blomberg dryer separates and smooths out individual garments as they dry, so when the cycle finishes clothes come out wrinkle-free and ready to wear. 

Gentle Care

Blomberg's closed loop heat exchange system means the heat pump dryers use a circulating air temperature that is consistently 40 percent lower than conventional dryers. This gentle care helps keep all fabrics-even woolens-at their best and extend garment.

Quick Drying

An 8.45 lb. load will dry in less than one hour. They also save your clothes. Faster drying and cooler temperatures reduce friction and shrinkage for clothes that look their best and last longer.

Direct Draining

A calibrated water-level sensor identifies any deviation from the correct water level in the tank and automatically starts draining if the level is exceeded.

16 Drying Cycles

Choose between Automatic Regular/Delicate Cycle, Automatic Perm Press/Knits Cycle, and Air Fluff / no heat.


3- Miele - PDR908 HP 

Electric Standard Ventless - Heat Pump

Combined Energy Factor (CEF): 9.75

Drum Capacity (cu-ft): 4.6

Estimated Annual Energy Use (kWh/yr): 245

Honeycomb Drum

Less folding, easy finishing: Laundry is dried very gently and evenly in the honeycomb drum.

PerfectDry System

The Miele PerfectDry system dries garments perfectly.

Intelligent Dryers

Gentle and uniform drying thanks to intelligent technology.

Short Program Cycles

Premium commercial technology allows you to benefit from the shortest program cycles.


4- Asko - T411HS.W.U 

Electric Standard Ventless - Heat Pump

Combined Energy Factor (CEF): 9.1

Drum Capacity (cu-ft): 4.9

Estimated Annual Energy Use (kWh/yr): 263

Butterfly™ Drying System

The two paddles inside the machine gently push the clothing in a figure eight, to spread the garments out and allow air to circulate through them evenly.

Soft Drum™ Technology

The new drum design enhances airflow around the load, thereby increasing the drying effect and allowing for even and gentle drying with both small and large loads.

Air Lift™ Paddles

The Air Lift™ paddles are designed to lift the load as high as possible for increased time in the air flow to enhance the drying effect and shorten the drying time while preventing them from bundling.

Multi Filter System™

This is a filter system of five different filters that ensures that all lint and even smaller particles are trapped before they reach the sensitive inner parts of the tumble dryer.

Lint Trap™

The Lint Trap™ is placed in the door and is designed to be easy to empty and clean.

16 Programs

This dryer comes with 16 drying programs to choose from - Auto Extra Dry, Auto Dry, Auto Normal Dry, Auto Iron Dry, Jeans, Synthetic, Terry, Down, Bedding, Silk/Wool, Shirts, Steam Wrinkle Care, Steam Refresh, Quick Pro, Time, and Airing.

Drying Sensor

ASKO dryers with a sensor system will dry your clothes in the shortest possible time and with lowest possible energy consumption.

Steam Wrinkle Care

Repetitive steam injections and heat treatment to eliminate creases in the fabric. Low heat is used to also cater for sensitive fabrics.

Quick Pro Cycle

With this program, you can get your wash completely dry in less than an hour.

Mesh Filter

This filter traps slightly smaller particles than the Lint Trap™ and is automatically cleaned with water.

Foam Filter

As a final step before the air hits the condenser, the foam filter traps the

smallest dust particles.

Lint Cup

Models with a steam function have an additional small filter, the Lint Cup, that protects the steam generator from lint and dust.

65 dB(A) noise level

LCD display

Interior light

Remaining time and program end indicator


5- Samsung - DV53BB89**H*

Electric Standard Ventless - Heat Pump 

Combined Energy Factor (CEF): 8.5

Drum Capacity (cu-ft): 7.8

Estimated Annual Energy Use (kWh/yr): 281

AI Optimal Dry

Automatically chooses the best settings based on what you're drying

Super Speed Dry

Dry a full load in just 30 minutes and achieve a complete wash and dry in under an hour with an added Super Speed Washer

MultiControl™

Eliminate the long reach and operate your dryer right from your washer when the units are stacked

AI Smart Dial

Simplifies your dryer's control panel, learns and recommends your favorite cycles, and allows you to customize your cycle list, making laundry day a breeze

20 Dry Cycles

More cycles to cover almost every washing need for your active family

Sensor Dry

Automatically optimizes the time and temperature of your drying cycle to protect your clothes from heat damage while avoiding excess energy use.

Steam Sanitize+

Samsung Steam Sanitize+ cycle removes 95% of pollen from fabric, while Multi-Steam refreshes clothing and relaxes light wrinkles.

Wrinkle Prevent

It prevents clothes from getting wrinkled

Vent Sensor

Continuously monitors the condition of your dryer's air duct to make sure it's running safely and efficiently.

Drying Rack

The included drying rack provides a perfect place to dry delicate items, sweaters, and footwear gently.


As you can tell, all of these are Heat Pump, ventless, electric-powered dryers. The reason for this is that currently, those are the most efficient and effective models on the market. 


Tips for Energy-Efficient Dryers

If you're looking at buying a new dryer, look for one with these features: 

Sensors to Detect When Clothes Are Dry -Just what it says on the tin. If you make sure that the dryer is no longer running when the clothes are dry, you’re saving energy as well as saving your clothes from additional wear and tear.

Delayed Start- Make use of any time based discounts for energy in your area with a delayed start on your dryer.

Steam Cycle- This helps save you time on ironing or re-running the clothes to prevent or remove wrinkles.

Steam Cycles - Many ENERGY STAR dryers also include convenient features, such as a steam cycle that can help save time on ironing clothes by preventing wrinkles. 


If however you're looking to make the one, you already have more efficient, try these tips: 

-Dry your loads back to back.  Doing this means that the dryer doesn't have to heat up as much by comparison to letting it cool in between. 

- Separate out your lights and your heavier materials. If your dryer already has a sensor for when something is done, this is more effective. The point, though is that your lighter clothes (socks, pajamas, t-shirts etc) are going to dry much more quickly than your heavy materials like sheets, towels, & denims. Save yourself time and energy by separating them so that when you're waiting for a load to dry it's because everything is still drying, not just one or two items. 

-Don't overload the dryer.  If the clothes don't have a way to tumble around and have air circulating, then it's much harder for them to dry.  

-Make sure your dryer vent is regularly cleaned if you have one. Much like in our last tip, if the air cannot get out, the dryer has to work harder, and your electric bill is going to go higher. 


And that is our top five most energy-efficient dryers available on the market as of right now. What did you think? Were you helped more by the new dryers or the tips for improving your current dryer?  Let us know in the comments below or over on our Facebook page! As always, we love to hear from you. 


If you're not looking to replace your dryer, it's just making weird rattling noises, we can help. You can reach out to us at ((214) 599-0055) or on our contact page. Wherever you live in the Dallas Metro area, we will work with you. At Appliance Rescue Service, our top goal is to get your home running smoothly again.  From Addison to Frisco, we're here for you. 


Organizing Your Home Before the Holiday Daze

Getting Your Home Ready Before the Holidays Hit

Raise your hand if your house becomes a mess every year during the time between Halloween and Christmas?  If you did, you’re not alone. Your Blogger is there right with you. What if though, you had a handful of tips and tricks to tackle this holiday season without losing your mind, the gifts you’d bought, and every square inch of space in your home? Well, that’s where today’s post comes in. 


First up, the general things. 

Two bins made of wicker sit side by side.

Courtesy of Alexa

-Use Bins and baskets around the home to contain mess and clutter. Sure it’s a cheat, but if you have designated spaces to put things, they’re less likely not only to go missing but end up scattered over every other available surface. 

Three stacking storage units sit side by side full of various toys and books, sorted into bins.

Courtesy of C.M. Zijderveld

- You can also use bins and baskets to sort gifts if you purchase as you go through the year purchasing. We like having a row of baskets at the top of the closet. It looks good all year long, and so long as you don’t label the outside, you’re the only one that knows that you’re hiding gifts and not your out-of-season clothes. 


-Clean stuff up! Get rid of stuff and do a pre-holiday donation blitz. 

Go through and trim stuff down. Do you hate that ornament? Donate it. Is a wreath falling apart? Either deconstruct it for craft materials or send it to the recycling center. 

Essentially, if you don’t love it, don’t keep it. 


Have a plan! 

Whether you’re breaking down your decorations from Halloween, setting up for Thanksgiving, or getting organized for Christmas, having a plan saves you time and headaches. 


Play Tetris! 

When it comes to storing things away, unless it’s breakable, it’s better to store smaller things inside larger things. Two examples here. 

A bunch of boxes are all tossed together in  a hodge podge of a mess, and a very  bad example of storing things inside one another.

This would be a very bad example of storing things inside one another. The only reason nothing is broken is because it’s cardboard.

  • A good example would be storing small details like tiny skulls, potion bottles, and bats inside a larger fake pumpkin. By doing this, you maximize the space that the pumpkin is taking up, and you ensure that you don’t lose or break the smaller items. 

  • Storing glass ornaments inside your grandmother’s trifle dish without wrapping or protection. Doing this means that you’ll end up with shards of glass given enough time and movement. 


-Think about where you’re going to store things before you go shopping. If you already know exactly where it’s going, it’s more difficult to lose it in the holiday daze, and you know if you have the space for it. 


Store the specifics together. Don’t just toss everything into 1-2 boxes and call it done. Put together like with like and protect the things that need it inside that storage. We will always suggest storing everything in totes that are labeled on the outside and the lid. 

- Also make sure to make a list of everything that’s inside the tote and tape it to the inside lid of the tote. This lets you ensure that you know exactly what’s inside them. 


-Separate out your Halloween decorations, store your costume pieces in their own plastic sealable bags, and those organized into totes. You can also store all of your decor in totes as well.  (You can also do the same with fabrics for other holidays, but we’re still thinking about Halloween and Halloween costumes here at ARS.) This is to protect your papers, plastics, and fabrics from moisture, bugs, and other rodents. 


What about Christmas? That’s a lot of very specific items that need careful handling. 

-Glass ornaments? Wrap them in paper towels before storing them in an ornament carrier (even if that is just  a photo box.) 

-Egg cartons and cupcake boxes are also great for storing ornaments of all shapes and sizes.

-Loving on the Christmas lights? Turn a sheet of cardboard into cord storage, keep them all separate, and put them into their own bin. 

- Fake Christmas tree? We haven’t figured out anything more straight0forward than the totes made just for this, but let us know if you do. 


- What about wrapping? Do you love it or loathe it? 

Try setting up a station for gift wrapping. Have a container for wrapping papers and keep all of them in that container. 

Keep everything sorted so that it’s close to hand. That can mean a large tote box that has everything inside it in trays that you only pull out when you need it, or it can be a table in a corner with everything stored away.
Your Blogger’s setup contains the following. 

Tape

Sharp scissors

A flat open area

Wrapping paper

Notecards and pens

Power cable, an outlet, and the phone (for entertainment AND wrapping help.) 

A kraft paper background with slick bows, a small box wrapped with a ribbon, a pair of craft scissors, a spool of ribbon and a ribbon tied into a bow.


Rounding out our tips in the kitchen, let’s get sorted!

-Store your baking supplies together. It is a fantastic way to keep your kitchen organized and your life nice and easy. Plus, when you pull out the baking supplies every year, you’ll get excited knowing that all the fun of the holidays is just around the corner. 


-Sort and store cookie cutters in photo boxes. The small boxes with their labels on the outside make it easy to find just the ones you want and store them away when you’re done. 

-Baked Gift Supplies can also be stored together. If you keep everything you need in one box or tray, it’s all there when you’re ready to pack up the cakes and cookies. Bakers' twine, cookie bags, cupcake liners, and tags, everything is right there for you. 

Thanks to Bernadette Wurzinger

And there you have it! Our tips for how to make the holidays run more smoothly and keep you from pulling your hair out this winter. Let us know in the comments below or over on our Facebook page how you make the holidays easier on yourself. 


If you wound up here because you pushed the dreaded button (no, not that one, the one on your oven labeled ‘Self-Clean’,) we’re here to help. First up, step away from the oven. Next, set up an appointment with us via our contact page or by giving us a call at ((214) 599-0055). We’ll work with you to select a time and date that works for your schedule and send one of our technicians to get your oven working again. In the event it’s not because of your oven but instead one of your other major appliances, it’s ok; we can still help. For any of your major appliances, Appliance Rescue Service is here to help get your home running smoothly again. 


Lazy Weekend Mushroom Pie

Who Wants To Stress Over Meals When It's This Close To The Holidays?

When you can’t be bothered to try new or complicated recipes in the lead-up to the holidays, check out this week’s recipe. It’s warm, filling, utterly delicious and most importantly, it’s easy to make! 


Ingredients:

850g of assorted mushrooms 

3 Tbsp of extra virgin olive oil 

2 Tbsp unsalted butter

2 medium leeks

1/2 C heavy cream

1/2 tsp fresh grated nutmeg 

PIe Dough- Extra flaky 

Egg wash 

Fresh rosemary - garnish

Fresh thyme - garnish

A note on mushrooms: 

When it comes to mushrooms, you have a lot of different options that will work well with this pie.  Some examples that work well are chanterelles, trumpets, creminis, oysters, or morels.  You could go with any of the ones in our list as one type or pick a few of each to see how they interact.  Just make sure that they're properly sourced and cleaned before eating them! 

Recipe : 

-Preheat your oven to 425*F, and remove your pie dough from the freezer, setting it to the side on the counter, so it begins to defrost. Ideally, you don't want it frozen, but you don't want it warm and extra soft, either. 

- Take your leeks, halve them and slice them thinly. You do not want huge chunks for this.  Toss them with salt and pepper, and then measure to make sure you have 2 cups, firmly packed. 

- Prepare your mushrooms. Take your paring knife to trim the mushrooms into medium to large size pieces, leaving clusters of whole mushrooms whenever possible.  (They're great for texture and appearance when you do this!) 

-Transfer your mushrooms to a dish and toss them with olive oil, salt, and pepper to season. 

- Spread your mushrooms out in one even layer on a baking sheet and pop that into the oven. Roast the mushrooms until they're tender, 25-30 minutes. They will shrink quite a bit, but don't expect them to brown much.  Set the pan aside to cool when done. 

- In a medium saute pan, melt the butter over medium heat.    Add the leeks into the pan and cook them, turning down the heat to medium-low. Keep cooking for 8-10 minutes or until the leeks are very soft, almost a melted texture. 

- Add the cream and nutmeg to the pan, bringing it to a simmer. Simmer until the cream reduces, and the mixture thickens, around 3-4 minutes.  Set that aside to cool while you prep the dough. 

- Set your oven rack towards the base of the oven, if possible, with a baking or pizza stone on it.  Line a baking sheet with parchment paper. 

-On a lightly floured surface, roll out your dough into a rectangle a bit larger than 10 x 16 inches.  Use your rolling pin to wrap the dough around and transfer that to your baking sheet.  Brush the dough with your egg wash, then lightly prick the dough all over with a fork.  If you want, you can use a paring knife to straighten up the edges. 

- Spoon your cooled leek mixture into the center of the dough and spread it into an even layer, leaving a border around all edges, 1 inch wide that's uncovered. Arrange the mushrooms on top of the leek mixture, overlapping and layering as needed, but don't stack them. You want them in a single layer to ensure that they cook evenly. Drizzle lightly with olive oil. 

- Pop the pan into the oven and bake until the crust is a deep golden brown and your mushrooms are crisp 40-45 minutes. Garnish the pie with herbs as soon as you take it out of the oven. Allow it to cool for 5-10 minutes before serving.  

And that is how you make Lazy Weekend Mushroom Pie! If you do give it a shot or have suggestions, let us know in the comments below or over on our Facebook page. 


If you're worried about the holidays, though and would like to have a professional do a maintenance check, give us a call! We'll work with you to find a time that works for your schedule and send out one of our technicians to go over all of your appliances. We'll help you make sure that everything is running up to standard or find any problems before they become major ones. At Appliance Rescue Service, our goal is to keep your home running smoothly. Wherever you live in the Dalals Metro Area, we want to work with you. Give us a call at ((214) 599-0055) or reach out to us via our contact page to set up an appointment today.

Keys To Mid-Century Modern Design

Whether You're Just Looking Or You're All In, These Are The Keys To Design For Your Home

Do you miss the simplicity of the 50s? Or maybe you're just tired of the cluttered look of modern decor? If you said yes to either of these questions, Mid-Century Modern decor might be for you. Don't fret if it's not something you're familiar with, though, as we're going to explain where Mid-Century Modern came from, what Mid-Century Modern focuses on, and ten tips for how you can implement Mid-Century Modern in your home. 


Mid Century Modern was a concept that, unsurprisingly, rose to popularity in the middle of the 20th century. The world was changing at such a pace, and people were trying to carve out something that was new.  It was heavily influenced by the German school of design and architecture, Bauhaus. At this time, the school emphasized clean lines, functionality, and a futuristic look. 


These three components came to shape the core concepts of  Mid Century Modern design, along with a few others. These included the fusion of the organic and manmade, muted tones and seamlessly combining the indoors and outdoors. 


If you're looking to learn a bit more about Mid Century Modern, check out some of the designers who were famous for it. 

Eero Saarinen

Charles & Ray Eames

Isamu Noguchi 

George Nelson

Cara Greenberg

Arne Jacobsen

Herman Miller


Let's take a look at ten tips that you can use in your home today to start putting together the Mid Century Modern look of your dreams. 

1) Fusion of Indoor and Outdoor

Bring plants into your home, not just on the edges or the porch. They should be incorporated throughout the decor, as MCM is all about breaking down the separation between inside and outside. Another way to bring that in is having window treatments that leave as little separation between you and the outside world as possible. 


2)  Use Size To Your Advantage

When it comes to space, having more space typically makes us more comfortable. So to bring that feeling to a room, use furniture that's smaller. Using smaller pieces in neutral tones not only highlights your statement piece but also allows the furniture to fade into the room, providing a more spacious feeling. 

3) Vary The Height Of Things Within The Room

When you look into a room, you don't want everything to be at one equal height. Whether it's decor on the walls, furniture, or decorations,  mix things up. 

4) Natural Colors With Pops Of Color 

It doesn't have to be all black, white, and wooden in order to be Mid Century Modern. Bring in some color! Use natural tones (again focusing on the incorporation of nature) and then add a splash of color. 

5) Minimalism 

An bedroom with a pair of open balcony doors is framed by grey curtains, while the bed is made in grey and white bedding, showing off minimalism.

Courtesy of StuBailey

This sounds like a very simple concept. 'Just chuck everything out and only buy what you need." Except... how many of us are good at living like that? 

The thing is, minimalism doesn't have to be getting rid of everything. It's about reducing the clutter and having open, functional spaces. Furniture is simple with sleek lines, without much in the way of ornamentation. 


6) Keep It Functional

Unlike some other styles, Mid-Century Modern wants everything to be functional. If it doesn't have a purpose, it doesn't belong. The flip side of that is that every functional item in your home is also uniquely beautiful because of that. It's a difficult balance to maintain in our fast fashion world, but when you're committed to the design, it's worth it to hunt down pieces that fit the concept. 


7) Mixing Materials 

Just like we want to bring in the outdoors, we want to bring in a balance of man-made vs. natural. Woods and metals, leather and velvets, the consistent interplay between the two is part of the fun. 


8) Velvets

Courtesy of yaoyaoyao5yaoyaoyao

Picking right up from that last point is a material your Blogger loves, velvet. While texture can be said to be an important part of any decorating scheme, velvet holds a special place for Mid Century Modern. This is a lovely way to escape and relax while still holding to the minimal feeling of the design. 

9) Build Each Room Around Statement Pieces 

Courtesy of Steven Miller

For each room, pick 1-2  pieces that really stand out and fit the concept of Mid Century Modern as you see it.  Work around those pieces for the rest of the room to mimic, contrast or highlight them. Bring in colors that complement or contrast them. Bring in other shapes that highlight that one. Bring in textures that are similar. It all ties back together to focus on the piece you’ve chosen. 


10) Choose Statement Lighting

For our last point, make sure to choose lighting with some oomph for your rooms. Light, and the lighting we choose, is just as much a part of a room as the furniture or walls. So, the light fixtures that you choose should stand out just as much. 


And that's a wrap! What do you think? Are you interested in learning even more about Mid Century Modern decor? Or have you decided it's not for you? Let us know in the comments below or over on our Facebook page. 


While you definitely can fit your laundry room and kitchen into a Mid Century Modern design, we know that's not why everyone lands on our website. If you're having issues with your refrigerator or your oven, reach out! You can get hold of us on our contact page or by giving us a call at ((214) 599-0055). No matter which of your major appliances is on the fritz, Appliance Rescue Service will work with you to figure out what the problem is and work with you to get it running smoothly again.