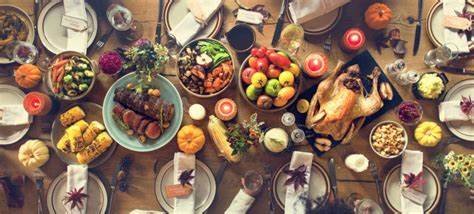
Yeah, we know it's overdone, but how often do we get to use such a fowl pun?
Cooking methods
Slow Cookers (breast or small roast)
Instant Pot (breast)
Air Fryer (breast)
Convection Oven (whole turkey)
Traditional Oven (whole turkey)
Deep Fry (whole turkey)
Have you ever wondered what the differences were in how to cook a turkey in your kitchen? We did. So we took all the different ways we could think of and tried them out.
Before The Cooking Begins
Before you start cooking your turkey, we advise taking a few steps. First off, how much turkey do you actually need? Are you doing a whole turkey? A small one? A large one? What about just getting pre-sliced turkey? (For those of you that are skipping the turkey altogether, we aren't really sure we can help with that. At least not in this post.) Unless you're looking at doing a turkey eating contest, estimate roughly 1 lb of turkey per person at your gathering. So if you've got 20 people, get a twenty-pound bird. If you want to be able to make all sorts of delicious leftovers, estimate at roughly 1.5 pounds of bird per person.
Thawing a frozen turkey isn't actually that difficult. What matters is that you plan for it leading up to the day you intend to cook the bird. There are three methods you can go about thawing it, depending on the size of your bird. For all of these, we advise making sure the bird is still fully wrapped in order to prevent the spread of germs. You can thaw it in the fridge for several days prior to Thanksgiving. You can thaw it in the sink, changing out the water every two hours or so. You don't want hot water for this or else the turkey will start to cook. Instead, shoot for lukewarm to slightly cool. Your third option is to use your bathtub as an oversized sink, in the event that you have a very large bird or you're cooking multiple different turkeys. For this one, we strongly advise bleaching and scrubbing the tub both before and after you use it. Again, keep your water lukewarm to slightly cool. The good news is that you won't have to change the water during the thawing process.
Once you've got a fully thawed bird, it's time to remove the giblets. These are going to be the various organs from the bird. Sometimes they'll be bound together into a small bag, other times you'll need to remove the pieces from either the interior of the turkey or from the neck. You can save or toss these as you prefer. We think they're great for stocks and gravies. Now pat the turkey dry inside and out with paper towels and set it aside for the time being.
Now that we've gone through the uniform bits of preparing your turkey, it's time to consider the different ways you might want to cook it. (Admittedly we hope that you'll read the whole article prior to doing the prep, but it is up to you.)
Slow Cooking That Turkey
If you're looking at a small bird or a turkey breast, a slow cooker is a great way to go. You should be able to feed about 8 people with one slow cooker, depending on the size you have. You'll want to mix together the seasonings you intend for the turkey along with water in order to give the turkey plenty to soak up. You can also use different soup mixes if you want to get creative. One that we've seen suggest is actually French onion soup, or an au jus mix. Your cooking time for this should be about 6-8 hours on low. To check for doneness you're wanting the internal temperature to be 155-160. We know it's supposed to be about 165-170 but, your turkey is going to continue heating after you remove it from the oven. So, look for that temperature, that the turkey has soaked up the juices and the meat is tender.
A slow cooker is going to result in very juicy, tender meat.
Instant Pot, Instant Turkey?
Now, the instant pot is obviously not going to fit the entire turkey. For that reason, you're better off using a turkey breast in there rather than trying to figure out if you can fit the whole bird in there. Again, this is going to be a very good for a family gathering 8 or less. Start by putting oil on your turkey. Pat or rub it down, rather than just pouring it on. You can use any oil you find is tastiest, but we suggest either sunflower or olive oils. Now rub on your spice mix of choice.
With all of that done, pour roughly 1/4 cup of water into the instant pot alongside the turkey breast. Now start the pressure cooker for 25 minutes and use the time for doing something else. When the time is up wait for the full pressure release and allow the turkey breast to rest for 10-15 minutes before you start carving.
Using an Instant Pot for your turkey is still going to give you a very juicy meal, but it’s not going to be as tender as the slow cooker.
Air Fryer... for a Turkey?
We don't quite get why you might want to fry your turkey, but hey, an air fryer might make it slightly healthier? Slightly? Eh, we don't judge. This is still an entirely valid method of making a turkey whether it's just for you or if you're looking to do custom spice blends for different family members.
These are ideal for 1-2 people at 1-2 pounds of turkey breast. Start by rubbing down your turkey with the spices of choice. Be generous with them and really coat the outside of the turkey. Put it in for 30-35 minutes at 390*F. Once again you're aiming for an internal temperature of 160*F, but you're not going to have much in the way of continued cooking once you take it out. Once the air fryer is done, take out the turkey, plate it up and let it sit for 15 minutes before you dig in.
We’ll point out that this is for using our method. You might have different results if you try a different route or add other elements to the recipe. For this turkey though you’re going to end up with nice, crispy skin with a fairly standard poultry texture to the meat.
Convection Oven
A convection oven is much larger than anything we've dealt with up till now. What that means is that you can get creative! You can cook a whole turkey, you can cook several different 'cuts' of turkey or you can do several different varieties of just say turkey breasts. It's up to you, Fortunately, you can also go back to the 1 lb of bird per person rule, without having to worry that you'll have to do multiple rotations of cooking to feed everyone.
Start off by preheating your oven to 350*. Now move your bird over to the roasting pan and grab your favorite spice mix and some oil. Again, you can use whatever type you prefer, we like sunflower because it doesn't add anything to the taste of the bird. Once you've rubbed down the bird with oil, rub in the spice mix you've chosen. Depending on the spices in question you might for a light coating or decide to add a really solid crust to the bird. Once you've got your turkey prepped, it's time to toss it into the oven for 2 - 2.5 hours. You can baste it using the juices or some chicken broth during the process, or you can choose to leave it alone. Either way, you're going to want to use a thermometer to check the temperature of the thigh to figure out when the bird is done. Once the thigh has reached 180* internally, you're good to go. Again we advise letting the bird rest for 15-20 minutes prior to carving it up in order to seal in the flavor.
At some point you’ve likely had a turkey cooked in a traditional electric or gas oven, this is going to give you a very similar result, although the skin should be slightly crispier. It’s going to still be more tender than a chicken though.
Traditional Oven….We’ve got nothing for this one. (Leave your suggestions in the comments!)
Much like the convection oven, you can cook everything up to a whole bird with your traditional oven. You're really only limited by the size of the turkey compared to the internal space of the oven. It's great! Make sure to do a comparison beforehand this way you don't end up with more bird than your oven can handle. Once again we're sticking with the 1lb of turkey per person, or 1.5 lb if you're wanting to send people home with leftovers.
This time you'll be preheating your oven to 325*, a lower temperature to allow the turkey to stay nice and juicy. Move the turkey over to the roasting pan and grab your oil and spices. Rub in the oil and then crust your bird to your desired level of spices. We think a nice thick pepper crust is a great way to do a turkey. Once you've done that, grab some tin foil and make a tent for your turkey. You don't need it just yet, but you'll want to ensure that the turkey doesn't end up burning in the last half hour to an hour of cook time. Set that aside for now and pop the turkey into the oven.
Once again you want to use the thickest part of the thigh to see if the turkey is done. This time you're looking for a range between 165 & 180 when it's done. A good technique to use is to cook the turkey for two hours, check it and if it's not hot enough at that point, to baste it, close it back up and set it for another thirty minutes. Once the skin has turned a golden brown, that's the point when you put the tin foil over top of the turkey. Make sure that you're not closing the sides, you still want the air to flow through and for the bird to cook.
When it's done, remove the turkey from the oven and allow it to sit for 10-15 minutes.
A traditional oven-roasted turkey is going to result in the most ‘traditional’ flavor. It’s going to be juicy if you treat it right, and the skin is going to be softer than the convection oven.
Deep Frying The Turkey -
When you want the really crispy skin
We're going to start off this section with a warning. Please read all instructions thoroughly before you do this. It's a wonderful method for cooking turkey we know, but every year hundreds of people end up injured and at least 1,000 fires are started. It's a delicious way to cook the turkey, but we want all of you to be safe as well.
You're going to want to use a turkey that's between 10 and 20 pounds for this. Make sure that your turkey is completely thawed before you even consider filling the pot. Once you've guaranteed that, place the turkey into the pot and fill the pot with water. Fill up until the water is one inch below the top of the turkey. That's the line you're going to want to go to when you fill the pot with oil later. If you fill the pot over the top of the turkey your pot is likely to boil over during the cooking process. If your pot cannot hold all of this, you do not have the right size pot. Please consider a different method of cooking.
If you do, remove the turkey and pat both it and the pot dry. Back to the turkey, grab your spices or marinades, and cover your turkey. Now grab some butcher's twine and tie the legs of the turkey together and attach those to the stand that came with the fry pot. Once you've got the turkey and the stand situated into the pot, fill the pot with oil up to the line you noted earlier. We suggest using oil with a high smoke point like canola, corn or soybean. Grab the thermometer that came with the pot and attach that to the fryer. Bring up the heat slowly to 350* F.
Once you have your oil at 350, slowly and carefully raise and lower the turkey several times in the oil to seal the juices into it. We suggest 3-4. It's going to be a messy process so gloves and an apron might be useful. Once you've sealed the turkey, lower it back into the oil and leave it there. You're going to want to cook it for 3 minutes per pound of turkey. So if you've got a 10-pound turkey you're looking at 30 minutes of cooking time. Not bad in comparison to the other methods.
When you're checking for doneness, again look to the thickest part of the thigh. This time you want an internal temperature of roughly 180* to 190* F. Make sure to slowly and gently lift the turkey out of the oil so you don't get splashed.
Let the turkey rest for 10-20 minutes before carving. While you're waiting on that, go back to your fryer and turn off the heat. Now cordon off where you have it for the next three hours at minimum before you try to move the pot or dispose of the oil. After that point, you can carefully check to see if it's cool, and if not, leave it alone for another hour.
This is the method to use if you really like your crunch. The skin is very ‘crispy crunchy’ without being burnt or charred. The meat isn’t as tender as other methods, but that’s sort of the point?
Although we've given you the basics on how to do this, we do also advise this article from Butterball for a more in-depth article. (How To Deep Fry A Turkey | Butterball®)
So, what do you think? What's your favorite method of years past for cooking a turkey? Are you going to try something new this year? Let us know in the comments below or over on our Facebook page, we always love to hear from you!
If you've ended up here because you tried to clean your oven prior to the big meal and found out that your oven devoured itself, it's ok. We can help. Give us a call at ((214) 599-0055) or send us a message through our contact page and we'll be happy to help.
Additional Reading
Self Cleaning Ovens
How To Prepare Your Kitchen For the Holidays

