From grills and prep space to refrigerators, pergolas, and entertaining areas, learn what makes an outdoor kitchen truly functional.
There was a time when an "outdoor kitchen" meant dragging the grill out onto the patio, balancing a plate of burgers on the nearest folding table, and making a dozen trips back inside because you forgot the tongs... again.
These days, outdoor kitchens have become true extensions of the home. They're places where friends gather while dinner cooks, where kids play in the yard while the adults catch up, and where a weeknight meal somehow feels a little more like a vacation.
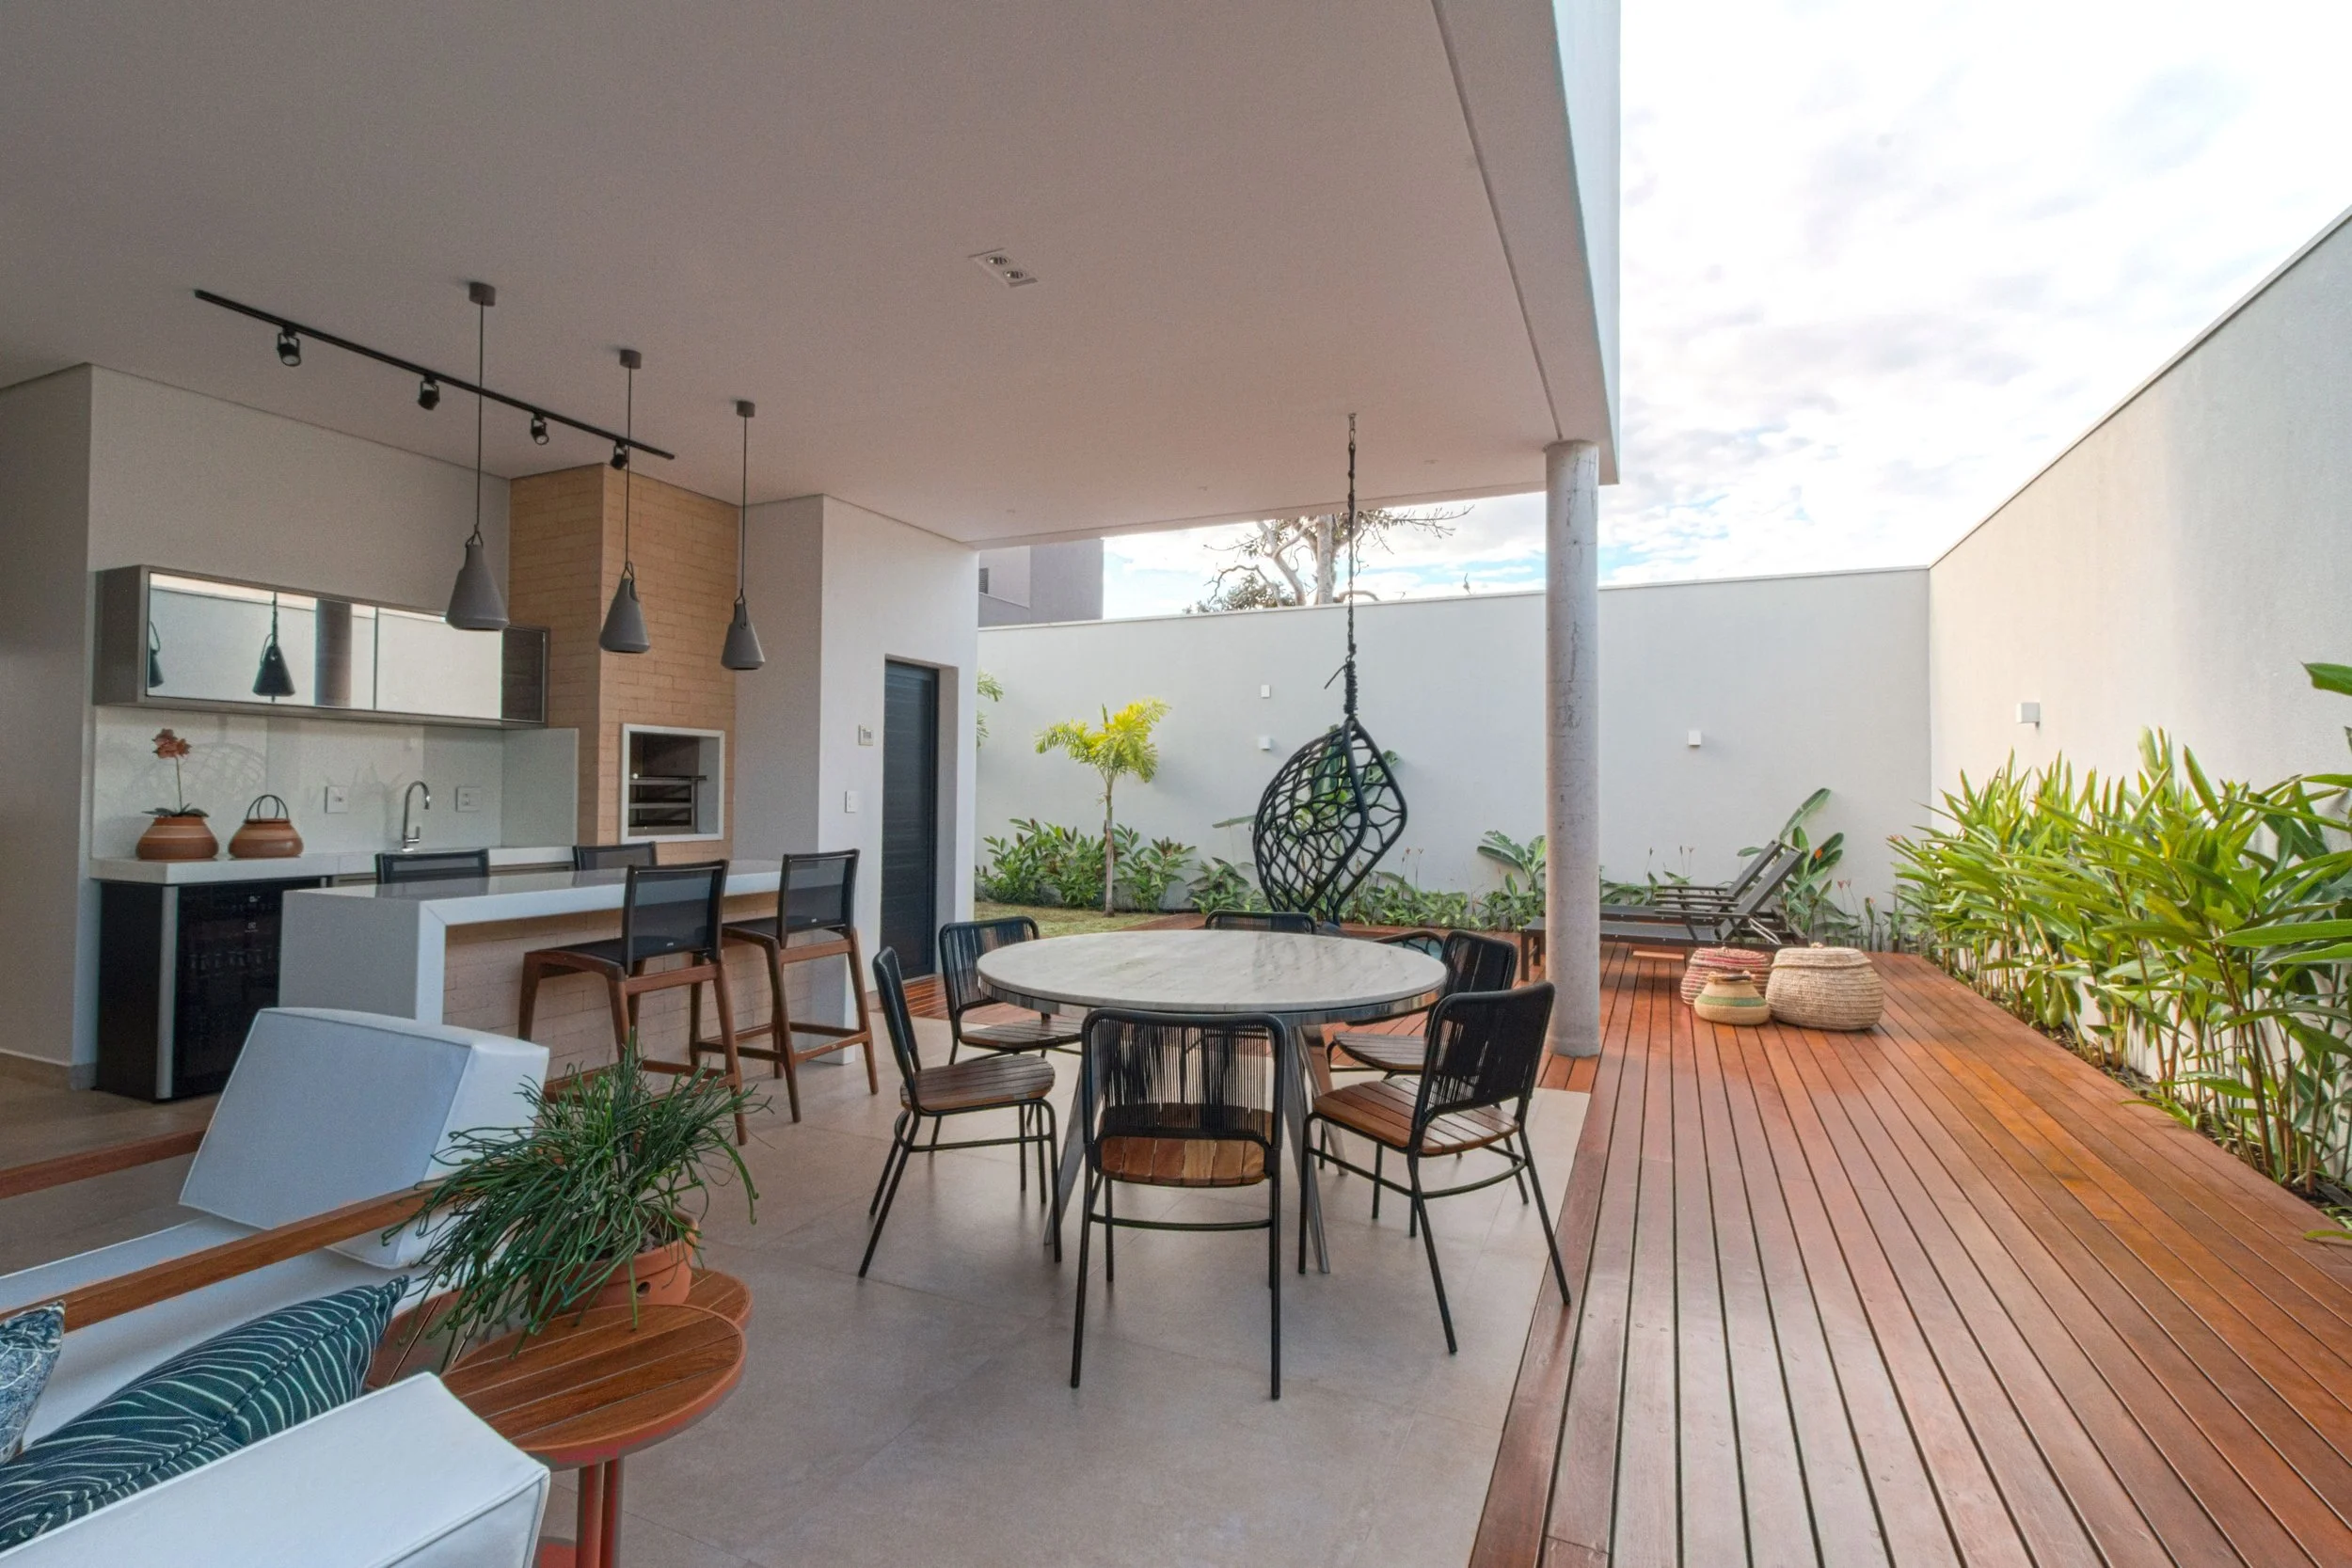
Courtesy of Felipe Hueb.
The best part? Your dream outdoor kitchen doesn't have to look like a magazine spread or cost as much as a new car. The most enjoyable outdoor kitchens aren't necessarily the biggest or the fanciest. They're the ones designed around the way their owners actually cook and entertain.
So, if you're dreaming about creating an outdoor cooking space of your own, here's how we'd prioritize the features.
The Essentials
Every outdoor kitchen needs exactly two things to earn the name.
A Way to Cook
This doesn't have to be a massive built-in gas grill with every bell and whistle. It needs to be the cooking method you enjoy using. The one that you’ll use over and over because you enjoy doing it.
Maybe that's a traditional gas grill. Maybe you're devoted to charcoal. Perhaps you're happiest tending a smoker all afternoon, or you've fallen in love with a flat-top griddle. Some homeowners even build their entire outdoor kitchen around a wood-fired pizza oven.
There isn't a wrong answer here. The best cooking appliance is the one you'll actually use.
A Stable Prep Surface
Once you've got heat, you need somewhere to prepare food safely.

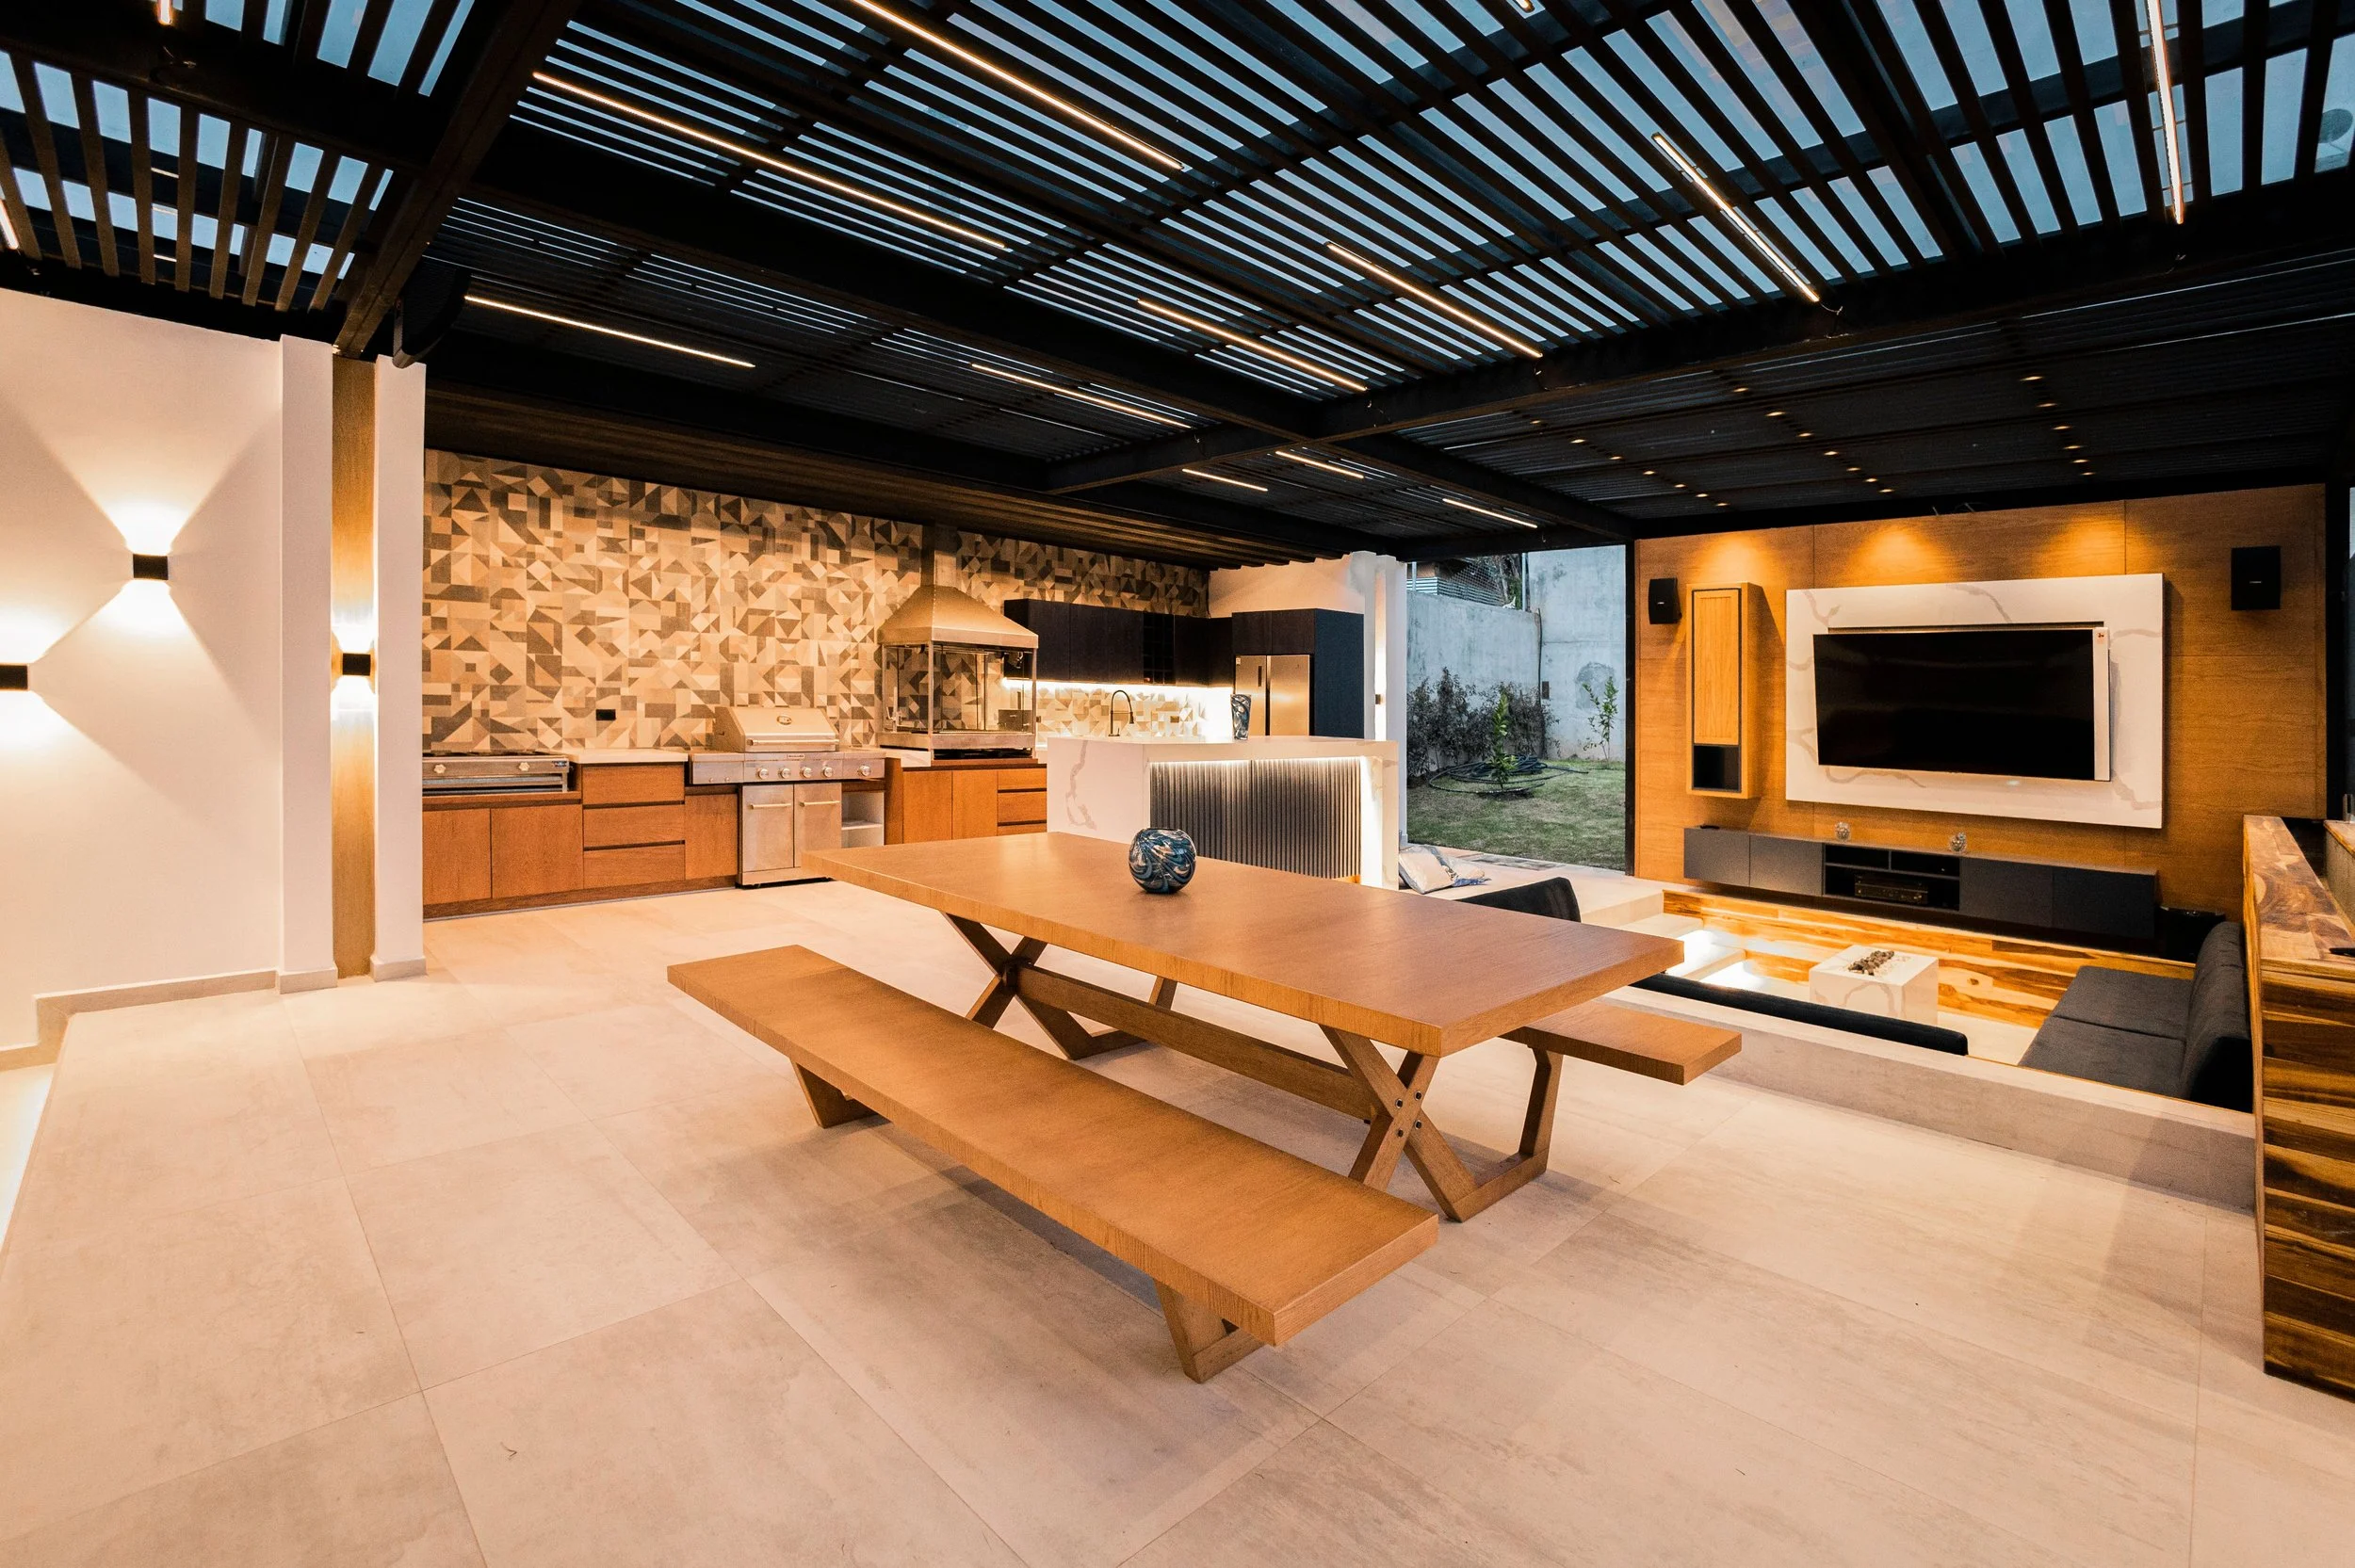
Courtesy of Hayden Walker
Even a modest countertop makes an enormous difference. Instead of balancing cutting boards on patio furniture or running inside every few minutes, you have a dedicated workspace for seasoning meat, assembling burgers, slicing vegetables, or plating dinner.
That's really all you need for a functional outdoor kitchen. Everything else simply makes the experience easier, more comfortable, or more entertaining.
The Features You'll Appreciate Every Time You Cook
Once you've covered the basics, these upgrades quickly become the things you'll wonder how you ever lived without.
Shade Makes Everything Better
If you're grilling in Texas, you already know the sun isn't exactly subtle.
A pergola, covered patio, pavilion, or even a retractable louvered roof can completely change how often you use your outdoor kitchen. Shade keeps the cook cooler, helps protect food from direct sunlight, and makes outdoor dining far more comfortable for everyone.
Better yet, a covered space lets you keep enjoying the backyard when the weather decides to throw one of those quick summer thunderstorms your way.
Built-In Counter Space
The more prep space you have, the more useful your outdoor kitchen becomes.
Long counters provide room to prepare ingredients, serve food buffet-style, or just set things down without balancing plates on every available surface. Built-in cabinetry also gives you a convenient place to store grilling tools, serving trays, and outdoor cookware.
Remember to keep cabinets clean between cookouts. Leftover crumbs have a funny way of convincing local wildlife they've been invited to the barbecue too.
An Outdoor Refrigerator
A small refrigerator may not seem exciting until you're halfway through cooking and realize you don't have to sprint inside for every bottle of sauce, slice of cheese, or cold drink.
Whether you choose a compact beverage refrigerator, under-counter model, or drawer-style unit, cold storage makes entertaining dramatically easier.
If you add refrigeration outdoors, be sure you're planning for the proper electrical service and using appliances specifically designed for outdoor conditions. Summer heat makes refrigeration systems work much harder, so choosing the right equipment and keeping an eye on temperatures helps everything perform as intended.
Lighting Extends the Party
Nobody wants to race against sunset while flipping burgers.
Good lighting turns your outdoor kitchen from a daytime-only feature into a place you'll enjoy well into the evening. Task lighting over cooking surfaces makes preparing food safer, while overhead fixtures, pendant lights, or string lighting create a warm atmosphere for family dinners and weekend gatherings.
If you're already building a covered structure, it's the perfect opportunity to include lighting from the very beginning.
Luxury Touches Worth Considering
This is where your outdoor kitchen starts reflecting your personality.
A Dedicated Drinks Station
Nobody enjoys running inside every ten minutes to refill the ice bucket.
A beverage refrigerator, small bar area, or dedicated drink station keeps refreshments close at hand and lets guests help themselves without wandering through the house. It also frees up your indoor refrigerator when you're entertaining larger groups.
Comfortable Seating
Indoor kitchens naturally become gathering places. Outdoor kitchens can do the same if you give people somewhere to settle in.
A bar-height counter with stools lets guests chat with the cook without getting underfoot, while a nearby dining table or comfortable seating area encourages everyone to linger long after dinner is finished.
Some of the most inviting outdoor kitchens aren't focused solely on cooking. They're designed around spending time together.
Storage
Drawers and cabinets might not be the flashiest addition, but they're among the most practical.
Dedicated storage keeps utensils, grill brushes, serving platters, spices, charcoal, propane accessories, and outdoor dishes exactly where you need them. Less time hauling supplies back and forth means more time enjoying the meal.
A Pizza Oven
Let's be honest. A pizza oven probably isn't essential.
But if homemade pizza nights sound like your idea of fun, or you've always wanted to experiment with artisan breads, roasted vegetables, or cast-iron desserts, it can become the centerpiece of the entire backyard.
Just remember that these appliances generate serious heat. Keep children and pets safely away from the cooking area while everything is in use, and always allow equipment to cool completely before anyone gets too close.
Make It Uniquely Yours
One of the biggest advantages of an outdoor kitchen is that there isn't a universal blueprint.
Courtesy of Esteban Santiago Gonzalez
Some homeowners add side burners for seafood boils or breakfast cookouts. Others install sinks to make cleanup easier or ice makers for effortless entertaining. Outdoor televisions, sound systems, ceiling fans, fireplaces, decorative backsplashes, herb gardens, accent lighting, and even retractable screens can all help shape the space around your family's lifestyle.
The trick is resisting the urge to chase every trend.
Instead of asking, "What does everyone else have?" ask, "What would we actually use?"
The answer will almost always lead to a better outdoor kitchen.
Three Ways to Bring It All Together
There are several approaches to building an outdoor kitchen, and each has its advantages.
Some homeowners choose complete outdoor kitchen kits that include cabinetry, appliances, and countertops designed to work together. Others purchase modular components and create a custom layout over time. And for ambitious DIYers, building the kitchen piece by piece can spread the cost across several seasons while allowing the design to evolve naturally.
Whichever route you choose, don't skip the planning.
Every successful outdoor kitchen begins with three fundamentals:
A level foundation. Whether you choose concrete, pavers, or tile, your appliances need a stable surface.
Proper utilities. Electrical service, gas lines, and water should all be planned before construction begins, not after.
Good drainage. Rainwater, spilled drinks, and routine cleaning all have to go somewhere. Proper drainage helps prevent standing water, mold, and unwanted pests beneath your cabinets and appliances.
Courtesy of Dalila Dalprat.jpg
Finally, remember that outdoor appliances spend every day exposed to the elements. Clean surfaces regularly, cover equipment when practical, remove food debris from cabinets, and inspect electrical outlets after severe weather. A little routine care goes a long way toward keeping your outdoor kitchen ready for the next family cookout.
The Backyard You'll Love Coming Home To
A dream outdoor kitchen isn't defined by the number of burners, the size of the refrigerator, or whether there's a pizza oven tucked into the corner.
It's defined by how often it brings people together.
Whether your ideal evening is grilling burgers for the family, hosting neighbors for the big game, or enjoying a quiet dinner under the stars, the best outdoor kitchen is the one designed around the way you actually live.
Build the essentials first. Add the features you'll truly appreciate. Skip the trends that don't fit your lifestyle. And when you invest in quality outdoor appliances, take good care of them so they're ready whenever your next backyard gathering rolls around.
Website:
Call (214) 599-0055