Thanksgiving

Organizing Your Home Before the Holiday Daze

Getting Your Home Ready Before the Holidays Hit

Raise your hand if your house becomes a mess every year during the time between Halloween and Christmas?  If you did, you’re not alone. Your Blogger is there right with you. What if though, you had a handful of tips and tricks to tackle this holiday season without losing your mind, the gifts you’d bought, and every square inch of space in your home? Well, that’s where today’s post comes in. 


First up, the general things. 

Two bins made of wicker sit side by side.

Courtesy of Alexa

-Use Bins and baskets around the home to contain mess and clutter. Sure it’s a cheat, but if you have designated spaces to put things, they’re less likely not only to go missing but end up scattered over every other available surface. 

Three stacking storage units sit side by side full of various toys and books, sorted into bins.

Courtesy of C.M. Zijderveld

- You can also use bins and baskets to sort gifts if you purchase as you go through the year purchasing. We like having a row of baskets at the top of the closet. It looks good all year long, and so long as you don’t label the outside, you’re the only one that knows that you’re hiding gifts and not your out-of-season clothes. 


-Clean stuff up! Get rid of stuff and do a pre-holiday donation blitz. 

Go through and trim stuff down. Do you hate that ornament? Donate it. Is a wreath falling apart? Either deconstruct it for craft materials or send it to the recycling center. 

Essentially, if you don’t love it, don’t keep it. 


Have a plan! 

Whether you’re breaking down your decorations from Halloween, setting up for Thanksgiving, or getting organized for Christmas, having a plan saves you time and headaches. 


Play Tetris! 

When it comes to storing things away, unless it’s breakable, it’s better to store smaller things inside larger things. Two examples here. 

A bunch of boxes are all tossed together in  a hodge podge of a mess, and a very  bad example of storing things inside one another.

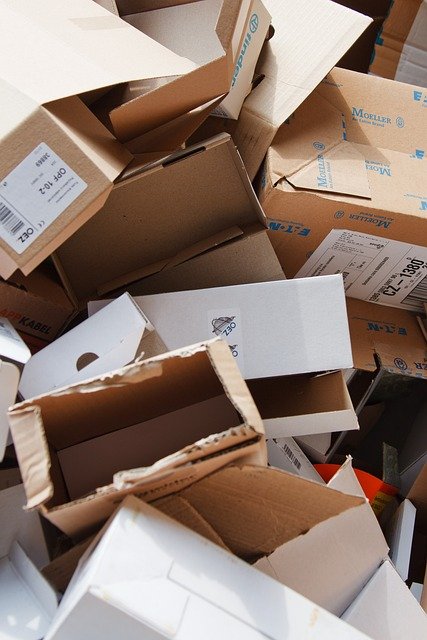
This would be a very bad example of storing things inside one another. The only reason nothing is broken is because it’s cardboard.

  • A good example would be storing small details like tiny skulls, potion bottles, and bats inside a larger fake pumpkin. By doing this, you maximize the space that the pumpkin is taking up, and you ensure that you don’t lose or break the smaller items. 

  • Storing glass ornaments inside your grandmother’s trifle dish without wrapping or protection. Doing this means that you’ll end up with shards of glass given enough time and movement. 


-Think about where you’re going to store things before you go shopping. If you already know exactly where it’s going, it’s more difficult to lose it in the holiday daze, and you know if you have the space for it. 


Store the specifics together. Don’t just toss everything into 1-2 boxes and call it done. Put together like with like and protect the things that need it inside that storage. We will always suggest storing everything in totes that are labeled on the outside and the lid. 

- Also make sure to make a list of everything that’s inside the tote and tape it to the inside lid of the tote. This lets you ensure that you know exactly what’s inside them. 


-Separate out your Halloween decorations, store your costume pieces in their own plastic sealable bags, and those organized into totes. You can also store all of your decor in totes as well.  (You can also do the same with fabrics for other holidays, but we’re still thinking about Halloween and Halloween costumes here at ARS.) This is to protect your papers, plastics, and fabrics from moisture, bugs, and other rodents. 


What about Christmas? That’s a lot of very specific items that need careful handling. 

-Glass ornaments? Wrap them in paper towels before storing them in an ornament carrier (even if that is just  a photo box.) 

-Egg cartons and cupcake boxes are also great for storing ornaments of all shapes and sizes.

-Loving on the Christmas lights? Turn a sheet of cardboard into cord storage, keep them all separate, and put them into their own bin. 

- Fake Christmas tree? We haven’t figured out anything more straight0forward than the totes made just for this, but let us know if you do. 


- What about wrapping? Do you love it or loathe it? 

Try setting up a station for gift wrapping. Have a container for wrapping papers and keep all of them in that container. 

Keep everything sorted so that it’s close to hand. That can mean a large tote box that has everything inside it in trays that you only pull out when you need it, or it can be a table in a corner with everything stored away.
Your Blogger’s setup contains the following. 

Tape

Sharp scissors

A flat open area

Wrapping paper

Notecards and pens

Power cable, an outlet, and the phone (for entertainment AND wrapping help.) 

A kraft paper background with slick bows, a small box wrapped with a ribbon, a pair of craft scissors, a spool of ribbon and a ribbon tied into a bow.


Rounding out our tips in the kitchen, let’s get sorted!

-Store your baking supplies together. It is a fantastic way to keep your kitchen organized and your life nice and easy. Plus, when you pull out the baking supplies every year, you’ll get excited knowing that all the fun of the holidays is just around the corner. 


-Sort and store cookie cutters in photo boxes. The small boxes with their labels on the outside make it easy to find just the ones you want and store them away when you’re done. 

-Baked Gift Supplies can also be stored together. If you keep everything you need in one box or tray, it’s all there when you’re ready to pack up the cakes and cookies. Bakers' twine, cookie bags, cupcake liners, and tags, everything is right there for you. 

Thanks to Bernadette Wurzinger

And there you have it! Our tips for how to make the holidays run more smoothly and keep you from pulling your hair out this winter. Let us know in the comments below or over on our Facebook page how you make the holidays easier on yourself. 


If you wound up here because you pushed the dreaded button (no, not that one, the one on your oven labeled ‘Self-Clean’,) we’re here to help. First up, step away from the oven. Next, set up an appointment with us via our contact page or by giving us a call at ((214) 599-0055). We’ll work with you to select a time and date that works for your schedule and send one of our technicians to get your oven working again. In the event it’s not because of your oven but instead one of your other major appliances, it’s ok; we can still help. For any of your major appliances, Appliance Rescue Service is here to help get your home running smoothly again. 


Thanksgiving Recipes for Small Groups

Also Known As “ How Not To Go Insane This Holiday”


Somehow, trying to get the entire family under one roof for a holiday always seems to turn into a headache.


Everybody says they'll be there, but when it comes time to decide who's bringing what, half the family's plans have changed - now they aren't coming. Great Aunt Jean said she'd host, but dropped out at the last minute. Uncle Tim said he'd bring dessert, but then brought the dreaded casserole instead. The sister who was supposed to bring the drinks only brought ice, the brother who was supposed to bring the bread brought a salad... And now no one knows what's going on. The person pressed into hosting is taking a frantic tally to figure out what's missing, someone's already in their car on their way to the only store in town that's open on Thanksgiving, and no one knows whether or not the turkey will be done in time.


It happens every year, in varying degrees, to every family. There are always too many moving parts. So this week's post is dedicated to keeping everything simple. Read on for the easiest recipes we could think of to help you get through this mess with your sanity intact.


The easy way, and the COVID-19 friendly way, to survive the holiday is to not have everyone over. Do a smaller celebration. The recipes in this post are sized for a group of four to six people.


Appetizer


Taco Bites


Chances are the kids are going to try to skip as many healthy foods as they can when dinner hits the table. Let's sneak something in early.


Ingredients:

2 15.5 oz cans chickpeas

1 1 oz packet taco seasoning

3 Tbsp oil

1/4 head iceberg lettuce, torn

3 roma tomatoes, chopped

1/4 cup shredded cheese


Tools:

Cutting board, knife, colander, baking sheet with a rim, plastic bag, paper towels


Instructions:


Preheat your oven to 450.


Pour your oil into the baking sheet and tilt to move the oil around until you've coated the entire bottom of the pan. Place the coated pan into the oven for two minutes.


Dump your chickpeas into the colander, rinse them and allow them to drain, and then pat them to remove some of the excess water.


Pour your taco seasoning into the plastic bag, add the chickpeas, seal the bag and shake! The goal is to evenly coat the chickpeas. There will be seasoning left over, and that's okay. You can hold on to it and sprinkle it on top later if you'd like.


Spread your seasoned chickpeas in a single layer on the hot baking sheet and bake for 14 minutes.


While the chickpeas are baking, wash your lettuce and tomatoes. Rough chop the tomatoes and tear the lettuce into large pieces.


Once you remove the chickpeas from the oven, allow them to cool down some - but not to room temperature - and drain off excess oil.


Wrap a spoonful of chickpeas, a few chunks of tomato, and a sprinkling of cheese into a strip of lettuce and roll it up like a burrito (hold in place with a toothpick if necessary). Serve with guacamole, sour cream or salsa if desired.


Entree


Thanksgiving is all about the turkey for most families. But why carve up a whole bird and encourage everyone to fight over the drumsticks while they ignore everything else? We suggest a turkey pot pie instead. It's so easy you can have the kids help! Cook the turkey and potatoes in the slow cooker overnight so it's all ready to shred and mash in the morning.


Turkey Pot Pie


Ingredients:

1 boneless turkey breast (Butterball Cajun-seasoned 3 pound is a favorite here)

6 large russet potatoes, chunked

2 14 oz bags frozen mixed vegetables, thawed

1 18 oz jar turkey gravy

1 can Pillsbury crescent dough


Tools:

Slow cooker, deep baking dish, mixing bowls, cutting board, slotted spoon


Instructions:


The night before you plan to have your Thanksgiving dinner, wash and cut up your potatoes. Place them into the bottom of your slow cooker, and add enough water or broth to cover. Place your turkey breast on top of the potatoes, place the lid on the slow cooker, and set it to low. Allow it to run overnight, at least seven hours.


In the morning, turn off the slow cooker and pull the turkey. Shred it on the cutting board and set it aside to cool. Stir your mixed vegetables and gravy in with with your shredded turkey.


Use a slotted spoon to remove the potatoes from the slow cooker. Put them into a mixing bowl and mash them with a fork. Lumps are fine, no worries! You may choose to add milk or butter at this step.


Line the bottom of your baking dish with your mashed potatoes. 


Pour a thick layer of your turkey and vegetable and gravy mixture on top of your mashed potatoes.


Top with the sheet of crescent dough. It's okay to trim it down or stretch it to fit - just make sure to stretch evenly and gently so it doesn't tear.


Poke a few small vent holes with a fork or knife before placing your pot pie in the oven.


Bake at 375 for 10-15 minutes.

Turkey Pot Pie


Sides


Cranberry Sauce


Repeat after us: Cranberry sauce is not supposed to come from a can.


Cranberry sauce is the easiest Thanksgiving side, by far. (Unless you forget the lid on the pan. Trust us, do not forget the lid!) The tried and true method of berries, a simple syrup, a handful of spices, and a few minutes of intense heat makes a foolproof sauce.


Ingredients

1 12 oz bag fresh cranberries

1 cup sugar

1 cup water

1 teaspoon lemon juice

1 teaspoon cinnamon

1/2 teaspoon allspice


Tools:

Sauce pan, lid, heatproof serving dish


Wash your cranberries and toss out any sad-looking ones. Sad berries make sad sauce.


Combine your sugar, water and spices in the pan. Place over medium heat and bring up to a boil.


Pour in your fresh cranberries - be careful not to splash!


Cook your cranberries in your covered (we cannot stress this enough! Boiling sugar hurts, and exploding berries are messy!) pan, stirring frequently, until all of your berries have popped.


Remove from heat and stir in your lemon juice.


In the event your family does not want lumps in the sauce, you can push this mixture through a fine sieve to separate the skins from the jelly - but we like it better with the lumps. We also prefer it warm, but feel free to put it into the fridge for half an hour if you'd like it to firm up.


Bacon Cheddar Brussels Sprouts


In our experience, most kids despise Brussels sprouts. But most kids love bacon and cheese. Hopefully, in your case as in ours, they balance out a bit. And just about every Thanksgiving dinner could use some more veggies.


Ingredients:

1 2.5 oz bag bacon crumbles

1 12 oz bag frozen Brussels sprouts, thawed

4 oz shredded cheddar cheese

1/2 stick butter, melted


Tools:

Baking sheet


Mix your Brussels sprouts, melted butter and bacon together in a mixing bowl.


Arrange the sprouts in a thin layer on your baking sheet. Make sure to leave a little wiggle room between them for air to circulate. Top with shredded cheese.


Bake at 400 for 20 minutes. You can roast them a little longer if you'd like, but keep a close eye on them so they don't burn. Literally no one will want to eat burned veggies.


It's that simple. Honestly.

Homemade cranberry sauce with fresh cranberries


Desserts


Everyone expects pie on Thanksgiving... But it doesn't have to be the same old pie you've had every year. Don't get us wrong here, we love pumpkin pies - they're fantastic looking, easy, delicious and they keep well for a few days.


Every once in a while, though, it's nice to flip the script. This year, try an ice cream pie!


Pumpkin Ice Cream Pie


Ingredients

24 oz vanilla ice cream, softened

1 15 oz can pumpkin puree

pumpkin pie spice, to taste

1 9" pie crust (traditional or graham, or even Oreo if you'd prefer)


Tools:

Mixing bowl, pie pan, aluminum foil


If you're using a traditional crust, bake it ahead of time and let it cool. Please don't pour ice cream into a raw or still-hot crust - you'll end up with a soggy mess either way.


Spoon your softened ice cream into a mixing bowl. Shake in some pumpkin pie spice - however much you like. Some people like a bunch, some families aren't fond of it.


Fold in your pumpkin puree and stir. Mix it until thoroughly incorporated if you want a uniform pie, but if you want the swirl effect, just stop mixing when it looks the way you want it to.


Pour your ice cream mixture into the prepared pie crust, wrap up the top in foil and stick the whole thing into the freezer to chill back up. It should be firm and good to go in about three hours.


If you want to be extra fancy, drizzle it with caramel syrup and top with whipped cream when you serve it.


Take a deep breath. If you've reached the serving dessert stage, the worst of the craziness will soon pass.


What do you think? Are you as eager (read: apprehensive) about the holiday as we were? We hope you'll let us know over on our Facebook page. Feel free to share your family traditions or Thanksgiving hacks! And if something in your kitchen is acting like a little turkey and making you want to use some fowl language... Give us a call, or make an appointment online here.


It’s Back Again, The Self-Cleaning Oven

This time, it’s got a partner in crime! 


Thanksgiving is just around the corner and we're already swamped from the nightmare that is 2020. There's meals to plan, family to either pick up or travel to and somehow you're supposed to clean the house too? We're right there with you. One thing we can say though, no matter how tempting, don't use the 'self-clean' function on your oven. 


Shocked woman opening her oven where there is a fire and smoke

Let's start off by looking at how it works. Technically speaking, a self-cleaning oven is a misnomer. It's not actually cleaning itself. Instead it super heats the bits of leftover food and whatnot inside of your oven to make it easier to remove. It's not even meant to replace a cleaning routine.


When we're talking about a self-cleaning mode we are discussing two different possibilities. You have your high heat models and then you have steam models


Light It Up! 

A high heat model starts by locking the oven door. This is important because the next step is to raise the internal temperature between 900 to 1,000° F. The cycle lasts between 2 and 6 hours. The door unlocks only after the oven has cooled completely. So why do people choose this method? Most people think that the high heat model is going to reduce the food and any other debris like tinfoil down to ash. It actually doesn't. It might end up blackening the waste, and it does help with removing it from the walls of the oven where it can get caked on, but it doesn't reduce it down to ash. 


It's Getting Steamy In Here 

The steam-based cycle on the other hand requires putting approximately one cup of distilled water into the bottom of your oven. Typically there's a special reservoir. The door stays unlocked for the entire cycle because the temperature is only being raised to 250° F.  The grime is softened and loosened by the steam, allowing you to wipe it out much more easily. This cycle lasts between 30 minutes to an hour.


The Downsides 


Fumes 

During their cleaning cycle both types of ovens emit foul smells, burning odors, fume and can even release potentially harmful byproducts such as carbon monoxide. The North Texas Poison Center even suggests that you leave your house while you have the high heat models running because they can produce a volume of fumes that is toxic. According to them "  Although Teflon ...  when it is heated to 600 degrees F, breathing the fumes can cause chills, fever, profuse sweating, cough, flu-like symptoms and chest tightness." 


Costs Add Up Quick! 

Another downside to the high heat model is that the excessive heat built up within the oven can short out fuses or burn out your heating elements. Yes we can replace them for you, or if you're handy with appliances and electronics, you can purchase the parts and do it on your own. The problem is that those pieces add up quickly. Not to mention when you're wanting to host Thanksgiving dinner in the same week, if not the next day as one patron recounted, there's not enough time to get it fixed before your oven. 


How Much Does It Use? 

One final issue with these two options, to us at least, is that the high heat version, which is what the majority of our customers have, will cost you the equivalent amount of entire months worth of oven usage. For just one cycle of self-cleaning it typically takes 8 kW hours. The steam clean option is slightly better with only taking three kilowatt hours worth of power. But that still roughly 1/3 of your monthly usage.


Instead what we suggest is doing the process by hand. Cleaning your oven yourself, or having someone clean it for you won't damage any of the internal components or burnout your heating element. All you need is white vinegar, baking soda, and water. Make sure that you avoid anything abrasive though, as they can damage the coating of your oven, causing chips and scratches. Those chips and scratches can then make it far more likely that they will get in your food, or through your exhaust fan, out into the air you're breathing. 


If you're wanting to avoid all that, here's how to clean your oven. 

-Start by removing the racks. They might need to be cleaned too, but for the time being you can put them into the kitchen sink, or your bathtub. (We advise putting down an old towel to prevent it from scratching the finish.) 

-From there, grab a rag, wet it down and wipe down all of the surfaces of the oven. Pay attention to where the built up crud is and take note. 

-Grab a mixing cup and some baking soda. Pour one half cup of baking soda into the cup and add water a few drops at a time. Keep going until you have a thick paste. 

-Take the paste and apply it thickly over every surface in the oven. You want a solid coat, without any of the enamel underneath showing through. Let that sit overnight. 

-Once the requisite six to eight hours have passed, lay out a mat or some newspapers under your oven door and grab a sponge. Moisten the sponge slightly and wipe out as much of the baking soda as you can. You're going to have to rinse out the sponge several times, as you keep wiping until no more paste is in the oven. If your oven still seems dirty, go ahead and repeat the process, being sure to let it sit overnight again. 

Burned and blackened oven interior with the heating element destroyed.


We hope we've answered some of your questions about self-cleaning ovens! If you have questions, comments or concerns, please let us know in the comments below or over on our Facebook. If your oven, or any of your other major appliances, are giving you trouble, feel free to call or come over to our website to book an appointment. We want to help keep your home running smoothly!