Slow and Easy Sunday Stuffed French Toast

You’ll End Up Wanting The Whole Plate For Yourself

I don’t care; take me to the Recipe!

When we at ARS think of Sunday, it's a time for family, having fun, and spending the day cooking. This Sunday we wanted to whip up something a little different and try our hand at Stuffed French Toast. In theory, a very easy recipe. In practice? Well. It’s still easy to do, but experimenting makes it far more fun. 


This is a VERY subjective and experimental recipe. There are a couple different reasons for this. How firm you want your bread to be is going to affect how much egg it can soak up without distorting and turning into goo. However, it’s also going to affect the final taste and texture. The ratio of fruit to cream cheese is going to vary wildly based on which brand of fruit jam you buy and how much liquid still exists in that. So, if you want a hard and fast “here is the amounts you need, here is what you’ll get” recipe, we suggest checking out one of the others that we’ve linked in our additional reading section at the bottom. It’s ok if that’s what you’re in the mood for! This isn’t a recipe for when you need breakfast on the table 20 minutes ago. It’s more for when you want to spend Sunday experimenting with your family and having fun in the kitchen and if there ends up being several versions of food at the end, you win! 

On to the recipe! 

Ingredients

Bread - We suggest either Challa or a huge loaf of Italian. It’s the size that matters as much as anything. 

Cream Cheese

Slivered almonds - to taste - we suggest at least ¼ per two slices of bread, but it’s up to you on how much texture/crunch you want in your mix 

Sour Jelly or Preserves - We chose sour cherry 

Milk or heavy cream, or a mix if you want- only about 2 TBSPs though. 

Eggs - you want roughly 2 eggs per slice of bread

Cinnamon

1 Tbsp packed light brown sugar


Tools

-Cast iron griddle or a skillet

- mixer 

-Pie pan or other large shallow dish 

-Bread knife 

-Paring knife

Our bread really is 2 inches wide, it’s so large though it doesn’t look like it.

Our bread really is 2 inches wide, it’s so large though it doesn’t look like it.

To start with, a note on breads.

 Although we suggest using either Challa or Italian, you can do this recipe with a loaf of brioche bread. The important thing is that this is a high and thick loaf of bread. You want something that is at least 3- 4 inches wide, and at least two inches high. Yes, this is going to give you really large slices of bread, but that’s the intent here. 


Now, grab your loaf of bread and start by slicing it into 2 inch thick slices. So, ideally, your slice should be 2 inches wide, 2 inches thick, and however long. 


At this point, you can leave your slices out overnight to firm up, or move on to the next step. 


Whatever you decide, when that time has passed, flip over a slice, grab a paring knife and cut a slice that’s roughly 2-3 inches long. You’re looking to form a deep pocket inside of the bread.  Do that to all of your slices, and set them to the side for a moment. 


Grab your cream cheese and preserves and measure them out in a 2 to one, cream to fruit ratio. You want this to be stiff enough to fill it into the slices, but with enough fruit that you get the taste. Either use a food processor or a fork and mix the two together, adjusting the ratio as needed. 


This is roughly how thick ours ended up being after we adjusted the ratio several times.  You also definitely need additional help when trying to fill the slices with your filling.

This is roughly how thick ours ended up being after we adjusted the ratio several times. You also definitely need additional help when trying to fill the slices with your filling.

Now is when you’ll need to get a second set of hands. We had a few willing participants who were able to help us, in exchange for future delicious food. Have your partner hold open a slice of bread with two forks, while you use a third fork to fill the bread with your cream cheese mix. 


Egg, Milk, brown sugar and cinnamon

Yum Delicious eggy mix! The base to any good French toast.

Once all of your bread is filled, mix together your eggs, dairy, cinnamon, and sugar into a pie pan, or some other shallow dish.  

Stuffed bread soaking in a shallow pie pan filled with egg mixture for making french toast

With how thick the bread is, the additional soaking time is very important to allow it to really seep into the bread. It’s also why we said that you might want to let your bread sit over night so that it can hold up to that extra time.

Lay your bread into the dish and let it soak on one side for 2 minutes. Flip it over and do it for another 2 minutes.

While your bread is soaking, turn your stove on to medium-low, toss in  1 Tbsp of butter and allow it to melt. 

And now we begin the cooking process to make our  French Toast

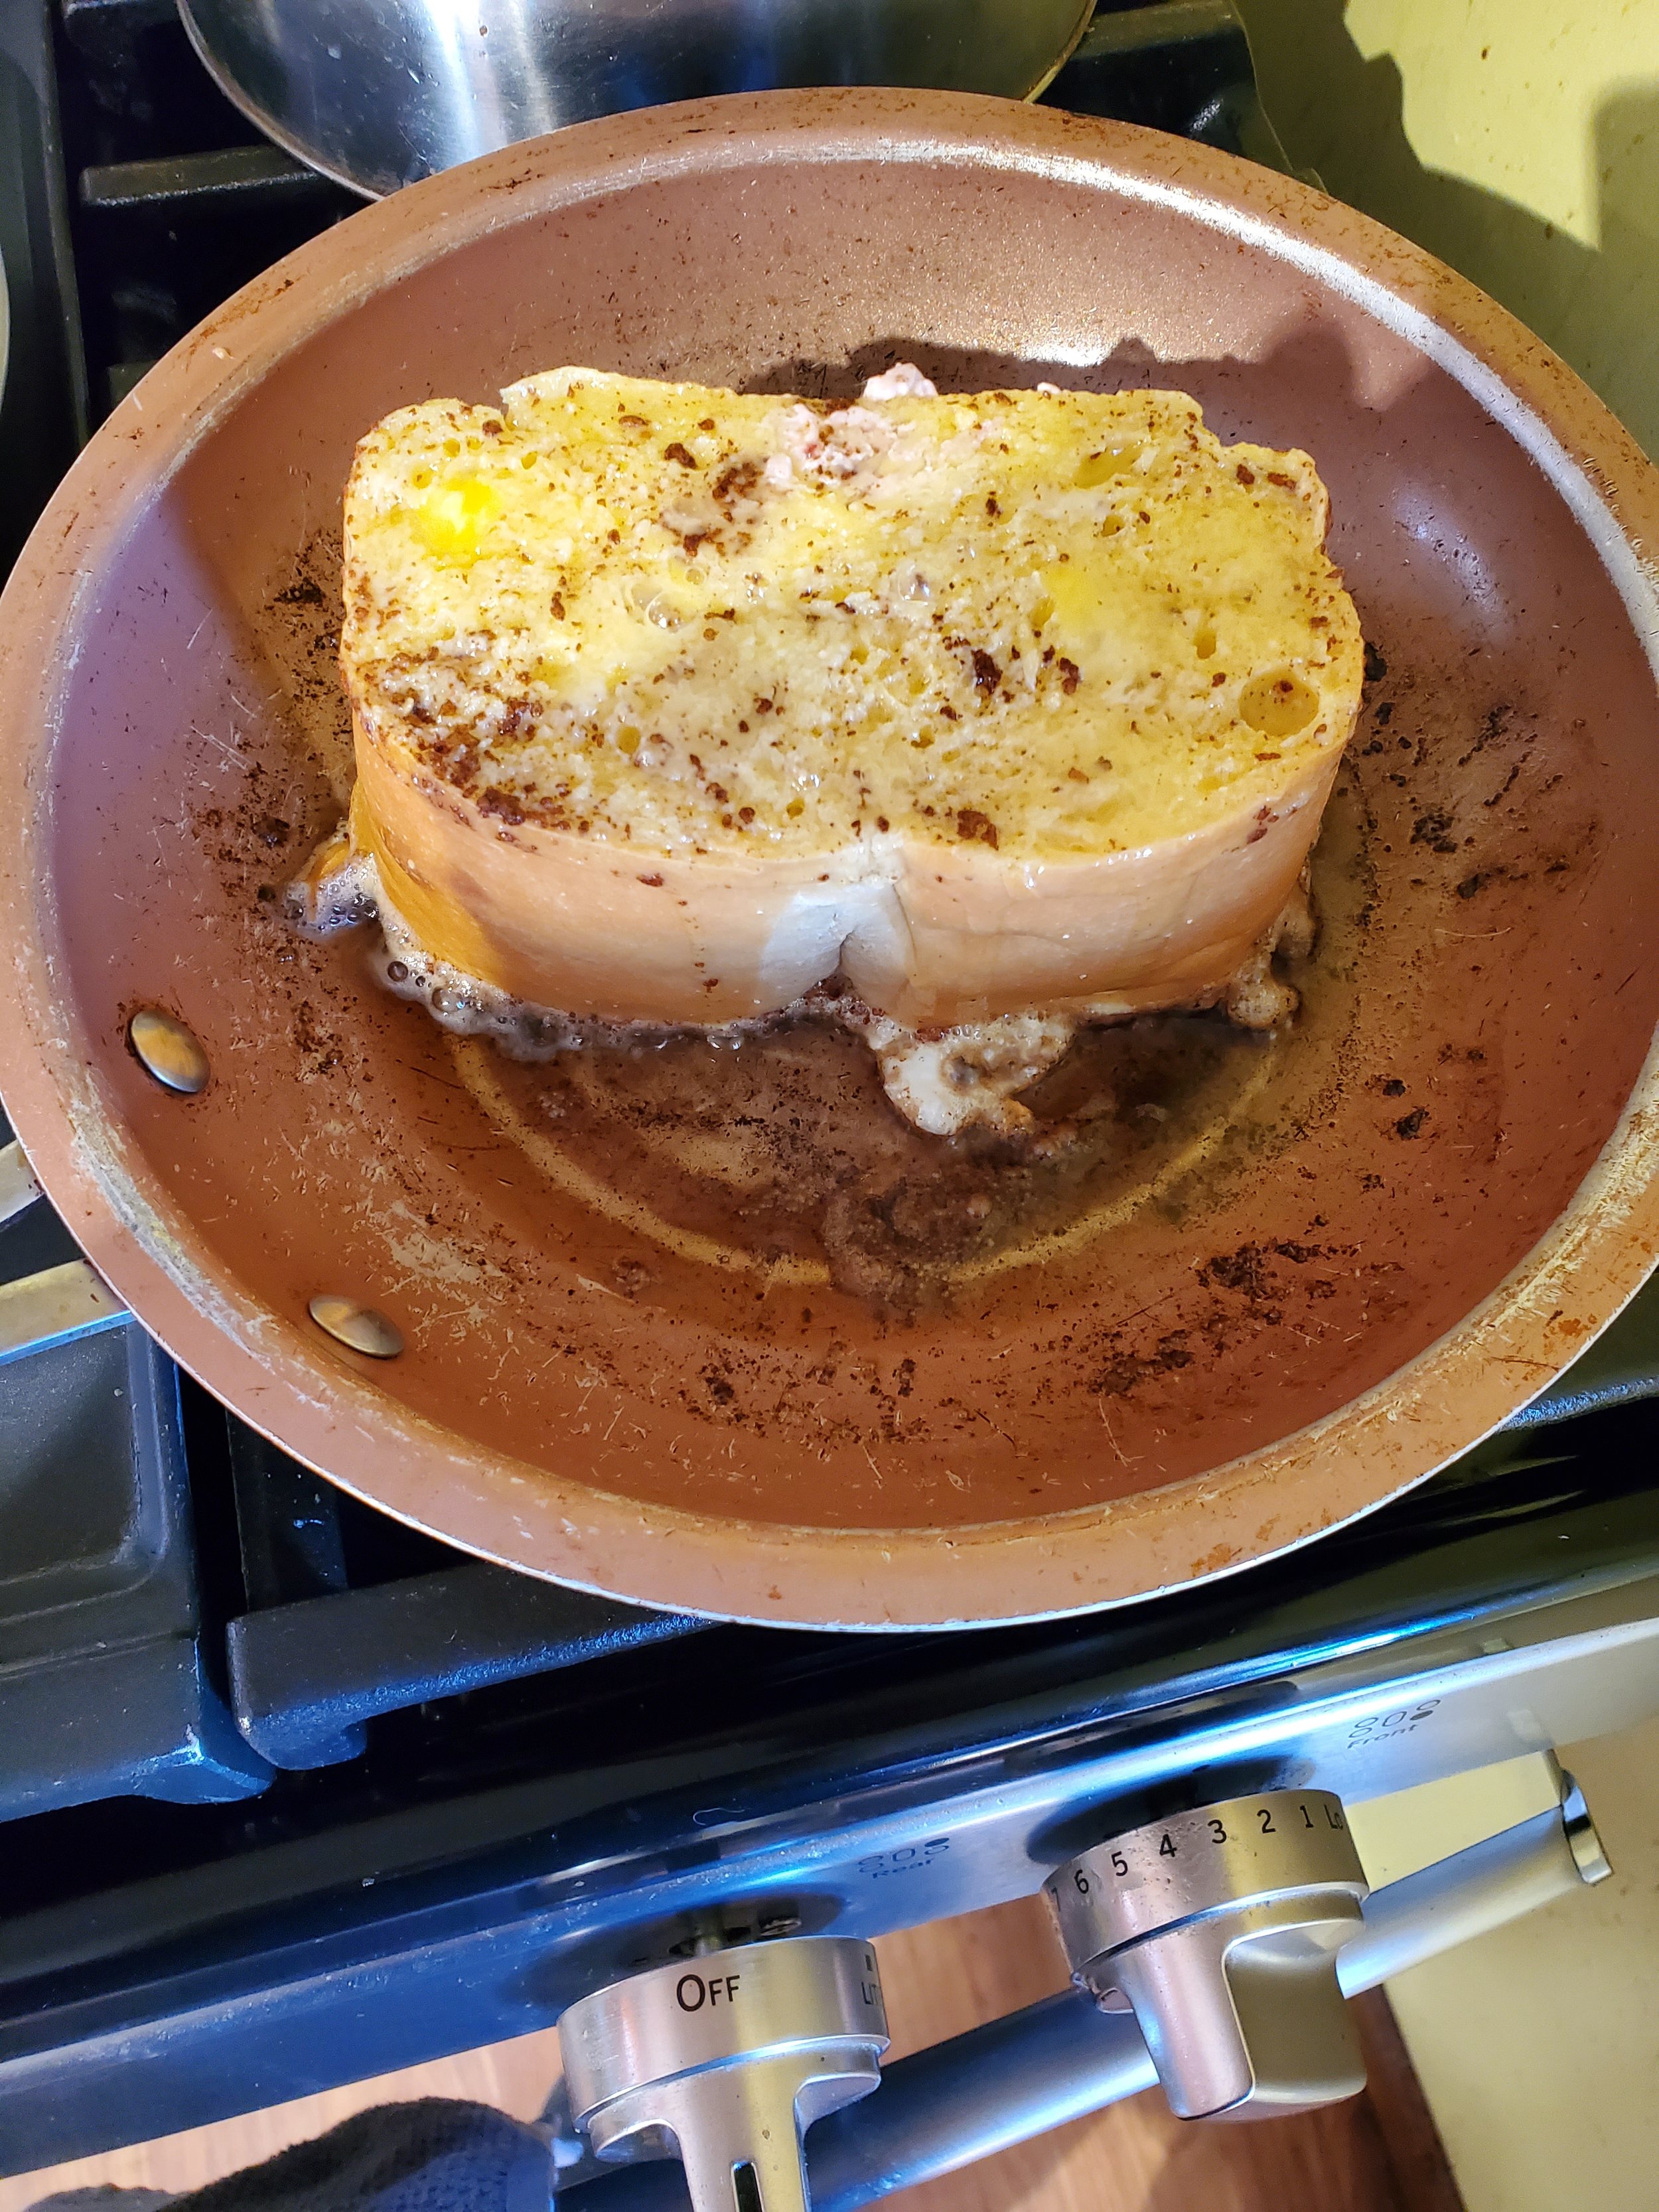
And we begin the cooking process! At this point it smells so sweet and eggy, but that shifts as the egg cooks and the surface of the toast browns.

Place one to two slices of bread in your pan at a time, and let them become golden brown, roughly 5 minutes on a side. Flip, add more butter if you need, and allow it to cook for another 5 minutes, or until golden brown. 

And here we have the delicious final results that are rich, filling, delicious and such good French Toas you'll want the whole thing.

And here you have two super thick slices of French toast so good you’ll be wanting to keep all of it for yourself.

Plate your delicious Stuffed French Toast and serve with either butter or genuine maple syrup. We tried it with just butter, and it was truly delicious. 


So what did you think? Will you be trying this one? Let us know over on our Facebook page and don’t hesitate to share photos! We’d love to see how the recipe turned out for you! 


If you ended up here because your stove isn’t maintaining heat evenly though, we can still help! Even with sharing delicious recipes like this, in our work time, we want to keep your home running smoothly. If you’re noticing trouble with any of your major appliances, reach out! We can help you set up an appointment that works for your schedule and figure out what the trouble is. 

Give us a call at ((214) 599-0055) or check out our appointment page to get things started. 


Additional Reading

Whether you want a more exact recipe, or just more delicious food. 

Brown Sugar - Cinnamon Oat Bars

A Sweet-Tart Cake To Beat All The Pies

Broccoli & Cauliflower Soup

The ‘post-Thanksgiving’ Meal Guide

11 Things You Need To Know About Security Cameras for Your Home

What Matters, What Doesn’t, and How To Choose

Table of Contents: 

Reasons To Set Up A Security System 

Different Aspects of Security Cameras 

Trail Cams & Their Uses 

Security systems used to be a thing that you only needed if you were rich. You purchased them to provide protection for your assets and family, not just for your peace of mind. It meant having an outside company securing your home 24/7. Now though, you can recreate that both inside and outside of your home using DIY kits, individual models and a little bit of planning. So why is an appliance repair company talking about all of this? Because our goal at Appliance Rescue Service is to keep your home running. While normally that means we tackle things like your appliances and doing repairs, sometimes there are things that we find useful that we want to share with you. So let’s dig in.

Reasons to Set up A Security System 

So what are some of the reasons you might look into getting a security camera system for your home? In today’s era, many people simply feel better having one. Even if you live in a gated community, it doesn’t imply perfect security. It’’s the same concept of having life insurance when you’re strong and healthy in your 20s, “just in case.” For others, it might be that you’ve had a dispute with someone and you feel it’s needed to prove your argument, to ‘catch them,’ so to speak.  A security system is also useful when it comes to knowing how your kids are doing if you have to go out of town for the weekend. We will of course always advocate for relying more on talking to your kids rather than needing to use a camera, but we know that it can help put people’s minds at ease. Of course, there’s also the possibility that you have noticed a recent uptick in theft in your area and want to keep you and your home safe.  Is your list of reasons different than the ones we’ve discussed? Don’t worry. There are still plenty of times when a security system is useful, these are just some of the most common. 

Different aspects of security cameras

The next thing then is to understand what you’re looking at. What do all of the different features of a security camera mean towards the total goal? That’s where this section comes in. 


Battery Power vs Plug-Ins

This one is self explanatory at first glance, but it has deeper implications. If you choose a security camera that’s battery operated, you need to add it to your schedule to check in on it. There’s no point in having a camera if it doesn’t have power, right? A plug in though, you’ll need to have someone wire it into your home so that it can’t just be unplugged from the outside.  You have to weigh up which matters more to you and how you intend to utilize the system. 


Video Resolution

The camera’s resolution is important, but that doesn’t mean that you need to stake everything on it, unless you’re looking to purchase this for a private security job. In which case, we have to ask why you’re here?
Anyway, the resolution of the camera is the same as for your computer or your tv. How clearly do you want to see what’s going on? The caveat is that resolution doesn’t automatically imply clarity when it comes to night vision. 


Color Vs Black & White

This one is straight forward. Do you want your video in color or black and white? So long as the resolution is good, we’d say that color is only incidental, but it is up to you. 


Field of View

A more important one, how far can the camera see? Different types of cameras will have a different angles. You’ll see everything from 360* fish eyes, to wall mounts that give you 130*. We suggest getting a rough blueprint of your house, selecting areas where you want to put cameras, and then charting out the different angles. This way you cans see if they cover each other, if there are any blind spots, or other obstructions due to things around your house. 


Audio Recording Capabilities

On one hand, having sound can be useful. If your home does get broken into, voice recordings might be used to identify a suspect. However, this is an additional feature that will not only make the video files larger, it is also going to raise the price of the cameras. It’s up to you. 


Onboard Storage 

Much like the power issue, this is one that seems simple but has larger implications for how your home security is going to fit into your life. If the camera has onboard storage, you’re going to need to remove the cards and back them up, and reviewing them as needed so that they don’t record over themselves.  If it doesn’t have onboard storage, this is going to mean that you need a centralized location to store the data that it sends back, or pay for a cloud subscription. 


Smart Connectivity 

This is whether or not the cameras connect to things like Alexa, Google Assistant, or other systems.  While being able to turn on a camera with your voice is useful, we feel that there are too many drawbacks still inherent within the smart connectivity systems to really vouch for them at this point. 


Night Vision Capability

Here we’re back to another key feature in a security system. This is one we think you need to really pay attention to if you’re setting up your own system as how this integrates with  daytime vision is going to be an important factor for your night time security. Are there significant differences in visibility or clairty? Another question is at what point is the ‘drop off’ for night vision? How far out can the camera see clearly? Some of the ones we’ve included in our list are able to see only up to 25 feet, something you need to take into account based on how high the cameras are mounted on your home. 


Ability to be Hidden 

The ability of your security system to be hidden says different things, all of them psychological. On one hand, having a system set up clearly says “I am capable of defending my home. I have the tools to catch you.” On the other hand it also says “I have things I need to protect.”  Having them in plain sight also means that someone can observe from the outside where the patterns are within a system and if there are any gaps that you might have missed. So being able to hide your security cameras can be useful. That’s our thoughts on the matter though, and we are not security experts. 


Price 

As with many things, everything comes down to price. How much are you willing to invest into individual units? Will you need an electrician to set them up for you? What about someone who is skilled with computers to handle how they connect to one another your internet? Do you intend to install the units yourself or hire someone else? All of these things need to be charted out and considered before you make an ultimate decision on which plan is right for you and your home. 

Why trail cams can be useful for additions to your security net 

Now, if you really want to buff up your security system,  you might consider trail cams. These are also useful if you’re looking at adding security to an area that is difficult to move around on, has obstructions, or poor internet connectivity. While they don’t alert you when something happens, they can be useful if you’re looking at just proving someone has been on your property, or you’re looking to add security to further reaches of your property.
Some additional benefits of trail cams include: 

-Most trail cams catch still photos, but due to motion detection, they can catch quickly passing things like someone creeping around the backyard. Since they’re meant to catch shots of animals usually, this is one area where they are more dependable vs traditional security cameras. Those still shots will typically be crisp. 

-There are some trail cams that are capable of doing video as well as still shots. 

-One thing to be aware of about them is that the majority of them are onboard storage only. Again, this means that you have to add checking, cleaning and backing up data to a regular rotation on your to-do list. 

 - As of right now, due to what they are, they all have some form of battery power, so please see above on ‘to-do lists.’ 

- Most of them do come with some sort of camouflage design in order to make them less obvious. 


We hope that this helps make security cameras and the systems that go into place with them less opaque. You can definitely DIY your own system, so long as you’re willing to plan out what goes into it, and how you want everything done. As always, we will suggest that if you’re not certain, that you seek a professional. Down below we’ve provided two sets of charts for you to download so that you can compare and contrast different models and their benefits vs drawbacks. 


If you’ve gotten down this far and you’re thinking “well, that’s interesting and all, but it’s got nothing to do with my oven smelling like something died.” Don’t worry, we really can help with that too. At Appliance Rescue Service whether you live in McKinney or Dallas, Frisco, or Coppell, we can help. You can reach out to us at ((214) 599-0055) or by setting up an appointment via our webpage. We won’t stop until you’re happy with the repairs and your home is running smoothly again. 

Trail Camera attributes and qualities

Answering Your Major Questions About Induction Stoves (2022)

How It Works And Why Your Pans Won’t

Induction Stoves

The Basics

In-Depth Look

So my current pans won’t work? 

Do I actually want one? 

If you’ve gone shopping for new stoves recently, you’ve probably seen something about induction stoves. If you’re like the rest of us, you’ve probably questioned “what’s an induction stove and why the heck would I buy one?” This week we’re answering your major questions about induction stoves: How do they work, and why don’t my pans work with them?


If you’re not really interested in the technical aspects of an induction stove, this is for you. Start off by thinking about a typical gas or electric stove. You turn on the burner, and it heats that specific spot. But there are uneven areas, due to the way the heat has to spread through it. Induction stoves are an entirely different beast. A copper coil within the ‘burner’ has electricity sent through it. That electricity is transmitted through the glass top to the pan that you put on top of the burner. That pan heats up, only where it comes into contact with the electricity. So, in theory, yes, you could heat only one-half of your pan. If however, you have all of your pan on the coil, you are going to get a very even heat, since the heat is actually coming from the pan itself instead of from the stove.  

If that didn’t answer all of your questions, that’s ok. We can take a slightly more in-depth look at things now. If it did answer everything you wanted to know, feel free to skip this paragraph. Picture a coil of copper wire. Now apply an alternating current to the coil, making it oscillate, or move back and forth at high regular speeds. This oscillating creates a magnetic ‘flux’ or a field around that singular burner. Now put your pan on top of that burner, and the two interact, so long as the pan is made of either iron or steel, both magnetic materials. The magnetic flux from the stove creates a current in the pan, the pan has a natural resistance to that current, and so it begins to heat up. Since all of this is based on magnets and electricity, you don’t have to have the pan and the coil directly touching, which means that the stove can have a heat-resistant ceramic layer between the two. Although the surface will still become hot, it’s considerably less hot than either a gas or electric stove will get. 

 So why then don’t copper and aluminum pans work? Or ceramic ones? The reason is the magnetic current. None of these things are magnetic, so they can’t interact with the current. While it is less than ideal, it is one cost of using this type of stove. On the upside though, if you have to purchase all new pots and pans, at least you can choose specifically which ones you’ll need instead of just getting a set? 

And now we get to the real crux of the matter. Do you really want one? Well, to be honest, we can’t tell you if you do or don’t. Since we fix all sorts of stoves, we see, perhaps better than most, that all stoves have their pros and cons. On one hand, you’ve got a stove that is noticeably cooler to the touch. It also creates perfectly even heating, no need to worry about hot spots. Since there isn’t a flame or a hot surface element, you can worry less about accidentally starting a fire.  In terms of how quickly they work, gas stoves are faster than electric stoves. However, an induction stove is even faster than a gas stove, heating water twice as fast as most gas stoves.  They’re also supremely easy to clean, a fact we love. 


However, just like with any purchase, there are cons to an induction stove as well. An induction stove is a very complicated system. They’re typically more expensive to purchase and to install. They’re also more expensive to repair, if and when they do suffer a malfunction. As mentioned above, you will have to purchase a new set of pots and pans, as anything without an iron or steel bottom won’t work.  Since they heat up faster than other types of stoves, your cooking style will have to adjust to match it. That can take time, and mean a lot of burnt food at first, if you’re not prepared for it. A final, if odd, con, is that they do make more noise than other options. 


Important warning: THEY CAN BE RISKY IF YOU HAVE A PACEMAKER, DO TAKE NOTE. The electromagnetic system does pose a certain risk to disrupting pacemakers, however, most pacemakers are safe around these. Still, check with your doctor before purchasing to make sure it won’t compromise your health if you have a pacemaker. 


So, do you think you’ll be getting an induction stove any time soon? Why or why not? Let us know over on our Facebook page, we’d love to hear from you! 


If you’re here because you have an induction stove and it’s broken or otherwise acting ‘odd’ we can help. Give us a call at ((214) 599-0055) or set up an appointment via our page and we’d be more than happy help get your stove back in perfect condition.


Lentil & Quinoa Soup

Rich, warm, and so delicious you’ll be fighting for seconds


I don’t care! Take me to the recipe! 


Winter is firmly here now, at least according to the calendar, so we’re dreaming of soups. Maybe not a super hearty soup though, since the weather is all over the place? Fortunately, we have this Moroccan-inspired lentil & quinoa soup to hit the spot. 


Ingredients: 

1 yellow onion

2 Tbsp roasted garlic paste

3 carrots

6 Tbsp  unsalted butter

2 ½ tsp sweet basil 

1 tsp cumin 

3 plum tomatoes

1 ¾ cup dried brown lentils

½ cup tri colored quinoa (or just  straight quinoa, but this adds flavor) 

3 cloves of garlic

½ cup full fat plain Greek yogurt 


Tools: 

Food processor

Chef’s knife

Cutting board

6-quart pot


-Grab your onion and chop it into rough dice.  Pop that into your food processor and give it a few pulses, until the pieces are roughly the size of your pinkie nail. 


-Set your stove to medium heat, put in 4 Tbsp of butter and allow that to melt. Once that’s done, toss in 2 Tbsp of roasted garlic paste (an example is Better Than Bullion) allow that to melt and disperse into the butter. Once that’s done, add your onion and allow that to begin cooking. You’re not looking for them just to turn transparent, you want them to actually soften during this process so that the flavor isn’t overwhelming later. 


-While your onion is cooking, grab your carrots and chop them up into large rounds, then toss them into the food processor. You want your carrot to be the same size as your onion, roughly. When that’s done, scrape the carrots into the pot, give it a few cracks of pepper, and a ¼ cup of water.  


-Mix together your sweet basil and cumin and stir into the pot.

- Back to the chopping block, grab your plum tomatoes and slice them into (roughly) 8 pieces. Toss them straight into the pot and stir occasionally as things cook for the next 5 minutes.  You’re looking for the tomatoes to being to lose their shape, and for the carrots and onions to soften.

-Add 7 cups of water to the pot, along with your lentils, quinoa, and a few cracks of pepper and 1 tsp of salt.  Add a lid to the pot and let it come up to a boil.  Once that’s done, uncover the pot and turn down the heat until it’s just at a gentle simmer. 

- Allow the pot to continue simmering until the lentils are tender, roughly 25 minutes, although it might be longer. 

- After roughly 15 minutes have passed, grab your garlic and mince it. Put that into a fresh frying pan with 2 Tbsp of butter on medium heat. Stir the mixture constantly. You want the outside of the garlic to begin to blacken, without it actually smelling or tasting burnt. It’s a really fine line, and we understand if you want to stop just when the garlic gets to a nice golden brown. At this point you can also add in a little bit of red pepper flakes, more sweet basil or white pepper. When the garlic is at your preferred stage of ‘done’, pull it from the heat and set it to the side. You don’t want it to continue cooking. 

-Once your lentils are soft, turn off the heat and dish up the soup. Add a dollop of Greek yogurt to each dish and some of the garlic butter on top. Mix everything together and enjoy for a delicious meal. 


-Even with the garlic paste added, it doesn’t have a ton of depth or texture, until you add in the yogurt and garlic and mix it all together. It’s when all the pieces are together that you get the magic. 


What did you think? Do you have a way to make the recipe even better? Did your family love it? (Ours did, we were shocked!) Did they hate it? (We’ve all got recipes like that.) Let us know over on our Facebook page, as always, we love to hear from you about how your adventures in the kitchen turn out. 


If you’re wondering what an appliance repair company is doing talking about soups and recipes, don’t worry, you didn’t land on an alternate blog. Appliance Rescue Service is still here to fix your appliances and make them as good as new. Whether it’s your dishwasher or your dryer, your stove or your ice maker, we’re here to help. Just give us a call at ((214) 599-0055) or set up an appointment on our page, and we’ll work with you to get your home running again. 

Additional Reading:

Broccoli & Cauliflower Soup - If you need something a little heartier, this is just as easy to make, and just as delicious.


5 Must Have Kitchen Essentials for Fall

5 Kitchen Tools From The Future

What Food Engineers Are Coming Up With Today Can Be In Your Kitchen Tomorrow

Table of Contents:

Fromaggio Smart Cheesemaker

CocoTerra Tabletop Chocolatier

Barsys 2.0 Cocktail Machine

LG Snow White Ice Cream

Mycusini Chocolate 3D printer 


kitchen. We’ve got all sorts of fun food and drink based tools that you might see in your home kitchen over the next few years. From chocolates, to drinks, to ice cream and cheese, we’re taking a look into the future to see what food engineers are coming up with. 


Fromaggio Smart Cheesemaker 

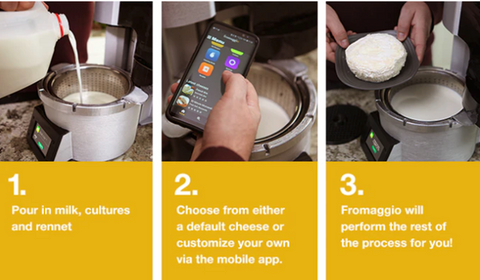
Say you have a dinner coming up, and you want to offer up baked brie and fresh mozzarella to your guests. You’re also thinking about some chevre for a salad that you want to serve. Unfortunately for you, your local shop doesn’t carry any brands that you like. What’s worse, it’s difficult to ship cheese, especially when you’re trying to get it to Texas in the summer. You don’t want to go without the cheese course, so what about making your own? The Fromaggio Smart Cheesemaker connects to an app to create almost any type of cheese you can request. It sits on your table and works away while you go on with your life. You can make everything from chevre to yogurt, and many other cow and goat milk cheeses as well. Some cheeses are even able to be made within an hour. According to Fromaggio, the machine is capable of making up to 2lbs of soft cheese or 1lb of hard cheese in a single cycle, for less than it would cost you at the store. 


If you’re interested in purchasing your own, Fromaggio is taking pre-orders now, with it estimated to ship in April of 2022. 


CocoTerra Tabletop Chocolatier

Not interested in cheeses? What about chocolates? Then you might be interested in the CocoTerra Tabletop Chocolatier. This wonderful tool handles all of the steps needed to make chocolate using the connected mobile app. Whether you’re looking to make specific shapes, or you want to blend your own chocolates, it’s possible with the CocoTerra. The app has many different recipes available for you to begin to learn how to make chocolates, allowing you to exclude ingredients for those with allergies, or to emphasize flavors. In two hours you can make any type of chocolate you can dream up. What’s better is that although the company does offer ingredients and even decorations, you’re not restricted to shopping through them. You can purchase materials from anywhere to make your chocolates.  Roughly half a pound of chocolate can be made at one time, which with custom chocolates would be a wonderful night’s feast. 

Although we’re note certain when CocoTerra is going to move to mass production, they are offering pre-orders right now hoping to deliver in the Winter of 2022.


Barsys 2.0 Cocktail Machine

It’s been a long day, and all you want is a Negroni. It’s been one of those days. You don’t want to mix it yourself, you really just want it ready for you when you walk in the door. Fortunately, you know that you set up your Barsys Cocktail Machine earlier that day. All you have to do is pull up the Barsys app on your phone and tell it to make it for you when you park in the drive and it will be ready by the time you get inside.
The Barsys is an alternative to having to memorize tons of different recipes, or being uncertain of how much you need of this or that. You can put in up to 5 bottles of liquor and 3 different mixers to create all sorts of drinks in 15 to 30 seconds. 

In the interests of full disclosure, we do have to talk a bit about some of the flaws with the Barsys. According to many different sources the Barsys app is buggy and lags when processing requests. It’s also been said that the machine does leak during the mixing process. While these are problems that might deter you from purchasing right now we would still suggest keeping an eye on the company. 

If you’re interested in purchasing it you can grab it here from Barsys


LG Snow White Ice Cream 

Think about your friend’s Keurig machine. You insert a pod, and out comes coffee. Now imagine if you will that it’s summer, and you can press a button and get ice cream instead. Insert any combination of flavor and ice cream pods into the LG Snow White and get back a dizzying array of ice cream options. Currently, the flavor pods are expected to include a wide range of common ice cream flavors, and the pods for type will feature ordinary soft-serve, alongside more uncommon types such as gelato and custard.  Although we don’t currently have pre-order possibilities or even a launch date, we do know that the testing is going very well and we should see more news as the next year or two goes on. 


Mycusini Chocolate 3D printer 

Rounding out our list, we’re taking a very different look at chocolates in comparison to the CoCoTerra. This offering from Mycusini allows you to build complicated, edible structures in your own kitchen. Want to make that wonderful chocolate peacock you saw in a magazine? You can. 

In contrast to the CoCoTerra, the Mycusini only works with specific types of chocolate, so your ability to use it is limited to the availability of the Mycusini chocolate. The machine does come preloaded with several designs, but they do offer the ability to design and load even more through their Mycusini club. 

There are two different versions of the Mycusini, as of writing. The Mycusini 1.0 features a 105mm by 80mm printing area with a maximum height of 50mm (4.1in by 3.1in, 1.9in height)

The Mycusini 2.0 features a 90mm by 90mm square printing area, and updates the original design by having a more robust, enclosed build, and a larger and more user-friendly touch screen display.

Both of them have the ability to use SD cards to download new designs and templates. 

If you’re interested in getting a Mycusini for your home to experiment with you can get them here, along with supplies, and other accessories. 


The future is full of interesting and surprising possibilities, including the future of your kitchen. Some of these are already available, while others are still in the testing phases and will hopefully come in the near future. All of them are likely to get better with each new iteration. Which kitchen tool of the future are you most excited by? Which one do you think is a bad idea? Let us know over on our Facebook page, we’d love to hear from you. 


If on the other hand, you’re dealing with the very real present where you’ve got issues with your current kitchen appliances, we can help! Give us a call at ((214) 599-0055) or set up an appointment on our webpage and we can help you, no need to wait for the distant future.  At Appliance Rescue Service we’re here to help you, now and in the future. 


Additional Reading: 

Cutting Edge Appliance Concepts of the Future

Top 5 Craziest Smartphone Capable Appliances

9 Kitchen Gadgets You Don’t Need