Sweet

Easy No-Cook Not Quite a Cannoli

When You Want The Treat, But Can’t Work In The Heat

Looking for a sweet treat that is easy to make and will impress your friends and family? Look no further than this not quite cannoli recipe! While it may not be the traditional version of the beloved Italian dessert, it is a delicious and fun twist on the classic. With a crispy shell and creamy filling, this dessert is sure to satisfy any sweet tooth. Plus, it can be customized with your favorite flavors and toppings for a truly unique dessert experience. So why not give it a try and see for yourself how delicious not quite cannoli can be!


Ingredients:

15 oz container ricotta cheese

3/4 cup confectioners sugar

1/2 teaspoon almond extract

1 teaspoon vanilla extract

Pinch table salt

Pinch ground cinnamon

Pinch corn starch

Chocolate chips

Ready-made chocolate chip cookies (large)


Tools:

Fine mesh sieve

Spoon

Plastic wrap 

Two decent sized mixing bowls

Small plate

Something sort of heavy

Measuring spoons

...time. More time than you think.


Before you begin, know that while this recipe is a no-cook one, it does not like to be rushed. If you're looking to get the whole thing done by dessert tonight, you should probably get started at breakfast. That ricotta is going to take what feels like forever to drain. 


On a related note, do not skip that draining step. Skipping it yields watery, runny, thin cannoli filling. Thin filling does not stay in place and makes awful sandwiches. It also doesn't taste right. Save yourself the trouble.


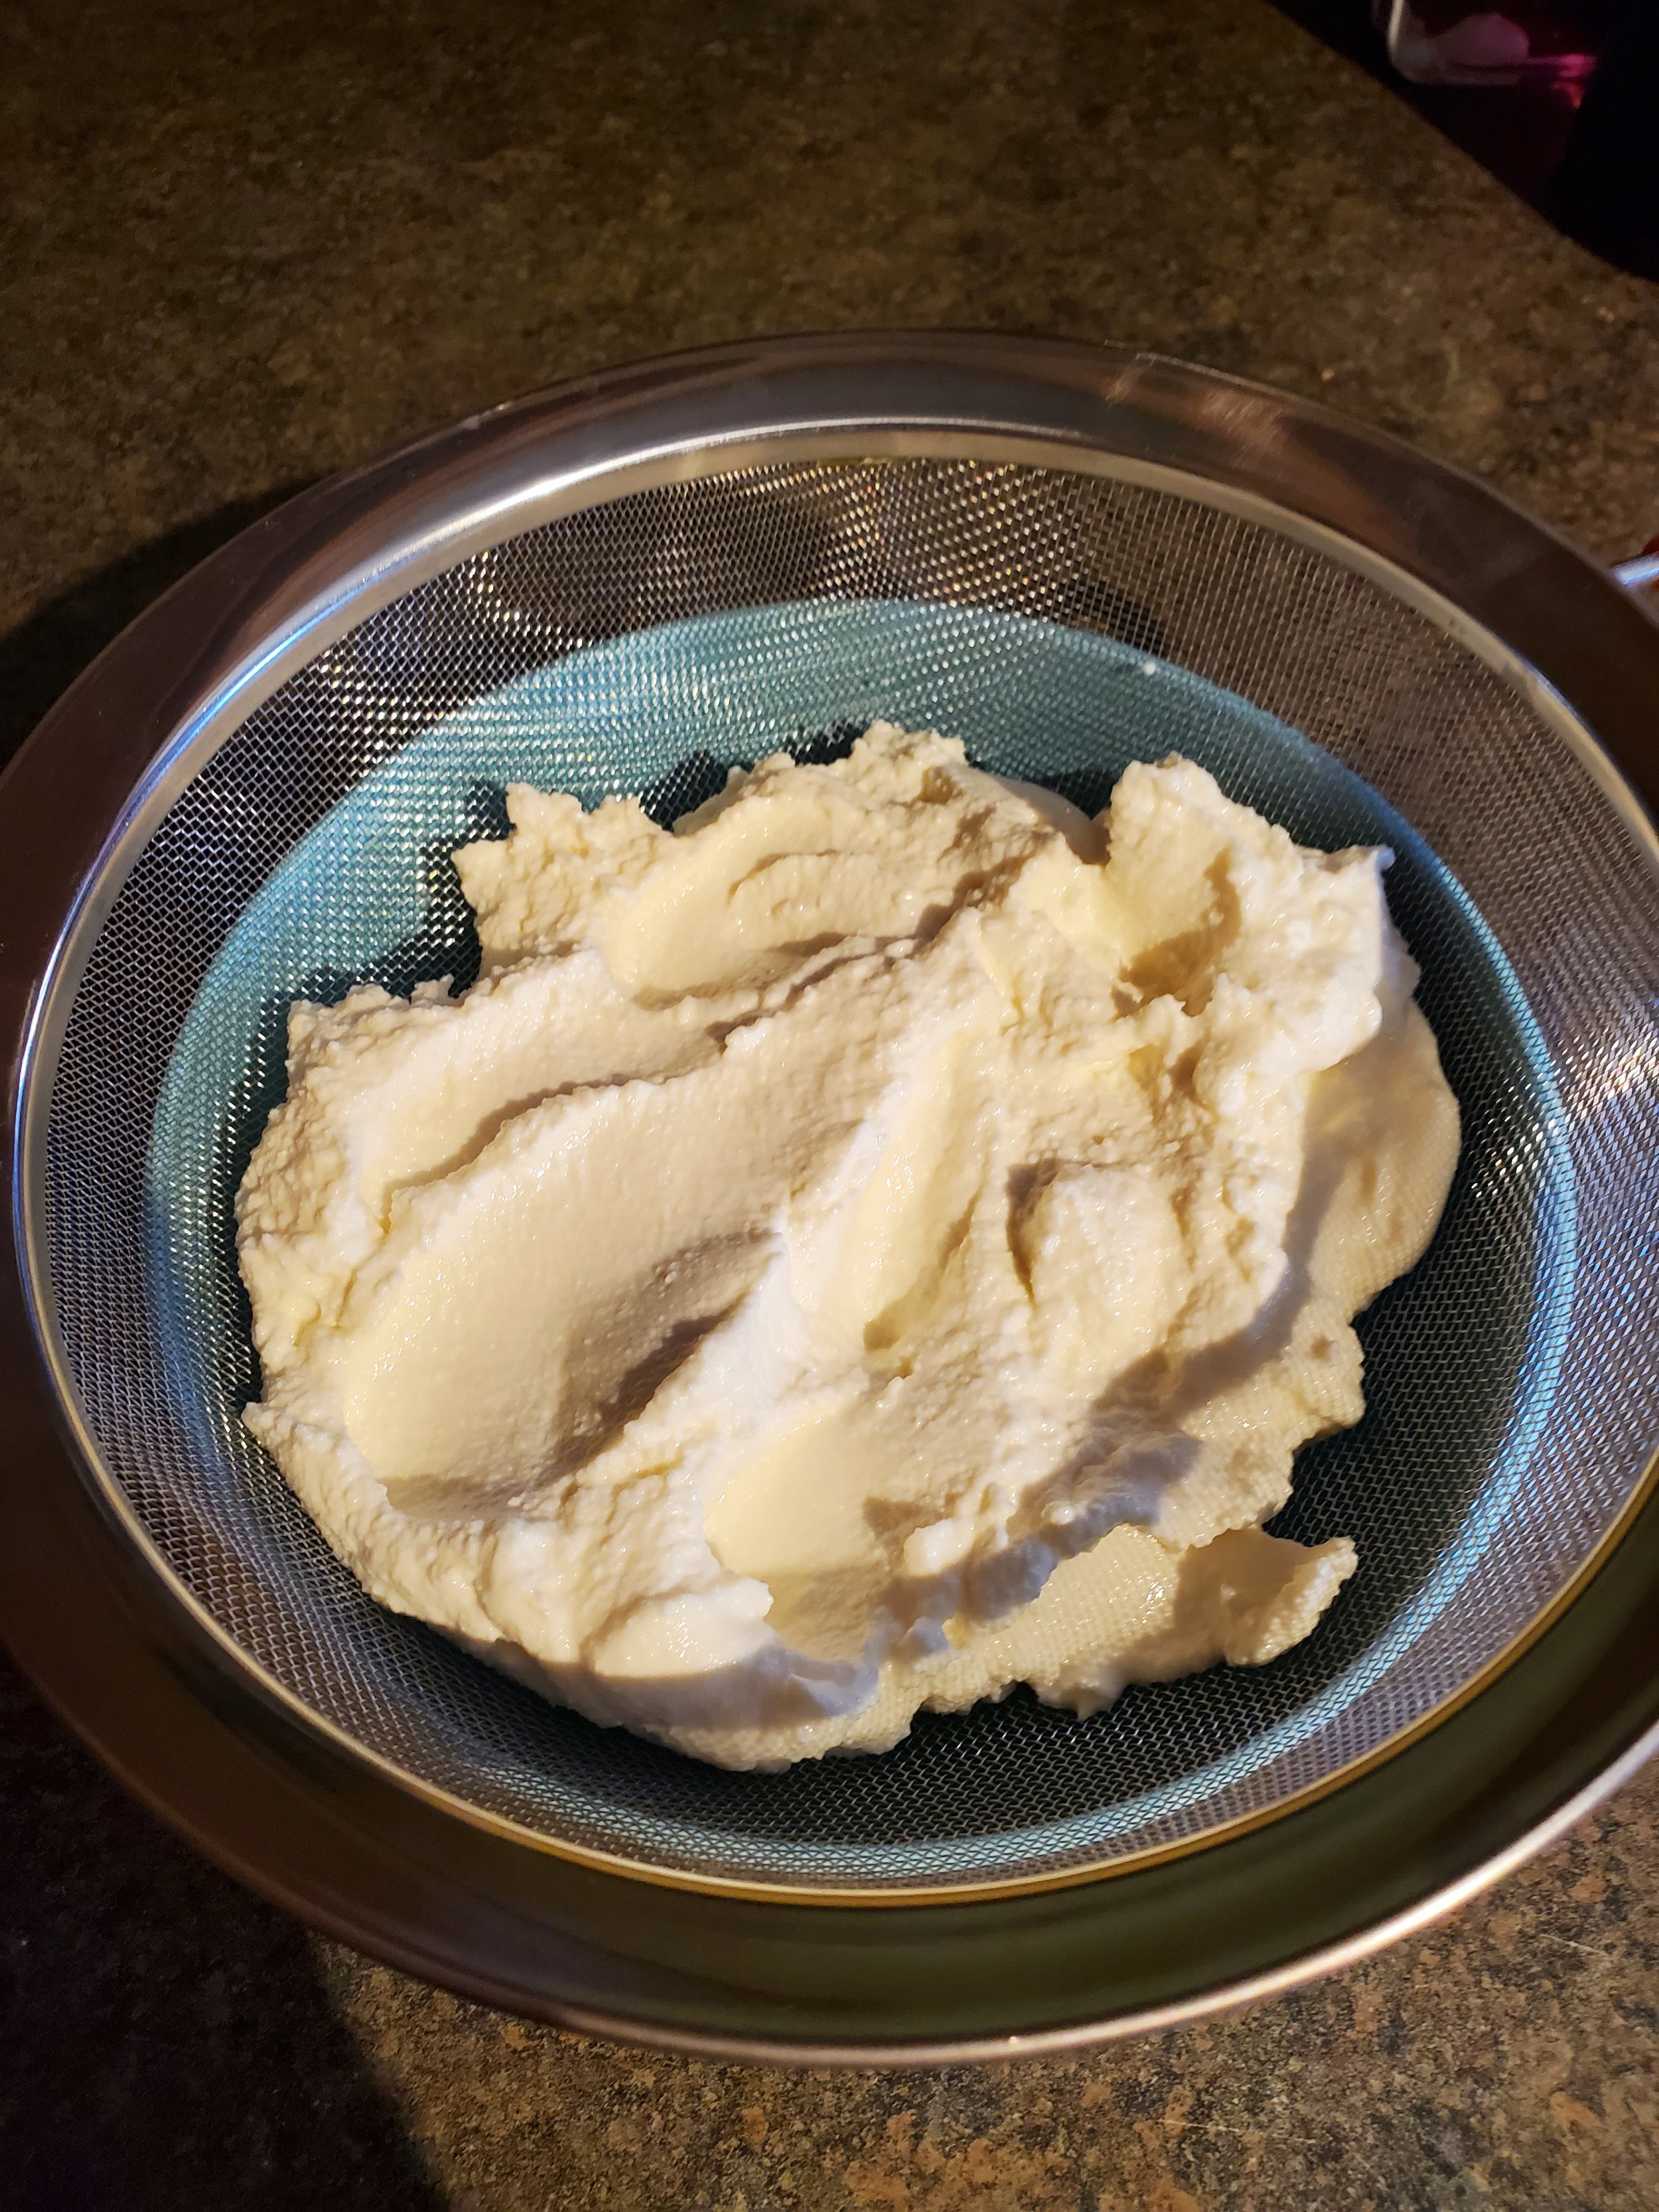
Once you have all your ingredients out and ready to go, pop the lid and plastic cover off the ricotta. Before we do anything else, this is going to have to do its own thing. Please note it looks like a congealed, wet lump of cheese right now, and we're going to have to encourage it to change these characteristics. 


Nest the sieve into one of the bowls so it can catch the drained whey. Stir the ricotta while it's still in the container, then scoop it out into the sieve. If you have a cheese cloth, feel free to use it to line the sieve and wrap the ricotta - but in our experience, most people don't keep one in their kitchens. 


Gently press the ricotta into the sieve and smooth out the top. (If you're squeezing cheese through the sieve, you're pushing too hard.) Set a layer of plastic wrap over it and place a small plate on top of the plastic wrap to press the cheese. Let it sit for half an hour or so and check back to see if any of the whey is working its way out to the bowl.


Once you're sure it's working, you can add some weight to speed up the process - we put a pound of dry chickpeas on top of the plate, since they were both comparatively heavy and handy.


Now you can go do something else. For a while. Think at least three, possibly up to five episodes of your favorite show.


After a couple hours, you'll stop seeing the amount of whey in the bowl increase, and the ricotta will have taken on the consistency of crumbly-looking curds. This is when you know it's ready to be moved to the other bowl you took out.


Remove your weight, plate and plastic wrap if you haven't already done so. If you used a cheese cloth, lift the edges of it to transfer the cheese - but if not, just upend your sieve over the clean bowl and scrape it free with a spoon.


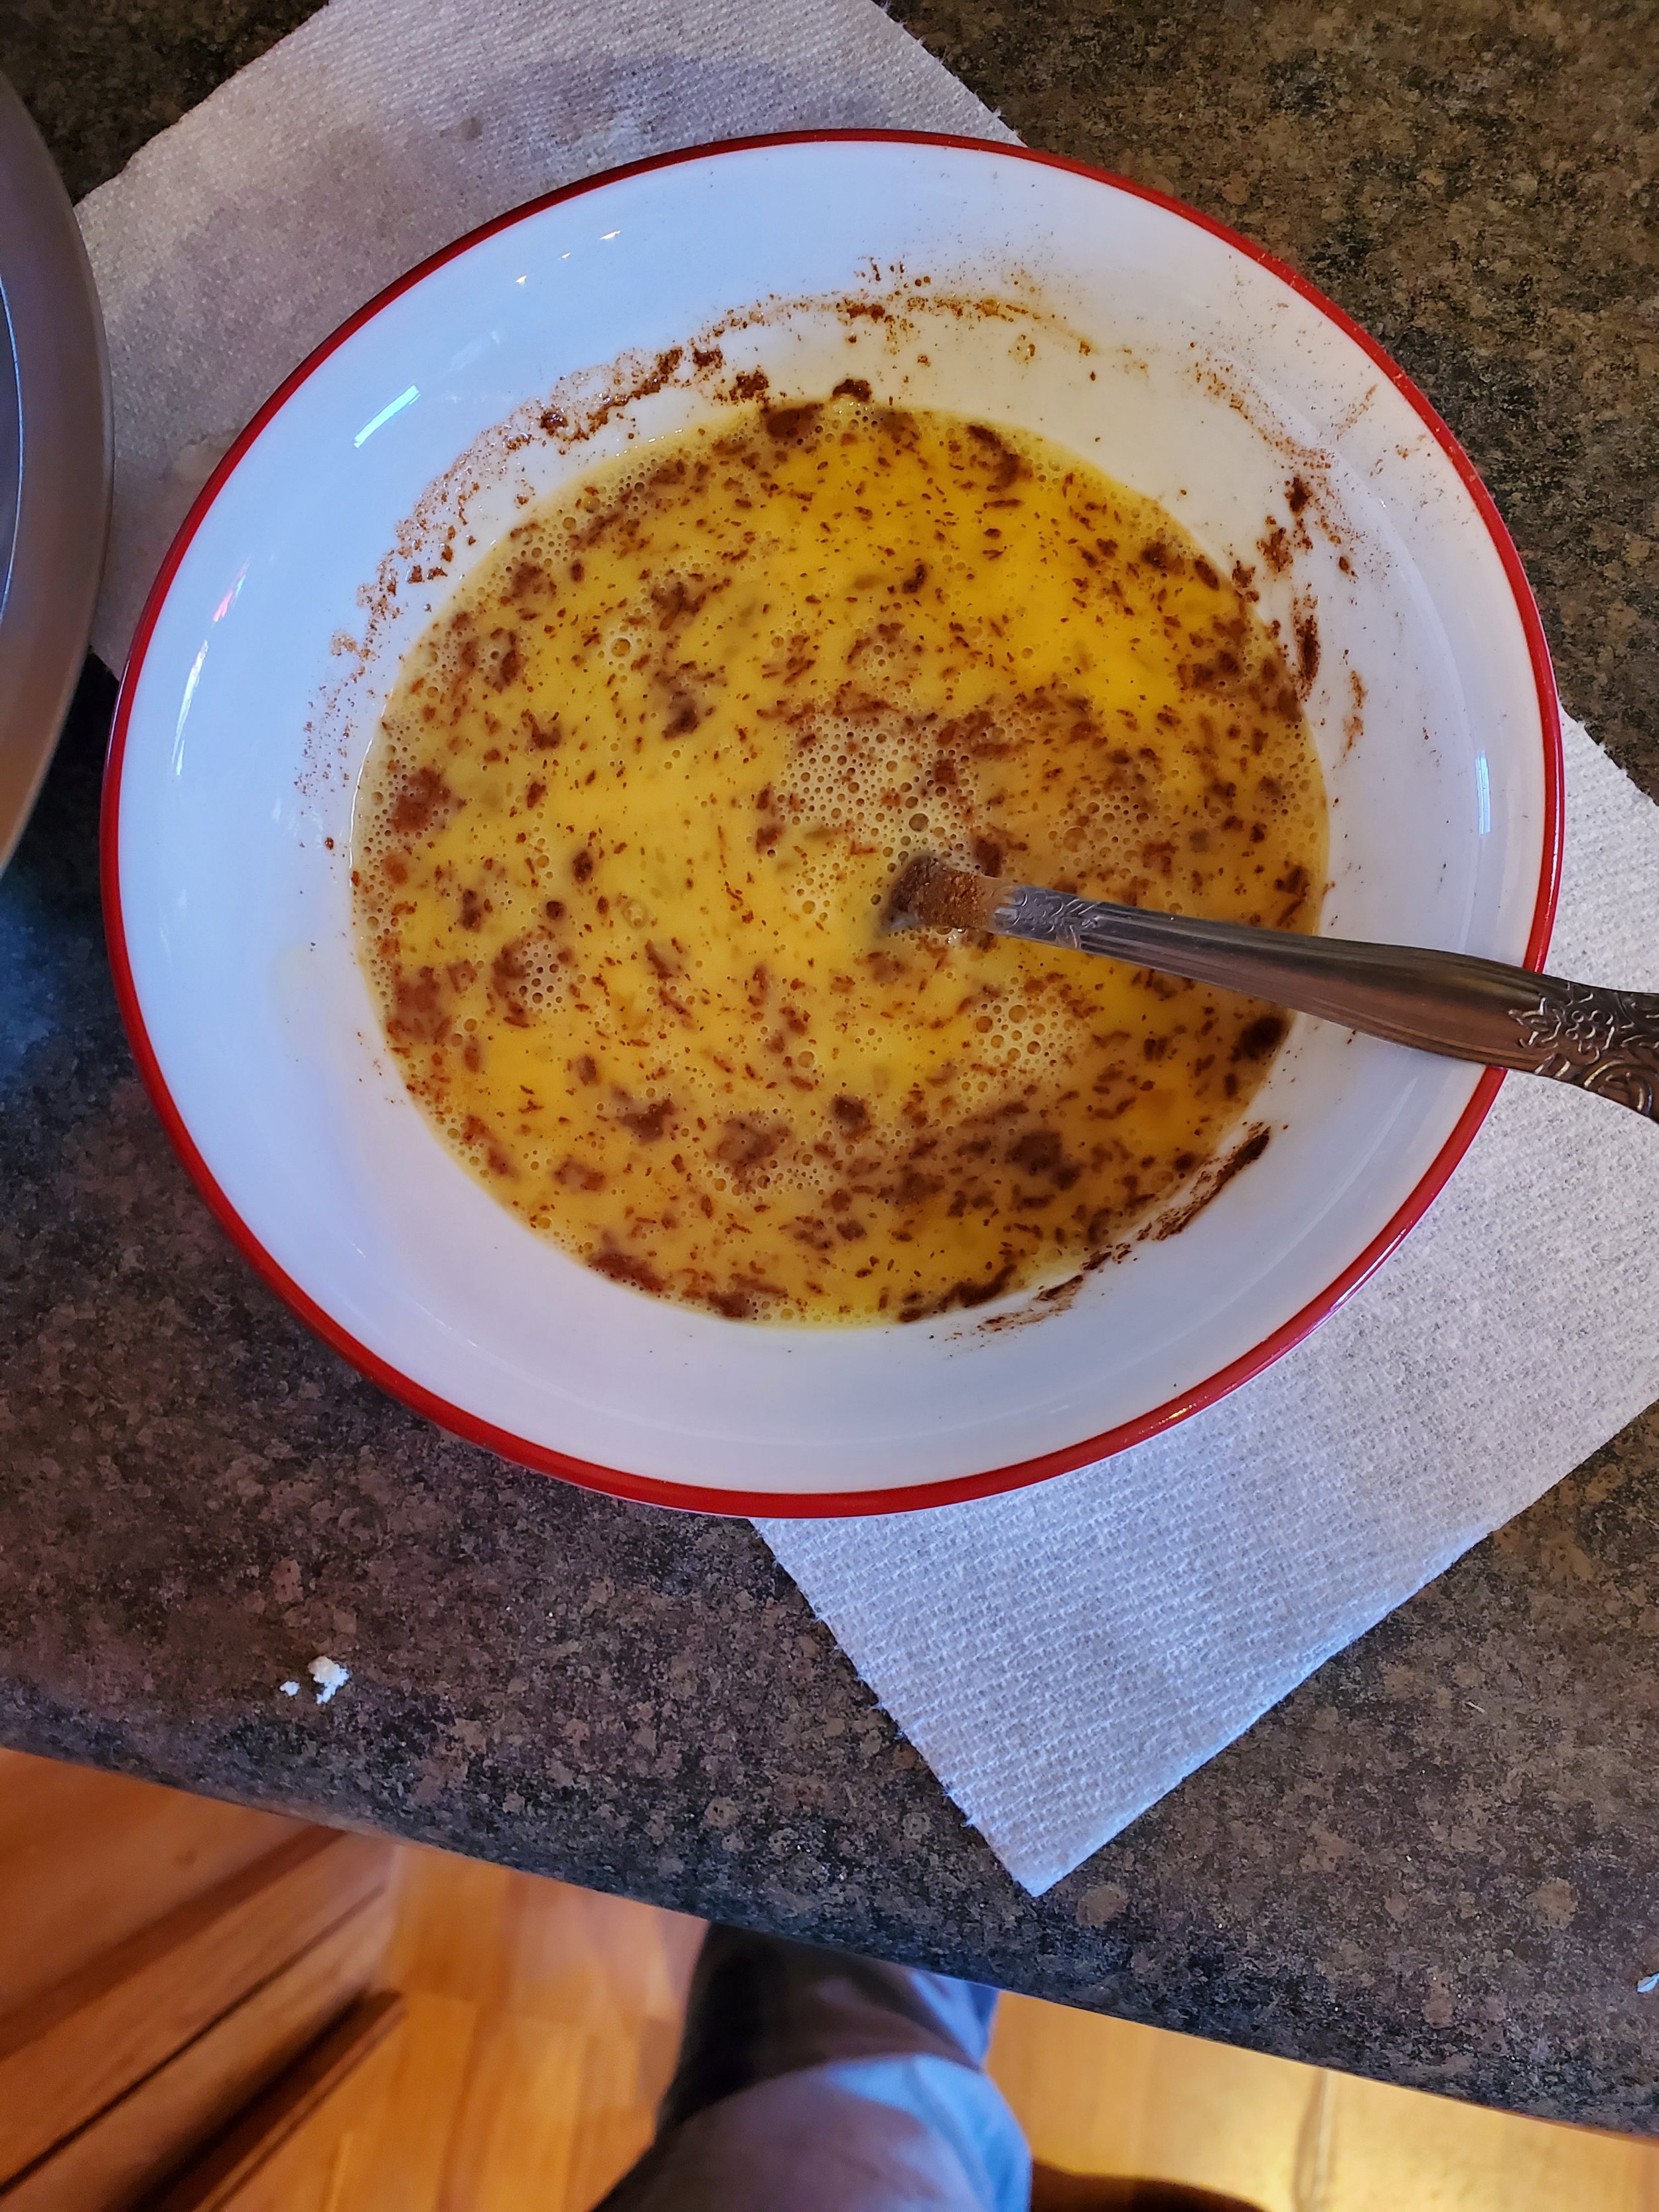
Measure your extracts into the ricotta and stir well. The vanilla will lend it kind of an off-white color. Stir in your salt and cinnamon, then slowly add your confectioner's sugar a little at a time, stirring to completely incorporate it before you add more.


When you've added all the confectioner's sugar, scoop up some of the cannoli filling with the spoon and tilt it back over the bowl. If it's slick enough to slide off the spoon, it's not yet the right consistency and you'll need to add in the corn starch (or more confectioner's sugar, but in our opinion that makes it much too sweet). Don't add much, and be absolutely sure there are no lumps before you add it. Stir very thoroughly. 


Once your filling no longer slides right off the spoon, it's ready for chocolate chips. Add as much or as little as you'd like. We usually start with about a quarter cup and add from there - but for the sake of full transparency, we rarely ever actually measure chocolate unless it's to melt. We just add until it looks right.


Stir it all well, and go get those cookies you set aside this morning and warned the whole house not to touch. This, of course, assumes your family follows instructions (this one struggles, especially with sweets-related instructions) and left you the cookies.


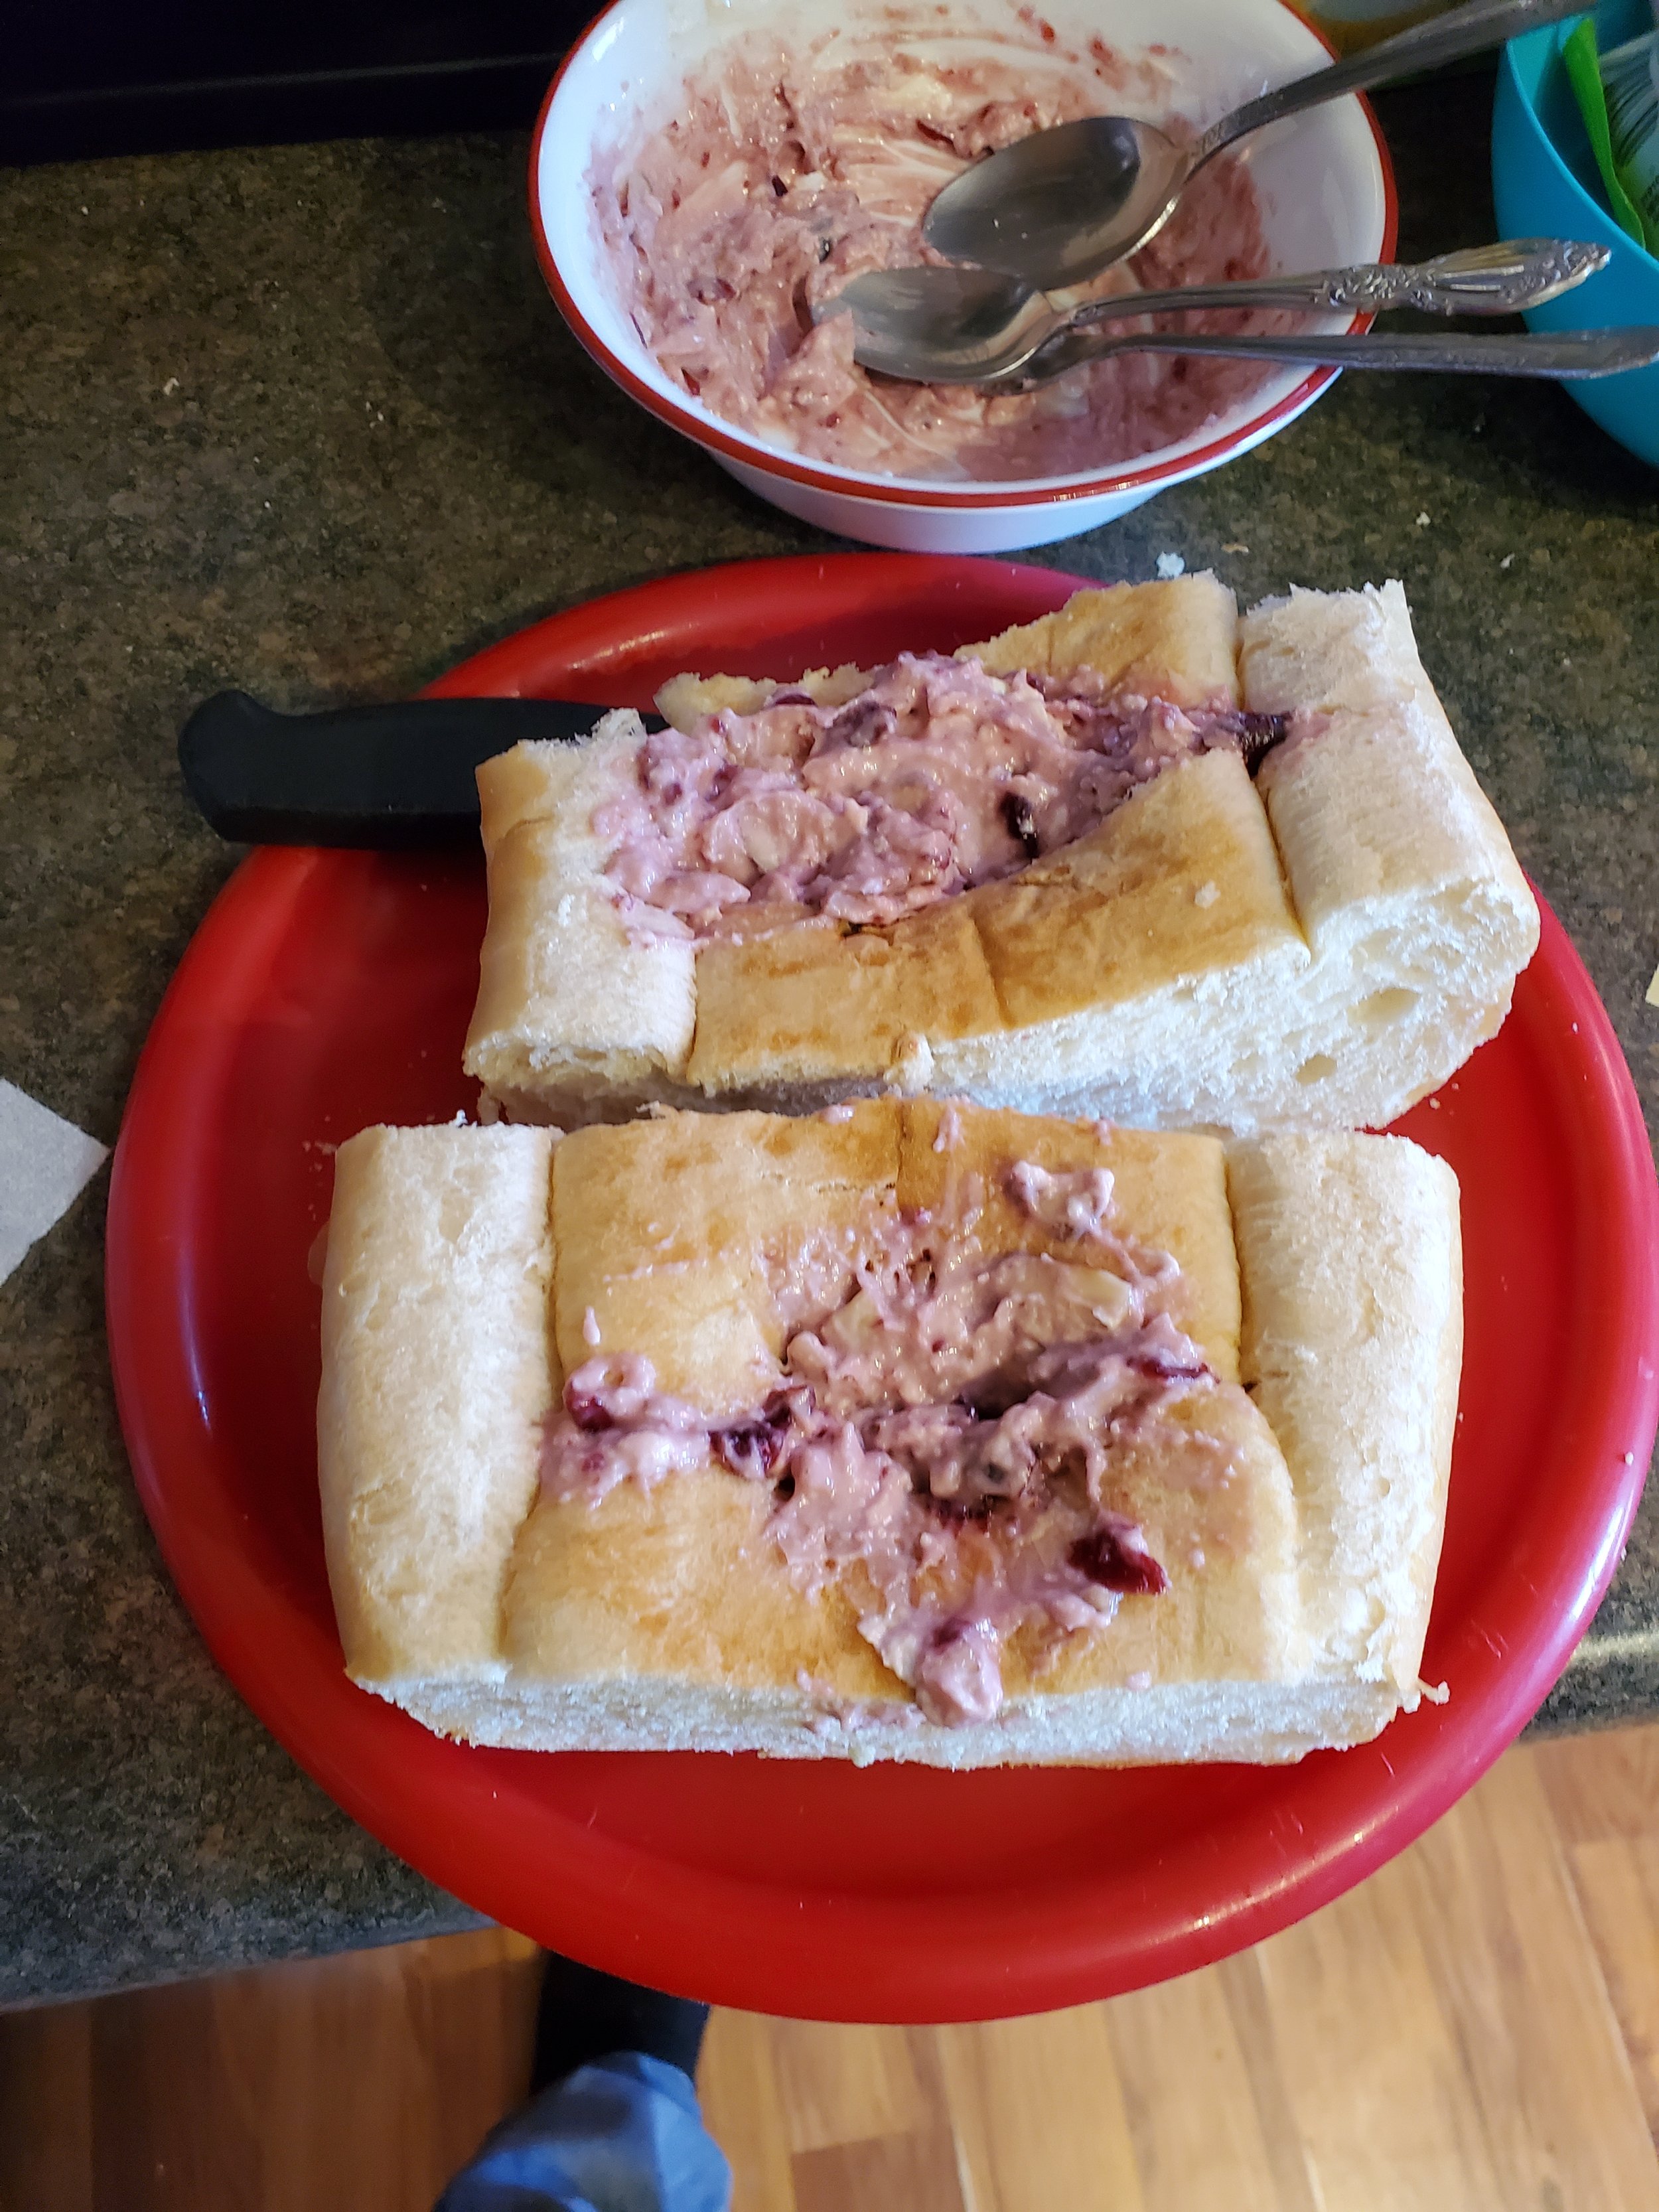
Scoop a heaping tablespoon of filling and drop it in the middle of the flat side of one of the cookies. Use the back of the spoon to spread it out a bit. Don't be afraid to add more if it looks like the cookie can support it. Slap another cookie flat side down on top of it, and go enjoy your hard-earned cannoli cookie sandwich.


You’ve read this far, so let us know over on our Facebook page what you think! Are you going to try this one out? 


If you’re looking up no-cook recipes because your stove or oven aren’t working, we can still help! You can reach out to us via our contact page or by giving us a call at ((214) 599-0055). Whether you’re in McKinney, Garland or Coppell, you can call on Appliance Rescue Service whenever you need us. 


Sweet Veggie Tropical Curry

 It’s sweet; it’s got a ton of veggies, and it’s a riot of color! 

Sometimes you want to step out of the norm and try something adventurous. For your Blogger, that was this meal. It’s a delicious, multi layered sweet and spiced curry that is packed full of veggies and still manages to be extremely filling. We hope you enjoy it as much as we did! 

Ingredients:

4 red potatoes, chopped

12 baby carrots, chopped

4 large fresh mushrooms

2 tablespoons olive oil

salt and pepper, to taste

1 small red onion, slivered

4 tablespoons coconut oil, divided

1 tablespoon minced garlic

1 teaspoon ground ginger

1 teaspoon allspice

1 teaspoon nutmeg

1 teaspoon turmeric

1 tablespoon chili powder

1 teaspoon garam masala

1 teaspoon ground coriander

1 28-oz can crushed tomatoes

1/3 cup heavy whipping cream

1 teaspoon light corn syrup or brown sugar

two packages yellow rice

1 ripe plantain

Kosher salt, to taste


Tools: Cutting board, Knife, Can opener, Tongs, Slotted spoon, Serving spoon, Colander, Mixing bowl, Large, deep, slope-sided sauce pan or caldera with lid, baking dish, smaller sauce pan with lid, shallow frying pan with lid


As always, begin by washing your produce! We don't want dirt in dinner, and we're pretty sure we also don't want anything else from the field except the food itself.


Take your potatoes and chop them into roughly inch and a half chunks. Nothing has to be exact - they're potatoes. We didn't peel them for this recipe, but you can if you'd rather. Toss them into the pot, then chop the carrots, too. Add them to the same pot. Cover the veggies with just enough water and put a lid on the pot. Start the burner on medium and let them simmer for about ten minutes. 


While they simmer, it's time to take care of some other small tasks.


Preheat your oven to 450.


Chop up the mushrooms. We diced them up as small as possible so they'd hide in the sauce (we have some picky eaters in the house). You might want big pieces instead - they'll cook up either way at 450 degrees, so do whatever. The only thing we wouldn't advise is leaving them whole.


Open the can of crushed tomato and put it somewhere close by. You'll need it soon, but not quite yet.


We also used this time to start measuring the spices needed. There are a lot of them this time, but try not to omit anything - all of them are important to the finished product. We set them into a little glass dish off to one side until we were ready for them.


After the ten minutes of simmering are up, dump the veggies into the colander to drain them. Rinse the pan but not the colander full of veggies. Transfer the vegetables to the mixing bowl, drizzle them with olive oil, toss in the mushrooms and mix thoroughly. Add a little salt and pepper if you'd like, then transfer them again, this time to the baking dish. Bake them uncovered for 20 minutes.


Once the baking dish is in the oven, you'll have a clear cutting board and a little more counter space. Time to attack that onion. This is another produce item we tend to chop as small as possible due to picky eaters. Make sure you clean your knife when you're done with this step - the next thing you'll be cutting with it will not go well with onion.


However you choose to cut yours, once it's done, drop it into the pan you used for the veggies. Add about two tablespoons of coconut oil and the tablespoon of minced garlic and heat on low until the oil is melted. Bring the heat up to medium, add your many spices, and stir like crazy with the slotted spoon. It's going to be pasty looking - that's normal. Put the lid on it and let it go until you can smell all the spices. There's a noticeable difference, and you'll catch it long before you scorch anything, don't worry. If you're concerned, you can stir it occasionally while you wait for it to get to that point.


As soon as you know the onions are done, add in that crushed tomato, the heavy whipping cream, and the syrup. Give it a thorough stir, until the cream is fully incorporated. Cover it again and bring the heat back down as low as it will go.


The vegetables in the oven should be finishing up about now, right? Not really. The timer's about done, though. Take the veggies out and give them a stir, but then put them right back. Set the timer for ten more minutes.


Grab your packages of rice and get those going according to the package instructions in the smaller saucepan.


Once the rice is set to simmer, start heating the remaining two tablespoons of coconut oil in the frying pan on medium heat. Grab your plantain and cut it in half lengthwise. Flip the halves so they're flat side down on the cutting board and cut each in half again, short ways this time. This makes it easier to peel them and easier to fry them - double win! Once you've got the peel removed, place the slices flat-side down in the coconut oil. Sprinkle the tops with kosher salt, then cover them. You'll want to let them cook for about three minutes, but watch them carefully so they don't burn.


By now the ten extra minutes for the roasting vegetables should be up. Remove them from the oven and add them to the tomato mixture in the pan. Stir carefully to make sure everything is coated, then allow it to continue simmering while you check on the rice and the plantains.


After your three minutes (give or take) are up for the plantains, flip them carefully with tongs (don't squeeze too hard, they'll squish!), sprinkle this side with kosher salt, and replace the lid. They'll need another two or three minutes, but then everything should be ready.


Serve as plantain on top of curry on top of rice. 


Let us know what you thought of this recipe over on Facebook! As always, we love to hear from you! 


If you actually came to our site because one of your appliances is giving you trouble, we can help. Give us a call at ((214) 599-0055) or go to our contact page to set up an appointment. We'll work with you to find a time and date that works for your schedule to figure out what the problem is and how we fix it.  


Banana Cake Bonanza

So You Need To Use Up The Bananas You Have

I Don’t Care! Take Me To The Recipe!

Ingredients

Cake:

2 cups all-purpose flour

1/2 teaspoon baking powder

3/4 teaspoon baking soda

1/2 teaspoon salt

1/4 cup buttermilk

1 cup mashed bananas

1/2 cup unsalted butter, softened

1 1/2 cups sugar

2 eggs, lightly beaten

1 teaspoon vanilla extract

Banana pudding:

3 cups milk

1 cup sugar

2 tablespoons cornstarch

1/4 teaspoon salt

6 egg yolks

2 teaspoons banana or vanilla extract


Banana frosting:

1 banana, smashed

1/2 cup whole milk

3 cups powdered sugar, sifted


Alternate Topping Option: 

Three bars of your favorite (plain) milk chocolate

2 cups of heavy whipping cream

Instructions:

Banana cake: 

Go ahead and preheat your oven to 300*F and gather up all of your ingredients. (Trust us, this makes it SO much easier, and you feel very TV-Star-Chef like. It's a good feeling.) 

Grab three separate bowls all of the same size.  In the first one, you're going to sift your flour with a fine sieve. This gets air into the flour as well as breaking up clumps, which is important for a cake like this. Once that's done, mix in your baking soda, baking powder and salt. 

Example of sifted flour for making banana cakes

Grab a second bowl and toss in approximately two large bananas. If you'd like to measure them precisely, we advise using another bowl to mash them and then measuring one scoop at a time. Give them a thorough smashing with a fork, and then add in the buttermilk. 

Using a stand mixer or a hand mixer, cream together your butter and sugar until it's pale, fluffy, and fully incorporated. You will want to start off on low so you aren't inhaling sugar and slowly work your way up. Once you've got it nice and fluffy, add in your eggs and vanilla and continue to mix. 

Next up is adding the dry ingredients and the banana a bit at a time. Alternate back and forth between them. until your dough is nice and thick, but it should also have a smooth consistency. 

Batter consistency for making banana cakes

This is what the consistency and smoothness of your batter should look like by the end of things, although, we will point out, your bowl should be much more full than this. We forgot to grab a photo prior to filling up the muffin tins.


Now, a quick discussion of forms for the cake. You can use muffin tins, or an eclair pan, or you could do something crazy and use that Star Wars tin that you got for Christmas from the company White Elephant. BUT whatever you do, there's two things you need to make sure of. 1) Your form needs to be only 1/2 full when you make these. The batter will rise and you will end up with what looks like cookies on top of your cake otherwise.  That turned out fine for us in our initial tests, but if you're wanting exactly what we offered, then you're going to need to make sure the tins are only 1/2 filled.  (ask us how we know that one!

Once you've filled your cake forms of choice, pop them in the oven for 25 minutes, rotating your pan (or pans) halfway through the cooking time. 

That /should/ be enough time BUT we advise checking with a fork or toothpick stuck in the center. If your testing implement comes out of the cake clean, great! You're done. If not, turn the pan, and leave it in there for another 2 minutes. Continue the process of testing and turning every 2 minutes until it /does/ out clean. 

Once they're done, allow them to cool completely, and we'll move on to making pudding! 

A preface for this section. Please, read all of the instructions carefully. Puddings are tricky beasts and they are just as easily destroyed as souffles. Our first attempt at making this ended up with cooked egg and grainy bits. Even after sieving the pudding could not be saved. You have been warned.

To start with, grab your six eggs and crack them into a pyrex bowl or measuring cup, preferably one that has room for more than just those six eggs. In a small saucepan, combine milk, sugar, cornstarch, and salt, mixing thoroughly. Cook over medium-high heat if you've got an electric stove, or medium low if you've got a gas stove.  Do this until it thickens and bubbles begin to form on the surface. Reduce the heat to low and cook it for two more minutes. Remove the pan from the heat, and grab your ladle. Carefully pour one scoop at a time of the milk mixture into the eggs, using a whisk or fork to mix thoroughly. Go slowly, and add about 1/3 of the milk mixture to the eggs.  MAKE SURE TO MIX THOROUGHLY and that you've brought the temperature of the eggs up to (roughly) the same temperature of the milk mixture. Once that's been reached, add the egg mixture into the pan and put that back on the heat, allowing it to come up to a gentle boil. Cook that for 2 minutes, stirring constantly. (and yes, we mean /constantly/. You don't have to whisk it so hard it flies out of the pot at you, but you do have to keep the mix turning constantly or else you'll end up with the bottom scorched. 

Making pudding for the first time for banana cakes

NO, this is NOT what your pudding should look like. We’re including this image for the horror factor. Don’t let your pudding end up like, and carefully follow the steps we’ve outlined, please.

Remove the pan from the heat and add in your extract of choice. (We chose vanilla when we made it, to give some balance to the banana cake.) Pour your pudding into a clean heat proof dish and allow the pudding to come down to room temperature. Then pop it into the refrigerator to continue cooling completely. 

For your frosting:  If you're going with the banana option: 

Grab a full banana, smash it up and then add it to a blender. Add in 1/2 cup of whole milk and blitz it until the mixture is fully liquid. Pour that mixture into your third bowl from earlier and whisk in the sugar one cup at a time. 

If you're going with the chocolate topping: Grab a clean, completely dry saucepan, and pour in 1 cup of cream, reserving the other half. Put the heat on low and allow the cream to come up to heat slowly while you chop up your chocolate. You're looking for small pieces, so if you get slivers while you're chopping, that's perfectly fine. 

Once you've got it all chopped up, add it to the cream, and bring your heat up to medium-low, stirring constantly. Just like before we don't want the cream to scorch. Once your chocolate has fully melted and you don't see anything solid any longer, that's when you need to make some choices. How thin you want your icing is going to decide how much of that second cup you need to add. If you want a ganache, keep it as is, don't bother adding any more. If you want to thin it out, add a little bit of the cream at a time, fully incorporating it until you are satisfied with how thick it is. Once the proper thickness has been reached, pull it from the heat and keep stirring until it's cooled down to room temperature. 


So, has everything rested/cooled/set? Yes? Then it's time to put it all together!! :D Grab a large piping tip, and set up a bag with your pudding inside it. Now, grab one of your muffins and inject the pudding in the center if you have a muffin, or in 3 places if you have an eclair shape. Put it onto a plate or cooling rack on a cookie sheet, and do the same to all of the other cakes. Once that's done, it's time for your frosting of choice.  Spoon that over the top of each cake and enjoy! 


We know there were a lot of warnings and choices that you had to make for this week's recipe. We just wanted to make sure that you were able to learn from our (many) mistakes and ended up with a delicious food. If you /did/ end up with a delicious treat, consider showing us over on Facebook? If you ended up with a horrific mess, well you can show us that too! 


If you're here because your stove threw a horrendous hissy fit during your attempt to make this (how /did/ you manage to get icing there?) that's ok!* You can give us a call at ((214) 599-0055) or set up an appointment with us on our contact page and we can help you fix it and get your home running smoothly again.


Additional Reading 

A SWEET-TART CAKE TO BEAT ALL THE PIES

MONKEY BREAD, MONKEY BRAINS, PULL-APART BREAD, IT ALL TASTES GOOD!

SPOOKY & HAUNTED HALLOWEEN DESSERTS

SLOW AND EASY SUNDAY STUFFED FRENCH TOAST


*Appliance Rescue Service does not accept any blame for things that may have gone wrong during the process of making this recipe. We are not liable if you opt to not follow the warnings we give, or forget to follow safety measures.

Slow and Easy Sunday Stuffed French Toast

You’ll End Up Wanting The Whole Plate For Yourself

I don’t care; take me to the Recipe!

When we at ARS think of Sunday, it's a time for family, having fun, and spending the day cooking. This Sunday we wanted to whip up something a little different and try our hand at Stuffed French Toast. In theory, a very easy recipe. In practice? Well. It’s still easy to do, but experimenting makes it far more fun. 


This is a VERY subjective and experimental recipe. There are a couple different reasons for this. How firm you want your bread to be is going to affect how much egg it can soak up without distorting and turning into goo. However, it’s also going to affect the final taste and texture. The ratio of fruit to cream cheese is going to vary wildly based on which brand of fruit jam you buy and how much liquid still exists in that. So, if you want a hard and fast “here is the amounts you need, here is what you’ll get” recipe, we suggest checking out one of the others that we’ve linked in our additional reading section at the bottom. It’s ok if that’s what you’re in the mood for! This isn’t a recipe for when you need breakfast on the table 20 minutes ago. It’s more for when you want to spend Sunday experimenting with your family and having fun in the kitchen and if there ends up being several versions of food at the end, you win! 

On to the recipe! 

Ingredients

Bread - We suggest either Challa or a huge loaf of Italian. It’s the size that matters as much as anything. 

Cream Cheese

Slivered almonds - to taste - we suggest at least ¼ per two slices of bread, but it’s up to you on how much texture/crunch you want in your mix 

Sour Jelly or Preserves - We chose sour cherry 

Milk or heavy cream, or a mix if you want- only about 2 TBSPs though. 

Eggs - you want roughly 2 eggs per slice of bread

Cinnamon

1 Tbsp packed light brown sugar


Tools

-Cast iron griddle or a skillet

- mixer 

-Pie pan or other large shallow dish 

-Bread knife 

-Paring knife

Our bread really is 2 inches wide, it’s so large though it doesn’t look like it.

Our bread really is 2 inches wide, it’s so large though it doesn’t look like it.

To start with, a note on breads.

 Although we suggest using either Challa or Italian, you can do this recipe with a loaf of brioche bread. The important thing is that this is a high and thick loaf of bread. You want something that is at least 3- 4 inches wide, and at least two inches high. Yes, this is going to give you really large slices of bread, but that’s the intent here. 


Now, grab your loaf of bread and start by slicing it into 2 inch thick slices. So, ideally, your slice should be 2 inches wide, 2 inches thick, and however long. 


At this point, you can leave your slices out overnight to firm up, or move on to the next step. 


Whatever you decide, when that time has passed, flip over a slice, grab a paring knife and cut a slice that’s roughly 2-3 inches long. You’re looking to form a deep pocket inside of the bread.  Do that to all of your slices, and set them to the side for a moment. 


Grab your cream cheese and preserves and measure them out in a 2 to one, cream to fruit ratio. You want this to be stiff enough to fill it into the slices, but with enough fruit that you get the taste. Either use a food processor or a fork and mix the two together, adjusting the ratio as needed. 


This is roughly how thick ours ended up being after we adjusted the ratio several times.  You also definitely need additional help when trying to fill the slices with your filling.

This is roughly how thick ours ended up being after we adjusted the ratio several times. You also definitely need additional help when trying to fill the slices with your filling.

Now is when you’ll need to get a second set of hands. We had a few willing participants who were able to help us, in exchange for future delicious food. Have your partner hold open a slice of bread with two forks, while you use a third fork to fill the bread with your cream cheese mix. 


Egg, Milk, brown sugar and cinnamon

Yum Delicious eggy mix! The base to any good French toast.

Once all of your bread is filled, mix together your eggs, dairy, cinnamon, and sugar into a pie pan, or some other shallow dish.  

Stuffed bread soaking in a shallow pie pan filled with egg mixture for making french toast

With how thick the bread is, the additional soaking time is very important to allow it to really seep into the bread. It’s also why we said that you might want to let your bread sit over night so that it can hold up to that extra time.

Lay your bread into the dish and let it soak on one side for 2 minutes. Flip it over and do it for another 2 minutes.

While your bread is soaking, turn your stove on to medium-low, toss in  1 Tbsp of butter and allow it to melt. 

And now we begin the cooking process to make our  French Toast

And we begin the cooking process! At this point it smells so sweet and eggy, but that shifts as the egg cooks and the surface of the toast browns.

Place one to two slices of bread in your pan at a time, and let them become golden brown, roughly 5 minutes on a side. Flip, add more butter if you need, and allow it to cook for another 5 minutes, or until golden brown. 

And here we have the delicious final results that are rich, filling, delicious and such good French Toas you'll want the whole thing.

And here you have two super thick slices of French toast so good you’ll be wanting to keep all of it for yourself.

Plate your delicious Stuffed French Toast and serve with either butter or genuine maple syrup. We tried it with just butter, and it was truly delicious. 


So what did you think? Will you be trying this one? Let us know over on our Facebook page and don’t hesitate to share photos! We’d love to see how the recipe turned out for you! 


If you ended up here because your stove isn’t maintaining heat evenly though, we can still help! Even with sharing delicious recipes like this, in our work time, we want to keep your home running smoothly. If you’re noticing trouble with any of your major appliances, reach out! We can help you set up an appointment that works for your schedule and figure out what the trouble is. 

Give us a call at ((214) 599-0055) or check out our appointment page to get things started. 


Additional Reading

Whether you want a more exact recipe, or just more delicious food. 

Brown Sugar - Cinnamon Oat Bars

A Sweet-Tart Cake To Beat All The Pies

Broccoli & Cauliflower Soup

The ‘post-Thanksgiving’ Meal Guide