Breakfast

Escapee From New York: Chocolate Bagels

Getting Great Bagels Right In Your Kitchen

One thing that’s hard to get in Dallas is an honest bagel. However, it’s our opinion that just because we’re living in Texas, doesn’t mean we can’t have good bagels. This recipe is one we had to tweak a few times before it was ready, but we finally got that delicious chewy texture that is unique to New York bagels.  It’s especially good when paired with a vanilla cream cheese. Even better? You can start your day with it, or have it for dessert!


Ingredients


Day One:

2 1/2 cups flour

2 tablespoons baker's cocoa

4 squares baker's chocolate

2 teaspoons active dry yeast

2 teaspoons kosher salt

1/2 teaspoon xanthan gum

1 cup warm water

2 tablespoons honey


Day Two:

8 cups water

1/4 cup honey


1 egg

1 tablespoon water


Tools: mixing bowl, measuring cups and spoons,  large baking sheet (insulated is best), aluminum foil or plastic wrap, kitchen towel, parchment paper, stock pot or caldera, 

heatproof bowl or shallow pan (to melt chocolate), large slotted spoon, spatula, small bowl, brush


This one is a labor-intensive recipe - don't panic; you can do this! Just be sure you allow yourself enough time to work on it. We recommend you get to work on them at least a day before you plan to serve them. Bagels will rise two separate times, and it's best to leave them overnight on one of those two rounds.


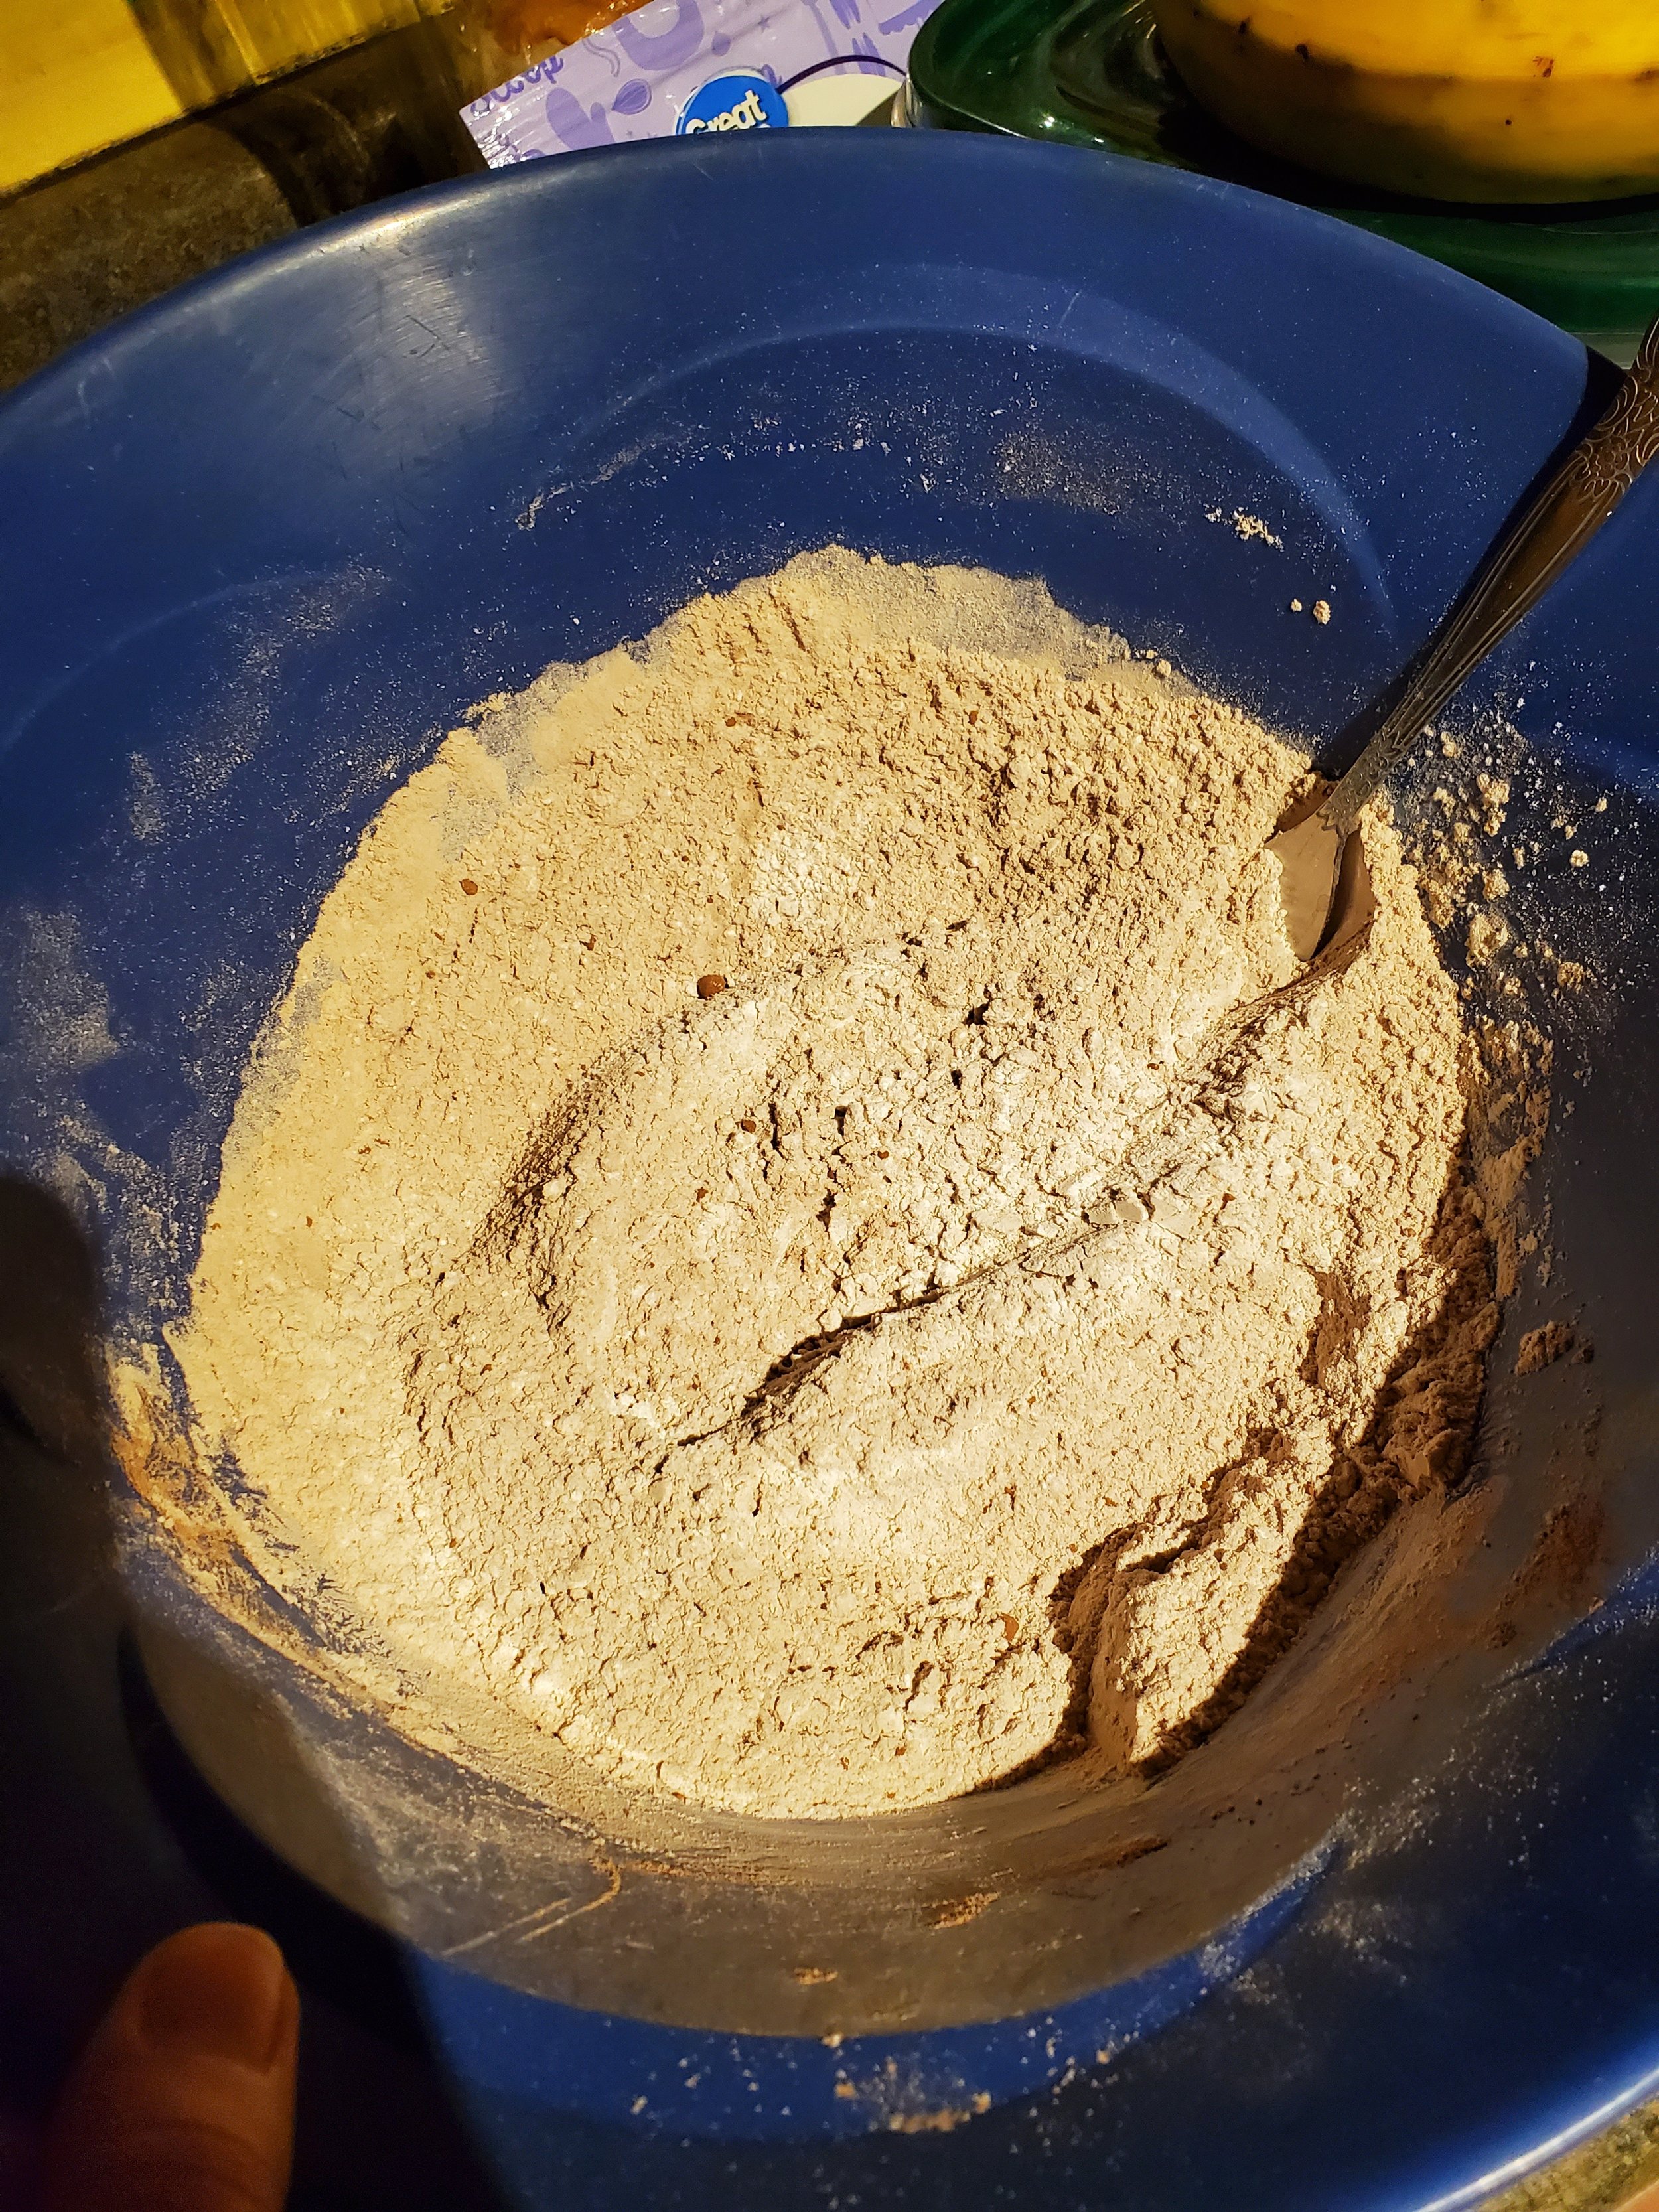
Measure out your flour and move it to the large mixing bowl. Try not to pack it down when you do this.


To the flour, add the baker's cocoa and the xanthan gum. Don't go overboard with the xanthan gum! We know it's only a tiny little bit as compared to everything else, but trust us: a little of this stuff goes a long way.


Add your kosher salt and use a regular spoon to give it a quick stir to incorporate all the dry ingredients.


Start your pan on the lowest heat setting and break your chocolate into it, or snap your chocolate into a heatproof bowl to microwave it. Either way, be ready to stir frequently to avoid burning. Once it's all melted, you can add it to your dry ingredients.


Shift your attention to wet ingredients for a minute. Use a measuring cup to get the proper amount of water. You can start with cold water and heat it up in the microwave if you're using a glass measuring cup, or you can let the tap run warm and then fill the cup if you're more comfortable that way. Just make sure it's not too hot, as too much heat will kill your yeast.


To your water, add your tablespoons of honey and stir until the honey has dissolved. This will only take a few moments, as long as the water is warm enough.


After dissolving the honey, measure the dry yeast into the same cup. The water will wake it up, and it should fizz or foam a little as you stir. (If it doesn't, your yeast has kicked the proverbial bucket. It's much better to have to toss a cup of water and spoonful of honey than the whole bowl of ingredients, which is part of why we're doing things this way.)


Add your remaining wet ingredients to your dry, and stir it around a little until it makes a shaggy-looking dough. It will look uneven and swirly because it's not fully incorporated, but that's okay; you're not done with it. Now you get to use your hands and get messy! 


With clean, dry hands, knead until it comes together into a smooth ball. Remove it from the bowl and then knead some more on a clean counter. We know you're probably afraid of over-working it, but bagel dough is serious stuff. Knead it on the counter for ten minutes. Resist the urge to add water - it's supposed to be stiff. We set a timer on the microwave or a wristwatch to make sure we don't quit too soon (your hands and forearms will probably get a little tired if you're out of shape like we are).


Once you've reached your ten-minute knead time, move the dough back into the bowl. If there are scraps and spots of flour left in the bowl, wipe it out before you transfer the dough; you really don't want the headache of trying to work excess flour in after this rests overnight. Cover it tightly with foil or plastic wrap and place it in the refrigerator. Leave it there overnight and come back to it in the morning.


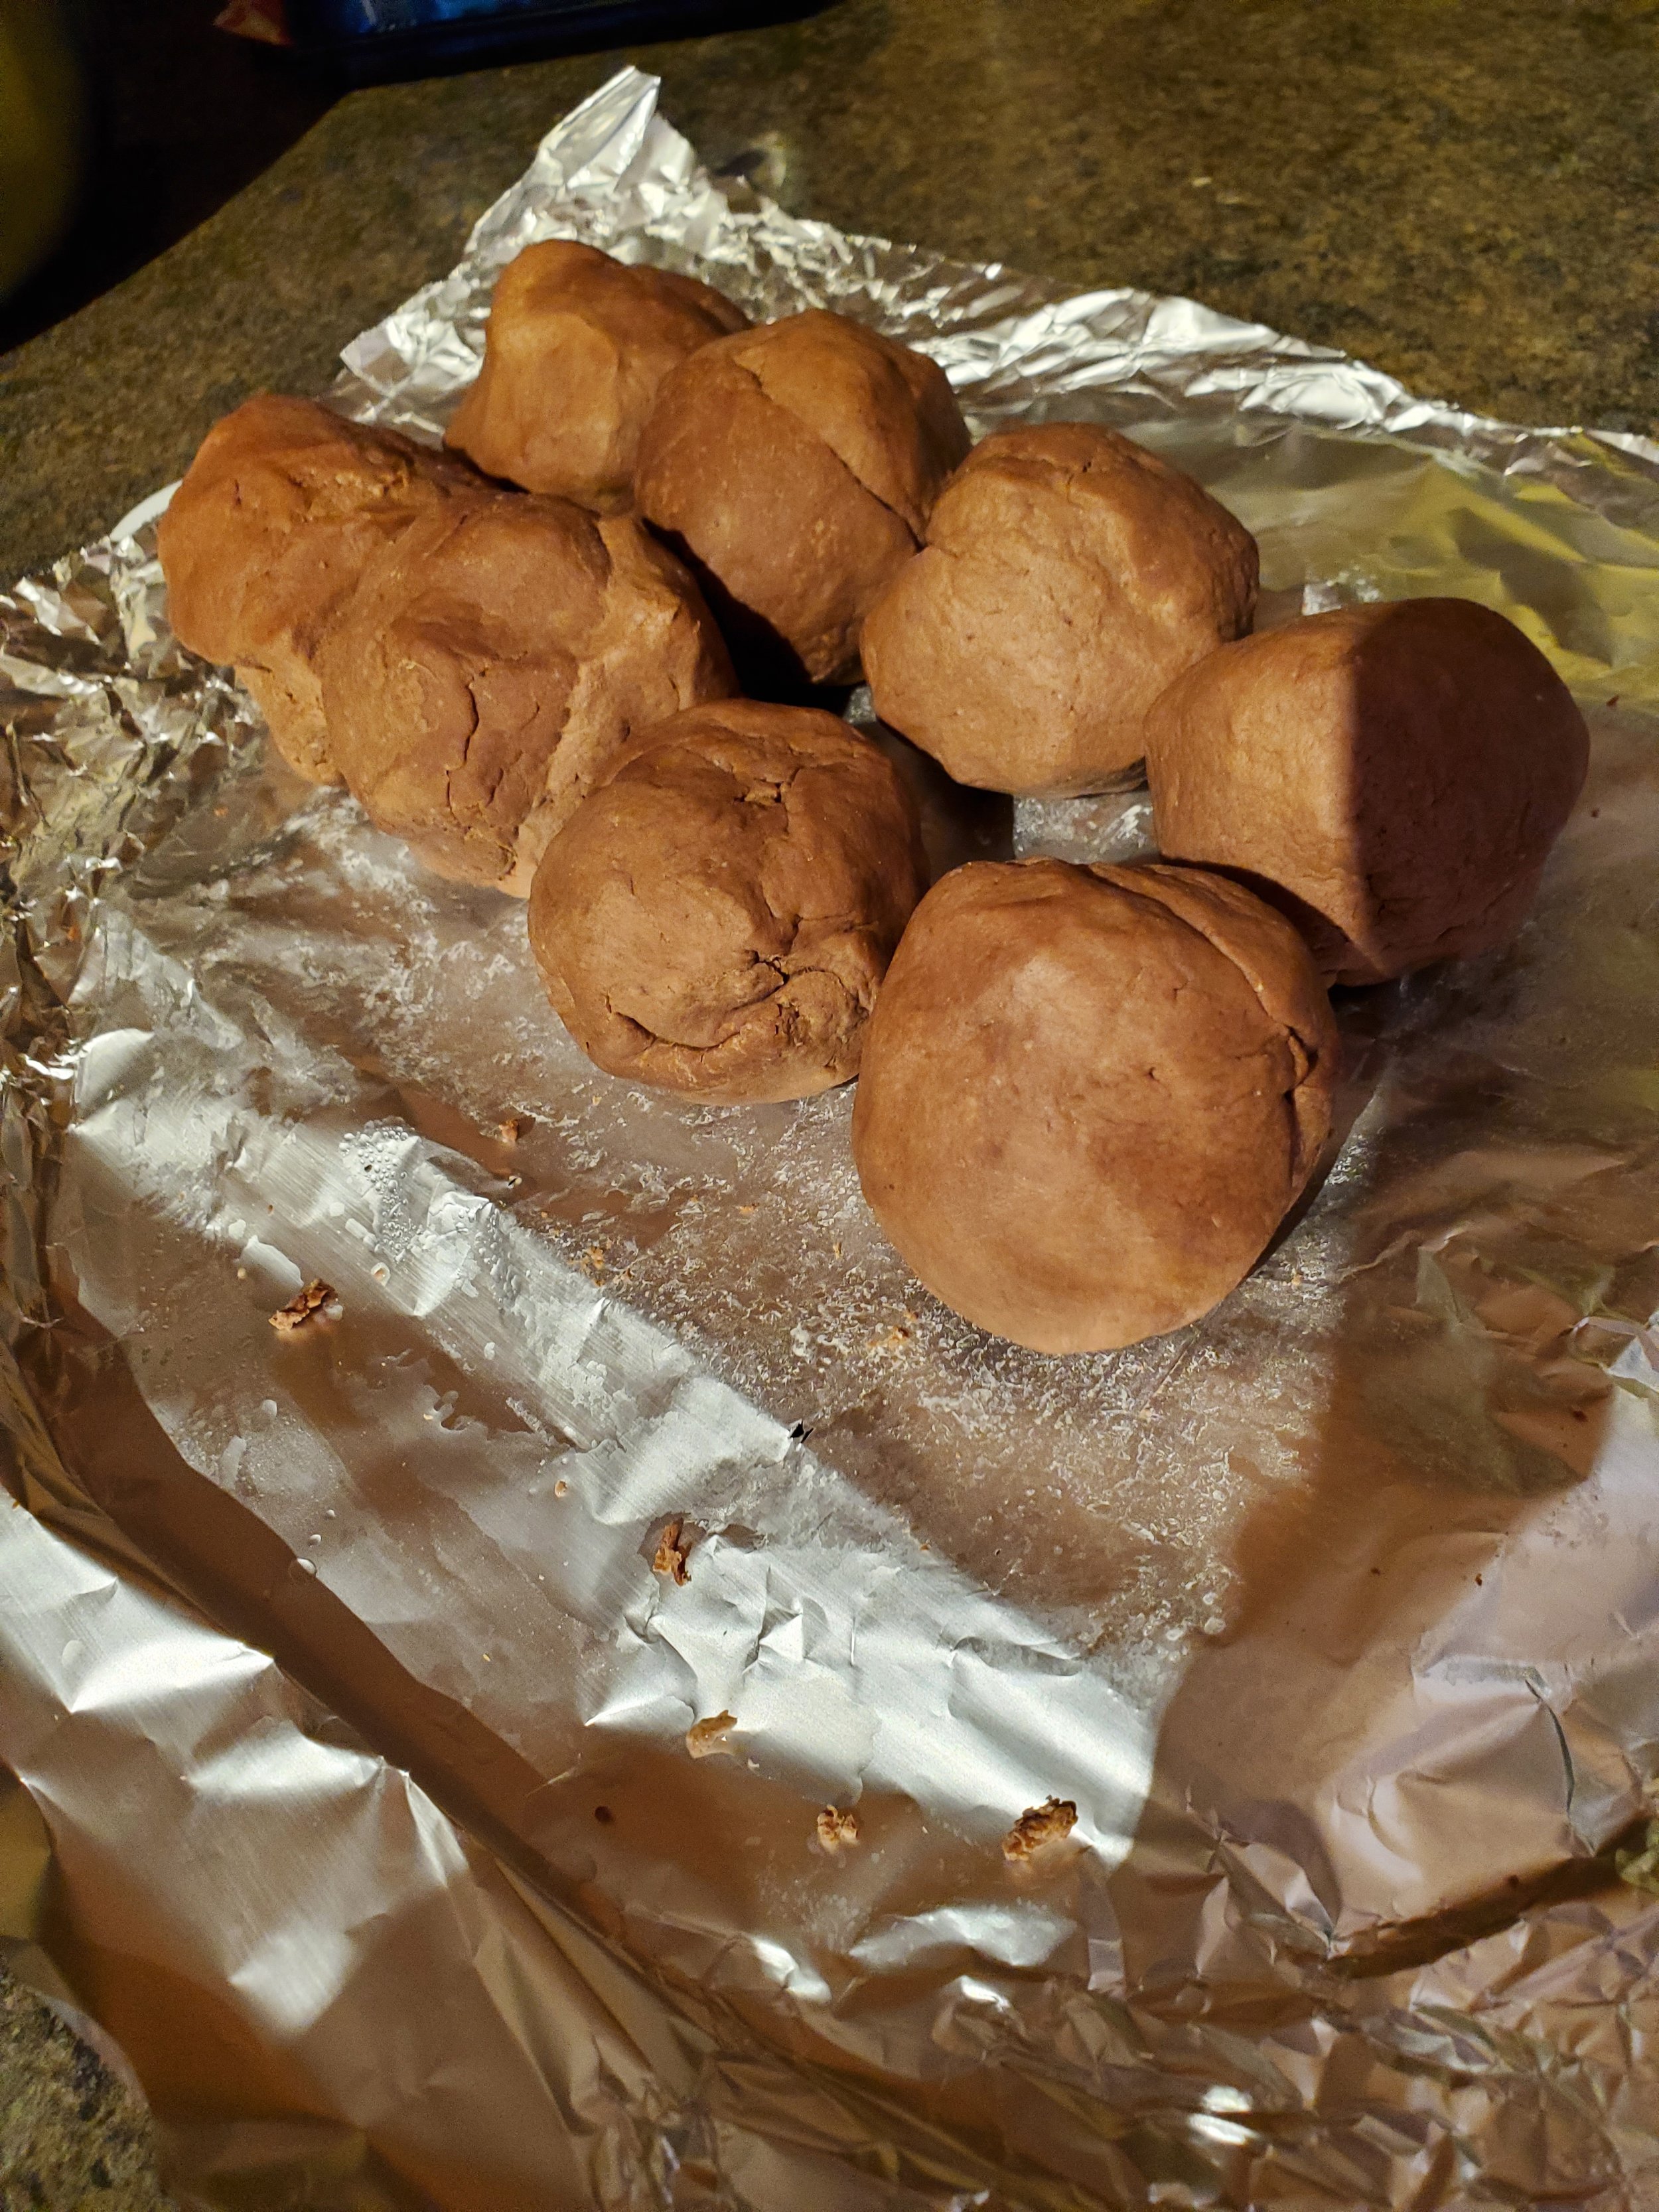
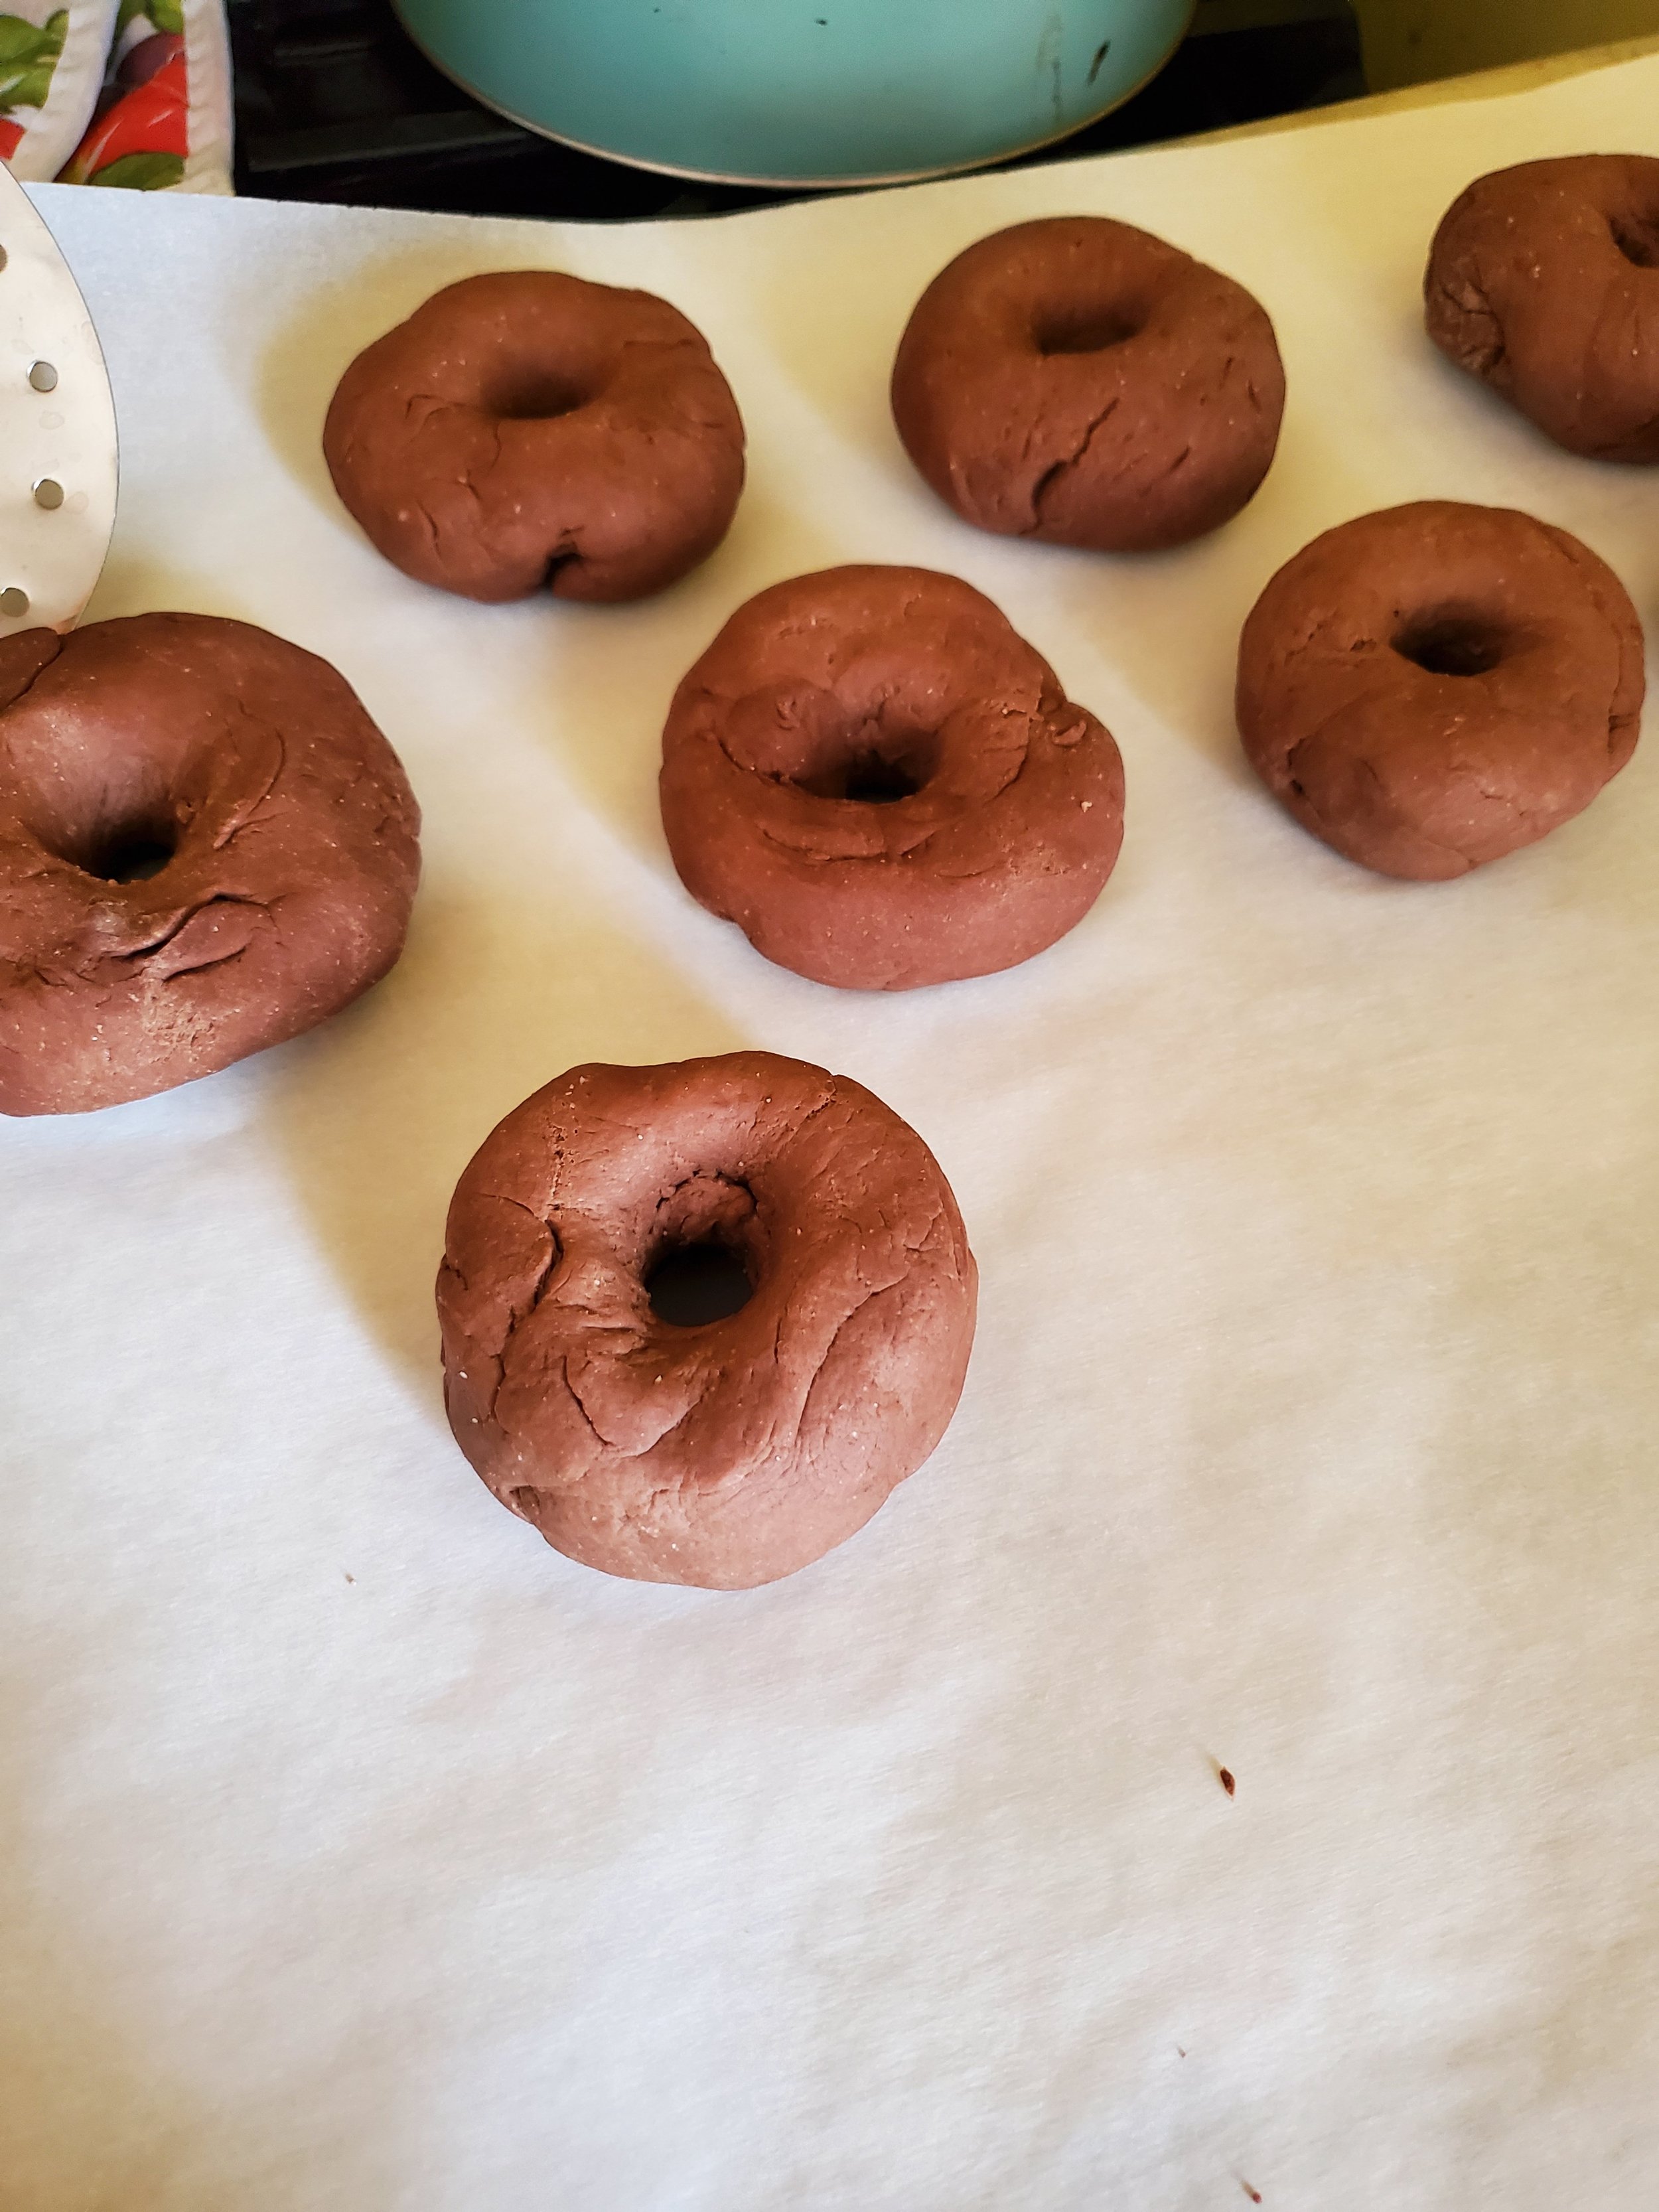
The next day, remove your dough from the refrigerator, turn it out of the bowl onto the counter, and split it into eight even-sized pieces. Work each piece for a few minutes until it's warmed up and softened, and roll it into a ball. Once you've finished all of them, set them back in the bowl. Cover them with a clean kitchen towel and let them rest for 20-25 minutes while your oven preheats to 425*.


Yes, we said 425*. Yes, that's high. No, you won't burn the bagels.


While your oven warms up, you can take care of a few other little tasks. Grab your parchment paper and line your baking sheet. Get out your stock pot, add your eight cups of water and bring it up to boil. Measure your quarter cup of honey. Whisk your tablespoon of water into the egg. Now take a deep breath, and walk away for a few minutes.


When your timer inevitably summons you back, grab a ball of dough and roll it between your hands. You want to make a disc this time, not a ball (or a log like other recipes may tell you). Put your thumbs in the center as you rotate the dough around, pushing outward gently a quarter turn at a time. After a few turns, your thumbs should be able to push through and create the hole in the center.


Once you have the center opened up, give it a few more turns under gentle pressure to smooth the edges in the center and around the outside of the circle of dough. Be careful to retain the depth you've created - try not to press the dough flat while you work.


When you're satisfied with your bagel shape, place it on the parchment paper-lined baking sheet. We like to keep the sheet next to the oven vent to give the bagels a little last rise (it's a cheater tactic, but fluffy bagels are better bagels).


Repeat until all your bagels have been shaped and smoothed to your liking and transferred to the baking sheet.


Time to check on that pot of boiling water. Assuming it's really boiling and not just simmering, drop in that quarter cup of honey and give it a stir to dissolve. If you can't stir out the boil, your water is hot enough.


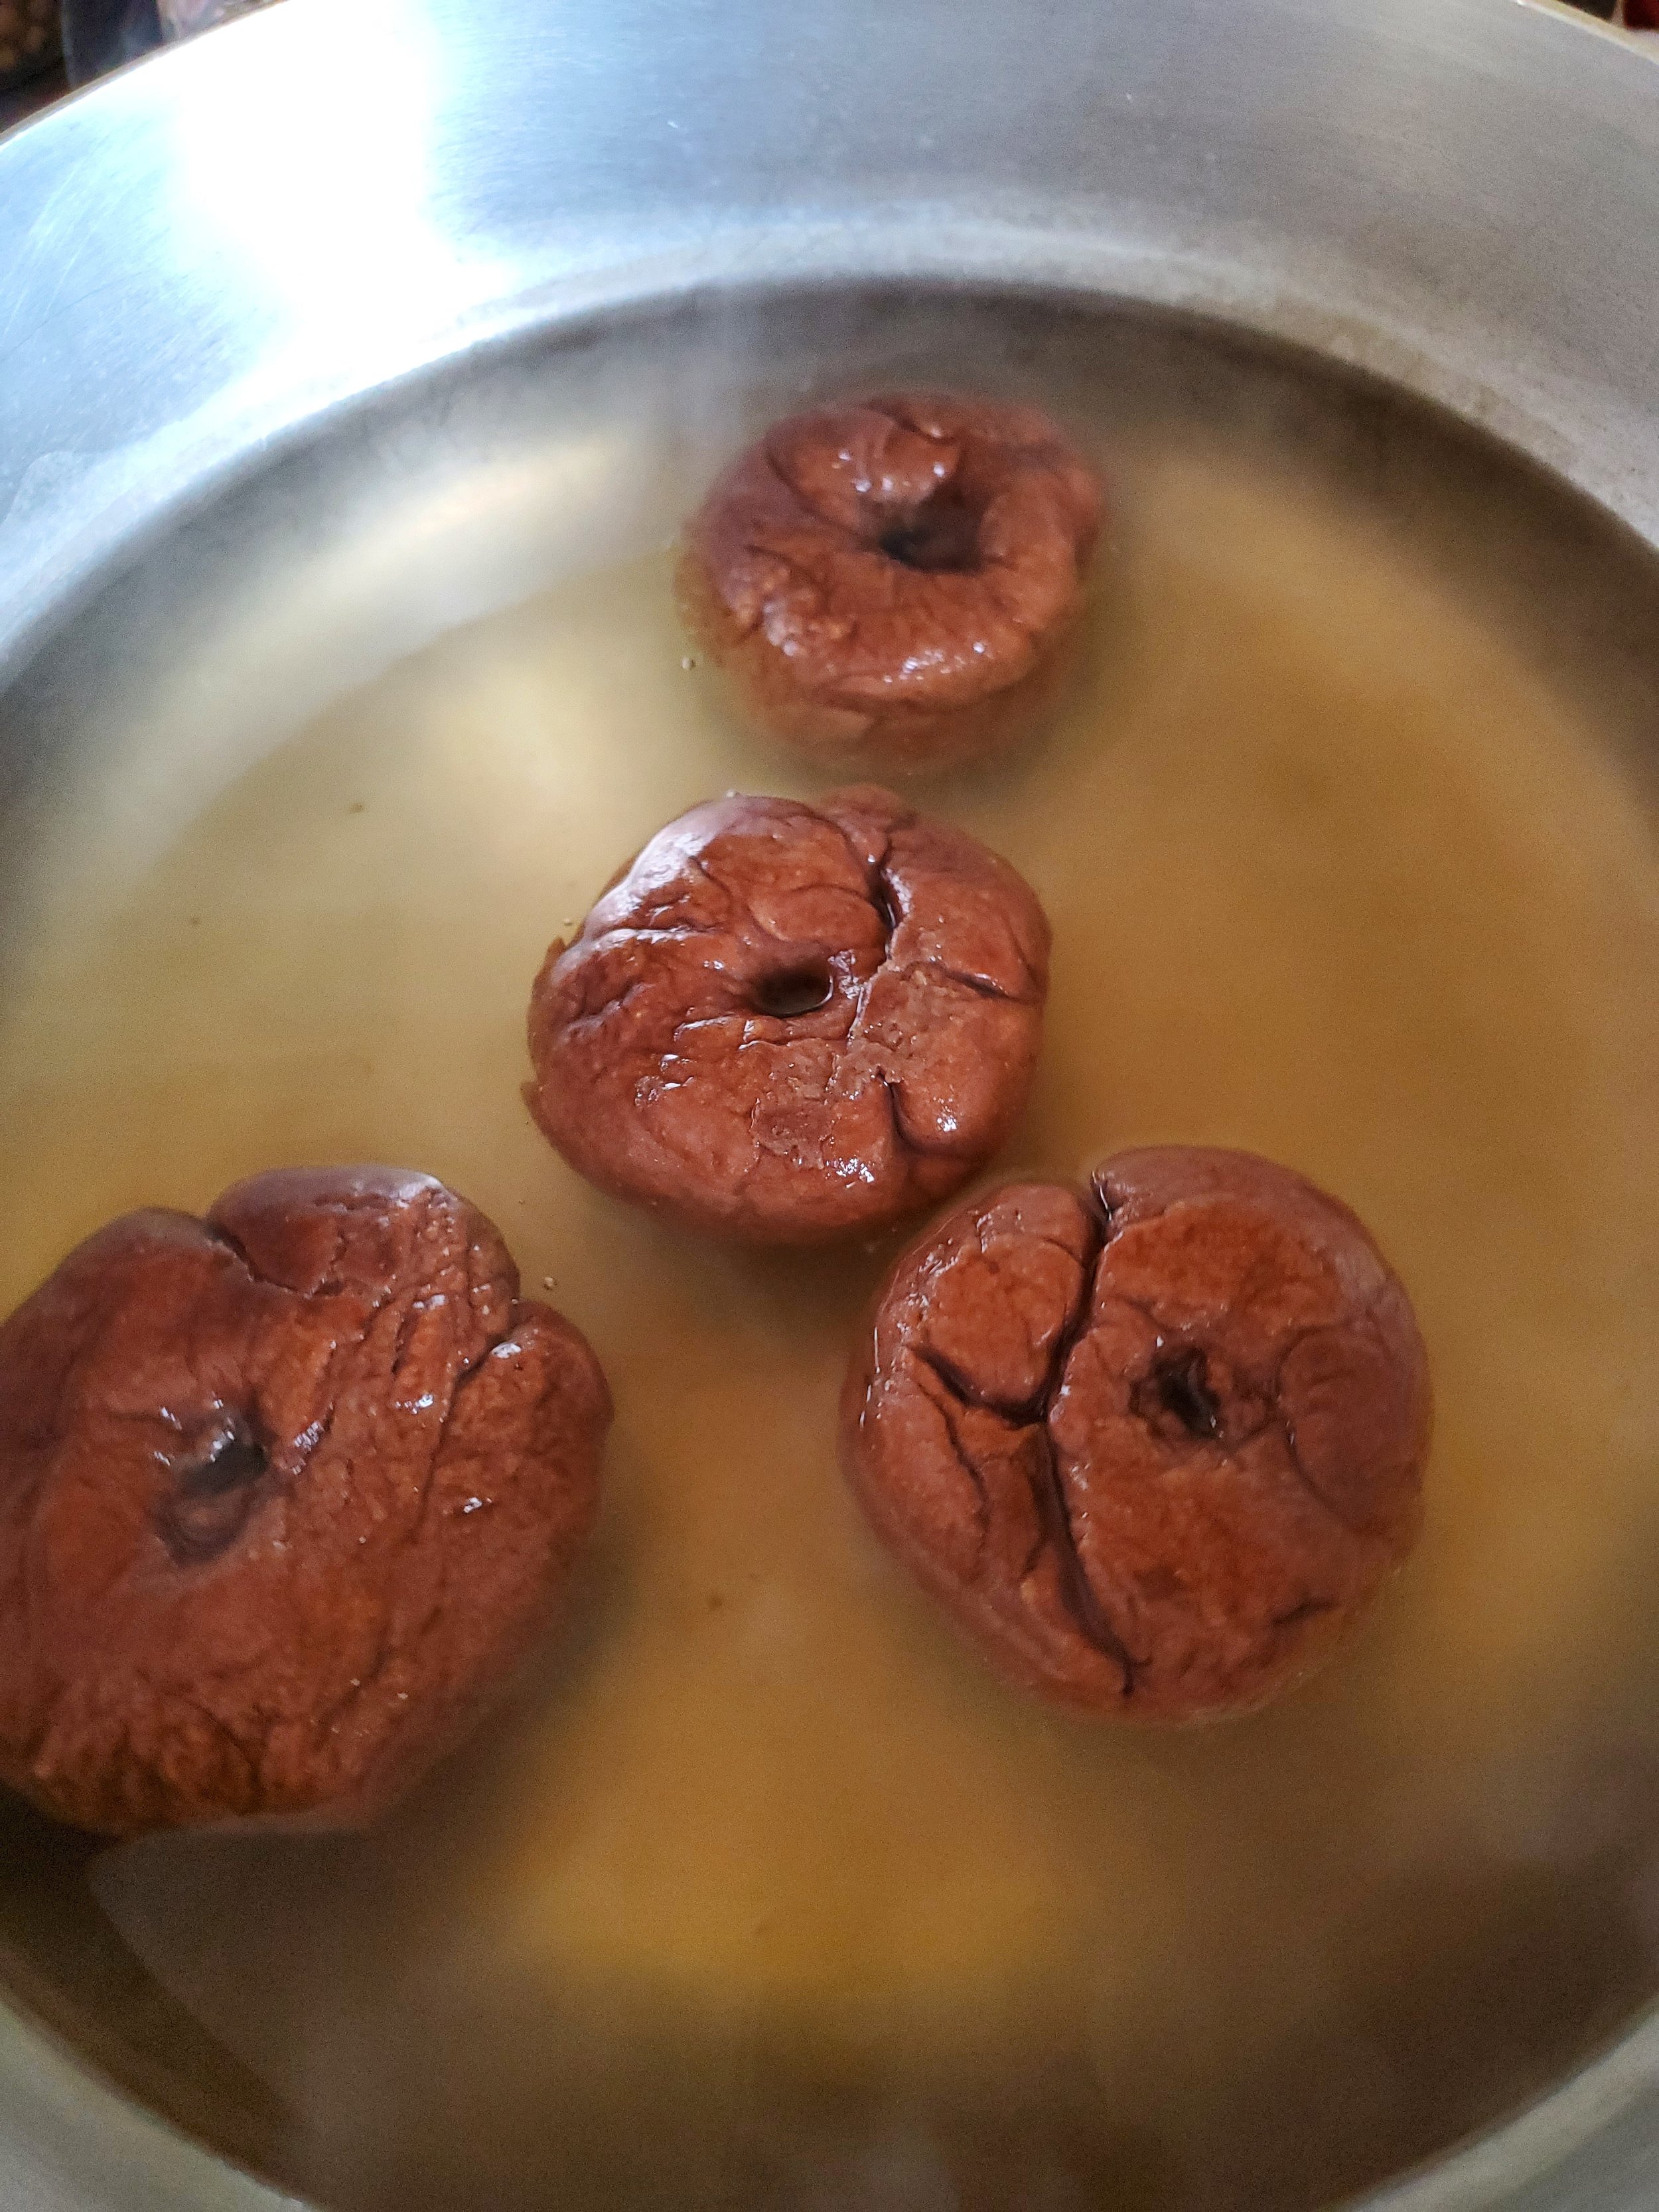
Use a slotted spoon to gently transfer your bagels one by one to the hot water. We do them as two waves of four, but adjust according to the size of the pot you're using - as long as they fit without touching each other or the edges of the pan, they'll be fine. Just make sure not to squish them in there.


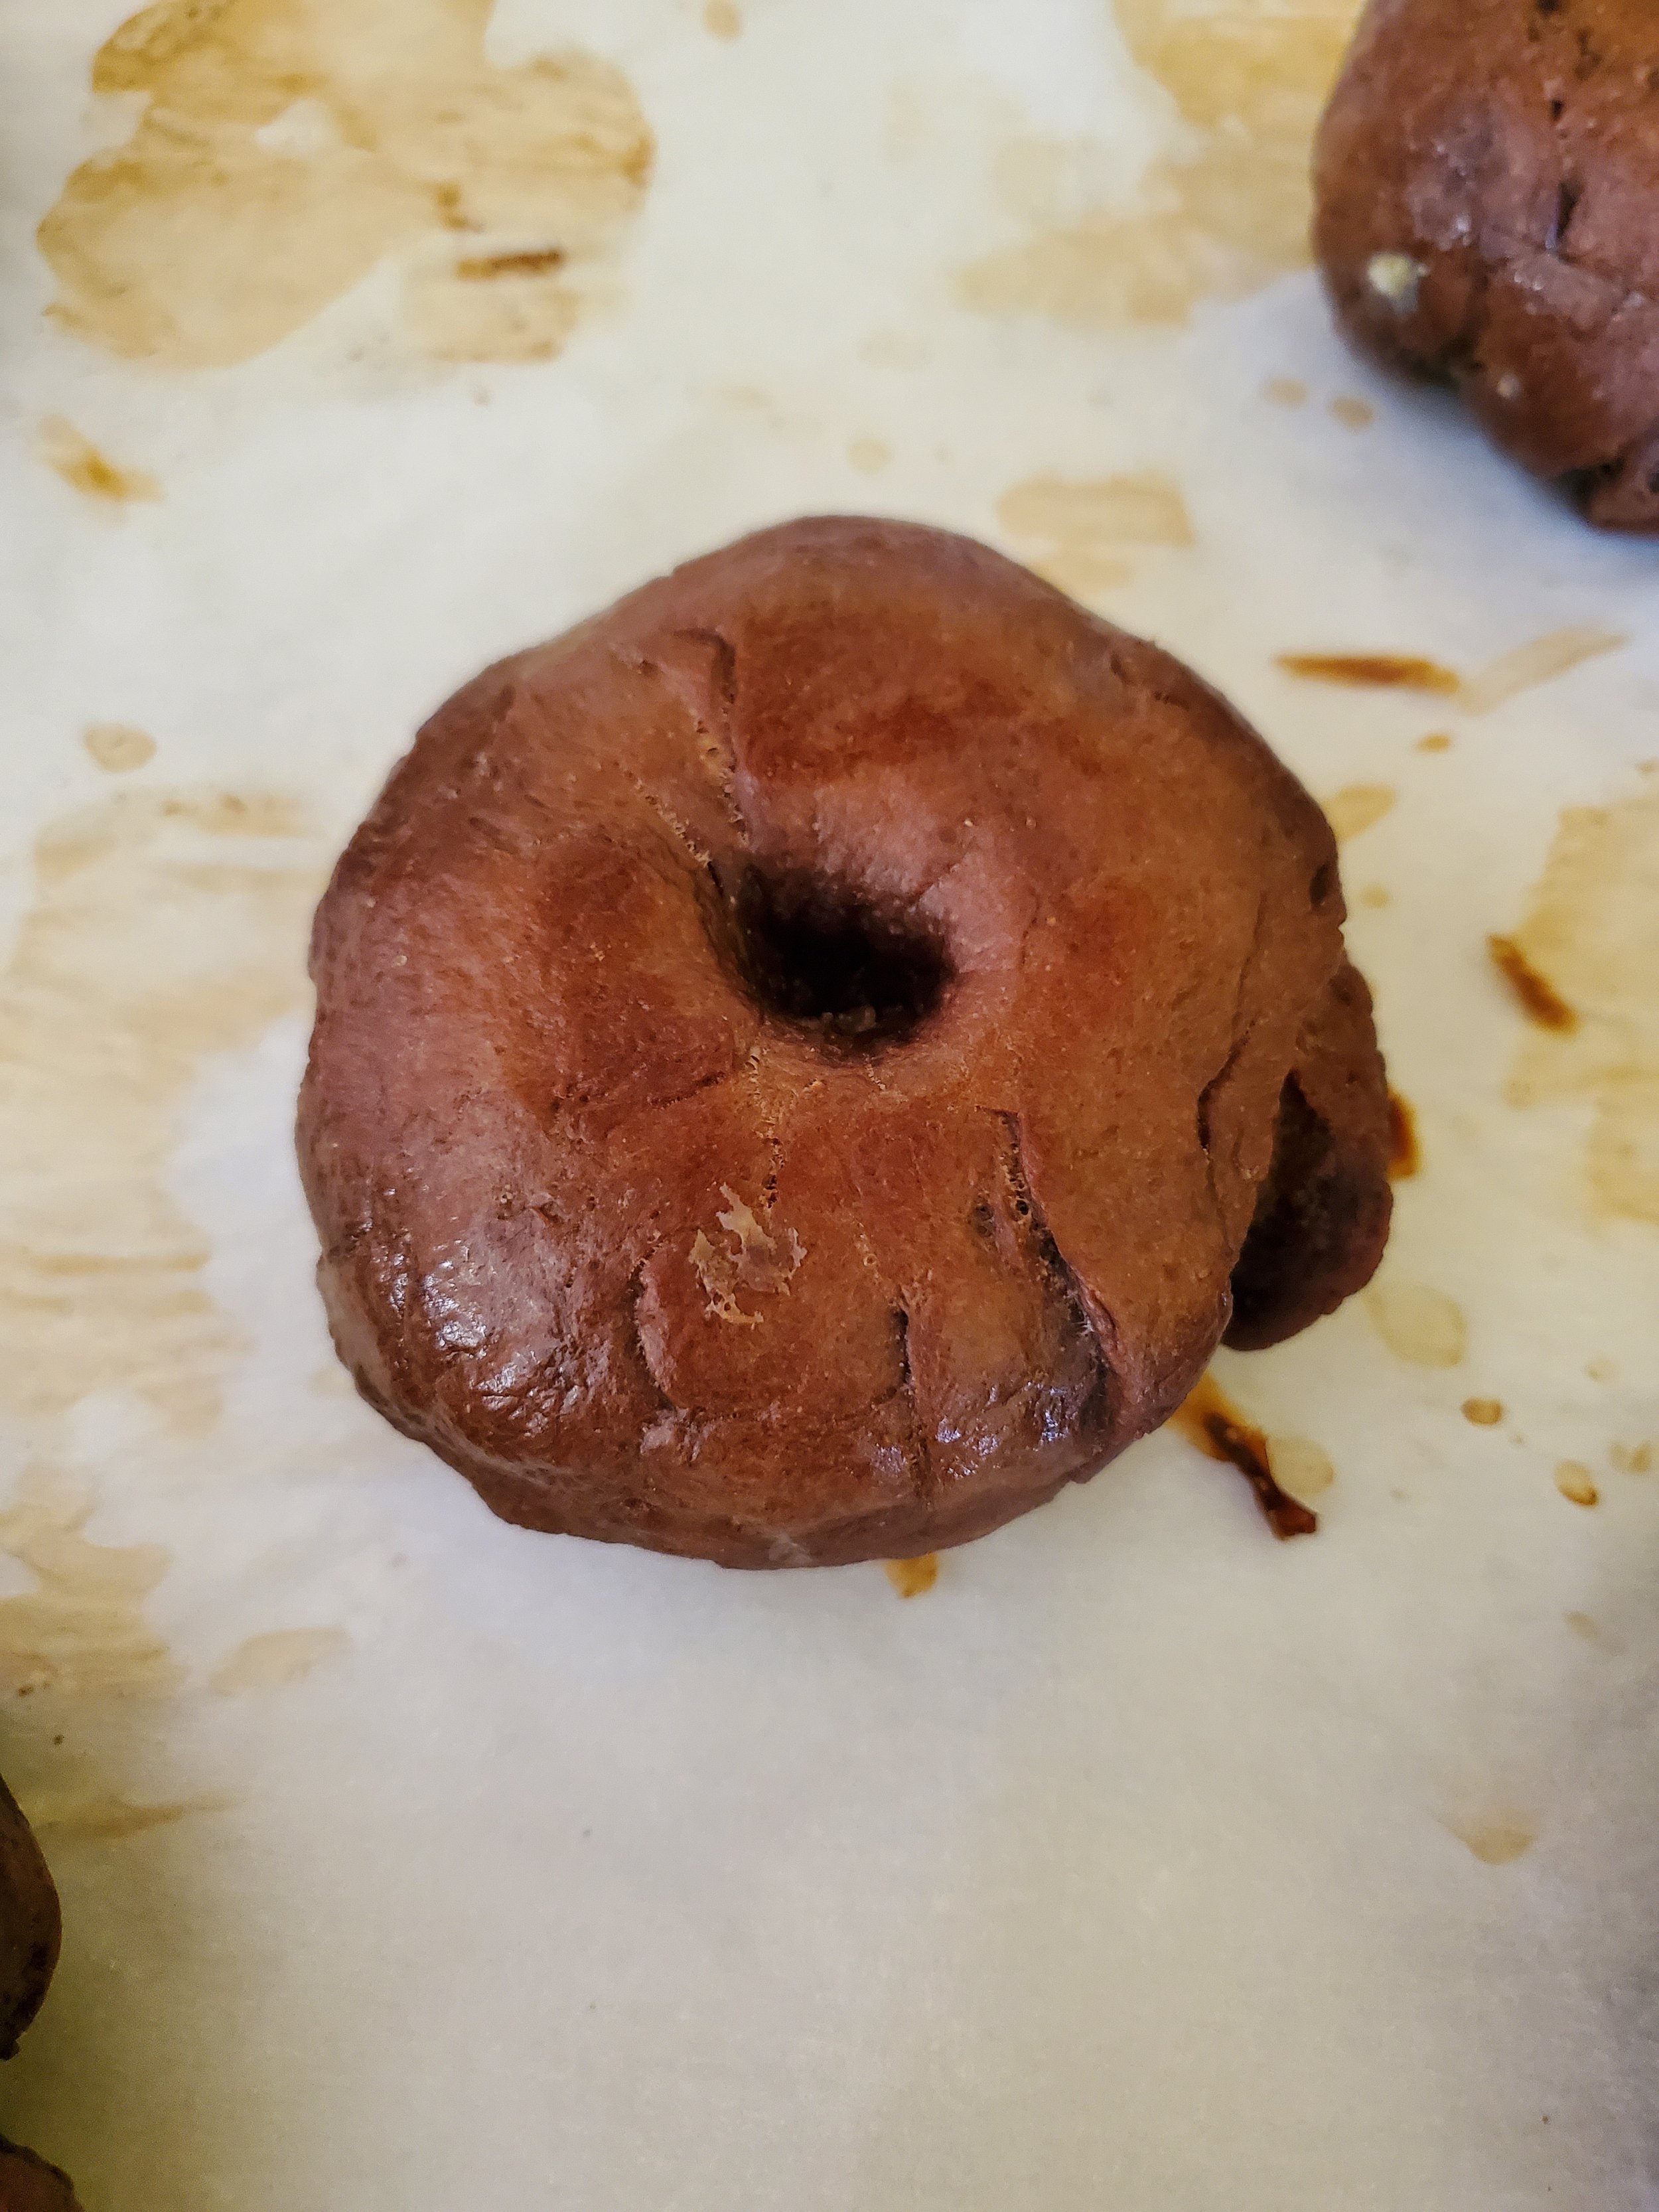
Let the bagels sit in the boiling water undisturbed for thirty seconds, then use the slotted spoon to flip them and boil the other side for the same amount of time. Lift them carefully out of the water at the one-minute mark and, after letting the excess water drain off, place them back on the parchment-lined baking sheet.


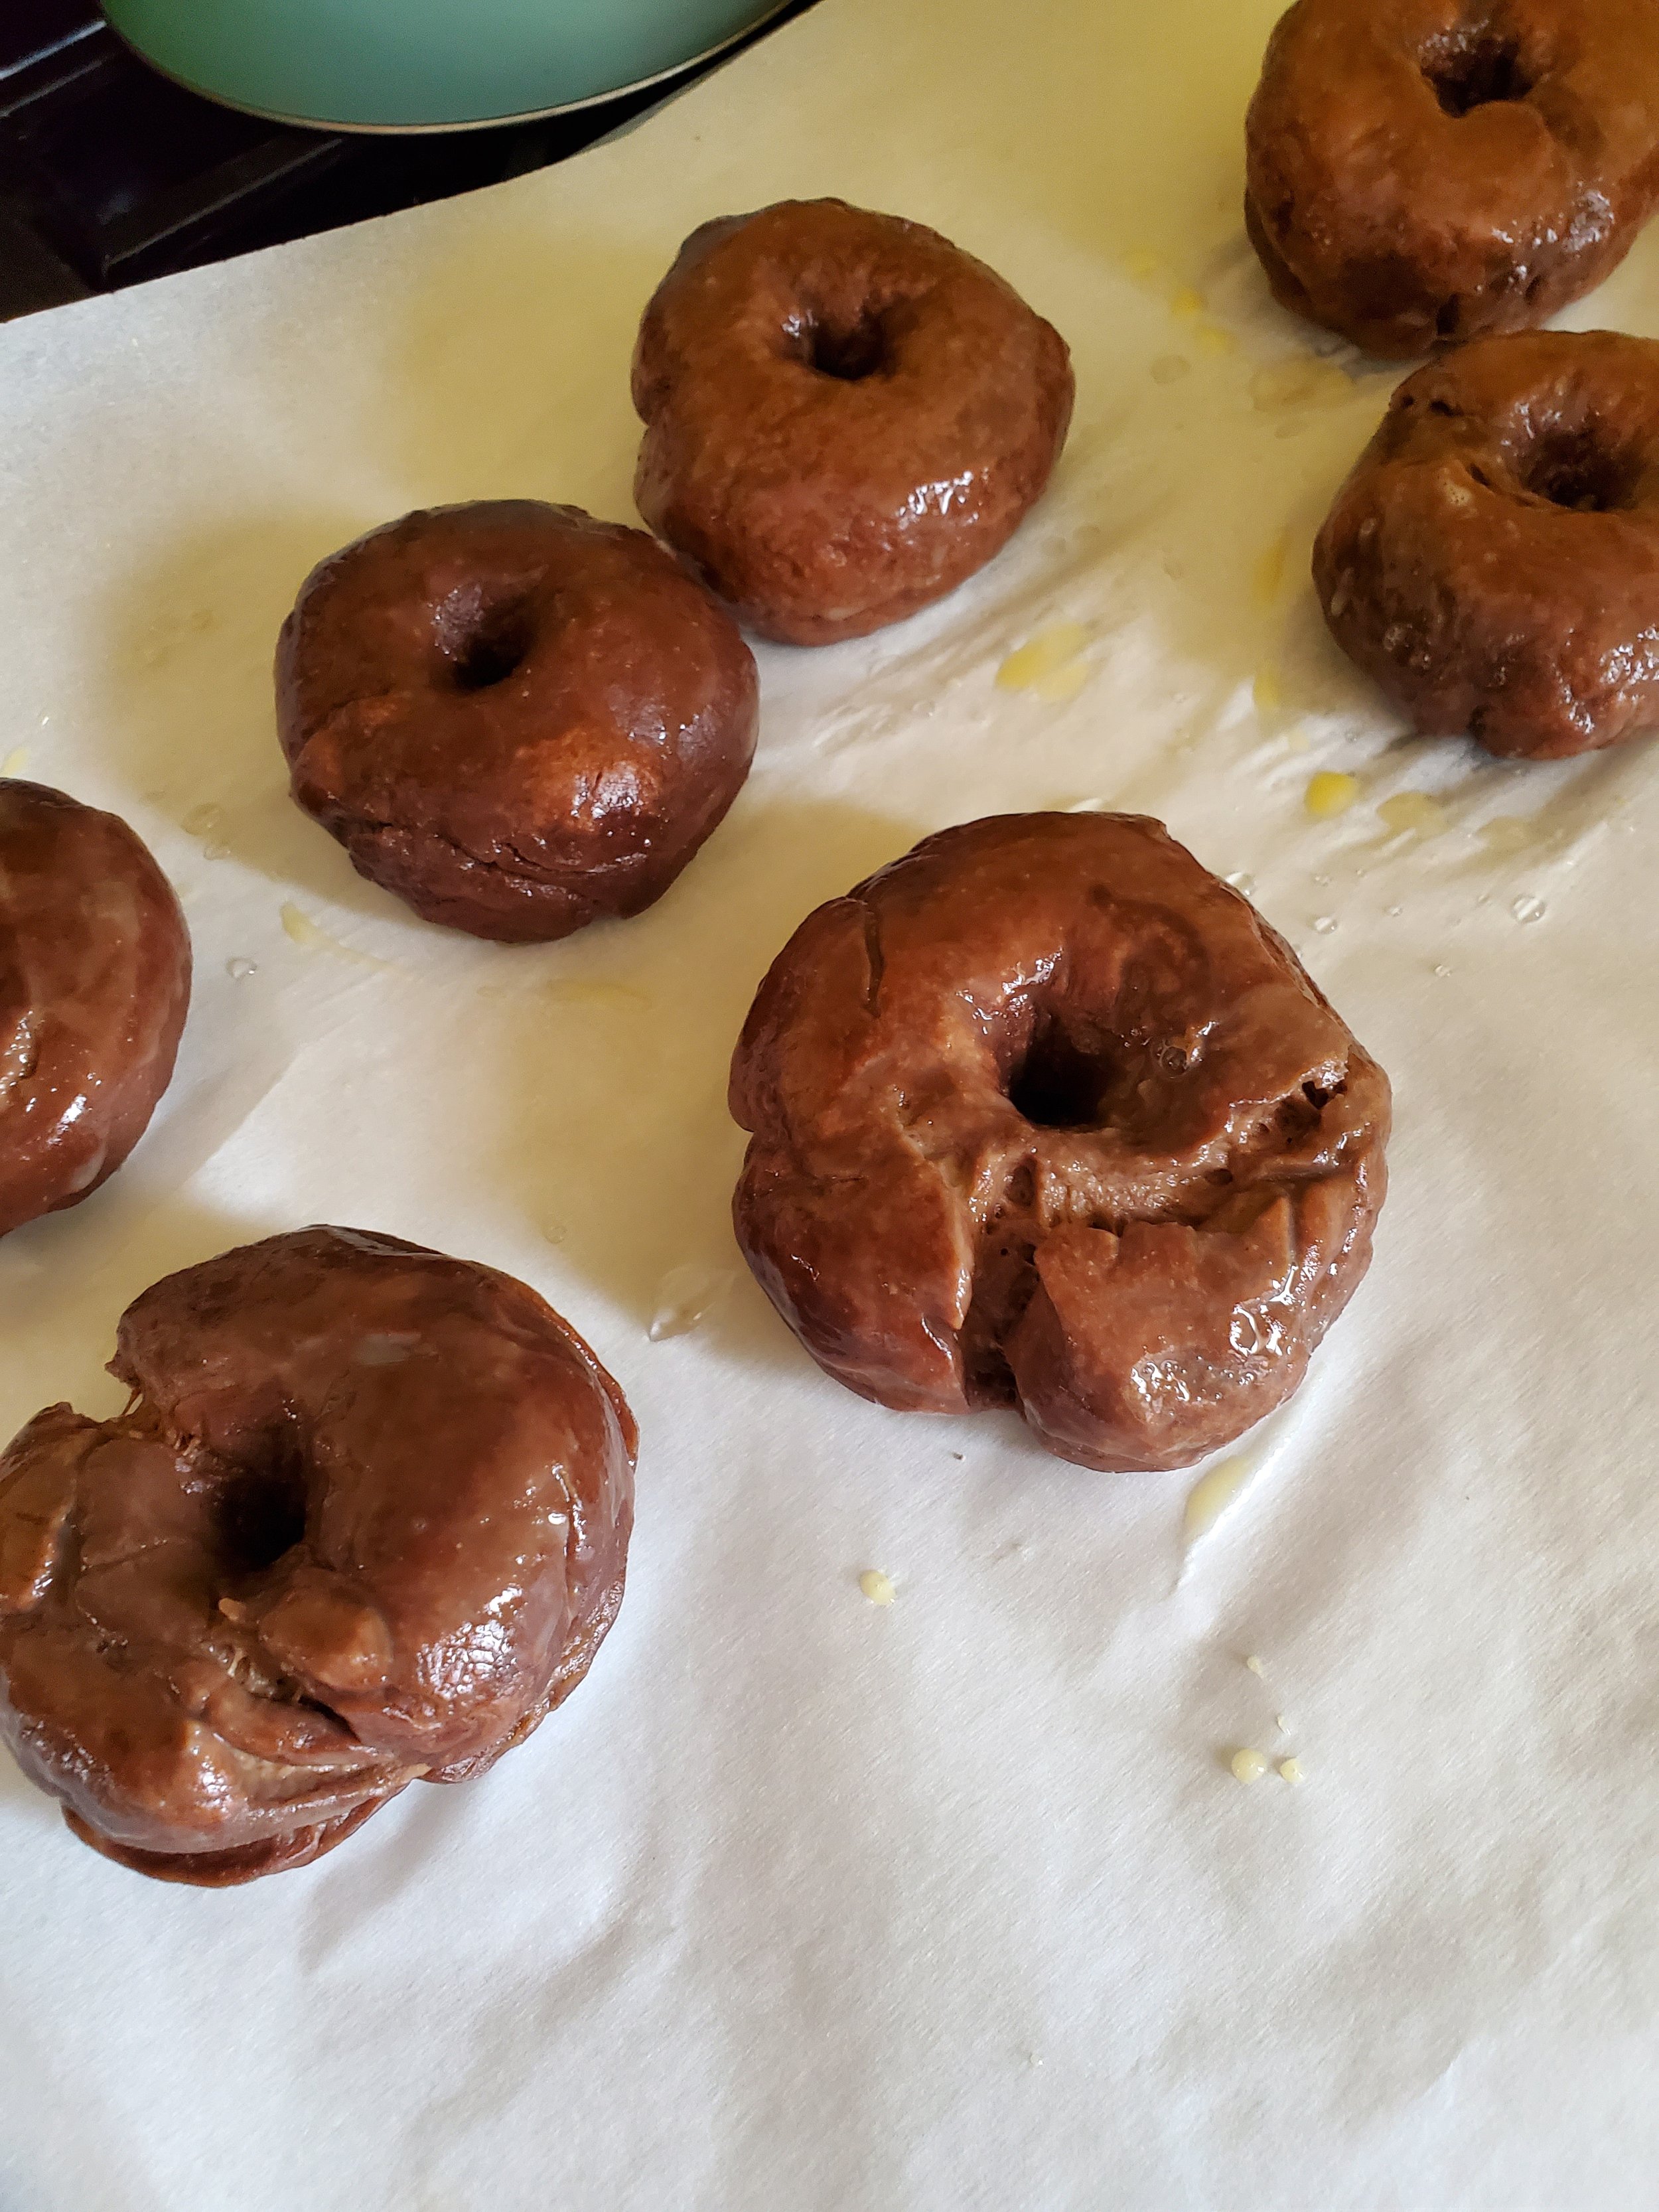
Take up your brush and egg-wash the exposed side of the bagels. It doesn't take much, so start with just enough to lightly coat them. You can add more, but you won't be able to take it away if you overdo it.


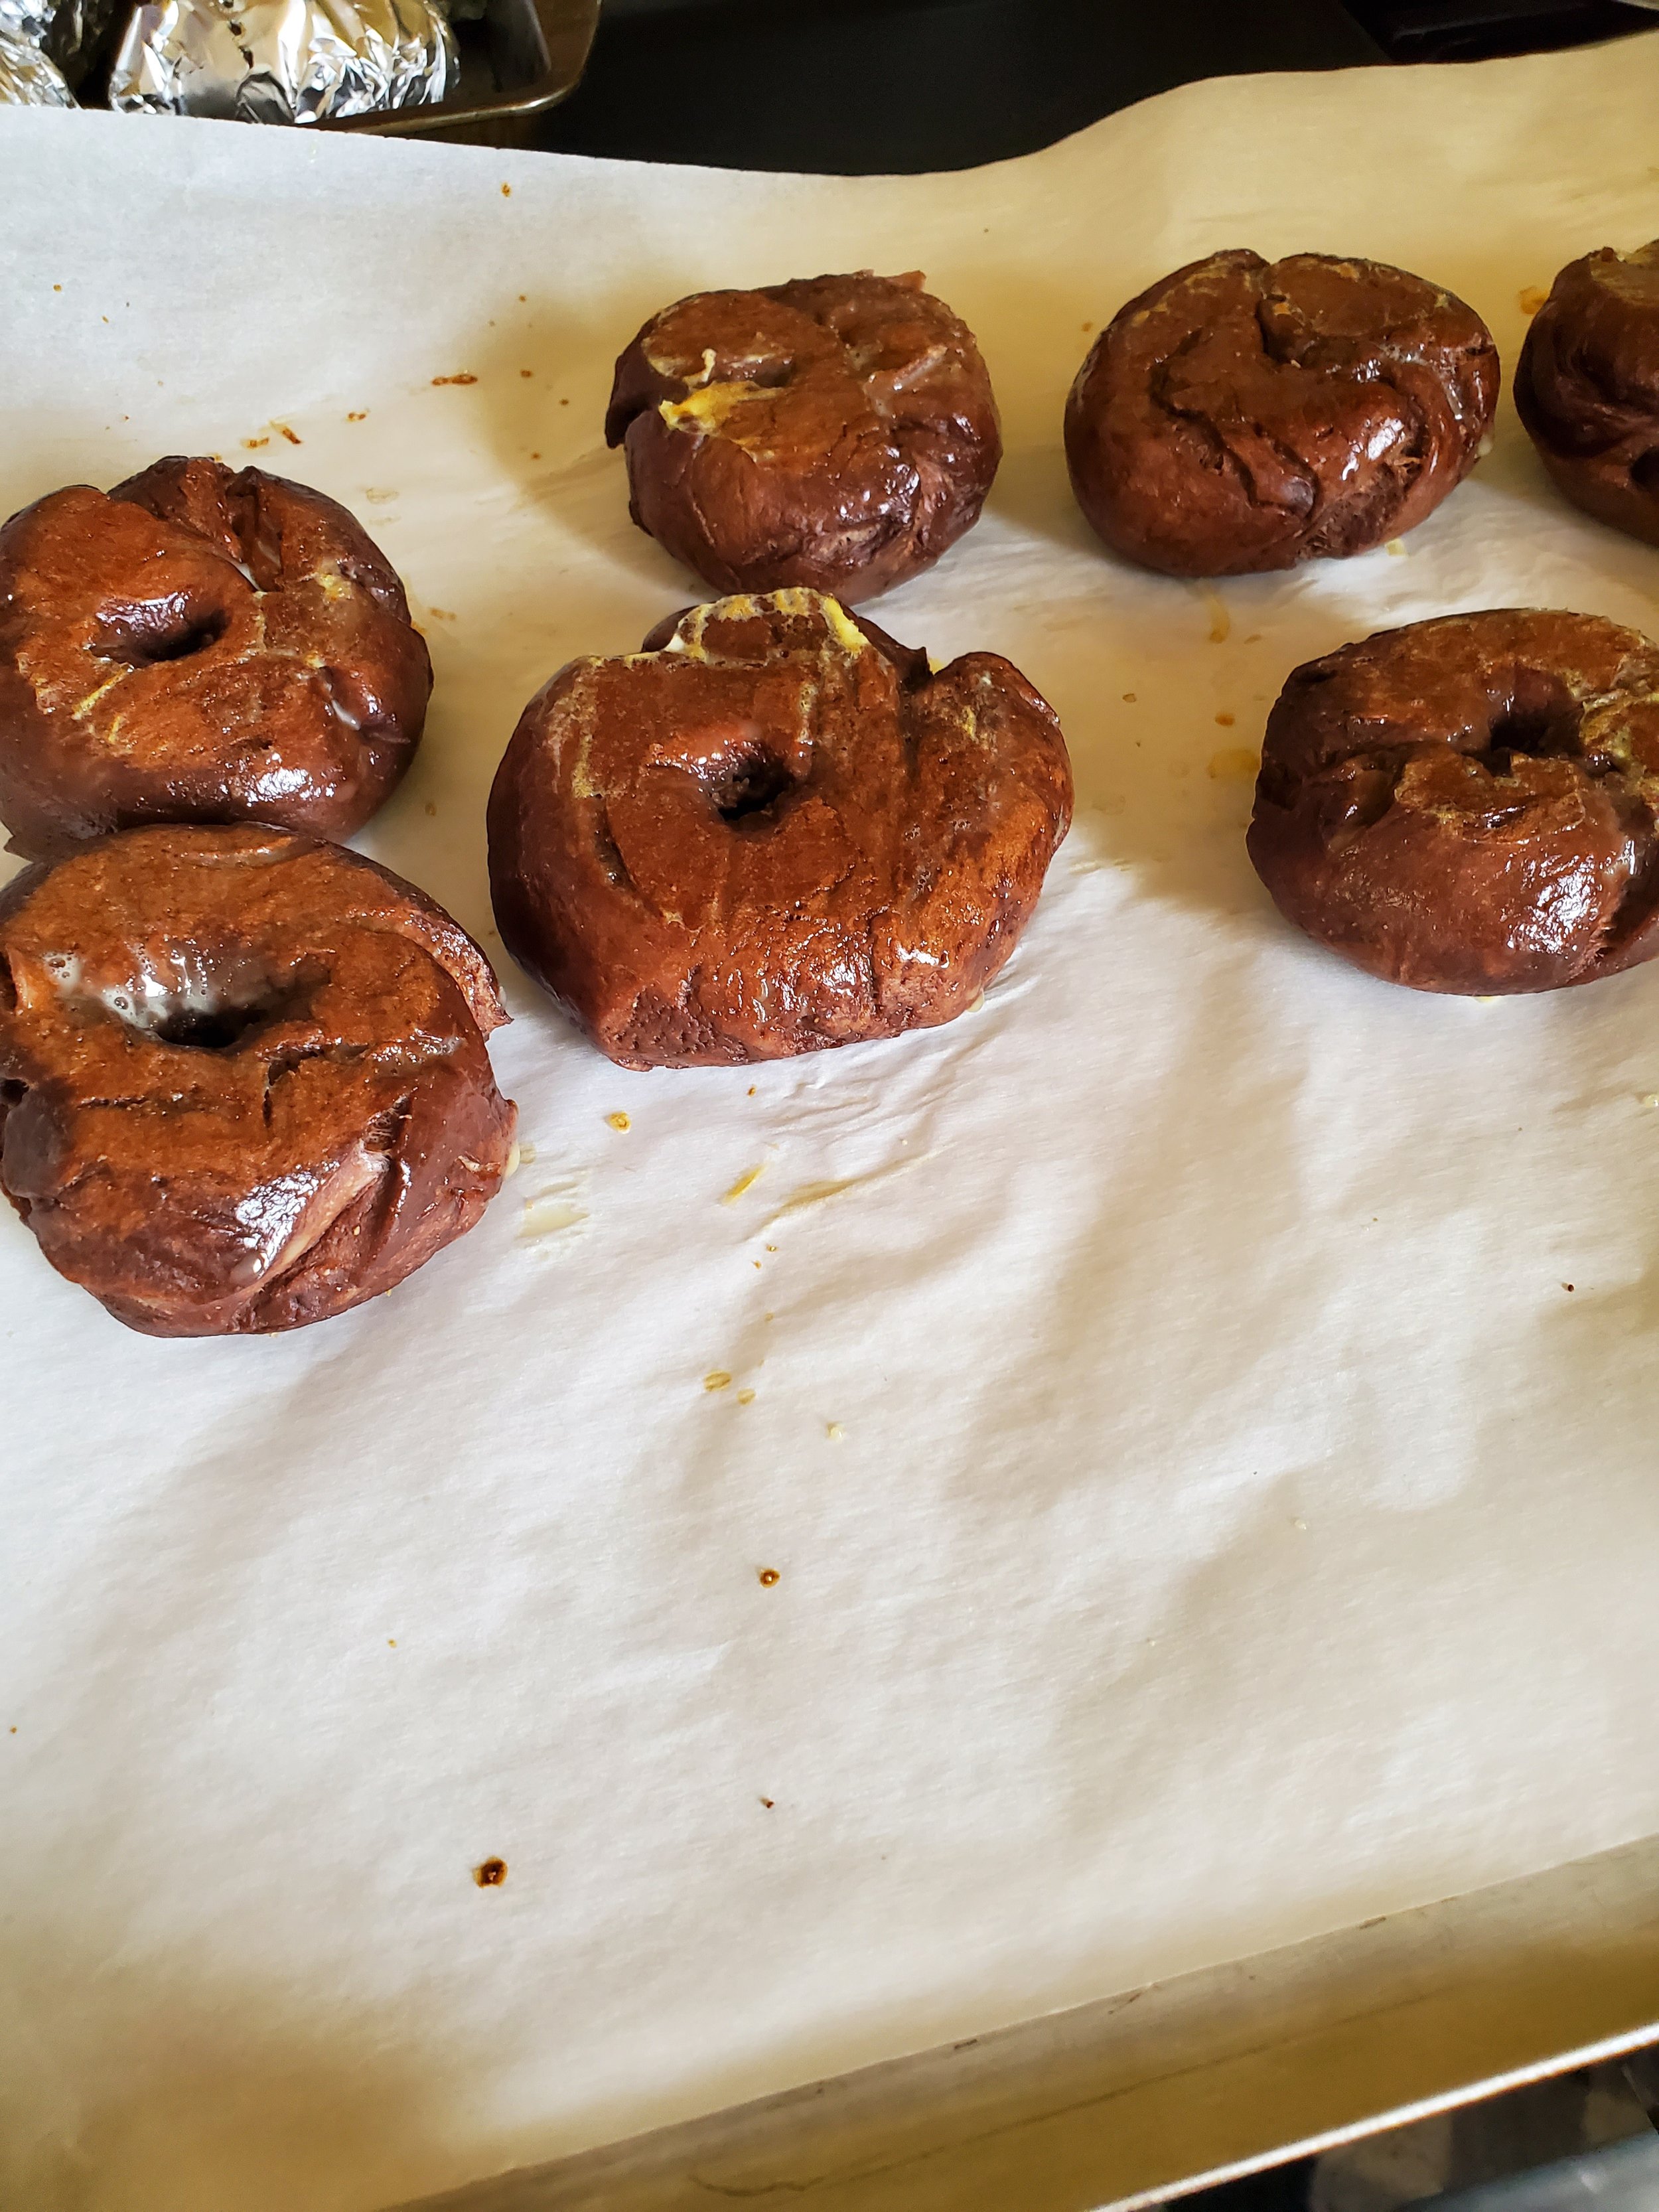
Slide them into the oven on the center rack and set a timer for eight minutes. When your eight minutes are up, remove them and check to be sure they're nice and glossy looking. Assuming so, flip them in place, brush the bottoms with egg wash and put them back in for eight more minutes.


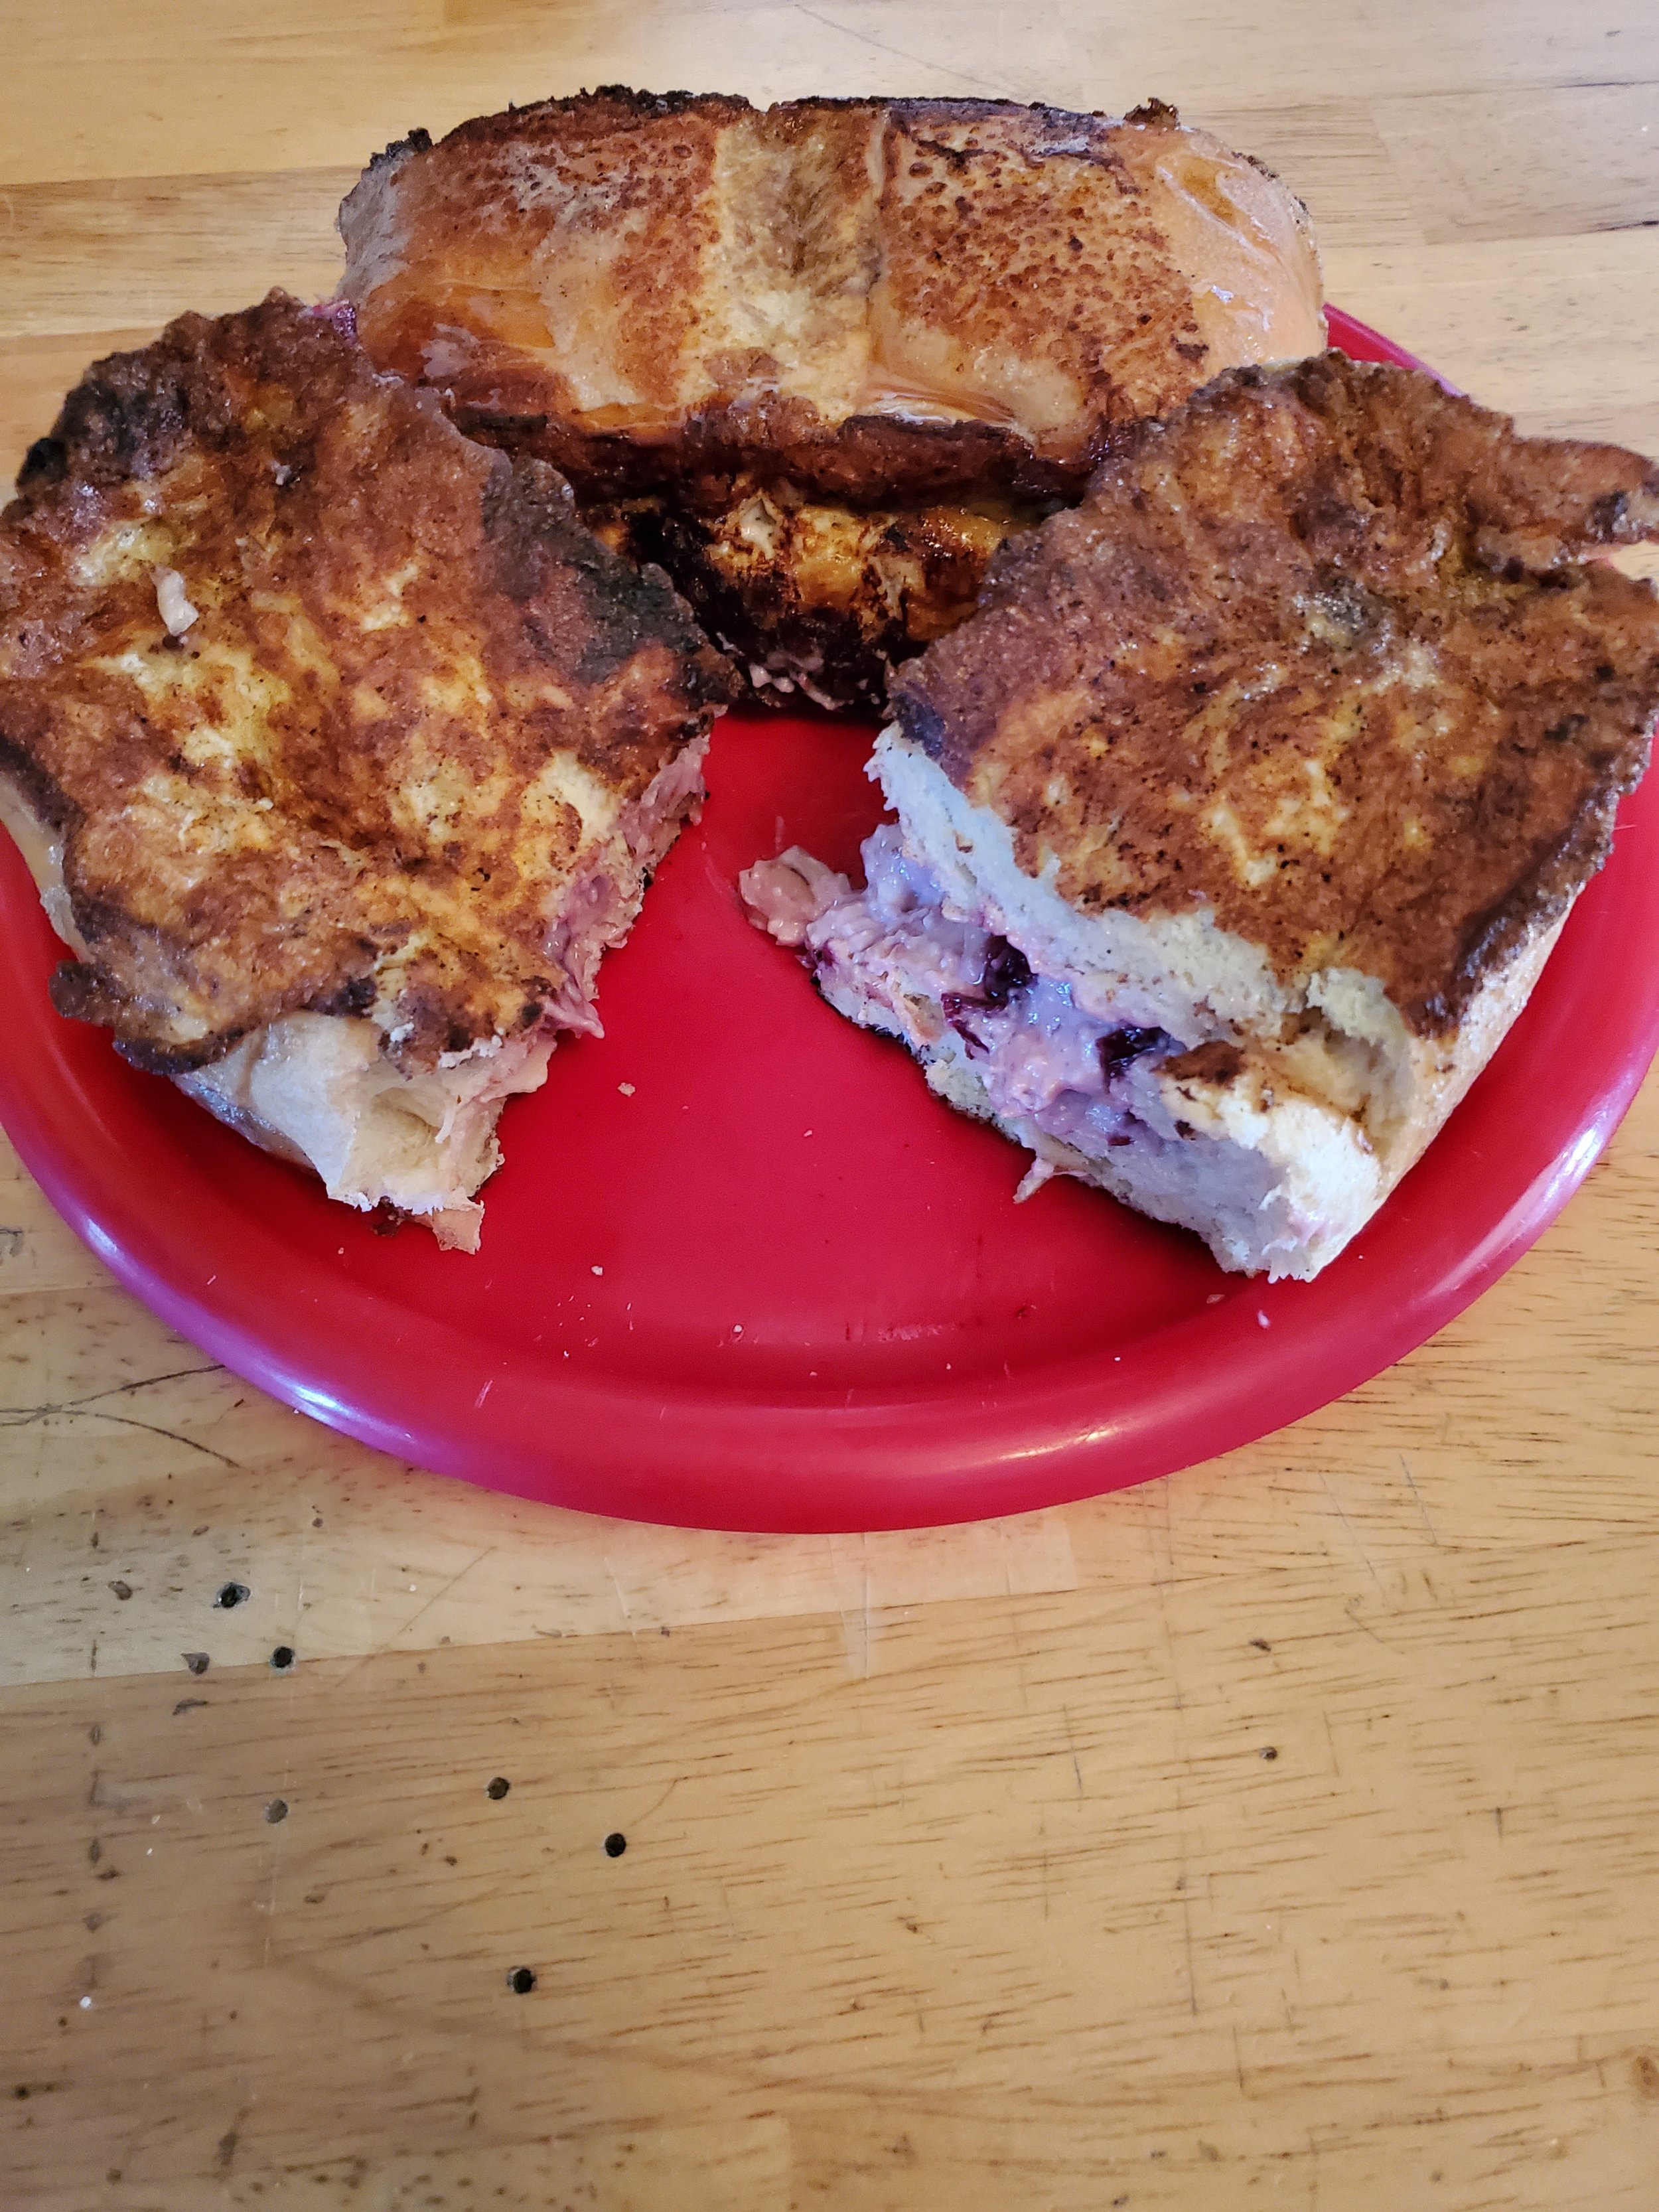
After you've reached the end of the second timer, they're ready to go! We recommend letting them rest on the baking sheet or a cooling rack for ten minutes, but they smell so good it's hard to resist splitting them and tossing them right into the toaster and chowing down with a little cream cheese.


Let us know what you thought of this week’s recipe on our Facebook page! We want to hear all of the interesting ways you make these and see how they turn out! 


If you wound up here because your appliances are malfunctioning, give us a ring! You can reach out to us via phone at (214) 599-0055) or by going to our contact page. Wherever you are in the Dallas Metro area, Appliance Rescue Service is here to help. Whether you're in Coppell, Allen, or Plano, we'll work with you to get your home running smoothly again.


Handpies for Every Meal!

Handpies for Dinner, Dessert, Breakfast and Lunch!

The greatest thing about making handpies is that they can be made for any meal of the day! Breakfast, lunch, dinner or dessert, the possibilities are endless! Sweet or savory, eating at a table, on a picnic or as you rush out the door on your next adventure, handpies are a fantastic option for meals. 

We admit, we might have gone a wee bit overboard with the number of recipes we put together in this post, but with as many possibilities as there are, we couldn't stop ourselves. So for this post, we've made it so that each recipe collapses into itself so that you can look at them one by one, rather than trying to wade through the entire article at once. 

We'll start off with the crust for your pies, and then move on to the fillings. 

  • 6 cups of Bread Flour

    2 tsp salt

    1 cup + 1/2 Tablespoon cold butter

    1 cup cold water

    2 egg yolks

    5-7 cups of your filling of choice, see below

    Combine flour and salt into a mixing bowl.

    Cut your cold butter into tiny pieces, and work it into the flour, ideal using a fork or your fingers. (or an assistant, that works too!)

    in a separate bowl, mix the water and one of your egg yolks together until well blended. Pour that into the flour and mix everything until it comes together.

    Turn the dough out onto your counter and knead it lightly until it becomes a dough, rather than a mess of ingredients. The best way to knead the dough is to push forward and away from you with the heel of your hand, then fold the dough back towards yourself. Rotate it 90 degrees and repeat.

    Wrap the dough in plastic wrap and let it chill for at least 30 minutes, or up to a day.

    When you're ready to bake your hand pies, preheat your oven to 445*F. Grab two baking sheets and line them with parchment paper *

    Take your dough out of the fridge and set it on your counter. Cut it into 10 equal pieces of dough. Feel free to use a scale if you want, or just measure by eye and feel if you're feeling adventurous.

    Set all of the pieces to the side but one, and roll that one into a 7 inch circle.

    Add a rounded half cup of your filling to the center of the circle and fold the edges over so that you have a half moon.

    With the edge you can get creative. Start by pressing the dough firmly together all around the filling. Then choose your crimping design of choice. The easiest method is to pinch and fold back the dough on itself so that you get a 'crimped' edge. You can also check out Pinterest to see what other nifty options you have. We don't advise using just a fork for this dough because of how much filling you have.

    Place five pies on each of your baking sheets, and mix up your remaining egg yolk with 1 Tbsp of water.

    Use a pastry brush and generously apply the wash to each pie.

    Bake your pie for 20 minutes at 445* and then, without removing the pies from the oven, turn the heat down to 345* for another 15-20 minutes until they're crispy and browned.

    *Important note here: Parchment paper is NOT the same as wax paper. Whatever you do, don't try and bake wax paper you will ruin your baking sheet if you're lucky and hurt your oven if you're not.

    This is your basic pie dough. You can make this and freeze it once you've kneaded the dough, once you've cut the dough into sections, or once you've got it rolled out into rounds. All we suggest is making sure to wrap it in wax paper or plastic wrap and then putting it into a freezer safe container.

    Important Note: In our pictures down below, we made a half batch and mini pies, rather than the full size ones you get with this recipe.

  • 1 Tablespoon Unsalted Butter (you won't need additional salt thanks to the salt and the cheese)

    1 Cup Yellow Onion, diced

    2 ½ Cups Baby Bella Mushrooms sliced

    ½ teaspoon Ground Pepper, fresh

    ½ teaspoon Sea Salt

    2 Tablespoons fresh Thyme chopped

    2 ½ Cups Fresh Baby Spinach chopped

    1 ½ Cups Gouda or Gruyere Cheese, grated

    ______________________________

    Add mushrooms, onions, salt, pepper, and thyme in a skillet with 1 tablespoon of butter. Cook for 3-4 minutes until softened. Don't go based off the onions being transparent as further cooking will happen while you bake the handpies.

    Stir in spinach while warm and remove from heat. Let cool and drain any excess juices.

    Once cooled, add in your cheese of choice and mix thoroughly to combine.

    Split your filling evenly between your pie rounds and bake to enjoy.

  • 16- oz cooked ham, chopped

    ¾ cup shredded cheddar cheese

    ¾ cup shredded Swiss cheese

    1 (8-oz) package cream cheese, softened

    1 Tbsp Dijon mustard

    1 Tbsp Worcestershire sauce

    1 Tbsp brown sugar

    ¼ tsp onion powder

    ______________________________

    In a large bowl, mix your ham, swiss cheese, cheddar chees and cream cheese, mixing until thoroughly combined.

    In a smaller bowl, mix together your dijon mustard, Worcestershire sauce, brown sugar and onion powder until blended.

    Add the two together and mix thoroughly.

    Split your filling evenly between your pie rounds and bake to enjoy.

  • 2 lbs chicken breast

    1.5 tbsp olive oil

    1/2 cup yellow onion, finely diced

    1 Red pepper, finely diced

    1 Yellow pepper, finely diced

    10 cloves of garlic, minced

    2 cup chicken stock (split in half)

    1 Tbsp tomato paste

    3/4 tsp salt

    1/4 tsp pepper

    ______________________________

    Grab your Instapot or crockpot and place your chicken and 1 cup of the chicken stock into it. Mix in 4 of your 10 garlic cloves.

    Put the lid on the pot and cook for 20 minutes if you're using an Instantpot or 6 hours if you're using a slow cooker.

    In a large skillet, heat the olive oil over medium heat.

    Add onions, 6 cloves of minced garlic, and peppers, and sauté for about 5 minutes until softened.

    Add chicken, tomato paste, 1 cup of chicken stock, salt and pepper.

    Simmer, stirring often, allowing some of the liquid to evaporate, about 10 minutes.

    Allow to cool to room temperature or in the fridge for 2 hours. If you're doing this in stages, you can chill overnight in the refrigerator too.

    Split your filling evenly between your pie rounds and bake to enjoy.

  • Fair warning on this one. There are Zero hard and fast amounts because we weren't given hard amounts. It's more of a "guess and test" recipe like we've done in the past.

    Unsalted butter

    corn - we advise fresh or frozen as it's easier to get them.

    red onion, finely diced

    limes- juice in one bowl and zest into another so you can add as much as you like.

    red bell pepper, finely diced

    cilantro

    jalapeño, we suggest starting with 1 jalapeno to start with, finely diced without the seeds or pith

    sour cream

    Cotija cheese, and if you can't get hold of that, you can go with queso fresco

    ______________________________

    In a large skillet over medium-high heat, add your butter and frozen corn. Cook for 8-10 minutes stirring often until the corn is cooked through and has a charred look to it. The high heat will cook it quickly and the char adds a nice smokey flavor to the recipe.

    Remove from skillet and pour into a large bowl. Add the red onion, lime juice, lime zest, bell pepper, cilantro, and jalapeño. Stir to combine.

    Add the sour cream and the cheese and stir to mix. At this point we suggest tasting the mix and seeing how you like it, adjusting different flavors as needed so that it's just right before you move on.

    Once you've got the flavors right, split your filling evenly between your pie rounds and bake to enjoy.

  • 1 Tbsp olive oil

    1 Tbsp unsalted butter

    1 white onion, finely diced

    1 carrot, peeled and finely diced

    1 rib celery, finely diced

    Salt to taste

    Black pepper, freshly ground to taste

    4 cloves garlic minced

    1 pound ground beef

    1 ½ tsp Italian seasoning

    ½ tsp white pepper

    1 Tbsp tomato paste

    2 Tbsp Worcestershire sauce

    3 level Tbsp all-purpose flour

    1 ¼ cups beef stock or broth

    1 medium russet potato, peeled and diced into ¼ -½ inch cubes

    2 tsp fresh thyme leaves

    1 Tbsp finely chopped parsley

    ¼ cup green peas

    ______________________________

    Start by gathering up your onion, carrot, celery, potato and parsley and chop them as stated above, keeping them separate as you finish working with them.

    Take your skillet and put it down over medium- high heat, and add in the olive oil and butter. Once your butter is fully melted, stir it together with the olive oil and add in your onion, carrot and celery plus salt and pepper. Saute the vegetables until they're softened, but not transparent.

    Add in your garlic and once you can smell it, add in the ground beef, Italian seasoning, white pepper, and a few more dashes of salt and black pepper. Cook the ground beef until it's no longer pink, using a spatula to crumble the beef.

    Once the beef is finely cooked, if you're having a hard time getting it to crumble, you can remove it from the heat and once it's cooled enough, use your hands to break everything up. This is an optional step, and will require bringing the pan back up to heat before moving on.

    Once your beef is finely crumbled, add in your tomato paste and the Worcestershire and stir that into the pan, and top with the flour. Stir everything together to blend well.

    Add in your beef broth and the potato and stir to combine everything. Put the lid on the pan and allow it to simmer until the potatoes are tender, approximately 30 minutes. When a fork pressed gently against a potato cube slides through easily, you know they're done.

    To finish it off, add in your thyme, chopped parsley and the peas and mix to combine. Make sure no other spices are needed, and then allow the filling to cool completely.

    Once you've got the flavors right, split your filling evenly between your pie rounds and bake to enjoy.

  • 12 oz of fresh Blackberries

    1/4 cup sugar

    1 tbsp lemon juice (the bottled stuff is just fine)

    1/2 tsp cinnamon

    1 egg, beaten

    Additional Sugar for Topping

    ______________________________

    Rinse your blackberries well, and dry them with a clean towel, carefully or you'll end up dying your towel.

    Cut them in half, and toss them into a medium-sized bowl. Add in your sugar, lemon juice and cinnamon and mix well so that there is very little liquid left in the mix. Add a tiny amount of sugar at a time if there is too much liquid after adding in the initial 1/4 cup.

    Use an egg wash to help seal the pastries as you make them, to ensure they don't pop open while baking.

Notes on Freezing Your Handpies

There are several points throughout this process where you can stop and freeze what you've made.

- You can roll the dough around wax paper and then wrap the roll in plastic wrap.

- You can cut out your circles, layering them with squares of wax paper and freeze them at that point.

- You could make the handpies and freeze them prior to baking them.

- You could bake the handpies and then freeze them after they've cooled.

For any of these options, make sure to label and date what you've made so that you can use them within two months. For us we think the best options are either making the handpie circles or going ahead and making the pies up but not baking them. 

And that is six different handpie recipes that you can use for any meal throughout the day whether you're at home or on the go. They freeze great and they taste even better. When you give these a shot, please let us know over on our Facebook page or in the comments below. We love hearing from you and all about your cooking adventures. 


If you're contemplating handpies for meals because your stove isn't working properly, we can help. You can reach out to us at our office by calling ((214) 599-0055) or by going to our contact page to set up an appointment. We'll work with you to find a time that fits your schedule before sending one of our experienced techs to solve the issues. We work with you every step of the way to get your home running smoothly again.

Slow and Easy Sunday Stuffed French Toast

You’ll End Up Wanting The Whole Plate For Yourself

I don’t care; take me to the Recipe!

When we at ARS think of Sunday, it's a time for family, having fun, and spending the day cooking. This Sunday we wanted to whip up something a little different and try our hand at Stuffed French Toast. In theory, a very easy recipe. In practice? Well. It’s still easy to do, but experimenting makes it far more fun. 


This is a VERY subjective and experimental recipe. There are a couple different reasons for this. How firm you want your bread to be is going to affect how much egg it can soak up without distorting and turning into goo. However, it’s also going to affect the final taste and texture. The ratio of fruit to cream cheese is going to vary wildly based on which brand of fruit jam you buy and how much liquid still exists in that. So, if you want a hard and fast “here is the amounts you need, here is what you’ll get” recipe, we suggest checking out one of the others that we’ve linked in our additional reading section at the bottom. It’s ok if that’s what you’re in the mood for! This isn’t a recipe for when you need breakfast on the table 20 minutes ago. It’s more for when you want to spend Sunday experimenting with your family and having fun in the kitchen and if there ends up being several versions of food at the end, you win! 

On to the recipe! 

Ingredients

Bread - We suggest either Challa or a huge loaf of Italian. It’s the size that matters as much as anything. 

Cream Cheese

Slivered almonds - to taste - we suggest at least ¼ per two slices of bread, but it’s up to you on how much texture/crunch you want in your mix 

Sour Jelly or Preserves - We chose sour cherry 

Milk or heavy cream, or a mix if you want- only about 2 TBSPs though. 

Eggs - you want roughly 2 eggs per slice of bread

Cinnamon

1 Tbsp packed light brown sugar


Tools

-Cast iron griddle or a skillet

- mixer 

-Pie pan or other large shallow dish 

-Bread knife 

-Paring knife

Our bread really is 2 inches wide, it’s so large though it doesn’t look like it.

Our bread really is 2 inches wide, it’s so large though it doesn’t look like it.

To start with, a note on breads.

 Although we suggest using either Challa or Italian, you can do this recipe with a loaf of brioche bread. The important thing is that this is a high and thick loaf of bread. You want something that is at least 3- 4 inches wide, and at least two inches high. Yes, this is going to give you really large slices of bread, but that’s the intent here. 


Now, grab your loaf of bread and start by slicing it into 2 inch thick slices. So, ideally, your slice should be 2 inches wide, 2 inches thick, and however long. 


At this point, you can leave your slices out overnight to firm up, or move on to the next step. 


Whatever you decide, when that time has passed, flip over a slice, grab a paring knife and cut a slice that’s roughly 2-3 inches long. You’re looking to form a deep pocket inside of the bread.  Do that to all of your slices, and set them to the side for a moment. 


Grab your cream cheese and preserves and measure them out in a 2 to one, cream to fruit ratio. You want this to be stiff enough to fill it into the slices, but with enough fruit that you get the taste. Either use a food processor or a fork and mix the two together, adjusting the ratio as needed. 


This is roughly how thick ours ended up being after we adjusted the ratio several times.  You also definitely need additional help when trying to fill the slices with your filling.

This is roughly how thick ours ended up being after we adjusted the ratio several times. You also definitely need additional help when trying to fill the slices with your filling.

Now is when you’ll need to get a second set of hands. We had a few willing participants who were able to help us, in exchange for future delicious food. Have your partner hold open a slice of bread with two forks, while you use a third fork to fill the bread with your cream cheese mix. 


Egg, Milk, brown sugar and cinnamon

Yum Delicious eggy mix! The base to any good French toast.

Once all of your bread is filled, mix together your eggs, dairy, cinnamon, and sugar into a pie pan, or some other shallow dish.  

Stuffed bread soaking in a shallow pie pan filled with egg mixture for making french toast

With how thick the bread is, the additional soaking time is very important to allow it to really seep into the bread. It’s also why we said that you might want to let your bread sit over night so that it can hold up to that extra time.

Lay your bread into the dish and let it soak on one side for 2 minutes. Flip it over and do it for another 2 minutes.

While your bread is soaking, turn your stove on to medium-low, toss in  1 Tbsp of butter and allow it to melt. 

And now we begin the cooking process to make our  French Toast

And we begin the cooking process! At this point it smells so sweet and eggy, but that shifts as the egg cooks and the surface of the toast browns.

Place one to two slices of bread in your pan at a time, and let them become golden brown, roughly 5 minutes on a side. Flip, add more butter if you need, and allow it to cook for another 5 minutes, or until golden brown. 

And here we have the delicious final results that are rich, filling, delicious and such good French Toas you'll want the whole thing.

And here you have two super thick slices of French toast so good you’ll be wanting to keep all of it for yourself.

Plate your delicious Stuffed French Toast and serve with either butter or genuine maple syrup. We tried it with just butter, and it was truly delicious. 


So what did you think? Will you be trying this one? Let us know over on our Facebook page and don’t hesitate to share photos! We’d love to see how the recipe turned out for you! 


If you ended up here because your stove isn’t maintaining heat evenly though, we can still help! Even with sharing delicious recipes like this, in our work time, we want to keep your home running smoothly. If you’re noticing trouble with any of your major appliances, reach out! We can help you set up an appointment that works for your schedule and figure out what the trouble is. 

Give us a call at ((214) 599-0055) or check out our appointment page to get things started. 


Additional Reading

Whether you want a more exact recipe, or just more delicious food. 

Brown Sugar - Cinnamon Oat Bars

A Sweet-Tart Cake To Beat All The Pies

Broccoli & Cauliflower Soup

The ‘post-Thanksgiving’ Meal Guide

Culinary Adventure: Sourdough Pancakes!

Get ready to taste the best pancakes you’ve ever had. 


This recipe is going to require a good bit of planning ahead. It's going to take at least a week of forethought. We know, that sounds like an awful lot - usually these are one-day recipes, or even just a few minutes. But that week of planning will lead you to the best and fluffiest pancakes, and it will make things like bread and tortillas easier in the future if you choose to keep it going.


You're about to embark upon a culinary adventure. And it starts with a science experiment.

Allow us to introduce you to sourdough.


There are two ways to get started with this. Three, if you happen to have a friend with a starter who's willing to share (which we can basically guarantee they will be - keeping a starter alive requires frequent discarding, which means a nice chunk of active starter is up for grabs each time). You could start your own; there are tutorials all over the internet for it. You could order some dehydrated starter from a business, and bring it back to life with a little flour and water. Or maybe you can ask that friend we mentioned earlier - it seems like, after quarantine, everyone knows someone with a little sourdough monster living in a jar in their kitchen.


A starter requires a little bit of attention each day, as well as some feeding and some culling. Basically, once it's alive, you toss out enough of it to get it back down to a manageable size, then add flour and water until you've reached a 1:1:1 flour to water to starter ratio. Give it a stir, put a lid on it, and let it sit until feeding time tomorrow. Or if you're likely to bake a bunch, skip the discard and add that much more flour and water. (In case you haven't guessed, we bake a bunch.) And when you don't plan to bake too much, or if you might have to leave town and no one will be around to feed it, you can put it into the fridge or freezer so that it goes dormant.


Once you have that starter ready to go (it'll smell strongly of yeast and it'll be visibly bubbly), you get to do the fun part: make a great big mess measuring it out!


It's squishy. It smells funny. It might be a food. Your dog will love it. Please be sure to keep it away from the fuzzy friends in the house - sourdough starter is no good for them, but they have no way to know that themselves.


Ingredients:

1 1/2 cup active sourdough starter

1/4 cup melted butter

3 eggs

1 1/4 cup milk

2 teaspoons almond extract

1 2/3 cup flour

1 tsp baking soda

1 tsp baking powder

1 tsp salt

1 cup fruit or chocolate chips (optional - we used blueberries for the example in the photos)

Double double… what? What do you mean it’s too early for that still?

Double double… what? What do you mean it’s too early for that still?


Tools:

Mixing bowl, whisk, measuring cups and spoons, spatula, pan or griddle, non-stick spray. Optional: hand mixer.


Measure your liquid ingredients into the mixing bowl and whisk them all together. Try not to have too much of a difference in temperature between the eggs, milk and butter when you start mixing... because hot butter plus eggs plus milk is also the recipe for scrambled eggs.


Add your dry ingredients one at a time, holding the fruit or chocolate chips for last (if you've chosen to use them). Start gently so you don't wear the flour - but once you've got everything dampened, you can switch to using a hand mixer to speed things up if you prefer. Your batter will be thin, and possibly a little lumpy, but that's okay.


Start the heat under your pan or griddle and allow it to warm up to medium.


Fold your fruit or chocolate chips (again, assuming you've chosen to use them) into the batter. You should probably do this part by hand, as using a mixer can pulverize delicate fruit. Then again, pureed berries in the batter can dye the whole pancake vibrant colors. Maybe you're cooking for Rick Riordan fans who have been clamoring for blue pancakes. If that's the case, or if you want, say, pink or purple for a theme party, go ahead and smash all the berries you want.


Turn the heat under the pan or griddle down to low, spray with non-stick spray. Give the layer of spray a quick smear with the back of the spatula (this sounds weird, but it helps prevent the bubbly, uneven-looking cooking on the bottom) and pour a blob of pancake batter in.


Wait until you can see bubbles coming up to the uncooked top of the pancake most of the way into the middle, and the edges begin to look all set up. That usually takes a minute and a half to two minutes on our griddle, but you know your kitchen better than we know it, so make your own call here.


Slide the spatula under the pancake, lift and flip it all in one motion. Keep in mind, the more you drag it out, the more pancake batter drips you'll be stuck cleaning up later.


Cook for another minute on this side, lift an edge with the spatula and check for doneness. If it still looks pale, let it cook a little longer. If it's looking a bit scorched, lower the heat even more, and maybe feed that one to the family pet (cooked sourdough is fine!).


Once the pancake has reached the desired color on both sides, move it to a plate and start the process over again, repeating until you have enough pancakes or you run out of batter. We like to keep the plate of pancakes covered with another plate of the same size inverted over top to trap some of the heat, but be aware that it'll hold moisture too - and no one wants soggy pancakes unless they're drowning in syrup.


Now that you’ve got a stack of pancakes, let us know what you think over on Facebook! Is this going to be a regular breakfast addition for you? Would you rather try doing something else with your sourdough starter? (Hint: The internet has tons of ideas.) Or maybe you’d rather check out a different breakfast option entirely, something a little sweeter. For that we suggest checking out our Apple Oatcake, still just as good, if a little less work intensive.  


Now that we’ve helped you feed yourself, potentially for months if not years, it’s time to clean up the kitchen. What do you mean you’ve got a busted dishwasher? That’s ok, we can help with that too. If your dishwasher is busted and you live in The Colony or the surrounding area, we can help you. Dried out valves, peeling liners, flooding kitchens, we’ve seen them all and we’re here to keep your home running smoothly. Give us a call at ((214) 599-0055 ) or visit us at our website to set up an appointment today. 

delicious sourdough blueberry pancakes

Breakfast Apple Oat Cake

The Perfect Get-Going Food For A Winter Morning


By now, your winter break is probably over. That means the kids are back to school, too. We aren't sure about your house, but in this house, we're all slow to get moving on cold weather mornings. That lag often translates into running late for school, hurrying to work, and forgetting a decent breakfast.


Even if your kids are remote or hybrid learners in the ever changing school landscape that is so common this year, they're not freed from the constraints of having to get out of bed on time; most schools are tracking attendance based on what time they log in! The remote learners just have a shorter commute - from wherever they sleep to wherever the computer is kept.


Clearly this whole winter situation wasn't designed to be easy. Who really wants to get up before the sun when it's freezing out? You need something tasty to look forward to in the mornings - something that you can prepare ahead of time, and just grab and go during your busy out the door rush.


We think you might just need our special apple oat cake. It's full of fruit and grain, and it even has a little boost of protein from the addition of some nuts. (That extra protein is to help you stay feeling full.) It's also low in sugar, so you won't get that wilted sugar-crash feeling like a bowl of cereal or a muffin sometimes leaves you with.


You can bake it in an eight inch round pan and cut it up into soft triangles, or you can spread it in a thin layer on a rimmed sheet pan and cut it into crispier bars. You can keep it simple and make it the same way we did, or you can jazz it up with goodies like maple syrup or chocolate chips. Experiment with it and find what you like!


Ingredients


2 cups oats (quick cooking or old fashioned are fine, but NOT steel-cut)

1 cup unsweetened apple sauce

2 eggs

1/2 cup (one stick) butter or margarine, melted and cooled

1/4 cup sugar

2 tablespoons ground cinnamon

1 teaspoon baking powder

1/2 teaspoon salt

1/4 cup sliced almonds, chopped walnuts or peanuts

1/4 cup dried berries or raisins


Tools


Mixing bowls, whisk or fork, measuring cups, spoon, pan (8 inch round or 13 by 9 inch sheet), aluminum foil


Instructions


Preheat your oven to 350.


Mix together your oats and applesauce in the mixing bowl. Add your salt and baking powder and stir until both are incorporated.


Stir in your sugar, cinnamon, nuts and berries. Feel free to add other goodies here, too, like a spoonful of honey or some favorite spices.


In another bowl, whisk your two eggs lightly. We'll be adding them to the first bowl at the same time as the melted butter or margarine, so make sure you've let the heat come back down some on the butter/margarine. The last thing we want to do is end up with scrambled eggs in oats. (Certainly someone out there must like eggs and oatmeal, but we don't think they go together too well.)


Mix your whisked eggs and melted butter into the first bowl and stir thoroughly.


Line your pan with aluminum foil to help make sure everything comes out in one piece and can be cut up neatly, rather than coming out of the pan in misshapen lumps of varying sizes.


Pour your oat mixture (we hesitate to call this a batter, as it's quite thick and rather lumpy) into the pan you prepared. Smooth it down with a spoon and nudge it into the corners or up to the edges of the pan - it won't spread very much on its own.


Once it's nice and level in the pan, place it in the oven on the middle rack. For a round pan, it should take about 40 minutes. If you used a sheet pan, cut that time down to about 25 minutes and check it frequently to avoid burning the bottom or edges.


Once a toothpick inserted into the center of the cake comes out clean, and the center of the cake looks solid and lightly browned, it's ready to come out of the oven.


Allow it to cool for eight to 10 minutes before using the aluminum foil to lift it up from the pan and place it on the counter. Cut into slices or bars, whichever you like.


Store in an airtight Tupperware, wrapped in plastic wrap, or wrapped in aluminum foil. They'll keep up to four days at room temperature. Alternatively, you can freeze them, and then pop them in the toaster oven in the morning. They're pretty tasty if lightly toasted and buttered or drizzled with melted peanut butter.


Sure, it's not quite as alluring as visiting the local drive through, but it's more convenient! And it might make you feel a little better about your progress on those new years resolutions. Let us know what you’re planning for year ahead over on our Facebook page, or in the comments below. 


If your appliances are giving you fits, don’t forget that we’re here to help. Whether you need someone to take a look at your oven, or you just want some maintenance tips for your dryer, we aim to be the best. For you and all of our clients in the Coppell area, Appliance Rescue Service is just a call or click away. 


Call us at (214) 599-0055

Apple oat cake with chunks of cranberry