Welcome Autumn with Fall Fruit Bread

Welcoming in cooler weather with a baking spree.

Welcome to Autumn! 

While the first day of autumn is technically not until next week Tuesday, everyone else seems to already be on the fall flavors bandwagon. We're getting tired of lagging behind. If The-Big-Coffee-Chain-We-Cannot-Name can start offering pumpkin spice lattes in AUGUST, we’re sure we can give you a recipe based on in-season fall fruits a few days ahead of schedule.

We haven't offered you fine readers anything sweet lately in the recipe posts, and the collective sweet tooth is starting to make some noise around here. So this week's recipe is a fruit based dessert. Or maybe breakfast; we certainly won't tell anyone how or when to eat their baked goods.

If you're lucky enough to have an orchard nearby, head out and grab some fresh apples or pears! They're both in season right now, as are cranberries (which, unfortunately, only make their appearance in their dried form in this recipe). You might make it an adventure in cooking with the family. If not, it's fine to just pick up a few fresh fruits at the farmer's market or local grocery store. You can even get away with using canned goods for this recipe if you're short on time. But whichever kind of fruit you start with, you'll find yourself needing a food processor or blender.

This is a big batch recipe; it'll make a loaf for you and a loaf to give to your neighbor! Alternatively, keep it all for yourself - and if you and the family don't eat it all up right away, you can wrap the second loaf in foil and plastic and put it in the freezer for later.


Fall Fruit Bread

3 cups all-purpose flour

1 3/4 cup sugar

3 large eggs

1 tablespoon vanilla extract

1 tablespoon ground cinnamon

1 teaspoon baking soda

1 teaspoon baking powder

1 teaspoon salt

1/8 teaspoon ground cloves

1/4 teaspoon nutmeg

1 cup pureed apple (or unsweetened applesauce) *

2 cups pureed pear **

1/4 cup dried cranberries


* 2 large apples, or 3 medium apples

** 5 average pears, or two 14-oz cans of pear halves in juice or syrup, drained and rinsed

Let's start with the scariest part of this recipe: the purees. If you've started with fresh apples and pears, you'll have more steps than the folks who've opted for canned goods - but this is all part of the fun.

Bonus: if you're baking with kids, this can be a good teaching opportunity for fractions and conversions. Measure out your cut fruit to track your progress as you go.

Readers who have chosen to use canned goods should skip down to Step 4.

Step One:

Wash all of your fresh produce, please! Apples and pears sold in grocery stores often have a layer of food-grade wax that can complicate this recipe.

Step Two:

Core and slice your fresh apples and pears. Thinner slices will cook up quicker, but thicker slices are good for a chunkier texture. Whether or not you peel the fruit is also up to you - keep all the nutrients by leaving peels intact, or create a finer texture and uniform color by removing skin.

Step Three:

Toss all of your cut fruit into a pan and add just enough water to cover. Cook over medium heat 10-20 minutes, until pieces are tender.

Step Four:

Drain your fruit, either from the pan you've cooked it in or from the can it arrived in. Put all the apples (or applesauce) and pears into a blender or food processor. Blend until you've reached your desired consistency.

Step Five:

Sift together all of your dry ingredients. Whisk your eggs in a separate dish and add the eggs, fruit and vanilla extract to the dry ingredients slowly. Try to avoid over-mixing; an over-mixed batter makes a tougher, chewy cake. If your batter looks heavy, dense, or dry, you can add a tablespoon of water or milk at a time until it reaches normal cake batter consistency. Fold in your dried cranberries.

Step Six:

Grease two loaf pans and fill each to about 2/3 full. Avoid overfilling - an overfull loaf pan can create a nasty mess in your oven if the batter overflows while cooking. If you still have batter left over after filling two loaf pans, consider making a few muffins or a mini loaf.

Step Seven:

Bake at 325 degrees for 1 hour. You should not need to make any time or temperature adjustments for dark/nonstick pans versus glass or aluminum. Just make sure to test with the toothpick trick before removing the loaf pans from the oven - some loaves are a little picky and need slightly more time than others.

Make sure to let them cool at least ten minutes before attempting to turn them out. If you're working with silicone pans, you may need to let them cool completely before the loaves will release without crumbling.

Serve as it is, still warm from the oven - fresh baked goods are tough to resist. On the second day, we prefer to cut it into slabs, toast for a few minutes in the toaster oven and add a pat of butter and a dollop of jelly.

A warm kitchen, and the smell of something you've made at home, and the chance to share with people you care about are the best autumn memories you'll fall back on when the weather changes... But we'll probably still dream about the pumpkin spice drinks from big chain shops, too.

Don't forget if your current washer is giving you trouble and you don't want to replace it you can always give us a call and we'll help you get it back and running. You can place an appointment on our web page or give us a call at (214) 599-0055.

Rainbow Save-Your-Tail Frittata

Also Known as “Oh shoot, I don’t have anything to make and I need to at least pretend I eat healthy!”

We're sure it's happened to you: you're home late, the kids are clamoring for dinner, and you need a quick and easy idea before they start gnawing on you. Or maybe you've got some unexpected company on the way; a friend called and they'll be coming over on short notice. Perhaps it's your turn to bring the main course at the church potluck, or you're hosting a holiday meal for extended family, or even preparing meals you can freeze for someone who's bereaved or expecting?

All of these potentially stressful situations can share one simple, flexible solution. Better yet, the dishes are minimal; one cast iron pan can handle the job alone. And as another added bonus, this recipe can even work if you're serving special diets, like vegetarian or gluten free.

Allow us to introduce you to your new favorite dish: the frittata.

It's like an omelette, but fluffier. Or like a quiche, but gluten free. Or maybe it's whatever you make it. You could do a pizza frittata for the kids, a roasted vegetable frittata for your friend, Mediterranean for church and Mexican inspired to freeze as a make-ahead meal for someone else. No matter what you choose to do with it, the Italians knew what they were doing when they invented this dish.

So please, take the basic recipe from this post and make something amazing. And maybe leave a note in the comments section so we can hear about it, too.

 
Frittata.jpeg

Property of The Kitchn

Ingredients

Rainbow Vegetable Frittata

(Serves 2)

4 Large eggs

1 Roma tomato, diced

2 mini orange sweet peppers, chopped

1 small blue* potato, finely diced

1 handful of fresh spinach, chopped

1/4 small red onion, diced

1/4 cup shredded mozzarella cheese

1/2 tsp dried oregano

1/2 tsp dried basil

Salt and pepper to taste

Butter, for sauteeing vegetables

*The blue potato is optional; please feel free to omit it entirely, or to substitute a baby red or small Idaho potato if heirloom produce isn't available in your area.

Instructions:

Before you do anything else, preheat the broiler on your oven. You'll need it briefly at the end.

In a heavy cast iron skillet, drop a pat or two of butter and bring it up to medium heat. Once the butter is melted, add the potato (if you're using one) and let it cook slowly while you prepare your eggs. We find it helpful to cover the pan for this step if possible.

Crack your eggs into a bowl and whisk the eggs up with the spices. Set to the side for now.

Add your remaining vegetables to the pan and saute, stirring frequently, until potatoes are soft and onion is nearing translucency. This should take you about 5 minutes, but don't worry if you need extra time - better an extra two minutes here than a par-cooked potato ruining the meal. Be mindful of the fact spinach wilts quickly, and consider adding it last.

Once your vegetables are ready, pour the egg mixture over top. Keep the heat no higher than medium.

As your egg begins to set, resist the urge to stir! Instead, take a thin spatula and gently pry it away from the edges of the pan and up from the bottom. The goal here is to let the raw egg slip into the opened space. Repeat this process as each layer sets.

Cook in this manner for about 7 minutes. You want the bottom portion to be completely set and the top portion to be soft-set.

Spread your shredded cheese in a thin layer over the top of the eggs.

Move the pan from the stove top to under the broiler. Broil for 3 minutes.

Now the fun part! Cut into whatever shape you want, and enjoy!


Let us know what you think over on our Facebook page! We’d love to hear from you and how your meal turned out! 

If this isn’t your thing, we have something completely different coming out in two weeks, so be sure to check back then. 

Remember, if your appliances are giving you trouble, or if you just want someone to give them a once over, give us a call. We want to help keep your home running in tip top shape. 

Call ((214) 599-0055) 

Set an appointment online.


Notes

As we said in the beginning, this is a flexible recipe. Use whatever herbs, spices, meats, vegetables and cheeses speak to you. We love the combinations of chorizo, garlic, cilantro, tomato and sweet onion topped with queso fresco, or of spinach, artichoke hearts, rosemary and feta, or hot Italian sausage with sun dried tomato, zucchini and provolone cheese. We've even heard tell of Cajun-inspired shrimp and Andouille sausage frittatas with red beans, onions, peppers and hot sauce.

A good rule of thumb to work with is two eggs per person. For every serving of eggs, you'll want half a cup of "filling" (meats, vegetables, etc.) and 2 tablespoons of cheese. (Unless you're like our family, which would gladly put half a pound of cheese into eight eggs and call it a frittata. We're not sure if the recipe is really flexible enough for this interpretation, but... We're not judging your fritatta, so be nice about ours.)

Blue Potato organic heirloom.jpg
Roma.jpg

Courtesy of Nature Farms

Ravioli Alla Caprese

 Proving that delicious pasta is absolutely possible to make at home.

This week’s recipe is all about Italy.  Delicious ravioli is a comfort food when many of us need a little comfort. What are you supposed to do though if you can’t get out to the store? It’s a really complicated thing to make right? Well actually, no. The only thing that’s complicated about the dough is the need to balance ‘enough’ mixing versus ‘not enough.’ Once you’ve got that, the rest is easy. 

Ingredients

For The Dough: 

1 cup water

¼ tsp kosher salt, plus more for the pasta water

2 ½ cups all purpose flour plus more for dusting 

For The Filling

1 cup whole milk ricotta cheese, drained

¾ cup finely grated mozzarella or mild sheep’s milk cheese

½ cup freshly grated Parmigiano-Reggiano cheese

½ tsp dried oregano

1 large egg

½ tsp kosher salt

For The Sauce

3 Tbsp extra-virgin olive oil

2 cloves garlic, smashed and peeled

1 25-ounce jar tomato puree

3 springs basil, plus torn leaves for topping

1 4-inch piece Parmigiano-Reggiano cheese rind, plus grated cheese for garnish

¼ tsp kosher salt 

To make the dough: Grab a small saucepan and put in on high heat, bring the water and ¼ teaspoon salt to a simmer.  Place your flour in a medium sized mixing bowl. Pour the hot water over the flour and mix together using a  silicone spatula or a wooden spoon. Continue mixing until it becomes a shaggy dough. Dump the mixture out onto a lightly floured surface and knead the dough for 5 minutes or until smooth and elastic.  Wrap your dough with plastic wrap and let it rest for 10 minutes on the counter. 


While that’s resting, let's make the filling.  In a medium bowl, mix together the ricotta, mozzarella, Parmigiano, oregano, egg and salt. 

To make the sauce: Take a clean pot and heat it over medium heat, add the olive oil and garlic. Cook the garlic for 2 minutes, or until the garlic is lightly browned and aromatic. Pour in the tomato puree, the basil springs, the cheese rind and a bit of salt. Let the sauce simmer for 12 minutes, stirring often. When the sauce has thickened slightly, remove and discard both the basil and the cheese rind.  

Roll your pasta dough out on a lightly floured surface to a ⅛ rectangle 6 inches by 36 inches. Place little mounds of the filling (roughly 2 teaspoons each) of the filling at an inch apart on the long edge of the dough. Fold the dough in half long ways, covering the filling and carefully press around the filling sealing the dough. 

Cutting apart the dough can done in two different ways. You can use a glass or a cookie cutter if you want round ravioli.Or you can cut them apart using a knife if you want square ravioli. Remove any scraps and repeat. You should end up with roughly 30 ravioli at the end of the process. 

Put a large pot of water on high heat and season liberally with salt.  Once it’s boiling, it’s time to start cooking. Add the ravioli in batches and simmer for about 3 minutes, or till they float. At that point you’ll know they’re cooked through. Using either a ladle or a slotted spoon, remove them from the pot. To serve, ladle spoonfuls of sauce to the center of a plate and position the ravioli on top.  Sprinkle with grated Parmigiano and torn basil. 


Notes: 

Let’s start with this “what the heck does ‘alla Caprese’ mean??” In this case it means in the style of Capri, which is an island off the western coast of Italy. The style of Capri is (almost) anything made with tomato, basil, olive oil and mozzarella.  

Now, if you want to make this process even easier you can go into your freezer and grab out an empty ice cube tray. Next, lay the dough over the tray and carefully push the filling into each of the wells. Fold the other half of the dough over the top, as in the original instructions and use the walls between the wells to press together the two layers of the dough. Finally, flip the tray over onto a lightly floured surface and using a sharp knife cut about the cubes. If you want to get really nifty you can even take a fork and press down the edges both to make sure they’re firmly attached and also to make them look nice. 

Additions to the filling- You most definitely can add to the filling, but make sure that if you do that the additions are small in size.

Some good examples for additions might be: mushrooms, ground beef, Italian sausage, crab, prosciutto, chicken, or sweet potatoes. 

Let us know how it goes! We want to hear about your attempts and how they turn out, either here in the comments below or over on our Facebook page. 

Don’t forget, if you want to schedule a check up for your appliances, that is something we do! You can also count on us to help fix them if they’ve been rude enough to break on you. We don’t stop until the job is done right. You can reach us by phone ((214) 599-0055)or by making an appointment on our website. 

Down Home Comfort with Sweet Tea-Brined Pork Chops and Red Pepper Relish

So good your guests won’t want to leave. 


This month’s first recipe is one that’s perfect for the dog days of summer. It doesn’t take much to prep and it’s easy to throw on a grill to cook. So many of us already drink sweet tea in the summer, we decided to try it in other uses as well. We came across this idea and after testing it out, it’s a winner!  Try out our Sweet Tea Brined Pork Chops and Red Pepper Relish.

Ingredients

8 orange pekoe tea bags*

1 cup sugar

6 bay leaves (preferably fresh)

1 Tbsp coriander seeds

6 bone-in center cut pork chops (2 inches thick; about 5 lbs total) 

3 red bell peppers, chopped

1 large vidalia onion, diced

2 Fresno chile peppers, seeded and chopped 

¼ cup apple cider vinegar

¼ cup apricot preserves

Freshly ground pepper

Kosher salt

Vegetable oil, for the grill 


-Make the brine: Bring 6 cups of water to a boil in a large pot. Turn off the heat and add the tea bas and let steep for 10 minutes. Discard teh tea bags. Stir in ¾ of a cup sugar, ½  cup salt, the bay leaves and coriander seeds. Cook over low heat, stirring consistently  until the sugar and salt are dissolved. Roughly 3 minutes.  Remove from the heat, pour into a  large heat proof pitcher and set the pot aside for the time being. Let the brine cool to room temperature, roughly 30 minutes. Refrigerate the brine until very cold, at least one hour.Pour the brine into the reserved pot and add the pork chops. Cover and refrigerate for at least 8 hours, or overnight. 


-Once the brine and pork is in the fridge, make the pepper relish. Put the bell peppers, onion and chilies in a food processor and pulse until broken down but not pureed. This should be 2 or 3 times on most food processors.  Transfer to a small saucepan and add the vinegar, preserves, the remaining ¼ cup of sugar and ¼ tsp of salt. Bring to a boil, then lower the heat and simmer until slightly reduced, but still juicy. Keep a close eye on it as time may vary based on time of year. It should take about 10 minutes. Remove from the heat, transfer to a serving bowl and refrigerate until you’re ready to serve. (You can make the relish up to a day ahead.) 


Preheat your grill to medium. Oil the grill grates lightly. Remove the pork chops from the brine and pat dry. Season the chops with salt and pepper. Grill, covered until well marked, roughly 14-16 minutes. If they get too dark, rotate them 90* . Flip the chops and cook, covered until well marked on the other side. Take a digital thermometer and insert it sideways into the center. It should register 145* and at that point it’s done. Transfer the pork to a cutting board and let it rest for 10 minutes. Serve with the relish. 


NOTES 

*Or the equivalent amount of loose leaf orange pekoe, if you’re willing to use it. 


So what is orange pekoe exactly? 

Rather than a flavor, orange pekoe is actually in reference to the quality of the tea. 


Tea leaves are picked from different heights on a plant for different purposes. The younger the leaf, or the higher it is on the plant, the more flavor it has. Another matter that goes into grading is how whole or broken a leaf is after it has been processed and dried. So an orange pekoe tea is made up of whole, young leaves. 


That’s not to say that the bagged tea you can pick up at your local store isn’t perfectly good tea. This is just the actual definition of an orange pekoe. So, no your pork isn’t going  to taste like oranges, unless you add some into the brine. 

Tea plant with leaves labeled based on the different tea grades.


Did you ever wonder what the difference was between a jam and a relish?

We did while making this recipe. A relish, according to Britannica, is a cooked and pickled vegetable or fruit preserve. It’s typically eaten with a bland food to bring flavor, but we can promise that’s not the case with this dish! 


Thank you very much for joining us for this recipe. We hope you enjoy cooking it as much as we did. Which was your favorite part? The tea brined pork or the relish? We’d love to hear from you over on our Facebook page. We want to see how yours turned out. 


If you found out that your stove or refrigerator weren’t working properly while you were making this, don’t hesitate to give us a call. 


Whether it’s your refrigerator or stove, your ice maker or your dryer, we fix appliances. And if all you want is to schedule a maintenance check? We can do that too. 


We look out for our clients in Allen and the surrounding areas and we want to keep your home running in tip top shape. 


Call us at ((214) 599-0055) or schedule an appointment on our website

All’s Well That Jams Well

Or, 4 Different Jams You Can Make From Your Garden


This week we’re talking about 4 different canning recipes. The harvest from our gardens are starting to come in, so it’s time to put them to use. Given how strange the weather was this year, it’s probably a good idea to store up as much as we can. 


First off, why canning? Why not freeze drying or dehydrating? 

Canning is a long used method of preserving harvests so that you can have fruits, vegetables, even full meals safe all through winter. 

Freeze drying and dehydrating are both expensive and more complicated than canning is, and can only be applied to certain foods. 

Canning means your harvest doesn’t have to be composted if you get more than you can eat before it spoils. 

You save money by canning your own foods, especially if you opt to trade some of what you’ve grown with neighbors or friends who raised different plants. 


Shelves of jarred foods in all different colors.

So what is canning? 

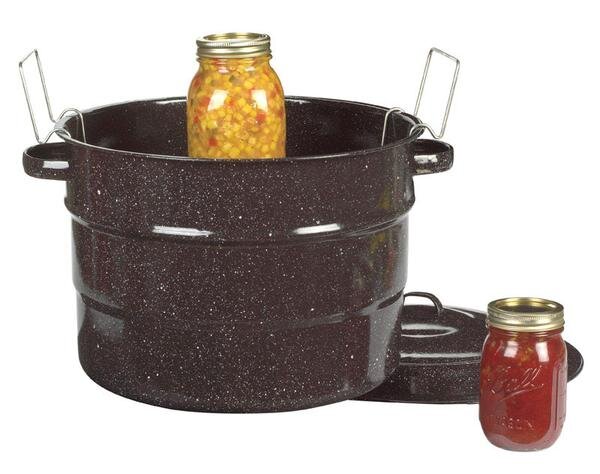
Canning, whether you use the water bath method or a pressure canner*, is a way to preserve foods in sealed jars.  You place the foods into sterilized jars and heat them to a temperature that kills microorganisms. This is for two reasons. 

  1. To keep the food from spoiling. 

  2. It drives the air out, which causes a vacuum seal as it cools. 

*A pressure canner is not the same as a pressure cooker


The Two Methods

- Boiling Water Bath 

Just like it sounds. In this one you cover the jars of food with water and bring it to a boil ( 212* at sea level) and cook it for a set amount of time. 

- Pressure Canning

Jars of food are placed in a  special pressure cooker in 2-3 inches of water. The lid is locked on and the temperature is raised to 240*F. 

The two different methods are used for different foods, based on their acidity. 

The boiling water bath is great for fruits, jams, jellies and tomatoes because they have a higher acidity. 

Pressure canning on the other hand is for use with low acidity foods like meats, vegetables, seafood and poultry. The pressure canner method not only kills bacteria but it kills the spores of botulinum that loves meats and vegetables. While the organism can’t live past 212*F, the spores that they produce can. The pressure canner is the only way to get the food hot enough to kill them off before they can grow inside the low acidity foods. 


Fortunately for us, all four of our recipes this week are foods that can be canned using the water bath method. 


Spiced Pear Jam

8 cups peeled, finely chopped pear,  (should be 5 ½ pounds)

4 cups sugar

1 tsp ground cinnamon 

¼ tsp ground cloves

Bring all ingredients to a boil in a dutch oven, stirring constantly. Reduce heat, simmer, stirring occasionally 2 hours or until thickened. Skim off foam with a metal spoon. 

Pour  immediately  into hot jars, leaving ¼ inch headspace; wipe jar rims. Cover at once with metal lids, and screw on bands. 

Process in a boiling water bath 10 minutes 

Store in a refrigerator up to 3 weeks or freeze up to 1 year. Thaw in refrigerator when ready to use. 

Should yield 5 half pints. 


Fruity Preserves

1 (20 oz) can crushed pineapple in juice, undrained

4 granny smith apples, peeled and chopped

2 Tbsps grated orange rind

3 oranges, peeled, seeded and chopped

3 lemonds, peeled and chopped

4 cups of sugar

Bring all ingredients to ao boil in a dutch oven, stirring constantly. Reduce heat and simmer, stirring occasionally 1 ½ to 2 hours or until thickened. Remove from heat and skim off foam with a metal spoon. 

Pour immediately into hot jars, leaving ¼ inch head space; wipe jar rims. Cover at once with metal lids and screw on bands. 

Process in a boiling water bath, 10 minutes. 

Store in a refrigerator up to 3 weeks or freeze up to 1 year. Thaw in refrigerator when ready to use. 

Yields 6 half pints 


Tri-Berry Lemon Jam 

1 cup crushed strawberries about 1 pint

1 cup crushed blueberries about 1 pound

1 cup crushed raspberries about ¾ pint

1 Tbsp grated lemon rind

2 ¼ cups sugar, divided 

1 (1 ¾ ounce) package powdered pectin 

Combine the first 5 ingredients in a  large bowl. Combine ¼ cup sugar and pectin in a small bowl. Gradually add pectin mixture to fruit mixture, stirring vigorously. Let stand 30 minutes, stirring every 10 minutes. 

Stir in remaining 2 cups sugar gradually until no longer grainy. 

Pour into containers, leaving ½ inch headspace. Cover with lids; chill 24 hours. Store in a refrigerator up to 3 weeks or freeze up to 1 year. Thaw in refrigerator when ready to use. 


Yields 4 half pints 


Tomato Preserves

3 pounds of tomatoes, peeled and diced

4 cups sugar

¼ cup lemon juice

1 (6 ounce) package strawberry gelatin

Bring first 3 ingredients to a boil  in a Dutch oven, stirring constantly. Boil, stirring occasionally, 0 minutes. Remove from heat and stir in gelatin until dissolved. 

Pour into containers, leaving ¼ inch head space and cover with lids; cool 1 hour. Chill 24 hours. Store in refrigerator for 3 weeks or freeze for up to a year.  Thaw in refrigerator when ready to use. 


Should yield 5 half pints


Remember, even if your garden wilted (like our blogger’s) you can pick all of this up at your local grocery store or farmers market. 


We hope you liked this week’s post, be sure to let us know in the comments or over on Facebook. Do you already know how to can foods? Do you have a favored recipe? 


And if you’re living in the Allen area and your appliances are acting up, you can always call or use our website to set up an appointment. We want to help.