Chocolate Raspberry Thumbprints

The Best Cookies for Any Bake Sale


Sometimes the weather just calls for cookies.


While it is very firmly spring now, we sometimes get late cold fronts and even ice storms into April, where we are. We've had hard freezes as far into the year as mid-May, even. And cold days like that are an excellent excuse to make cookies. 


This time we ran a little short on butter and had to get creative. So we combined the idea of cream cheese snowball cookies and shortbread thumbprint cookies and ended up with this sweet little hybrid: chocolate cream cheese thumbprint cookies.


Ingredients:

1 8 oz block cream cheese

1/2 stick butter

1 egg

1/4 c bakers cocoa

2 1/4 c all-purpose flour

1 c sugar

1/2 tsp almond extract

2 tsp vanilla extract

2-3 tbsp raspberry preserves


Tools:

Cookie sheet

Parchment paper

mixing bowls

microwave safe dish or saucepan (to melt butter and cream cheese)

measuring cups and spoons

spoon

ziploc bag

toothpick or scissors or sharp knife


Before we get started here, you should know that two of your ingredients are going to be your problem children. The butter and the cream cheese are going to be solid when you start out, but they really need to be liquid in order to do their jobs here. So we need to melt them - carefully. Most people use the microwave to accomplish this, but we have had terrible luck with that in the past (think exploding and/or scorched edges and untouched centers despite careful timing and frequent stirring). We prefer to use the stovetop and a saucepan over the lowest possible heat and stir every minute or so.


Cream cheese does melt, it's just stubborn. This is definitely not a recipe where you can substitute in cream cheese's lower-fat sibling, Neufchatel cheese. Leave it over the heat until you have no more lumps. You'll need to be extra patient with this step, sorry.  


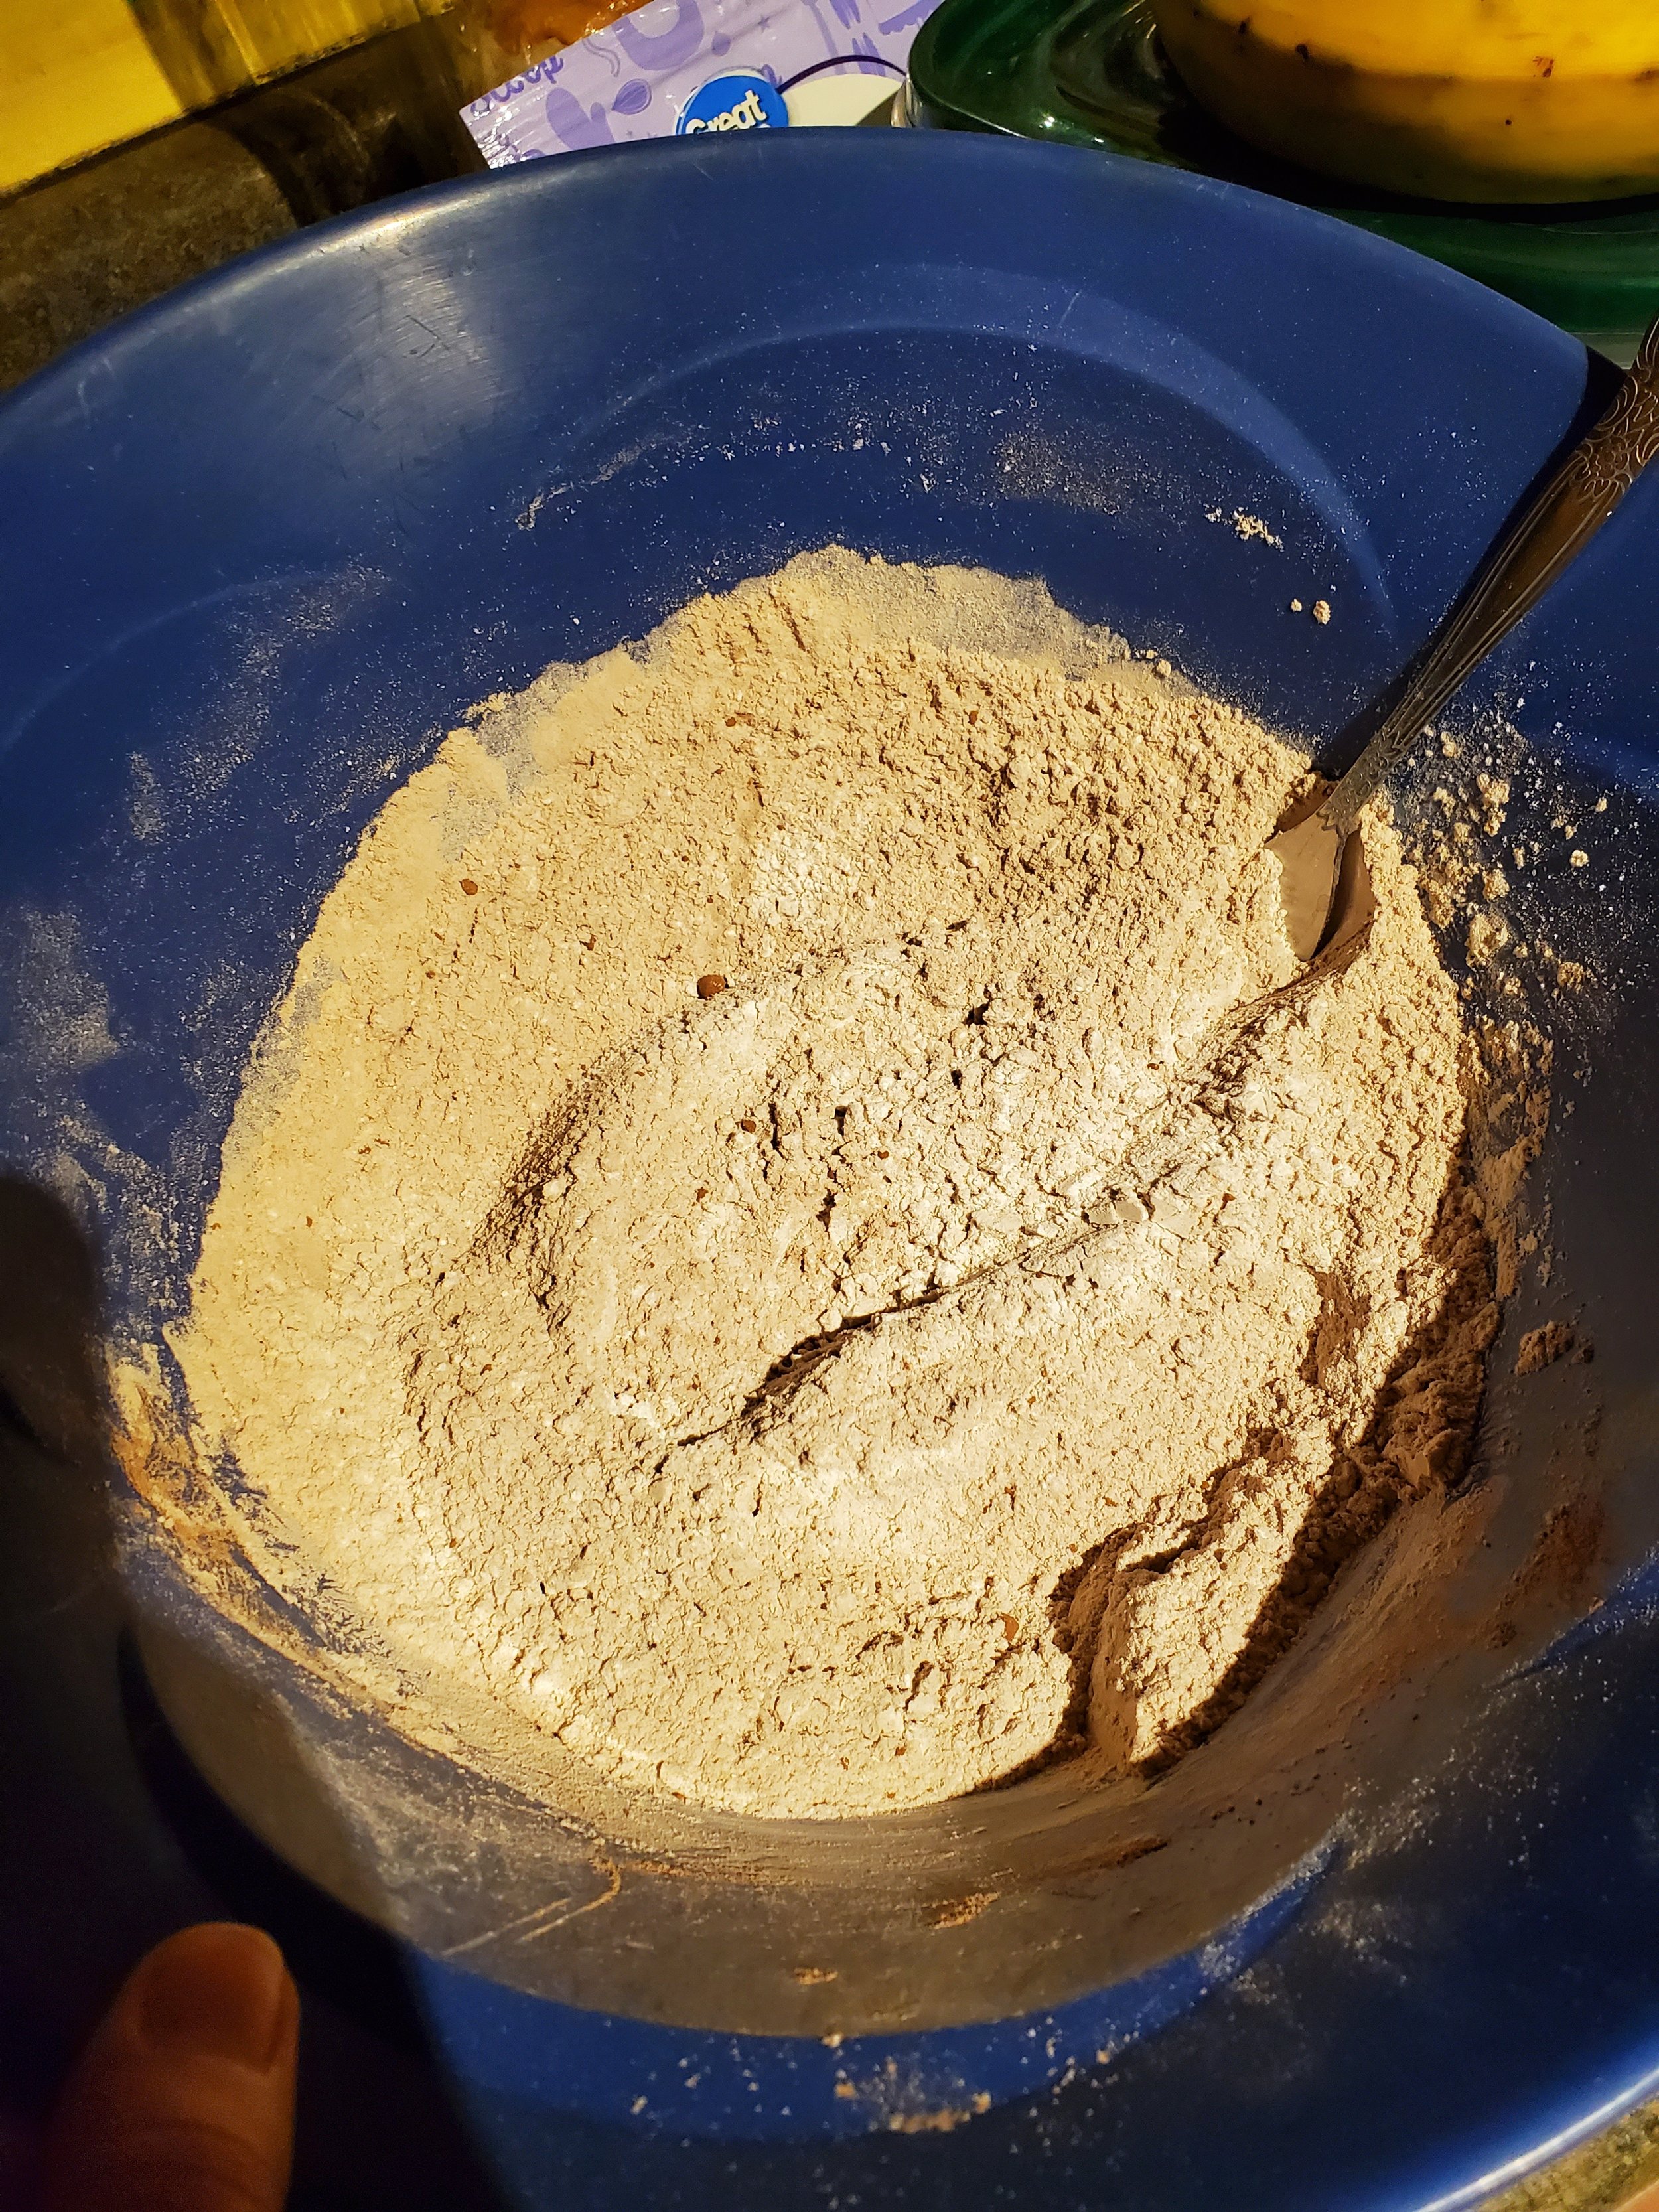
As with any doughy recipe, mix your wet ingredients in one bowl (be sure to break the yolk on the egg, you want it to incorporate fully) and your dry ingredients in another. This helps prevent finding big lumps of crumbly, un-mixed flour or globs of sticky egg when you go to work the dough into individual cookies.


Stir together the contents of your two mixing bowls in the larger of the two bowls. Don't overdo it, because the cookies will be tough if you get carried away.


Once everything is mixed well, divide your dough into 36 balls. We know, three dozen feels like a weird number to shoot for, but it's what our test batch turned out to have after we split off comfortable serving-sized pieces.


Put down a layer of parchment paper on your baking sheet and preheat your oven to 375 degrees.


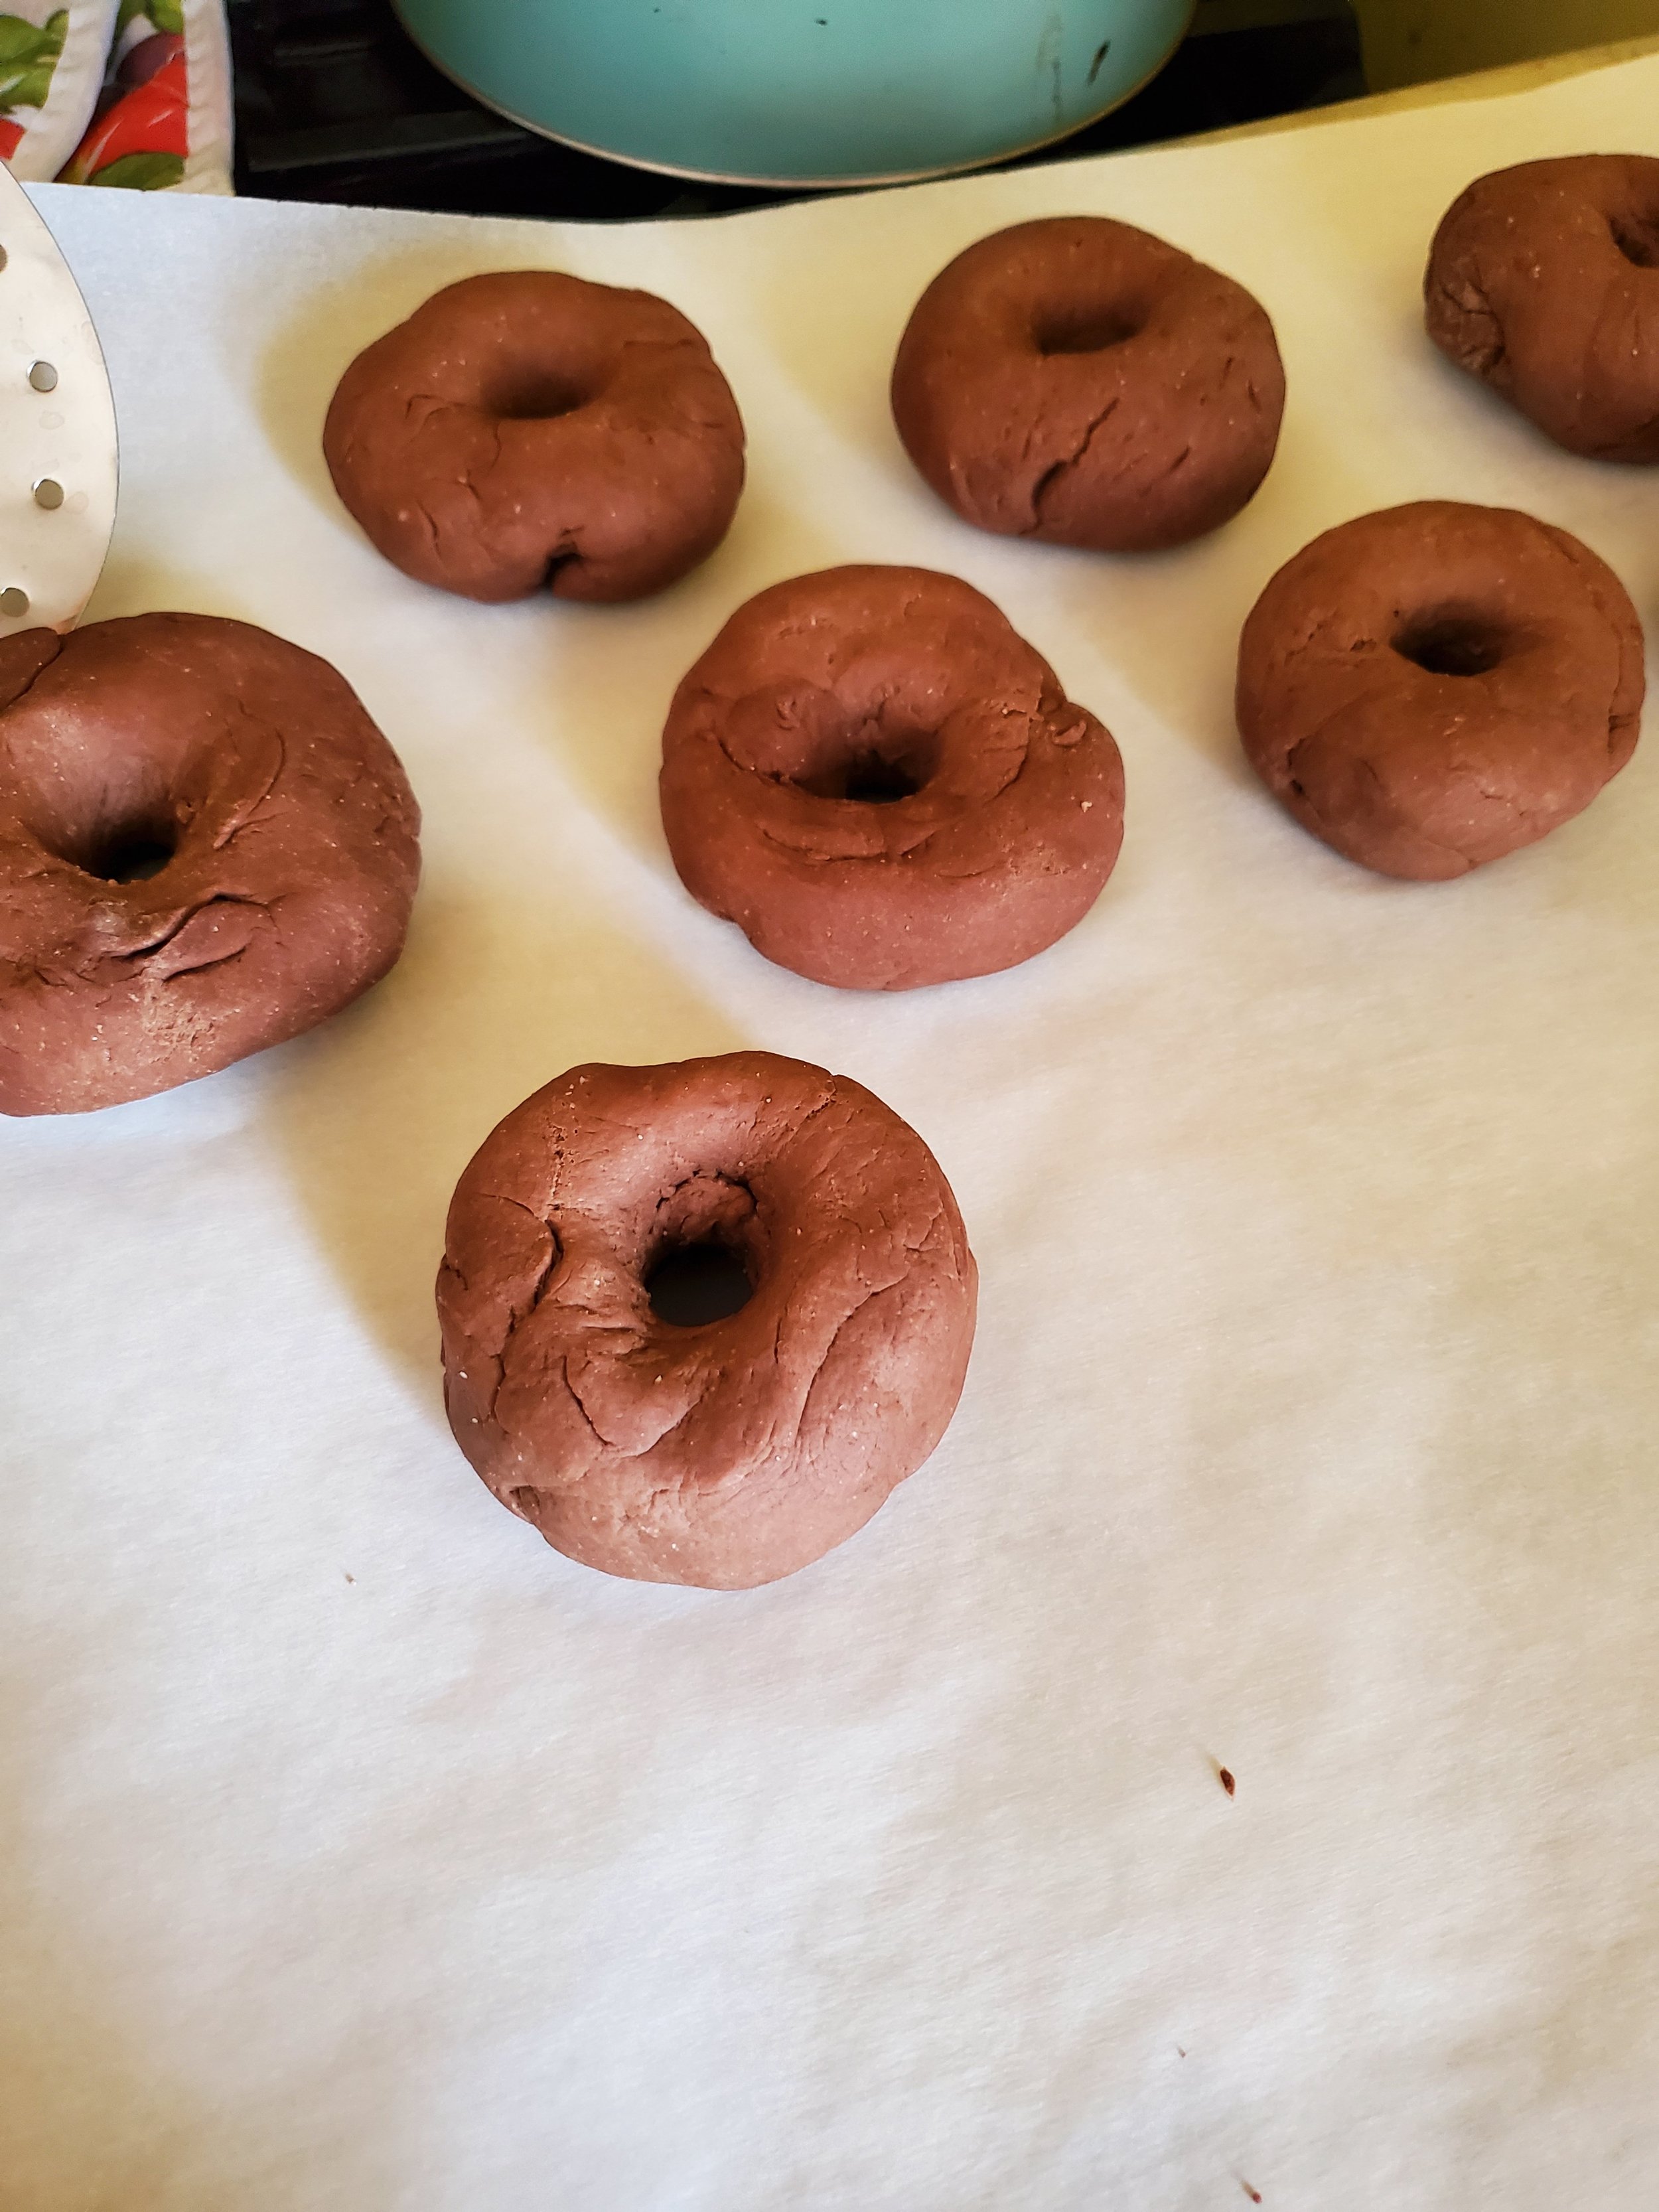
Place each of the dough balls destined to become cookies on the sheet. They don't spread much at all, so as long as there's some space between them to press them, you can really pack them in.


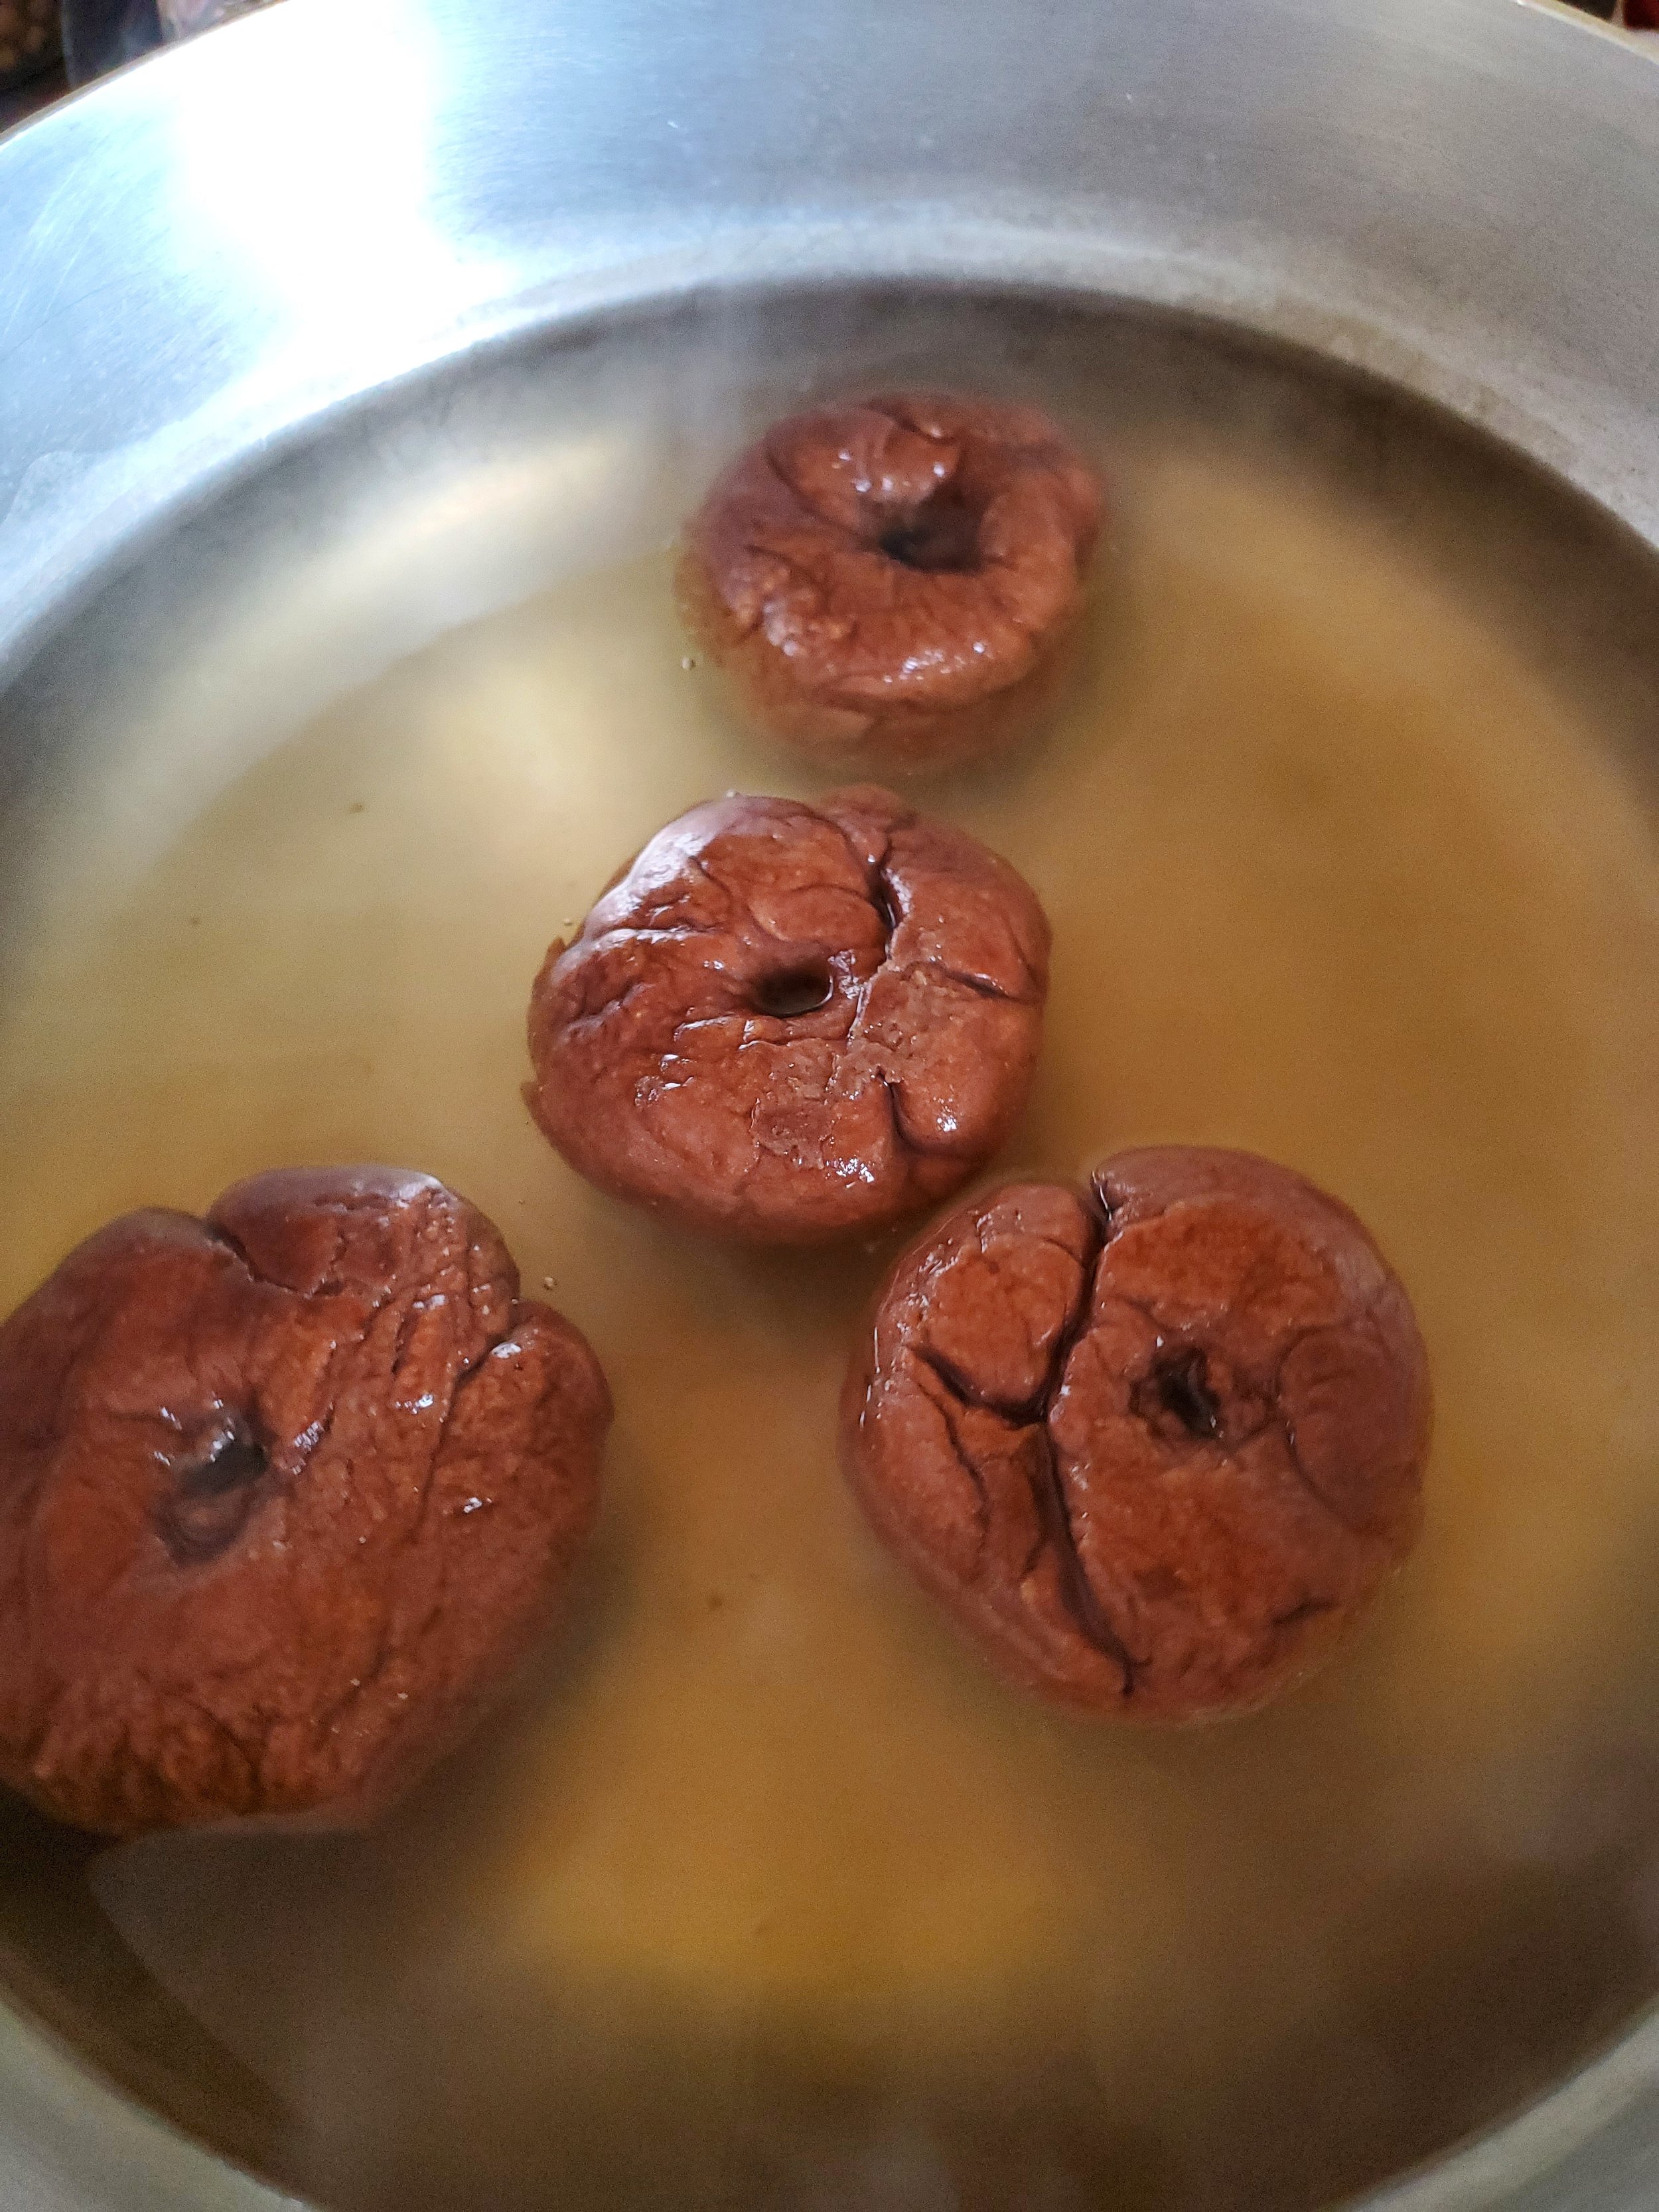
Press lightly on each one with your thumb (or a spoon, or literally anything that will slightly flatten the dough and create a little well for your raspberry preserves). The goal here is to flatten the ball of dough into a thick disc, leaving a little divot in the center that doesn't create a slope to the outside edges of the cookie. If you like runny messes of preserves, that's your business - but we'd very much prefer it stay where we put it. 


Once all the cookies are shaped and ready for the preserves, fill a ziploc bag with the preserves and use something sharp to cut or poke a little hole in one corner. Utilize it like a piping bag, squeezing a little bit of preserves into each cookie. Try not to overfill any of the wells, as they'll make an epic mess if you do.


Place the cookies in the oven and bake for 10-12 minutes. Allow them to cool on the cookie sheet for at least ten minutes before you try to move them - they'll still be very soft when you take them out of the oven, and they'll need that extra few minutes to firm up a little.


We know it's tempting to eat them right away - they smell so good, after all! - but please, please give them time to cool. Otherwise, you'll be like us and burn the roof of your mouth on what feels like molten lava.  


We won’t ask if you’re going to try making them this time. These are too good not to try. So instead, let us know over on our Facebook, what other types of jam do you think you could pair with this? 


Since you wound up here, and you’ve read all the way to the bottom, when was the last time you had a maintenance check for your appliances? If you haven’t done it in at least a year, you might consider having one. Spring and fall are the best times to have your appliances checked out, rather than the chaos of the holidays or the heat of the summer. Getting an experienced technician to walk through all of your problems now can mean your appliances are less likely to fail during the heat of the summer. 


If that type of preparation is something you’re interested in, give us a call ((214) 599-0055) or reach out to us via our contact page. We’ll work with you to set up a time and date that works for your schedule and send out one of our technicians to work with you. At Appliance Rescue Service, our goal is to keep your home running smoothly. 


Places to Avoid: The Paw Version!

Or, Appliances That Your Pets Need to Stay Away From

Appliance Rescue Service has been taken over by the pets! This week we (Murder Mittens the cat and Odie the dog) are talking about our favorite places in the house, the appliances! They offer warm, and cold and food, we can't forget the food! 

Courtesy of Gomez Daniel


Washer


MM: I don't understand why the humans use this one it removes their scent, and then they have ti put it all over things again.  They put their clothes in, the clothes get wet, and then they move them over to another rumbly. 

O: And! They yell at you when you get them wet any other time, even though they also have the rain room that they go into.

MM: That is the bathroom. They put my litterbox in there as well. The wet machine is nice to lay on when it rumbles, but you're right on them griping about getting wet. 

O: I don't like the way everything smells,  but I love watching the clothes tumble round and round.

MM: Of course you do.


Dryer 

O: I hate this one more than the wet machine. It smells and it's hot. 

MM: As usual you have no taste. This one is perfect to curl up inside of when the humans have removed their clothes. You just have to make sure you don't stay in there when they put the clothes back. 

Courtesy of RaGeBe

O: Wait is it that where you go when I want to play?


Oven


O: It's the hot food box!  Humans like to put their food in and then they take it out later and it's a warm and I don't get why they put it in there to make it warm because it's just as good cold but sometimes if you're fast enough you can steal food from it! 

MM: Or if you wait for the right moment you can steal food from it and take a nap inside the warm. It's too hot sometimes, but that is why you are supposed to wait. 

O: And we're not going to talk about how you got your tail singed the one time.

MM: Not if you don't want me telling Ralph where you hid your bone.


Dishwasher 


O: This is my favorite! This one has all of the smells and food, almost every day! 

MM: Yes but the humans always yell at you for standing on it. Whereas I can stand on it and not get caught.

O: And that is just one more reason that I steal your kibble when you're not looking. Anyway, the humans put in the food dishes, and they still have food on them. They don't even lick their dishes clean! And then the machine makes lots of noise and spits steam everywhere - 

MM: Which is the best time to lay on the counter above it.

O: And then when they open it there's no more food! Why do they feed the food to the machine and not to me!


Stove

O: This one is tough Murder Mittens. On one hand, the humans make food up there, lots of food.

MM: On the other hand, even if you can get up to the food, you never know if it's safe.

O: Exactly! It looks like it's the rest of the kitchen but sometimes it's hot and sometimes it's not and sometimes there's fire according to Ralph down the street.

Courtesy of elina-volkova

MM: You trust the Chihuahua? He barks at his own shadow.

O: You have a point. Maybe his has fire but ours doesn't?


Refrigerator

O: The cold box! There is so much food in here and the humans just leave it in there and stare in front of the food as if they expect it to do something. I know the food is dead when they put it in there so why do they stare at it? 

MM: You expect me to be able to explain the humans?

O: No it just doesn't make sense. Anyway this one is also great during the hot months if you're sneaky you can get in there and eat the food and be cold all of the best things in one spot.

Courtesy of luca andrade

MM: As much as I hate it, I have to agree. There's food, there's tight spaces to curl up in, and it is cool when it is unbearably hot outside.


Freezer

O: This one is frustrating. On one hand it's nice and cold when it's hot outside. I love this box. On the other hand it smells like food but everything's frozen and hard definitely not food it's so cruel for the humans to do this. And then they yell at you when you want to stay in there and they put wet things on you. 

MM: The wet things. Perhaps the humans think you don't bathe yourself I certainly don't. As to the cold box, I believe the humans put things here so that they are food for longer like hiding one of your treats so that you can eat it later. 

O: But who would they hide it from? It's not like with my treats and you're going to eat them later. 


A final note from the People of Appliance Rescue Service: Although this has been phrased in a rather light-hearted way these are all places that you want to keep your pets out of for their safety and for the longevity of your appliances. In the event of your pets getting into one of your appliances and you being unable to get them out please make sure to call your vet first and a second. While we love our pets as much as the next person, we are much better at fixing appliances than we are animals. If you want to reach out to us about your appliances, you can reach out to us at ((214) 599-0055) or by heading to our contact page


4 Reasons You Should Not Get a Professional Range

(And 4 Reasons You Absolutely Should)

Have you ever watched the Food Network and thought, "I would love to own a range like that?" For many of the shows on air, 'that' is a professional range. These are larger-than-average oven and stove combinations meant to handle a lot of cooking. There are plenty of reasons that you should not get a professional range for your kitchen, and there are also plenty of reasons that you should. We're going to take a look at a few of each.


Your kitchen is too small. 

Courtesy of meekBASE

Let's face it; professional ranges are large. They're meant to be. They're intended for people who love to cook. If you're working with a galley kitchen or a older home where space is at a premium? A professional range will make the from more crammed, leaving you with even less storage space. The smallest professional range you can get is a 30 in. Which at that point, there's little difference between a professional range and a standard.


You want a ‘straightforward’ range with no fuss. 

If you’re not interested in the various bells, whistles and toys that can come with a professional range, that’s a fantastic reason not to get one!  If all you need is 4 burners and an oven to make the meals you enjoy, why go for something larger? 


You're working on a tight budget.

Although there are a range of options on the market, the starting price for most professional ranges is $10,000. When you consider just how much that can go towards in other areas of a kitchen upgrade or repairing your current range model, spending that amount is only sometimes worth it. If you're working on a tight budget, that amount of money might be better spent on other options.


You don't cook much, or you prefer baking.

If cooking isn't for you, or you prefer baking to cooking on a stovetop, you don't need a full professional range. In the case of the former, a 'basic' range is fantastic, especially when paired with things like multi-cookers and countertop ovens. On the other hand, if you prefer baking to working on a range rather than a balanced blend, a set of double ovens would get you more bang for your buck.


Some people, though, do want a professional range. If that's you, even after the reasons we just listed, let's take a look at some of the reasons you would want one. 


 If you want the space for a grill and griddle without using pans.

If you love grilling all year round, a professional range is for you. If you love making breakfast every morning and want an easier way to do it, such as having a griddle, a professional range might be for you. And if you want to add more of both to your life, all the better!


You love to cook and bake, and you need more space to do it.

If you love an equal balance of cooking and baking, but your current range isn't enough, then a professional grade is a great upgrade. Most professional ranges come with four to eight burners and one to two oven compartments. That is a whole lot of room to do a whole lot of cooking.


You're interested in all the bells and whistles a top-of-the-line range can offer.

Whether you're looking at Wolf, La Cornue, or Miele, or any of the other brands, professional ranges tend to come with all of the bells and whistles. Everything from Wi-Fi connectivity and digital displays to built-in sous vide Chambers and convection ovens.

Appliance Rescue Service, Kitchen repair, appliance repair, oven repair, stove repair, refrigerator repair, washer repair, washing machine repair, ice machine repair, dryer repair, freezer repair, Appliance Repair Service Dallas, Appliance Repair Ser


You want something truly custom.

Photo Courtesy of La Cornue

While this is possible with other types of ranges, professional ranges tend to be even more customizable. From the color and trim to the placement of burners to being able to choose to swap out burners for induction sections, grills, or even wok burners. If you want a truly unique range meant precisely for how you work in the kitchen,  as of right now, a professional is a great way to get it.


What do you think? Are you sold on the idea of getting your own professional range? Let us know over on our Facebook page, as always. We love to hear from you and your thoughts on the matter. 


If you wound up here, though, because your current range is giving you fits, we can help. Whether you have a standard range, a wall oven with a built-in stove, or you already own a professional range, we service it. You can reach out to us via our contact page or by giving us a call at ((214) 599-0055). We'll work with you to find a date and time that fits your schedule and send one of our expert technicians to solve the problem. At Appliance Rescue Service, our goal is to get your home running smoothly again.

Escapee From New York: Chocolate Bagels

Getting Great Bagels Right In Your Kitchen

One thing that’s hard to get in Dallas is an honest bagel. However, it’s our opinion that just because we’re living in Texas, doesn’t mean we can’t have good bagels. This recipe is one we had to tweak a few times before it was ready, but we finally got that delicious chewy texture that is unique to New York bagels.  It’s especially good when paired with a vanilla cream cheese. Even better? You can start your day with it, or have it for dessert!


Ingredients


Day One:

2 1/2 cups flour

2 tablespoons baker's cocoa

4 squares baker's chocolate

2 teaspoons active dry yeast

2 teaspoons kosher salt

1/2 teaspoon xanthan gum

1 cup warm water

2 tablespoons honey


Day Two:

8 cups water

1/4 cup honey


1 egg

1 tablespoon water


Tools: mixing bowl, measuring cups and spoons,  large baking sheet (insulated is best), aluminum foil or plastic wrap, kitchen towel, parchment paper, stock pot or caldera, 

heatproof bowl or shallow pan (to melt chocolate), large slotted spoon, spatula, small bowl, brush


This one is a labor-intensive recipe - don't panic; you can do this! Just be sure you allow yourself enough time to work on it. We recommend you get to work on them at least a day before you plan to serve them. Bagels will rise two separate times, and it's best to leave them overnight on one of those two rounds.


Measure out your flour and move it to the large mixing bowl. Try not to pack it down when you do this.


To the flour, add the baker's cocoa and the xanthan gum. Don't go overboard with the xanthan gum! We know it's only a tiny little bit as compared to everything else, but trust us: a little of this stuff goes a long way.


Add your kosher salt and use a regular spoon to give it a quick stir to incorporate all the dry ingredients.


Start your pan on the lowest heat setting and break your chocolate into it, or snap your chocolate into a heatproof bowl to microwave it. Either way, be ready to stir frequently to avoid burning. Once it's all melted, you can add it to your dry ingredients.


Shift your attention to wet ingredients for a minute. Use a measuring cup to get the proper amount of water. You can start with cold water and heat it up in the microwave if you're using a glass measuring cup, or you can let the tap run warm and then fill the cup if you're more comfortable that way. Just make sure it's not too hot, as too much heat will kill your yeast.


To your water, add your tablespoons of honey and stir until the honey has dissolved. This will only take a few moments, as long as the water is warm enough.


After dissolving the honey, measure the dry yeast into the same cup. The water will wake it up, and it should fizz or foam a little as you stir. (If it doesn't, your yeast has kicked the proverbial bucket. It's much better to have to toss a cup of water and spoonful of honey than the whole bowl of ingredients, which is part of why we're doing things this way.)


Add your remaining wet ingredients to your dry, and stir it around a little until it makes a shaggy-looking dough. It will look uneven and swirly because it's not fully incorporated, but that's okay; you're not done with it. Now you get to use your hands and get messy! 


With clean, dry hands, knead until it comes together into a smooth ball. Remove it from the bowl and then knead some more on a clean counter. We know you're probably afraid of over-working it, but bagel dough is serious stuff. Knead it on the counter for ten minutes. Resist the urge to add water - it's supposed to be stiff. We set a timer on the microwave or a wristwatch to make sure we don't quit too soon (your hands and forearms will probably get a little tired if you're out of shape like we are).


Once you've reached your ten-minute knead time, move the dough back into the bowl. If there are scraps and spots of flour left in the bowl, wipe it out before you transfer the dough; you really don't want the headache of trying to work excess flour in after this rests overnight. Cover it tightly with foil or plastic wrap and place it in the refrigerator. Leave it there overnight and come back to it in the morning.


The next day, remove your dough from the refrigerator, turn it out of the bowl onto the counter, and split it into eight even-sized pieces. Work each piece for a few minutes until it's warmed up and softened, and roll it into a ball. Once you've finished all of them, set them back in the bowl. Cover them with a clean kitchen towel and let them rest for 20-25 minutes while your oven preheats to 425*.


Yes, we said 425*. Yes, that's high. No, you won't burn the bagels.


While your oven warms up, you can take care of a few other little tasks. Grab your parchment paper and line your baking sheet. Get out your stock pot, add your eight cups of water and bring it up to boil. Measure your quarter cup of honey. Whisk your tablespoon of water into the egg. Now take a deep breath, and walk away for a few minutes.


When your timer inevitably summons you back, grab a ball of dough and roll it between your hands. You want to make a disc this time, not a ball (or a log like other recipes may tell you). Put your thumbs in the center as you rotate the dough around, pushing outward gently a quarter turn at a time. After a few turns, your thumbs should be able to push through and create the hole in the center.


Once you have the center opened up, give it a few more turns under gentle pressure to smooth the edges in the center and around the outside of the circle of dough. Be careful to retain the depth you've created - try not to press the dough flat while you work.


When you're satisfied with your bagel shape, place it on the parchment paper-lined baking sheet. We like to keep the sheet next to the oven vent to give the bagels a little last rise (it's a cheater tactic, but fluffy bagels are better bagels).


Repeat until all your bagels have been shaped and smoothed to your liking and transferred to the baking sheet.


Time to check on that pot of boiling water. Assuming it's really boiling and not just simmering, drop in that quarter cup of honey and give it a stir to dissolve. If you can't stir out the boil, your water is hot enough.


Use a slotted spoon to gently transfer your bagels one by one to the hot water. We do them as two waves of four, but adjust according to the size of the pot you're using - as long as they fit without touching each other or the edges of the pan, they'll be fine. Just make sure not to squish them in there.


Let the bagels sit in the boiling water undisturbed for thirty seconds, then use the slotted spoon to flip them and boil the other side for the same amount of time. Lift them carefully out of the water at the one-minute mark and, after letting the excess water drain off, place them back on the parchment-lined baking sheet.


Take up your brush and egg-wash the exposed side of the bagels. It doesn't take much, so start with just enough to lightly coat them. You can add more, but you won't be able to take it away if you overdo it.


Slide them into the oven on the center rack and set a timer for eight minutes. When your eight minutes are up, remove them and check to be sure they're nice and glossy looking. Assuming so, flip them in place, brush the bottoms with egg wash and put them back in for eight more minutes.


After you've reached the end of the second timer, they're ready to go! We recommend letting them rest on the baking sheet or a cooling rack for ten minutes, but they smell so good it's hard to resist splitting them and tossing them right into the toaster and chowing down with a little cream cheese.


Let us know what you thought of this week’s recipe on our Facebook page! We want to hear all of the interesting ways you make these and see how they turn out! 


If you wound up here because your appliances are malfunctioning, give us a ring! You can reach out to us via phone at (214) 599-0055) or by going to our contact page. Wherever you are in the Dallas Metro area, Appliance Rescue Service is here to help. Whether you're in Coppell, Allen, or Plano, we'll work with you to get your home running smoothly again.


Which of These Four Styles is Best For Your Bathroom Renovation?

Which Plan Fits Your Home Needs?

So you're looking at updating your bathroom, or perhaps, you are gutting it completely. Either way, there are design choices that you want to consider before you bring in contractors or designers.

Let's get the basics out of the way. No matter what type of bathroom it is or how you envision it looking, some things will stay the same. You want to know what your budget is. You want to know how much of a safety net you have when those costs inevitably go over. Whether it's due to unforeseen issues, running out of a particular material, or having the project stretch longer than intended. It's always better to have a secondary amount of money you're willing to spend. You will need to research who you want to work with. Who in your area has the skills you're looking for? Who has the necessary licenses and permits? Which brings us to the next point, what licenses and permits do you need in your area? In your blocker's neck of the woods, it has recently been deemed that no one who is not a professional is allowed to do plumbing or electrical work, even to fix a faucet. Knowing what you can get away with on your own or what permits will be needed in order to make changes to your house is vital. Without that, the project delays for even longer, and you want to get down to business. It would be best if you also had a plan for what you want.

Fortunately for you, coming up with that plan is what this article is all about. We're going to look at four different cases that might cause a person or family to redo their bathroom and various features you might look at to fit that particular ideal. 

The Spa Bathroom

First up, we have the spa. This is for the person who loves spending time in their bathroom. This is for the person who enjoys being able to relax and wants their bathroom to reflect that finally. Whether every night, once a week or just once a month. If your ideal place to retreat to, to give yourself some much-needed self-care, is a spa, then this is for you.

Courtesy of PIRO

  • Starting with the floor, look at doing underfloor heating and even cooling since this is Texas.

  • Putting dimmer switches in or purchasing special light bulbs so that you can adjust your lighting

  • Add an oversized tub to soak your worries away. And also be able to use all sorts of bath salts and bath bombs.

  • Put in a walk-in shower with a built-in bench to soak under the water after a long day.

  • While you're at it, either a waterfall shower head or having multiple shower heads from different directions is a treat that should not be missed. You can even ensure that the shower heads have Bluetooth capabilities so you can put on relaxing music.

  • A towel warmer is a luxury, especially in the middle of a cold snap. 

The Family Bathroom

Next, let's take a 180° turn to a family bathroom. If you have a large family of children, it's not always possible to give everybody their own bathroom. Sometimes it makes the most sense to put all of the kids to sharing one bathroom. With that in mind, there are several features that take this from a Gordian knot to merely a Herculean effort.

Courtesy of Michal Jarmoluk

  • Design a family bathroom from the ground up for cleaning. It will save you a headache later.

  • Make sure to install an exhaust fan to prevent mold buildup when you have showers one right after another.

  • Ensure the grouting is tight and your floor is sealed correctly. Not only does this prevent anything from breaking or pieces from getting ripped up, but it also makes cleaning much easier.

  • Consider baseboard lighting so that it's easier for everyone to find their way at night without having to turn on super bright lights. Baseboard lighting is fantastic, in our opinion, and it means you don't wake up half the house. 

  • Prioritize the storage that you have, and be bold and creative with creating new areas that work for your needs. 

    • Putting a shower stand in one corner of the shower means that you don't have different products over every edge of the tub and falling onto the floor if they get bumped.

    • Inside the cabinets, you have to make sure to maximize your vertical space. This can mean everything from having different baskets for different purposes to utilizing stacking boxes and shelves.

    • And since you're redesigning, the spaces between studs can be turned into narrow nooks for storage. We've seen this put to Great use for giving every child their own cubby for their towels, robes, and grooming products.

The Host Or Hostess’s Bathroom

You may not have a house full of children at this point, but you may have family and friends that visit often. For the host or hostess, a proper bathroom would look different. Instead of being a catch-all for keeping your family healthy and clean, it becomes a place to ensure your guests have all that they need during their stay.

Courtesy of La Belle Galerie

  • You'll want an all-in-one shower as well as a deep tub. You can add on mood lighting to the shower head or get one with a Bluetooth speaker to make the experience relaxing for your guests.

  • A smart mirror that allows for increasing or decreasing light by voice command is fantastic for giving your guests a private area to get dressed for whatever the day might hold. They are also able to tell the weather!

  • Having a fully equipped first aid cabinet. While we never want our guests to need it, having a stocked cabinet on hand ensures that whatever your guests might need, you're prepared. 

  • Putting in storage for plenty of oversized towels, wash clothes, bed linens, and robes. Having a cabinet like this ensures that not only can your guest make themselves comfortable, but they don't have to feel that they're bothering you if they need something in the middle of the night.

The Utilitarian Bathroom

If the other three haven't looked like you, you might be looking for something more utilitarian. For when you're done working on your latest project, be it metal, wood, paint, or any other messy endeavor. You may like to work on old cars and need a bathroom that isn't the same as the main house one. A utility bathroom would be more your speed. 

Courtesy of Amie Foster & Apartment Therapy

  • For that, we start off by recommending a curbless shower. This is a shower that has a linear drain at the back edge to make it easier to drain. It also means that there is no separation between you and the rest of the bathroom, be it curtain or door. Not only does this maximize the size of your shower, but in this case, it means you aren't tripping over something if you need to rinse something off immediately.

  • Having a solid counter with a deep stainless steel sink and a high faucet is another consideration if you regularly work with messy, staining, or caustic materials. Ensuring that you also have plenty of counter space around that sink means that you can put any specialized soaps in easy reach without having to hunt for them when you're in need.

  • It's also handy to have a separate and dedicated washer and dryer in the same room. This way, as you get clean, the clothes you were wearing can as well.

  • Putting a secondary sink next to your washer and dryer is an easy way to leave clothes to soak if you get anything on them that you'd rather not keep. 

  • Installing an exhaust fan in this bathroom is another necessity, not only for keeping mold out but also for airing out the room.

  • Installing either a solid floor, such as polished concrete that is then sealed, or installing large tiles that need very little grout, makes it much easier to clean a bathroom like this. With that, you could run a hose from either sink and wash everything towards the drain that you already have in the shower.

These are only some of the possibilities for what you might want in your bathroom. You might focus more on bringing in a sauna or mixing together two of the ideas. There's nothing that says you can't have a utility-oriented bathroom with a bit of spa thrown in there. Whatever you decide, let us know over on our Facebook page. As always, we love to hear from you.

If your washer and dryer that you have are giving you trouble and are perhaps smoking or flooding the space that they're in currently, give us a call. We service everywhere from Addison to McKinney, from Dallas to The Colony. You can give us a call at ((214) 599-0055) or by heading over to our contact page. We'll work with you to set up a time and date that fits your schedule for when our technicians can come and help. Appliance Rescue Service is always focused on getting your home running smoothly again.