Dessert

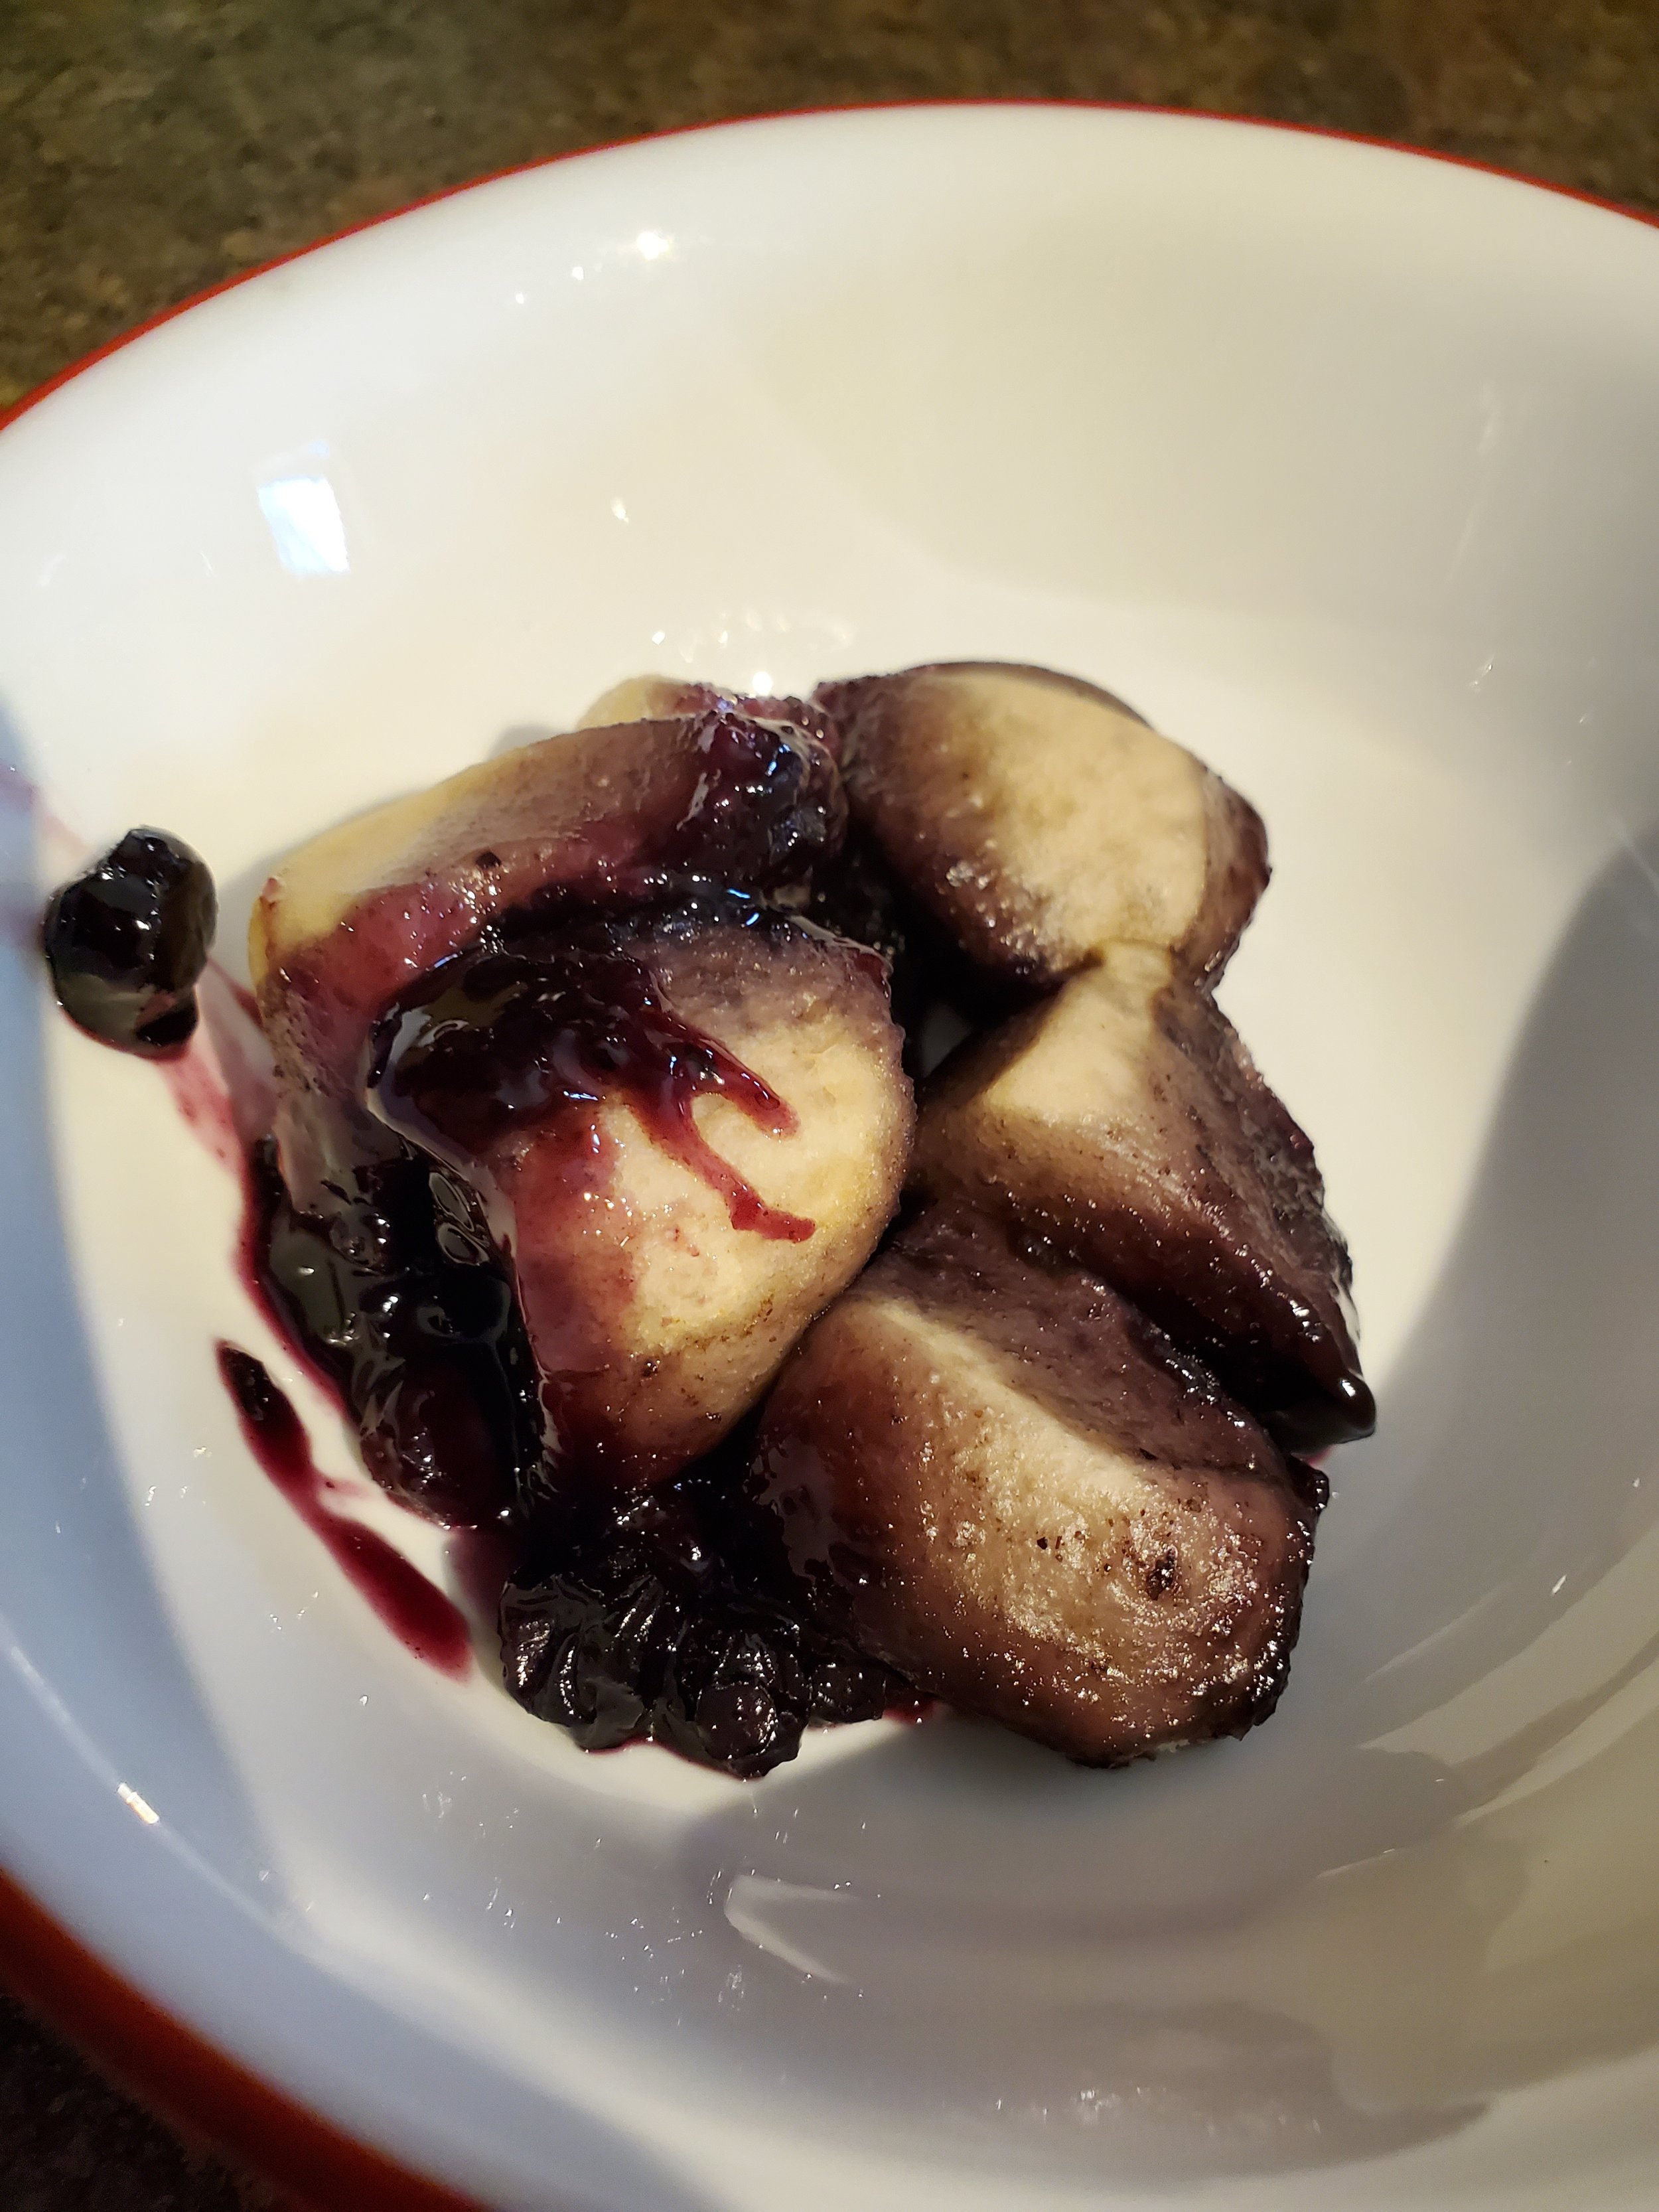
Purple People Eater Pieces

A Frightfully Fruitful Crumble From The Crypt

As we move closer to the best holiday of the year (no objections! - they'll just fall on deaf ears), it's time to start looking at creepy party recipes to feed a crowd of little ghouls, gremlins, goblins, or what have you.


Every year we try to conjure up at least one new spooky recipe. This year's is a dessert - purple people eater pieces.


It's a little bit pie and a little bit dump cake, and it's also a whole lot of mess if not carefully contained. So do be cautious in serving this one to littles or the spill-prone.


Ingredients:

1 1/2 cups frozen blueberries

1/2 cup frozen dragon fruit

1/2 cup brown sugar

1/2 cup water

1 teaspoon lemon juice

1/4 teaspoon five spice

1 container refrigerated biscuit dough


Tools:

large covered pot or Dutch oven

bowl

spoon

measuring cups and spoons

knife

cutting board


Begin with your blueberries - just scoop them out into a bowl. Your measurement doesn't have to be exact. Just get somewhere in the ballpark of a cup and a half.


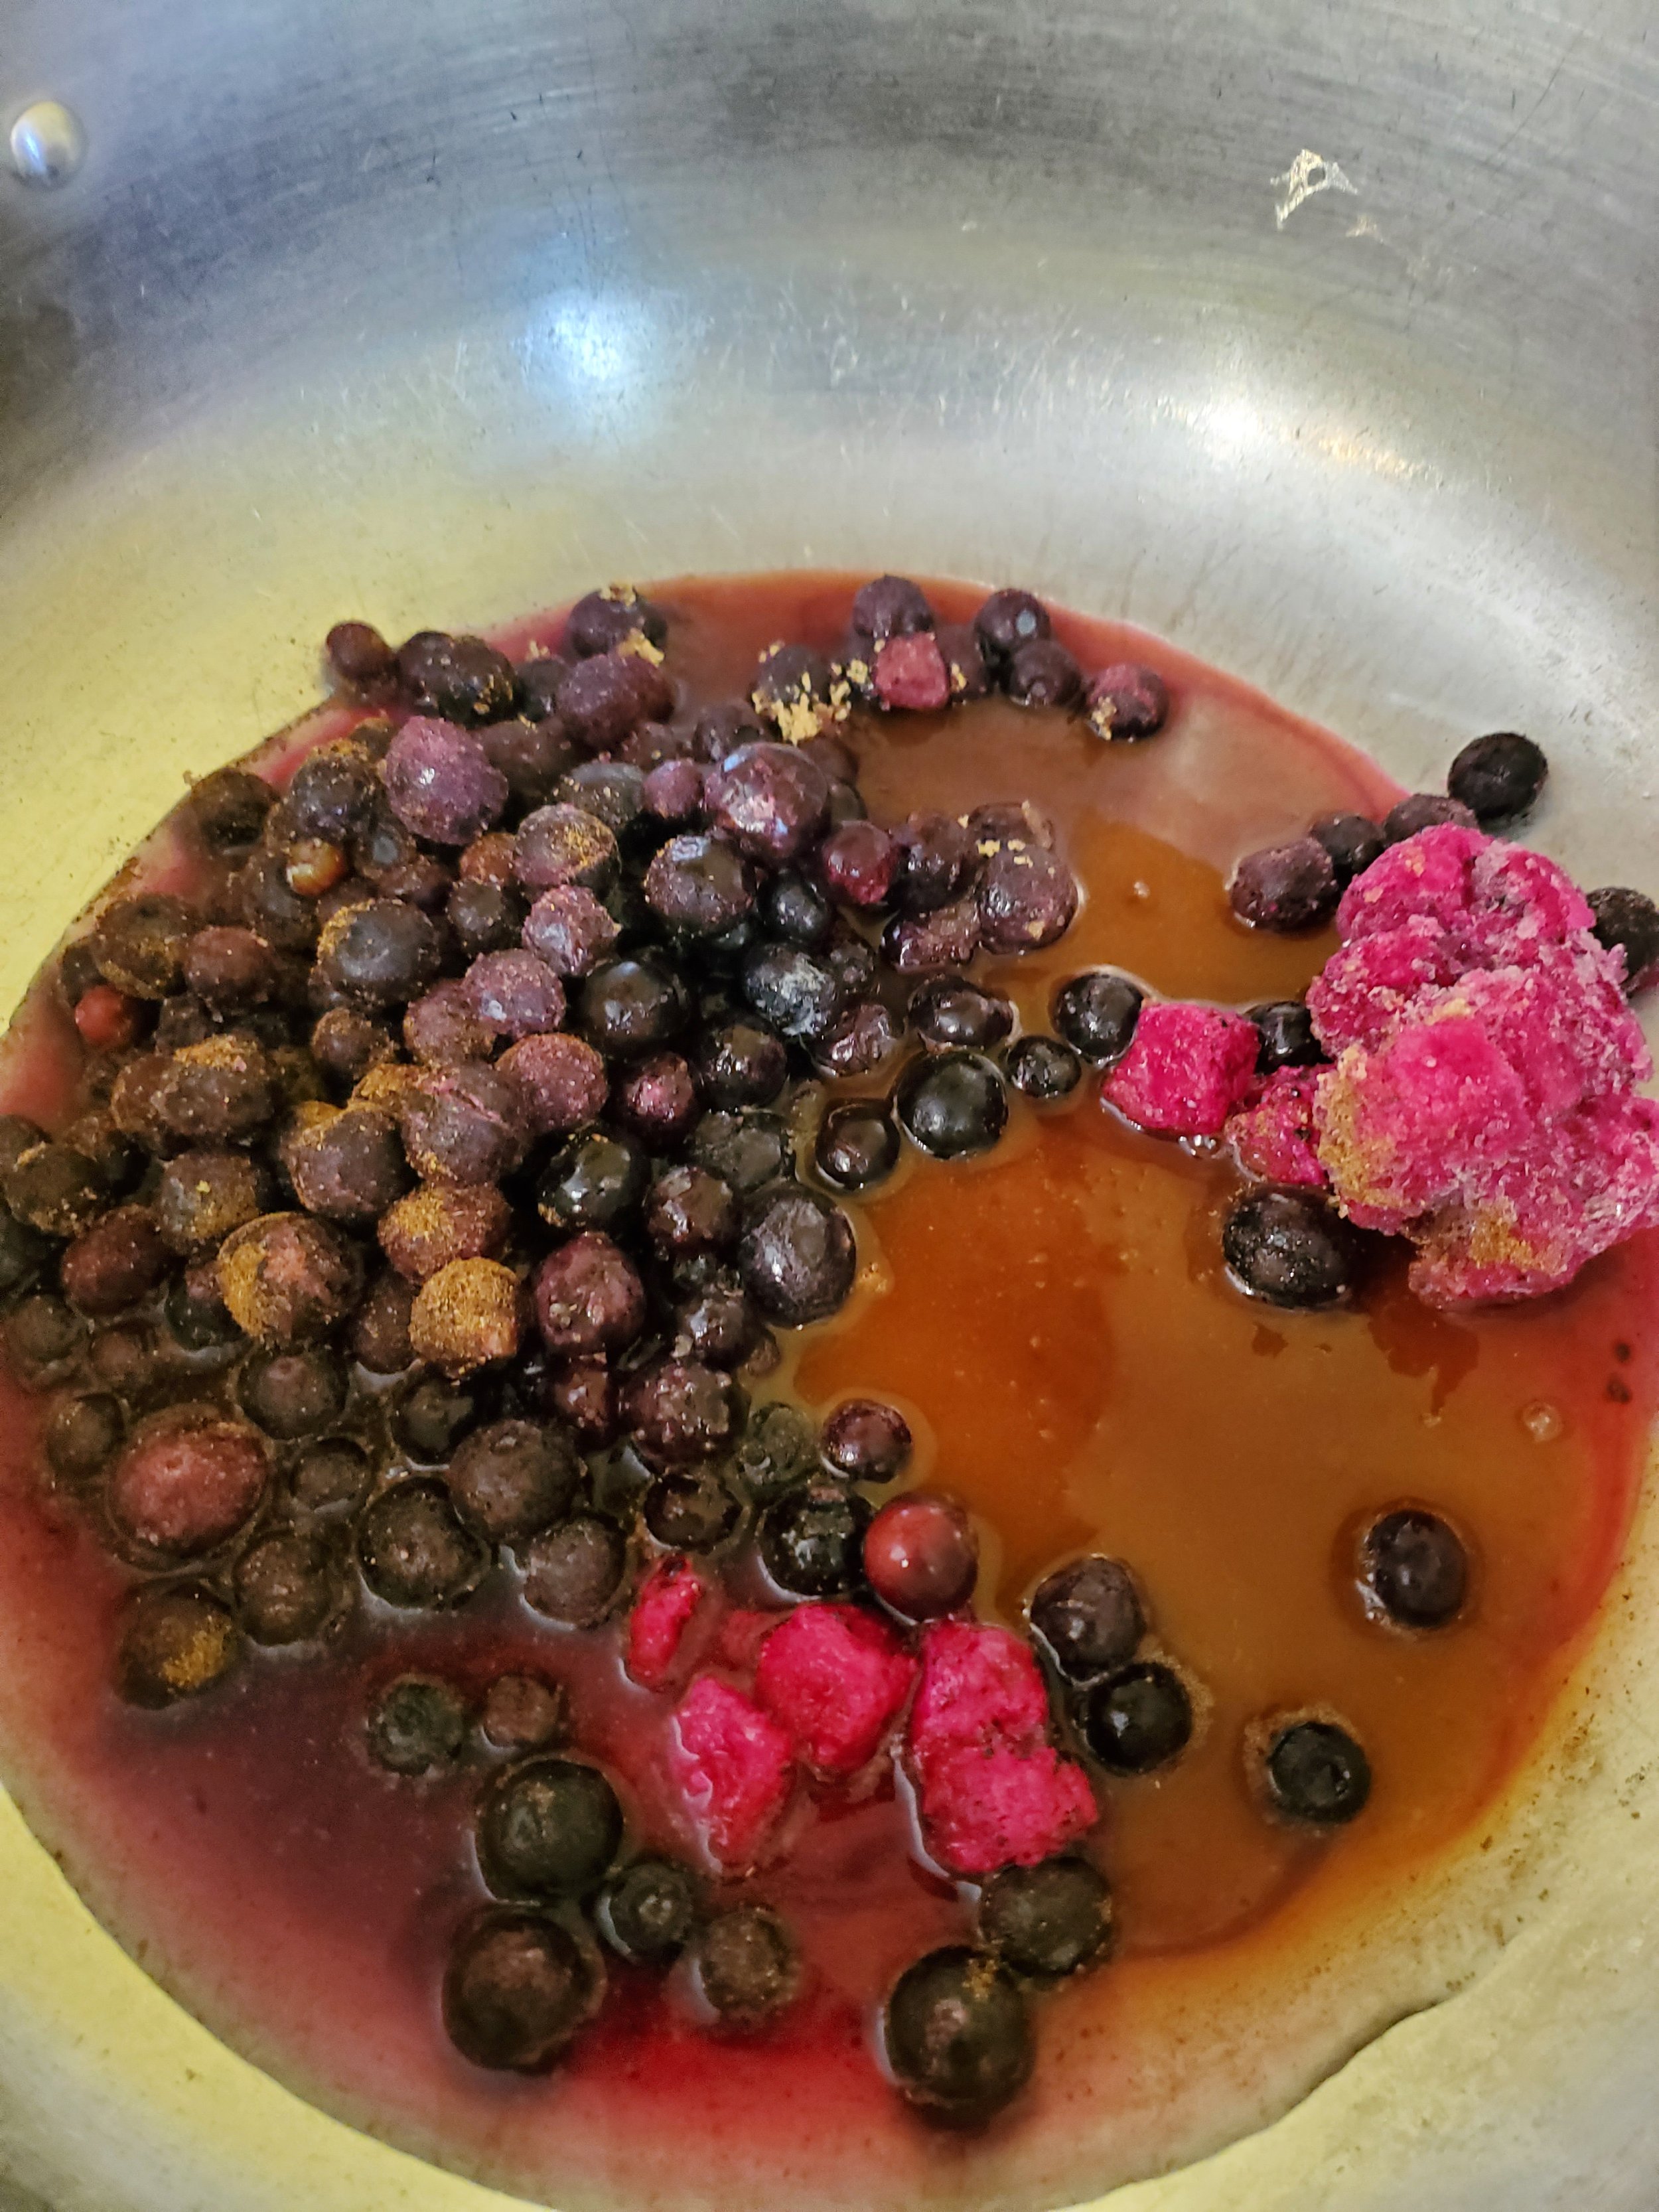
Add the dragon fruit pieces to the blueberries. We know dragon fruit is not something you find in the produce aisle on a regular basis, but even in the middle of nowhere we were able to pick some up frozen at a big box store. We've also had the opportunity to grab fresh dragon fruit at a local family grocery store. If you don't have the same luck, fear not! Any red- or pink-hued fruit can sub in. Strawberry, cherry, cranberry, pomegranate, guava... Just know the color may not be so vibrant. Dragon fruit is rather exceptionally in-your-face pink.


Measure in your brown sugar and your five spice. We know the five spice doesn't look like much, but just a little of this stuff makes an impact. You'll know it's there.


Dump the bowl into the dutch oven. Measure the water into the same bowl to take up as much of the sugar, spice and fruit juice as possible, and pour it over the fruit and spices in the pan.


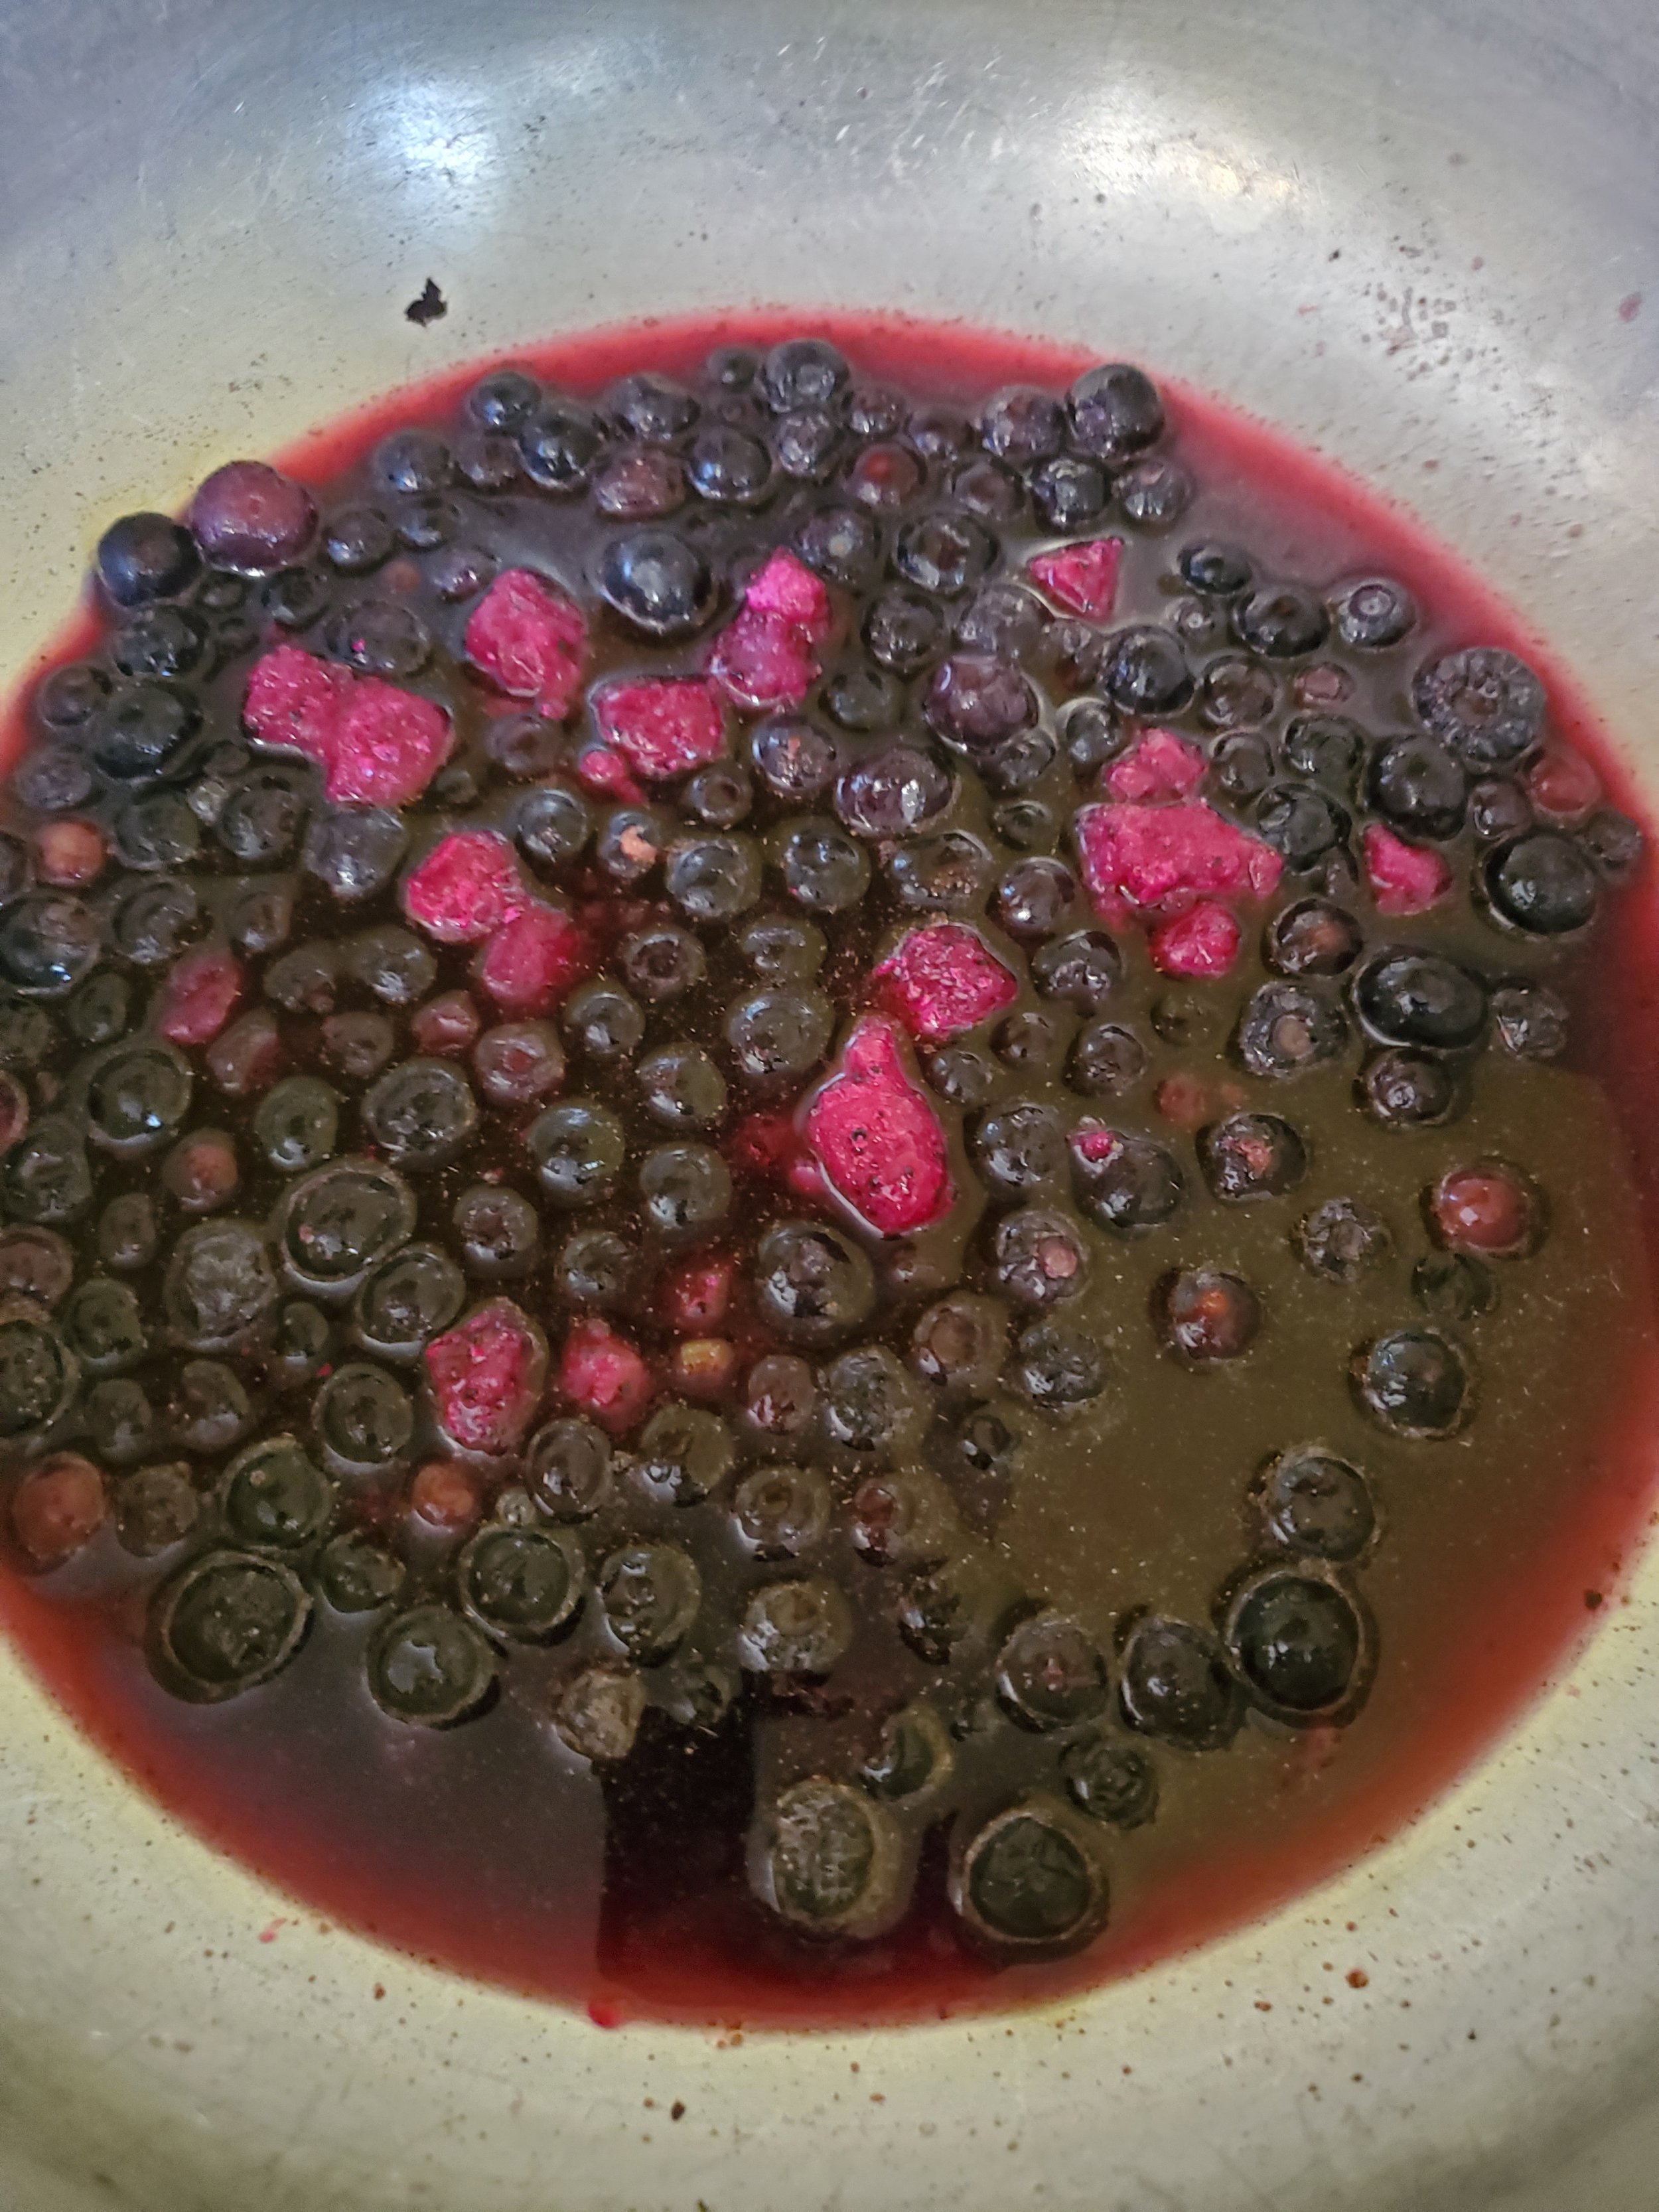
Turn the heat on low and give everything in the pan a good stir. The sugar should dissolve right off the bat, but it will take a bit for everything to heat through.


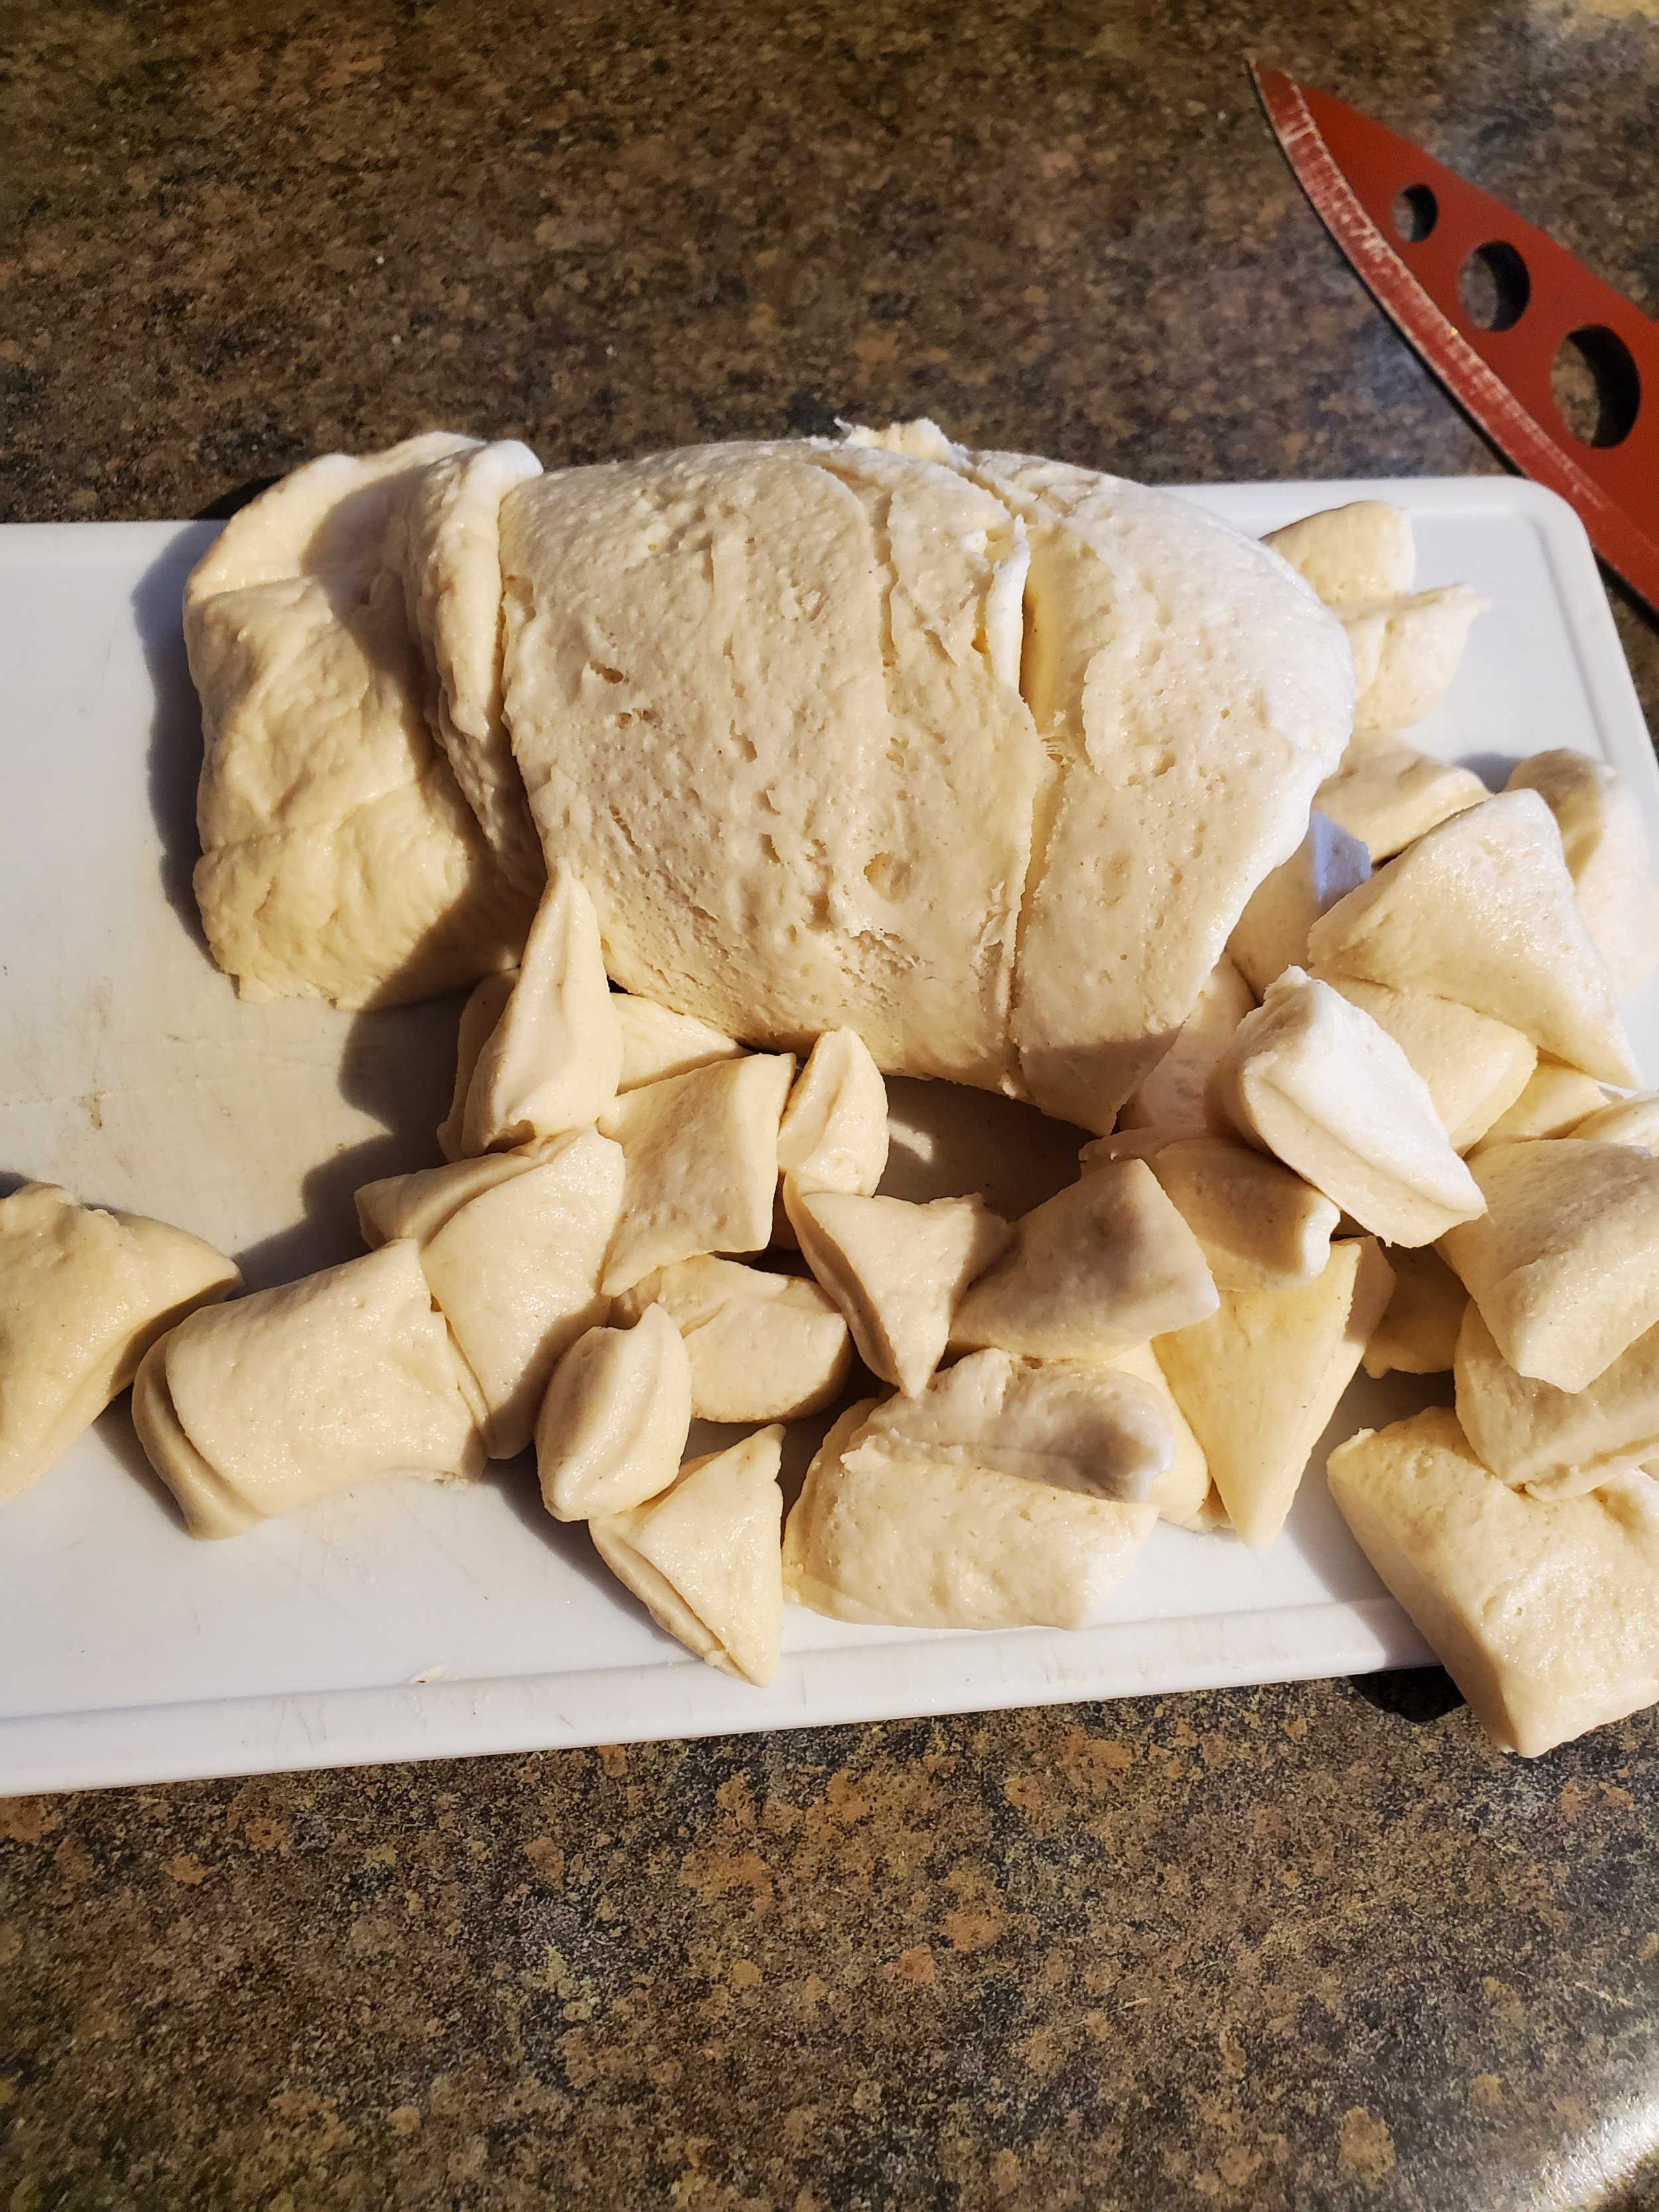
While waiting for it to come up to a simmer, grab your biscuit dough and pop the container open. Split them apart and put them on the cutting board, and cut your biscuits into pieces. We start with roughly quarters, then trim down a little from there. In our experience, there's always one biscuit in the package that's about three times the size of the rest on one side and squished down paper thin on the opposite. That one gets cut into a great many awkwardly shaped chunks.


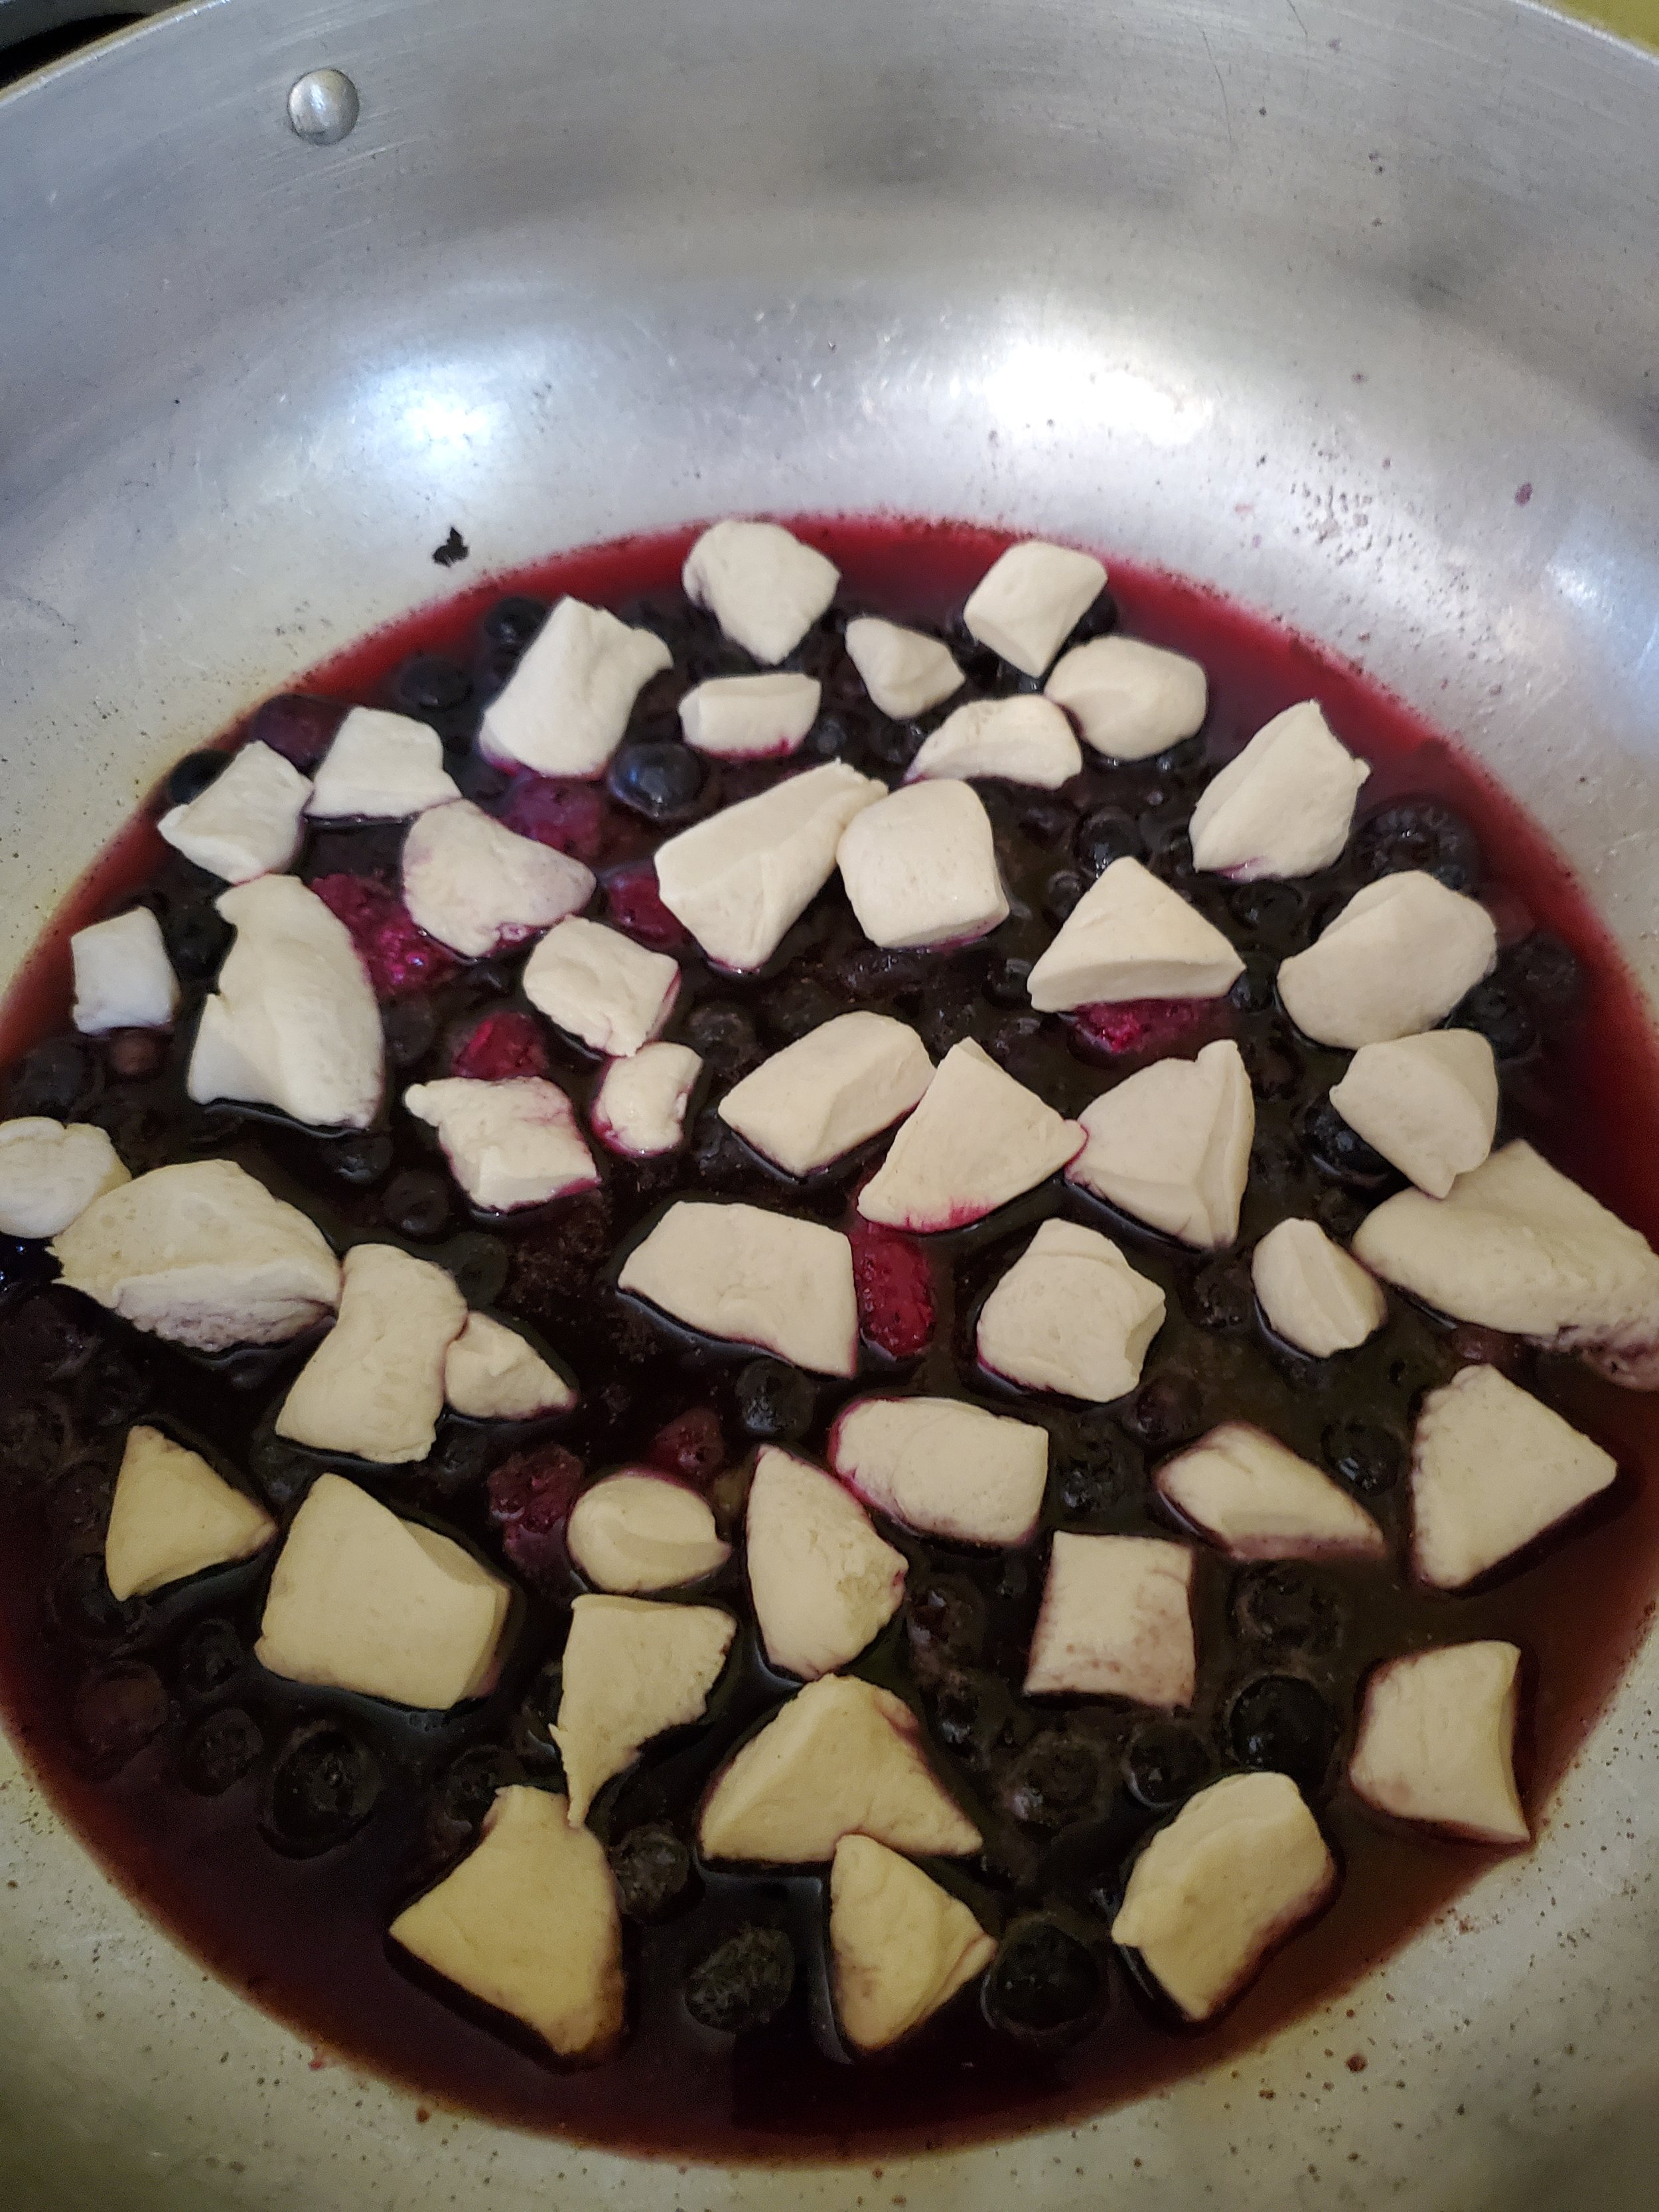
Give the contents of the pan one more good stir, then drop your funny-shaped biscuit pieces on top of the fruit mixture. From this point on, do not stir.


Once you have your biscuit dough on top of the fruit, increase the heat to medium-low. Cover the pan and allow it to simmer untouched for 15-20 minutes. Stay close to the pan - the smell is the best indicator of when it's done. If you can smell the fruit and spices getting fragrant without lifting the lid on the pan, it's close to done. If you have a clear glass lid that's not too fogged up, it should look syrupy between the pale biscuit pieces.


When you feel like it's ready, turn the heat off and lift the lid. Allow it to breathe and set for five minutes before serving.


Serve in heaping scoops, with or without a little ice cream.


As our spooky culinary adventure comes to a delicious conclusion, we hope you've enjoyed crafting and savoring "Purple People Eater Pieces" as much as we've relished sharing this unearthly treat with you. Let us know over on our Facebook page how it was received! 


Halloween is a time for enchanting flavors and mysterious gatherings, but it can also be a season of unexpected surprises. If, amid the spectral celebrations, you find yourself in need of a visit from one of our trusted repair technicians at Appliance Rescue Service, don't hesitate to reach out at our website or by giving us a call ((214) 599-0055). Just as we've crafted this bewitching dessert to delight your taste buds, our skilled technicians are ready to ensure your appliances continue to perform their culinary magic, ensuring your celebrations remain seamless and your spooky feasts flawless. Wishing you a hauntingly good time this Halloween season!


Additional Reading:

Chocolate Pecan Cake for a Special Date


Sweet Veggie Tropical Curry


Easy No-Cook Not Quite a Cannoli

When You Want The Treat, But Can’t Work In The Heat

Looking for a sweet treat that is easy to make and will impress your friends and family? Look no further than this not quite cannoli recipe! While it may not be the traditional version of the beloved Italian dessert, it is a delicious and fun twist on the classic. With a crispy shell and creamy filling, this dessert is sure to satisfy any sweet tooth. Plus, it can be customized with your favorite flavors and toppings for a truly unique dessert experience. So why not give it a try and see for yourself how delicious not quite cannoli can be!


Ingredients:

15 oz container ricotta cheese

3/4 cup confectioners sugar

1/2 teaspoon almond extract

1 teaspoon vanilla extract

Pinch table salt

Pinch ground cinnamon

Pinch corn starch

Chocolate chips

Ready-made chocolate chip cookies (large)


Tools:

Fine mesh sieve

Spoon

Plastic wrap 

Two decent sized mixing bowls

Small plate

Something sort of heavy

Measuring spoons

...time. More time than you think.


Before you begin, know that while this recipe is a no-cook one, it does not like to be rushed. If you're looking to get the whole thing done by dessert tonight, you should probably get started at breakfast. That ricotta is going to take what feels like forever to drain. 


On a related note, do not skip that draining step. Skipping it yields watery, runny, thin cannoli filling. Thin filling does not stay in place and makes awful sandwiches. It also doesn't taste right. Save yourself the trouble.


Once you have all your ingredients out and ready to go, pop the lid and plastic cover off the ricotta. Before we do anything else, this is going to have to do its own thing. Please note it looks like a congealed, wet lump of cheese right now, and we're going to have to encourage it to change these characteristics. 


Nest the sieve into one of the bowls so it can catch the drained whey. Stir the ricotta while it's still in the container, then scoop it out into the sieve. If you have a cheese cloth, feel free to use it to line the sieve and wrap the ricotta - but in our experience, most people don't keep one in their kitchens. 


Gently press the ricotta into the sieve and smooth out the top. (If you're squeezing cheese through the sieve, you're pushing too hard.) Set a layer of plastic wrap over it and place a small plate on top of the plastic wrap to press the cheese. Let it sit for half an hour or so and check back to see if any of the whey is working its way out to the bowl.


Once you're sure it's working, you can add some weight to speed up the process - we put a pound of dry chickpeas on top of the plate, since they were both comparatively heavy and handy.


Now you can go do something else. For a while. Think at least three, possibly up to five episodes of your favorite show.


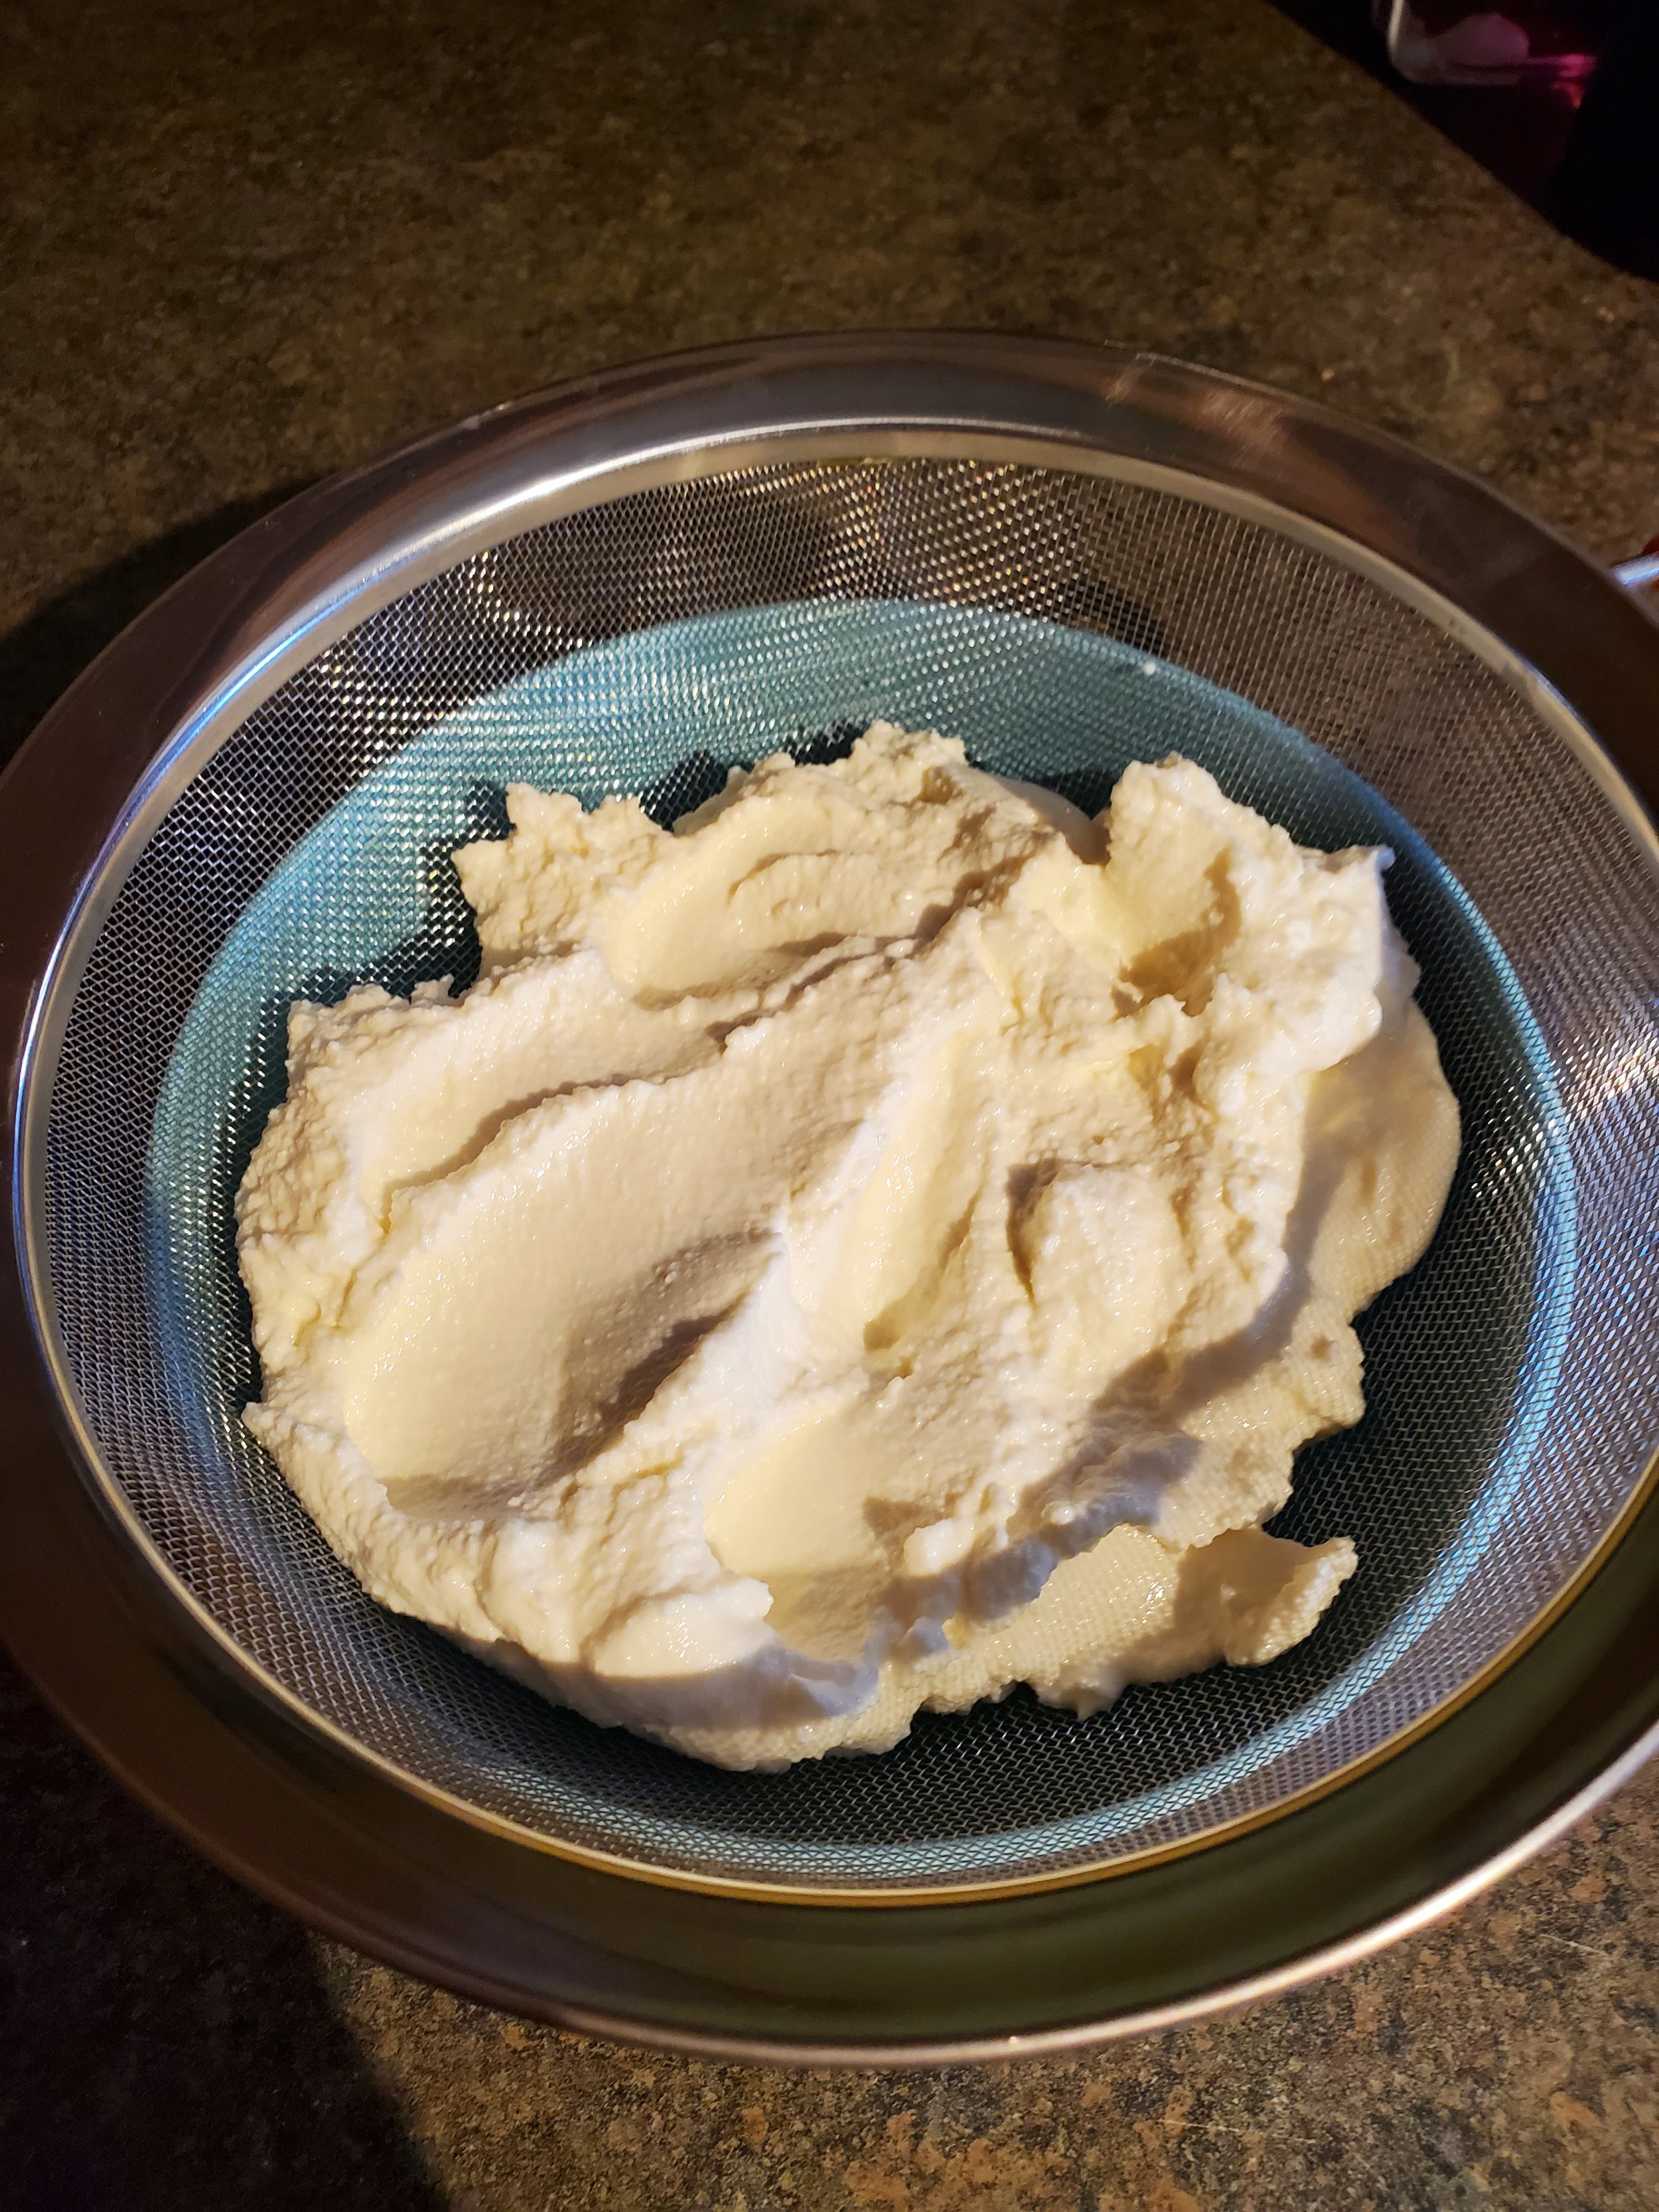
After a couple hours, you'll stop seeing the amount of whey in the bowl increase, and the ricotta will have taken on the consistency of crumbly-looking curds. This is when you know it's ready to be moved to the other bowl you took out.


Remove your weight, plate and plastic wrap if you haven't already done so. If you used a cheese cloth, lift the edges of it to transfer the cheese - but if not, just upend your sieve over the clean bowl and scrape it free with a spoon.


Measure your extracts into the ricotta and stir well. The vanilla will lend it kind of an off-white color. Stir in your salt and cinnamon, then slowly add your confectioner's sugar a little at a time, stirring to completely incorporate it before you add more.


When you've added all the confectioner's sugar, scoop up some of the cannoli filling with the spoon and tilt it back over the bowl. If it's slick enough to slide off the spoon, it's not yet the right consistency and you'll need to add in the corn starch (or more confectioner's sugar, but in our opinion that makes it much too sweet). Don't add much, and be absolutely sure there are no lumps before you add it. Stir very thoroughly. 


Once your filling no longer slides right off the spoon, it's ready for chocolate chips. Add as much or as little as you'd like. We usually start with about a quarter cup and add from there - but for the sake of full transparency, we rarely ever actually measure chocolate unless it's to melt. We just add until it looks right.


Stir it all well, and go get those cookies you set aside this morning and warned the whole house not to touch. This, of course, assumes your family follows instructions (this one struggles, especially with sweets-related instructions) and left you the cookies.


Scoop a heaping tablespoon of filling and drop it in the middle of the flat side of one of the cookies. Use the back of the spoon to spread it out a bit. Don't be afraid to add more if it looks like the cookie can support it. Slap another cookie flat side down on top of it, and go enjoy your hard-earned cannoli cookie sandwich.


You’ve read this far, so let us know over on our Facebook page what you think! Are you going to try this one out? 


If you’re looking up no-cook recipes because your stove or oven aren’t working, we can still help! You can reach out to us via our contact page or by giving us a call at ((214) 599-0055). Whether you’re in McKinney, Garland or Coppell, you can call on Appliance Rescue Service whenever you need us. 


Chocolate Raspberry Thumbprints

The Best Cookies for Any Bake Sale


Sometimes the weather just calls for cookies.


While it is very firmly spring now, we sometimes get late cold fronts and even ice storms into April, where we are. We've had hard freezes as far into the year as mid-May, even. And cold days like that are an excellent excuse to make cookies. 


This time we ran a little short on butter and had to get creative. So we combined the idea of cream cheese snowball cookies and shortbread thumbprint cookies and ended up with this sweet little hybrid: chocolate cream cheese thumbprint cookies.


Ingredients:

1 8 oz block cream cheese

1/2 stick butter

1 egg

1/4 c bakers cocoa

2 1/4 c all-purpose flour

1 c sugar

1/2 tsp almond extract

2 tsp vanilla extract

2-3 tbsp raspberry preserves


Tools:

Cookie sheet

Parchment paper

mixing bowls

microwave safe dish or saucepan (to melt butter and cream cheese)

measuring cups and spoons

spoon

ziploc bag

toothpick or scissors or sharp knife


Before we get started here, you should know that two of your ingredients are going to be your problem children. The butter and the cream cheese are going to be solid when you start out, but they really need to be liquid in order to do their jobs here. So we need to melt them - carefully. Most people use the microwave to accomplish this, but we have had terrible luck with that in the past (think exploding and/or scorched edges and untouched centers despite careful timing and frequent stirring). We prefer to use the stovetop and a saucepan over the lowest possible heat and stir every minute or so.


Cream cheese does melt, it's just stubborn. This is definitely not a recipe where you can substitute in cream cheese's lower-fat sibling, Neufchatel cheese. Leave it over the heat until you have no more lumps. You'll need to be extra patient with this step, sorry.  


As with any doughy recipe, mix your wet ingredients in one bowl (be sure to break the yolk on the egg, you want it to incorporate fully) and your dry ingredients in another. This helps prevent finding big lumps of crumbly, un-mixed flour or globs of sticky egg when you go to work the dough into individual cookies.


Stir together the contents of your two mixing bowls in the larger of the two bowls. Don't overdo it, because the cookies will be tough if you get carried away.


Once everything is mixed well, divide your dough into 36 balls. We know, three dozen feels like a weird number to shoot for, but it's what our test batch turned out to have after we split off comfortable serving-sized pieces.


Put down a layer of parchment paper on your baking sheet and preheat your oven to 375 degrees.


Place each of the dough balls destined to become cookies on the sheet. They don't spread much at all, so as long as there's some space between them to press them, you can really pack them in.


Press lightly on each one with your thumb (or a spoon, or literally anything that will slightly flatten the dough and create a little well for your raspberry preserves). The goal here is to flatten the ball of dough into a thick disc, leaving a little divot in the center that doesn't create a slope to the outside edges of the cookie. If you like runny messes of preserves, that's your business - but we'd very much prefer it stay where we put it. 


Once all the cookies are shaped and ready for the preserves, fill a ziploc bag with the preserves and use something sharp to cut or poke a little hole in one corner. Utilize it like a piping bag, squeezing a little bit of preserves into each cookie. Try not to overfill any of the wells, as they'll make an epic mess if you do.


Place the cookies in the oven and bake for 10-12 minutes. Allow them to cool on the cookie sheet for at least ten minutes before you try to move them - they'll still be very soft when you take them out of the oven, and they'll need that extra few minutes to firm up a little.


We know it's tempting to eat them right away - they smell so good, after all! - but please, please give them time to cool. Otherwise, you'll be like us and burn the roof of your mouth on what feels like molten lava.  


We won’t ask if you’re going to try making them this time. These are too good not to try. So instead, let us know over on our Facebook, what other types of jam do you think you could pair with this? 


Since you wound up here, and you’ve read all the way to the bottom, when was the last time you had a maintenance check for your appliances? If you haven’t done it in at least a year, you might consider having one. Spring and fall are the best times to have your appliances checked out, rather than the chaos of the holidays or the heat of the summer. Getting an experienced technician to walk through all of your problems now can mean your appliances are less likely to fail during the heat of the summer. 


If that type of preparation is something you’re interested in, give us a call ((214) 599-0055) or reach out to us via our contact page. We’ll work with you to set up a time and date that works for your schedule and send out one of our technicians to work with you. At Appliance Rescue Service, our goal is to keep your home running smoothly. 


Escapee From New York: Chocolate Bagels

Getting Great Bagels Right In Your Kitchen

One thing that’s hard to get in Dallas is an honest bagel. However, it’s our opinion that just because we’re living in Texas, doesn’t mean we can’t have good bagels. This recipe is one we had to tweak a few times before it was ready, but we finally got that delicious chewy texture that is unique to New York bagels.  It’s especially good when paired with a vanilla cream cheese. Even better? You can start your day with it, or have it for dessert!


Ingredients


Day One:

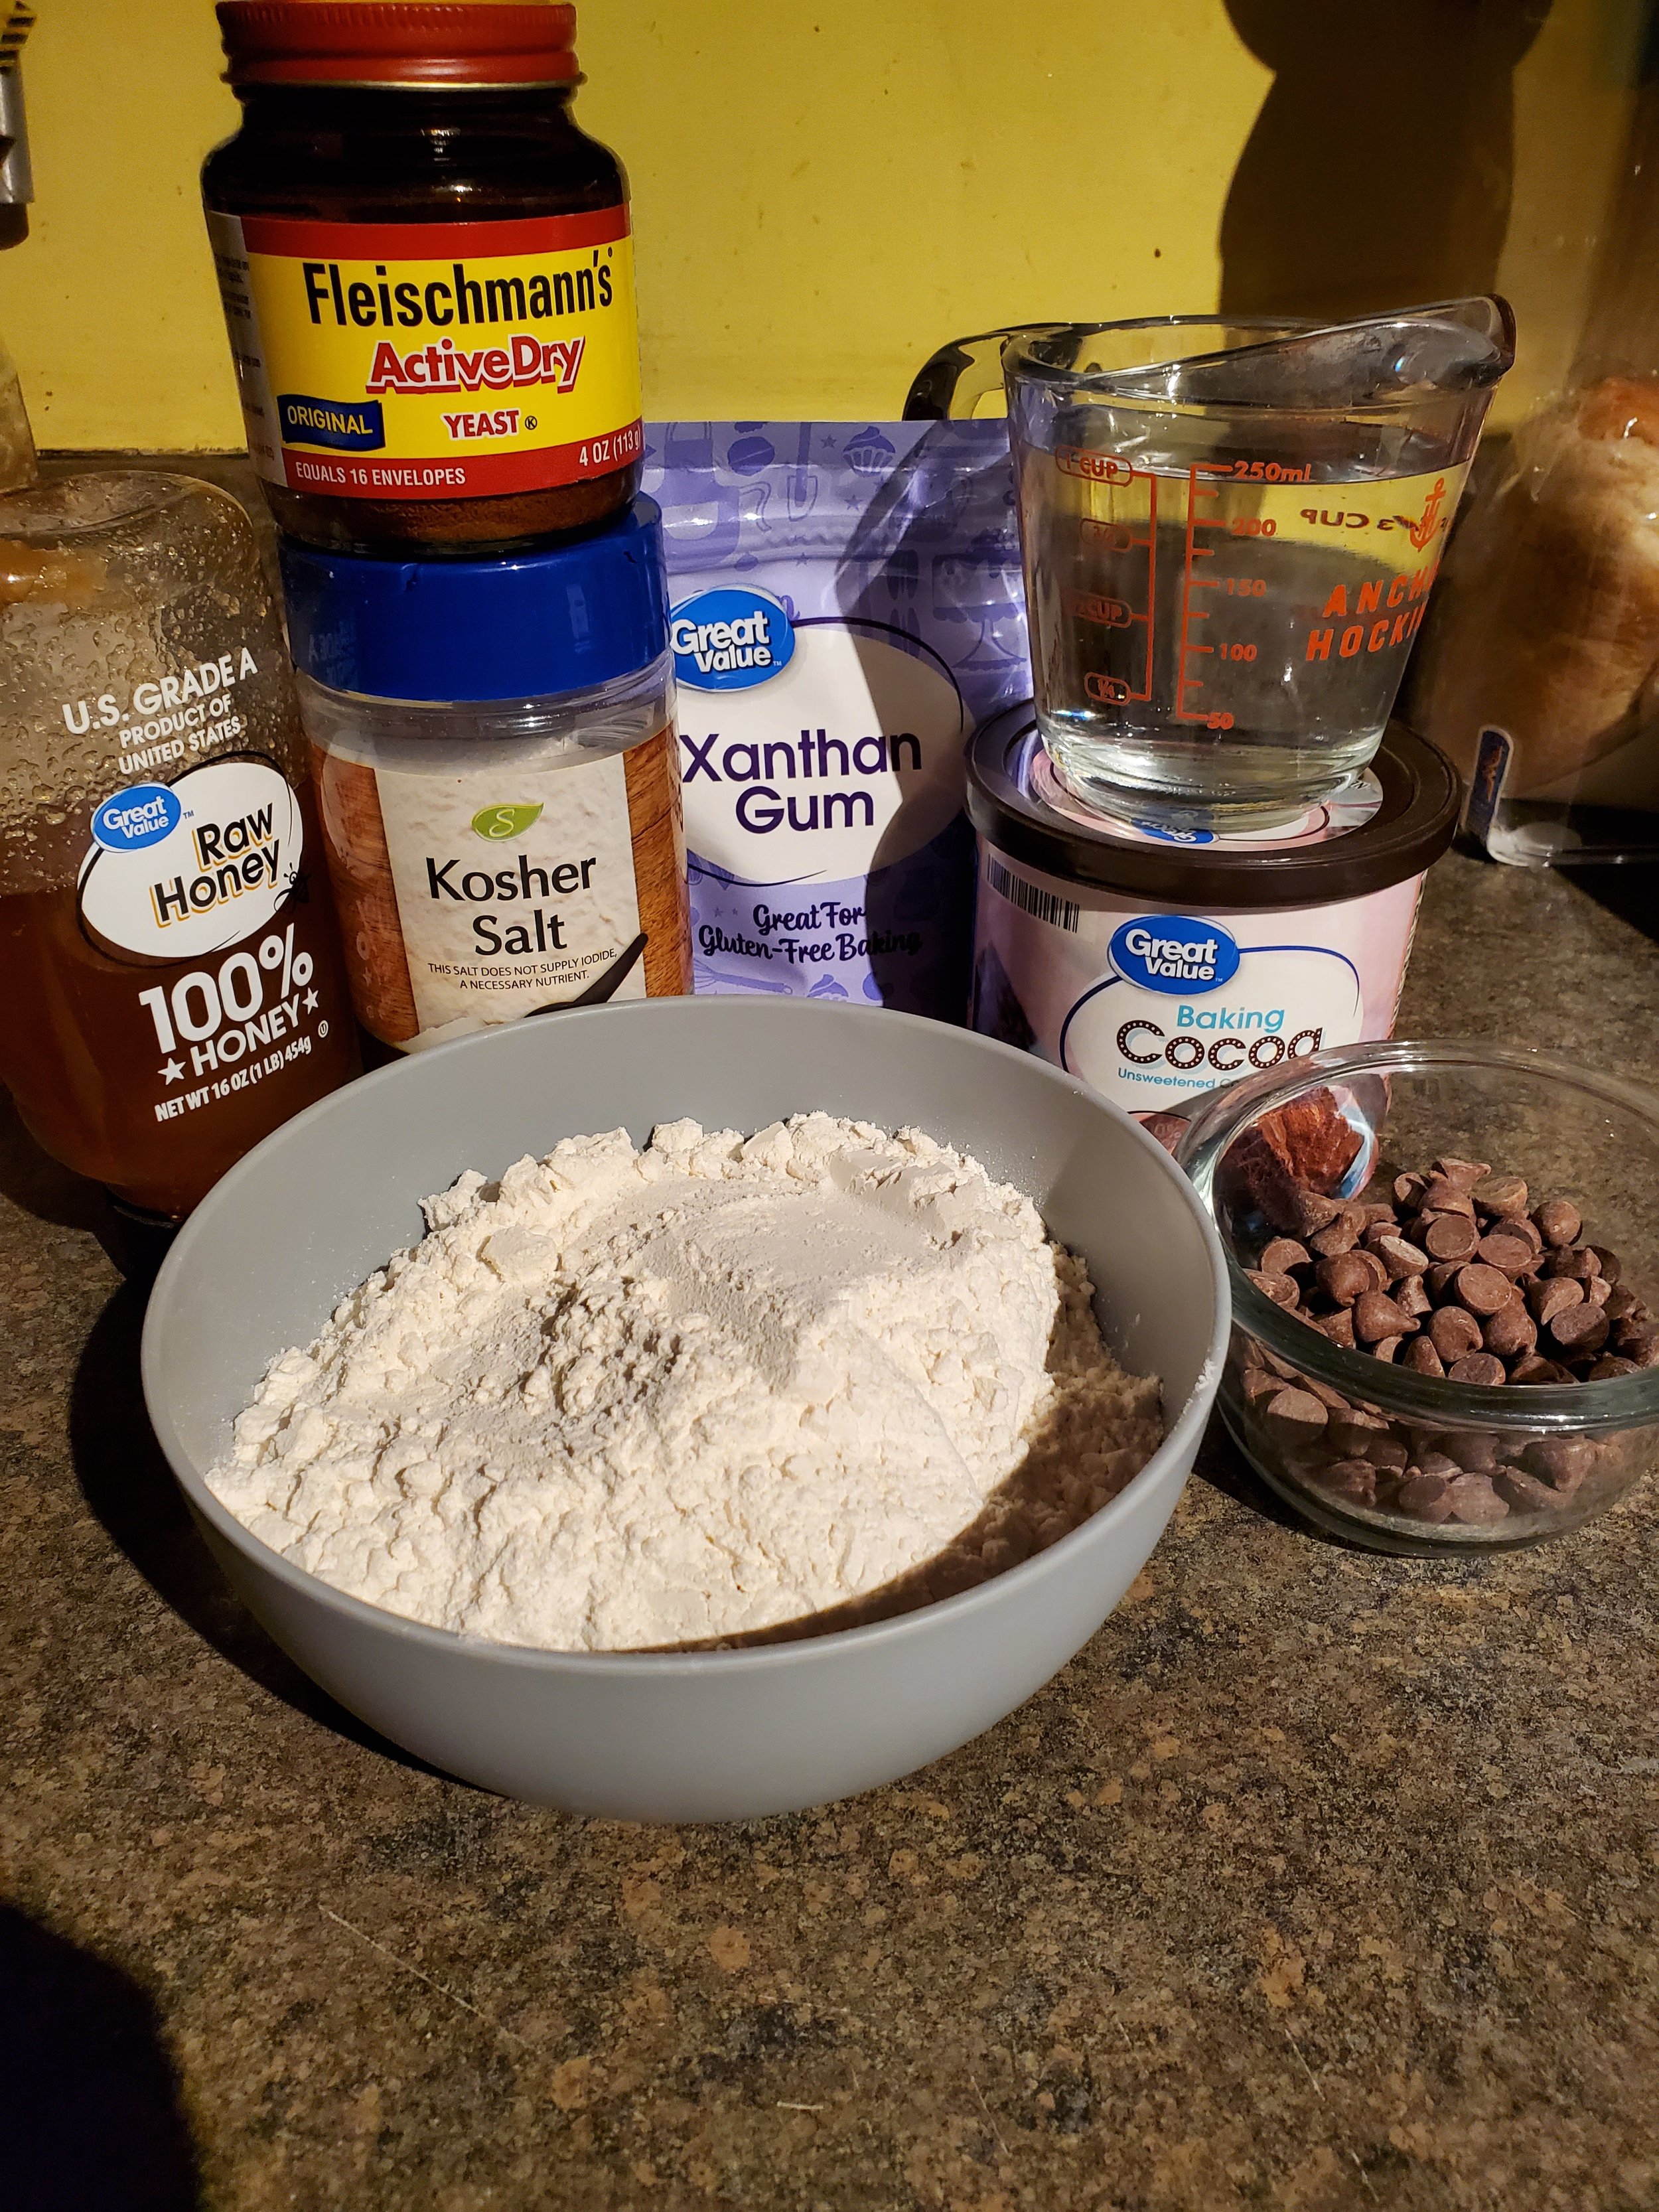
2 1/2 cups flour

2 tablespoons baker's cocoa

4 squares baker's chocolate

2 teaspoons active dry yeast

2 teaspoons kosher salt

1/2 teaspoon xanthan gum

1 cup warm water

2 tablespoons honey


Day Two:

8 cups water

1/4 cup honey


1 egg

1 tablespoon water


Tools: mixing bowl, measuring cups and spoons,  large baking sheet (insulated is best), aluminum foil or plastic wrap, kitchen towel, parchment paper, stock pot or caldera, 

heatproof bowl or shallow pan (to melt chocolate), large slotted spoon, spatula, small bowl, brush


This one is a labor-intensive recipe - don't panic; you can do this! Just be sure you allow yourself enough time to work on it. We recommend you get to work on them at least a day before you plan to serve them. Bagels will rise two separate times, and it's best to leave them overnight on one of those two rounds.


Measure out your flour and move it to the large mixing bowl. Try not to pack it down when you do this.


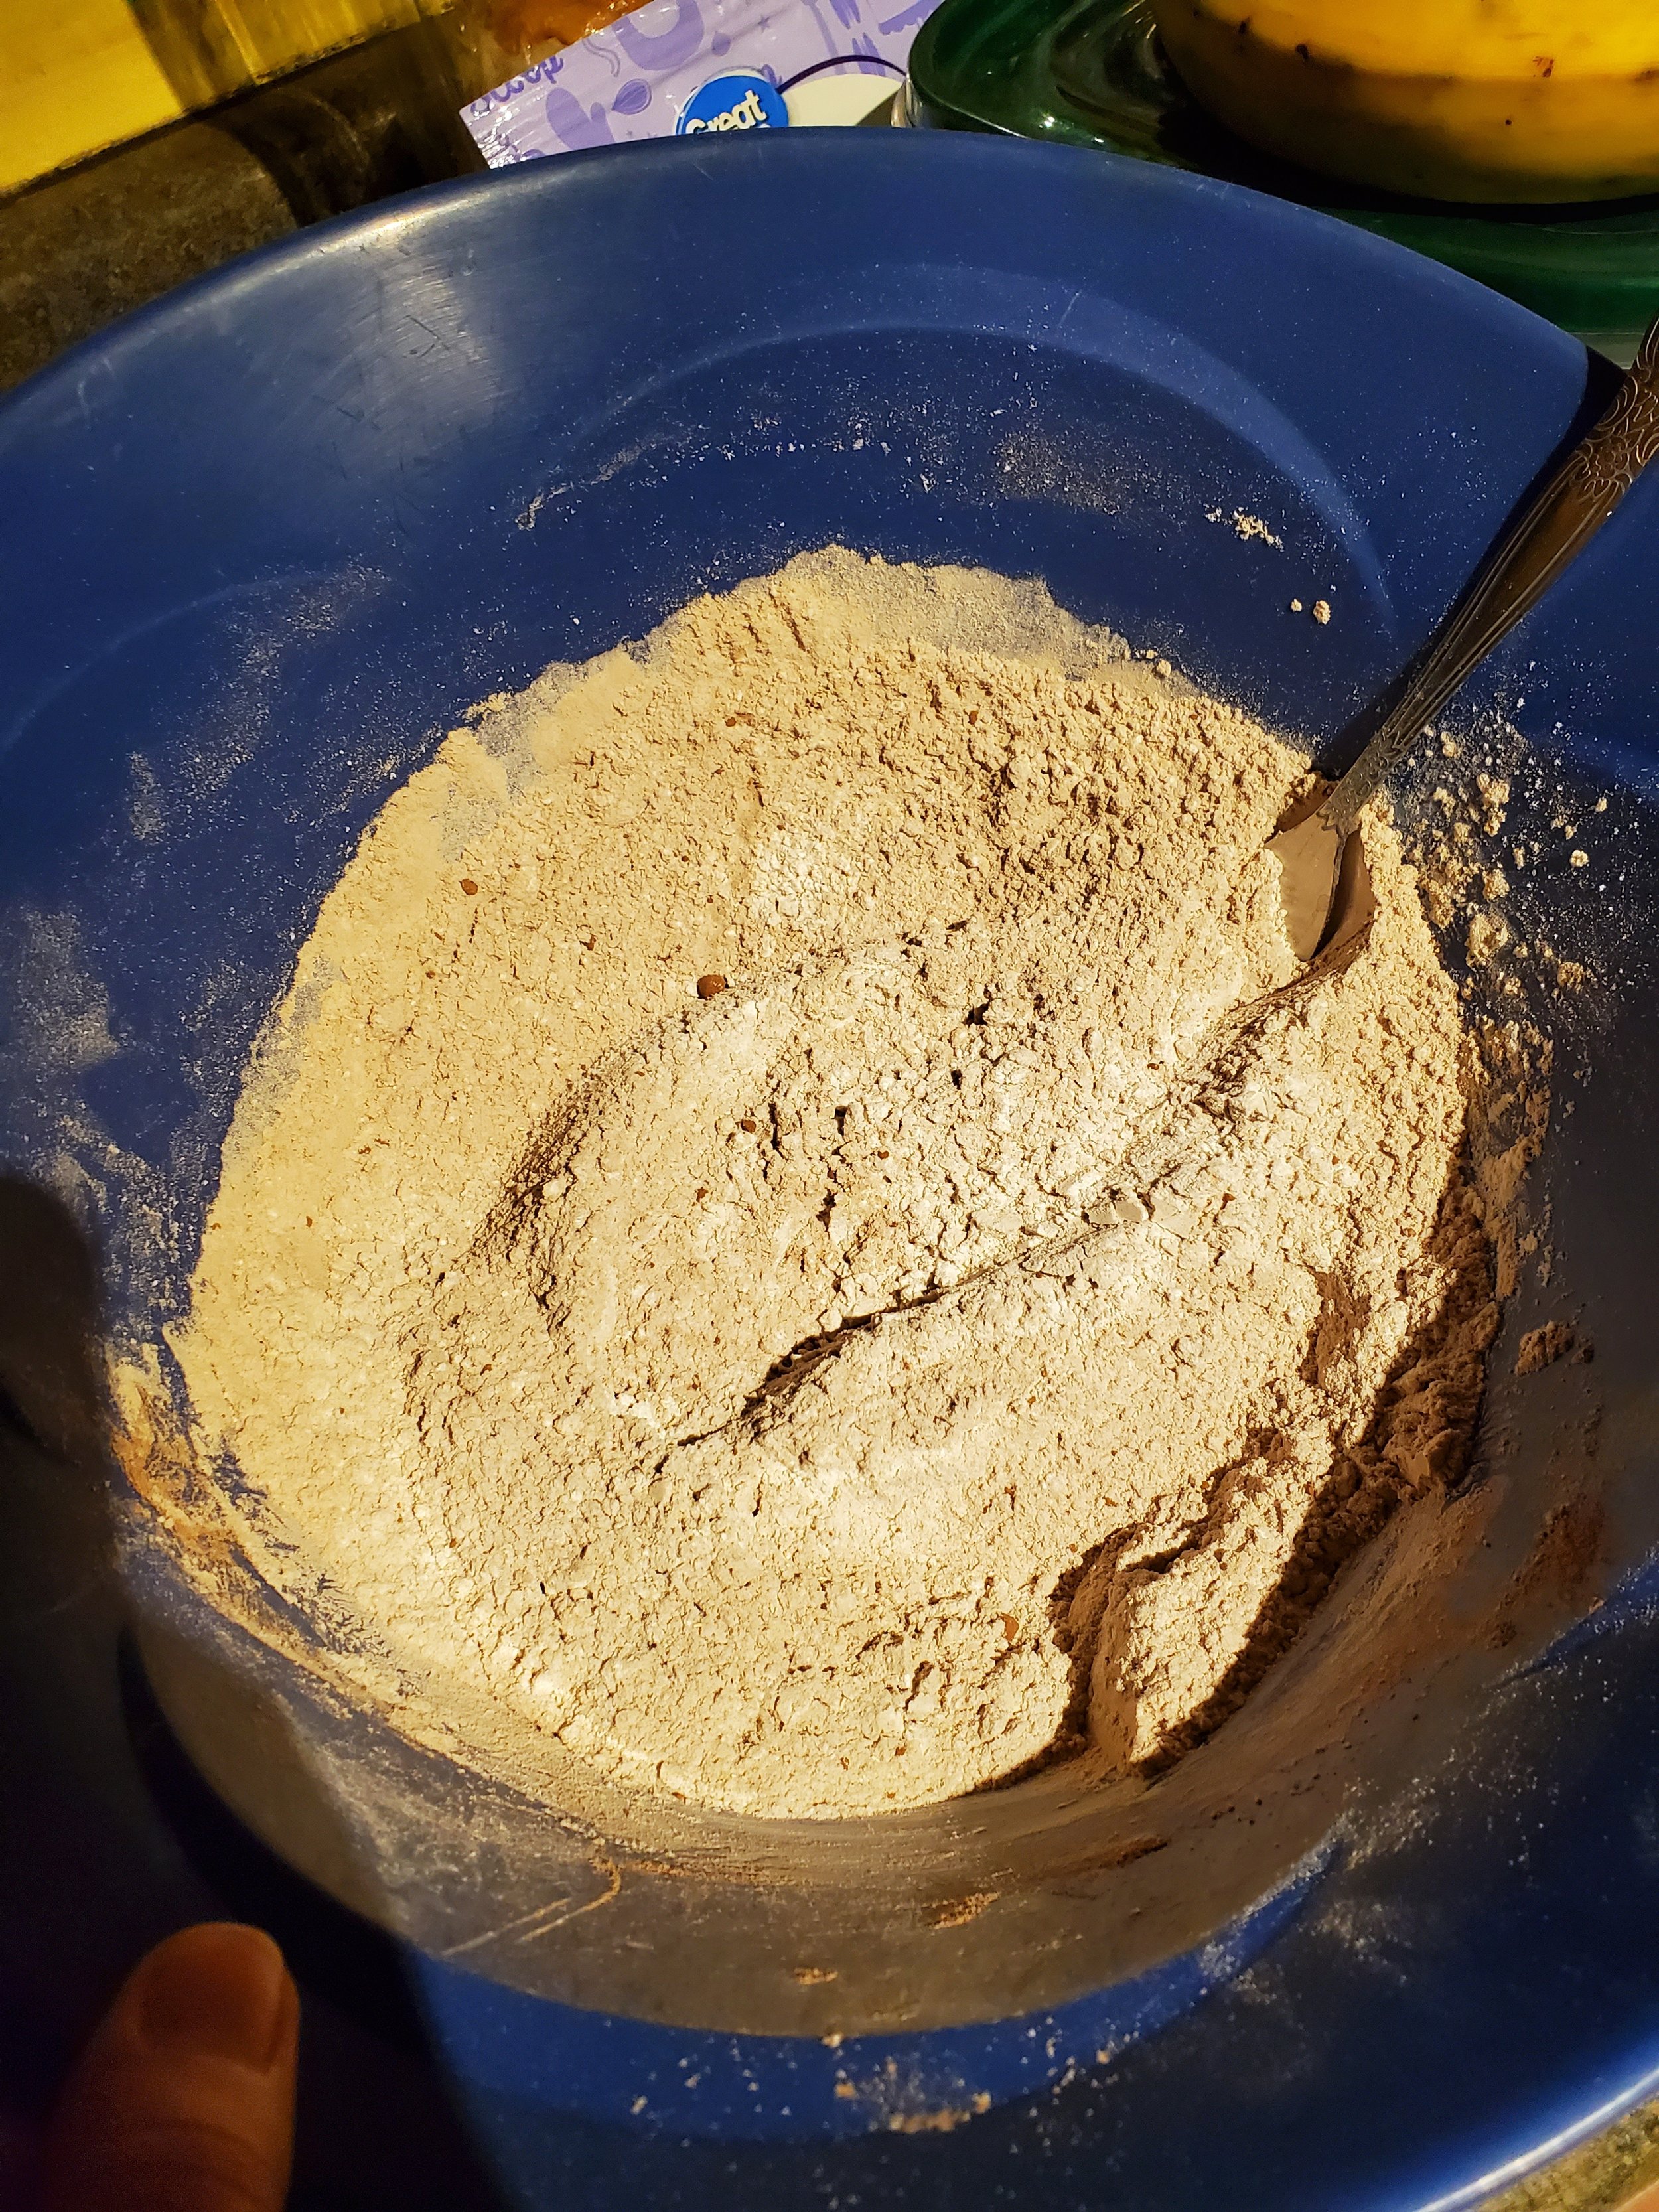
To the flour, add the baker's cocoa and the xanthan gum. Don't go overboard with the xanthan gum! We know it's only a tiny little bit as compared to everything else, but trust us: a little of this stuff goes a long way.


Add your kosher salt and use a regular spoon to give it a quick stir to incorporate all the dry ingredients.


Start your pan on the lowest heat setting and break your chocolate into it, or snap your chocolate into a heatproof bowl to microwave it. Either way, be ready to stir frequently to avoid burning. Once it's all melted, you can add it to your dry ingredients.


Shift your attention to wet ingredients for a minute. Use a measuring cup to get the proper amount of water. You can start with cold water and heat it up in the microwave if you're using a glass measuring cup, or you can let the tap run warm and then fill the cup if you're more comfortable that way. Just make sure it's not too hot, as too much heat will kill your yeast.


To your water, add your tablespoons of honey and stir until the honey has dissolved. This will only take a few moments, as long as the water is warm enough.


After dissolving the honey, measure the dry yeast into the same cup. The water will wake it up, and it should fizz or foam a little as you stir. (If it doesn't, your yeast has kicked the proverbial bucket. It's much better to have to toss a cup of water and spoonful of honey than the whole bowl of ingredients, which is part of why we're doing things this way.)


Add your remaining wet ingredients to your dry, and stir it around a little until it makes a shaggy-looking dough. It will look uneven and swirly because it's not fully incorporated, but that's okay; you're not done with it. Now you get to use your hands and get messy! 


With clean, dry hands, knead until it comes together into a smooth ball. Remove it from the bowl and then knead some more on a clean counter. We know you're probably afraid of over-working it, but bagel dough is serious stuff. Knead it on the counter for ten minutes. Resist the urge to add water - it's supposed to be stiff. We set a timer on the microwave or a wristwatch to make sure we don't quit too soon (your hands and forearms will probably get a little tired if you're out of shape like we are).


Once you've reached your ten-minute knead time, move the dough back into the bowl. If there are scraps and spots of flour left in the bowl, wipe it out before you transfer the dough; you really don't want the headache of trying to work excess flour in after this rests overnight. Cover it tightly with foil or plastic wrap and place it in the refrigerator. Leave it there overnight and come back to it in the morning.


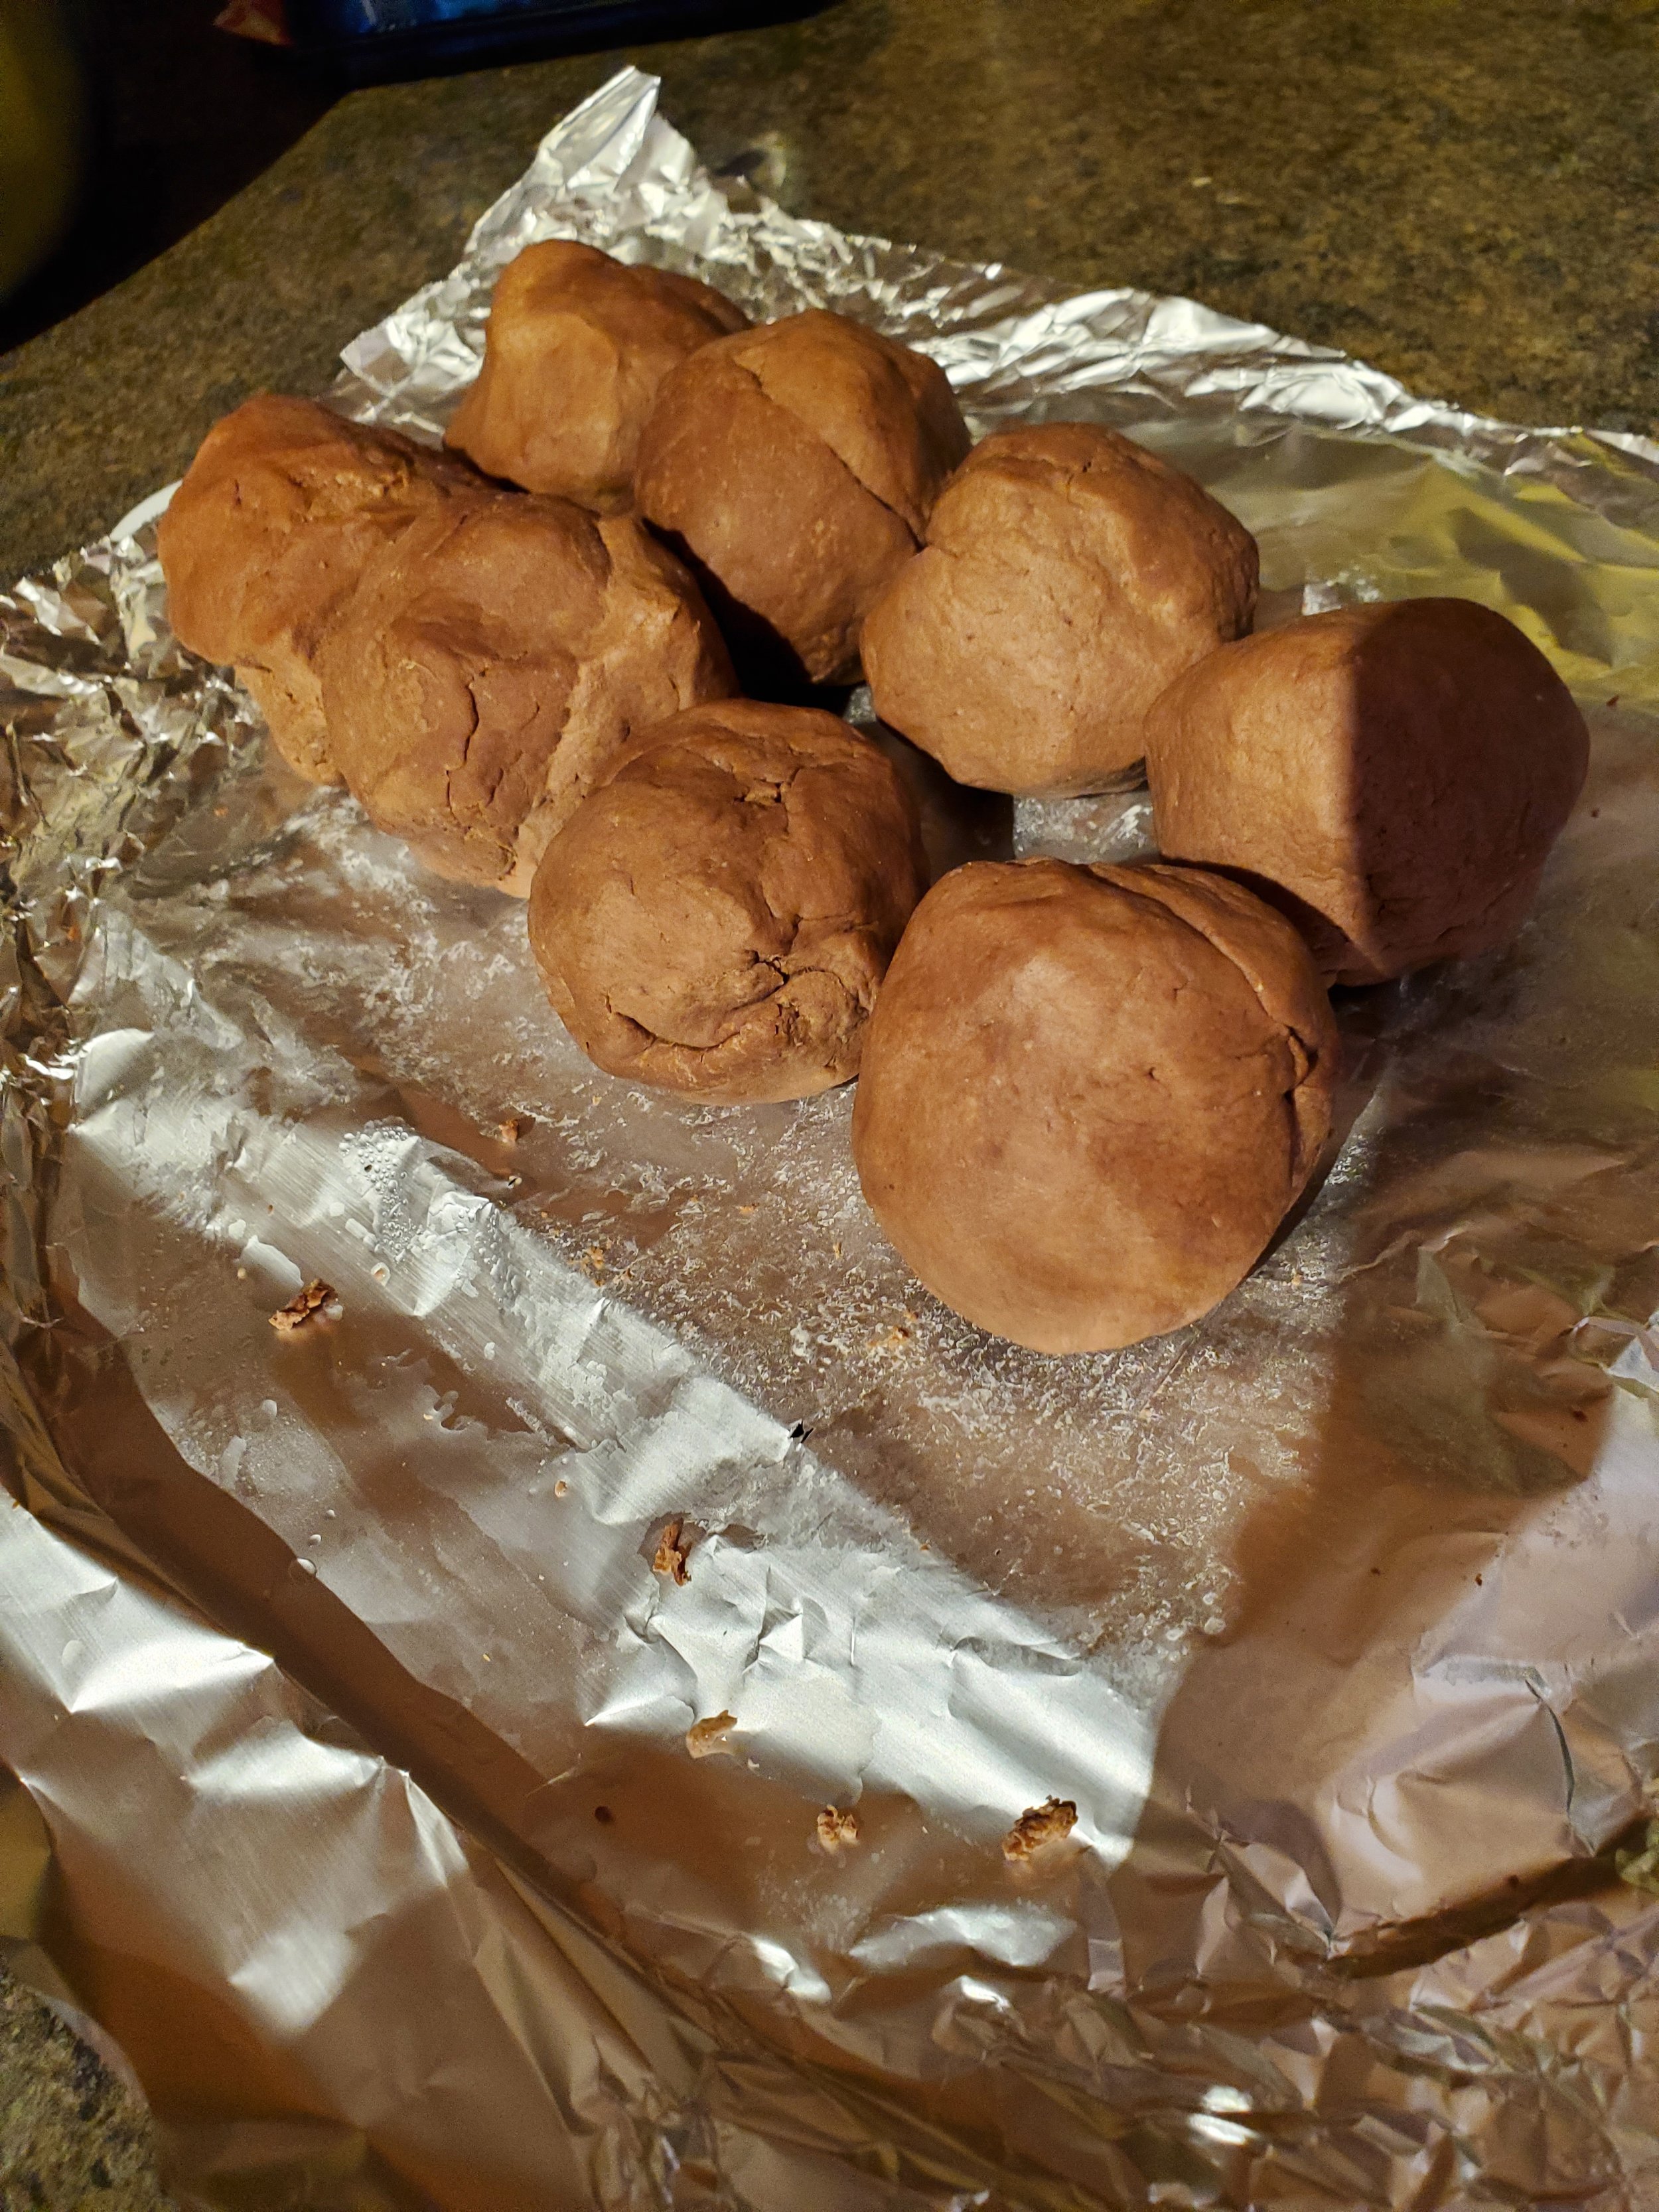
The next day, remove your dough from the refrigerator, turn it out of the bowl onto the counter, and split it into eight even-sized pieces. Work each piece for a few minutes until it's warmed up and softened, and roll it into a ball. Once you've finished all of them, set them back in the bowl. Cover them with a clean kitchen towel and let them rest for 20-25 minutes while your oven preheats to 425*.


Yes, we said 425*. Yes, that's high. No, you won't burn the bagels.


While your oven warms up, you can take care of a few other little tasks. Grab your parchment paper and line your baking sheet. Get out your stock pot, add your eight cups of water and bring it up to boil. Measure your quarter cup of honey. Whisk your tablespoon of water into the egg. Now take a deep breath, and walk away for a few minutes.


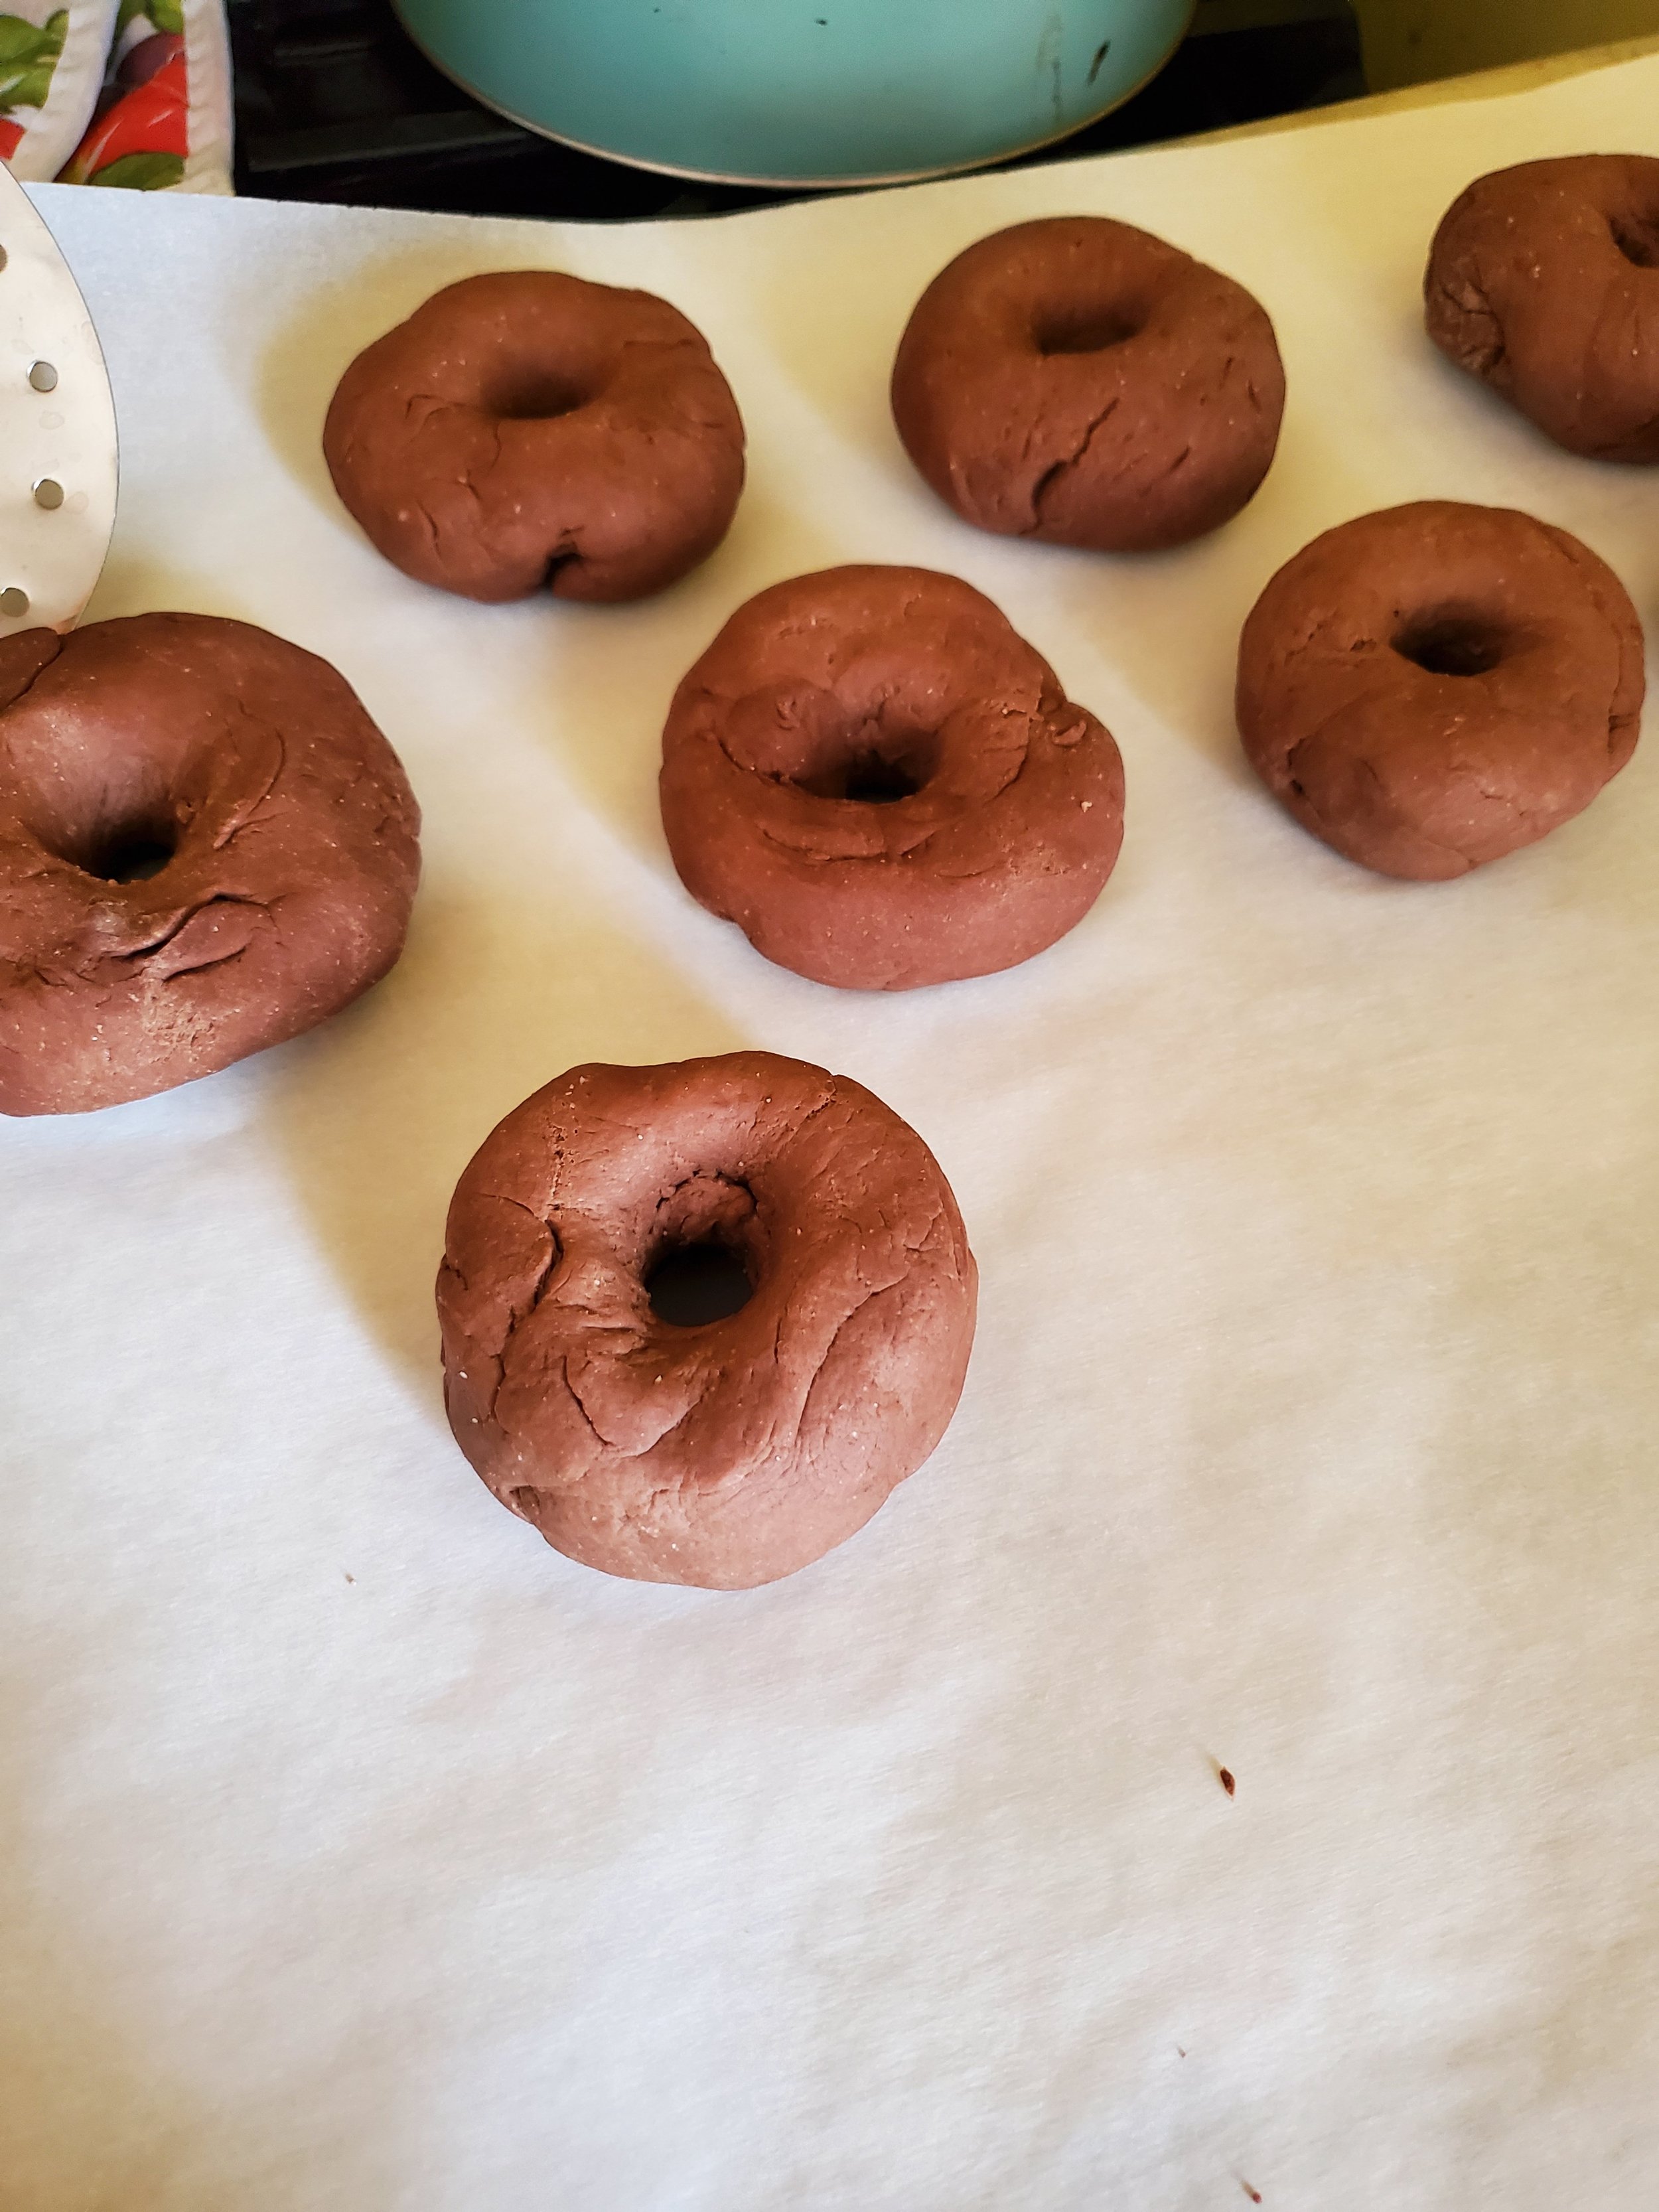
When your timer inevitably summons you back, grab a ball of dough and roll it between your hands. You want to make a disc this time, not a ball (or a log like other recipes may tell you). Put your thumbs in the center as you rotate the dough around, pushing outward gently a quarter turn at a time. After a few turns, your thumbs should be able to push through and create the hole in the center.


Once you have the center opened up, give it a few more turns under gentle pressure to smooth the edges in the center and around the outside of the circle of dough. Be careful to retain the depth you've created - try not to press the dough flat while you work.


When you're satisfied with your bagel shape, place it on the parchment paper-lined baking sheet. We like to keep the sheet next to the oven vent to give the bagels a little last rise (it's a cheater tactic, but fluffy bagels are better bagels).


Repeat until all your bagels have been shaped and smoothed to your liking and transferred to the baking sheet.


Time to check on that pot of boiling water. Assuming it's really boiling and not just simmering, drop in that quarter cup of honey and give it a stir to dissolve. If you can't stir out the boil, your water is hot enough.


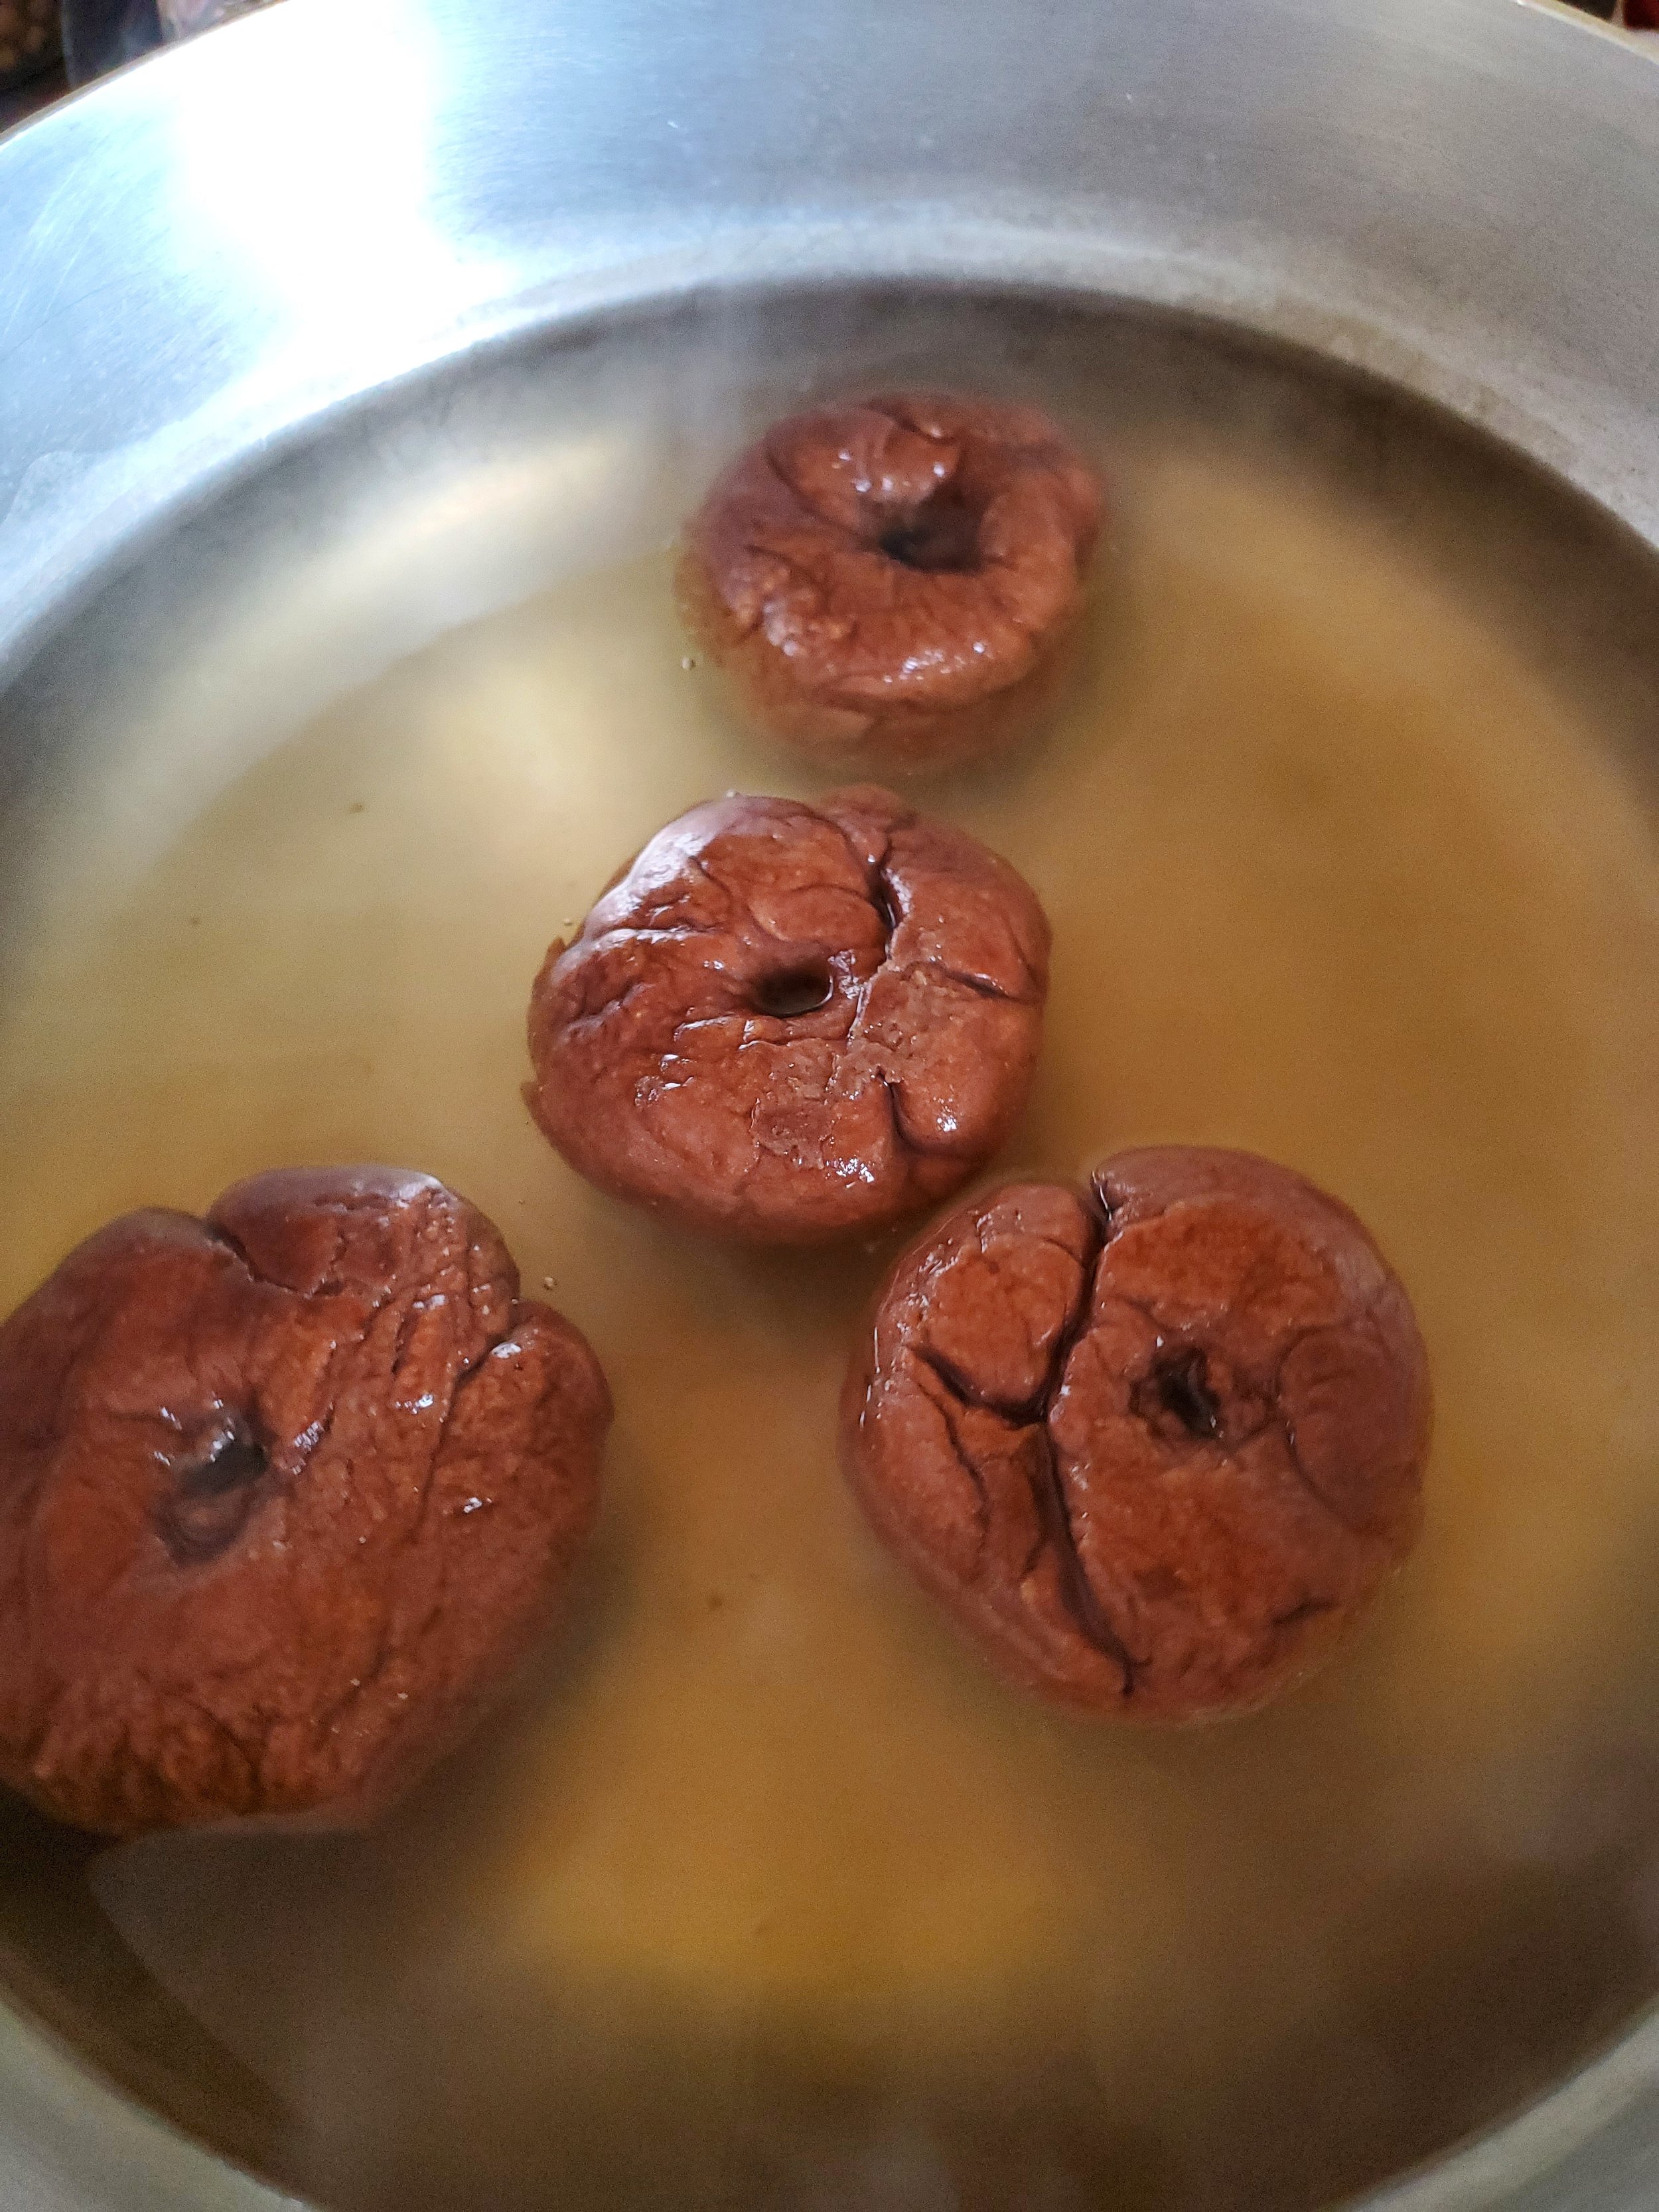
Use a slotted spoon to gently transfer your bagels one by one to the hot water. We do them as two waves of four, but adjust according to the size of the pot you're using - as long as they fit without touching each other or the edges of the pan, they'll be fine. Just make sure not to squish them in there.


Let the bagels sit in the boiling water undisturbed for thirty seconds, then use the slotted spoon to flip them and boil the other side for the same amount of time. Lift them carefully out of the water at the one-minute mark and, after letting the excess water drain off, place them back on the parchment-lined baking sheet.


Take up your brush and egg-wash the exposed side of the bagels. It doesn't take much, so start with just enough to lightly coat them. You can add more, but you won't be able to take it away if you overdo it.


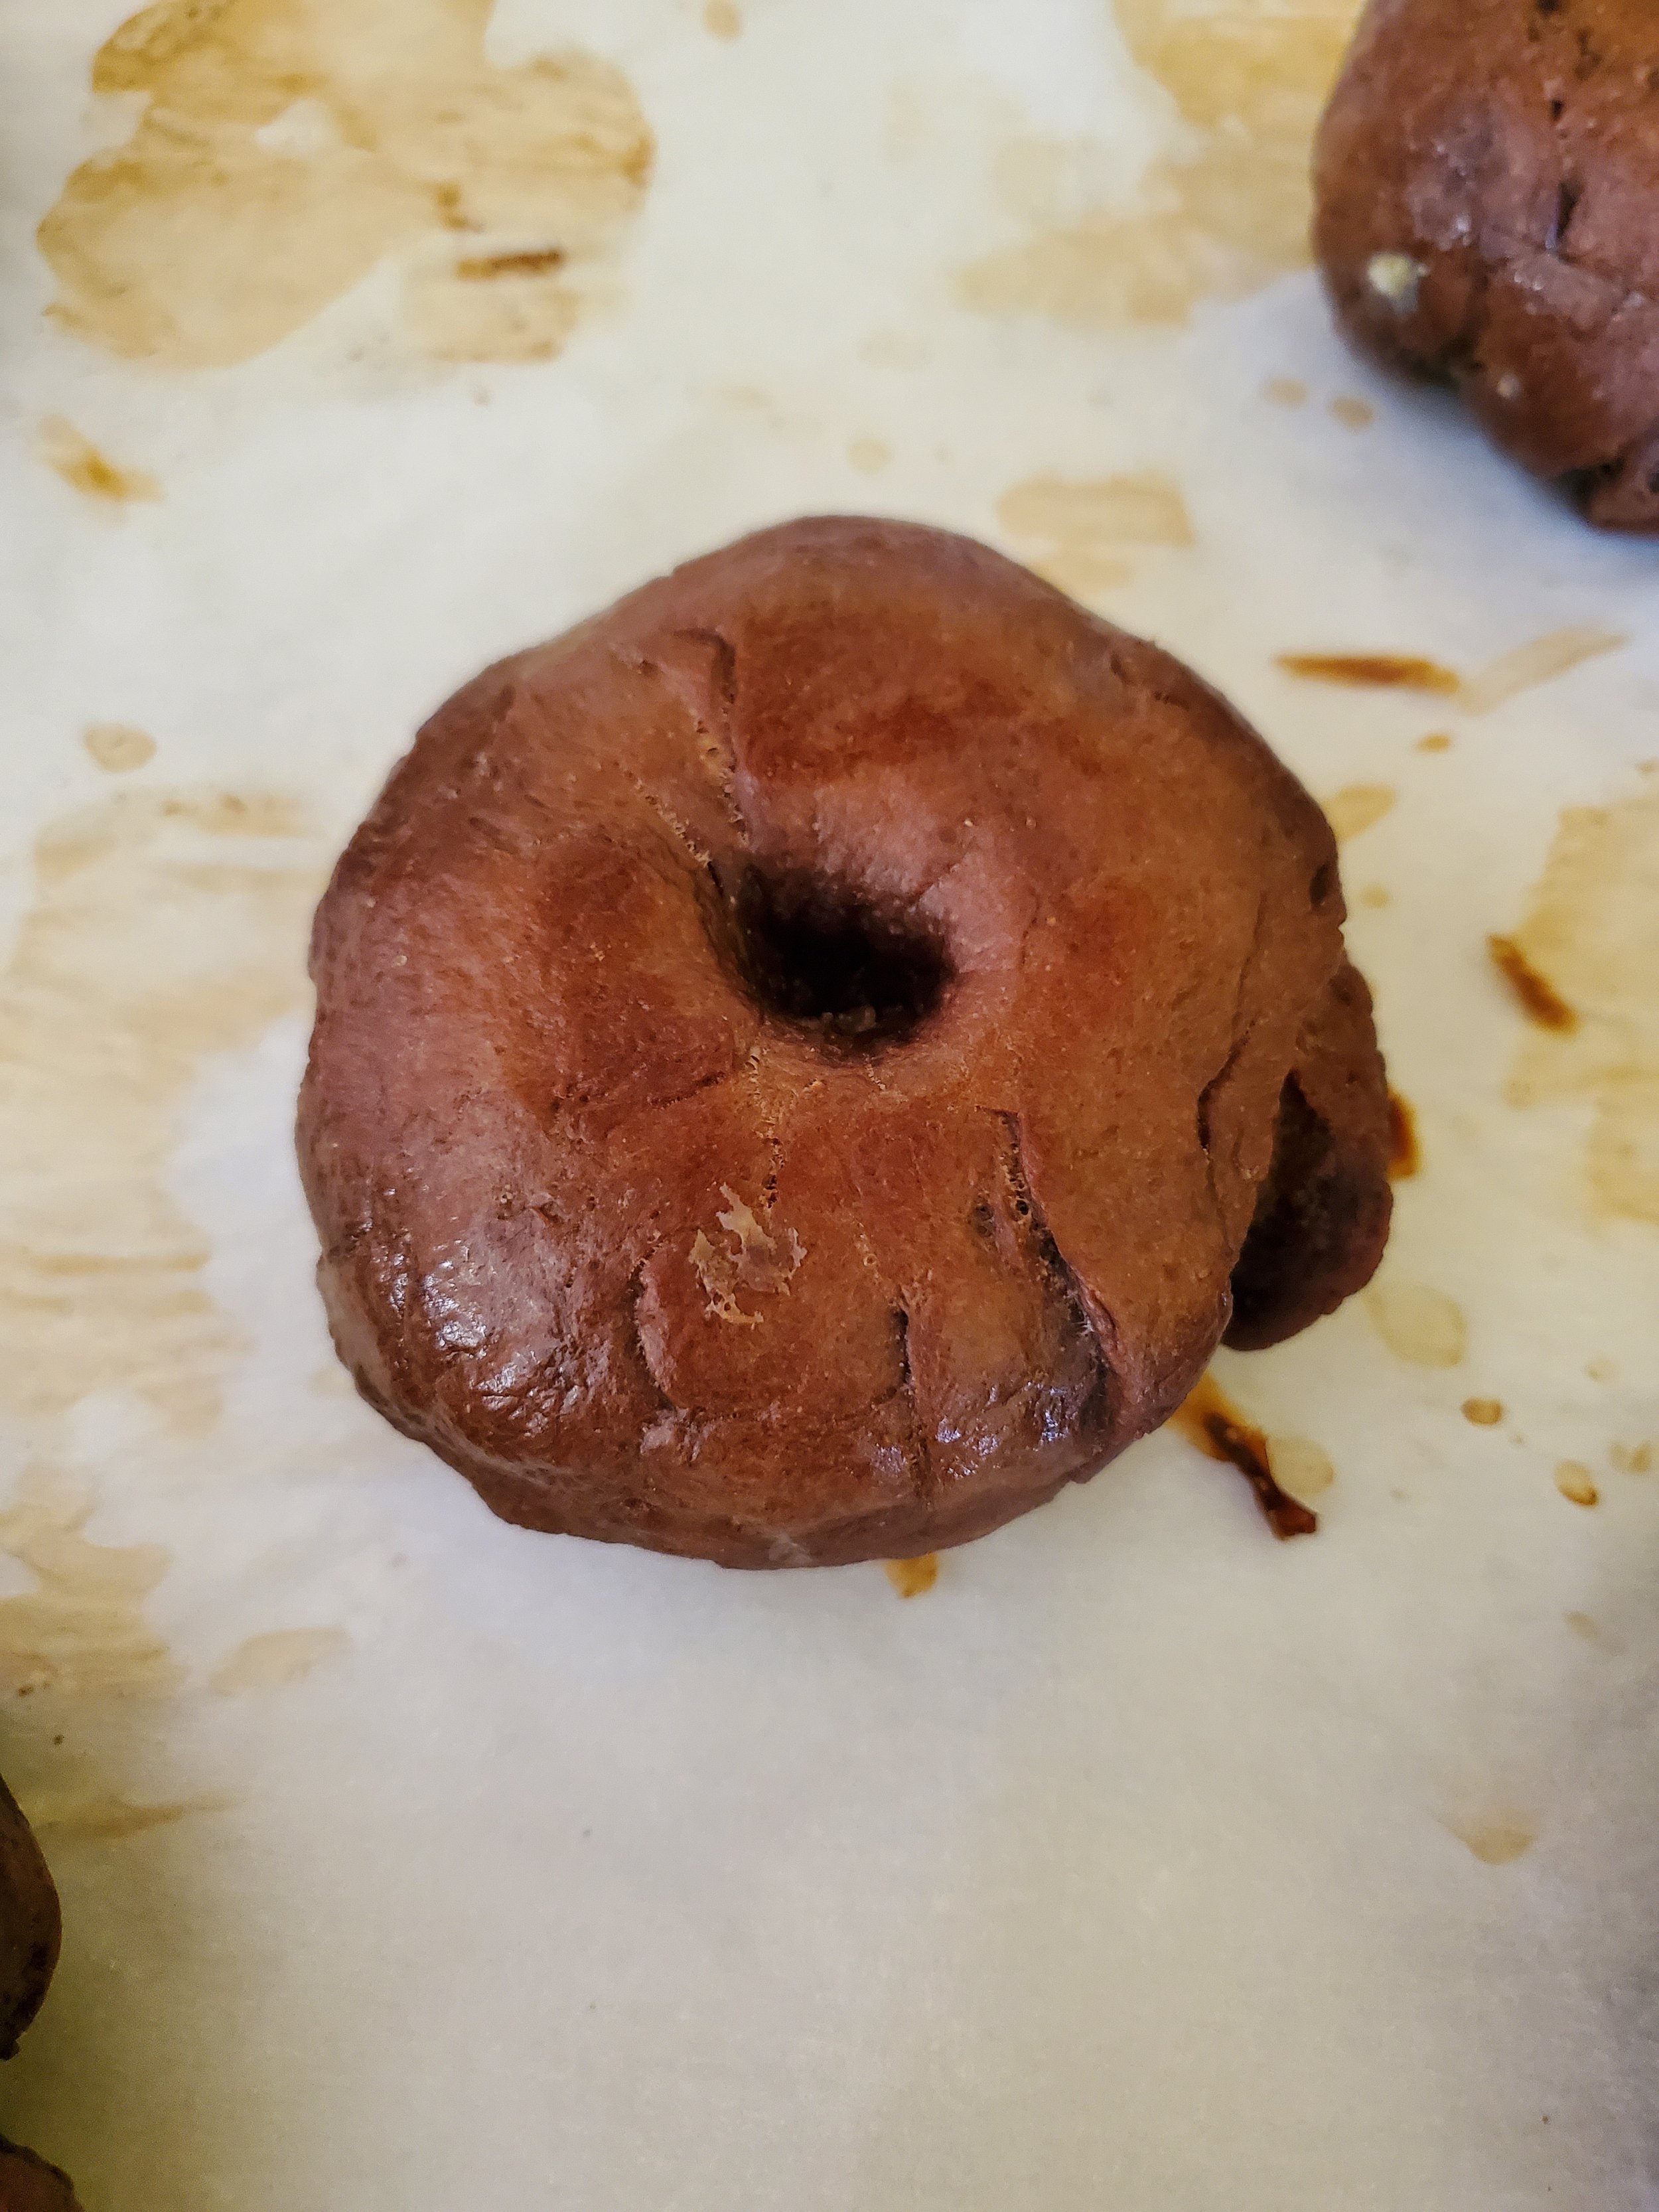
Slide them into the oven on the center rack and set a timer for eight minutes. When your eight minutes are up, remove them and check to be sure they're nice and glossy looking. Assuming so, flip them in place, brush the bottoms with egg wash and put them back in for eight more minutes.


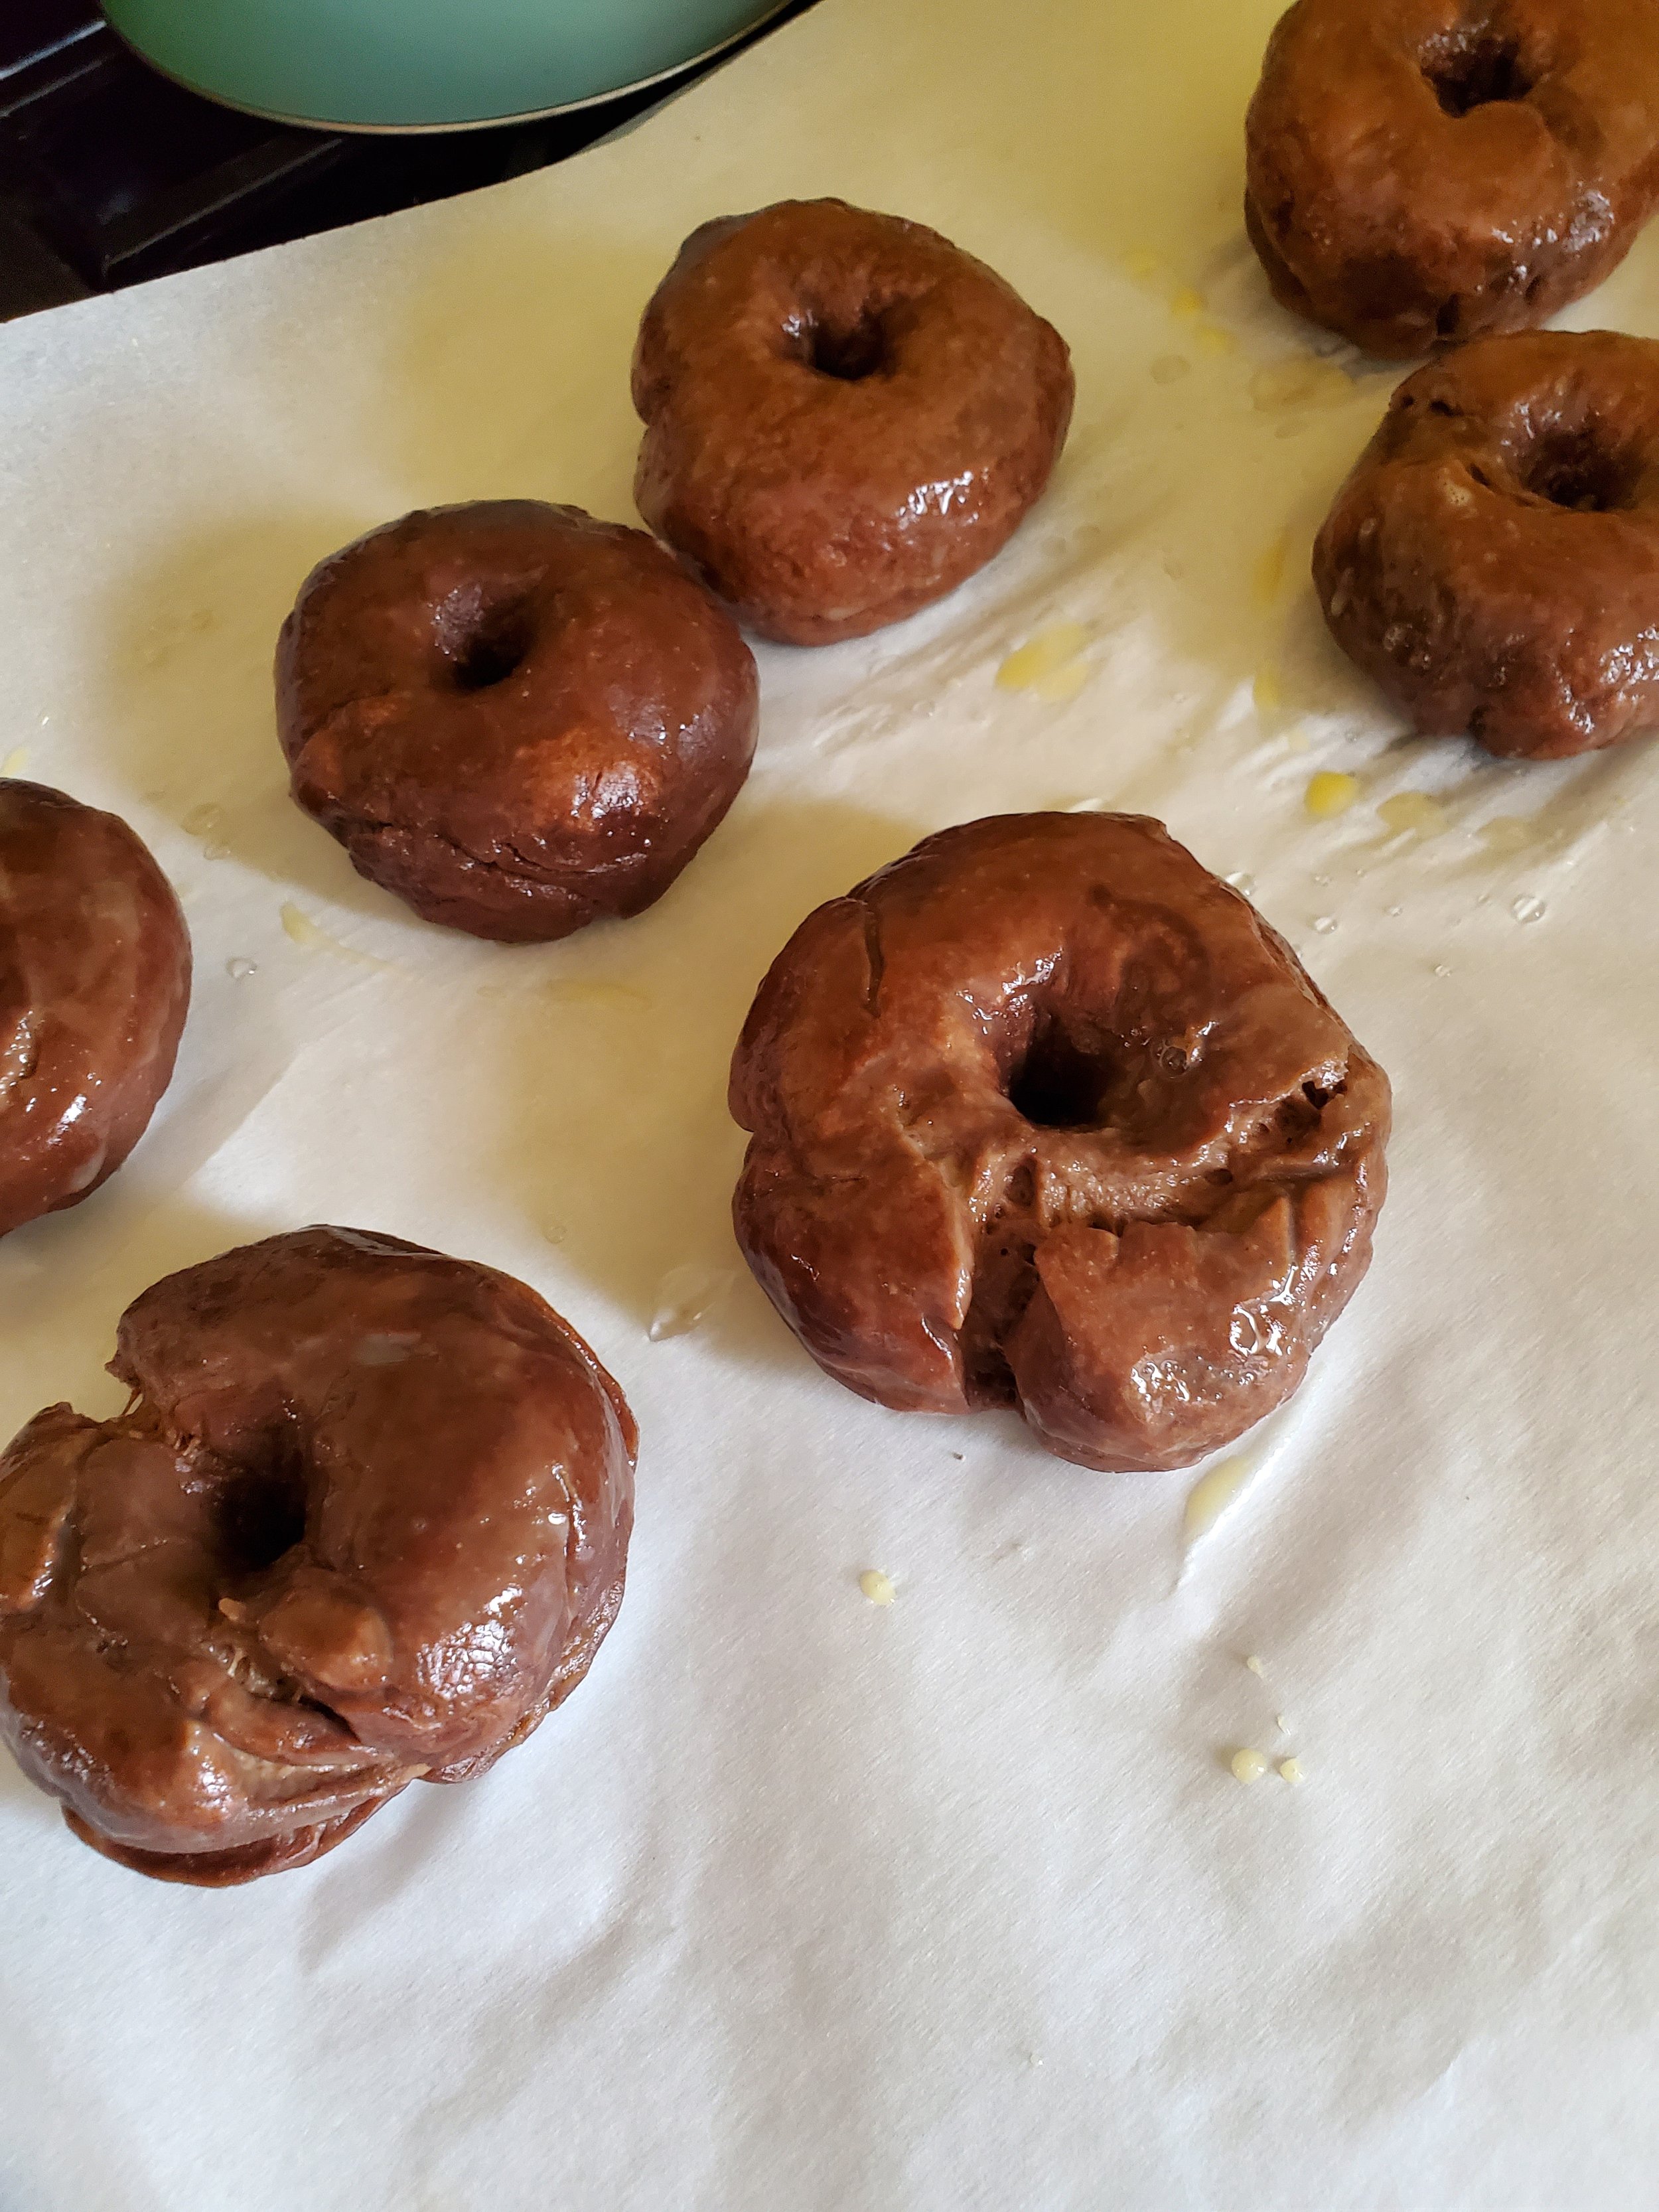
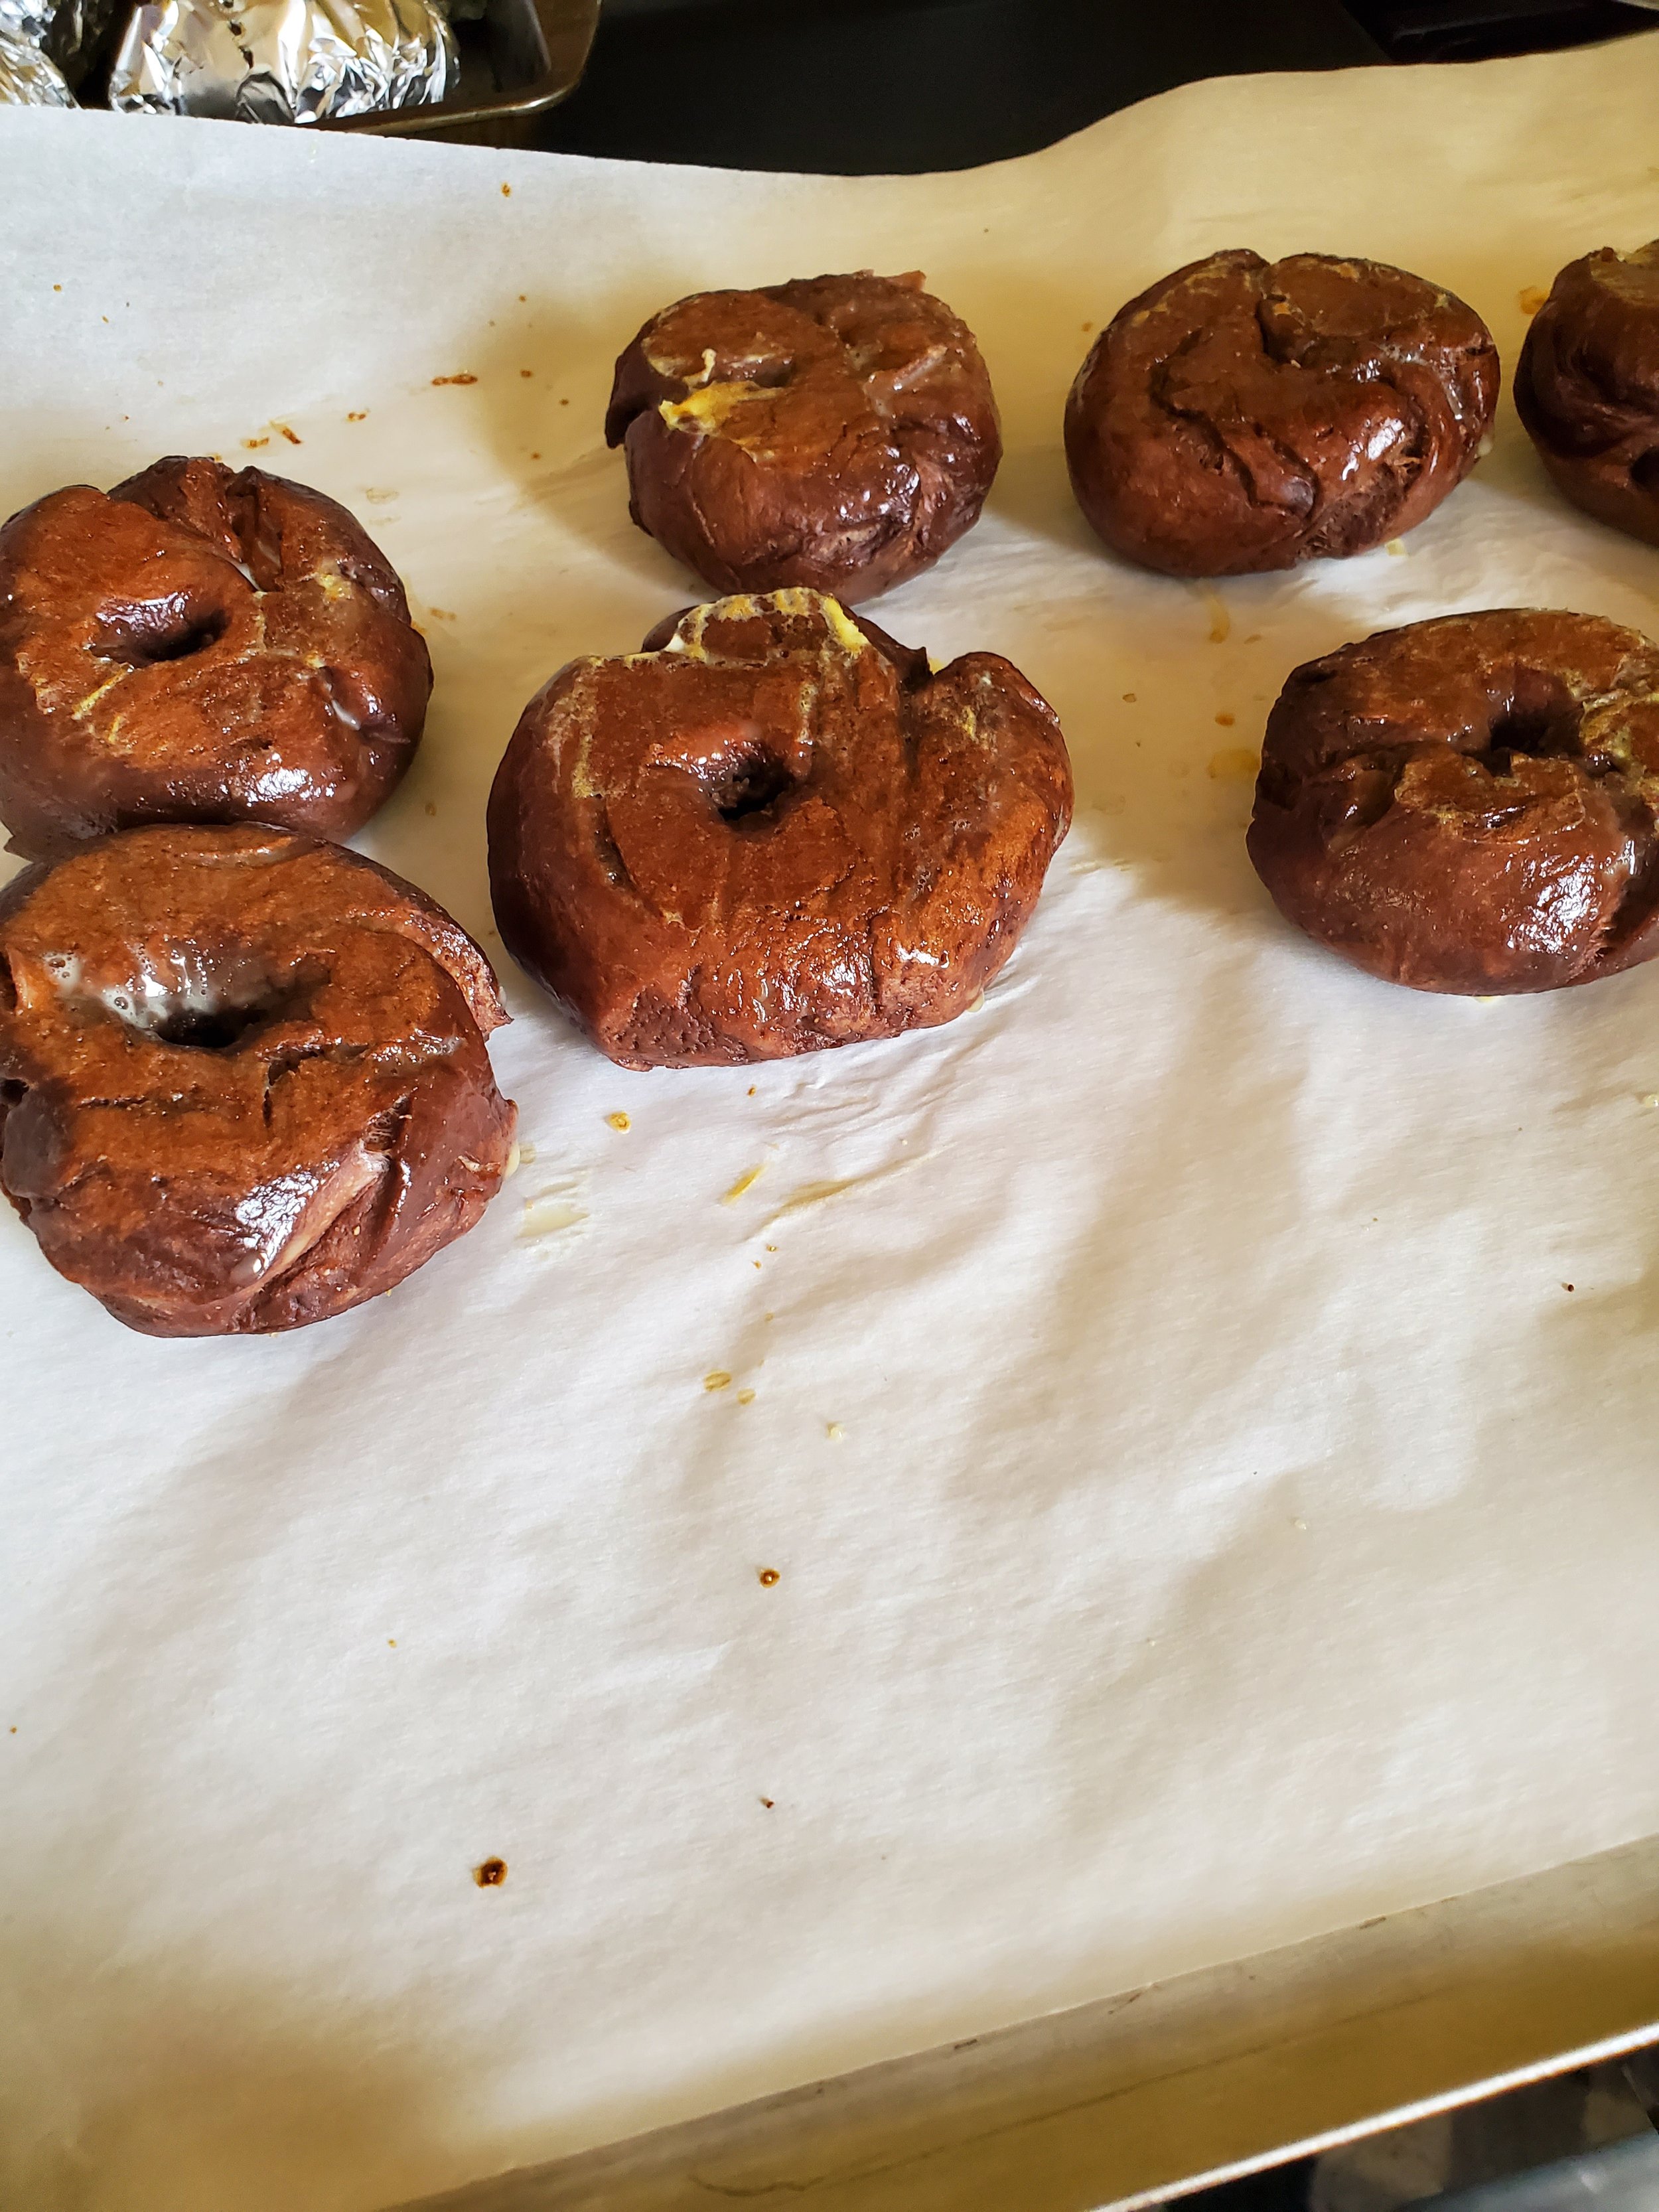
After you've reached the end of the second timer, they're ready to go! We recommend letting them rest on the baking sheet or a cooling rack for ten minutes, but they smell so good it's hard to resist splitting them and tossing them right into the toaster and chowing down with a little cream cheese.


Let us know what you thought of this week’s recipe on our Facebook page! We want to hear all of the interesting ways you make these and see how they turn out! 


If you wound up here because your appliances are malfunctioning, give us a ring! You can reach out to us via phone at (214) 599-0055) or by going to our contact page. Wherever you are in the Dallas Metro area, Appliance Rescue Service is here to help. Whether you're in Coppell, Allen, or Plano, we'll work with you to get your home running smoothly again.


Chocolate Pecan Cake for a Special Date

Or Just For Whenever You Feel Like It, It’s Cake After All!

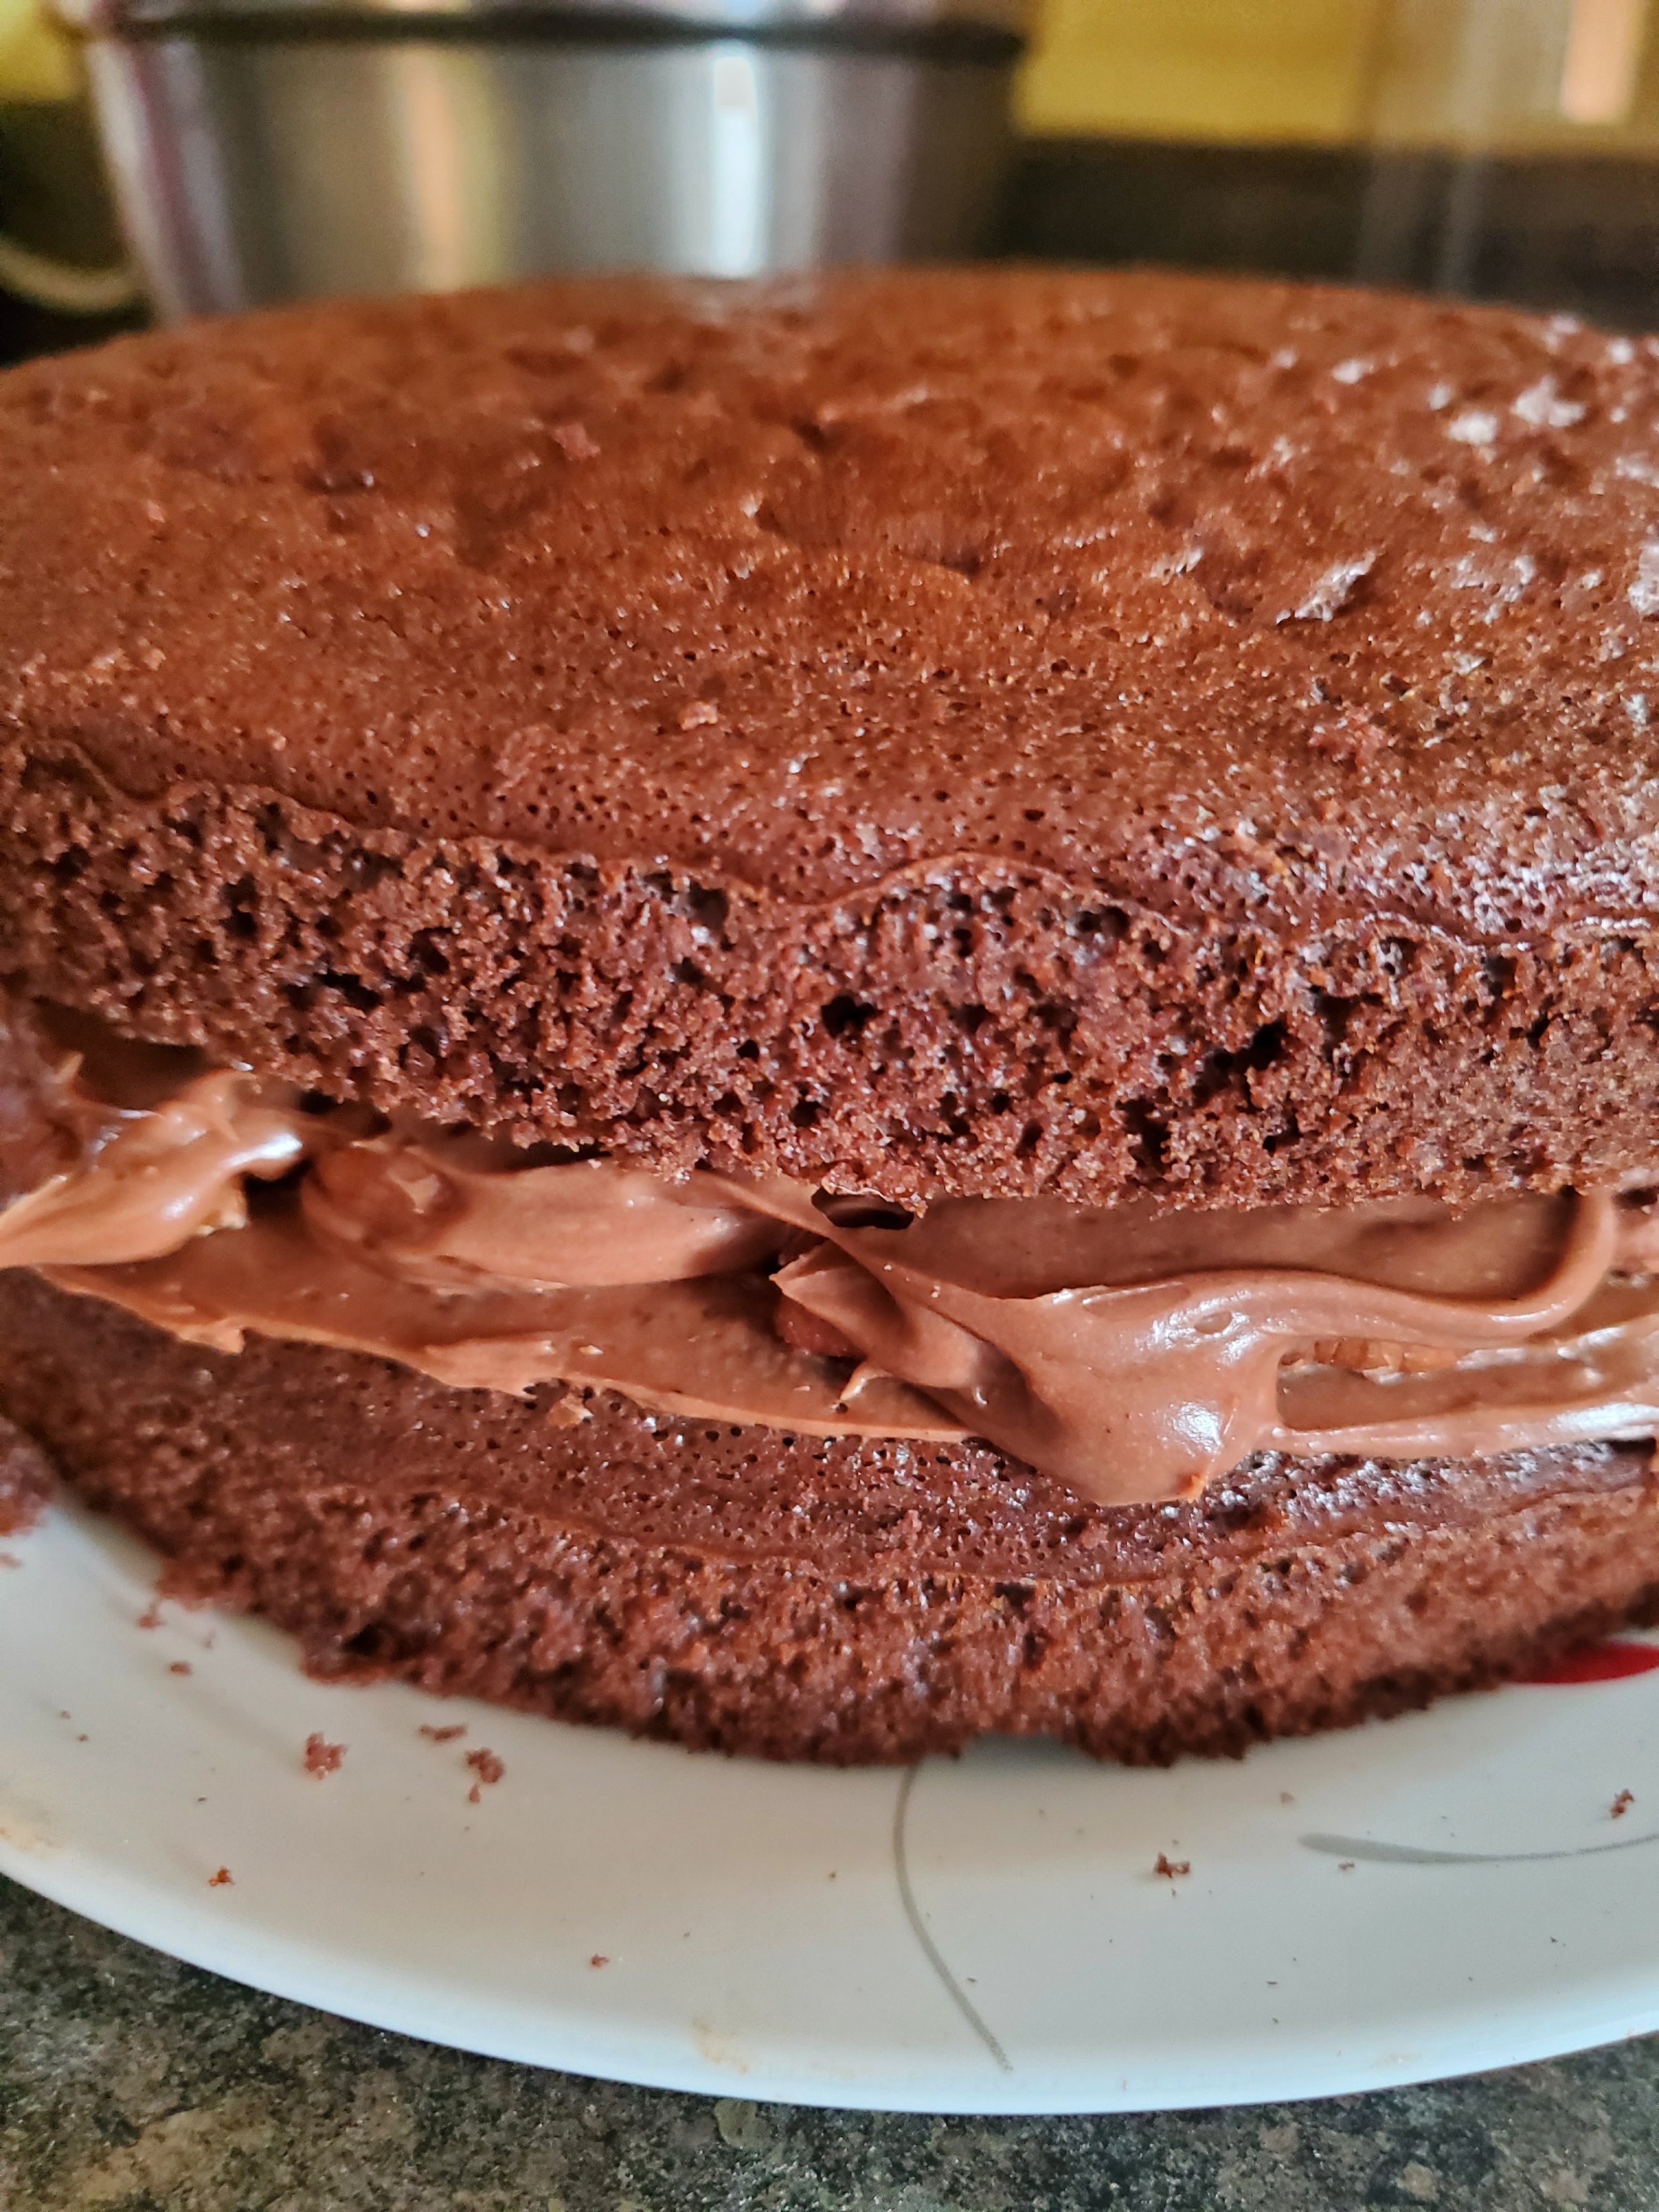
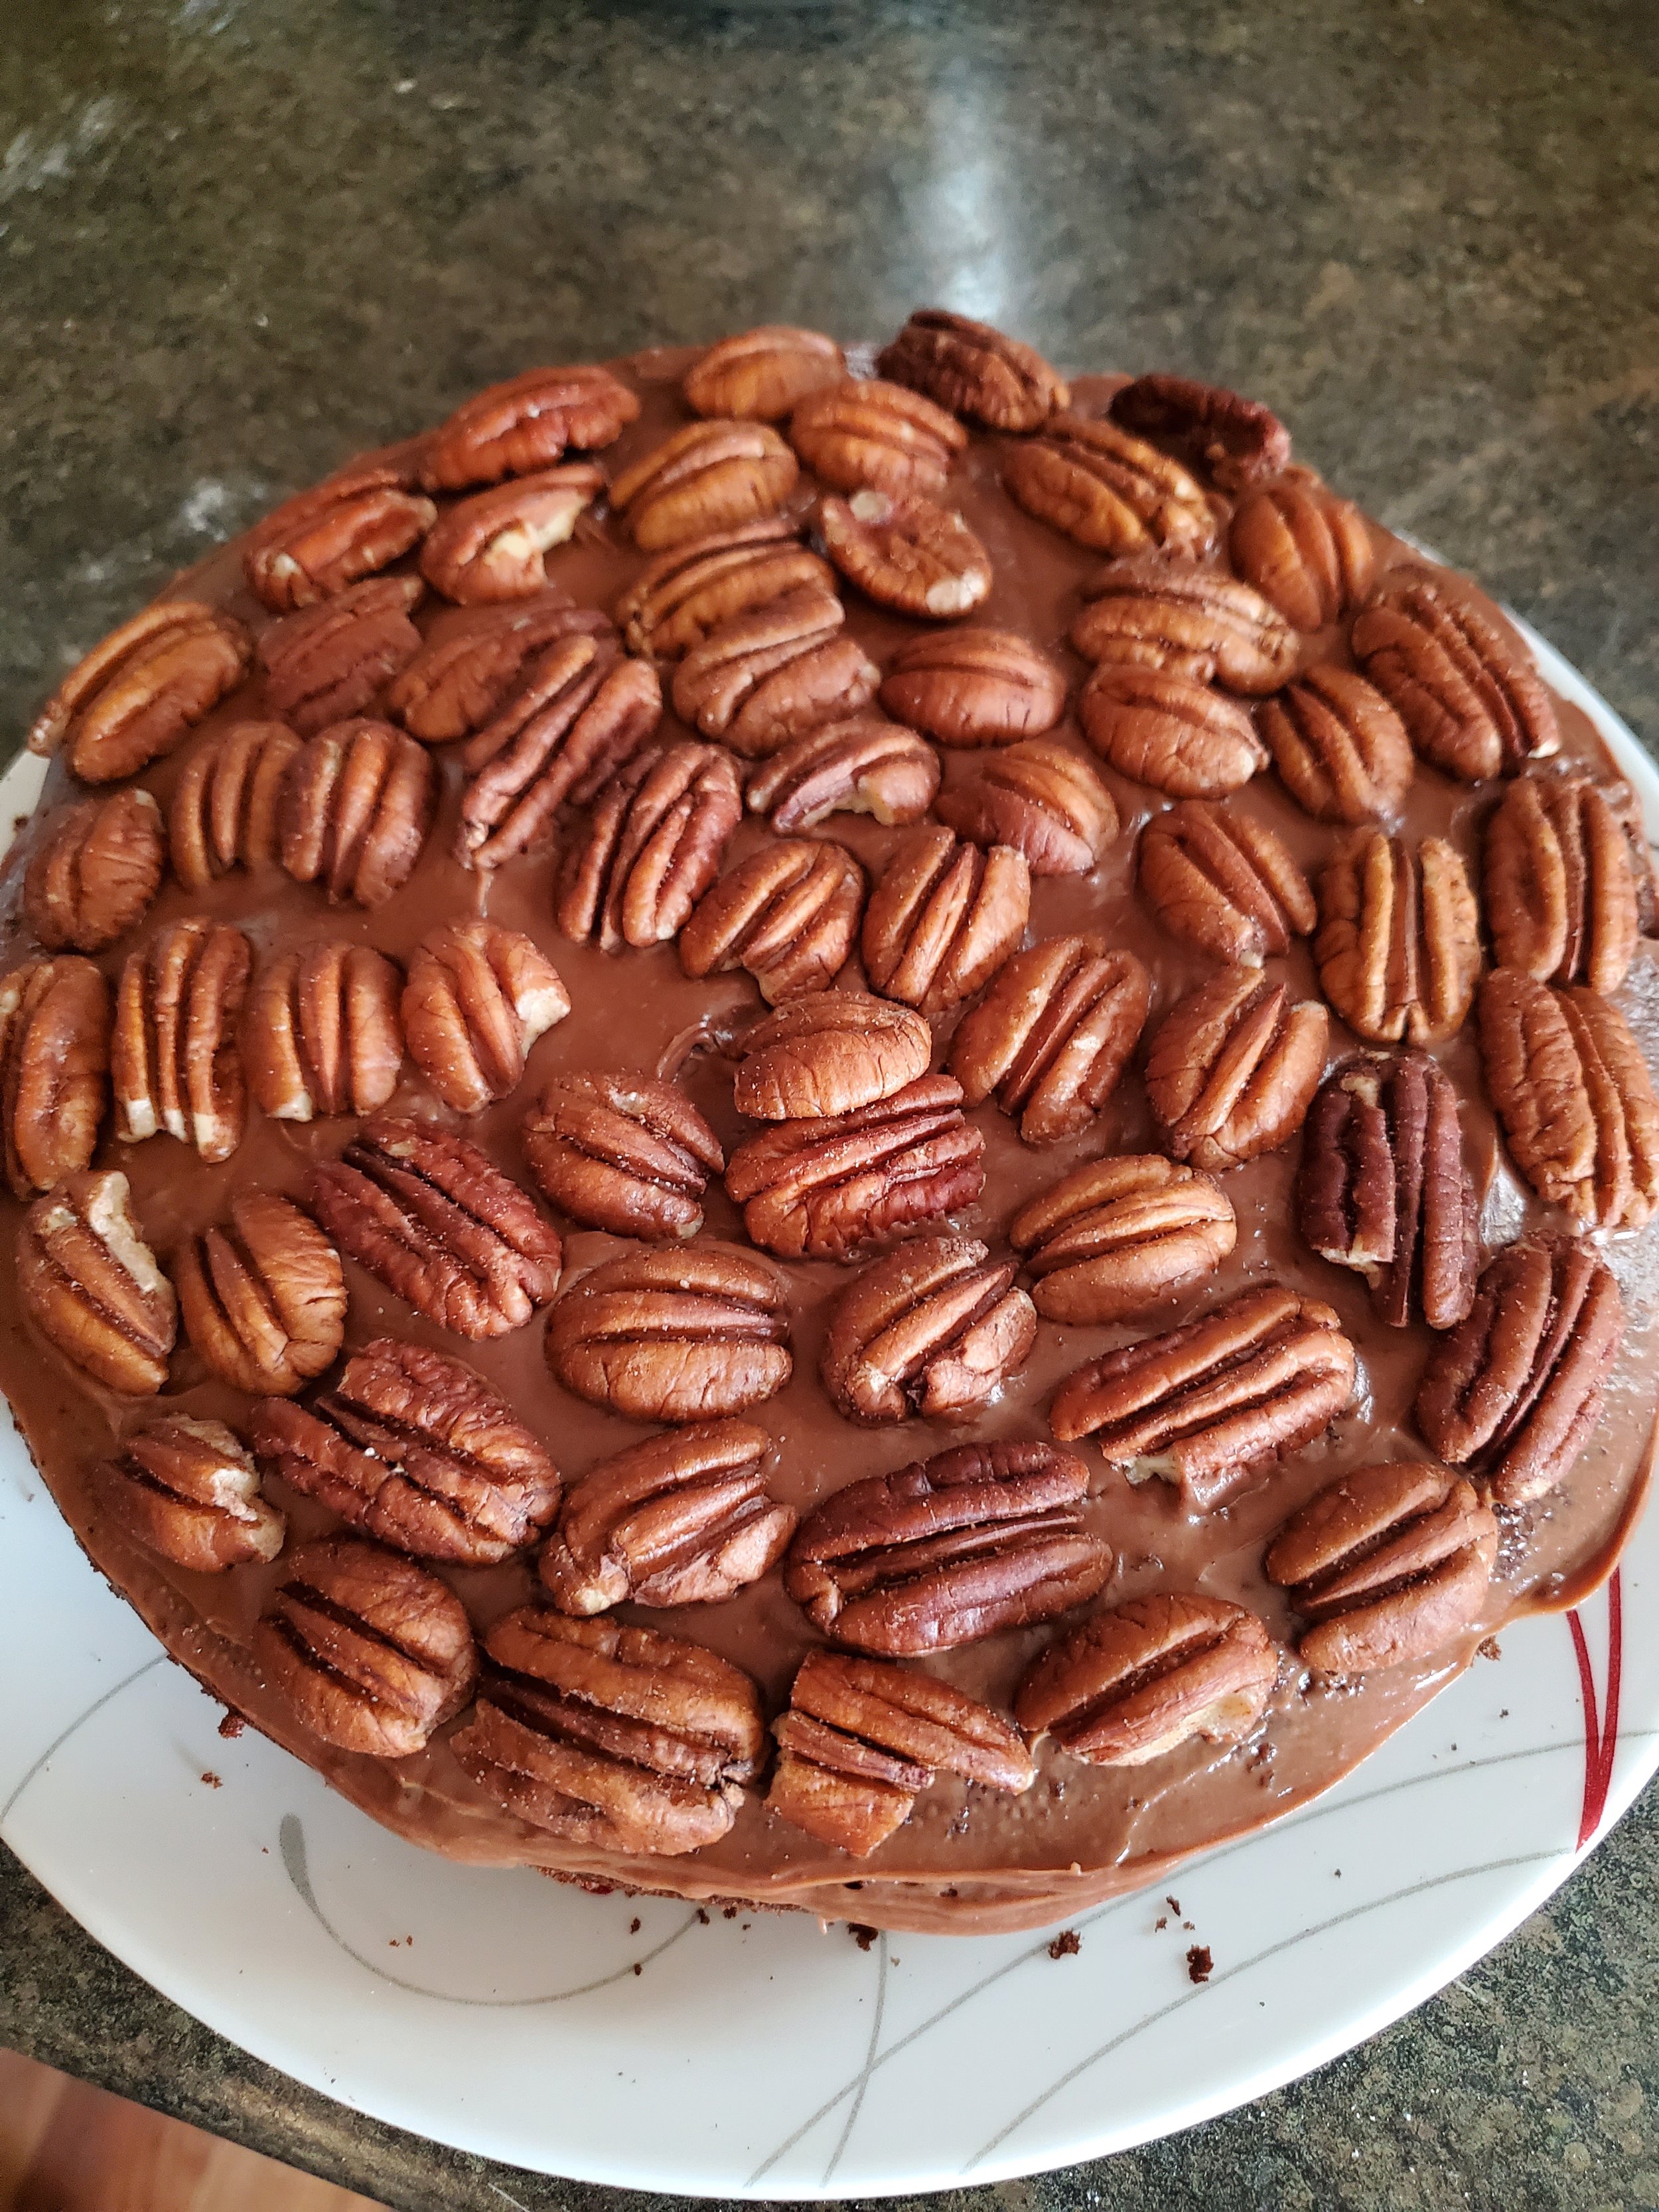
It’s almost time for the best day ever! No, we don’t mean Valentine’s Day, we’re talking about the day after, when all of the chocolate goes on sale! Now is the best time of year to snap up all sorts of delicious chocolates and make them into fun new desserts. This year, to celebrate, we made a layered chocolate pecan cake with frosting so rich and delicious you’ll have to force yourself to walk away.
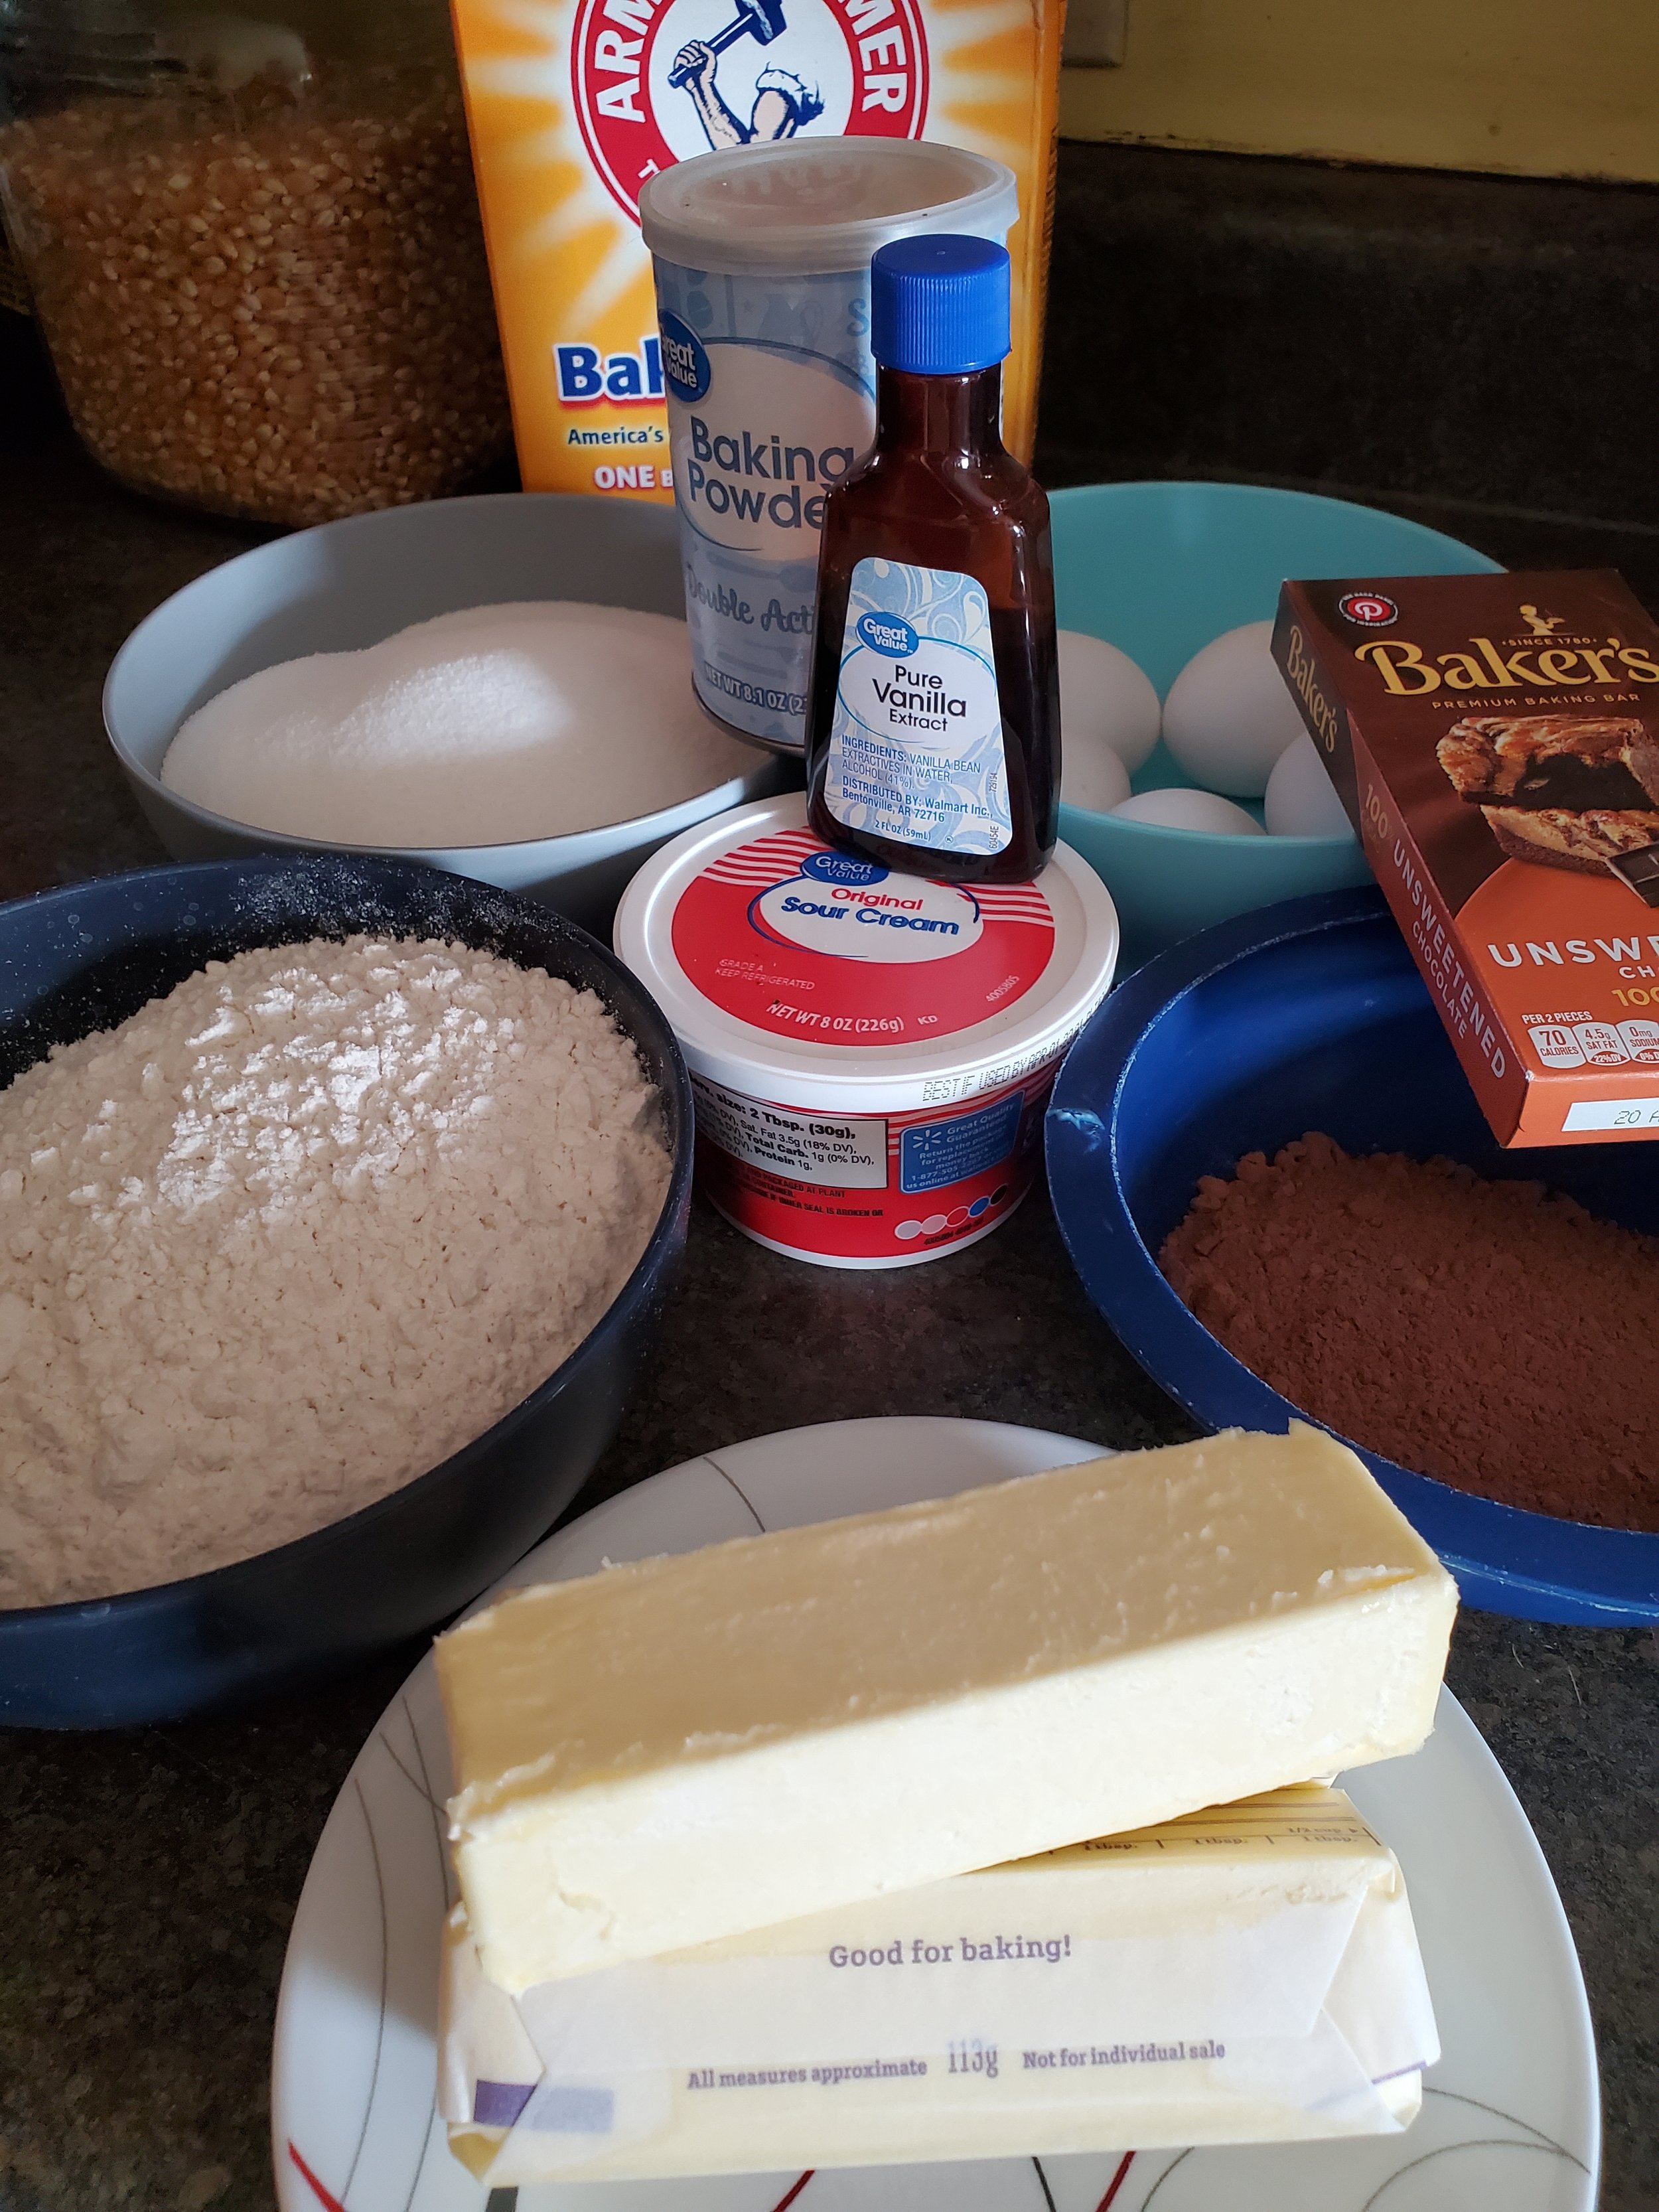
  • 4 ounces unsweetened chocolate

    ⅔ c unsweetened, non-alkalized American-style cocoa powder (normally we’re all for substitutions, but due to the chemical reactions, you need to get specifically this type of cocoa)

    1 ¼ tsp baking soda

    ¾ c boiling water

    1 ⅓ c unsifted cake flour

    1 c all-purpose flour

    ¾ tsp baking powder

    ¼ tsp salt + a pinch

    2 ½ sticks unsalted butter, at room temp

    5 large eggs

    1 c sour cream

    2 ½ tsp vanilla extract

  • ⅔ c heavy cream

    ⅔ c granulated sugar

    1 Tbsp unsalted butter

    1 ½ Tbsp light corn syrup

    1 tsp vanilla extract + 1 ½ Tbsp vanilla

    8oz milk chocolate chips

    2 ½ oz unsweetened chocolate

    11 oz of cream cheese

    2 - 2 ½ c powdered sugar

    1-2 tsp water

  • Two 9 Inch round cake pans

    Sifter

    Heavy-bottomed sauce pot

    Several small bowls for ingredients

    Parchment paper

    whisk

    Electric mixer or stand mixer

    Silicon spatula

    Icing knife

    Wire racks

Making the Cake 

Let’s start by taking your chocolate, for both the cake and the icing and getting them chopped up and set into their own bowls. You don’t have to dice them or make sure they’re even, what matters is breaking it up so that the melting can happen more easily later. 


Next  up, let’s prep the pans and the oven. Set one of your oven racks into the middle of the oven and set it to preheat to 350*F. While that’s ticking away, take up your two 9-inch, round cake pans and parchment paper. You’re going to want to generously grease the bottom and sides of the cake pans and then insert rounds of the parchment into the bottoms. Then grease the parchment as well. Once you’ve done that, take up a little bit of all-purpose flour and dust the pans. Tip the pans from side to side, making sure you have everything covered, and then tap out the excess over the trash. 


Next up, pop your unsweetened chocolate (the 4oz you need for the  cake, not the amount needed for the icing) into the microwave. Microwave it on high power for 20 seconds, remove it and stir. Continue this process back and forth until your chocolate is almost melted. Once you can see the melted edges, stir continuously and allow the residual heat to melt the chocolate the rest of the way through. 


In a medium bowl, stir together your cocoa powder and baking soda until well blended. Pour your boiling water over the mixture, stirring consistently. It’s going to bubble up, and that is the reaction you want which is going to make the cake light and fluffy and so tasty. Let that cool while we move on to mixing the ingredients. 


Take a sheet of parchment paper and lay it down on your counter and grab your sifting mesh. Sift together your flours over the paper.

In a separate large bowl, using a mixter on medium, beat your butter until it’s light and fluffy. You’ll need to scrape the sides down a few times as you, as the butter gets tossed everywhere by the mixer. Next, beat in one egg at a time, until just blended. Then add in your cocoa mixture and continue beating, still at medium, until the mixture is free of lumps. Again, you’ll need to scrape the sides down as you go. The mixture might look kind of curdled at this stage, it’s ok. 


Now let’s grab the chocolate we melted earlier. If it’s still warm and runny, that’s great! If not, pop it back into the microwave for a few seconds until it is nice and fluid again. Then add it into the batter until it’s smooth and fully incorporated. 


Switch the mixer down to low and beat in half of your dry ingredients. Once those are mixed in, add both the sour cream and the vanilla. Mix that together for 1 minute, scraping the sides of the bowl down as needed. Then beat in the rest of the dry ingredients just until the batter becomes smooth. 


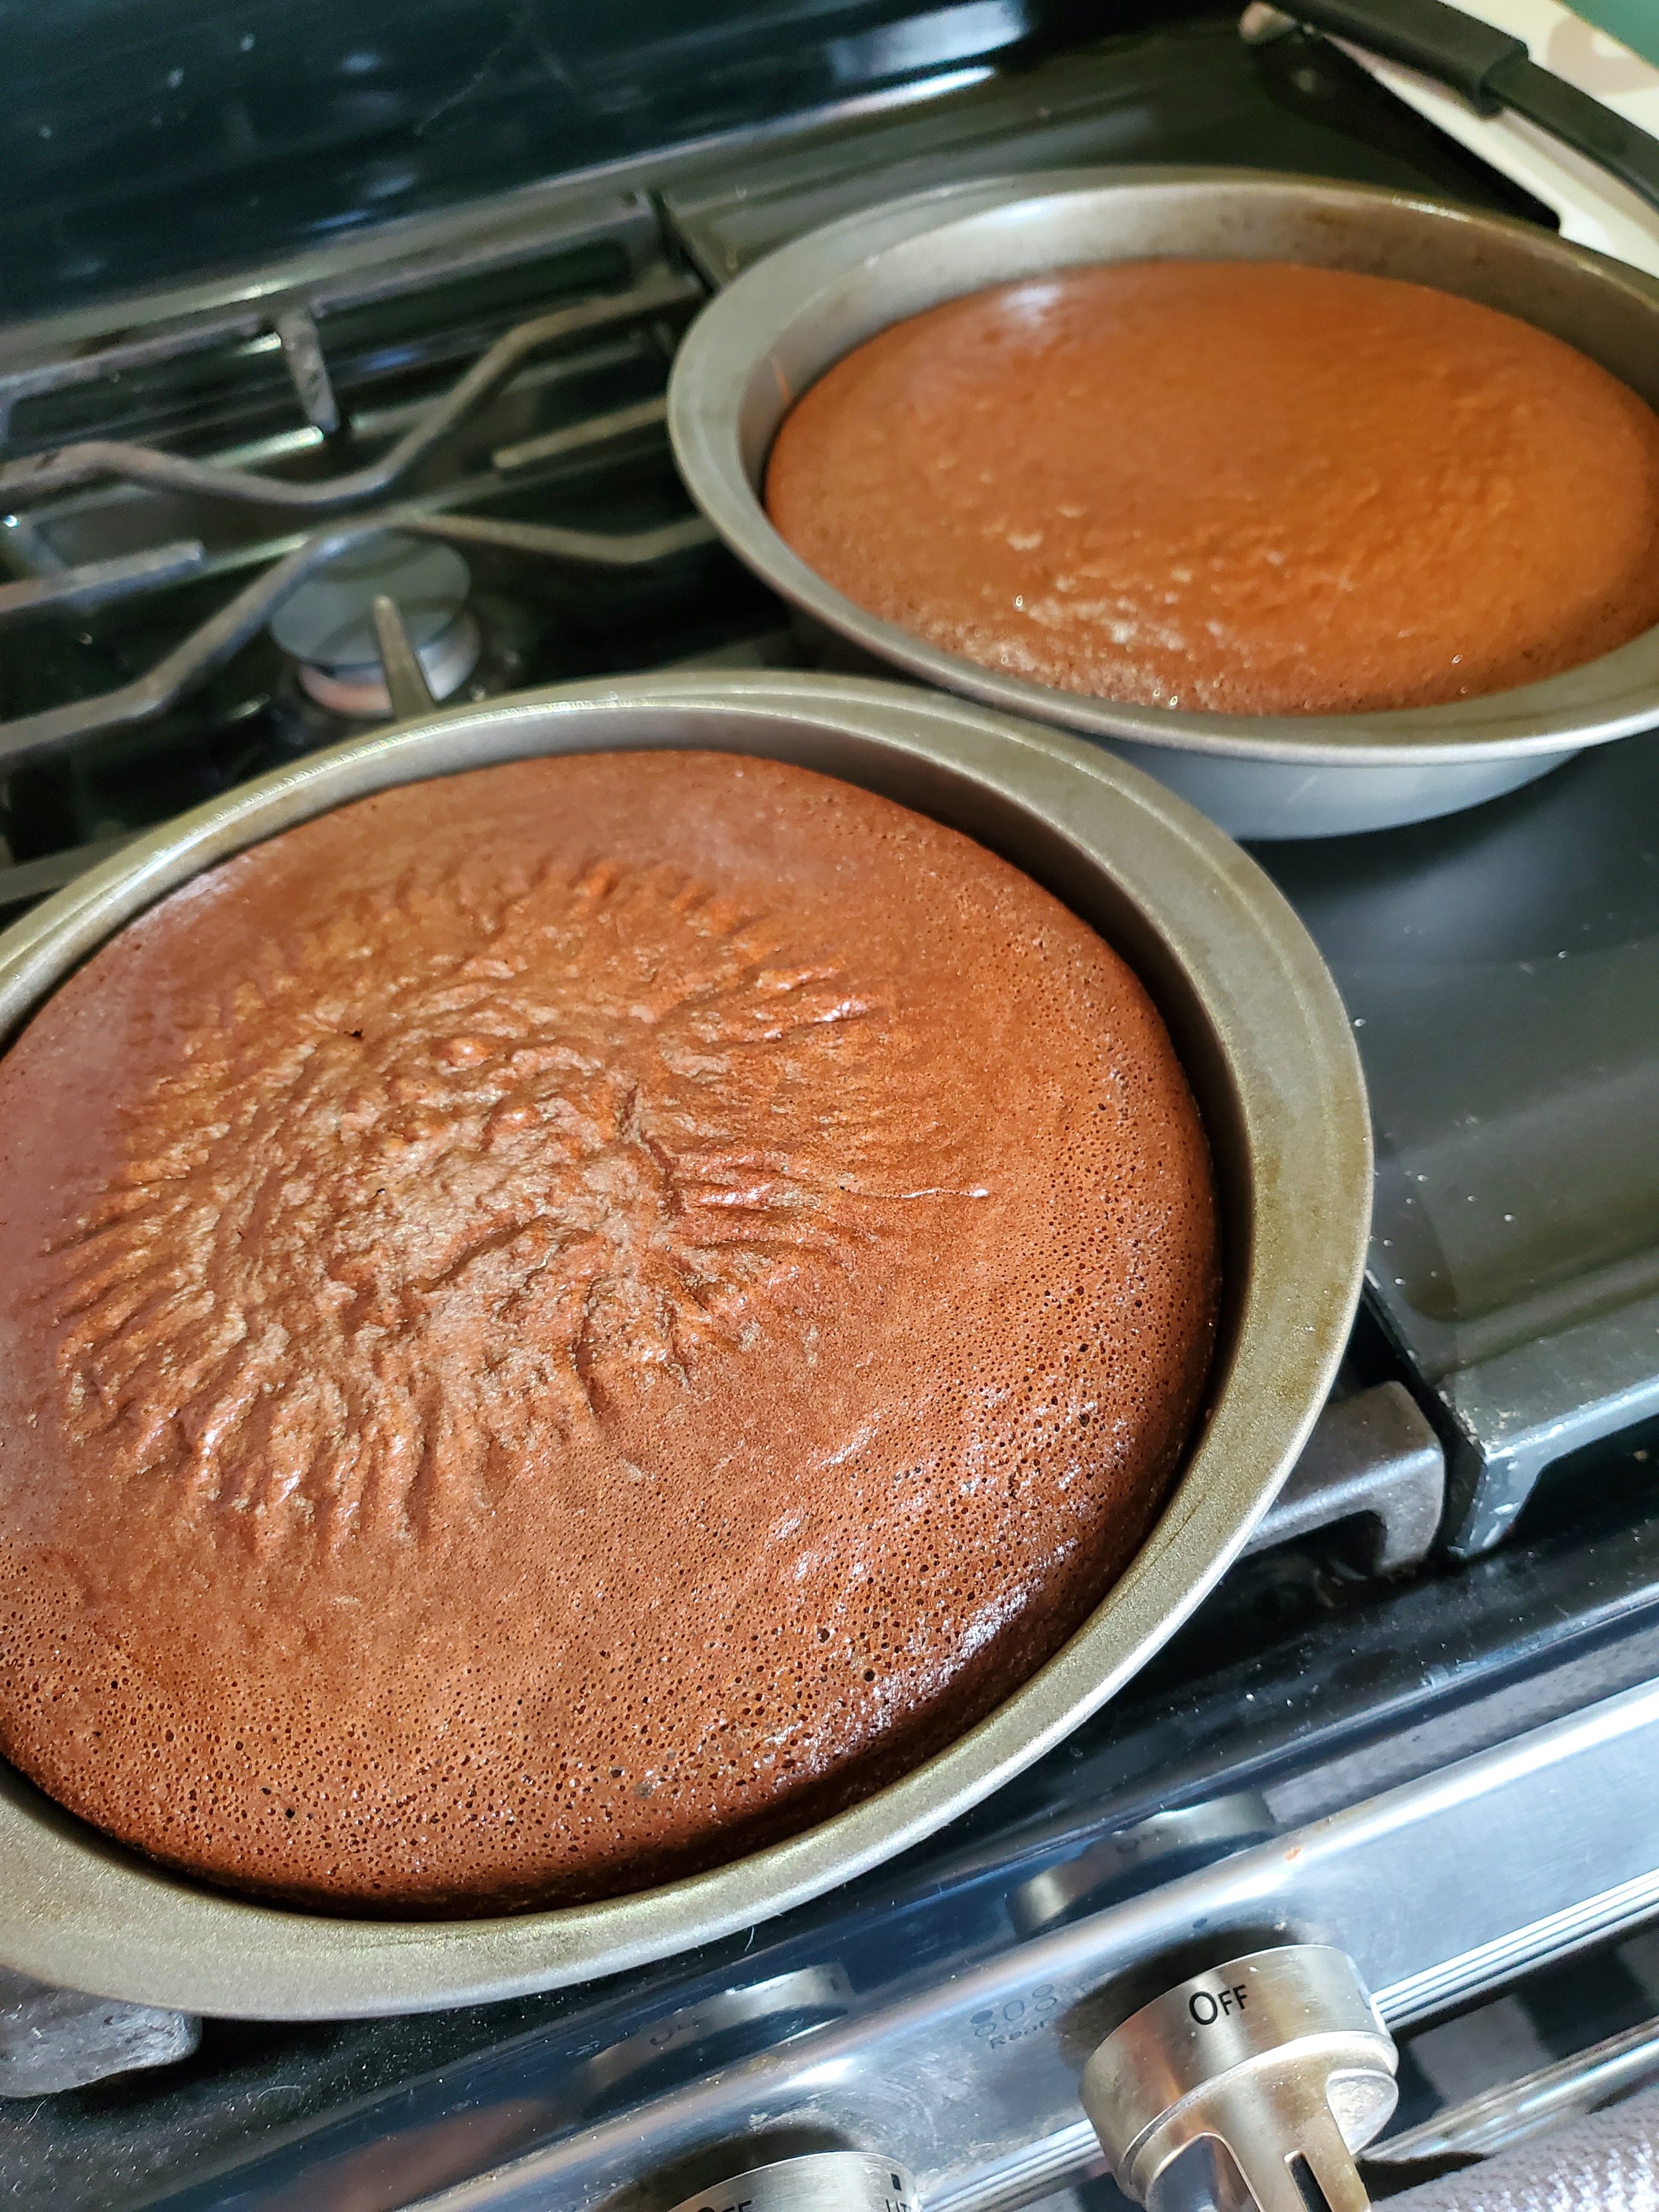
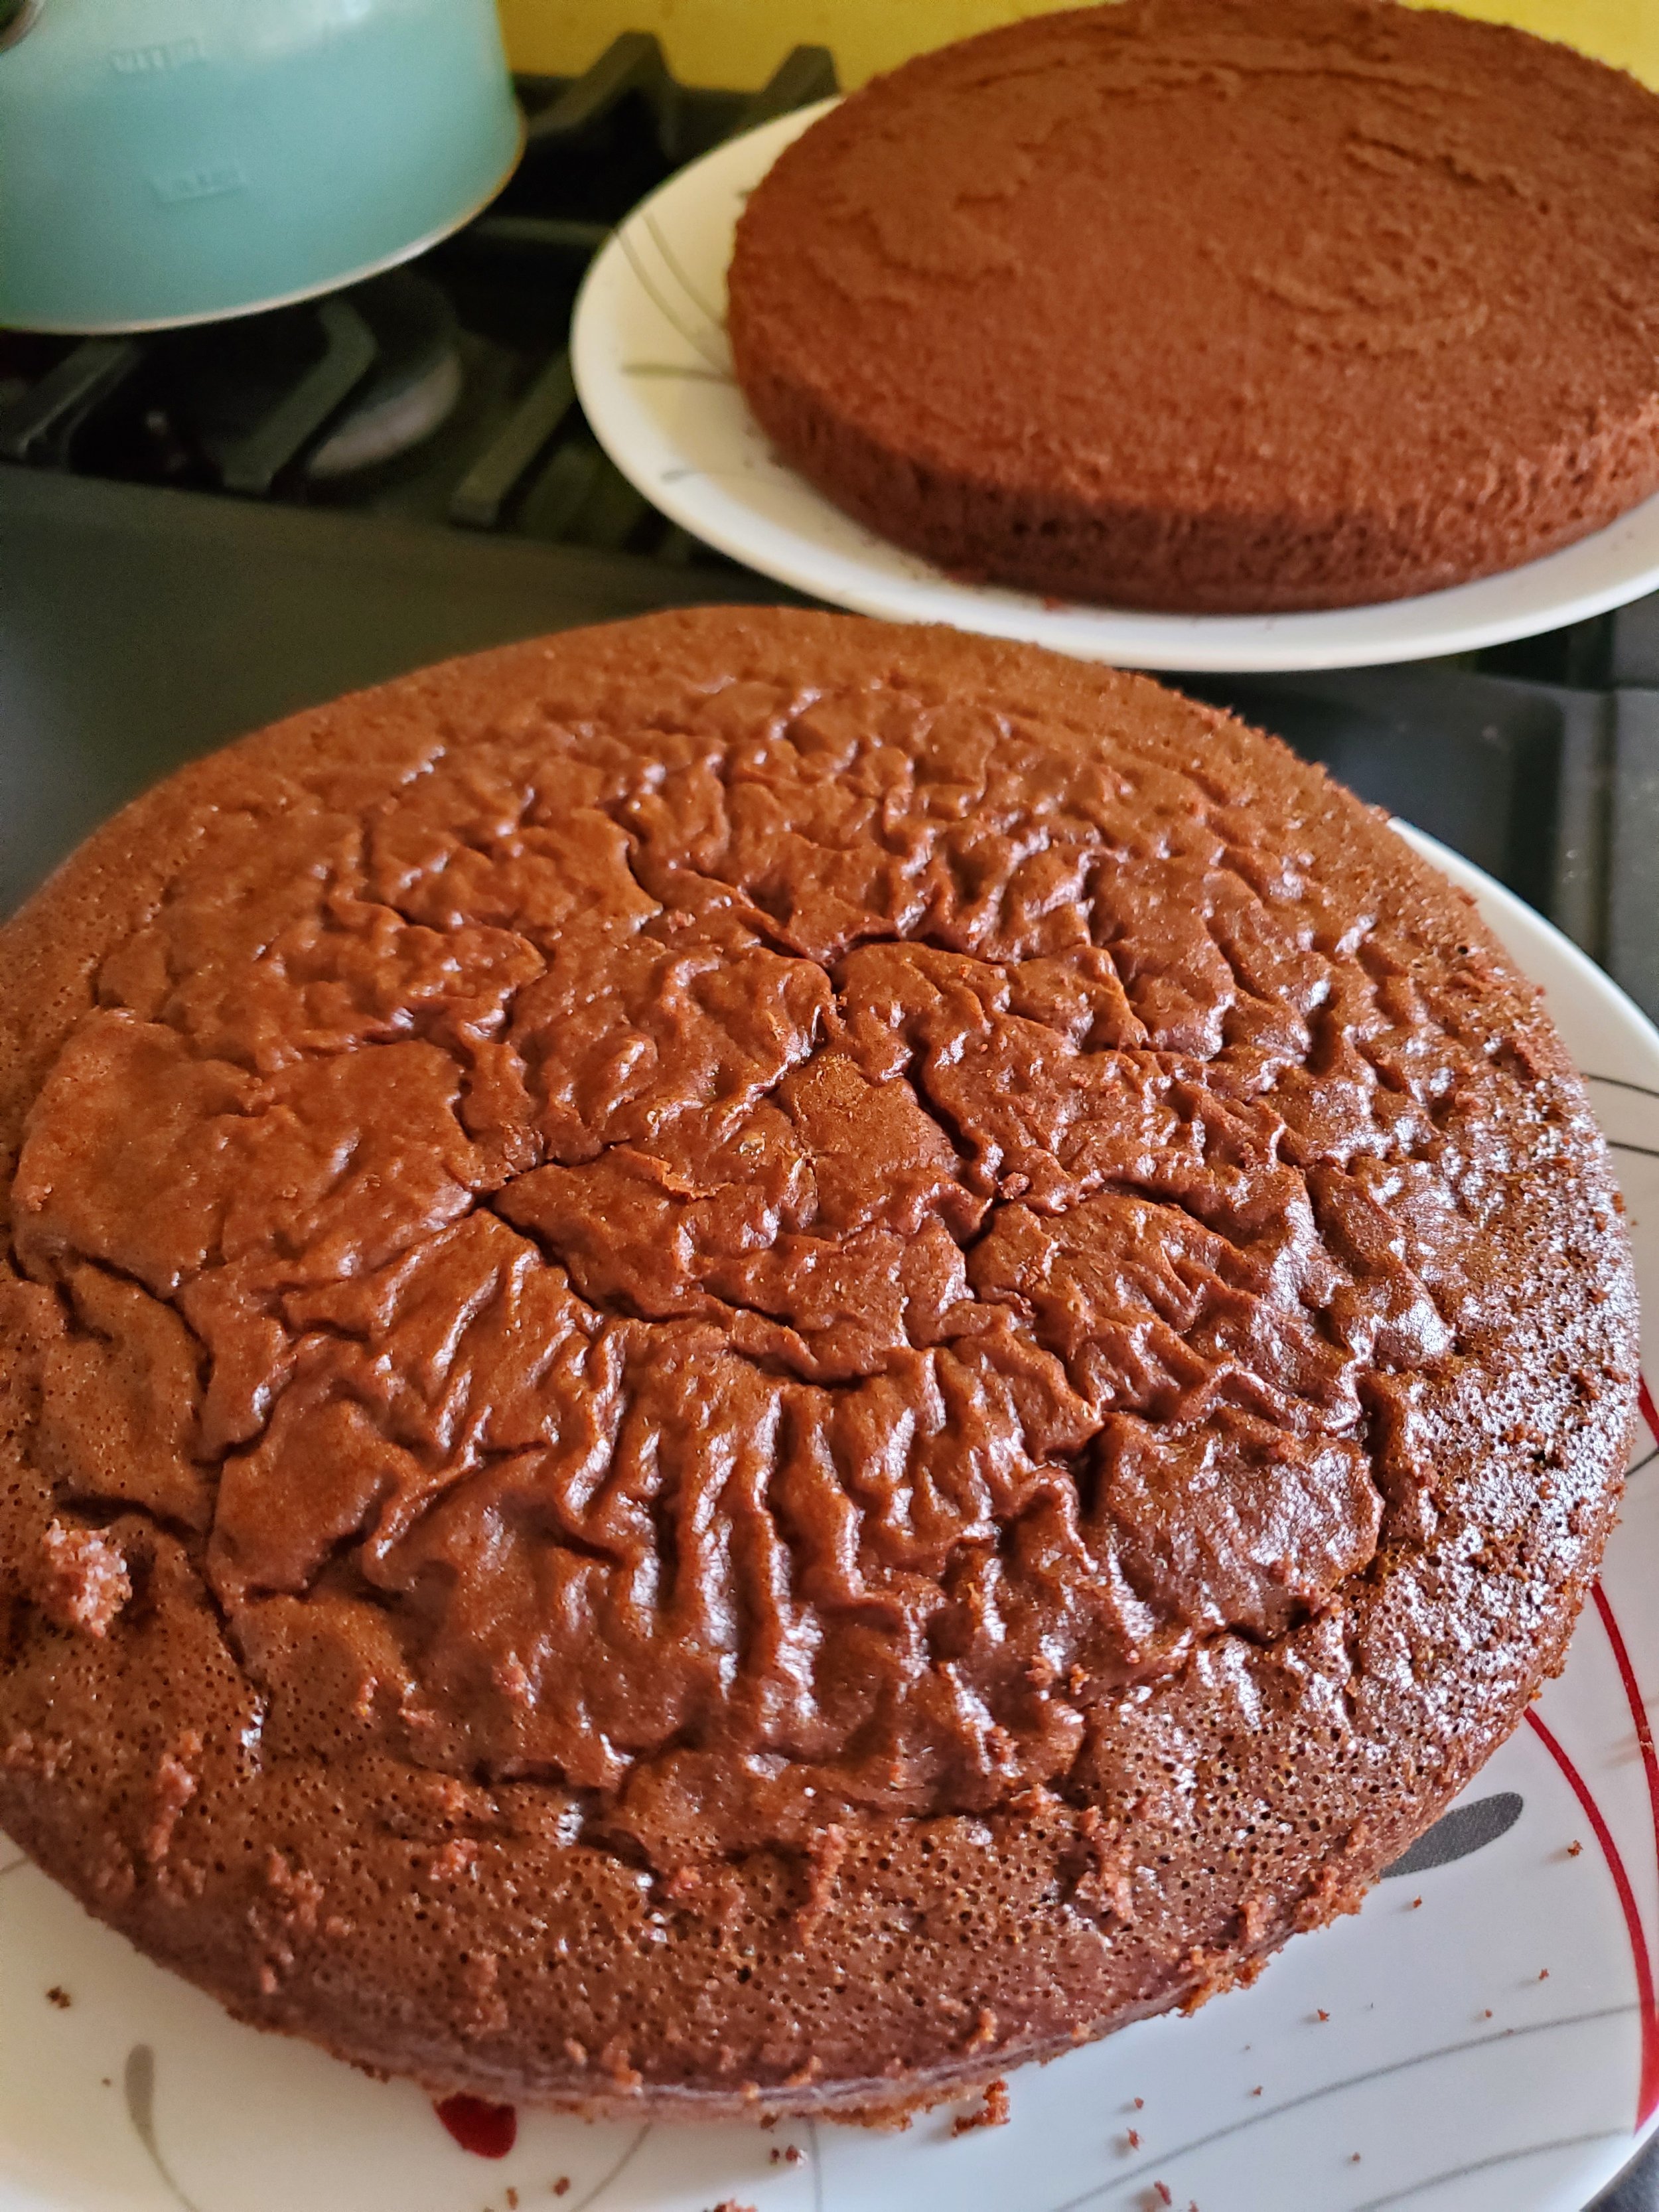
Split the batter between the pans, using the  back of a spoon to spread it to the edges. Back it in the oven for 25 to 35 minutes or until a toothpick inserted into the center comes out clean, but still moist and the cakes are starting to pull away from the sides of the pan. Transfer the pans over to a wire rack and let them cool completely. (Don’t do what we did and make the icing at this time.) 


When the cakes are fully cooled, carefully run a knife around the side of the pans and under the parchment. Go all the way around and then rap the pan on the counter to loosen the parchment from the bottom. Grab a plate and holding it tight against the top of the plan, flip the cake onto the plate and remove the paper. Once both cakes are out of their pans, give them a few more minutes to cool. 


Making the Frosting


Now that your cakes are on their way to being completely cool, it’s time to make the icing!

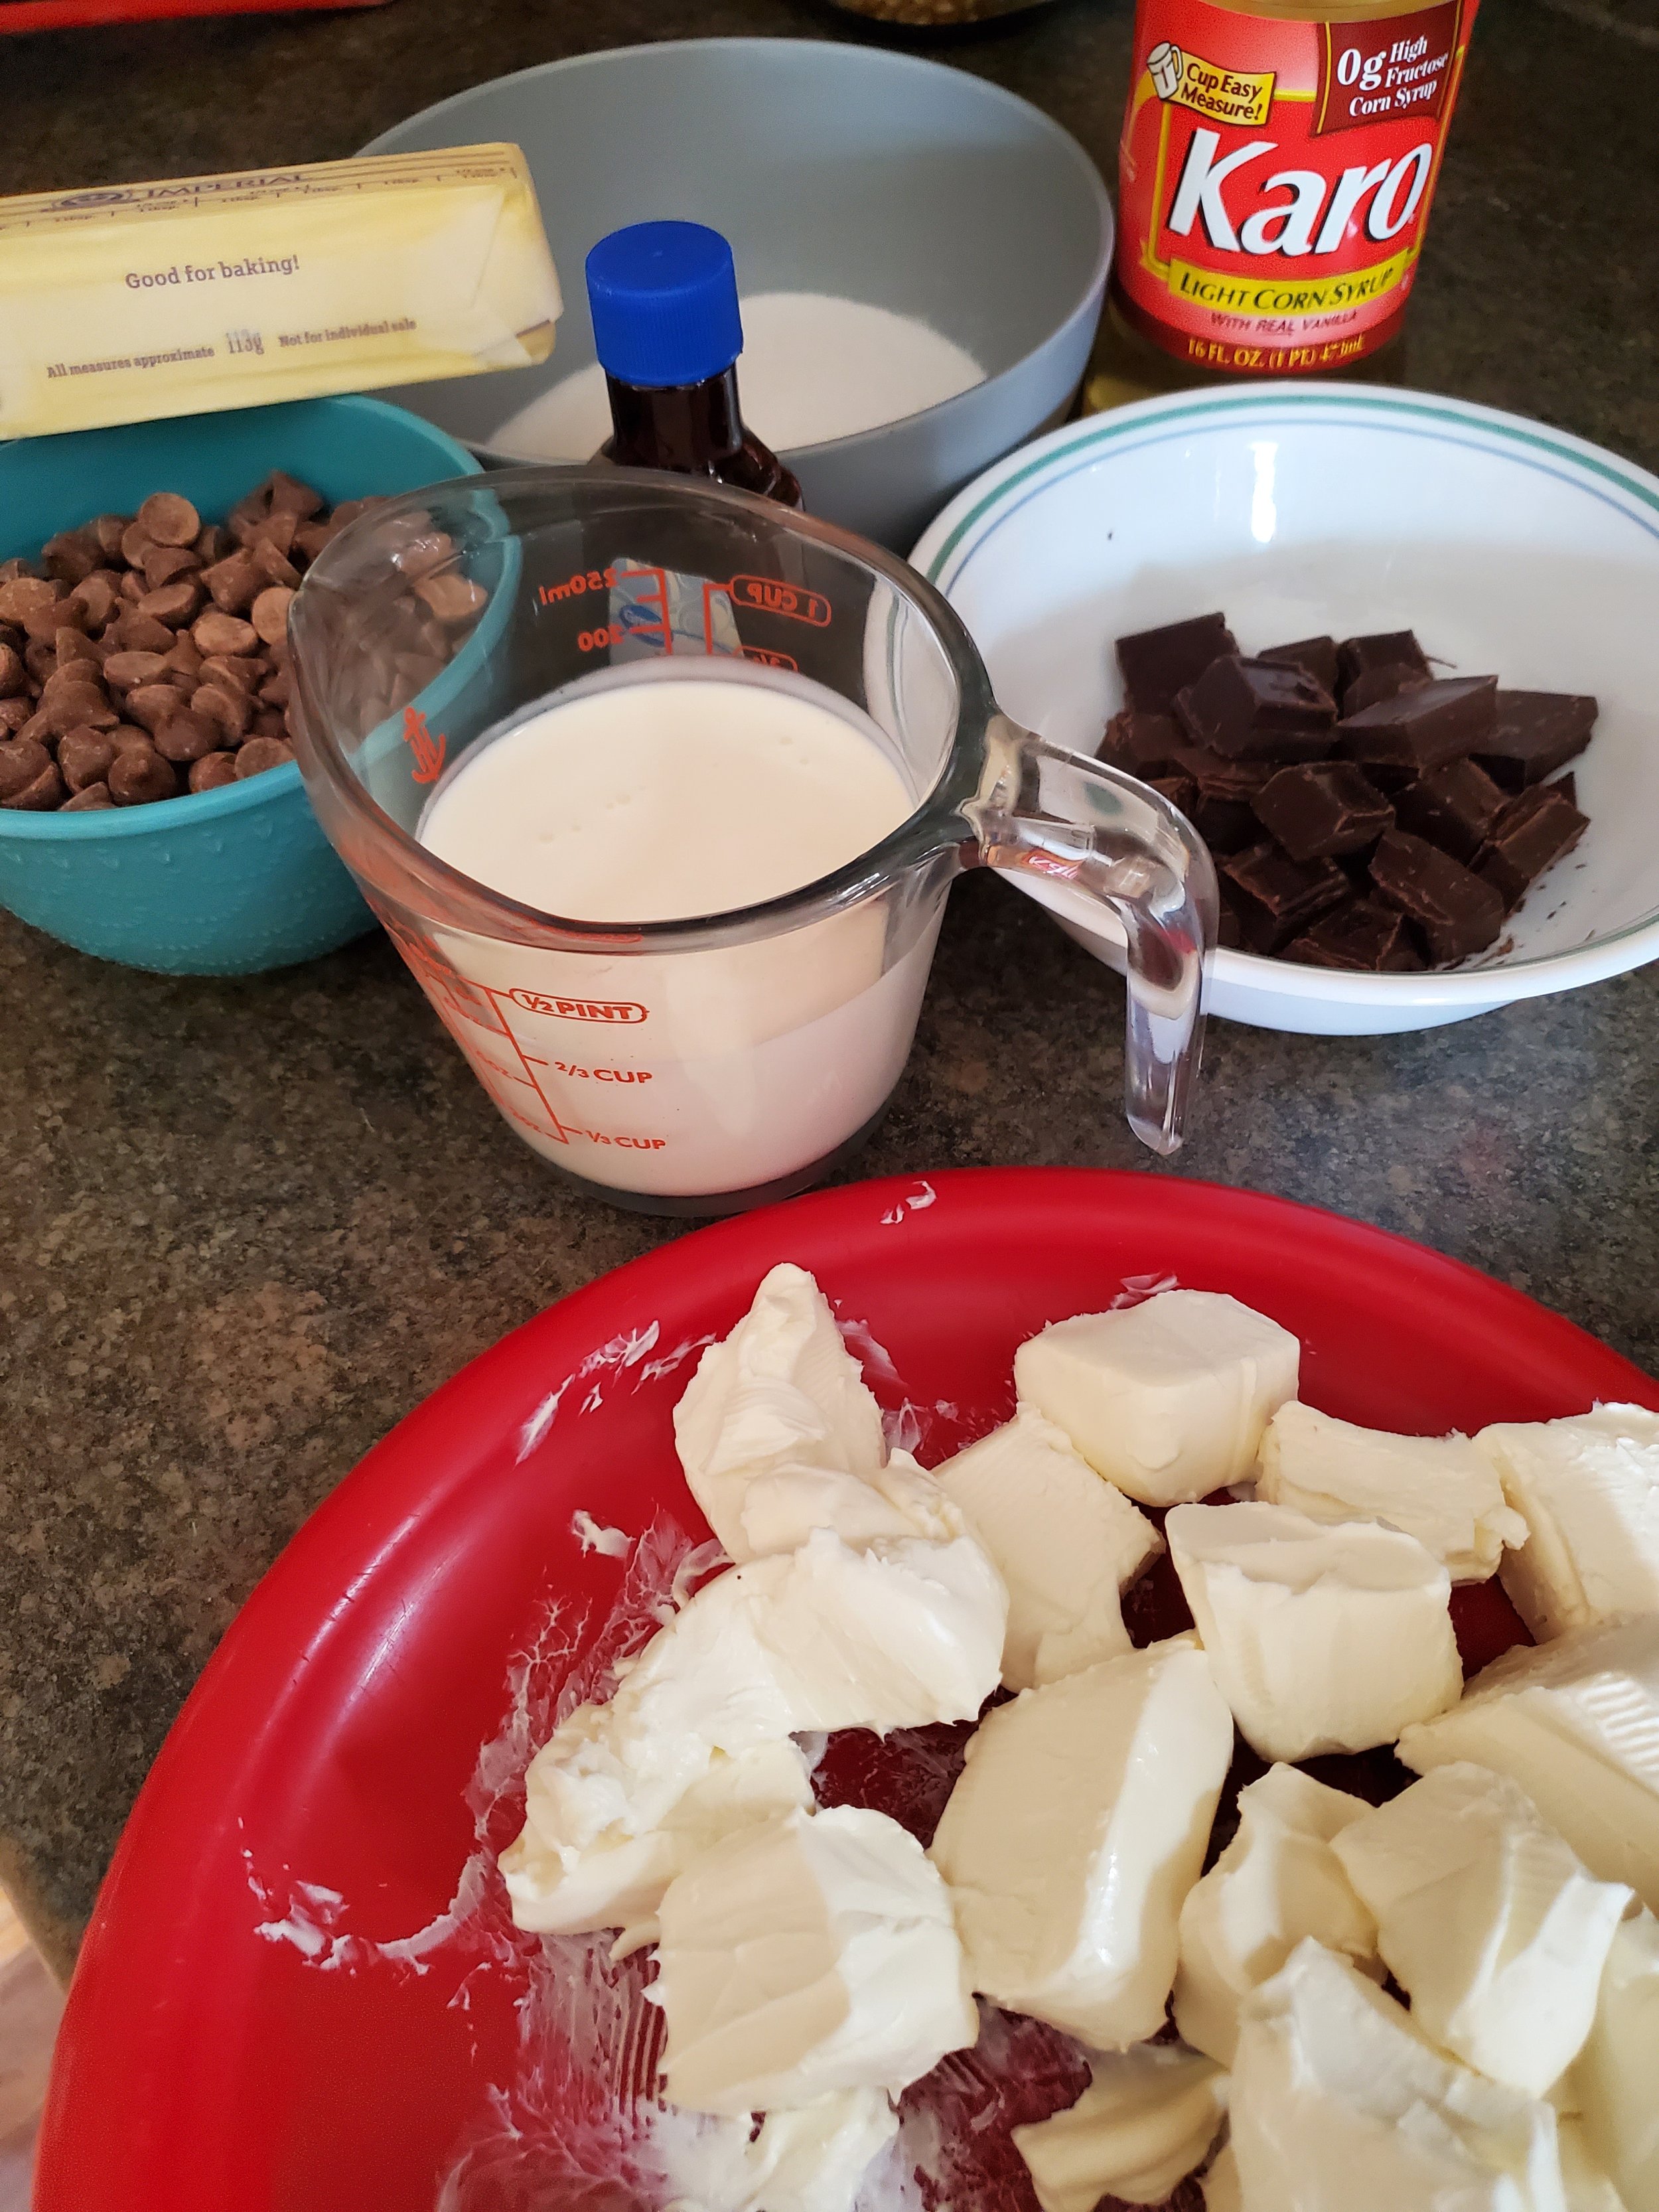
Take your 2-quart saucepan and put that on the stove, over medium-high heat. You’re going to add in, in order, your butter,cream, granulated sugar and then the corn syrup. (it’s best to do this quickly so nothing scorches, but that’s also why the butter goes in first.) Stir consistently while everything bubbles and melts and begins to blend. You can wash down the sides of the pan using a pastry brush in warm water, although we found this to be difficult. 


Once you’ve brought it up to a boil, keep it there for 3 minutes, stirring constantly. When the 3 minutes are up, remove it from the heat, add in the vanilla mixture and your chocolate until they completely melt. (It’s ok if they look slightly separated at this point.) 


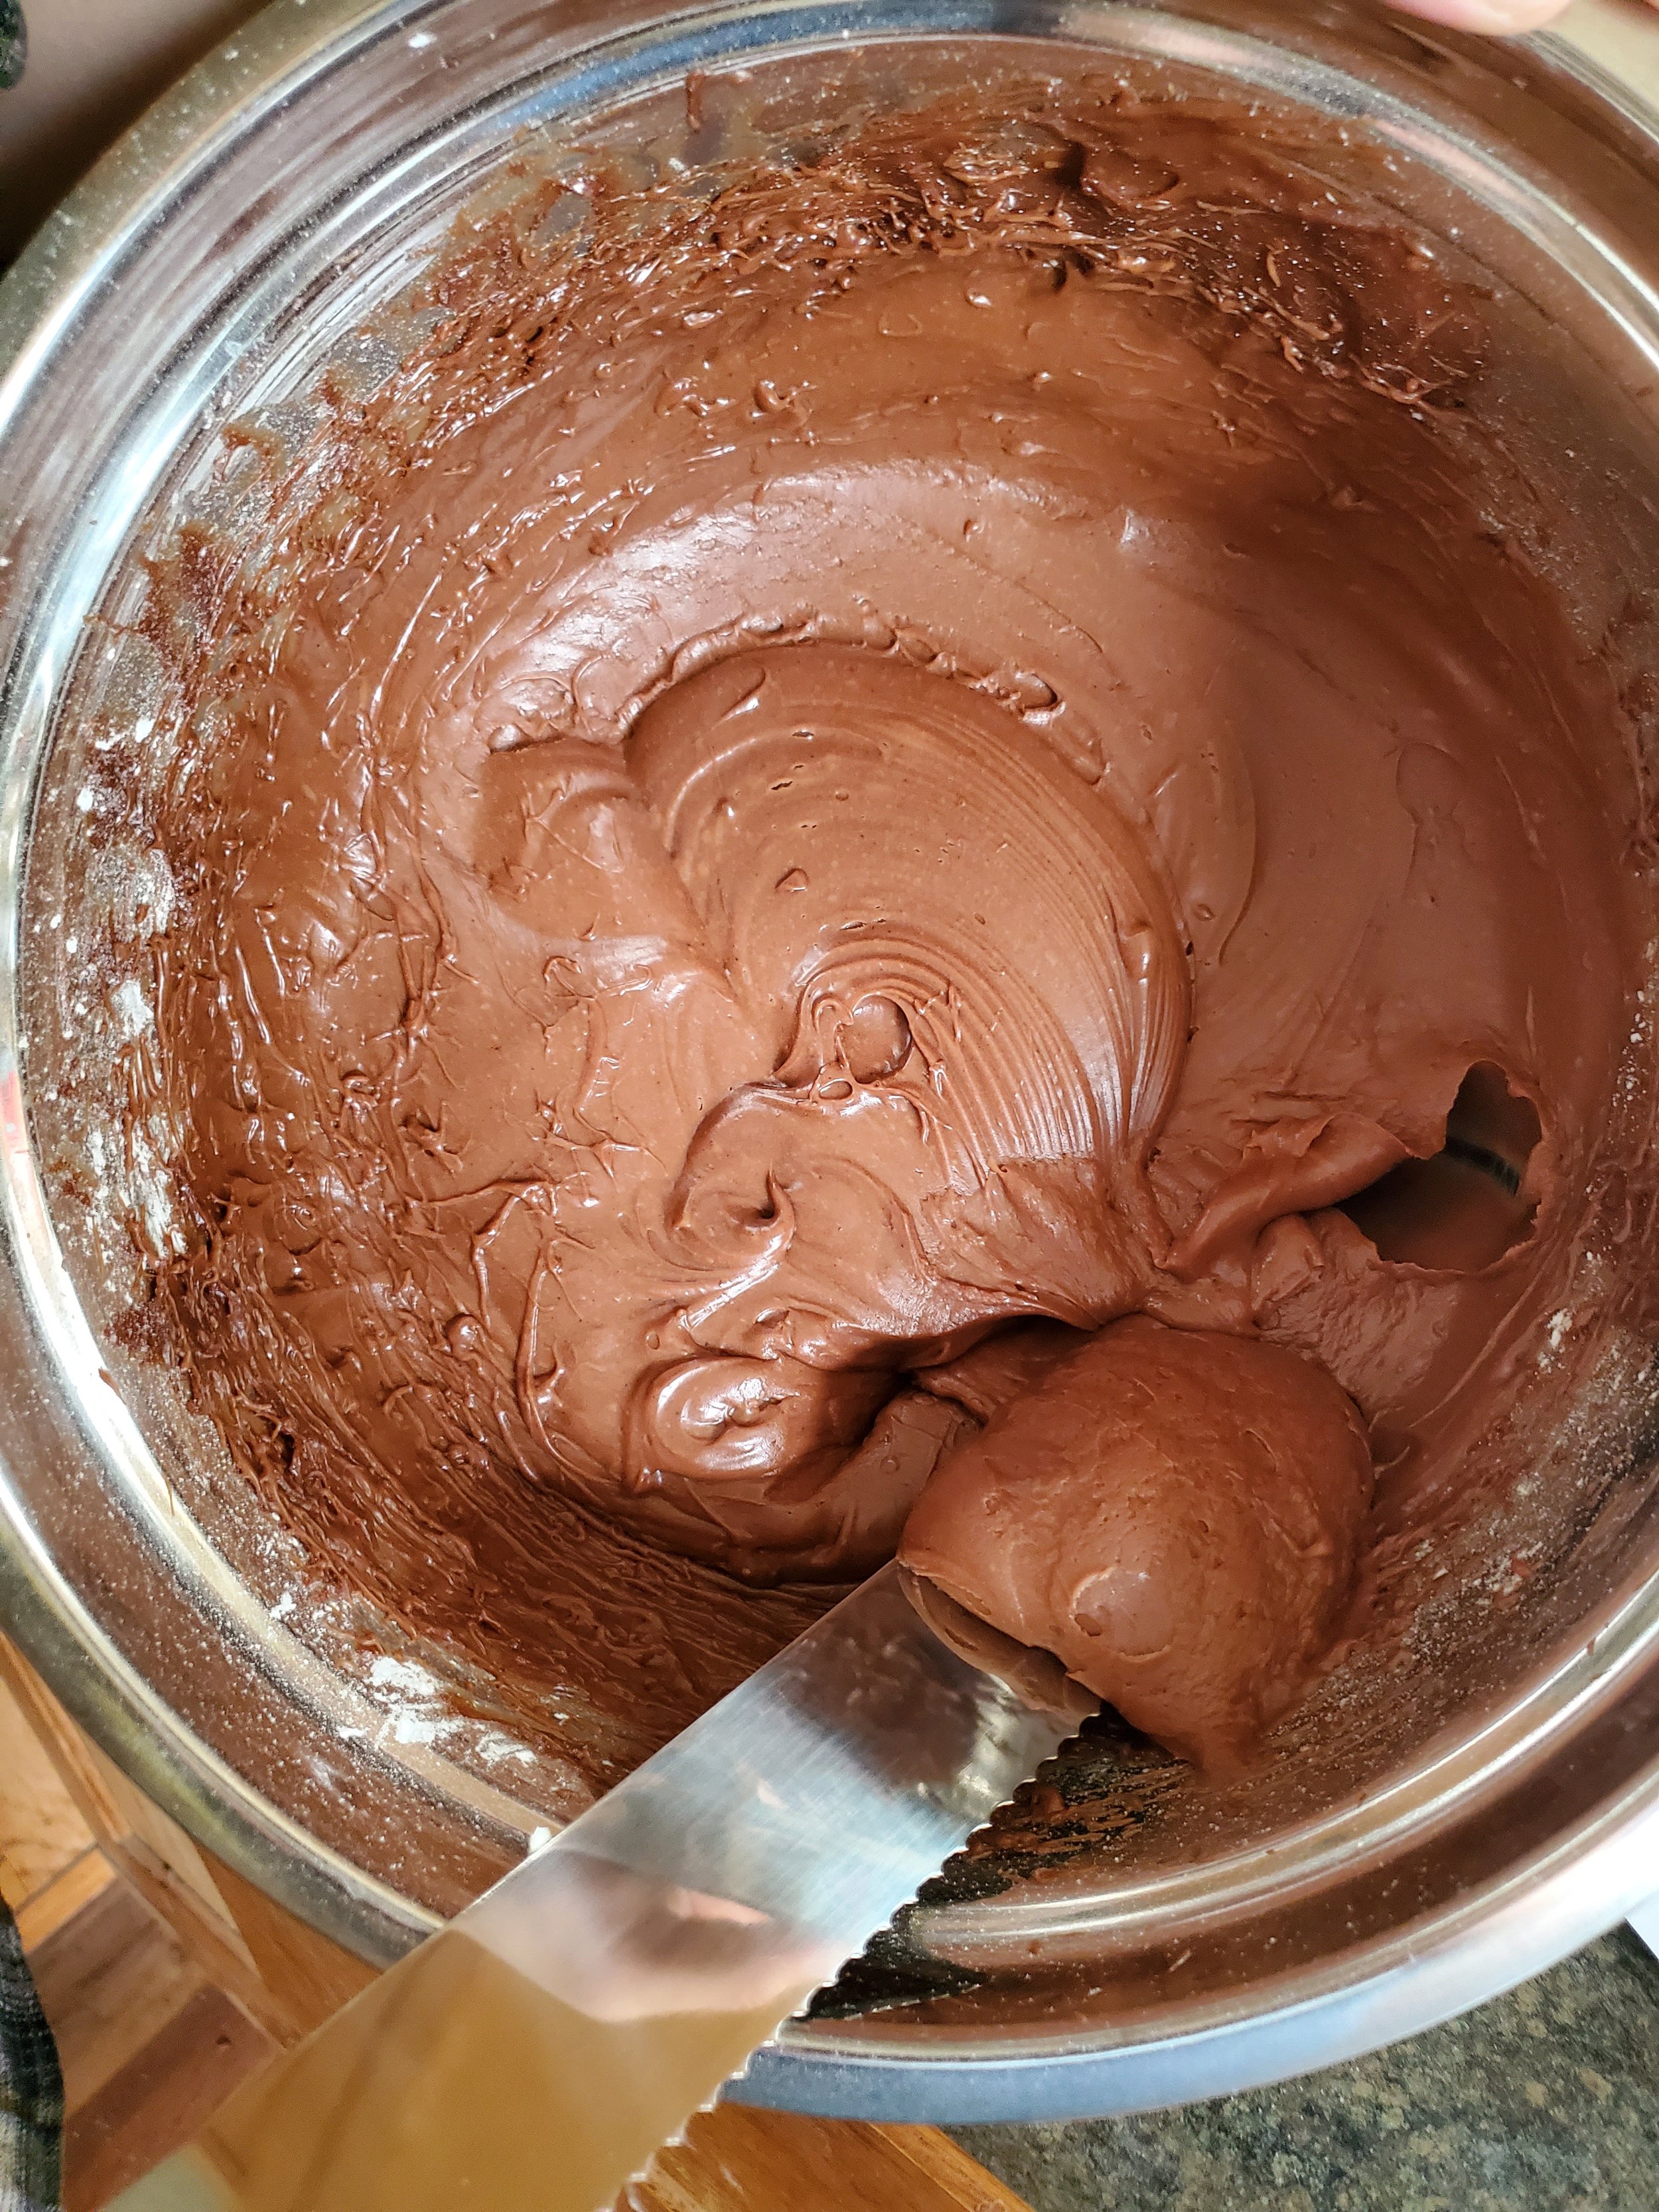
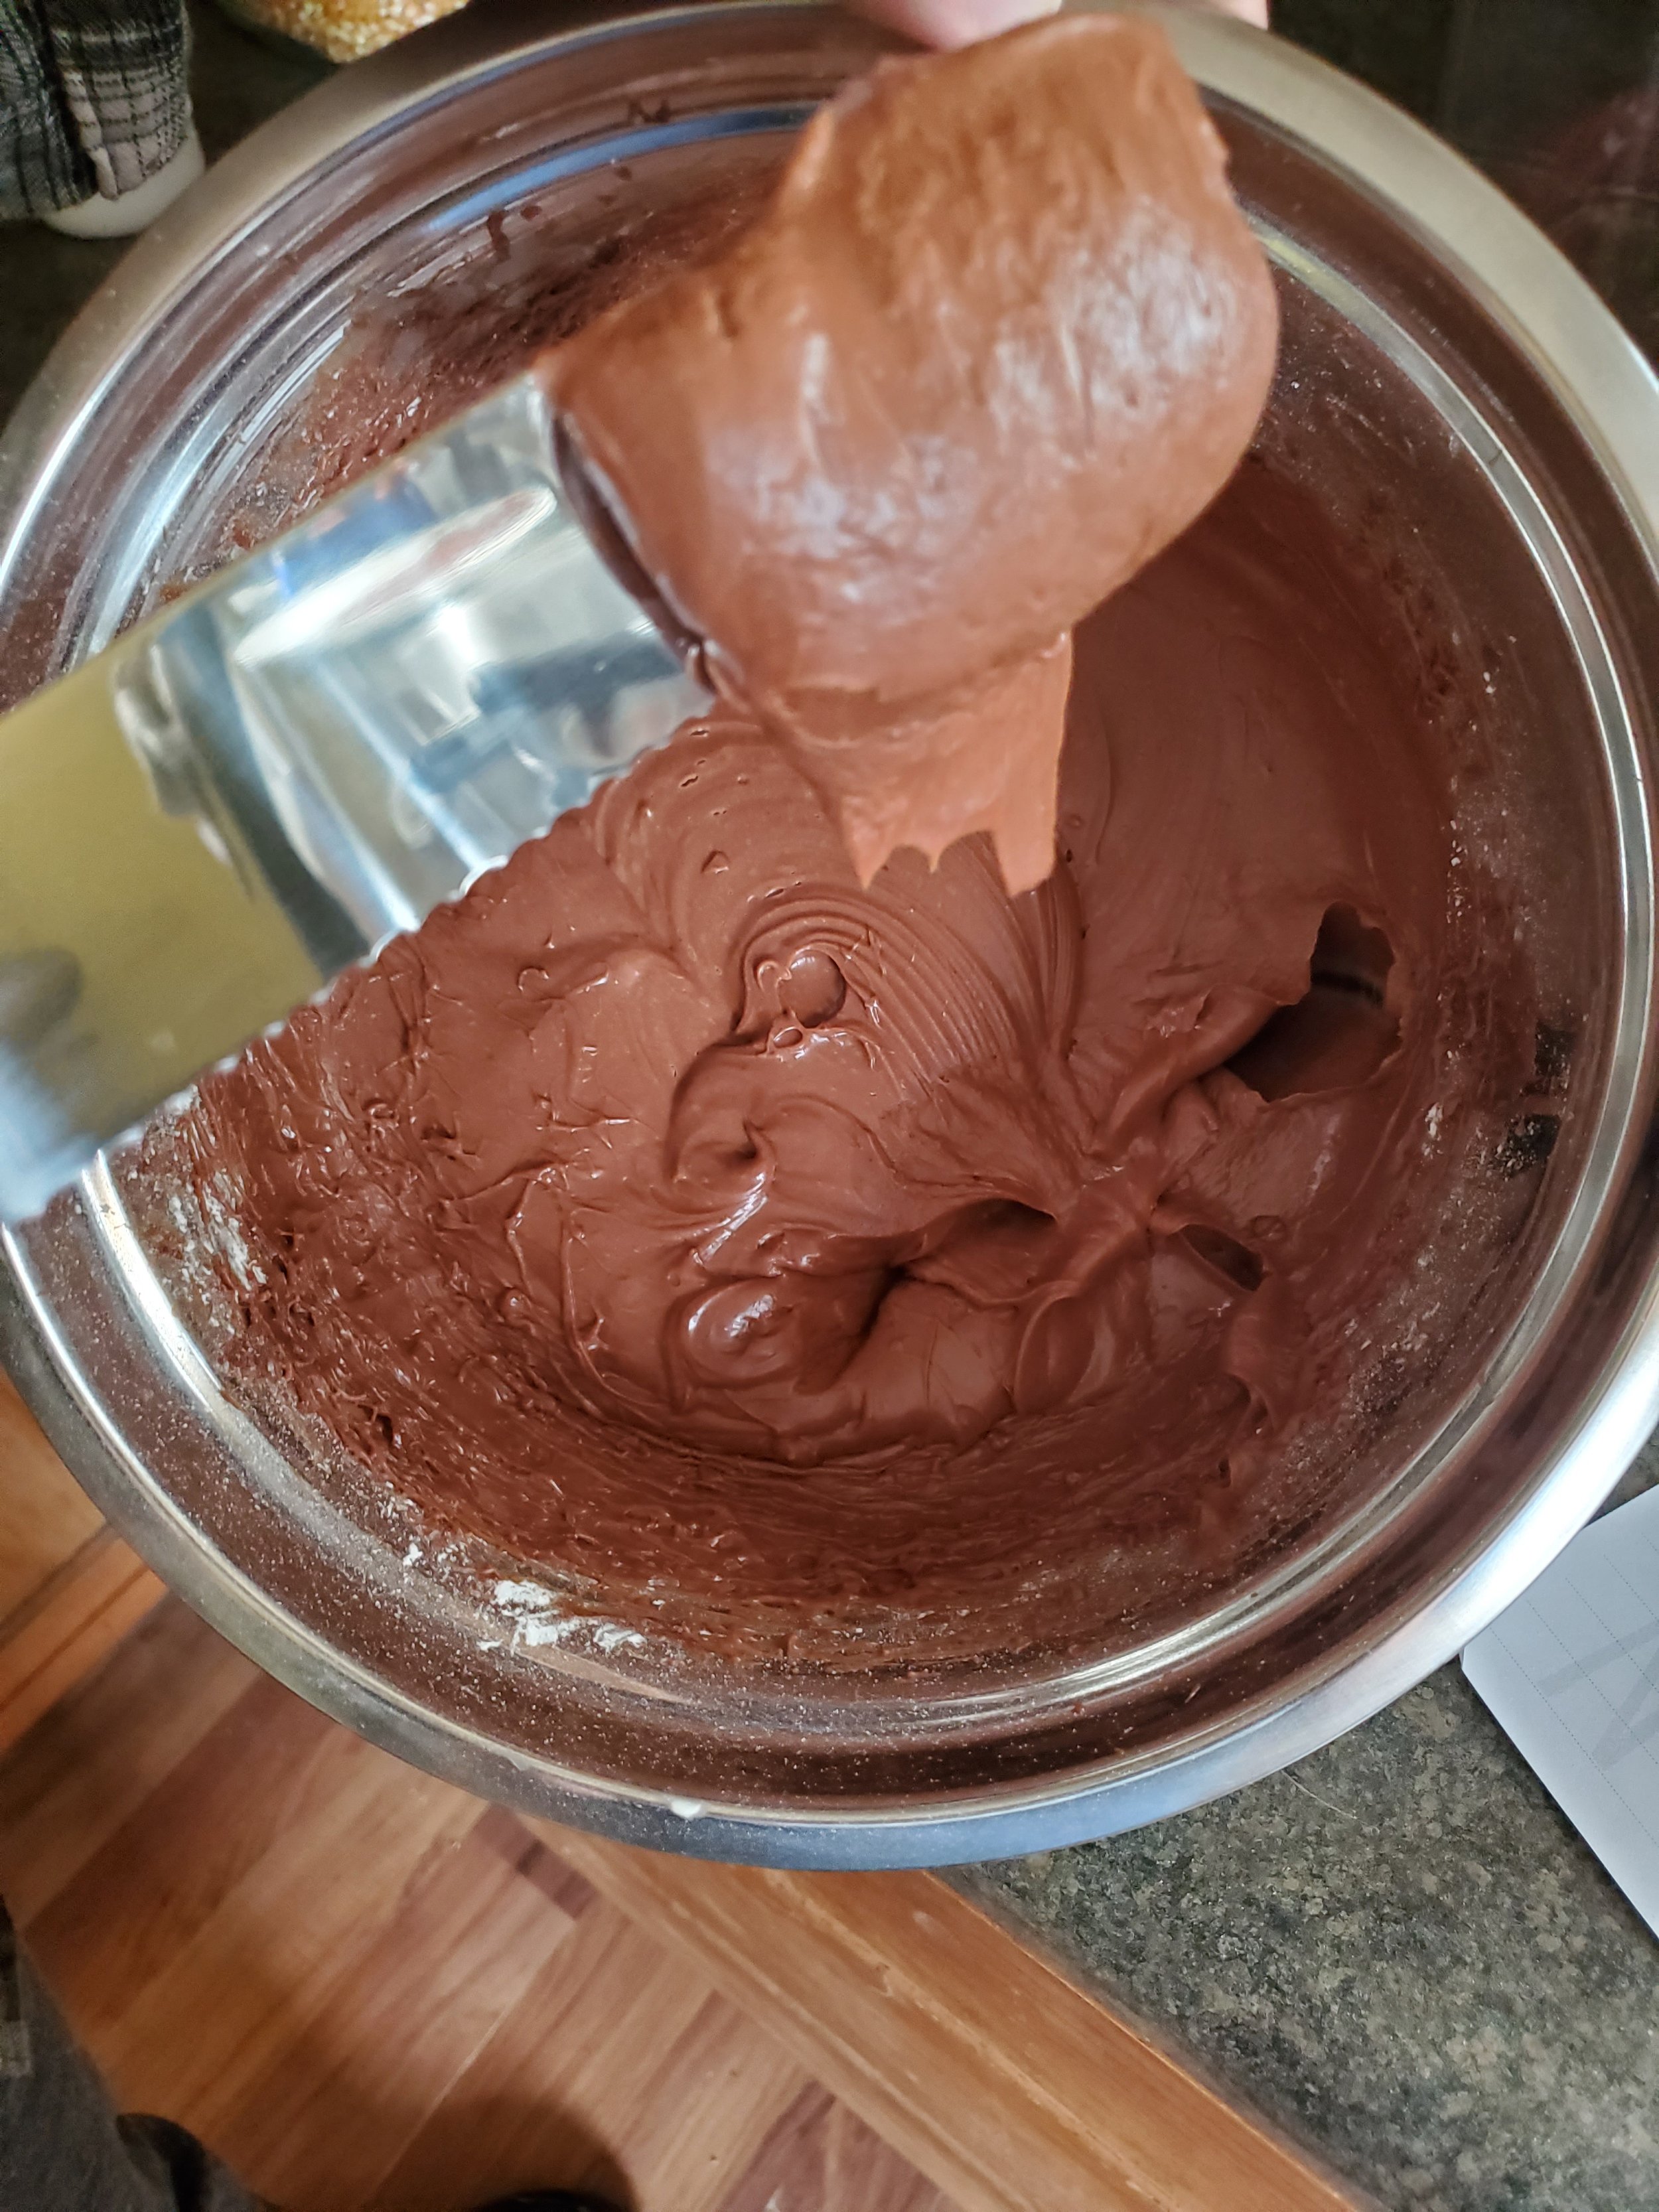
Transfer the mixture to a large bowl and grab your mixer again. Turn it on to low speed and beat in your cream cheese, one chunk at a time. Continue beating until all of the cream cheese is mixed in, scraping down the sides as needed. 


Next up, add in one cup of powdered sugar at a time, beating just to incorporated each time. Now raise the speed to medium-low and beat until the icing is completely smooth, approximately 1-2 minutes. It should be cool to the touch at this point.

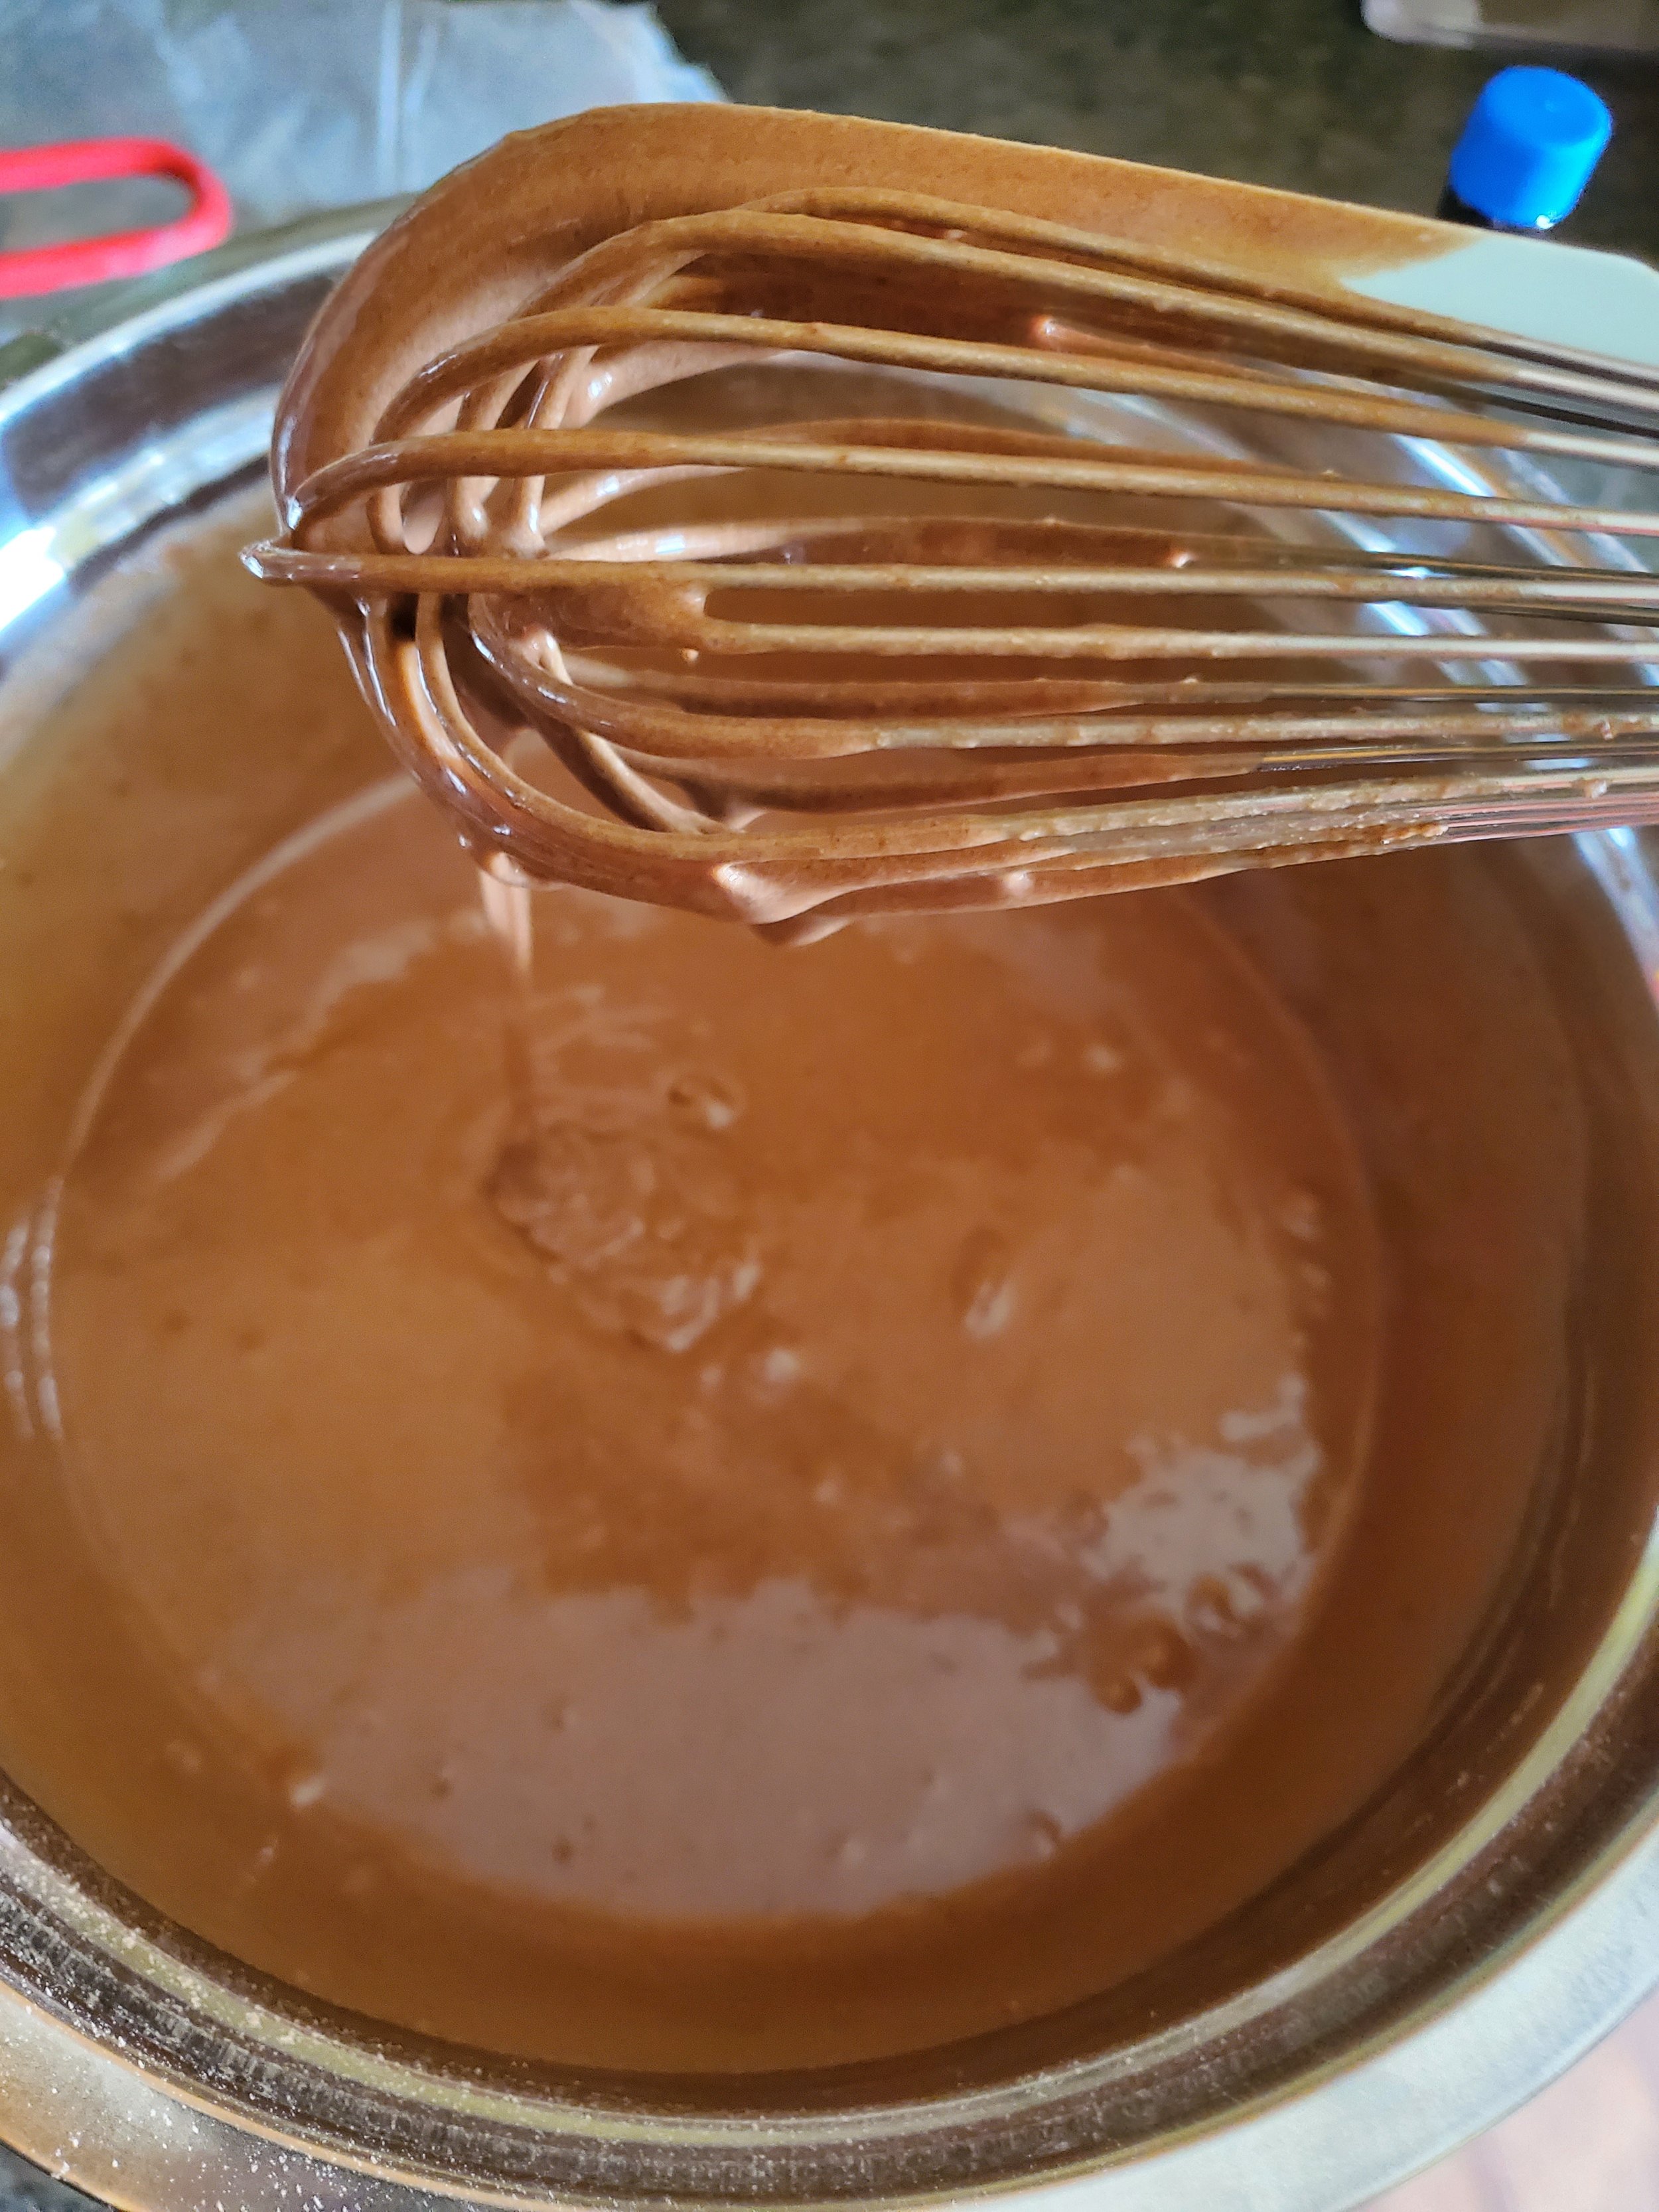
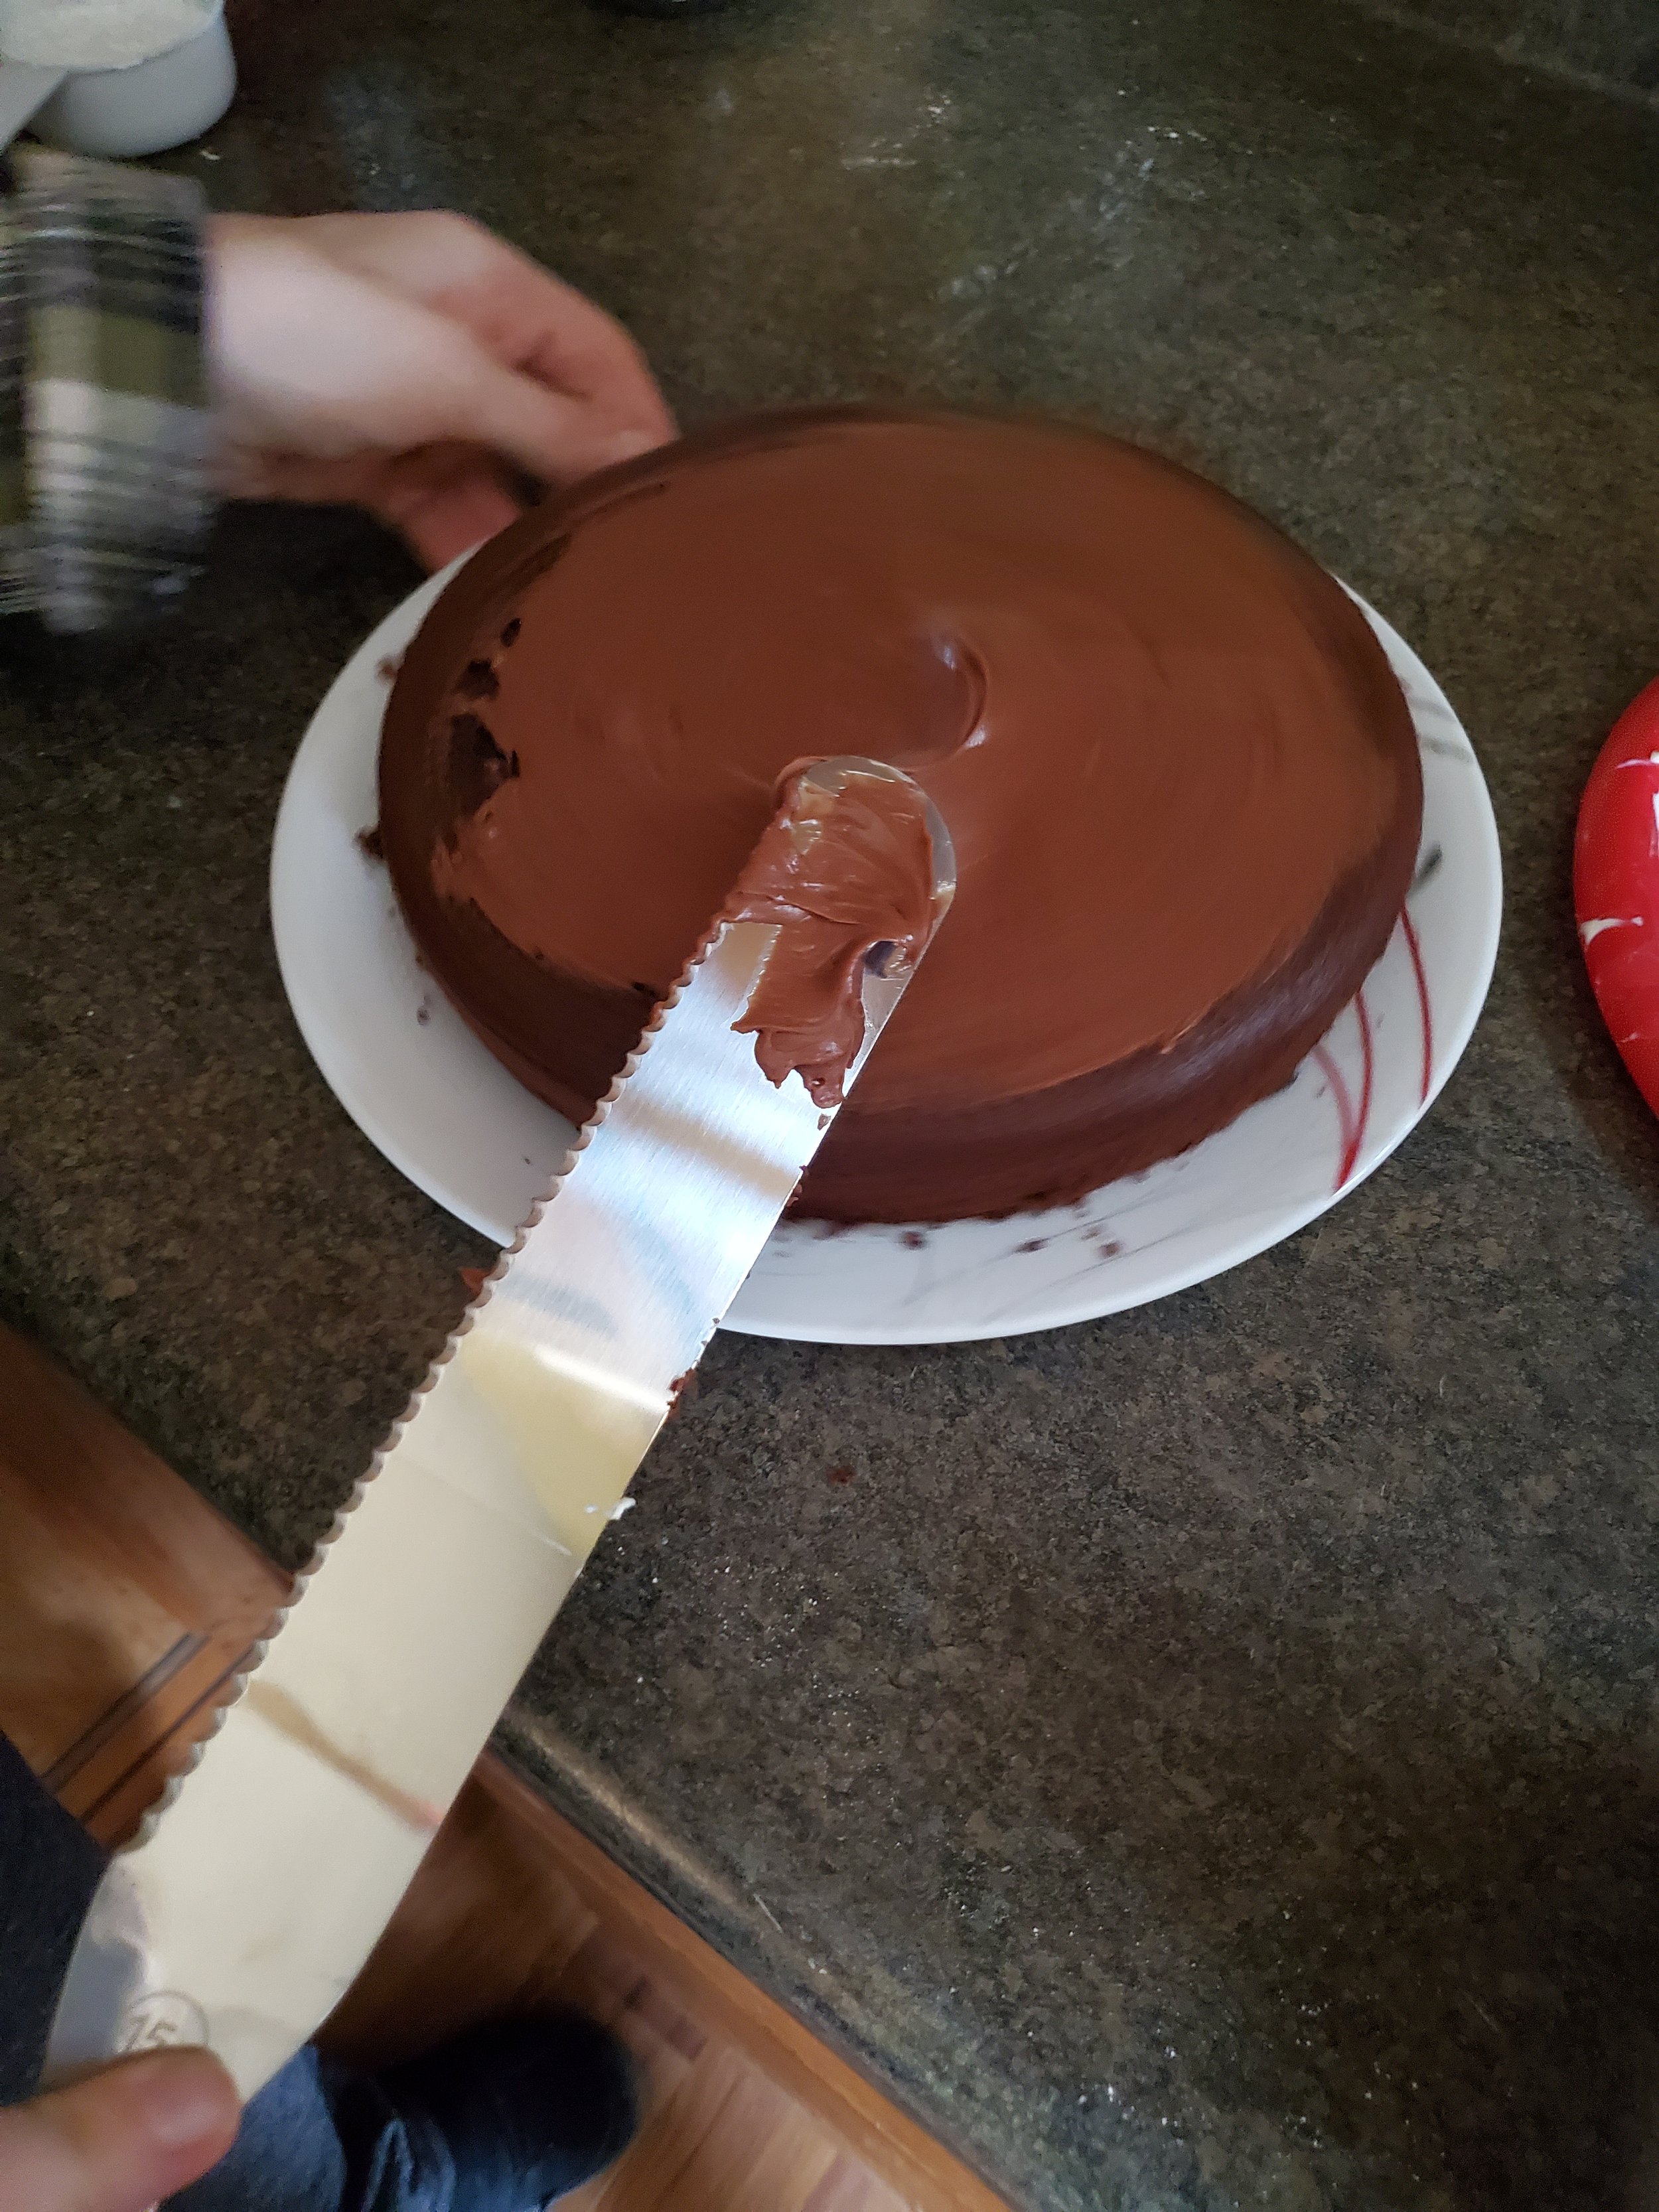
If the frosting is too thin, add in up to ½ cup more of powdered sugar, until fully incorporated and smooth.  Let it sit for 5-10 minutes, and then ice your cake. Because of the base, this is not a frosting you can make ahead of time and use later. 


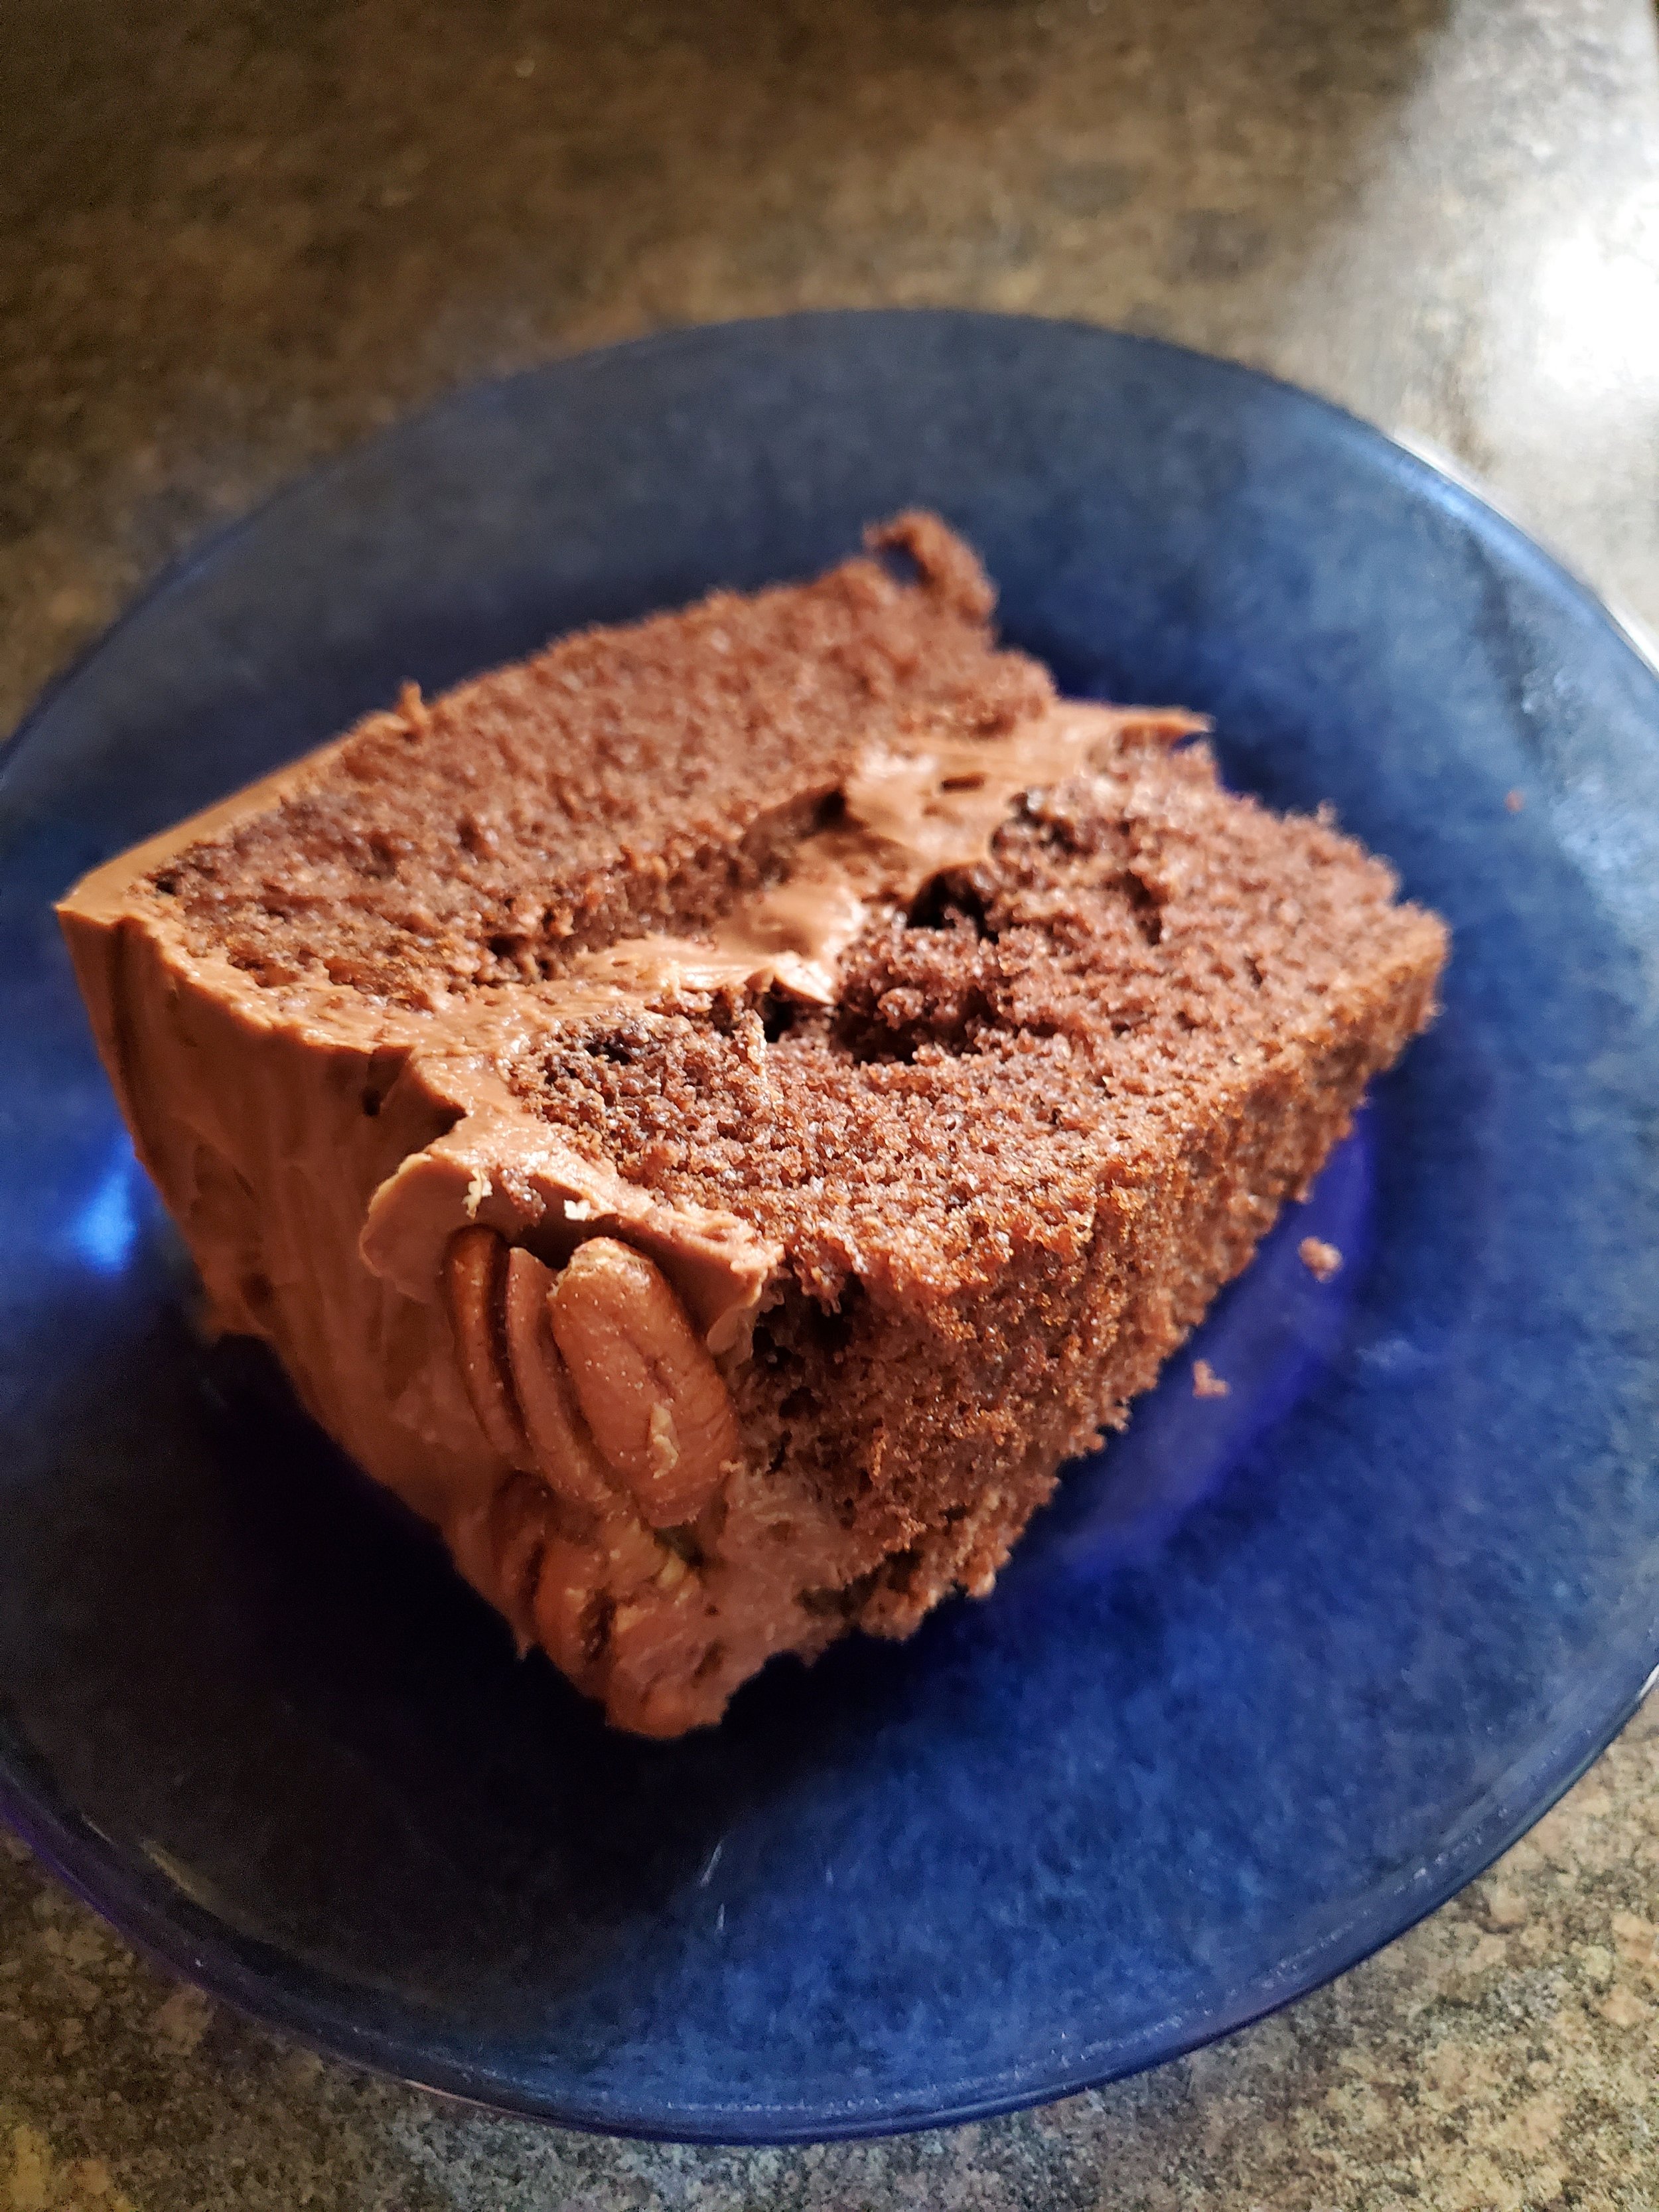
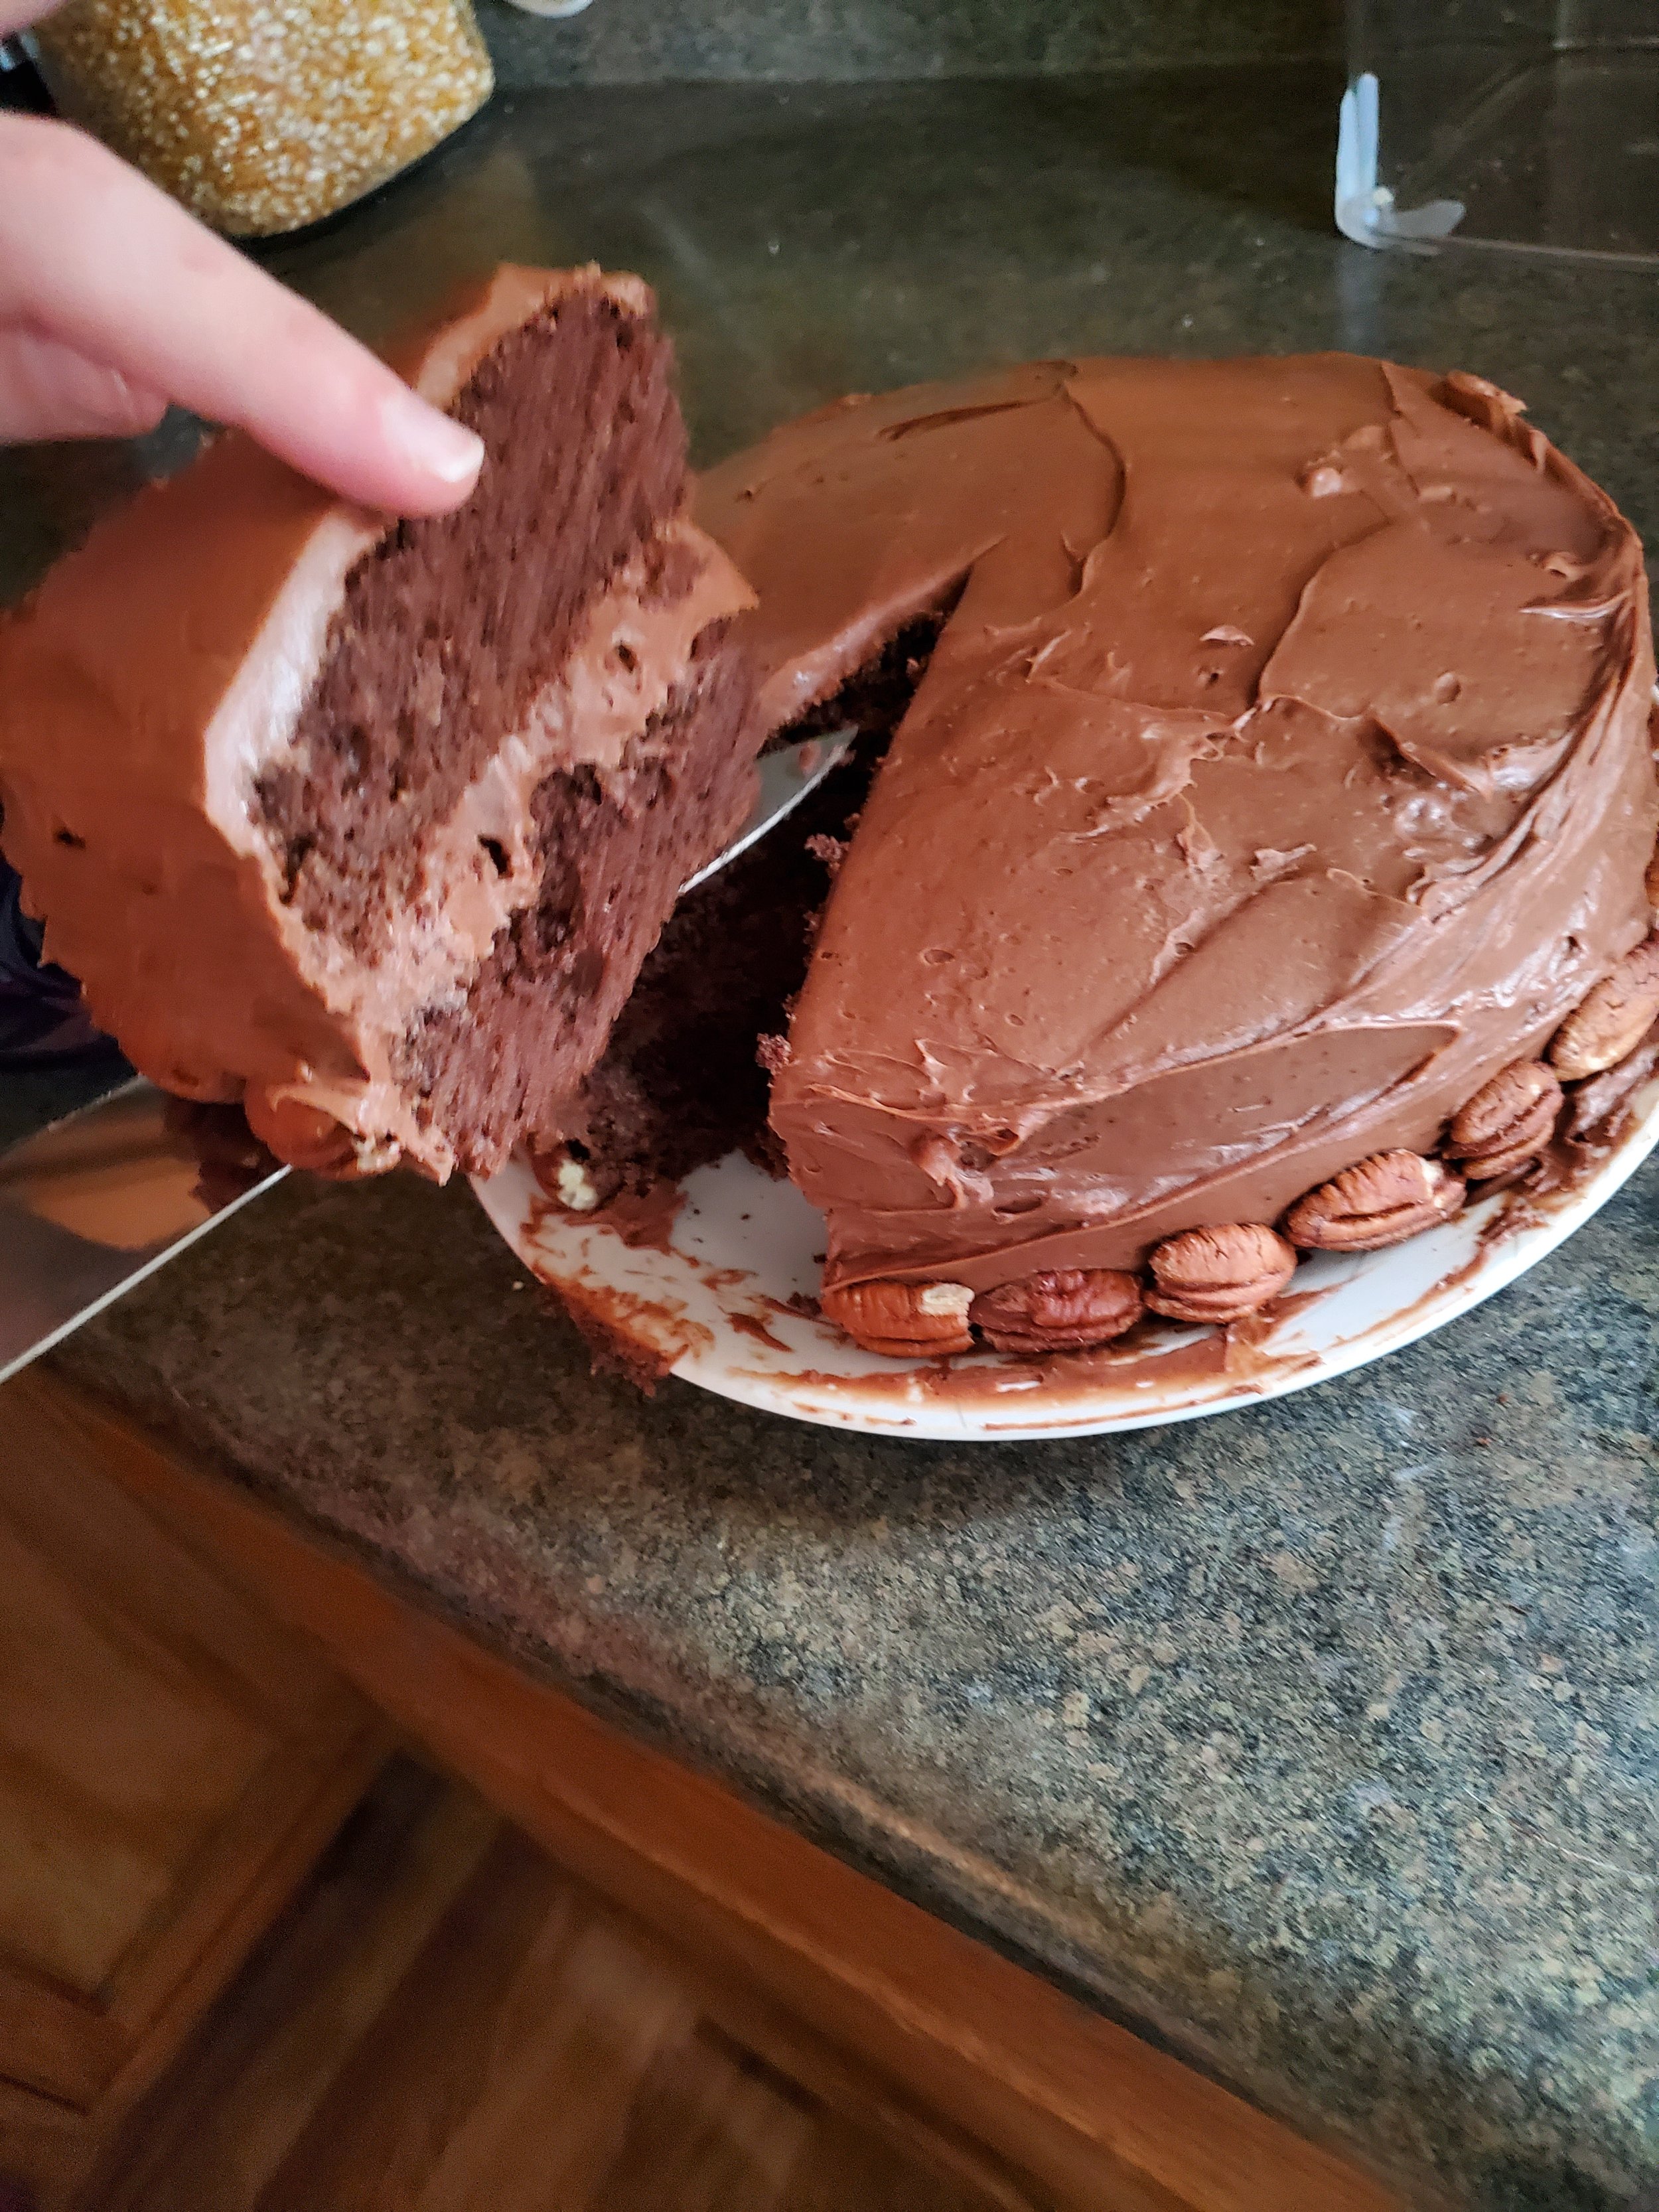
Spread a tiny bit of icing onto your serving plate of choice and place your first cake layer centered on top of it. Add a dollop of icing on the center and spread evenly. Cover the icing in pecan halves and then add a slightly thinner layer of icing on top of that. Place the second layer of cake and then put icing on top of that. Spread the icing evenly on top, and then use it to coat the sides. When finished, wrap the bottom of the cake in a layer of pecans. 


Slice and enjoy!


With that, enjoy your cake, and eat it too! (After all, what’s the point of a cake if you can’t?) 

If you do make this one, let us know over on our Facebook page! We love to hear what y’all get up and what changes you make. 


If your oven is giving you fits in trying to make this, reach out to us on our contact page or by giving us a call at ((214) 599-0055). We’ll work with you to set up an appointment that works with your schedule. Our goal at Appliance Rescue Service is to get your home running smoothly again.