Seared Ravioli With Italian Chicken

Comfort Food That Works On The Run


Welcome back to that lovely time every year where the weather has no better idea what it's doing than we do! Even the professionals appear to be clueless. Centuries of weather research and technology, and still the best we can do is educated guesses.


This week, let's do a recipe that can be a comfort food on chilly, rainy, dreary days... But that doubles as something easily portable in the event the weather is actually pleasant and the games or outdoor plans are good to go. (We've all had those nights, haven't we? The ones where we're sure beyond sure that the soccer games would be cancelled, only to hear from the coach two hours beforehand that the field is dry enough for the kids to play? That's just our house?)


Let's make some seared ravioli with Italian chicken!


Ingredients:

1 25 ounce package frozen cheese ravioli (or 48 ounce, depending on how much your family eats per meal)

1 pound thin chicken cutlets or tenderloins (again, adjust to how much your family eats)

2 tablespoons olive oil

1 10 ounce bottle Italian salad dressing

1 8 ounce can diced tomatoes, drained

1/2 of a small yellow onion

1 zucchini

2 cups fresh spinach

2 teaspoons dried parsley

1 teaspoon dried oregano

1 teaspoon garlic powder

1/2 teaspoon dried marjoram

salt and pepper, to taste


Tools:

Knife, cutting board, dutch oven or deep pot with lid, colander, mixing bowl, measuring cups and spoons


Fill your pot up with water, plop the lid on it and turn up the heat - we'll have to boil your ravioli for a few minutes to start off. But we can make use of the time we'll spend waiting for it to boil. Whatever you do, don't check on it too frequently. Surely you know a watched pot won't boil (okay, it will, but why bother staring at it? It's boring).


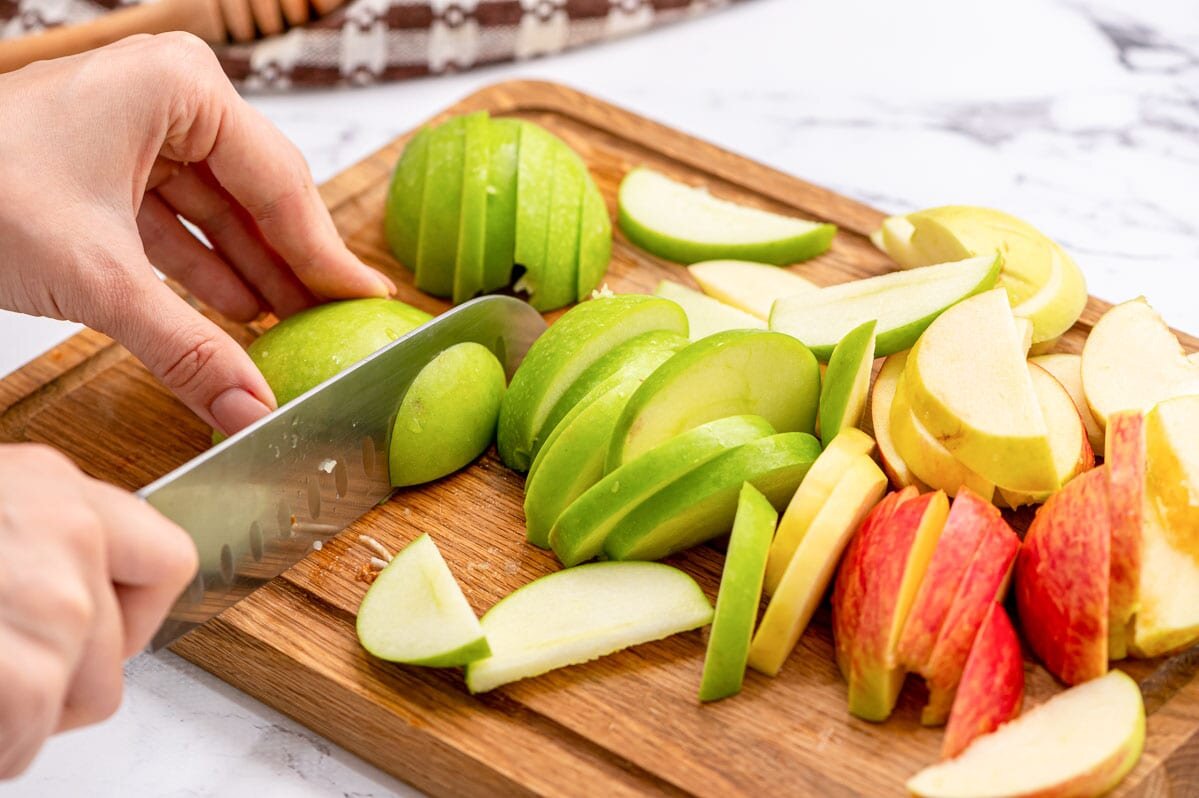
While we're waiting for the water to come up to a boil - and totally not looking at it, right? - take the half an onion and your zucchini and dice them up. Smaller chunks for pickier eaters, just like the last few veggie recipes (or if you really want to hide them, shred them with a grater). Open and drain your can of tomatoes. Put your tomato and zucchini together into the mixing bowl and set them aside for later. If you've grated the onion, you can add that here, too - but if it's diced, you'll want to sauté it. We'll address that in a later step.


By now the water should be boiling. Drop in your frozen ravioli - being mindful of the splashes, of course - and set the timer for about two minutes shy of however long the package says they'll take. For example, if the package says five minutes, it's wiser to go with three minutes for the purposes of this recipe. You can always cook them a little longer if necessary, but you can't un-boil them if you overdo it.


Once your ravioli are par-cooked, drain them into the colander and put the pot back on the burner. Add that olive oil to the pan and once it's back up to medium heat, put in your chicken. Sear the chicken for about five minutes each side. We find it helpful to put the lid on while the chicken is cooking, since it usually means fewer oil spatters to clean up later.


After you've cooked your chicken (if you're not sure, check it with a meat thermometer!), drop your diced onion into the pot and sauté it until it's translucent. (This adding-onions step only applies if you did, in fact, dice your onion instead of grating. If you grated it, skip to the next step. No, that's not an excuse to skip checking if your chicken is done.) 


Make sure you still have some oil left in the pan. If not, add a little more, because we're about to add pasta. Ravioli sticking to the pan at this stage will lead to ravioli pieces after the next step, so this ‘checking for oil’ thing is highly important for presentation value. Take your ravioli from the colander and add them to the pan in a single layer. Keep the heat on medium and sear the outsides of them. Flip once you can both smell and hear them getting a good sizzle on. You might need to remove them to make room for another wave - if you do remove some, put them in a covered dish to keep them warm, and allot a little extra time when you mix everything together just to make sure they're as warm as the rest of the meal.


When your ravioli are nice and toasty, go ahead and pour in your vegetable mix from a few steps ago. This is a good time to add your seasonings (the garlic powder, parsley, oregano, marjoram, salt and pepper) too, and to add back any ravioli you may have had to set aside. Add in your spinach, and give it a good stir - we want to wilt the spinach, but we don’t want it to disintegrate. Cover the pot again and let everything simmer for about three or four minutes.


Now comes the fun part. Taste test! Everyone reacts differently to seasonings, and everyone's preferences are individual. That's why we saved that Italian dressing until the very end. The dressing is a very punchy taste, and it can quickly take over a dish if you aren't careful. So add however much or little you prefer to your portion, and allow the rest of your family to do the same. That should prevent the worst of the "I don't like it" faces from the kids and veggie haters.


So, what’s your opinion on this one? Does it sound tasty enough for a weeknight attempt? Or are you still a little unsure? Let us know in the comments below or over on  our Facebook page. We’d love to hear from you. 


And if maybe your appliances are making you make some faces, give us a call. We can't fix it if your face gets stuck like that (thanks, Mom) - but we can do something about the machines. You can get hold of us at our website, or by calling us at ((214) 599-0055).

home made ravioli


Stuffed Peppers To Please Your Picky Eaters

How many veggies can you hide in plain sight?


We're sure that somewhere along the line, someone has probably lied and told you that carbohydrates aren't good for you. This is a terrible falsehood and should be thoroughly debunked, but we're not on board with turning this blog into a soapbox (at least, not right now). Carbs are necessary for normal metabolic function - but those common, refined carbs are really not the best source, especially if you have certain other health concerns. Here's a relatively simple recipe to get you three servings of veggies, one of them disguised as a processed carbohydrate!


Assuming you haven't already met, allow us to introduce you to a relatively new addition to your grocer's freezer section: riced cauliflower. If you're not familiar with it, it's simply tiny little chunks of cauliflower, snipped into the rough shape of grains of rice. It cooks up about the same as rice, but it's only about 2 grams of net carb in a cup, versus the 40+ grams found in regular white rice.


Stuff some of this in a hollowed out pepper, with some onion and tomato, and there's three of your recommended five servings of veggies for the day! Look at you, being all responsible and stuff.


Ingredients:


2 12 ounce bags frozen riced cauliflower

1 tablespoon vegetable oil (or whatever cooking oil you have handy)

2 Roma tomatoes

1 yellow onion

1 8 ounce can tomato sauce

4 cups chicken broth

1 teaspoon salt

1 teaspoon pepper

2 teaspoons dried parsley

1 teaspoon minced garlic

1/2 teaspoon onion powder

1/2 teaspoon turmeric

1/2 teaspoon ground cumin

4 medium bell peppers

4 slices provolone cheese


Tools:

Measuring spoons, knife, cutting board, slotted spoon, baking dish, aluminum foil, large frying pan or sauce pan with lid


First, cut the tops off your peppers, discard the tops and the seeds, and set the peppers aside, right side up, in your baking dish. Add about a quarter inch of water to the bottom of the baking dish (this will help avoid them drying out while baking).


Now that your cutting board is clear, chop up your onions and tomatoes. Cut them as large or as small as you like; if you don't appreciate big chunks of veggies, you might even consider tossing them through a food processor. We, however, generally like the variation in texture large chunks of veggies bring to the dish.


Start your oil heating in the frying pan or sauce pan over medium heat. Pour in your riced cauliflower and sear it in the oil.


We like to use the time while it's searing to measure out spices, but feel free to chill for a few minutes instead and just measure your spices directly into the pan later.


Once you've got your cauliflower mostly defrosted and searing, add the tomato and onion, as well as your minced garlic, give it a stir and place the lid on it. Stir frequently while they're cooking to prevent any of them sticking to the pan.


After things start looking like they're about cooked, pour in your can of tomato sauce, your chicken broth and all those spices you've measured out (or are still in the process of measuring, whichever). Give everything a good stir. It's going to look like the veggies are drowning in all that liquid - we know, it's normal. Don't fret. It will reduce, we promise.


Allow this to simmer (uncovered!) about 20 to 25 minutes, stirring occasionally. It may need more or less time, depending on how big of a burner you have this pan sitting on. The goal is for the veggies to have absorbed most of the liquid, but for there to be just a little left to prevent sticking to the pan, and to optionally use as sauce in/on the peppers.


Once everything has simmered down to where you'd like it to be, remove it from the heat. Maybe start your oven preheating to 350 while you're standing there, and save yourself a minute or two later on.


Grab a slotted spoon and transfer your veggie mixture to the hollowed out peppers. There should be enough to fill those peppers up to the very top. If you've got liquid left over in the sauce pan, feel free to drizzle it over the peppers at this point.


Cover the baking dish with a layer of aluminum foil and pop it in the oven for about half an hour. Half an hour yields a pretty crunchy pepper - so if you'd prefer something you can cut with a fork, you might want to lower the heat and lengthen your covered cook time.


After your half hour (or more, depending on preference) is up, remove the foil cover, place a slice of provolone cheese on top of each stuffed pepper, and bake ten or so more minutes - long enough to get the cheese all melted and browned and bubbly (AKA the best way to serve cheese).


Enjoy your veggies!


If you opt to make this week’s meal, let us know in the comments below or over on our Facebook! We’d love to hear from you and see the results.  


If on the other hand you need your oven fixed, or any of your other major appliances, we can help. Just call us at ((214) 599-0055) or make an appointment over at our website. We aim to be the most reliable appliance repair in Coppell and the surrounding areas, and we want to keep your home running smoothly. Whether that’s an oven that won’t heat right for making cookies, or a washing machine that won’t drain right, we’re here to help. 


Double Chocolate Guinness Cupcakes

The Second Best Use for Guinness


So Saint Patrick's Day is over. You're probably pretty tired of corned beef, cabbage, potatoes, and soda bread - and you're likely also tired of seeing recipes containing them.


But you know, there's one Saint Patrick's Day staple no one ever seems to get tired of. Guinness. And if you've already had your fill of Guinness for a while, but still have a couple bottles left in the fridge, there's only one thing left to do with them.


Bake.


That's probably not what you were thinking, but that's okay. We've got you covered.

Double Chocolate Guinness Cupcakes, anyone?

Double Chocolate Guinness Cupcakes in a red liner on a white plate

Ingredients:


1 ~15 ounce box chocolate cake mix (every brand is a little different; just try to stay in the 15 ounce ballpark)

1 4 ounce package chocolate pudding mix

1 11.25 ounce bottle Guinness Stout

3 large eggs

1/2 cup vegetable oil or melted unsalted butter

1 teaspoon vanilla extract

Tools:

Mixing bowl, mixer or whisk, measuring cups, sauce pan, spoon, cupcake pan, cupcake liners


Instructions:


Grab a bottle opener and crack open that bottle Guinness. Take a taste. No, seriously, you really should taste it. You do not want to ruin an entire batch of chocolate cupcakes with skunked beer. That's just disappointing.

Pour your Guinness into a sauce pan. We know, it seems like a bunch of extra work and an extra pan to clean. But the result is worth it. Turn the burner on medium-low and let the Guinness simmer. It will smell strongly like a brewery in the kitchen; you might consider opening a window to keep the family from complaining. It will also foam and threaten to make a great big mess, but this is normal. Give it a gentle stir to break up the foam and keep it from boiling over. Allow it to simmer for 20 minutes or so - your goal here is to reduce the Guinness down to about 1 cup. You started with not quite 12 ounces, so you have only a little ways to go here. Don't worry too much about the measurement until you can see a visible difference from your starting point in the pan.


Once you can see a difference between the amount of beer you started with and the amount of (reduced) beer you now have, remove it from the heat and allow it to come back to something around room temperature. Please do not immediately pour boiling hot beer into a measuring cup - it may crack or shatter the cup, and it will likely waste the Guinness. Both of these are terrible things.

While you're waiting for your Guinness to cool back down, start the oven preheating to 350 degrees.

Pour your cake mix and your pudding mix into your mixing bowl. Add in your vanilla extract, oil or melted butter and your eggs. (If you're using butter and you've just melted it, please also allow it to come back up a little closer to room temperature before pouring it in with the eggs. Otherwise the butter will scramble the eggs and you’ll have to start over.) You can give it a little stir at this point, but don't expect it to combine neatly or fully. There isn't near enough liquid, and we've added extra dry ingredients with the pudding mix.


Take your cupcake pan and place a liner in each of the wells. You'll make a little over a dozen large cupcakes with the amount of batter you'll have. We ended up with 14 and a half (because we lost some batter in transfer from the bowl to the pan) generous sized cupcakes - plan on 15 or 16.


By now, your Guinness should be back down to a more workable temperature. Measure out one cup of your reduced beer. If you have extra, that's okay - just set it aside and use it later to braise or baste some meats. If you've reduced it down further than needed and don't quite have a full cup, that's okay too - you can add a little water back.


Add your cup of Guinness to the other cake ingredients and stir well for about two minutes. If you're using an electric mixer, be aware that the batter will climb up the beaters while you mix. It's a very heavy batter for a cake, and it's also rather sticky - both of these are results of adding in that box of pudding mix. If you're worried about the batter hitting the body of the mixer, just pause and scrape it back down once in a while.


Be attentive and be careful not to over mix the batter - if you mix too long, it will go from thick and fluffy to dense and flat and chewy - and no one wants cupcakes that bounce. Mix until everything is combined, but quit when you stop seeing lumps or variations in color.


Transfer your batter from the mixing bowl to your cupcake liners. Again, this is some sticky stuff. You will likely find yourself needing an extra spoon to make it let go of the first one, and you might want to recruit someone else as extra hands if possible. Those cupcake liners, despite the blob of batter that should hold them down, will attempt to follow the spoon at least once. That's how we lost a cupcake worth of batter - the liner decided gravity wasn't going to hold it back, and suddenly the batter was on the counter and not in the cupcake pan. It was a mournful moment for all - especially the family dogs, who usually get the things that escape pans and plates, but were denied this time.


Once you have your cupcakes liners about 2/3rds full, pop them in the oven for 20 minutes or so. Toothpick test after 20 minutes to make sure they're done (sometimes they need an extra minute or two), and assuming they're fully baked, allow them to cool.


The beer flavor doesn't take over the cupcake, so expect a mostly chocolate flavor with some malty tones to back it up. Frost with whatever you'd like (we like just some simple whipped cream on top) and enjoy!


If you do decide to make this, or something similar, let us know over on our Facebook! We’d love to see what you get up to!

And if you’re in Dallas, and any of your appliances are acting a little... tipsy... don't blame the Guinness. Or the fumes. You cooked most of the alcohol out of it. Instead, give us a call - we'll shape them back up for you. You can reach us at our website or via ((214) 599-0055).

The “Healthier Than Your Average Sandwich” Sandwich

5 Servings of Veggies in ONE Dinner That Doesn’t Taste Like Sawdust

Like a great many people, you may be looking for ways to boost the nutritional value in your meals. We're always on the lookout for little ways to make the same tasty foods we already love work a little harder. We also love to hide some veggies in other foods, but that's a story for another time.

This time around, we're making chicken sliders. But with veggies. And we aren't just talking about the lettuce and tomato you might put in your sandwich - we're hiding a whole three servings of veggies in the chicken patty itself, and some oats.

We know it sounds crazy. Just trust us here. It still tastes like chicken, but you have a bunch of extra fiber, vitamins and minerals working in your favor now. You know exactly what went into it (unlike some brands of frozen patties, where the ingredients list is so long and so chemical-sounding that by the end you're still not sure whether or not it's food), so the slight difference in color from the norm shouldn't be a shock. And besides, you're putting it on a bun anyway, probably covered in ketchup, barbecue or buffalo sauce and a mountain of lettuce, tomato, pickles and onion.


Ingredients:

1 pound raw ground chicken

3/4 cup quick or old-fashioned plain oatmeal

1/4 cup grated Parmesan or Pecorino-Romano cheese

1 Tablespoon cayenne pepper (you can use paprika instead if someone's not into spicy food)

1/2 teaspoon salt

1/2 teaspoon black pepper

2 Tablespoons powdered chicken bouillon

2 Tablespoons dried parsley 

2 cups butternut squash puree

1 yellow squash

3/4 lb chopped cauliflower

Buns, cheese and sauce or veggies of choice for serving.


Tools:

Knife, cutting board, grater, food processor, measuring cups and spoons, mixing bowls, loaf pan, aluminum foil, cooking spray, meat thermometer. A gallon zip-close plastic bag can also make the process easier, if you have one.


If you're not buying you butternut squash already peeled and cubed, the first thing you should do is preheat the oven to 350 and toss the squash in. It's much easier to skin, cut and mash or blend if it's been roasted first - and roasting it will take about an hour. Your oven needs to preheat anyway, so go ahead and put it to work a little early.

However, if you brought home the peeled, cubed, steamable kind, you've just saved yourself about 40 minutes of waiting, and can skip this part and go right to the steaming process. Steam it according to package directions, and once it's done, just set it aside for a bit. We'll pulverize it later.

Start out by measuring your oatmeal and your grated cheese, cayenne or paprika, salt, pepper, and powdered bouillon into the food processor. Pulse it a couple times for about ten seconds, and once it's fine and powdery, transfer it to another bowl or container to make room in the food processor.

In the event you have a whole head of cauliflower, give it a wash and chop it now. If your cauliflower is the fresh or frozen already-crumbled variety, you get to save a bunch of effort and skip those steps. Whichever one you started with, put it in the steamer or microwave now. It'll need a little time to cook up - but not near as much as the squash. Keep an eye or an ear on it to make sure you don't end up turning it into baby food by overcooking it. Although honestly, if it does turn to mush, it just saves you from having to put it into the food processor later - so pick and choose your battles. (Would you rather poke cauliflower mush out of the steamer basket or scrub it off the food processor blades?)

Take your yellow squash and shred it with the fine side of your grater. This will be the first ingredient into the plastic bag, if you're using one - and into the mixing bowl if you're using one of those instead.

Turn your pound of ground chicken into the bag or bowl you just put the shredded squash into. Add the parsley to this mix, too.

About now, that cauliflower should be finishing up. Drain off any excess water and put the cauliflower into the food processor (assuming you didn't choose the cook-it-into-mush route). Give it a couple quick pulses, scraping down the sides occasionally, until most of the major lumps have been pulverized. You don't need it to be totally smooth; the texture helps with holding the chicken mix together. Once it's done in the food processor, add it to the chicken mixture.

This chicken thing will have to sit and wait until your butternut squash is ready to go - so hopefully you planned ahead a little, or you can keep yourself occupied until it's done roasting.

Once your squash is done roasting, peel it and hack it into rough cubes. It should be pretty soft by this point. If you started with a whole squash, you'll likely only need the neck portion of it to make up your two cups. Put the squash cubes into the food processor and give it all a whirl. You'll probably have to pause often and scrape down the sides, as squash tends to be a bit sticky and climb out of reach of the blades.

After you've pureed your squash, add it to the chicken mixture, pour the dry ingredients (oats, cheese, spices) over top, and mix it all together. If you've been working with a plastic bag like we tend to, zip it closed with a little air left in it and try not to be too rough when you squeeze. Containing the mess is a lot harder if you explode the bag by splitting a seam.

Once it's all thoroughly mixed together, line your loaf pan with a layer of aluminum foil and spray it lightly with cooking spray. The end goal is for this chicken to come out in a neat, single piece - although if you end up with chicken sloppy joes, they'll probably still be just as good. More fun for the kids, even.

Transfer your chicken from the mixing bowl or bag into the lined loaf pan, and bake it on the middle rack at 350 degrees for about an hour and a half. Make sure to test the temperature with a meat thermometer before serving - your goal is 165 or higher before we can call it done.

Allow it to cool in the pan for a few minutes after removing it from the oven, which will make removing and slicing it easier. Lift it from the pan using the aluminum foil as a grip, and turn it over on the cutting board. Peel back the foil and slice into half inch pieces. For best results, you can toast them in a frying pan to crisp them up a little on the surface before putting them on a bun and covering with sauces, cheese and whatever other veggies you prefer. * We’ve tried ranch, buffalo, caesar, honey mustard, spicy mustard, sweet Thai chili, barbeque, and Chick-Fil-A's chicken sauce. All of these were varying degrees of good, let us know what you try and think! 

Adding some veggies to the sandwich and/or eating with a side of roasted veggies, carrot sticks or salad can bring you up to all five recommended servings of vegetables with one meal! *Disclaimer: not an excuse to eat potato chips and cookies for the other two meals of the day.

This week’s post was a bit of an experiment. We already had a recipe ready to go, but it just wasn't enough. So we tinkered and we toyed and we cooked some more until we came up with this. It’s a strange concoction, that’s for sure. It’s also amazingly versatile and we’re already discussing all the ways we use this recipe in other meals. What did you think? Let us know over on Facebook, or in the comments below! We love to hear from you and hear what you think about the foods we make. 


What if you’re not here for food though? What if you showed up on our site because your fridge is busted or you need help with your dryer? We can still help you. In fact that is our primary business! If you live in Richardson, or any of the surrounding areas, we aim to be the appliance rescue service for you. We can help with any and all of your major appliances, and we won’t stop until we’ve solved the problem. All you need to do is call us at ((214) 599-0055) or reach out to us via our website


Not Quite Chicken Sandwhich on a French Baguette piled with tomato, lettuce and Onion

Party Snack Dinners

When you don’t feel like sitting down to a meal, but you need something more.


Super Bowl Sunday has come and gone - and like most families here in the U.S., your family probably ate so many snacks during the big game that dinner went by the wayside last weekend.

Here's the thing, though. Snack-y delicious things can still be considered dinner. There is no rule that you can't eat hors d'oeuvres and party food whenever you feel like making it.


In this post, we'll cover a couple of easy, tasty finger foods you can dash together on a weeknight and share with the family or a visiting friend. (Who says Wednesday can't be family movie night?)


Stuffed "Sandwiches"


It's less of a sandwich and more of a stuffed slice of bread... But it's an uncommon, tasty finger food. Plus, it's neither terribly messy nor expensive to make.


Ingredients:


One large loaf of Italian or French bread

8 oz softened cream cheese (we suggest the garden vegetable flavor Philadelphia brand, or spicy jalapeno flavor if you'd prefer some heat)

3 oz crumbled cooked bacon

1/2 cup matchstick carrots, chopped down

1/2 cup baby spinach, shredded

1/4 cup bell pepper, chopped

1 3 oz package sun-dried tomatoes (we like Bella Sun Luci brand)

handful of black olives, chopped

4 oz shredded cheese of your choice

Fresh or dried parsley, for garnish


Tools:

Cutting board, bread knife, paring knife, baking sheet, large bowl, spoon 


Allow your cream cheese to come up to room temperature while you work; the softer it is, the easier it will be to mix in your other ingredients.


Preheat your oven (or toaster oven if you'd rather) to 350.


Grab the bread knife and cut your loaf of bread into 3/4" to one inch thick slices. Use the paring knife to scoop out the centers of each slice to make each into a shallow bread boat. Make sure you only cut about halfway into the center - you still want it to be able to hold the cream cheese mixture. In the event any of your slices have a hole from an air bubble in the dough, consider covering it over with a spinach leaf to stop too much of the cheese from oozing out during the baking process.


Once your slices are scooped out, place them open side up on your baking sheet.


Chop up your carrots, bell pepper, olives and spinach as fine as you'd like them - and if your tomatoes are large pieces, you might consider cutting them down as well. Transfer all the cut veggies to the bowl.

If you're working with fresh parsley, now is the time to cut it - but don't mix it in with the other veggies.


Toss the crumbled bacon in with the veggies, then add your softened cream cheese. Give everything a good stir to make sure it's evenly distributed.


Spoon an even amount of the cream cheese mixture into each of your scooped out bread slices and level it out.


Cover the top of each slice in shredded cheese.


Bake at 350 until the shredded cheese is melted and the bread is lightly toasted.


Sprinkle on the parsley before serving. These "sandwiches" are best served with chips (which can function as a utensil, too, if the cheese mixture escapes!). 


Peanut Butter Cup Hummus


We know, no one thinks sweet when someone says hummus. But believe it or not, you can make sweet versions! And you can even make them out of things you probably have on hand already.


Once it's ready, use it as a dip for apple slices (Gala apples are excellent for this). The kids will never realize they're eating a vegetable.


Ingredients:


1 cup cooked chickpeas

1 teaspoon vanilla extract

4 tablespoons peanut butter

3 tablespoons honey or corn syrup

5 tablespoons baker's cocoa

2 tablespoons of sweetened condensed milk

a pinch of salt


Tools:

Food processor, measuring cup and spoons, bowl(s) to serve.


Cook up some chickpeas, or open up a can. You'll need about a cup of them, drained and rinsed.

Pour the rinsed chickpeas into the food processor, and measure in the peanut butter, honey and vanilla extract.


Process on low for a few seconds at a time, scraping down the sides when you pause. If the mixture seems too sticky or too inclined to climb up the sides, you can add some water a tablespoon at a time - but be careful not to add too much and thin it out. It can be pretty difficult (and messy!) to dip an apple slice in something soupy.


Once you've got the chickpeas processed down to a mostly smooth consistency, measure in the cocoa and milk and hit the button on the processor again a time or two to mix it all in.


Make sure you taste test at this stage, to figure out whether or not you need more sweetener, and/or how much salt you'd like to add. Everyone's family is different - we recommend finding the pickiest eater in the house and using them as the guinea pig.

Once you've adjusted to account for the picky eaters in the house, scoop some out into a shallow dish for every member of the family and cut up some apples to share. Pretzels also work well with this hummus, as do chunks of banana (toothpicks or forks help cut down on the sticky fingers problem with the bananas).


Hopefully this filling, deceptively healthy “dessert” joins the rotation in your family too!


If you liked this week’s post, drop us a line in the comments below or over on our Facebook, we’d love to hear from you! 


If on the other hand you showed up here because you need help with your appliances, we can help there too. We aim to be the best appliance repair company in Plano and the surrounding area, and that means we’re here, whatever your appliances need. You can reach out to us via our website or by giving us a call at ((214) 599-0055).  

sliced apples tart and sweet varieties