Party Snack Dinners

When you don’t feel like sitting down to a meal, but you need something more.


Super Bowl Sunday has come and gone - and like most families here in the U.S., your family probably ate so many snacks during the big game that dinner went by the wayside last weekend.

Here's the thing, though. Snack-y delicious things can still be considered dinner. There is no rule that you can't eat hors d'oeuvres and party food whenever you feel like making it.


In this post, we'll cover a couple of easy, tasty finger foods you can dash together on a weeknight and share with the family or a visiting friend. (Who says Wednesday can't be family movie night?)


Stuffed "Sandwiches"


It's less of a sandwich and more of a stuffed slice of bread... But it's an uncommon, tasty finger food. Plus, it's neither terribly messy nor expensive to make.


Ingredients:


One large loaf of Italian or French bread

8 oz softened cream cheese (we suggest the garden vegetable flavor Philadelphia brand, or spicy jalapeno flavor if you'd prefer some heat)

3 oz crumbled cooked bacon

1/2 cup matchstick carrots, chopped down

1/2 cup baby spinach, shredded

1/4 cup bell pepper, chopped

1 3 oz package sun-dried tomatoes (we like Bella Sun Luci brand)

handful of black olives, chopped

4 oz shredded cheese of your choice

Fresh or dried parsley, for garnish


Tools:

Cutting board, bread knife, paring knife, baking sheet, large bowl, spoon 


Allow your cream cheese to come up to room temperature while you work; the softer it is, the easier it will be to mix in your other ingredients.


Preheat your oven (or toaster oven if you'd rather) to 350.


Grab the bread knife and cut your loaf of bread into 3/4" to one inch thick slices. Use the paring knife to scoop out the centers of each slice to make each into a shallow bread boat. Make sure you only cut about halfway into the center - you still want it to be able to hold the cream cheese mixture. In the event any of your slices have a hole from an air bubble in the dough, consider covering it over with a spinach leaf to stop too much of the cheese from oozing out during the baking process.


Once your slices are scooped out, place them open side up on your baking sheet.


Chop up your carrots, bell pepper, olives and spinach as fine as you'd like them - and if your tomatoes are large pieces, you might consider cutting them down as well. Transfer all the cut veggies to the bowl.

If you're working with fresh parsley, now is the time to cut it - but don't mix it in with the other veggies.


Toss the crumbled bacon in with the veggies, then add your softened cream cheese. Give everything a good stir to make sure it's evenly distributed.


Spoon an even amount of the cream cheese mixture into each of your scooped out bread slices and level it out.


Cover the top of each slice in shredded cheese.


Bake at 350 until the shredded cheese is melted and the bread is lightly toasted.


Sprinkle on the parsley before serving. These "sandwiches" are best served with chips (which can function as a utensil, too, if the cheese mixture escapes!). 


Peanut Butter Cup Hummus


We know, no one thinks sweet when someone says hummus. But believe it or not, you can make sweet versions! And you can even make them out of things you probably have on hand already.


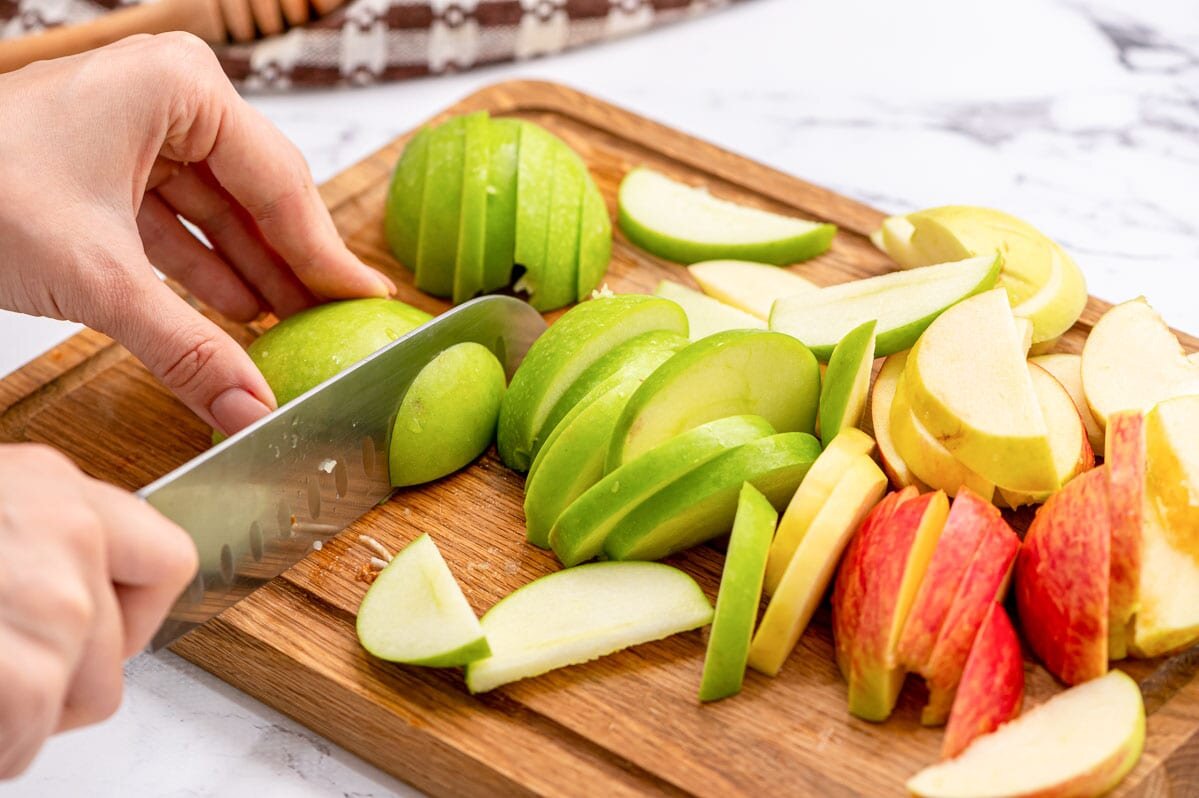
Once it's ready, use it as a dip for apple slices (Gala apples are excellent for this). The kids will never realize they're eating a vegetable.


Ingredients:


1 cup cooked chickpeas

1 teaspoon vanilla extract

4 tablespoons peanut butter

3 tablespoons honey or corn syrup

5 tablespoons baker's cocoa

2 tablespoons of sweetened condensed milk

a pinch of salt


Tools:

Food processor, measuring cup and spoons, bowl(s) to serve.


Cook up some chickpeas, or open up a can. You'll need about a cup of them, drained and rinsed.

Pour the rinsed chickpeas into the food processor, and measure in the peanut butter, honey and vanilla extract.


Process on low for a few seconds at a time, scraping down the sides when you pause. If the mixture seems too sticky or too inclined to climb up the sides, you can add some water a tablespoon at a time - but be careful not to add too much and thin it out. It can be pretty difficult (and messy!) to dip an apple slice in something soupy.


Once you've got the chickpeas processed down to a mostly smooth consistency, measure in the cocoa and milk and hit the button on the processor again a time or two to mix it all in.


Make sure you taste test at this stage, to figure out whether or not you need more sweetener, and/or how much salt you'd like to add. Everyone's family is different - we recommend finding the pickiest eater in the house and using them as the guinea pig.

Once you've adjusted to account for the picky eaters in the house, scoop some out into a shallow dish for every member of the family and cut up some apples to share. Pretzels also work well with this hummus, as do chunks of banana (toothpicks or forks help cut down on the sticky fingers problem with the bananas).


Hopefully this filling, deceptively healthy “dessert” joins the rotation in your family too!


If you liked this week’s post, drop us a line in the comments below or over on our Facebook, we’d love to hear from you! 


If on the other hand you showed up here because you need help with your appliances, we can help there too. We aim to be the best appliance repair company in Plano and the surrounding area, and that means we’re here, whatever your appliances need. You can reach out to us via our website or by giving us a call at ((214) 599-0055).  

sliced apples tart and sweet varieties


Slow Fast Food

Buffing up your lunch to turn it into a meal you’ll look forward to.


Do you ever get sick of pulling out your lunch and having it the same as several of your other coworkers? This week we're showing you how to start off with a basic cup of ramen, or other similar cup of Asian noodles and turn it into a proper meal. This should probably be done the night before, although if you get up early enough, you don't have to. If you add enough vegetables, you can also turn one cup of noodles into two separate meals. 


This recipe is meant to buff up a single cup of ramen or other Asian noodle fast foods. If you want to just feed yourself, think about each vegetable in the list as "how much of this can I eat in one sitting" rather than "what exact amount do I need." 


Ingredients: 


Ramen (cup)

Canned Meat (chicken or pork works best, but you can make other varieties too!) 

carrots

chives

celery 

onion 

cabbage (Napa if possible) 

baby spinach

mushrooms 

garlic 

Sesame oil (or vegetable oil if you don't have any) 

hard boiled eggs

Seaweed for garnish


Sauce Options

Sriracha

Hoisin sauce

Fish sauce

Peanut sauce 


Start with your cup of noodles. Admire the foam cup. Now set it aside. You're not going to need that 'til the very end. 

Now, let's go back over to your ingredients. Start by chopping up your vegetables. 

The point here is to get your veggies into sizes that are going to give your ramen different textures and layers. 

For the carrots, you'll want to either slice them like matchsticks or on a diagonal into thin layers. 

For the chives, you'll want cut them into slices, no more than 1/4 inch in length. 

Moving on to celery, this one is up to preference. You can do a fine chop and just use it for garnish, or you can slice them diagonally into chunks about 1/2" in length.

Next up is your onion. Again, this is up to preference. We like to go for strips rather than cubes because it adds more flavor and texture. However, you also have the option to dice them into chunks and just use them to flavor the ramen. 

Moving on to cabbage and baby spinach. For both of these shredding them is the best way to go, and both options work. 

Mushrooms, depending on the variety, have all sorts of options, based on the texture you want. We like to leave them whole, but you can dice them, turn them into chunks or matchsticks, whatever you like. 

Now that you're done with your vegetables, go ahead and mince your garlic. 


Heat a pan and toss in about one tablespoon of oil. Bring it up to medium heat and toss in your carrots and garlic. Once your carrots have begun to soften, add in the onion and the mushrooms. Your onions will be your unofficial guide for when to move on to the next step. You want to wait until the onions are partially translucent, and then add in the cabbage, spinach, chives and celery. At this point, turn the heat up and stir constantly. Keep the vegetables moving as you work them around. You can also add in any spices you want. A good place to start is white pepper and sea salt. Once your vegetables are fully cooked, go ahead and turn off the heat. Set the pan to the side.


Now heat up some water and make the packaged ramen. While that is cooking, pull out the can of chicken or pork or whatever other protein you chose and crack that open. Make sure to remove any fats or liquids that naturally come about from the canning process (a quick rinse can also help if the meat tastes too much like the can it's been housed in). Use a fork to shred the meat, but don't remove it from the can just yet. 


Once your ramen is done cooking (usually about four minutes), dump it into a bowl and add all of your cooked veggies and the meat.  Toss in some sauce if you'd like, and garnish with some of that seaweed you totally didn't buy just for this recipe. Mix well and plate it up, for you or any other adventurous eaters. 


Now that you have the basic concept, take a look at the produce section next time you go to grocery store. What vegetables do they have that you could add in? Do they have any meats or seasonings that you could add to yours to make the dish taste better? It's fun to keep an eye out as you go through the store to see what combinations you can come up with, it also keeps lunch fresh and interesting. 


We hope you enjoyed this week's recipe, and that if you do try it, you'll let us know in the comments below or over on our Facebook page. 


Don't forget that we're not just looking out for your meals. We also want to look out for your home. In the event you need something fixed, or if you're just interested in regular maintenance for your appliances, ARS wants to be there for you. Whether you're in The Colony or Coppell, we aim to be the best appliance rescue service for you and your home.  You can always call us at ((214) 599-0055) or get hold of us via our website.

Chinese noodles with meat,  carrots, peas, peppers mushrooms and spices


Breakfast Apple Oat Cake

The Perfect Get-Going Food For A Winter Morning


By now, your winter break is probably over. That means the kids are back to school, too. We aren't sure about your house, but in this house, we're all slow to get moving on cold weather mornings. That lag often translates into running late for school, hurrying to work, and forgetting a decent breakfast.


Even if your kids are remote or hybrid learners in the ever changing school landscape that is so common this year, they're not freed from the constraints of having to get out of bed on time; most schools are tracking attendance based on what time they log in! The remote learners just have a shorter commute - from wherever they sleep to wherever the computer is kept.


Clearly this whole winter situation wasn't designed to be easy. Who really wants to get up before the sun when it's freezing out? You need something tasty to look forward to in the mornings - something that you can prepare ahead of time, and just grab and go during your busy out the door rush.


We think you might just need our special apple oat cake. It's full of fruit and grain, and it even has a little boost of protein from the addition of some nuts. (That extra protein is to help you stay feeling full.) It's also low in sugar, so you won't get that wilted sugar-crash feeling like a bowl of cereal or a muffin sometimes leaves you with.


You can bake it in an eight inch round pan and cut it up into soft triangles, or you can spread it in a thin layer on a rimmed sheet pan and cut it into crispier bars. You can keep it simple and make it the same way we did, or you can jazz it up with goodies like maple syrup or chocolate chips. Experiment with it and find what you like!


Ingredients


2 cups oats (quick cooking or old fashioned are fine, but NOT steel-cut)

1 cup unsweetened apple sauce

2 eggs

1/2 cup (one stick) butter or margarine, melted and cooled

1/4 cup sugar

2 tablespoons ground cinnamon

1 teaspoon baking powder

1/2 teaspoon salt

1/4 cup sliced almonds, chopped walnuts or peanuts

1/4 cup dried berries or raisins


Tools


Mixing bowls, whisk or fork, measuring cups, spoon, pan (8 inch round or 13 by 9 inch sheet), aluminum foil


Instructions


Preheat your oven to 350.


Mix together your oats and applesauce in the mixing bowl. Add your salt and baking powder and stir until both are incorporated.


Stir in your sugar, cinnamon, nuts and berries. Feel free to add other goodies here, too, like a spoonful of honey or some favorite spices.


In another bowl, whisk your two eggs lightly. We'll be adding them to the first bowl at the same time as the melted butter or margarine, so make sure you've let the heat come back down some on the butter/margarine. The last thing we want to do is end up with scrambled eggs in oats. (Certainly someone out there must like eggs and oatmeal, but we don't think they go together too well.)


Mix your whisked eggs and melted butter into the first bowl and stir thoroughly.


Line your pan with aluminum foil to help make sure everything comes out in one piece and can be cut up neatly, rather than coming out of the pan in misshapen lumps of varying sizes.


Pour your oat mixture (we hesitate to call this a batter, as it's quite thick and rather lumpy) into the pan you prepared. Smooth it down with a spoon and nudge it into the corners or up to the edges of the pan - it won't spread very much on its own.


Once it's nice and level in the pan, place it in the oven on the middle rack. For a round pan, it should take about 40 minutes. If you used a sheet pan, cut that time down to about 25 minutes and check it frequently to avoid burning the bottom or edges.


Once a toothpick inserted into the center of the cake comes out clean, and the center of the cake looks solid and lightly browned, it's ready to come out of the oven.


Allow it to cool for eight to 10 minutes before using the aluminum foil to lift it up from the pan and place it on the counter. Cut into slices or bars, whichever you like.


Store in an airtight Tupperware, wrapped in plastic wrap, or wrapped in aluminum foil. They'll keep up to four days at room temperature. Alternatively, you can freeze them, and then pop them in the toaster oven in the morning. They're pretty tasty if lightly toasted and buttered or drizzled with melted peanut butter.


Sure, it's not quite as alluring as visiting the local drive through, but it's more convenient! And it might make you feel a little better about your progress on those new years resolutions. Let us know what you’re planning for year ahead over on our Facebook page, or in the comments below. 


If your appliances are giving you fits, don’t forget that we’re here to help. Whether you need someone to take a look at your oven, or you just want some maintenance tips for your dryer, we aim to be the best. For you and all of our clients in the Coppell area, Appliance Rescue Service is just a call or click away. 


Call us at (214) 599-0055

Apple oat cake with chunks of cranberry


Festive Foods for 2021

Easy Foods To Snack, Munch Or Nibble For A New Year’s Eve With Friends


We've done it. We are all in the home stretch of this strange, almost universally awful year. And you know what that means - it's time to look ahead to 2021!


With New Year's Day so close at hand, now is the time to start planning. No, definitely not those pesky new year's resolutions we all forget about by the end of January... We're talking about planning the party! Clearly finishing up 2020 is something worth really celebrating - perhaps not with all your friends quite yet (better to be safe now than sorry later), but certainly with your household.


So gather up the kids and some supplies and let's get to work on some party snacks.


Cracker Stacks


Of course, meats and cheeses and crackers are the go-to spread for a party. Easy, classic, fun, and reasonably healthy, they hit nearly all the boxes on the checklist in one go. But why not make it a little more interesting for the holiday? Design some cracker stacks to look like analog clock faces, counting down to the new year!


Ingredients:

1 17 oz box Cheez-It Grooves Sharp White Cheddar crackers

1 16 oz bag Margherita Sliced Hard Salami

2-4 oz brick Colby Jack cheese

2 Tablespoons sour cream (or ranch dressing, or onion dip)


Tools:


Cheese grater sandwich bags, scissors


Instructions:


Using the widest holes on the cheese grater, shred up some of the colby jack cheese. Your goal is about a quarter cup of shreds. (Please don't just buy a bag of pre-shredded cheese, as it's coated in starch so that it doesn't stick to itself or anything else - that defeats the purpose of it sticking to the salami later.)


Open up that box of Cheez-Its and separate the broken chunks from the intact crackers. Use the whole ones for this recipe, but save the pieces and crumbs in a sealed sandwich bag for the next recipe! Go ahead and pulverize those broken pieces so you have mostly small crumbs.


Toss two tablespoons of sour cream (or ranch, or dip) into a sandwich bag, press out the excess air and seal the bag. Take your scissors and make a tiny, tiny cut at the corner. 


For the base of the stacks, we started with Cheez-It Grooves sharp white cheddar crackers because they're very cheesy - their flavor helps make up for how little cheese we'll be adding at the end.


On top of each cracker, dot some of your sour cream and place a slice of salami. (If you'd rather take the extra cheesy route, you can melt a little of the cheese on the crackers before you place the sour cream and salami.)


On each slice of salami, place a small dot of sour cream in the middle. This is now the center point of your clock face. Those wide shreds of cheese you just grated can now become the hands of the clock, and your sour cream dot should hold them in place. If they're too wiggly, place a dot of sour cream at the ends also. Set them to whatever time you want - we think it's cute to count down from 11:00 to midnight, but it's also kind of frustrating when they're eaten up out of order - so to each their own.


Squash Fries


This is the reason we told you to save all those broken bits and crumbs from the crackers - they'll become part of the breading for these baked fries.


It's tough to measure out how much crumb you'll have to start with, because every box is a little different, but your goal is about 3/4 of a cup total. However much you're missing from that 3/4 cup, just add that much in Italian seasoned breadcrumbs (or whatever else you have on hand - we've also made up the difference with a "shake-n-bake" packet previously).


Ingredients:

3/4 cup crumbs (combined smashed Cheez-Its, Italian seasoned breadcrumbs, etc.)

1/2 teaspoon garlic salt

1/2 teaspoon white pepper

1 teaspoon dried parsley

2 eggs, beaten

2 large yellow squash


Tools:

Shallow dishes for egg and crumbs, knife, cutting board, baking sheet, spatula, cooking spray


Instructions:


Wash and dry your squash, trim off any questionable pieces with a sharp knife, and slice the squash into strips about 1/2" thick. Thinner strips will cook up quicker and crispier, so please shorten your cooking time if you adjust the size. No one likes burnt fries, be they squash or potato in origin.


Mix together your crumbs, garlic salt, white pepper and parsley in a shallow dish.


Spray your baking sheet lightly with the cooking spray. 


Drag the squash strips through the beaten eggs and allow any excess to drip off. Move immediately from the egg to the breadcrumb mixture, and roll the squash through the crumbs until well-coated.


Place your coated squash on the baking sheet and repeat until all the strips have been given the same treatment. Leave a little room between the strips on the baking sheet - it'll make turning them over easier later.


Bake at 400 for 20 minutes, turn them over with a spatula, and bake another 25 minutes. You'll know they're ready when they're golden and toasty looking.


What do you think? Do you think you’ll test out these recipes for your New Year’s party? Let us know over on our Facebook page or in the comments below. We’d love to hear from you.


If your appliances have been acting up after Christmas, we’re here to help. Whether you live in Richardson, or Dallas or the surrounding areas, we want to work with you. You can call us at ((214) 599-0055) or go to our website to make an appointment.


Fireworks for new year's eve


From our family to yours, have a happy new year!


Easy as 1-2-3 Christmas Cookies

Great for Gifts, Parties, Or Just You!


There are just under two weeks until Christmas. In fact, last we looked at a calendar, there are twelve full days until Christmas Eve... At which point the kids are likely going to start commenting that Santa needs some cookies.


In our house, it's tradition that the cookies for Santa are always homemade. The recipes and quantities may change from year to year - and honestly, sometimes we just get caught up in the rhythm of measure-knead-roll-cut-bake-cool-repeat, and end up making way too much.


So, for us, cookies are also Christmas gifts for the other households in our family. A little tray or box of handmade treats is also a cute, enjoyable and inexpensive long-distance (or socially-distanced) way to tell someone else you're thinking of them in this unconventional holiday season.


If homemade cookies sound a little out of your league, don't fret. These aren't terribly difficult. They're among the most crowd-pleasing recipes we know, and they are extra easy to personalize.


We'll start with a go-to favorite: Almond Puff Cookies. We've been making this recipe for almost fifteen years now, and it has never failed to impress. They're soft and fluffy, almost cake-like in texture when fresh. These don't really lend themselves to decorating with royal icing like sugar cookies because of the way they puff. A quick egg wash is often all we do to jazz them up. We like to cut these into bell, star and ornament shapes and wash them with different colors, but we've also included a handful of other decorating ideas your family might enjoy.


Almond Puff Cookies


Ingredients:

5 cups all-purpose flour

2 cups white sugar

1 1/2 c butter, unsalted, melted

4 eggs

2 tsp almond extract

1 tsp vanilla extract

2 tsp baking powder

1 tsp salt


Egg Wash (optional)

1 egg (well-scrambled) per each color you intend to make

2 drops food coloring per color

1 teaspoon water per color


Alternative Decoration Ideas (optional)

Sprinkles

Powdered sugar

Slivered almonds

Sweetened coconut flakes

Melted chocolate drizzle


Example of egg paint on cookies in autumnal red and orange

An example of what the egg paint can look like.

Tools:

Mixing bowls (2), rolling pin, cookie sheet(s), cookie cutter(s), small dishes for egg wash (divide by color), pastry brush, cooling rack, space to make a mess (100% not kidding here, especially if the kids are assisting)


Instructions:


Sift together your flour, sugar, baking powder and salt in one mixing bowl.


In the other mixing bowl, whisk together your extracts, eggs, and cooled melted butter. We do NOT want to cook the eggs quite yet, so please allow your melted butter to cool a little before this step; ideally it's still liquid, but not scalding hot.


Knead together the contents of both mixing bowls. If you feel like the dough is a little too stiff, feel free to add a tiny bit of water to it, but don't go overboard. Too much liquid can't be undone, and a wet dough is very difficult to cut into shapes.


Once you've established a nice lump of dough, squish it down into the bottom of the mixing bowl and put the whole thing in the fridge for about 15 minutes. We like to use this fifteen minute break to start making the egg washes, but if you chose another decoration, you're free to relax for a few.


After your fifteen minutes are up, start preheating the oven to 400.


While the oven heats, turn out your dough onto the counter and roll it to about a quarter inch thick. If you feel like there's not enough room on the counter for the whole ball of dough, divide it and toss half back into the bowl for now. Save yourself the headache of having to pull dough out of the backsplash or from under that knife block you couldn't find another place to put (no, we've never had this happen to us - gee, why do you ask?).


Grab the cookie cutters (the objects, not the little minions you may or may not have clamoring in the background). Either you or your helpers should cut as many shapes as you can from the dough you've rolled out, peel away the excess dough, and gently transfer the shapes to your cookie sheet. Be careful not to stretch or distort them during the transfer - if they're stretched, they'll bake up lumpy and uneven.


If you find yourself struggling with the process of transferring, you might consider rolling the dough out on a cutting board or a sheet of wax paper before cutting your shapes. Having an extra layer you can just pick up and flip over the cookie sheet sometimes makes it easier to get the cookies from Point A to Point B without creating oblong ornaments or lopsided stars. Another trick to try is chilling the cut shapes before moving them to the cookie sheet with a thin metal spatula. If you do use a spatula, try to find a smooth one without slots (as the slots risk tearing up the undersides of your cookies).


Repeat the rolling, cutting, and transferring of shapes until you're out of space on the cookie sheets, or out of dough, or out of patience, whichever comes first.


Once your shapes have been arranged on the cookie sheet, you've reached the ideal time to add an egg wash. Use your pastry brush to lightly coat the tops of your cookies with the color of choice. Try not to use too much, just cover it with a thin layer. You don't want it to puddle around the edges on the cookie sheet, as that gets messy and difficult to clean later.


If you're not doing an egg wash, coconut flakes and slivered almonds will hold up well in the oven, and even toast a bit - but sprinkles will lose some of their color to the moisture in the dough, and that color will leak all over the cookie, so it's better to add them, the powdered sugar, or the chocolate later, after the cookies have been removed from the oven.


Bake your cookies 5-8 minutes at 400 degrees. You'll know they're ready to leave the oven when the edges are golden, the centers are puffed up, and the egg wash (if you used it) is set and shiny.


The cookies are still very soft at this point, so allow them to cool for about two minutes before you move them from the cookie sheet to the cooling rack, where they'll finish setting up.


Should you want to do any further decorating, let the cookies cool about ten more minutes on the cooling rack to ensure they're fully set and ready to be moved about (or boxed up for giving).


After you’ve tried out this week’s recipe, consider letting us see? We would love to get pictures over on our Facebook page to see how your cookies turned out. 


If on the other hand you need your oven fixed, or any of your other major appliances, we can help. Just call us at ((214) 599-0055) or make an appointment over at our website. We aim to be the most reliable appliance repair in Addison and the surrounding areas, and we want to keep your home running smoothly. Whether that’s an oven that won’t heat right for making cookies, or a washing machine that won’t drain right, we’re here to help.

Cookie dough with stars cut out by a child