Chicken Satay Made Easy – A One-Pan Wonder

Big flavor, simple ingredients, and zero need for outdoor cooking.

Every so many months, we make it our mission to dig about in the back of the pantry cabinet and check for things getting dangerously close to their best-by dates. This round, we found some coconut milk and a bottle of San-J Thai peanut sauce, and we decided a satay was in order. The grill, unfortunately, was not an option, since we've had rainy weather for the whole week, so we chose to omit the skewers and charcoal and employ a hefty saute pan instead. Turns out, a little flexibility goes a long way in the kitchen. With a few simple swaps and the right technique, you can enjoy all the bold flavors of a classic satay—no grill required.


Ingredients:

1 pound chicken tenderloin

1/2 large yellow onion

1 tablespoon extra virgin olive oil

8 ounces peanut sauce, divided

6 ounces coconut milk (about half a can)

1 tablespoon red curry paste

1 tablespoon low sodium soy sauce

1 teaspoon lemon juice 

1 teaspoon cumin

1/2 teaspoon coriander

1/2 bag fresh spinach


Tools:

gallon Ziploc bag or other watertight container for marinating

measuring cups and spoons

cutting board

knife

tongs

spoon

large saute pan with lid

can opener (if your coconut milk doesn't have a pull tab)


The night before, put your chicken into a Ziploc or other container, shake the bottle of peanut sauce and pour 3-4 ounces of the sauce over the chicken, seal the container up and set it in the fridge to marinate overnight (and to safely defrost, if necessary).


In the event your veggies aren't washed and ready to go, take a moment and wash them before you begin all the other steps. The spinach in particular will take a bit to drain.


Measure your olive oil into the saute pan and tilt to spread it around. Add extra if you feel so compelled, but we don't feel like it really needs much. You may even need less if you're using a nonstick saute pan.


Food safety rules dictate that the first item on the cutting board should be your onion (veggies before raw meats to avoid cross contamination; a good habit to stick to, even though in this case we intend to cook the onion and chicken together). Trim the ends, cut in half down the center, and save half for something else. Cut the remaining half down into skinny slivers, separate the onion layers and toss them into the saute pan with the olive oil.

Drain off and discard the watered-down peanut sauce from the chicken, and cut the chicken into bite size pieces. Use the tongs to transfer the chicken to the saute pan, then crank up the heat to medium and place the lid on the pan. Allow the chicken and onion to cook for about five minutes, stirring occasionally. Larger pieces of chicken will call for longer cooking times, but the goal is to cook the chicken through. If in doubt, you can always use a meat thermometer.


Shake and pop open your can of coconut milk and measure six ounces (about half the can) into the pan. Add the soy sauce, lemon juice, and red curry paste. Stir until a uniform color is achieved. It'll take a little convincing for the curry paste to melt into the sauce. This why we're holding off on our other darker-colored ingredient for a moment: to ensure we get that paste evenly distributed.

Reduce the heat to a quick simmer, place the lid back onto the saute pan, grab and shake the bottle of peanut sauce, and make sure you've got most of the moisture out of your fresh spinach. Give it a little squeeze or press if necessary; you don't want to accidentally water down your sauce. The spinach brings enough moisture without excess water.

Remove the lid from the pan, sprinkle in the cumin and coriander, add four ounces of the peanut sauce, and stir thoroughly. Allow to simmer - uncovered this time - until the sauce reduces, about four minutes.

Add in the spinach, stir quickly, put the lid back on, and turn off the heat under the saute pan. Allow everything to sit undisturbed for a few minutes, watching until the spinach is visibly wilted.

Lift the lid, stir again to distribute the spinach evenly, and serve with your choice of carbohydrate (rice being the most traditional choice).

Great meals don’t always need elaborate planning—sometimes, all it takes is working with what you have. The same goes for your kitchen. Whether it’s a quick fix or routine maintenance, keeping your appliances in top shape ensures that every meal, whether planned or improvised, comes together without a hitch. If your stove, fridge, or any other essential appliance needs attention, our team at Appliance Rescue Service is ready to help. Because when your kitchen runs smoothly, so does everything else.


Website
Call (214) 599-0055

Additional Reading
Energizing Tuna and Turmeric Rice Balls: Perfect for Busy Days

Caffeinated Comfort: Pumpkin Muffins with Coffee Cream Cheese Frosting

Spice Up Dessert: Walnut Cayenne Tahini Cake 

Keep the Spark Alive: How to Spot & Prevent Electrical Issues in Your Appliances

From flickering lights to strange smells, electrical issues in your appliances can be serious. Here’s how to address them before they get worse.

Electricity is integral to our homes. From our food to our clothes to the large majority of our entertainment, all of it has something to do with electricity. Our appliances especially with a few notable exceptions, run on electricity. Which means keeping that spark working properly and safe is important. This week we're looking at the risks that can occur from an overloaded circuit or faulty wiring as well as how to spot and take preventative measures.


WHAT IS AN OVERLOAD? 

Before we go digging into your appliances and how your home is set up, you need to understand what an overload is and what causes them. 


An electrical circuit is the path that electricity flows along. It's made up of wires, conductors, switches, and a circuit breaker, which acts as a safety device. A circuit allows electricity to flow from the power source or outlet to all of the devices that are hooked to that outlet. 


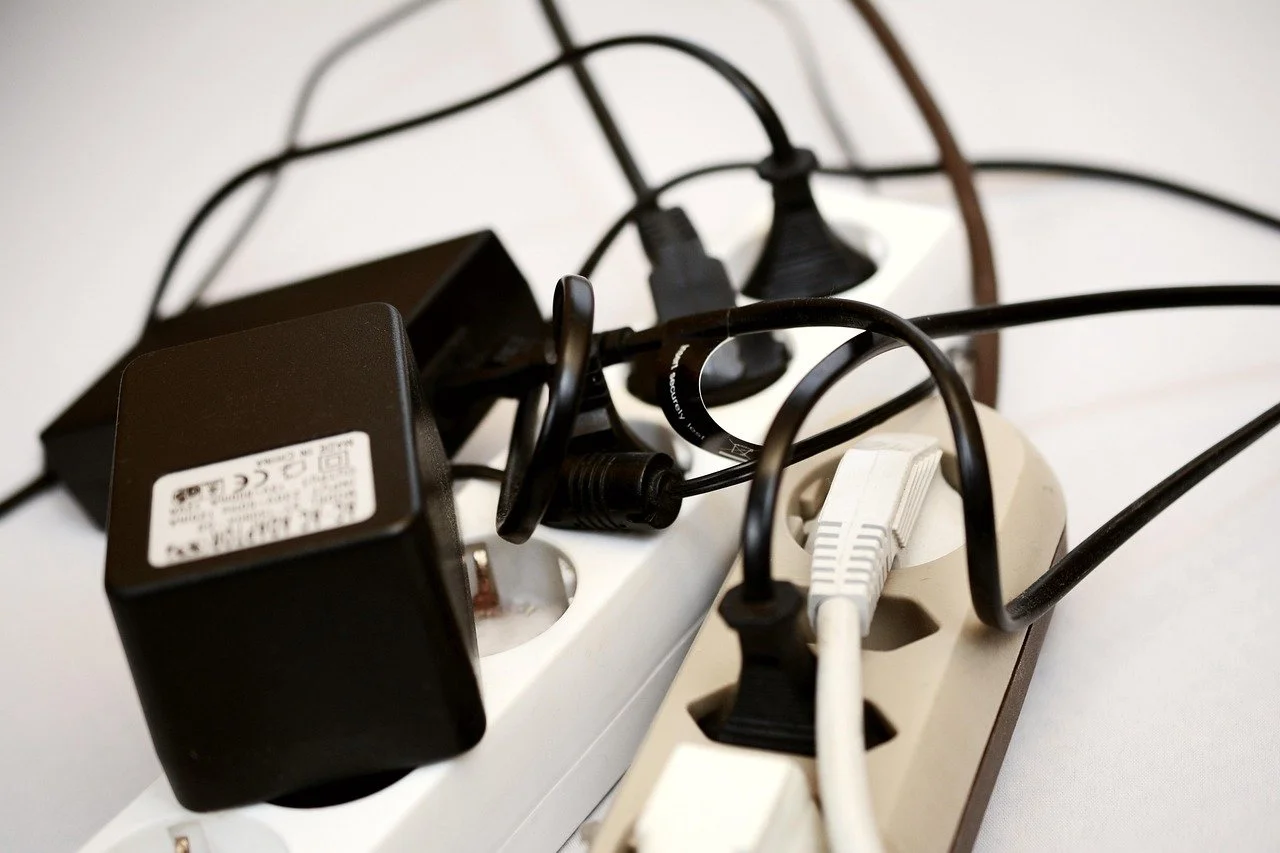
Power strips daisy chained together and overloaded

Courtesy of Conger Design

If you think of a circuit like  A river, then a circuit is overloaded when the water passing through it is at more than what the appliances and devices connected to it need or when they are pulling too much through the circuit.  For example if  your outlet is pulling double what your refrigerator needs, it is as if the river has overflowed. The gauge of the wire, the rating of the circuit breaker, and the electrical panel all work together to establish the maximum load for a circuit. And this is why the other type of an overload can happen, when appliances are pulling more than what an outlet is rated for.


While it can be hard to wrap your head around at first, understanding this concept is crucial to your home. Every circuit in your home has a set amount that it can handle safely. Overloading these circuits can lead to overheating, tripped breakers, broken appliances, or electrical fires.


Recognizing the Warning Signs

Being able to recognize the warning signs in your appliances all the potential overload not only keeps you safe but it keeps your appliances safe. Electrical problems can often start small but they will escalate and rapidly. 

Flickering and dimming lights are a sign to watch out for. This can indicate an overloaded circuit that's working to supply power. 

If your circuit breaker trips and then immediately trips again after you turn it back on this is another sign to watch out for. This means that it is detecting excessive current. 

The next step on the warning scale is if you have a smell of burning from your outlets or your appliances and you aren't cooking anything yet. This can mean that the wiring or the insulation are overheating. 


And then you need to keep an eye out , or maybe an ear out, for buzzing. Buzzing in either outlets or an appliance can and often does indicate that either wires are loose or that it is drawing too much power.

If your outlets start to become warm to the touch or worse discolored, this is not a sign this is a red flag. It is getting hot enough that you need to worry about a fire soon. 


If you notice any of these issues, take immediate action to prevent potential electrical damage or fire hazards.


Common Causes of Electrical Overloads

So we know what an overload is, and warning signs to look out for, the next step to keeping spark alive in your house is knowing the causes. What can you do today to keep that spark alive for years to come?


  1. Don't Put Too Many Devices on One Circuit

Plugging in power hungry appliances, like your refrigerator, space heaters, and dryers on the same circuit can easily overload that circuit. Kitchen circuits are especially prone to this problem. So make sure that you know which outlets are rated for what in your home. If you're buying new you should be able to ask, or you can ask an electrician to come out and give you a hand. 

2. Old or Outdated Wiring

Older homes, like those that were built in Grapevine and Bedford, don't always have wiring that was designed for modern electrical loads. Unless the house was gutted and rewired, many of these homes are built to older codes, and can struggle with the number of electronics we use today. This can cause the wiring to overheat and fail which increases fire risks.


3. Faulty or Failing Appliances

If you have an appliance that you haven't gotten to take care of yet, or haven't noticed that there was a problem, it may draw excessive power. If it's damaged or defective it can easily draw so much that it causes circuit breakers to trip.

4. Extension Cord Overuse

Say it with us. Extension cords are like Band-Aids. They're a temporary fix not a permanent one. Using extension cords long-term or worse Daisy-chaining them together, creates dangerous situations. We love having flowers around the house but Daisy chains are not one of them.  

And in the event that you haven't heard of the term daisy chain, that is when you plug one extension cord into another extension cord and hope that everything turns out fine. It doesn't. Especially if you have a power hungry set of computers plugged in. That's a recipe for fire. 

5. Loose or Corroded Wiring 

Poor electrical connection, such as between a plug and an outlet that has corrosion, can increase the resistance within the circuit. This can cause overheating and circuit failure as the appliance tries to draw power and gas to work harder to get it. 


Electrical wire of different gauges  on spools

Courtesy of Shelton Keys Dunning

6. Multiple High-Wattage Devices Running Simultaneously 

Even if they're on completely separate outlets, they might not be on separate circuits. So having multiple large appliances running at the same time can push the limits of an older electrical system. An example of this is having to make sure you run only your microwave or your toaster oven and not both at the same time because it'll flip the breaker. This is an example of multiple things on one circuit, but plugged into separate outlets.

How to Prevent Electrical Overloads


Fortunately there are steps that you can take to protect your home under appliances. 


  • Distribute your high wattage appliances across separate circuits. 

Don't plug them all into the same circuit and definitely not into the same outlet. The sole exception to this if your house was intentionally wired for it, would be the washer and dryer. And those are usually on a separate circuit of their own with a dedicated outlet. 

  • Use power strips with surge protectors 

         A power strip is not the same thing as an extension cord. Yes it does act to let you plug multiple things into an outlet, but it also has a mini breaker of its own so that if it gets overheated it will shut off.

  • Smart outlets are your friends 

Appliances and other electronics still draw power even when turned off. Previously it was necessary to just completely unplug them. Now with the Advent of smart plugs, you can shut them off either on a timer or from your phone much easier and it makes your electric bill easier to handle as well. 

  •  Upgrade outdated wiring 

If you know that you're home is an older home, 50 years or more, it would not hurt to have an electrician out to inspect the wiring system. They may advise you to upgrade, they might not. As we are not electricians, this is important but outside of our ballpark. 


Electrical Hazards & Consequences

Ignoring electrical issues isn't any good for you or your appliances. Just like a relationship ignoring the problem will not make it go away, it just grows teeth and gets bigger. 

Ignoring electrical issues can lead to serious dangers, including:

Electrical sparking

Courtesy of Ulrike Mai

  • Electrical Fires – Overheating wires can ignite surrounding materials, leading to devastating house fires.

  • Damaged Appliances – Power surges and overloads can shorten the lifespan of expensive appliances.

  • Electric Shocks – Faulty wiring or overloaded outlets can increase the risk of shocks, which can cause severe injuries.

  • Burns, muscular spasms, heart collapse, and other potentially fatal consequences can ensue from receiving an electric shock. Overloading circuits, needing more insulation, and not getting expert advice from electricians are all things that can increase the danger of electric hazards.

  • Arcing & Short Circuits – Overloaded circuits or damaged wiring can cause electrical arcing, which produces extreme heat and sparks, increasing fire risks.

  • Structural Damage – Persistent overheating can degrade wiring insulation and even damage walls or electrical panels over time.

  • Increased Energy Costs – Overloaded circuits force appliances to work harder, leading to inefficiency and higher electricity bills. 

  • Frequent Power Outages – An overloaded electrical system may cause regular outages or failures.


When to Call a Professional


If you experience any of the following appliance-related electrical issues, Appliance Rescue Service is here to help: 

  • An Appliance Is Tripping the Circuit Breaker Repeatedly – If resetting the breaker doesn’t solve the issue, the appliance may have an internal fault.

  • An Appliance Overheats or Emits a Burning Smell – This could indicate wiring issues or motor failure inside the unit.

  • A Major Appliance Suddenly Stops Working – Especially if there was no power surge or visible damage, it may need professional repair.

  • A Faulty Appliance Shows Signs of Electrical Issues – Buzzing sounds, inconsistent performance, or visible sparks mean it needs servicing.

  • A Fridge, Washer, or Dryer Loses Power Unexpectedly – If the issue isn't with the circuit itself, the appliance may have an electrical fault.

Don’t wait for sparks to fly—take action today to keep your home safe and your appliances running smoothly. If you notice persistent electrical problems—such as frequent breaker trips, buzzing outlets, or burning smells—it’s best to consult a licensed electrician. Regular inspections can prevent small problems from turning into major, costly repairs.  


Additional Reading
Common Appliance Issues That Could Ruin Your Holiday – And How to Prevent Them

The Risks of DIY Appliance Repairs and How to Avoid Them


Unlocking Your Dishwasher: A Troubleshooting Guide


Avoid the Break-Up: How Overloading Appliances Can Lead to Disaster

 Think cramming in that extra load will save time? Think again!

We all want our household chores to be as quick and efficient as possible. Tossing in an extra sweater, cramming in a few more dishes, or stuffing the dryer to the brim might seem like a great time-saver. But is it?

Overloading your appliances doesn’t just mean a subpar clean or an extra drying cycle. It causes real damage—broken parts, clogged drains, and costly repairs that could have been avoided. Worse, it shortens the lifespan of your machines, meaning you’ll be shopping for a replacement much sooner than expected.


In this article, we’ll take a look at the risks of overloading your dishwasher, washer, and dryer, along with some telltale signs that your appliances are crying out for a break.


Dishwasher

Let's start off with the one we’re all probably guilty of. Overloading the dishwasher. 


It's the end of a long week, and all you want is to go to sleep, and you just need to fit a few more dishes in. You don't want to wash them by hand, and surely you can find a way to make them fit. That is the type of thinking that we are all guilty of at least every now and then. But as you can tell, since you're here, that leads to many problems. 


The biggest one for that late-night version of you? Tomorrow-you is going to have to wash all of those dishes again. When there's not enough space in the dishwasher water and soap cannot flow easily and they struggle to clean everything fully. This means that you're going to be pulling out plates with food still stuck on them or silverware that is still oily from the day before. 


Putting in cookware and facing it downwards rather than to the side will act like a shield. That blocks the spray arm, which not only causes your other dishes to stay dirty but can also end up breaking your spray arm. 

If you pack things too tightly, you can end up having broken dishes from things being pushed during the wash cycle. 

Courtesy of jhenning

You can also end up dealing with clogged drainage which will then lead eventually to water leaking across your kitchen. It all starts with the food and oily residue that we mentioned before. When you're overloading the dishwasher, there's too much for it to handle and so not everything gets washed out. From there the drain's clog and not only does that cause issues with bacteria breeding, but it can also lead to water leaking out of the dishwasher because there's nowhere else for it to go.


Washer

Still dealing with water oriented appliances, let's take a look at the washer in your laundry room. Overloading your washing machine can come in one of two forms, either you are putting items that are two bulky and take up too much space, or you're putting an items that are too heavy. 


Both of these, however, will result in many problems, the least of which is having to rerun the load. 

Overloading your washing machine puts strain on the motor and faster wear and tear from that strain means the motor will die that much more quickly.


Like we mentioned, you'll have to rewash the load because the water is unable to reach everything during the first load. So you can either run it twice or deal with the clothes not being as clean as they should be. 

 Having your clothes packed tightly together is also likely to damage your clothing. Buttons, zippers, and other closures can catch on hems, stray strings, or even delicate fabrics and cause rips. This means your carefully curated wardrobe dies far more quickly than you would want.


Courtesy of RDNE Stock Project

You can also lose pieces. Have you ever wondered what happens to your  socks? When you know you put two pairs in and you only get one of each back? One of the reasons that can happen is that smaller items are easier to get sucked down the drainage of your washer. Which leads to its own problems, like clogged pipes or leaks depending on the size of the item. 


Dryer 

Your dryer has the easiest signs to spot if you're overloading it. If you dryer is producing lots of lint, and we do mean lots. If you are needing to dry a load more than once in order to get it completely dry. Or if you pull out excessively wrinkled clothing straight from the dryer. These are all signs that your dryer is overloaded. 


Courtesy of Planet Care

These are problems in and of themselves, but larger ones are the damage to the dryer itself. The belt, pulley assembly, and bearings, these are critical components. If these break, your dryer is non-functional. a


Overloading your appliances might seem like a non-issue or even a way to save time and money. But as we pointed out in each section, continual overloading means that you save neither. Overloading stops things from either getting cleaned or dried appropriately, as neither water nor air can flow easily. So you end up having to run a load twice maybe even three times, depending on what you were doing. Then, you end up with an even higher electric bill. With enough time and repeated overloading, you also wear down your appliance. This means that you then need to call in a technician to diagnose and fix the problem. Which, although we are here to fix your appliances, is not something we want for you. We’re always here to help with repairs, but preventing damage in the first place saves you time, money, and the frustration of an appliance breakdown.


Appliance Rescue Service is here for you—whether your appliances are brand new or have been with you for years. Our goal? To get them back in top shape so they serve you well for years to come.  You can reach out to us to via our website or by giving us a call and we’ll work with you to help you find a date and time that works for you.


Website
Call: (214) 599-0055


Additional Reading
Signs Your Appliances Are Overheating, and What to Do About It


DIY Repairs vs. Your Appliance Warranty: What’s the Real Cost?

Prepare Your Home for Fall: Essential Maintenance Tips


How We Fixed the Holiday’s Most Divisive Dish

 More veggies, more flavor, and way less salt—this is green bean casserole done right.

It seems like every holiday season, every gathering is subjected to the "classic" green bean casserole. You know the thing - a giant dish of canned green beans, cream of mushroom soup, sometimes bacon, usually fried onion... Always buckets of salt, and the same cloying, sticky mass lacking both flavor and texture.


Ingredients:

2 14-oz bags frozen Prince Charles vegetable blend

1 smoked sausage rope

1 yellow onion

5 ounces shredded cabbage

2 tablespoons minced garlic

2 tablespoons unsalted butter, plus a little extra to grease the dish

2 tablespoons all purpose flour

1 teaspoon smoked paprika

1/2 teaspoon dried parsley

1/2 teaspoon dried thyme

1/2 cup low sodium broth (chicken or vegetable)

1 cup 2% milk

 salt and pepper, to taste

2 ounces shredded cheddar or Colby jack cheese (optional)


Tools:


Sauté pan with lid

Colander

Cutting board

Knife

Whisk

Tongs

Measuring cups and spoons

9x13 baking dish


The guys in particular are adamantly anti-green bean casserole. One (beloved) grandparent has made it the same Campbell's-approved way for FORTY FIVE YEARS. Dad won't even look at it any more, after a childhood of the siblings sneaking their portions onto his plate. The teen won't touch it, or any other canned vegetable, having been rather spoiled by a combination of hidden vegetables and as-fresh-as-possible at all other occasions. The rest of us look at it and kind of sigh internally, but will consume it in the name of family harmony. There are a few left in the family who truly enjoy it, but we feel it was long past time for a change. 


While it took us a while, we believe we have finally tackled the challenge of a non-standard green bean casserole. Something with visual impact, depth of flavor, and a variety of textures. And also a LOT less salt. Some of us are sensitive to it, after all. In short, we think we've devised something to put on the table next year that hopefully won't be ignored like the usual casserole. Try it on the in between so you have most of the year to make it yours, and you can really take the family by surprise next Thanksgiving.


The big difference maker in this is the fact we're using five vegetables instead of just the bland, mushy singular. Green beans are fantastic - but canned green beans are just sad. Fresh is always the best option, but in the names of frugality (out of season produce is expensive!), availability (does your grocery store have fresh wax beans? Ours doesn't) and convenience, we're opting to use frozen.


If you're not familiar with the Prince Charles blend of vegetables, it's just green beans, wax beans and carrots. We feel like the mix is normally a little light on the carrots, so we like to add in an extra handful of baby carrots. Whether or not you do the same is your choice.


As always, wash any produce that didn't make its way to you already washed, prepped and ready to eat.


Toss your green beans, wax beans and carrots into the sauté pan with just a little water (half a cup at most). Set the heat to medium, put the lid on the pan and let them steam for six to eight minutes.


While they steam, chop your onion, shred your cabbage and cut the rope sausage to whatever size pieces you prefer. In this case, larger chunks of sausage will not affect the cook time, since it's precooked. You can choose any flavor of smoked sausage, but we used the Hillshire Farm roasted garlic chicken sausage.


After you've steamed the vegetable mix, pour it all into the colander to get rid of the excess water, then transfer it to a large mixing bowl. If you started with frozen like we did, it won't be cooked through, and this is a desirable outcome. We don't want mushy green beans after they've been baked - the whole point here was to flip the script on squishy, sad casserole - so we don't want them floppy before they've even made it to the oven.


Put the sauté pan back on the stove and flip the sausage, cabbage and onion into it. Add the garlic. Replace the lid and allow that to cook, covered, until the onion is translucent, stirring occasionally. When the onions are translucent and the cabbage has changed color, use tongs to transfer all of it into the mixing bowl with the beans and carrots. Stir to combine.


Preheat the oven to 350 and grease the bottom of a 9x13" baking dish. Pour the big mixing bowl of veggies into the baking dish and arrange them into an even layer. Add a little salt and pepper, if you so desire.


That same sauté pan, which probably would like to know when it gets a break by this point, needs to go back on the burner, still on medium. Melt the two tablespoons of butter and sift the flour into it, whisking it together to make a roux. As the color starts to deepen, add the smoked paprika, parsley and thyme. Continue to whisk to combine. Measure in your broth and milk, stirring constantly. Make sure to scrape sides and the bottom of the pan as you go, stirring until the sauce thickens.


Once your sauce has reached the desired consistency, pour it evenly over the vegetables and set that poor sauté pan down to cool (its work here is finally done for the day). Grate a thin layer of cheese over the top if desired, move the dish into the oven and allow it to bake uncovered for 20 minutes.


The holidays are all about tradition, but there’s nothing wrong with giving those traditions a little refresh—especially when it means bringing bold flavors and vibrant textures to the table. And just like a good holiday dish, your home’s appliances need a little care to keep everything running smoothly. Whether it’s a finicky oven or a fridge that’s working overtime, our team at Appliance Rescue Service is here to help. Because the only thing that should be bubbling over this season is your excitement—not your appliances!


Website

Call   (214) 599-0055


Additional Reading

Berry Bliss: A Delectable Mixed-Berry Clafouti Recipe

Ladle Love: Wholesome Potato Leek Soup Recipe

Fall Comfort Food: How to Make Perfectly Creamy Pumpkin Pasta


5 Ways to Show Your Appliances Some Love (and Keep Them Running Longer!)

Keep Your Home Running Smoothly with These Simple TLC Tips

While your appliances may not be able to say "thank you," they do a lot to make your life easier. And just like any hardworking partner, they deserve a little appreciation! So why not return the favor? This week, we’re sharing five simple ways you can show some TLC to your appliances—because a little care today means a longer, smoother-running life for them (and fewer headaches for you).


1. Make Sure They're on the Level

In any good relationship, balance is key, including your relationship with your appliances! Ensuring that your appliances are properly leveled might not seem like a big deal, but it can greatly impact their performance and longevity.


Take your refrigerator, for example. If it's not level, you may notice that the door doesn’t close all the way, leading to cool air escaping and higher energy bills. You might also have issues with food and drinks sliding around on uneven shelves. For your washer and dryer, being uneven can cause excessive vibrations that rattle the machine. This leads to damage over time to the gears and motors. A wobbly washer can also "walk" itself out of position, pulling on hoses and a risk of leaks or flooding. And let’s not forget your oven—if it’s sitting at an angle, you could end up with unevenly cooked meals. 


The good news? Checking and leveling your appliances is a simple! Many appliances have adjustable feet that you can tweak to ensure they’re sitting evenly. If you’re unsure how to do this, our team at Appliance Rescue Service is happy to help!


2. A Descale Treatment Works Wonders

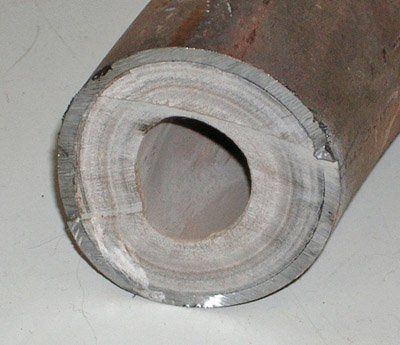
A relaxing spa treatment can leave you feeling refreshed—and your appliances can benefit from that kind of care. Over time, minerals from your water can build up inside appliances that rely on water flow. Your refrigerator, washing machine, and dishwasher are some examples. This buildup, commonly known as scale, can slow down water movement, clog hoses, and even cause parts to wear out prematurely. 


If you’ve ever noticed your washing machine taking longer to fill, your dishwasher not cleaning as well as it used to, or your refrigerator’s water dispenser running sluggishly, scale buildup could be the cause. Even if you don’t have hard water, mineral deposits still accumulate over time, making descaling an important part of routine appliance care.


Luckily, keeping buildup at bay is easy! Many appliances have specific descaling products designed for them, and running a cleaning cycle every few months can keep things running smoothly. If you're unsure where to start, a professional technician can help by performing a deep-clean descaling service to get everything back in top shape.


3. Help Them Get Organized

Love isn’t just about grand gestures—sometimes, it’s about the little things, like keeping things neat and organized. Your refrigerator, in particular, benefits from a little tidying up.


An overstuffed fridge isn’t just a hassle when you’re trying to find last night’s leftovers. It can also interfere with airflow, causing uneven cooling. Hot spots and cold spots can develop, leading to food spoiling too quickly or, in some cases, freezing when it shouldn’t. Plus, when your fridge has to work harder to maintain a steady temperature, it uses more energy, which can drive up your electricity bill.


To help your fridge function at its best, take some time to reorganize it:


Keep vents clear so air can circulate freely.

Group similar items together so you can find what you need easily.

Check expiration dates and remove anything past its prime.

Wipe down shelves regularly to keep things clean and fresh.


4. Give Them a Good Scrub

We all feel better after a nice, deep clean—and your appliances are no different! While regular wipe-downs help keep things looking tidy, every now and then, your appliances need a little extra attention to prevent buildup and ensure they keep running smoothly.


Your dishwasher, for example, can collect food particles, soap scum, and grease over time, which can clog filters and reduce its efficiency. Running a cleaning cycle with a dishwasher-safe cleaner once a month helps remove grime and keeps it working properly.


Your washing machine also benefits from a good scrub. Dirt, detergent residue, and even mildew can accumulate inside, especially in front-loading machines. Running a cleaning cycle with a washing machine cleaner or a vinegar solution helps keep unpleasant odors at bay and ensures your clothes come out fresh.


And don’t forget the outside of your appliances! Dust and grease can build up on refrigerator coils, stovetops, and even dryer vents. A quick wipe-down with warm, soapy water or a specialized cleaner can help keep things looking and working their best.

5. Treat Them to a Spa Day (a.k.a. a Maintenance Check)

You might not be able to send your appliances to a spa, but a maintenance check from a professional technician is the next best thing! Regular maintenance is one of the best ways to prevent unexpected breakdowns and costly repairs.

A trained technician can:


Check for signs of wear and tear before they turn into major problems.

Ensure all parts are functioning properly and efficiently.

Clean internal components to remove buildup and improve performance.

Make small adjustments that can extend the life of your appliances.

Think of it like a wellness check-up—your appliances might seem fine, but routine maintenance can catch minor issues before they become major headaches. Whether it’s a refrigerator that isn’t cooling quite like it used to or a dryer that’s taking longer than normal, a professional tune-up can keep everything in peak condition.

A little love goes a long way—especially when it comes to your appliances! Keeping them leveled, descaled, clean, and well-organized can make a big difference in their efficiency and lifespan. And when it’s time for a little extra care, our team at Appliance Rescue Service is here to help! Whether you need a maintenance check, a repair, or just some expert advice, our technicians are ready to keep your home running smoothly.

So go ahead—show your appliances some love today! They’ll thank you with years of reliable service.