home maintenance

Gross Truths About Appliance Filters (and How to Clean Them Right)

Learn when to clean and when to replace filters in your home’s most-used appliances.

When it comes to keeping your home running smoothly, the little things make a big difference—and few things are littler than your appliance filters. They sit quietly inside your fridge, dishwasher, dryer, microwave, and even your HVAC system, working day after day to keep your air cleaner, your water fresher, and your appliances safe from strain.

But here’s the catch: filters only do their job if you take care of them. Cleaning and replacing them on schedule is one of the simplest ways to extend the life of your appliances, save energy, and avoid bigger repairs down the road. The good news? With just a few minutes of attention, you can keep your home’s filters in great shape.


Refrigerator – Water Filter

Your refrigerator’s water filter works hard behind the scenes to make sure every glass of water and ice cube is clean, fresh, and safe to drink. When it’s neglected, the results show up quickly in taste, smell, and even how well the dispenser works.

So, how do you take care of it?

  • Locate the filter (commonly in a grille at the base, inside an upper corner, or behind a panel).

  • Shut off the water if your model requires it.

  • Twist or release the old filter and pull it out.

  • Insert the new filter, making sure it locks in place.

  • Run and discard 2–3 gallons of water through the dispenser to flush out air and activate the filter.

  • Reset the filter indicator light if your fridge has one.


-courtesy-of-Lowes

Cleaning Frequency: Replace every 6 months, or every 3–4 months for heavy use, larger households, or poor water quality.
Signs to Watch For: Cloudy water, slower dispenser flow, smaller or misshapen ice, odd taste or smell, strange noises, or a filter indicator light.
What Happens if I Don’t? You may end up drinking contaminated water, dealing with mold and bacteria buildup, or facing a clogged dispenser or ice maker.

Refrigerator – Air Filter

The air filter inside your fridge helps control odors, slow down bacteria growth, and keep food fresher for longer. A clean air filter means your fridge smells pleasant and your groceries last as they should.

So, how do you take care of it?

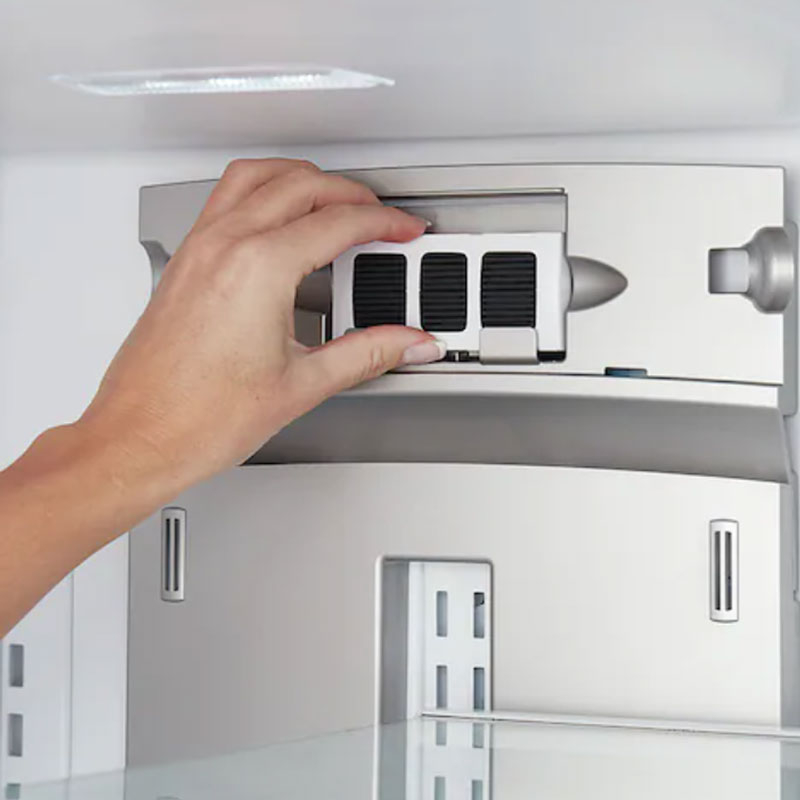
  • Locate the filter (typically near the back wall or ceiling inside the fridge).

  • Remove the cover and the old filter.

  • Insert the new filter into the holder.

  • Reattach the cover and reset the filter indicator if your fridge has one.

Courtesy-of-Frigidaire

Cleaning Frequency: Replace every 6 months, or up to 12 months in lower-use households.
Signs to Watch For: Lingering odors, food spoiling faster than usual, or a filter alert light.
What Happens if I Don’t? Odors linger, bacteria spreads, food spoils more quickly, and you may notice a stale or musty smell in your fridge even after cleaning.


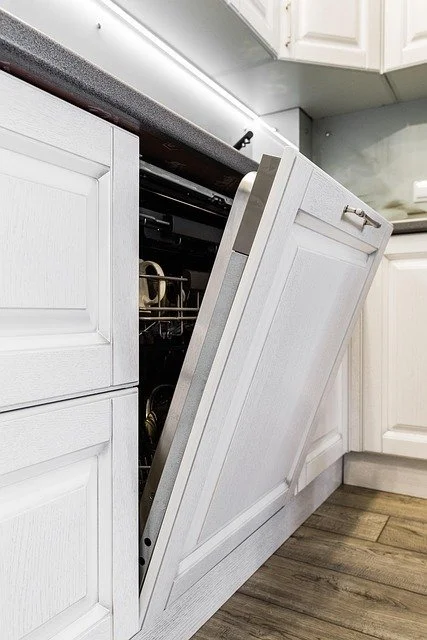
Dishwasher Filter

Your dishwasher’s filter is what stands between you and gritty, dirty dishes. It traps leftover food scraps and keeps the drain from clogging. Clean it regularly, and your dishes come out sparkling. Neglect it, and you’ll start to smell the difference.

So, how do you take care of it?

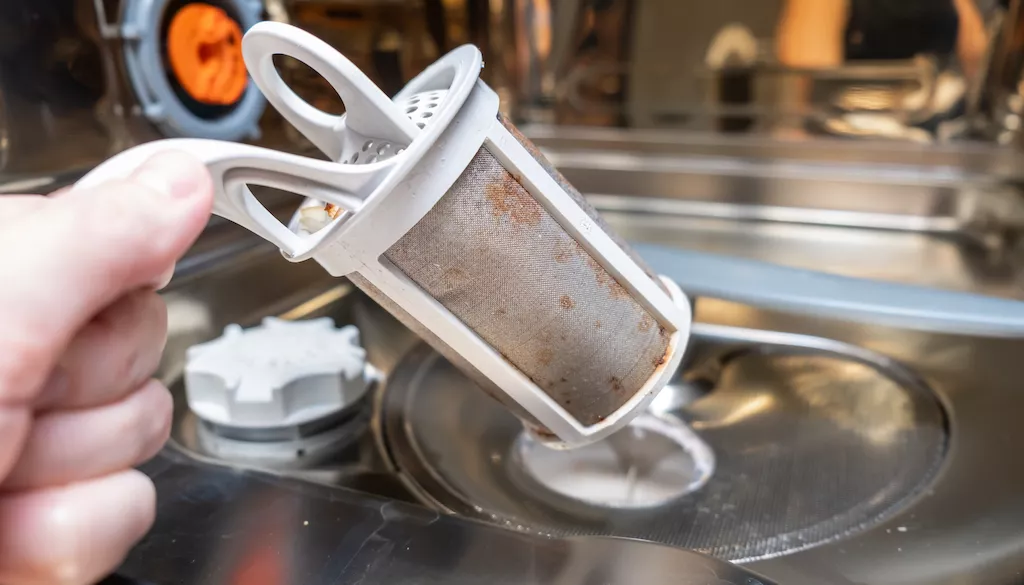
  • Remove the bottom rack to reach the filter, usually found under the spray arms.

  • Twist and lift the filter out (some models have multiple pieces).

  • Rinse under hot water to remove debris.

  • Use a sponge or small brush with mild soap for stubborn grime.

  • Reinstall the filter securely, then replace the rack.


Courtesy-of-Thumbtack

Cleaning Frequency: Clean every 1–4 weeks depending on usage. Manufacturers often recommend every 2–3 months. Some models have indicators after about 50 wash cycles.
Signs to Watch For: Gritty dishes, foul odor, drainage issues, or visible debris in the filter.
What Happens if I Don’t? Food debris builds up, leaving dishes dirty and smelly. Clogs can cause water backup, drainage issues, and even damage to the pump.


Microwave Filters – Grease & Charcoal

Over-the-range microwaves have two filters: grease filters that trap cooking residue, and charcoal filters that absorb odors. Keeping them clean means better ventilation and a fresher kitchen.

Grease Filter – How to Clean:

  • Unplug the microwave.

  • Slide or unclip the filter from the underside.

  • Soak in hot, soapy water (add a little baking soda for heavy grease).

  • Scrub gently with a dish brush, rinse thoroughly, and air-dry.

  • Reinstall when fully dry.


Charcoal Filter – How to Replace:

  • Unplug the microwave.

  • Remove the vent panel screws.

  • Take out the old charcoal filter.

  • Insert the new one in the correct position.

  • Reattach the panel and screws.


Cleaning Frequency: Grease filters should be cleaned monthly (or every 1–3 months with lighter cooking). Charcoal filters must be replaced every 6 months.
Signs to Watch For: Lingering smoke, persistent kitchen odors, or reduced vent performance.
What Happens if I Don’t? Odors and smoke linger, grease builds up, efficiency drops, and overheating becomes a risk.


Clothes Dryer – Lint Filter

Every load of laundry leaves behind lint, and your dryer filter’s job is to catch it. Clean it after each use, and your clothes will dry faster and safer.

So, how do you take care of it?

  • Pull out the lint filter and remove lint by hand after each load.

  • Once a month, scrub the filter with a brush in warm, soapy water.

  • Rinse thoroughly and let dry completely before replacing.

Cleaning Frequency: After every load for lint removal, and once a month for a deeper wash.
Signs to Watch For: Longer drying times, overheating, burning smell, or visible lint buildup in the vent.
What Happens if I Don’t? Expect slower drying, higher energy bills, damage to the dryer, and a serious fire risk from lint buildup.


HVAC / Air Conditioner

Your HVAC system is a home necessity when it comes to living in Texas, and that means taking care of it is too. Cleaning out the filters on it fights on two fronts: preventing excess strain on the system and keeping the air clean inside your home. In case you didn’t know, your HVAC system keeps the air clean by trapping dust, pollen, and other contaminants.

So, how do you take care of it?

  • Turn off the power to the unit.

  • Find the filter and inspect it for damage (there may be more than one—your manual will tell you).

  • Vacuum the filter with a soft brush attachment to remove loose debris.

  • For a deeper clean, soak it in hot water and white vinegar for 1 hour.

  • Rinse with clean water and let dry fully.

  • Replace the filter, ensuring it’s positioned correctly for airflow.


Cleaning Frequency: Reusable filters should be cleaned once a month and replaced every six. Disposable filters should be replaced every 1–3 months.
Signs to Watch For: Reduced airflow, increased dust in the home, or visible dirt on the filter.
What Happens if I Don’t? You’ll deal with higher energy bills, dirtier air inside your home, reduced airflow, and possible breakdowns in the system.


Filter care may not be glamorous, but it’s one of the smartest habits a homeowner can keep. Staying on top of these small maintenance tasks gives you cleaner air, safer water, fresher food, and peace of mind that your appliances are working their best.

And when the job calls for more than a filter swap—whether it’s a repair, replacement, or expert advice—ARS is here to help. Our team is dedicated to keeping your home comfortable and your appliances running smoothly, so you can focus on what matters most.


Website

Call: (214) 599-0055


Additional Reading

4 Steps To A Clean Range Hood 

Why Is My Oven Smelling So Strange? 

Don't Overlook Your Ice Maker: The Benefits of Regular Cleaning

Spring Home Maintenance Checklist: Avoid Costly Repairs with These Must-Do Tasks

Spring is the perfect time to refresh your home—inside and out. Here’s what every homeowner should do this season.

Although it feels like winter has already left us here in Texas, in theory spring is not here yet. But as the days grow longer, it's the perfect time to refresh your home and shake things out after being inside all winter. The transition isn't just about spring cleaning, it's about ensuring your home is in top shape to prevent expensive repairs down the line. From the roof to the foundation inside and out here's our spring guide for getting your home ready for warmer months.

Exterior Maintenance: Protecting Your Home’s First Line of Defense

Roof & Gutters: Inspect and Clear Winter’s Aftermath


After months of exposure to harsh winter weather, your roof and gutters need attention. Inspect the roof for missing or damaged shingles, as these can lead to leaks that compromise your home’s structure. If you do  notice sagging, or any signs of water damage, call a professional before small issues turn into costly repairs.

Courtesy of 123switch

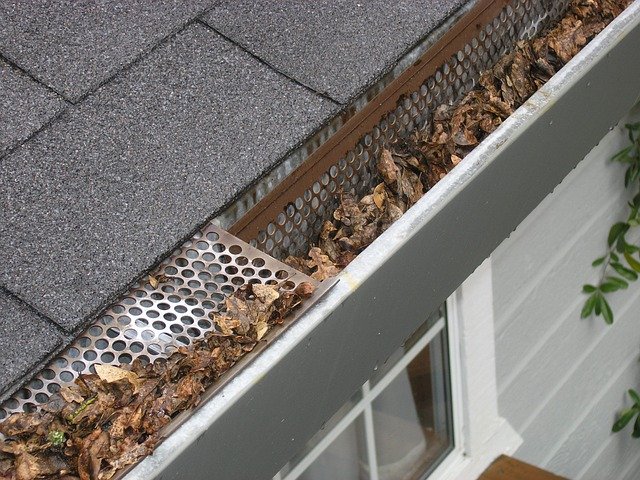
Gutters and downspouts also take a beating during winter. Here, you'll need to clear out leaves, twigs, and other debris to ensure proper drainage. Clogged gutters can lead to water damage, including foundation problems and basement flooding is left in tended.  If you haven't already, consider installing gutter guards to make upkeep easier.

Windows & Doors: Improve Efficiency and Let in the Light

Let's move on to windows and doors. With warmer weather approaching, it’s time to prepare your windows and doors for fresh air and sunshine. Inspect seals, weatherstripping and caulking for cracks or gaps that could allow cool air to escape, leading to higher energy costs. Re-caulking these areas helps maintain a comfortable indoor temperature. (And given our location, we need all the help we can get.)

Courtesy of Pexels

Give your exterior windows a thorough washing to remove winter grime and improve natural light. Also, check window and door screens for any tears or damage—repairing them now will prevent pests from sneaking inside when you open your home to spring breezes. The great news is that if there are any small tears, you can now buy patches instead of having to replace the full screen. 

Driveway & Walkways: Repair Winter’s Wear and Tear

A tree is torn up from the sidewalk with roots exposed thanks to water damage and wind.

Most cracked sidewalks will be smaller than this, but it's worth checking.

Cold temperatures and moisture can wreak havoc on your driveway and walkways. You'll need to look for cracks, potholes, or uneven surfaces that could become safety hazards. Sealing and repairing these issues early will prevent further deterioration and ensure safe passage for your family and guests. 

Outdoor Faucets & Sprinklers: Restore Water Flow

If you turned off exterior water sources for the winter, now’s the time to turn them back on. You'll also want to remove any foam protectors that you placed, as during warm months, those can be top homes for bugs and mice. Check for leaks in outdoor faucets and hoses, and ensure your sprinkler system is working properly. If you do have a sprinkler system, take the time to adjust the coverage to make sure all of your lawn gets water. 


Yard & Landscaping: Refresh and Revitalize

Winter can leave your yard looking a little worse for wear. Before you start gardening, you'll want to get it cleaned up. Start by removing debris such as fallen branches and leaves. Prune overgrown trees and hedges, especially those near your home, to prevent damage from high winds during spring storms. Adding mulch and ground cover will help to retain moisture and suppress weeds—refresh these areas for a polished, healthy landscape. 

Interior Maintenance: A Fresh Start for Your Living Spaces

HVAC System: Prepare for Warmer Days

Courtesy of Chad Populis

Let's get the biggest task out of the way first. Before the heat of summer sets in, you will want to schedule a professional inspection and tune-up for your air conditioning system. Regular maintenance keeps your HVAC system running efficiently and prevents breakdowns during peak usage. While you wait for that date to roll around, you can replace your HVAC and furnace filters to improve air quality and keep your home comfortable.

Kitchen & Appliances: Deep Clean and Maintain for Efficiency

A dirty vent hood that needs to be cleaned this spring.

Your kitchen appliances work hard year-round, and spring is a great time to give them a little TLC. Clean the range hood and vent filters to prevent grease buildup, which can be a fire hazard. (Especially after all of the heavy foods from the holidays.) You'll also want to check and clean your dishwasher and washing machine filters to ensure they operate at peak efficiency.

Courtesy of Kristoferb

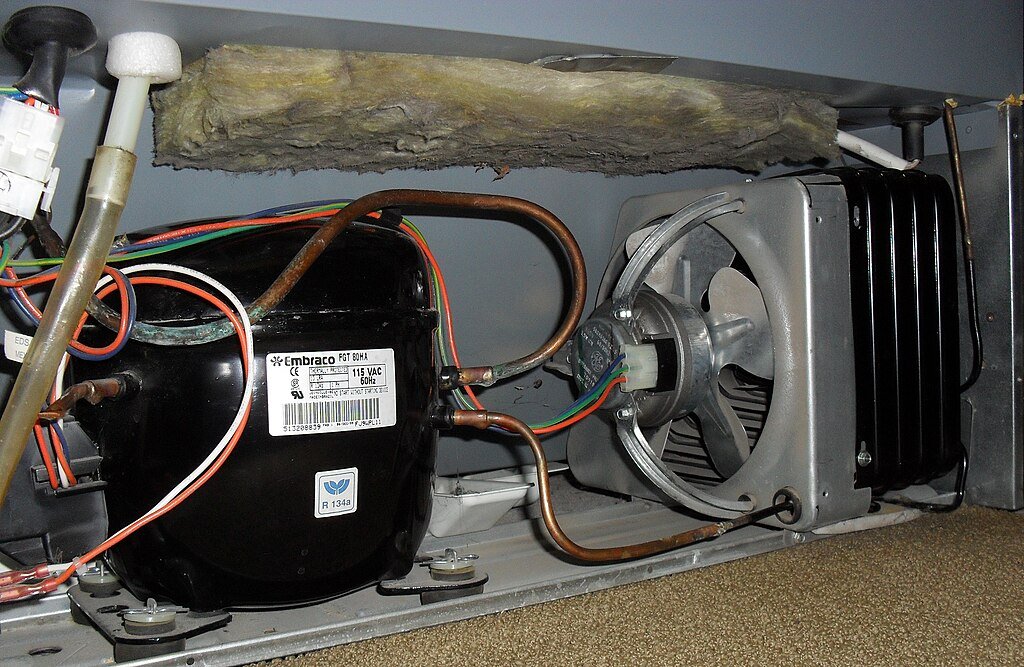
Your refrigerator also needs attention—vacuum the coils to improve efficiency and check that the seals are intact to maintain proper cooling. If you have a chest freezer, warmer days mean it is easier to defrost it if ice buildup exceeds 1/4 inch. After all, spring is a great time to start laying in pre-made meals for less cooking during summer. 

Bathrooms & Plumbing: Prevent Costly Water Damage

A few simple checks can help avoid plumbing headaches down the road. Start off by inspecting your pipes for leaks and weak water pressure. You'll also want to clean the sink and shower drains to prevent any clogs. It's also an ideal time to descale your shower head, as it should be done once a quarter. 

General Home Upkeep: Refresh Your Space

Spring cleaning isn’t just about tidying up—it’s about maintaining your home’s condition, especially after being inside and with guests all winter. Take this time to wash sofa covers, wipe down walls, and remove scuff marks. These small touches can make your home feel bright and renewed.

By tackling these maintenance tasks early in the season, you’ll ensure a smooth transition into spring and summer. A little effort now can save time, money, and stress in the long run—helping you enjoy the warmer months with peace of mind.

If you find that any of your appliances are giving you trouble, you can reach out to us at Appliance Rescue Service. While we aren't great at spring cleaning, we are fantastic at keeping your appliances running while you do. Even better we will work with you to find a time that best fits your schedule this spring for our technicians to visit. You can reach out to us at our website or give us a call to get started on scheduling a maintenance visit.


Website

Call

Courtesy of Monika

5 Ways to Show Your Appliances Some Love (and Keep Them Running Longer!)

Keep Your Home Running Smoothly with These Simple TLC Tips

While your appliances may not be able to say "thank you," they do a lot to make your life easier. And just like any hardworking partner, they deserve a little appreciation! So why not return the favor? This week, we’re sharing five simple ways you can show some TLC to your appliances—because a little care today means a longer, smoother-running life for them (and fewer headaches for you).


1. Make Sure They're on the Level

In any good relationship, balance is key, including your relationship with your appliances! Ensuring that your appliances are properly leveled might not seem like a big deal, but it can greatly impact their performance and longevity.


Take your refrigerator, for example. If it's not level, you may notice that the door doesn’t close all the way, leading to cool air escaping and higher energy bills. You might also have issues with food and drinks sliding around on uneven shelves. For your washer and dryer, being uneven can cause excessive vibrations that rattle the machine. This leads to damage over time to the gears and motors. A wobbly washer can also "walk" itself out of position, pulling on hoses and a risk of leaks or flooding. And let’s not forget your oven—if it’s sitting at an angle, you could end up with unevenly cooked meals. 


The good news? Checking and leveling your appliances is a simple! Many appliances have adjustable feet that you can tweak to ensure they’re sitting evenly. If you’re unsure how to do this, our team at Appliance Rescue Service is happy to help!


2. A Descale Treatment Works Wonders

A relaxing spa treatment can leave you feeling refreshed—and your appliances can benefit from that kind of care. Over time, minerals from your water can build up inside appliances that rely on water flow. Your refrigerator, washing machine, and dishwasher are some examples. This buildup, commonly known as scale, can slow down water movement, clog hoses, and even cause parts to wear out prematurely. 


If you’ve ever noticed your washing machine taking longer to fill, your dishwasher not cleaning as well as it used to, or your refrigerator’s water dispenser running sluggishly, scale buildup could be the cause. Even if you don’t have hard water, mineral deposits still accumulate over time, making descaling an important part of routine appliance care.


Luckily, keeping buildup at bay is easy! Many appliances have specific descaling products designed for them, and running a cleaning cycle every few months can keep things running smoothly. If you're unsure where to start, a professional technician can help by performing a deep-clean descaling service to get everything back in top shape.


3. Help Them Get Organized

Love isn’t just about grand gestures—sometimes, it’s about the little things, like keeping things neat and organized. Your refrigerator, in particular, benefits from a little tidying up.


An overstuffed fridge isn’t just a hassle when you’re trying to find last night’s leftovers. It can also interfere with airflow, causing uneven cooling. Hot spots and cold spots can develop, leading to food spoiling too quickly or, in some cases, freezing when it shouldn’t. Plus, when your fridge has to work harder to maintain a steady temperature, it uses more energy, which can drive up your electricity bill.


To help your fridge function at its best, take some time to reorganize it:


Keep vents clear so air can circulate freely.

Group similar items together so you can find what you need easily.

Check expiration dates and remove anything past its prime.

Wipe down shelves regularly to keep things clean and fresh.


4. Give Them a Good Scrub

We all feel better after a nice, deep clean—and your appliances are no different! While regular wipe-downs help keep things looking tidy, every now and then, your appliances need a little extra attention to prevent buildup and ensure they keep running smoothly.


Your dishwasher, for example, can collect food particles, soap scum, and grease over time, which can clog filters and reduce its efficiency. Running a cleaning cycle with a dishwasher-safe cleaner once a month helps remove grime and keeps it working properly.


Your washing machine also benefits from a good scrub. Dirt, detergent residue, and even mildew can accumulate inside, especially in front-loading machines. Running a cleaning cycle with a washing machine cleaner or a vinegar solution helps keep unpleasant odors at bay and ensures your clothes come out fresh.


And don’t forget the outside of your appliances! Dust and grease can build up on refrigerator coils, stovetops, and even dryer vents. A quick wipe-down with warm, soapy water or a specialized cleaner can help keep things looking and working their best.

5. Treat Them to a Spa Day (a.k.a. a Maintenance Check)

You might not be able to send your appliances to a spa, but a maintenance check from a professional technician is the next best thing! Regular maintenance is one of the best ways to prevent unexpected breakdowns and costly repairs.

A trained technician can:


Check for signs of wear and tear before they turn into major problems.

Ensure all parts are functioning properly and efficiently.

Clean internal components to remove buildup and improve performance.

Make small adjustments that can extend the life of your appliances.

Think of it like a wellness check-up—your appliances might seem fine, but routine maintenance can catch minor issues before they become major headaches. Whether it’s a refrigerator that isn’t cooling quite like it used to or a dryer that’s taking longer than normal, a professional tune-up can keep everything in peak condition.

A little love goes a long way—especially when it comes to your appliances! Keeping them leveled, descaled, clean, and well-organized can make a big difference in their efficiency and lifespan. And when it’s time for a little extra care, our team at Appliance Rescue Service is here to help! Whether you need a maintenance check, a repair, or just some expert advice, our technicians are ready to keep your home running smoothly.

So go ahead—show your appliances some love today! They’ll thank you with years of reliable service.


A Taste of Autumn: Easy Chicken Bake with Spinach and Artichokes

A quick, comforting recipe that brings the essence of fall to your dinner table.

Looking for a quick and delicious weeknight dinner that captures the essence of fall? This creamy chicken bake is not only packed with savory flavors but also brings a touch of autumn warmth to your table. With its blend of artichokes, spinach, and comforting cheese, this dish combines the richness of fall with the ease of a one-dish meal. Perfect for those crisp evenings when you want something hearty and satisfying, here’s how to make it:


Ingredients 

3-4 thawed chicken breasts

1/2 cup sour cream

6 ounces chicken broth

1 can quartered artichoke hearts

2 generous handfuls fresh baby spinach

1 teaspoon parsley

1 teaspoon oregano

1 teaspoon Kinder's onion-butter seasoning 

2 oz grated mozzarella cheese

2 tablespoons parmesan cheese

Olive oil spray

Salt and pepper to taste


Tools


Square baking dish

Measuring cups and spoons

Bowl

Spoon

Aluminum foil


If your spinach isn't already washed, please take a minute to get that done. Baby spinach can harbor some hitchhikers in our experience. Let it drain out any excess water while you divert your attention to other things.


Preheat the oven to 450.


Sprinkle a little bit of salt on your chicken breasts, but leave them where they are for now. 


Spray the bottom of your baking dish with the olive oil spray and set it aside. (The olive oil will make it that much easier to clean up later.) 


Thin 1/4 cup of sour cream with two to three ounces of chicken broth. At first, it will look like it will never mix, but just keep stirring. You'll get there. Once it's combined, transfer it into the oiled baking dish.


Pop the can of artichoke hearts and drain the water. Then give it a shake and drain it again. You might be surprised how much water hides out in the can even after you've flipped it completely upside-down. Layer the artichoke pieces into the sour cream.


Grab your spinach and place it in an even layer over the artichoke hearts. 


Thin the remaining 1/4 cup of sour cream the same way you did before, and drizzle just a little of it over the spinach. 


Place the chicken breasts in a single layer on top to weigh down the spinach, then drizzle the remaining sour cream mixture over the top of everything. 


Sprinkle everything with salt and black pepper (if desired), oregano, parsley, and onion butter seasoning.


Cover the pan tightly with aluminum foil. This step keeps the moisture in, ensuring that the chicken remains juicy while it bakes. Bake for 20-40 minutes at 450. Thinner pieces of chicken will, of course, be done quicker. We had a pretty hefty chunk and ended up baking for close to 45 minutes to make sure it was done.


When time is up, remove the pan from the oven and take off the foil. Test for doneness (chicken's safe internal temperature is 165). Move the oven rack closer to the broiler and reset the oven to broil.


Top the chicken with a layer of grated mozzarella, sprinkle the dried parmesan on top of that, and return to oven for 10 more minutes to broil.


This creamy chicken bake is the perfect way to embrace the flavors of fall. With its hearty ingredients and comforting, cheesy topping, it’s a meal that will warm you up on those cooler evenings. Serve it with a side of roasted vegetables or a fresh green salad for a complete, seasonal dinner. Enjoy the cozy, fall-inspired flavors in every bite!


As you enjoy this comforting fall dish, it’s a great time to think about preparing your home for the season ahead. Just as hearty meals warm you from the inside out, well-maintained appliances keep your household running smoothly and efficiently as the temperatures drop. Fall is the ideal season to check off those important maintenance tasks, like cleaning out vents, checking seals on your fridge, and making sure your oven is ready for holiday cooking. These small efforts now can prevent bigger issues later, giving you peace of mind as you settle into the cozy comfort of autumn evenings.

If you do run into any issues or need professional assistance, our team at Appliance Rescue Service is here to help. Whether it’s a quick repair or a thorough appliance check-up, our technicians are equipped to handle it all, ensuring your home stays functional and cozy throughout the season. There’s no need to let appliance troubles disrupt your fall festivities. Call on us for reliable, expert service, so you can focus on savoring your fall meals and the warmth of home without worry. Let us handle the hard work so you can enjoy the season to its fullest.


Website

Call: (214) 599-0055

Additional Reading

From Summer to Fall: Thai Curry Sweet Potatoes You’ll Love

Prepare Your Home for Fall: Essential Maintenance Tips

Impress Your Guests with This Easy-to-Make Apple Pecan French Toast Bake


Fact Check: Common Appliance Maintenance Beliefs Debunked

Fact Check: Common Appliance Maintenance Beliefs Debunked

Avoid common pitfalls with our debunking guide

Keeping your home running smoothly can feel like a juggling act, especially when it comes to your appliances. With so much conflicting advice out there, how do you know what’s true and what’s just a myth? In this true/false guide, we’ll clear up some of the most common misconceptions about appliance care. Whether it's knowing when to clean your dryer or understanding why overstuffing your fridge can backfire, we're here to help you navigate the world of appliance maintenance with confidence and ease.

Do you think cleaning your appliances just once a year is enough?
Unequivocally false. Certain pieces of your appliances only need to be cleaned once a year; many of them need to be cleaned at least once a quarter. For example, your dryer’s vent hose needs to be cleaned every 6 months to a year. But the inside of your dryer should be cleaned quarterly, and the lint catch on the inside of the dryer should be cleaned every time you do laundry.
Can you chuck those boring manufacturer’s directions after setup?
We know they're boring. Unfortunately, we are not the ones tasked with writing and making appliance manuals clean and easy to read. But we do not advise chucking them in the trash. Many of them come with important warranty information as well as what different errors or sounds can mean or how to set up and use some of the various features. So, instead, we suggest sticking them into a file with all of your other appliance manuals.
Does stuffing your appliances to the brim save you cash?
Many of us make this mistake. Whether it's the washing machine or the refrigerator, stuffing it to the gills does not help your electric bill. In fact, by putting too much into any of your appliances, you can often end up damaging them in different ways. The impact varies from appliance to appliance, and we’ll provide additional reading links at the bottom to explore this further.
Can all maintenance tasks be done by you, the homeowner?
While the more skeptical reader might say, “Of course an appliance repair company would say no,” there's a valid reason. Many times, specialized tools are required for appliance repairs. Manufacturers design their appliances with this complexity to necessitate professional servicing. There's also a safety concern, especially with electronics. Unless you are experienced with electronics, we do not recommend DIY attempts. While many repairs can be done yourself, there are some that should be left to professionals.
Do you think any old cleaning product will do the trick?
Hahahahaha. Excuse us while we catch our breath. If you have ever tried cleaning a stainless steel refrigerator with the same Lysol wipes that you use to clean your counters, you will know that this is not the case. Different cleaning formulas are designed for specific tasks. We wish there was a one-size-fits-all solution, but even we haven't found one yet.
Is regular maintenance really the key to dodging pricey repairs?
Absolutely true, and that’s why we offer maintenance services. By regularly maintaining your appliances and having them inspected, either by yourself or a professional, you can identify issues in their early stages before they lead to major breakdowns.
If the cost of materials, time, and tools is 50% or more than the appliance, should you call a professional?
This is about saving time and money. Before attempting a DIY repair, consider the tools needed, time required, and cost of materials. If these costs exceed 50% of the appliance’s original purchase price, it's wise to call a professional. Technicians have expertise and tools on hand, minimizing the risk of costly mistakes.
Is it fine to keep all appliances plugged in during repairs?
No. Even if the repair seems unrelated to electronics, always unplug appliances before starting repairs. It’s not just a safety precaution but also practical. A simple slip or twist could inadvertently activate a component or cause a mess, leading to further issues.
Is protective clothing for repairs: Overkill or essential?
Essential. While the necessity varies by task, protecting your hands and wearing gloves minimizes exposure to contaminants and ensures safety.
Can a hammer and Phillips head screwdriver handle all tasks?
Remember how we mentioned specialized tools invented by appliance manufacturers? This one is obviously false. Different appliances require specific tools designed for their components and mechanisms.
Should you diagnose the issue before starting any appliance repair?
Absolutely true. Professional repair services always perform diagnostics before proceeding with repairs. It’s crucial to identify the root cause accurately, even for seemingly straightforward issues.
Is taking notes during repairs a smart move or a waste of time?
While experienced technicians may not need notes, documenting your findings during repairs is beneficial if the project becomes overwhelming or needs professional intervention. It ensures accurate communication with technicians, aiding in efficient repairs.
Can you immediately resume using an appliance after fixing it yourself?
False. Always ensure proper functionality after DIY repairs. Whether it’s running a test load in your washer or checking replaced parts, confirm everything operates smoothly before regular use.
Should you call professionals if a repair project takes more than a few hours?
Absolutely. Some repairs, especially involving multiple appliance components, can be complex and time-consuming. If you’ve invested hours without progress, it’s best to seek professional assistance to ensure a proper fix and save your valuable time.

Keeping your appliances in top shape doesn’t have to be a daunting task. You can ensure your appliances run smoothly and efficiently by debunking these common myths and following the right maintenance tips. But remember, some repairs and maintenance tasks are best left to the professionals. At Appliance Rescue Service, we’re here to help with expert repairs and maintenance services that keep your home running without a hitch. Contact us today to schedule a service and experience the peace of mind that comes with knowing your appliances are in good hands.

Website
Phone: (214) 599-0055

Additional Reading


Don't Let Your Dryer Become a Fire Hazard

Test Your Refrigerator IQ

37 Reasons To Have Your Appliances Maintained Regularly