Get Your Protein with This Buddha Bowl

A Creative Way to Mix Up Left Overs 

Sometimes you want something that works with what you have left over from earlier in the week. Most times, you want something that’s going to fill you up and not leave you hangry a few hours later. This recipe fits both of those needs. Now, as with most recipes for Buddha bowls, you’re more than welcome to mix things up. Add in more veggies, add in less grain, sub out an entirely different sauce. This is one that we’ve been loving though, and have used multiple times since dreaming it up earlier this year. 

Sauce:

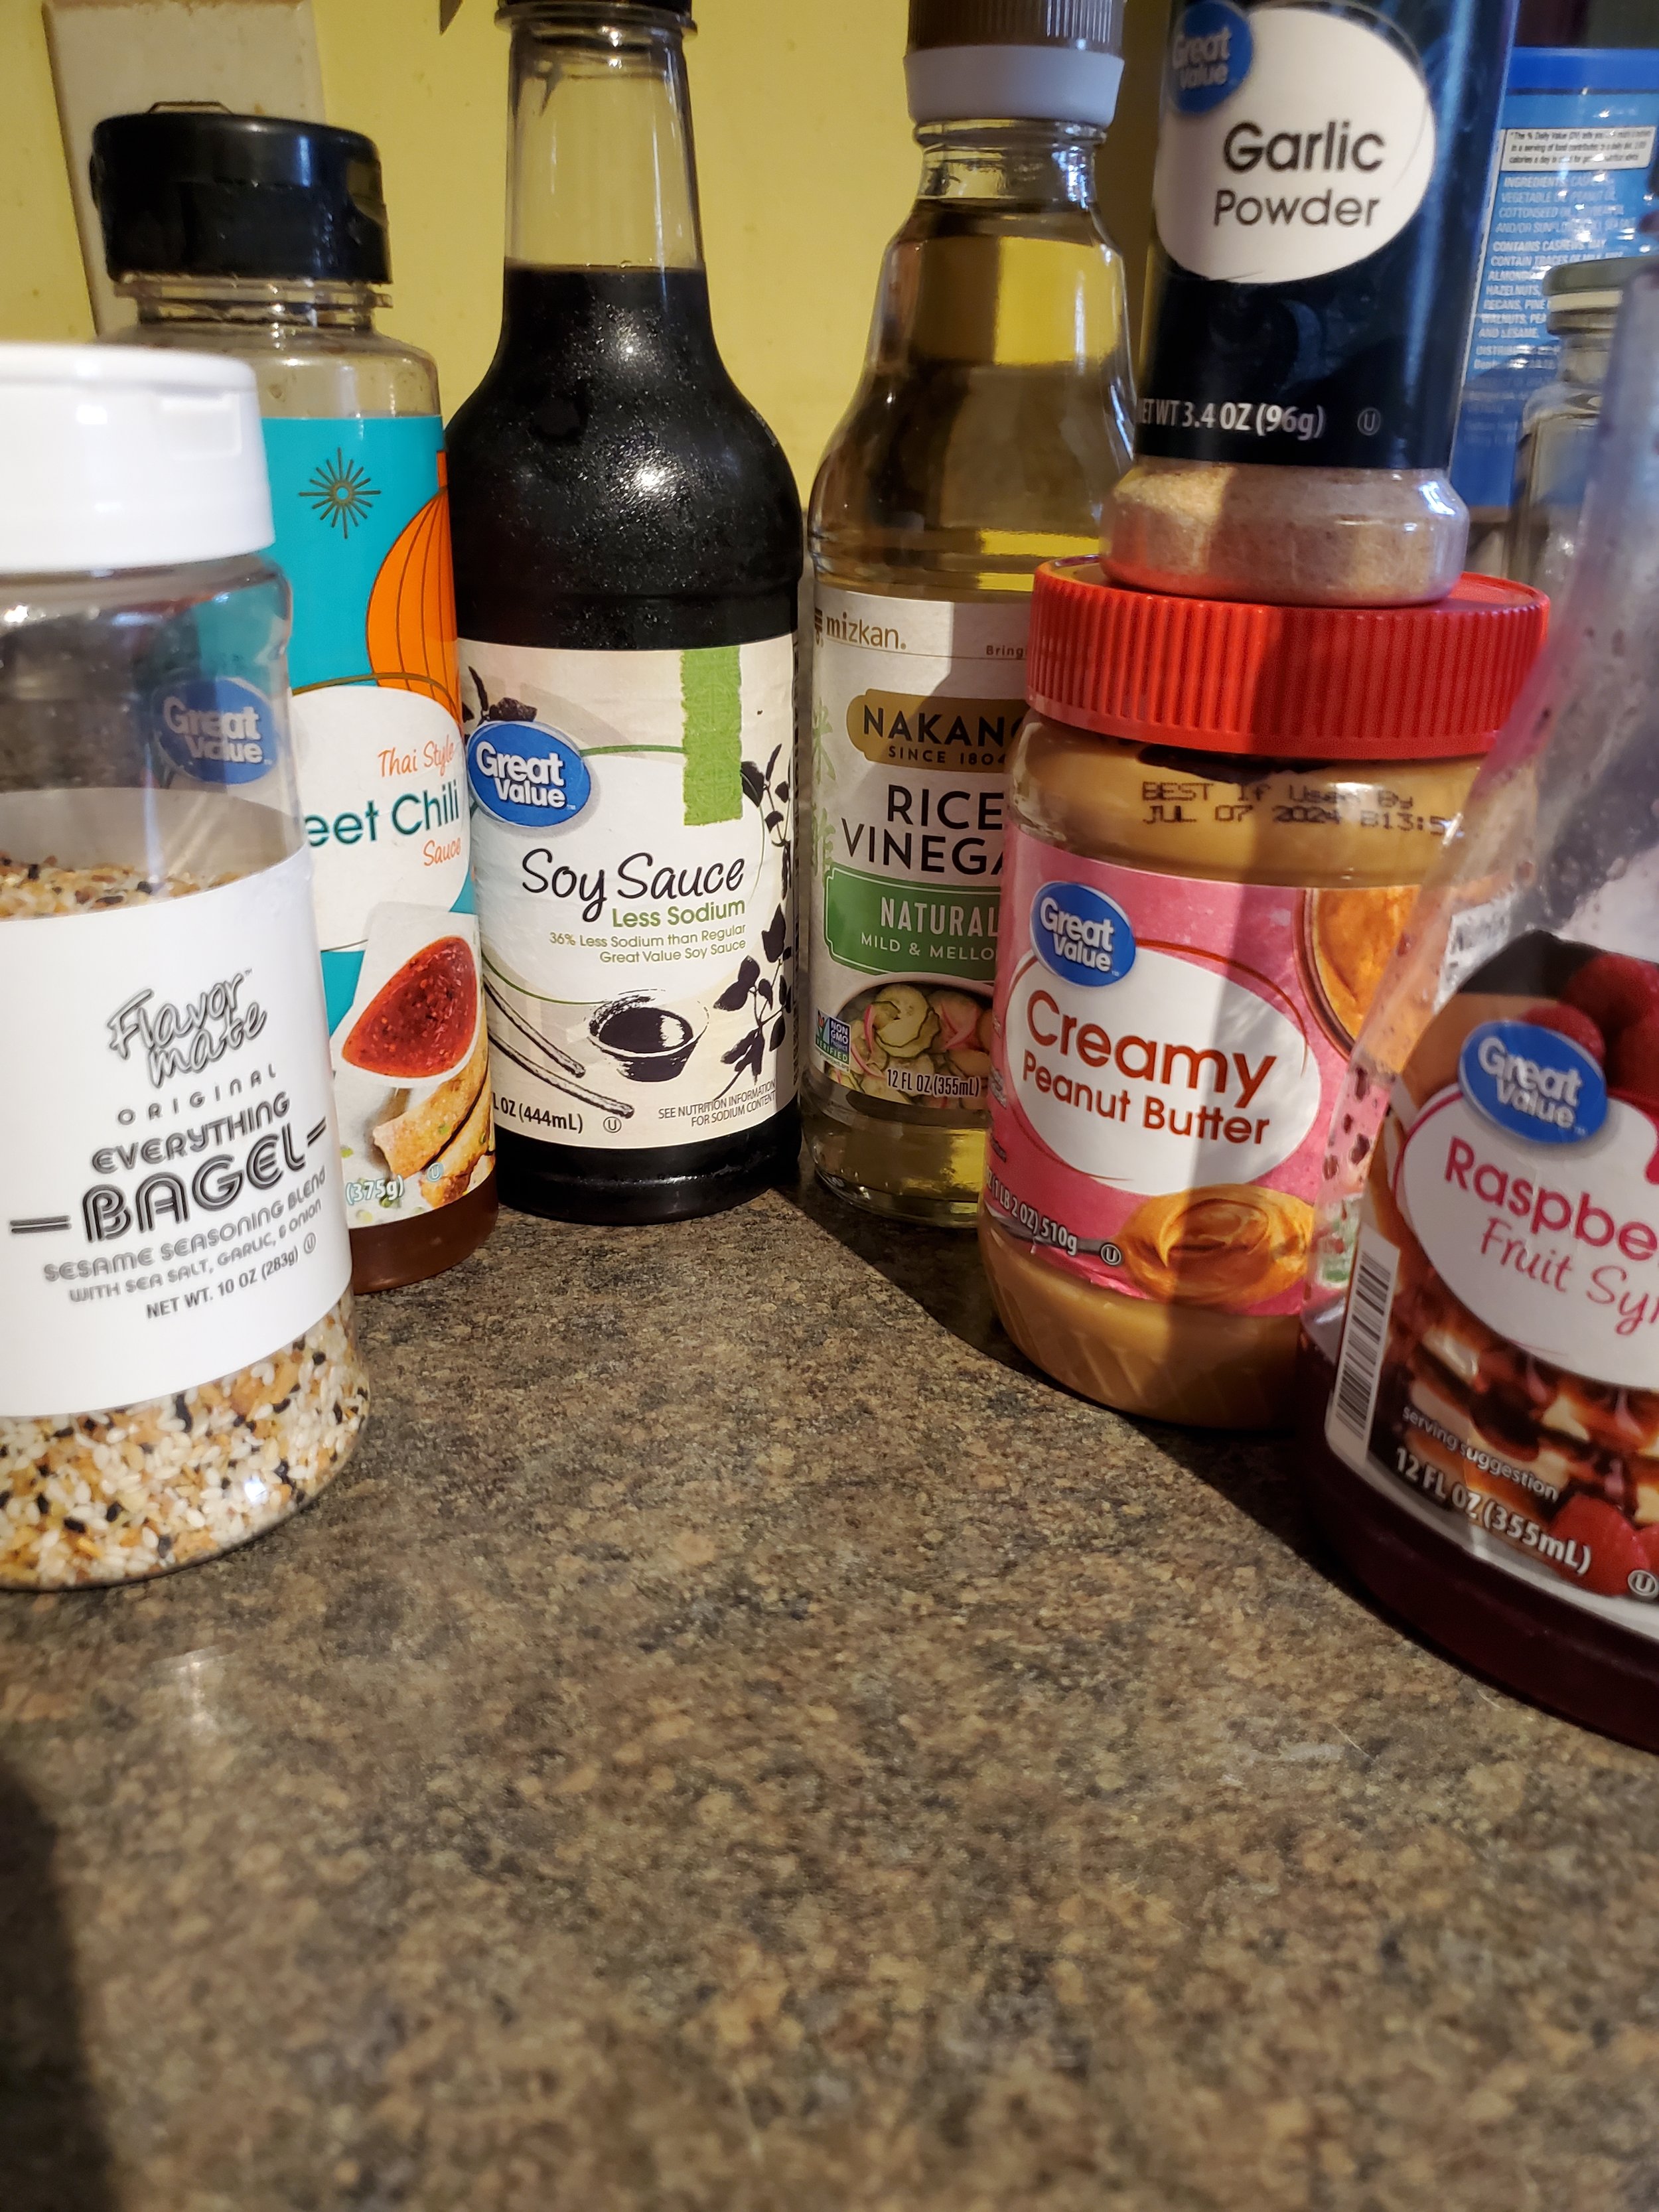
1/4 cup peanut butter

2 tablespoons low sodium soy sauce

2 teaspoons rice vinegar

1 teaspoon raspberry syrup

1/2 teaspoon sweet chili sauce

1 teaspoon garlic powder

2 tablespoons hot water


Bowl:

1 cup rice (cooked)

1 cup quinoa (cooked)

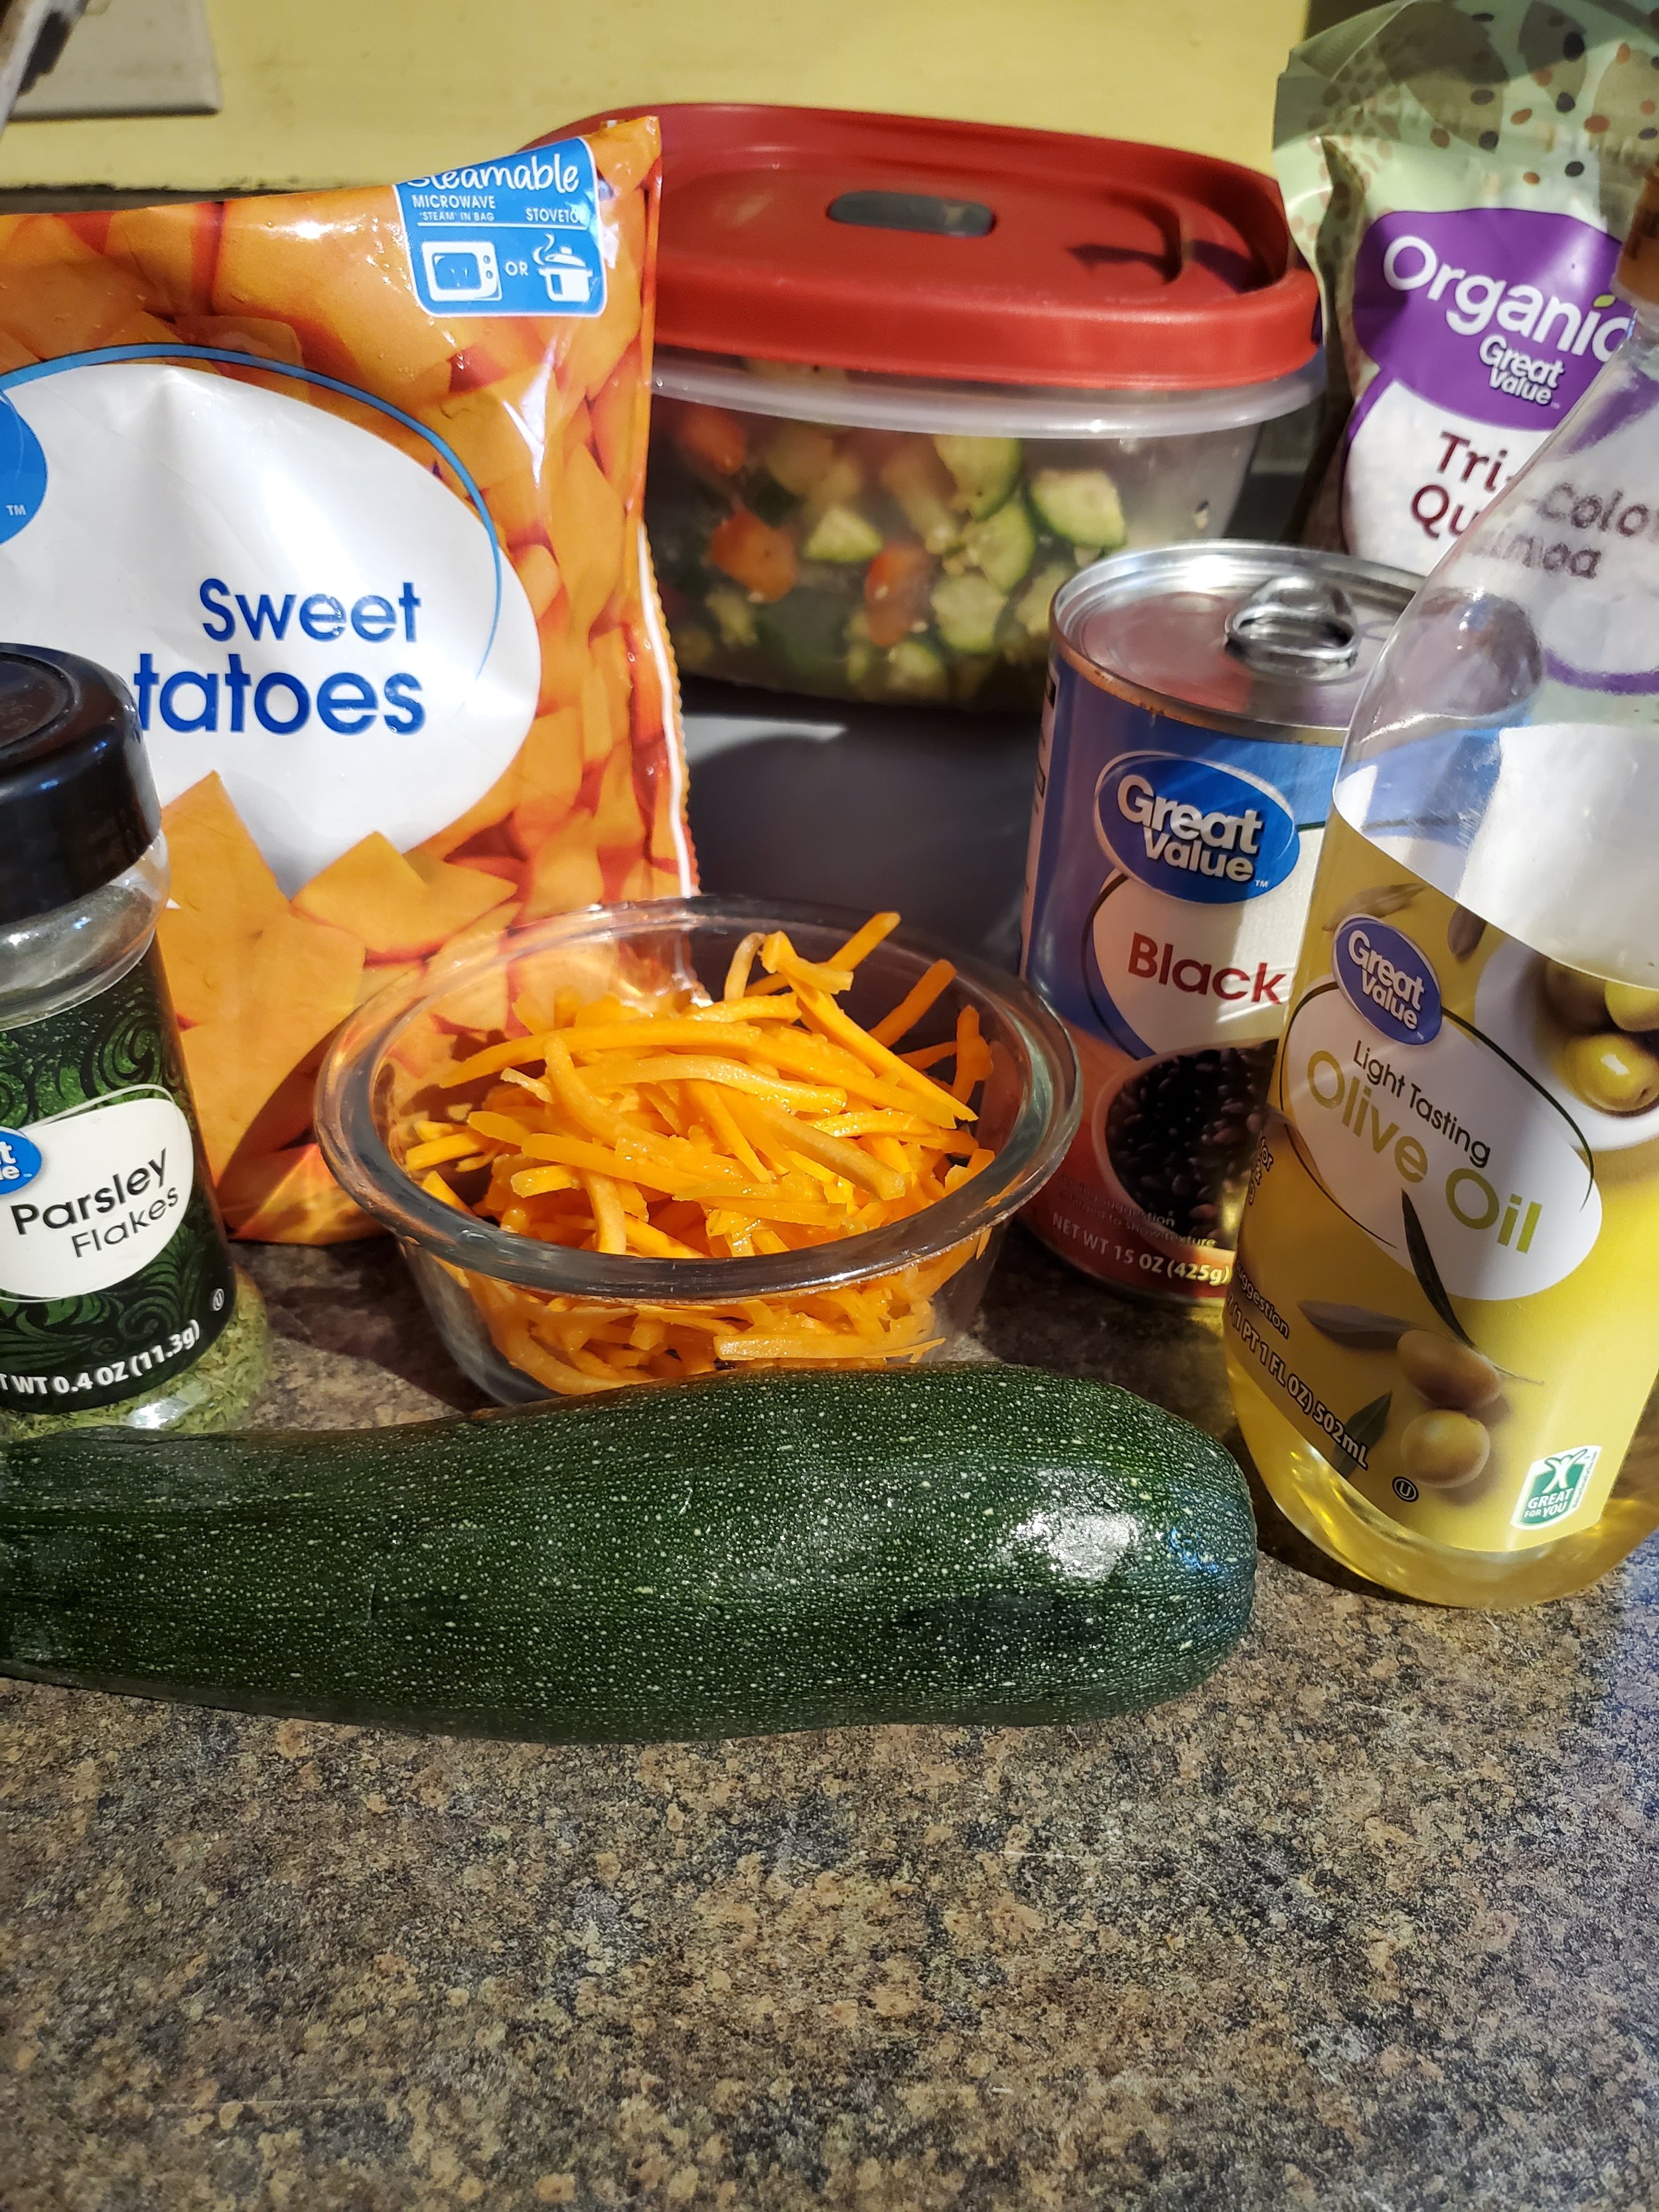
1/2 cup shredded carrots

1 package frozen sweet potato

1 can seasoned black beans

1 zucchini

1 teaspoon olive oil

1 teaspoon dried parsley

salt and pepper to taste


Tools:

cutting board

knife

measuring cups and spoons

serving spoon

sieve or colander

microwave-safe dishes

fork and spoon

frying pan


As always: wash your produce! This is our first step every time we're not utilizing washed/ready-to-eat veggies.


If you're not working with already-cooked rice and quinoa, go ahead and start them now. (This recipe was actually born out of there being too much rice in our fridge, left over from dinner the night before... which is why we sort of glossed over the cooking of the rice and quinoa steps.)


Put your steamable bag of frozen sweet potato chunks into the microwave and cook them according to package directions - in our case, roughly six minutes on high.


Dump the can of seasoned black beans into the colander or sieve to drain and give them a quick rinse before putting them into a microwave safe dish. You can set them aside for now, as they won't need to heat very long in the microwave, and the sweet potatoes will be hogging it for a while anyway. But when the sweet potatoes are finally done, swap them for the beans and zap them a minute or two, just long enough to heat them through.


Trim the ends and cut your zucchini into chunks - whatever shape or size you like is fine, but we do half inch quarter rounds because they cook quickly. Pour your olive oil into the frying pan, swish it around a little to coat, and add the zucchini. Sprinkle with parsley, salt and pepper, and saute for about 5 minutes over medium heat. You can substitute sesame oil for the olive oil if you have some, but it seems not a lot of people keep sesame oil in their pantries.


We chose to leave our shredded carrots raw, but if you'd prefer them cooked, feel free to toss them in with the zucchini about halfway through the cook time.


As your veggies heat/cook, grab a smaller microwave safe bowl and get started on the sauce. The first thing to go in should be the peanut butter. If you find peanut butter to be a little unwieldy (sticking to the spoon, landing in great blobs on the side of the dish instead of in the bottom, etc.) when you cook with it, feel free to employ the tactics of spraying your measuring cup with cooking oil before filling it and/or heating the peanut butter for 15-30 seconds in the microwave to soften it up.


After the peanut butter, use a fork to stir in the soy sauce, rice vinegar, sweet chili sauce, and syrup. These normally mix fairly easily. The troublesome one is usually the garlic powder. Once you have the other items mixed thoroughly, sprinkle the garlic powder on top and pour the hot water over it. Use the fork like a whisk and swish the hot water over the powder and into the peanut butter mixture a few times to combine.Switch to a spoon and stir it to death. Leave the spoon in the dish because you'll need it shortly.


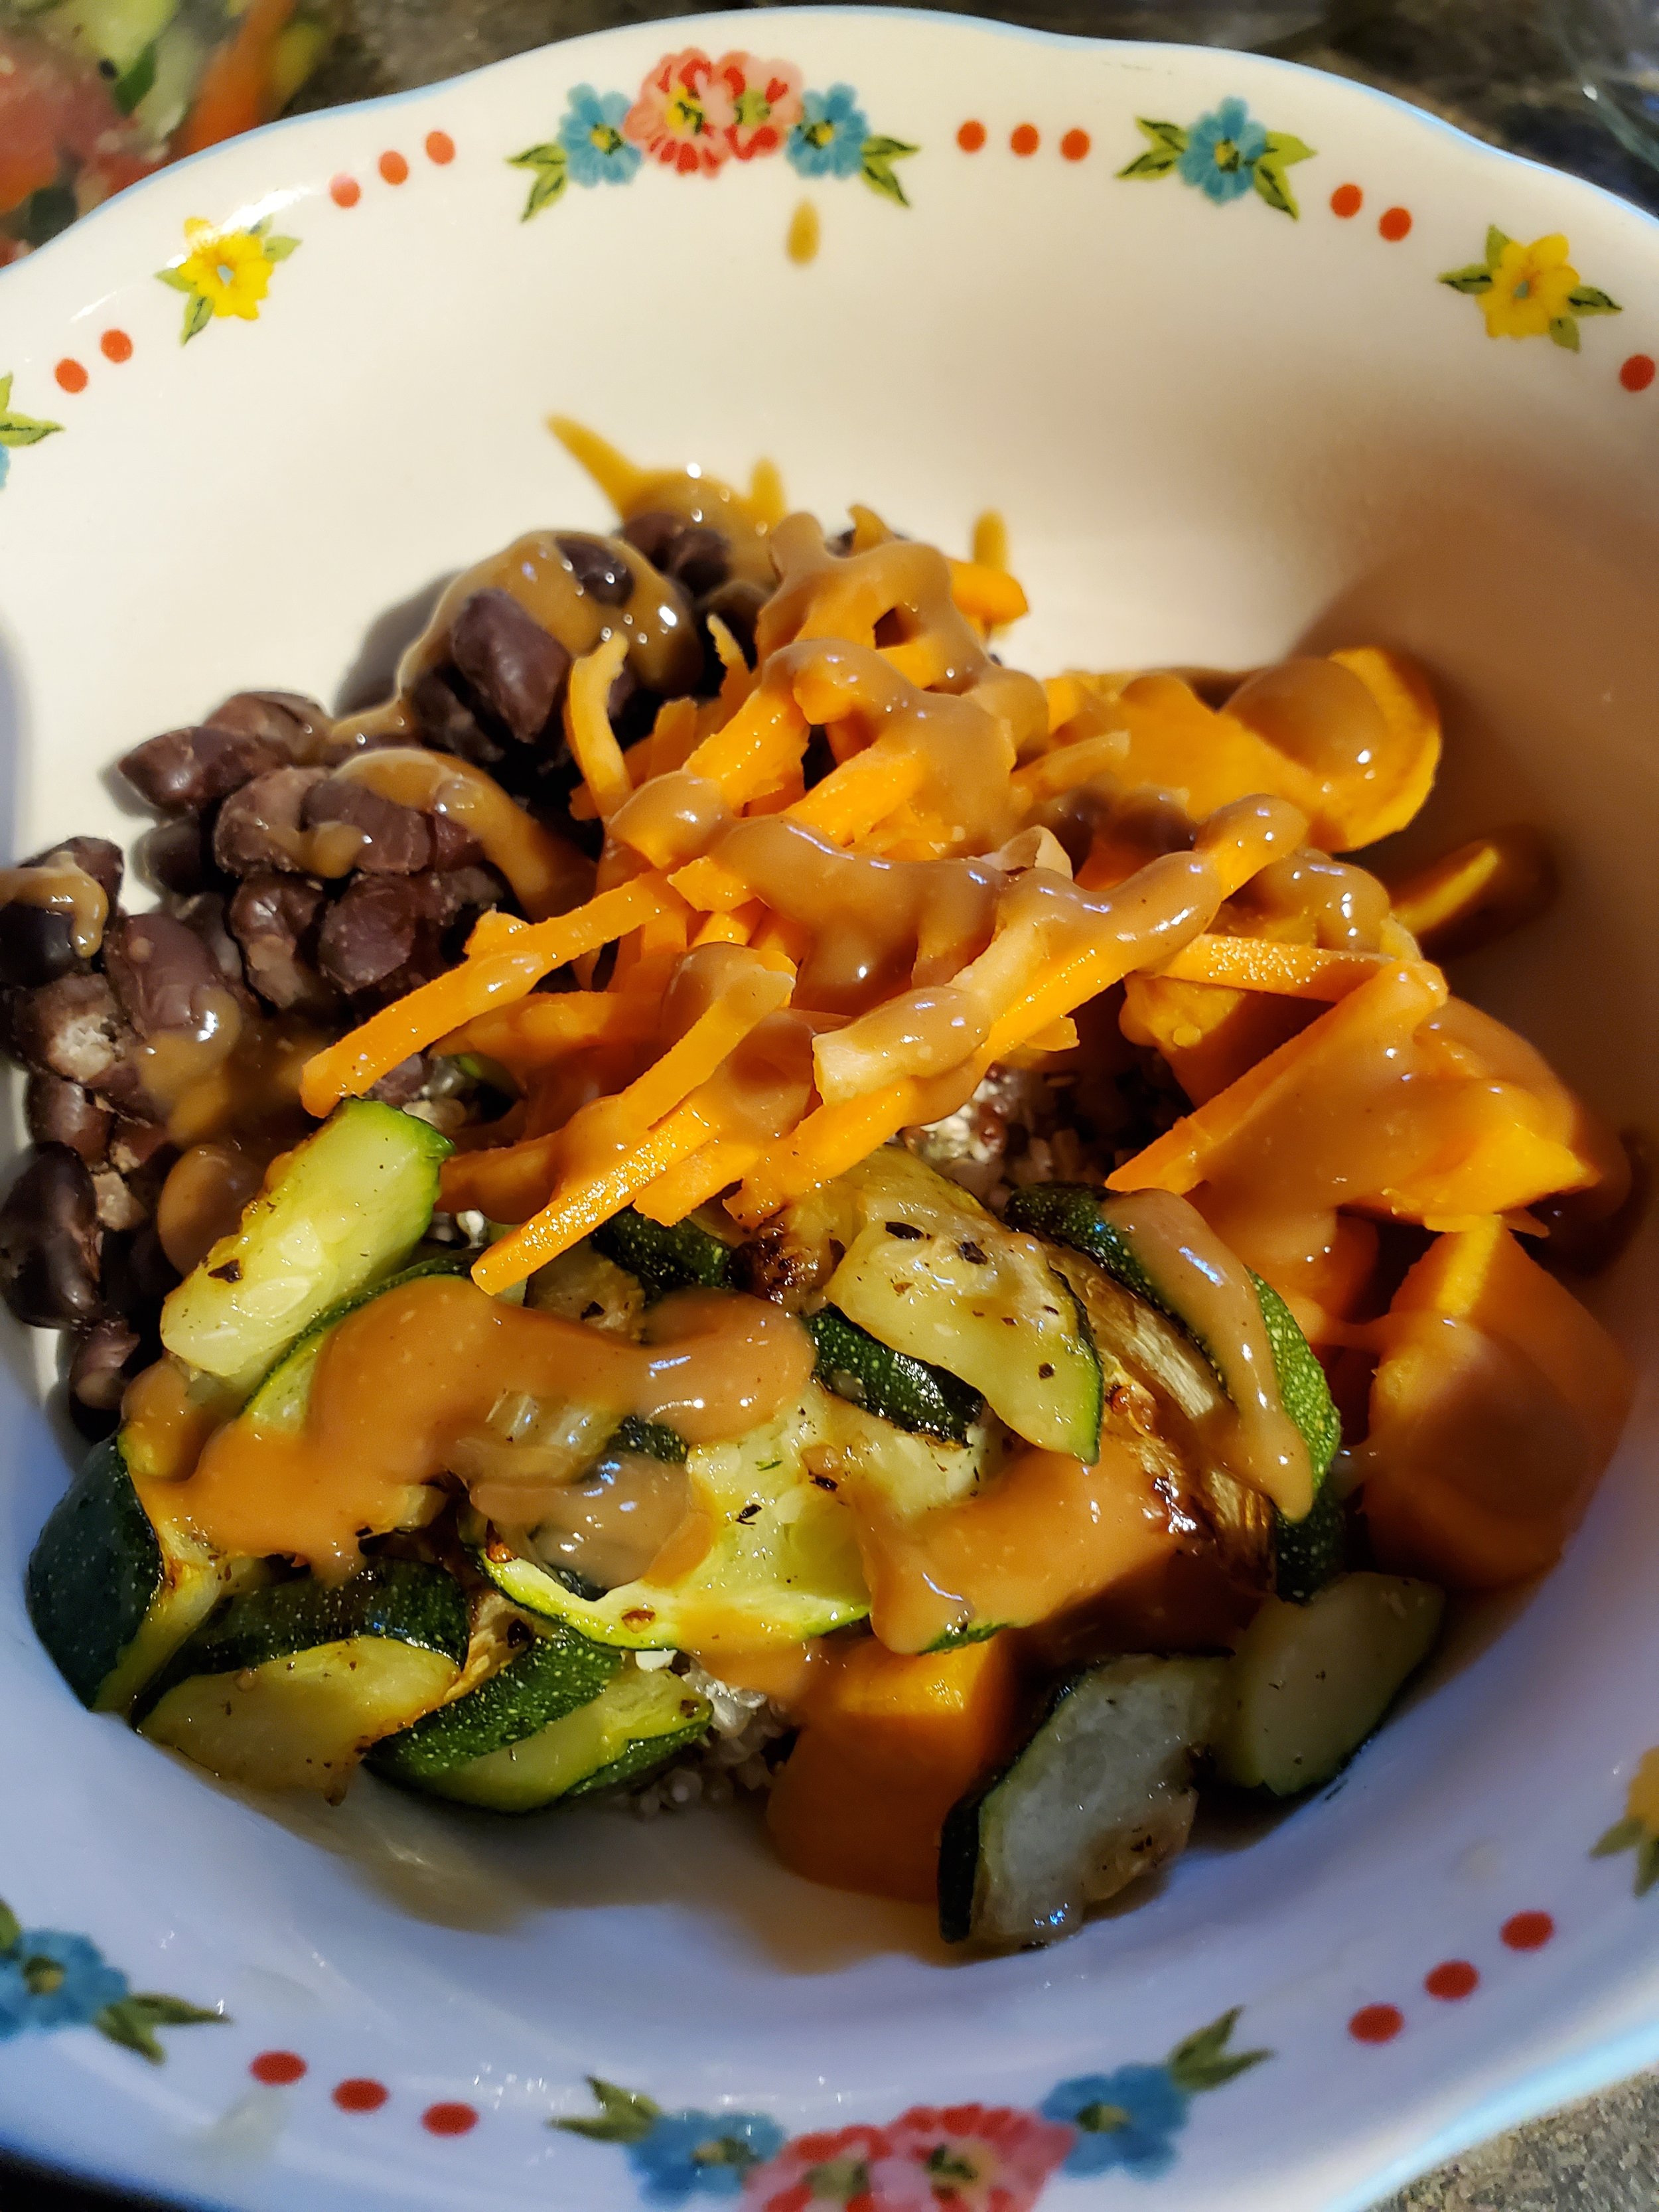
Once your grains and veggies are all cooked or warmed through, begin layering things into your bowls. We started with rice, then quinoa, then scoops of zucchini, sweet potato, and beans, then a sprinkling of carrots and a drizzle of sauce. If you have some handy, a little everything-but-the-bagel seasoning is also a nice topping.

We hope that you enjoyed this recipe! Let us know if you decide to make it over on our Facebook page. As always, we love to hear from you. 

If you’re wondering what to do with leftovers because your fridge just ran out, we can help with that too! You can reach out to us via our contact page or by giving us a call at ((214) 599-0055). We’ll work with you to set up a  time and date that works with your schedule. At Appliance Rescue Service, our goal is to get your home running smoothly again. 


Bugs of Summer: Fleas, Lice, Ticks and Bed Bugs

Can Your Washer & Dryer Get Rid of These Pests? 


One of the things we always love about summer is going out and exploring. New experiences, new cities, new friends and new foods! We even love bringing back souvenirs. What we don’t like to bring back are tiny bitey things that nest in our clothes, our bed or our hair. Fleas, lice, ticks and bed bugs are some of the worst travel companions you can pick up in the summer. While most of us take precautions, sometimes those precautions fail, and you wind up having to get rid of one or many of the little bugs. 


For many of us the first answer is to toss everything into hot water in the washer and then run it through the dryer. But is that always the best answer? Let’s take a look together. 

Courtesy of  Egor Kamelev


Can Your Washer or Dryer Kill Fleas?

Fleas are six-legged wingless creatures that will go after your pets if given half a chance. They love to live in warm, humid areas that are mostly undisturbed. So your pet and their bedding is ideal! An adult female can lay as many as 50 eggs in a single day, and live up to 100 days when left alone. While they won’t live on humans, they can jump up to 13 inches, which means they can easily transfer to you and start to bite on you as well as your pet. 

What are you to do then? Will showering yourself and your pet then throwing all of your soft goods into the washer and dryer solve the problem? No, but it is a good place to start. The hot water in your washer will clean the bugs and any eggs out of your clothes, bedding and all the rest. If you’ve just gotten home from travelling and noticed the problem, go ahead and wash everything you took with you on your trip, and give your pet a good combing and treatment with a flea dip.  If you’re lucky, you’ve caught the problem in time and don’t have anything else to worry about. 


If that doesn’t solve the problem, or if it’s been a few days and you’re just noticing the issue, plus “flea dirt” around the house, you’ll need to kick things up. Start with the same steps as before, wash everything, and especially your pet. Now start on a deep clean. Take your pets outside  and  move all of your furniture around. This gets rid of any hidden areas and exposes them to light and the vacuum you’re going to be grabbing. Now vacuum down everything. If you can’t wash it, vacuum it. When you’re done, either throw away the bag or thoroughly clean the container. Vacuuming is more than just cleaning in this case, you’re also attacking any larvae that are in their coocoons. The  cocoons are resistant to insecticides, so now you can go back through your home and spray things down with the appropriate pet and human safe chemicals, knowing that you’ve gotten rid of them. 

You will need to repeat these steps every other day, for at least 10 days, possibly up to a month, in order to get rid of the infestation, depending on the severity. Make sure to wash your pet’s bedding every week as well. 


Short answer: No, your washer and dryer alone won’t kill all of your fleas, but it will cut out a large portion of the problem. 


Can Lice Be Killed By Your Washer or Dryer? 

Lice - Courtesy of Egor Kamelev 

Lice are another six-legged menace. Lice, unlike fleas, don’t jump. You don’t have to worry about them leaping from person to person, but you do need to worry about them crawling. It’s why lice can go through an elementary school or daycare like wildfire. Fortunately, the CDC has said that head lice don’t survive for long off the human head. 


So, if you had one of the children in your life accidentally bring lice into your home, are you to get rid of it? In this case? Yes, your washer and dryer can kill almost everything.

If the issue is restricted to the bed, this will be the easiest scenario. Start by stripping the bed, down to the bare mattress. Toss everything that can be washed directly into the washer and run it on hot water and then high heat for at least 45 minutes. If it’s something delicate, like that embroidered case from your great-grandmother? It’s ok, just toss it into the dryer and run it for 45 minutes. The heat is what is going to kill the louse and the nits. Everything that can go through one of these two steps can be used immediately afterward. 


Anything that cannot be washed or dried on high heat, stuff it into a garbage bag. These are going to sit for 10 days.  


This is, unfortunately, going also to include your mattress, but you’ll need to do one more step before that. Take your vacuum and go carefully over every inch of it. Any creases, folds or other places that a louse can hide or burrow need to be gone over before you put it into the bag.


After 10 days, you can vacuum everything again and hopefully have gotten rid of your very unwelcome guests. If not, repeat the process as needed, and inspect other soft surfaces around your home as the potential cause of the re-infestation. 

Short Answer: Yes! Your washer and dryer can kill lice, although it shouldn’t be the only step you take in getting rid of them. 

Will Your Washer or Dryer Kill Ticks? 

Ticks Courtesy of Erik Karits

For those of you who regularly venture outdoors, we hear you. We know ticks are *technically* around all year. However, they do tend to be the *most* active between April and September. While these 8 legged beasties can carry some dangerous diseases, you don’t have to confine yourself inside during the warmer months, even in Texas. You can protect yourself, your pets and your home rather easily. Fortunately, most of them cannot survive and reproduce indoors, according to experts.  So your goal is how to get rid fo them if you have you have brought one or more in with you. 

To start with, check yourself and your pets as soon as you get home. Look under arms and legs, behind ears (or inside them for your fuzzy friends), inside your belly button, between your legs and in your hair.  After that, hit the showers. If you’ve been to an area that you know is likely to have ticks, but they didn’t latch on, a shower is a great way to get rid of them. 


What about your clothes, though? For that, toss them in the dryer first on a high heat setting for at least 10 minutes. The high heat not only kills the ticks, it also kills off any young. Since ticks prefer areas with high humidity, not only will they not like the inside of your home, they really won’t like your dryer. If you went camping, you should be able to check the labels and do the same to your backpacks and gear as well.  From here you can wash your clothing as normal and pack away your outdoor gear like you usually would.  


Short Answer: Yes! Your dryer can kill any ticks in your clothing or camping gear, although it should still be paired with prep-work before you go out and careful checks once you come home.  


Are Bed Bugs Killed In Your Washer or Dryer? 

Bed Bugs  Courtesy of  Pixabay

Our final pest is bed bugs. Just thinking about staying in a hotel with them is enough to make you shiver. And don’t think that just because you prefer the nicest hotels means you’re safe. It’s not agree that very few cases of outbreaks are coming from hotels, the vintage ottoman you just picked up, might be a different matter.  Many items like clothing, boxes and secondhand furniture can be a source of bed bug infestations, as they enjoy hiding anywhere people are.  

That’s why it’s not how clean your house is that is going to protect you, it’s being careful about treating things that come into your home. 


If you or someone in your home is waking up with bitchy red bites, especially under their clothes, it could be bed bugs. 

Your first step is going to be to call professionals. Not only do you need to confirm that it’s bed bugs, but you also need to squash the problem as quickly as possible. The longer you wait, the more the bugs can spread within your home, and if you wait too long, outside of it. 

Make sure to get written estimates from anyone you’re considering. They should be licensed experts, able to offer you a written plan of what pesticides they intend to use, what traps or heat treatments and how they’ll use it. While you can purchase over the counter pesticides, they are dangerous to use without proper guidance and it’s unlikely that you’ll be successful on your own. 

When talking to a company, ask all of the questions. A good company will answer them, and a company that won’t answer or tries to pressure you into setting an appointment, is a company you can weed out.  Always ask them about their success rater and if their treatment comes with a guarantee. If it doesn’t, or if they say you don’t need one, that’s another company weeded out of consideration. 

While you’re waiting on the professionals, there’s still plenty you can do, unless you want to burn everything and start from scratch as one of our team suggested. 

Start by sorting anything that’s infested, bedding or clothing, into clean plastic bags. Sort them based on how they need to be washed, and also include a dry-clean only pile.  Then wash and dry everything at the hottest temperature the material can handle. 

While some bugs will die thanks to a dip in your washer, it’s going to be the dryer that kills them. You’ll need at least 60 minutes in the dryer to get rid of them when it comes to the items that you can wash. 

After they’re dried, put everything into fresh clean bags, and do not remove them until the infestation is successfully eliminated.


Thoroughly vacuum everything. Rugs, floors, furniture, beds, any and all cracks and crevices. By cutting down on your existing population, you’re cutting down on the number that can bite you or repopulate. After you’re done vacuuming, put all of the bags or debris into a tightly sealed bag and put it into an outside garbage bin. 


Now it’s time to search all of your furniture. Again, you’re looking for cracks, crevasses, or places that don’t otherwise see much light, like the sides of your mattress or behind the headboard. Don’t forget about inside the beds as well. Look for black stains, blood and fecal matter from the 8 legged biters, discarded skins and the bugs themselves. 


When the professionals have come and done their thing, follow any and all directions that they have, and enjoy having your home free of pests again. 


Short Answer: Nope. Washing alone will not get rid of a bed bug infestation. However it is a very important step in the process. 


Have you encountered any of these summer bugs? How did you handle getting rid of them? Did we miss a step? Let us know over on our Facebook Page. 


Three out of four of our summer bugs can be killed in the washer and dryer, but what if your washer or dryer aren’t functioning properly? That is where we come in. While we can’t protect you from fleas, ticks, bed bugs or lice, Appliance Rescue Service can ensure that your washer and dryer are working properly. You can call us ((214) 599-0055) or go to our contact page to set up an appointment that works with your schedule. We’ll work with you to find the best time to send one of our experts to diagnose and solve the issue. At Appliance Rescue Service, getting your home running smoothly is our priority. 

The Charm of French Riviera Decor

Channeling the Coastal Elegance Into Your Home

If you want to bring a touch of five-star elegance to your home, look no further than the French Riviera. From Saint Tropez to Cannes and Nice, the Riviera has inspired interior design for over a century. Imagine the wind in your hair stretched out under a white linen tent and a glass of chilled wine in hand. The Riviera has been a resort area since Roman times and has developed a style that reaches deep into the past while still being unique and modern.


What are some color schemes that work well with French Riviera decor? 

On your walls white is the only thing you need. Wherever you go on the Riviera, your walls are largely uninterrupted White. Whether you want to go plaster or whitewash, you want to go with crisp linen to add movement; as long as it's white, you're on the right track. 

Not only does white allow light to be bounced back and thus heat to be bounced back, it also keeps rooms that might otherwise feel small and cramped feeling much more open and airy. You'll choose your white depending on the intention of the room and how much natural light you've got coming in, but you're looking for something very bright and pure.


Courtesy of quark-studio

When you start wanting to add color, look to blue first. Whether that is a pale and light Wedgewood blue from old English china or the brilliant and stunning blue of lapis, it's still your first go-to color. The Riviera is known for its blue skies in all shades, and that's what you're recreating here. Pair it with the rich earthy tones of terracotta, and you'll have a very good recreation of the sky and the sand of the Riviera. Bring in some gold and pale pinks for details and accessories, and you can bring in an upscale and modern atmosphere. Golds and rich deep coffees are also wonderful for layering in depth and accentuating the luxurious surroundings.


What are the key elements of French Riviera decor, and how can you incorporate them into your home? 

Natural Fibers 

Courtesy of dương-nhân

Now that you've chosen your color palette and chosen the specific white for your walls, it's time to look at filling your home with the different furniture that you need. Although you can make French Riviera Decor very modern, it's also a very old style. 

Start with looking to natural fibers. Cool crisp linens, hide, leather, cotton, and short-pile wool are all ideal for the furniture and rugs that you want around your home. Opt for white textiles with white work embroidery to bring in a more upscale and suite-like feeling.


Courtesy of maria-orlova

Think of furniture also made from natural materials like cane or willows in small doses around the room. 


Look To The Past

For more statement pieces, we're looking at a period-informed style. French interiors have never really recovered from the impact of Napoleon the First's neoclassical style, and that is obvious in the way many decors are layered with inherited furniture, art collections, and various gilded bits and bobs. The French Riviera look is actually a carefully curated mix of French history and culture, with Roman and Greek smashed together with coastal light drifting throughout. It is a very light, soft, and floaty design. In terms of furniture, you only need a few well-spaced upscale pieces. It must be in shades of either mahogany or ebony and when balanced against the space and whiteness of the room, allows it to act as an anchor. You wouldn't necessarily load up your wall and go high Victorian or cottage core. When you're dealing with the heat of the Riviera, you want air to be able to move, which inside means as much space as you can have. 

Windows 

A quick note on windows and window treatments, white, white, more white. You don't want creams or grays, you might go for some blues in tiny details, but for the most part, it's more white. Reach for linens and cotton for your curtains, and if you can use or install floor-to-ceiling windows, do it.

Feeling the Seaside Vibe

If you're looking to bring some more beach-y looks to your new decore, look for whether you can add in stripes. You'll want to go with either tans or marine blue for the oh-so-classic deck chair. You can even go for some windswept pieces scattered around as decor but don't go so far that you end up with a rustic or beach-shack look. 

Let Yourself Be Flashy 

Courtesy of pavel-danilyuk

Crystal is a wonderful way to evoke the jet set of the Riviera when used in restrained doses. Swaying in long chains to create a chandelier or used on a candelabra here or there, the beautiful prisms that they create add to the room without overpowering it. 


With that, we'll close out another monthly decor series. What do you think? Where does French Riviera decor rate on your scale? Let us know over on our Facebook! As always, we want to hear from you. 


If you're daydreaming about getting away to the French Riviera because your appliances have been up and quit because of the heat, we can help. Reach out to us at our offices ((214) 599-0055) or by going over to our contact page. So long as you're within our area of Texas, we would love to help get your home running smoothly again. 

Courtesy of raouf-meftah


Fast and Flavorful Tuna Toast

A Protein-Packed Meal That's Perfect For Lunch Or Dinner

Some days it's just too hot to cook - like this absurd heat wave practically everyone appears to be suffering through. No one wants to turn on the oven or stand over a stove burner on days like these - which is where minimal-effort-required recipes like this one come in. If we don’t have the time to toss something into the crockpot in the morning, this is a good recipe to have on standby. It’s also extremely simple to clean up after! 


The lazy streak is strong - for this recipe, we very literally used half of a large tub of sour cream for something else and then threw the remaining ingredients into the container. One less thing to wash later, since we didn't use a bowl! 


Ingredients:

2 cans chunk light tuna in water

1/2 cup sour cream

1 teaspoon garlic powder

1/2 teaspoon paprika

1/2 tsp freeze-dried chives

1 tsp parsley

pinch salt

black pepper to taste

8 slices rustic bread

12 multicolor grape tomatoes

4 oz or 8 thin slices gruyere cheese


Tools:

measuring spoons

knife

cutting board

spoon

can opener

toaster oven


Grab your can opener and open and drain your tuna. We often leave the can upside down with the lid in place, balanced on the divider between the sides of our kitchen sink. It drains slowly that way, but it frees up your  hands to move on to another task.


Pop your bread slices into the toaster oven and toast them for about two minutes. We like using some rustic bread, but if you don’t have any on hand, basic sandwich bread will do just fine. 


Measure your garlic, paprika, chives, and parsley into the container of sour cream (if you're lazy like us) or a bowl (overachiever). Stir until combined. Consider adding more of the spices - or something different - if it looks a little plain still. We rarely stick exactly to a recipe, so no one here will tell you that things must be done a certain way. If you want to go the extra step, or you’re not melted from the heat, you could use smoked paprika and actual minced garlic. 


Slice your cheese and set the slices to one side of the cutting board. 


About now, that toaster oven should let you know it's done. Flip the toast, but don't restart the toaster yet.


Wash the tomatoes before using them! Trim them up and slice them into rounds or wedges, whichever you prefer. We went with thin rounds for this, and pushed them to the opposite end of the cutting board from the cheese.


Your tuna should have drained by now. Feel free to press the lid in while flipping the can to force out more of the retained moisture. This is why "packed in water" is important - if you start with oil packed, you're likely to suffer an oily sandwich, or go to the extra trouble of rinsing.


Drop your tuna into the sour cream container or bowl and mix it into the sour cream. While most people would have opted for mayonnaise, we are not most people. At least one member of the household believes mayonnaise is the most disgusting substance on planet Earth and avoids it at all costs. Also, sour cream has a lower sodium content. less fat and more protein. In this case, being selective about one's battles also has some health benefits.


Scoop a serving of tuna onto each slice of partially-done toast and spread it out a bit. Add your tomato, then top with cheese and restart the toaster oven. Let it cook until the cheese is beginning to melt, but hasn't yet gotten to the thin state where it tries to run off the sides of the toast. Don't sacrifice perfectly good cheese! Also, save yourself the headache of trying to scour burnt gruyere off the heating element or crumb tray.


Serve as open-faced sandwiches with a veggie of choice on the side.


Does it pass the test for an easy dinner? Let us know over on our Facebook page! We’d love to hear if you try it or if you have an even easier summer meal. 


We understand that having properly functioning appliances is essential for being comfortable at home. That's why we offer a range of services to keep your appliances in top condition. Our team of experienced technicians is equipped to handle any issue, big or small, with your appliances. From scheduled maintenance to emergency repairs, we're here to help. And if you're not sure what the problem is, don't worry - we'll diagnose it for you and provide you with a clear explanation of what needs to be done. So, if you're in The Colony and need reliable appliance repair services, don't hesitate to give us a call. We're always here to help keep your home running smoothly. You can reach out to us by giving us a call at ((214) 599-0055) or by going to our contact page.

Why Is My Oven Making Weird Noises

6 Weird Noises Your Oven Can Make and What They Mean


Rattle rattle click, rattle click, rattle rattle click, boom! No, it's not the latest song; that's your oven. The question is, why is your oven making strange noises? 


Some noises your oven might make: 

  • Clicking

  • Popping

  • Wompf 

  • Beeping

  • Rattling 

  • Squeaking


Clicking 

 This is the most normal sound you can hear coming from your oven and also the least dangerous. Your oven might click when it is heating up, cooling down, or right when you turn it on. If that's the case, it's because the heating element is warming or cooling, and the metal is shifting. This is very common and older ovens. If the sound has recently become very loud, though, it can mean that your heating element is approaching the end of its lifespan and needs replacing soon. This can take several years of regular use. Most people will replace their oven long before the heating element goes out.

A modern oven has very precise coils that do make some noise as they work. So if the sound is while your oven is being used, this is a good thing. It means that the control coils in your oven are working as they should be.

Courtesy of Mike Gattorna

If you have an older gas oven, cooking is also normal; it means that the igniter is doing its job correctly. If your gas oven isn't clicking at all it might be a cause for concern as it can indicate that the igniter isn't working for one reason or another. if this is your situation please get your oven serviced immediately as it might be a buildup in the gas lines of the oven.


Why is my oven popping?

Well, there are many different sounds that your oven can make one that you never want to hear is popping. If you hear a popping or crackling sound that cannot reasonably be explained by your food immediately turn off your oven. This is either the wiring or other electrical components in your oven or the electrical outlet that it's connected to malfunctioning. The sound might also be accompanied by the smell of burning plastic. If that's the case, your oven is not only malfunctioning, it has begun to scorch and you need to immediately turn it off and disconnect it you can have a professional see it. 


My oven just made a strange WOMPF  sound! 


Courtesy of Max Rahubovskiy

Think of the most terrifying sound that could come from your gas oven. Are you thinking of it? Is it an explosion? To us there is nothing more terrifying than the boom or WOMPF that a gas oven can make when igniting improperly. What's happening here is that the gas is igniting after having built up. While this is a common occurrence for people with gas ovens it is not normal. If the gas is building up like this it means that one or more of your igniters is dirty. Having the gas flow or ignition system being restricted can lead to danger. A dirty igniter by itself is not a terrible danger. If you have your oven maintained regularly, getting the igniters cleaned and replaced as needed, you'll be in good shape. However, if you try to clean them yourself, it is very easy to scrub too hard and unintentionally cause a gas leak. While the small boom you might hear from your oven is not usually dangerous, a gas leak always is. 


Why won't my oven stop beeping?

Assuming that your oven is not beeping while preheating, coming to temperature, or because of a timer, there are two reasons your oven will beep. The first reason is that your oven is overheating. Many ovens have overheating issues, especially if you live somewhere, that's rather toasty during summer, like Texas, for example. Occasionally components within the oven can break, causing uncontrolled heating in the oven's primary heating element, which can cause it to sound a beeping alarm to alert you before it damages the oven or starts a fire. 

The second reason your oven might begin beeping at random is that there is damage or a short in your control panel. This can happen if your oven is close to a source of water or if your house has recently had any flooding or leaking issues. A shorted panel can beep at random or, even more annoying, keep beeping consistently. Make sure to call up a technician before you go delving into the depths of your oven to figure out the reason since some of these have high-voltage components. 


My oven is rattling; why?

Courtesy of dmitry-zvolskiy

Another common occurrence with your oven is having it rattle while it is running. If you recently had to move your oven or do a minor repair, that could be the reason. You can take a look at the back panel and the bottom cover to see if there are any loose screws. If that's not the case, it might be your oven fan. At that point, we again recommend calling in a professional to ensure that everything is secured properly.


Why has my oven started squeaking recently?

If your oven has recently begun squeaking after you turn it off, this is an easy problem to diagnose. It's your cooling fan that is sounding like a rogue rodent. This isn't the same as the convection fan located at the back of your oven. Instead, it's located on top. Given its positioning, this fan Austin falls victim to rising food particles and, over time, gravity. That will weigh it down, unbalance it and cause it to make creaking grinding or squeaking sounds. Fortunately, it just needs a good cleaning. Unfortunately, its location makes it a bit difficult to get to. Take a look at your owner's manual to see if it has any suggestions for how to go about cleaning it more easily.


Did we manage to answer your worries about your oven? If not, let us know over on our Facebook page. As always, we love to hear from you, and nobody wants to deal with an oven making noises at all times of the day and night.


 If you diagnose the problem, but you still aren't comfortable with the sounds that your oven is making, or you want it to be fixed by a team of professionals, feel free to reach out to us via our contact page or by giving us a call at ((214) 599-0055). We'll work with you and your schedule to find a time and date for our technicians to come out and find out what's going on. At Appliance Rescue Service, our top priority is getting your home running smoothly again.