Pepperoni & Canadian Bacon Stromboli

The most delicious recipe you’ll make all weekend.

Sometimes you really want a pizza, but you don’t have a good place nearby, and you don’t need to make a giant pie. The answer is stromboli. Stromboli is a wonderful food for when you’re going out, as it’s very much like a hand pie, even if ‘out’ is just heading out to enjoy your yard. As with most recipes we share, these are influenced by your Blogger’s history, as a stromboli is a very Philadelphia thing. 


Ingredients:


1 packet pizza dough mix or 1 pound premade dough

(if packet: 1/2 cup water, hot, and 1 teaspoon oil, or as directed)
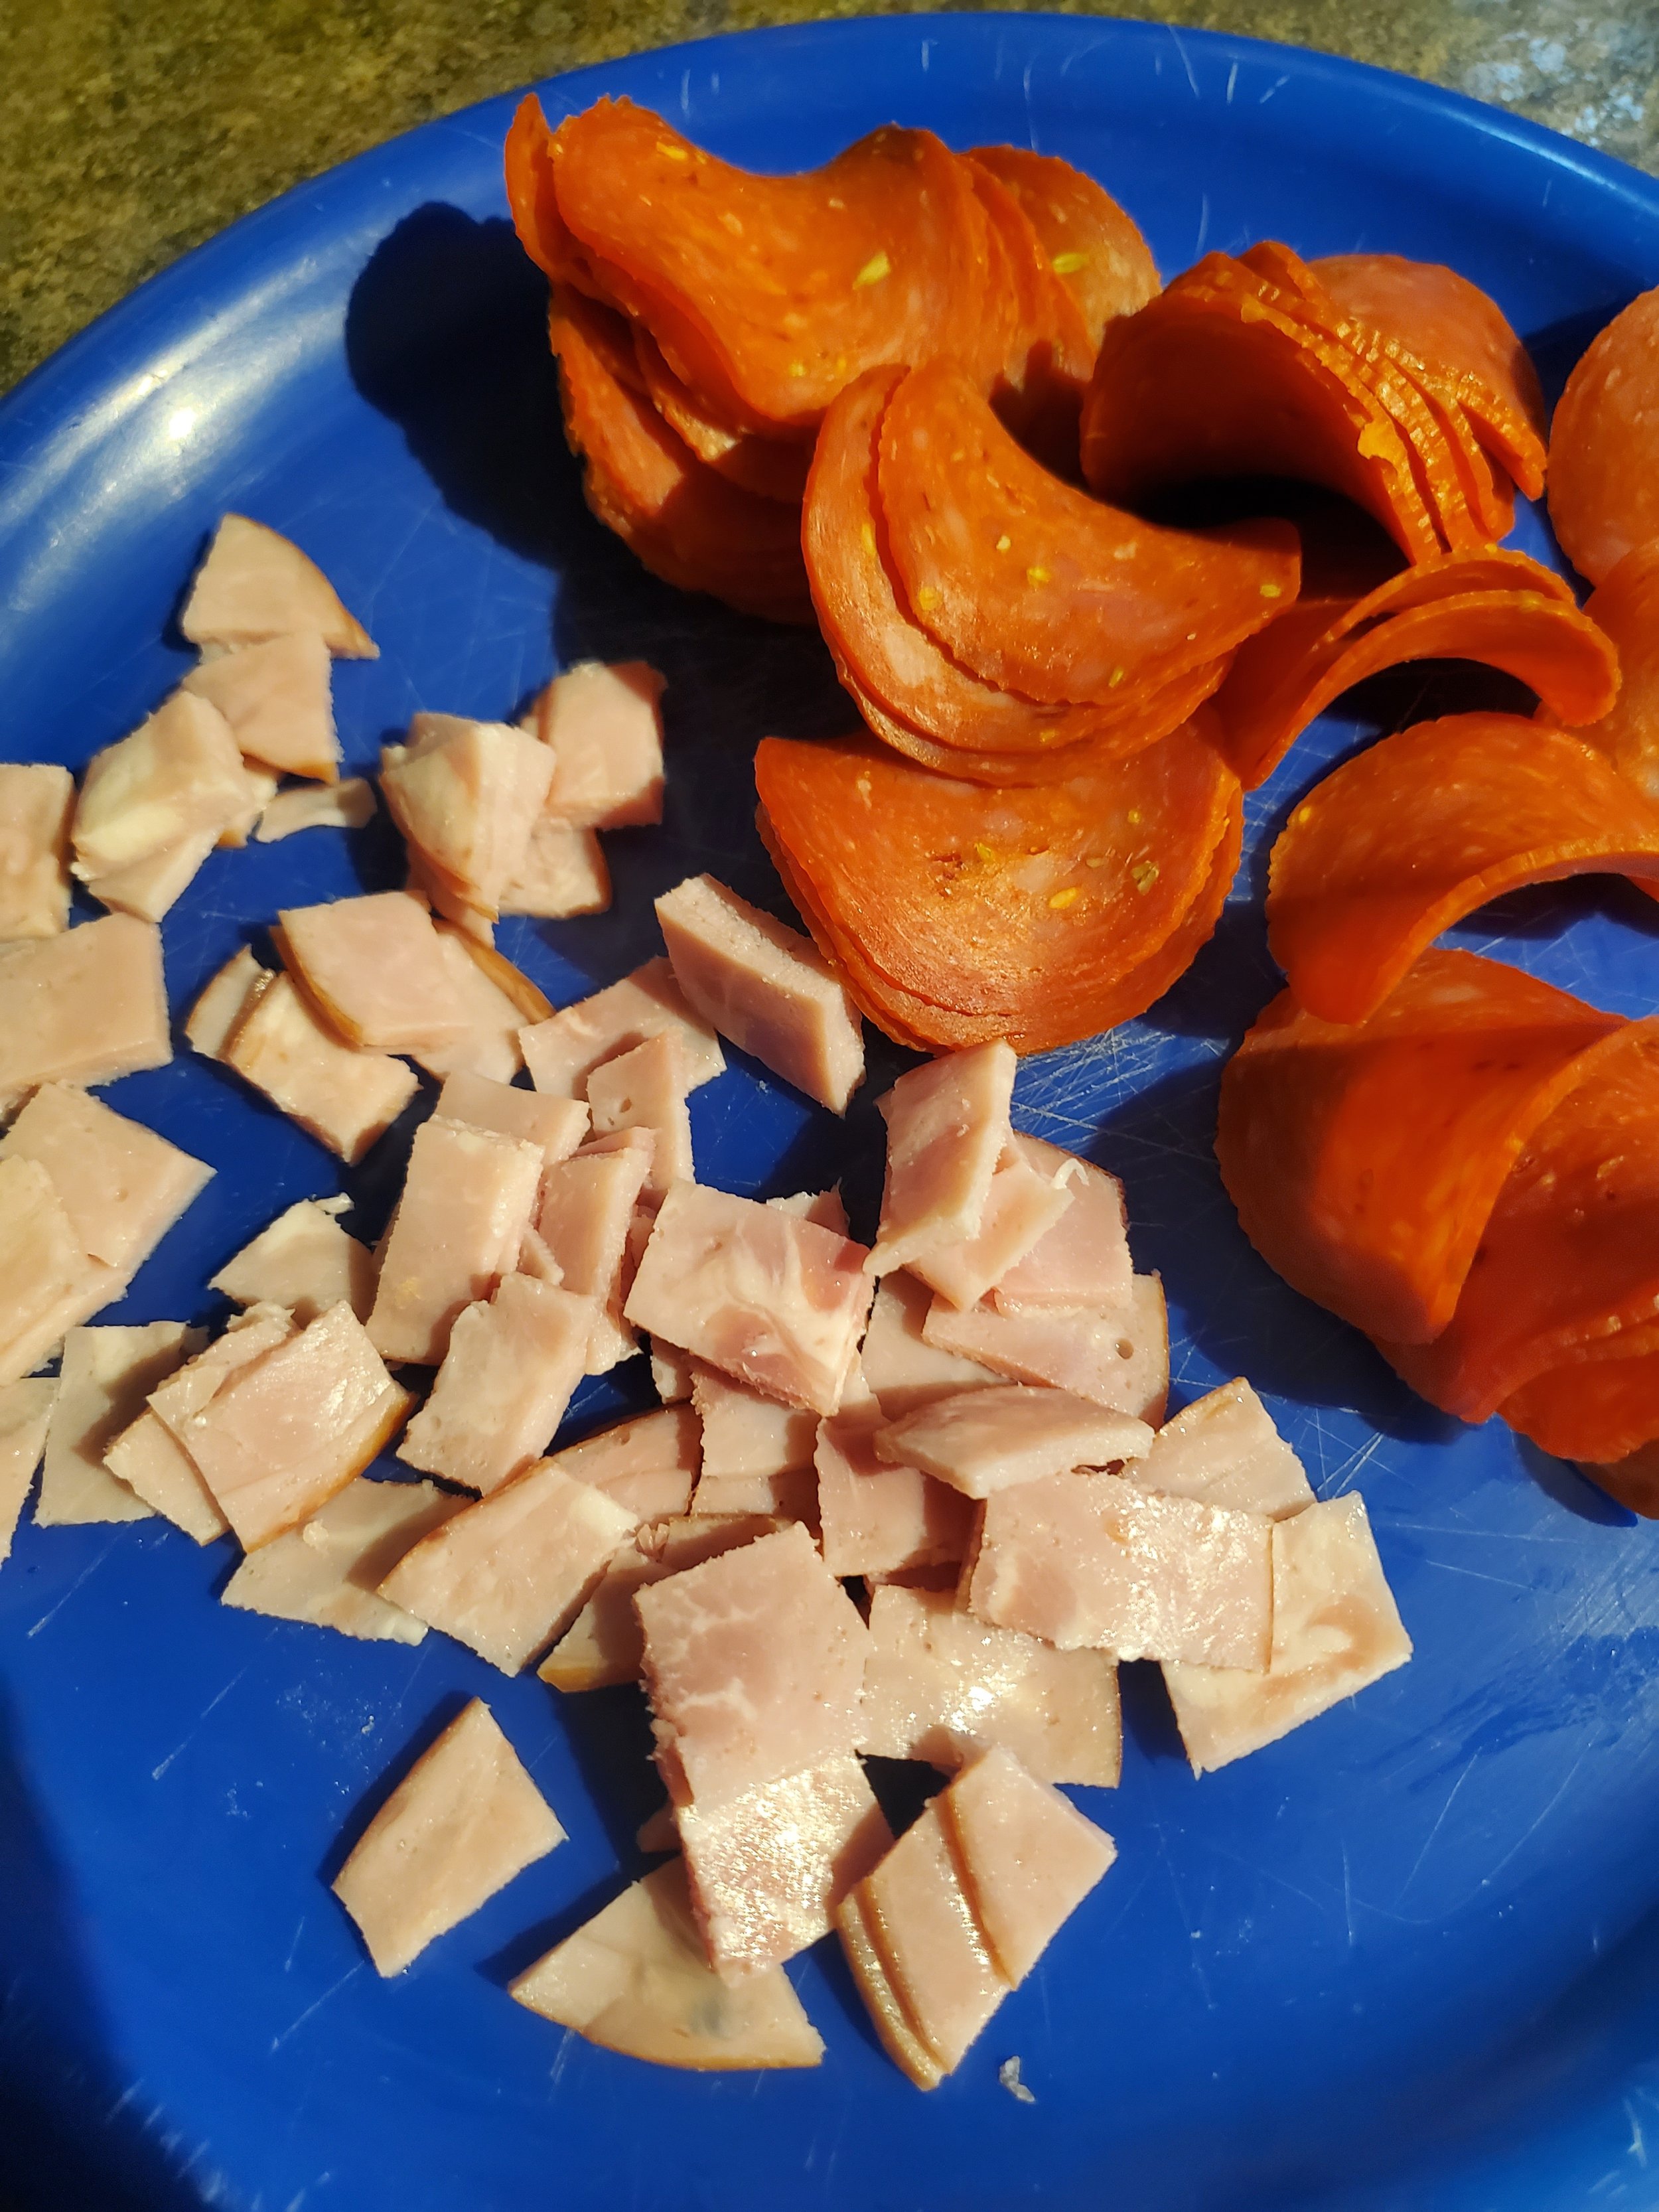
1/2 pack pepperoni

4 slices Canadian bacon

1/3 cup pasta sauce

1 cup shredded mozzarella

1 tablespoon butter

grated parmesan


Tools:

mixing bowl

spoon

parchment paper and/or aluminum foil

knife

baking sheet

spray oil

small heat-safe dish

basting brush


This recipe can be very messy. If you end up wearing some of it, no worries. It just means you've done it right.


To get started, either work your premade dough until it's soft and pliable, or mix together your dry ingredients, water and oil in a mixing bowl.


If you're making the dough, we recommend stirring it with a spoon until you get a shaggy, lumpy approximation of a dough ball - then knead by hand until you reach the desired consistency. If it's very sticky, add a little flour a spoonful at a time and work it in. If it's dry, add some water the same way.


We would like to take this opportunity to remind you that a little tackiness to the dough is actually helpful, and stops your stretched dough from rebounding immediately.


Working on a sheet of parchment paper is optional, but we find it to be extremely helpful, especially when transferring your finished product to the baking sheet. Feel free to make your own decision here. Some people prefer a clean countertop, some use a board or silicon mat, some (us included) like a piece of wax or parchment paper.


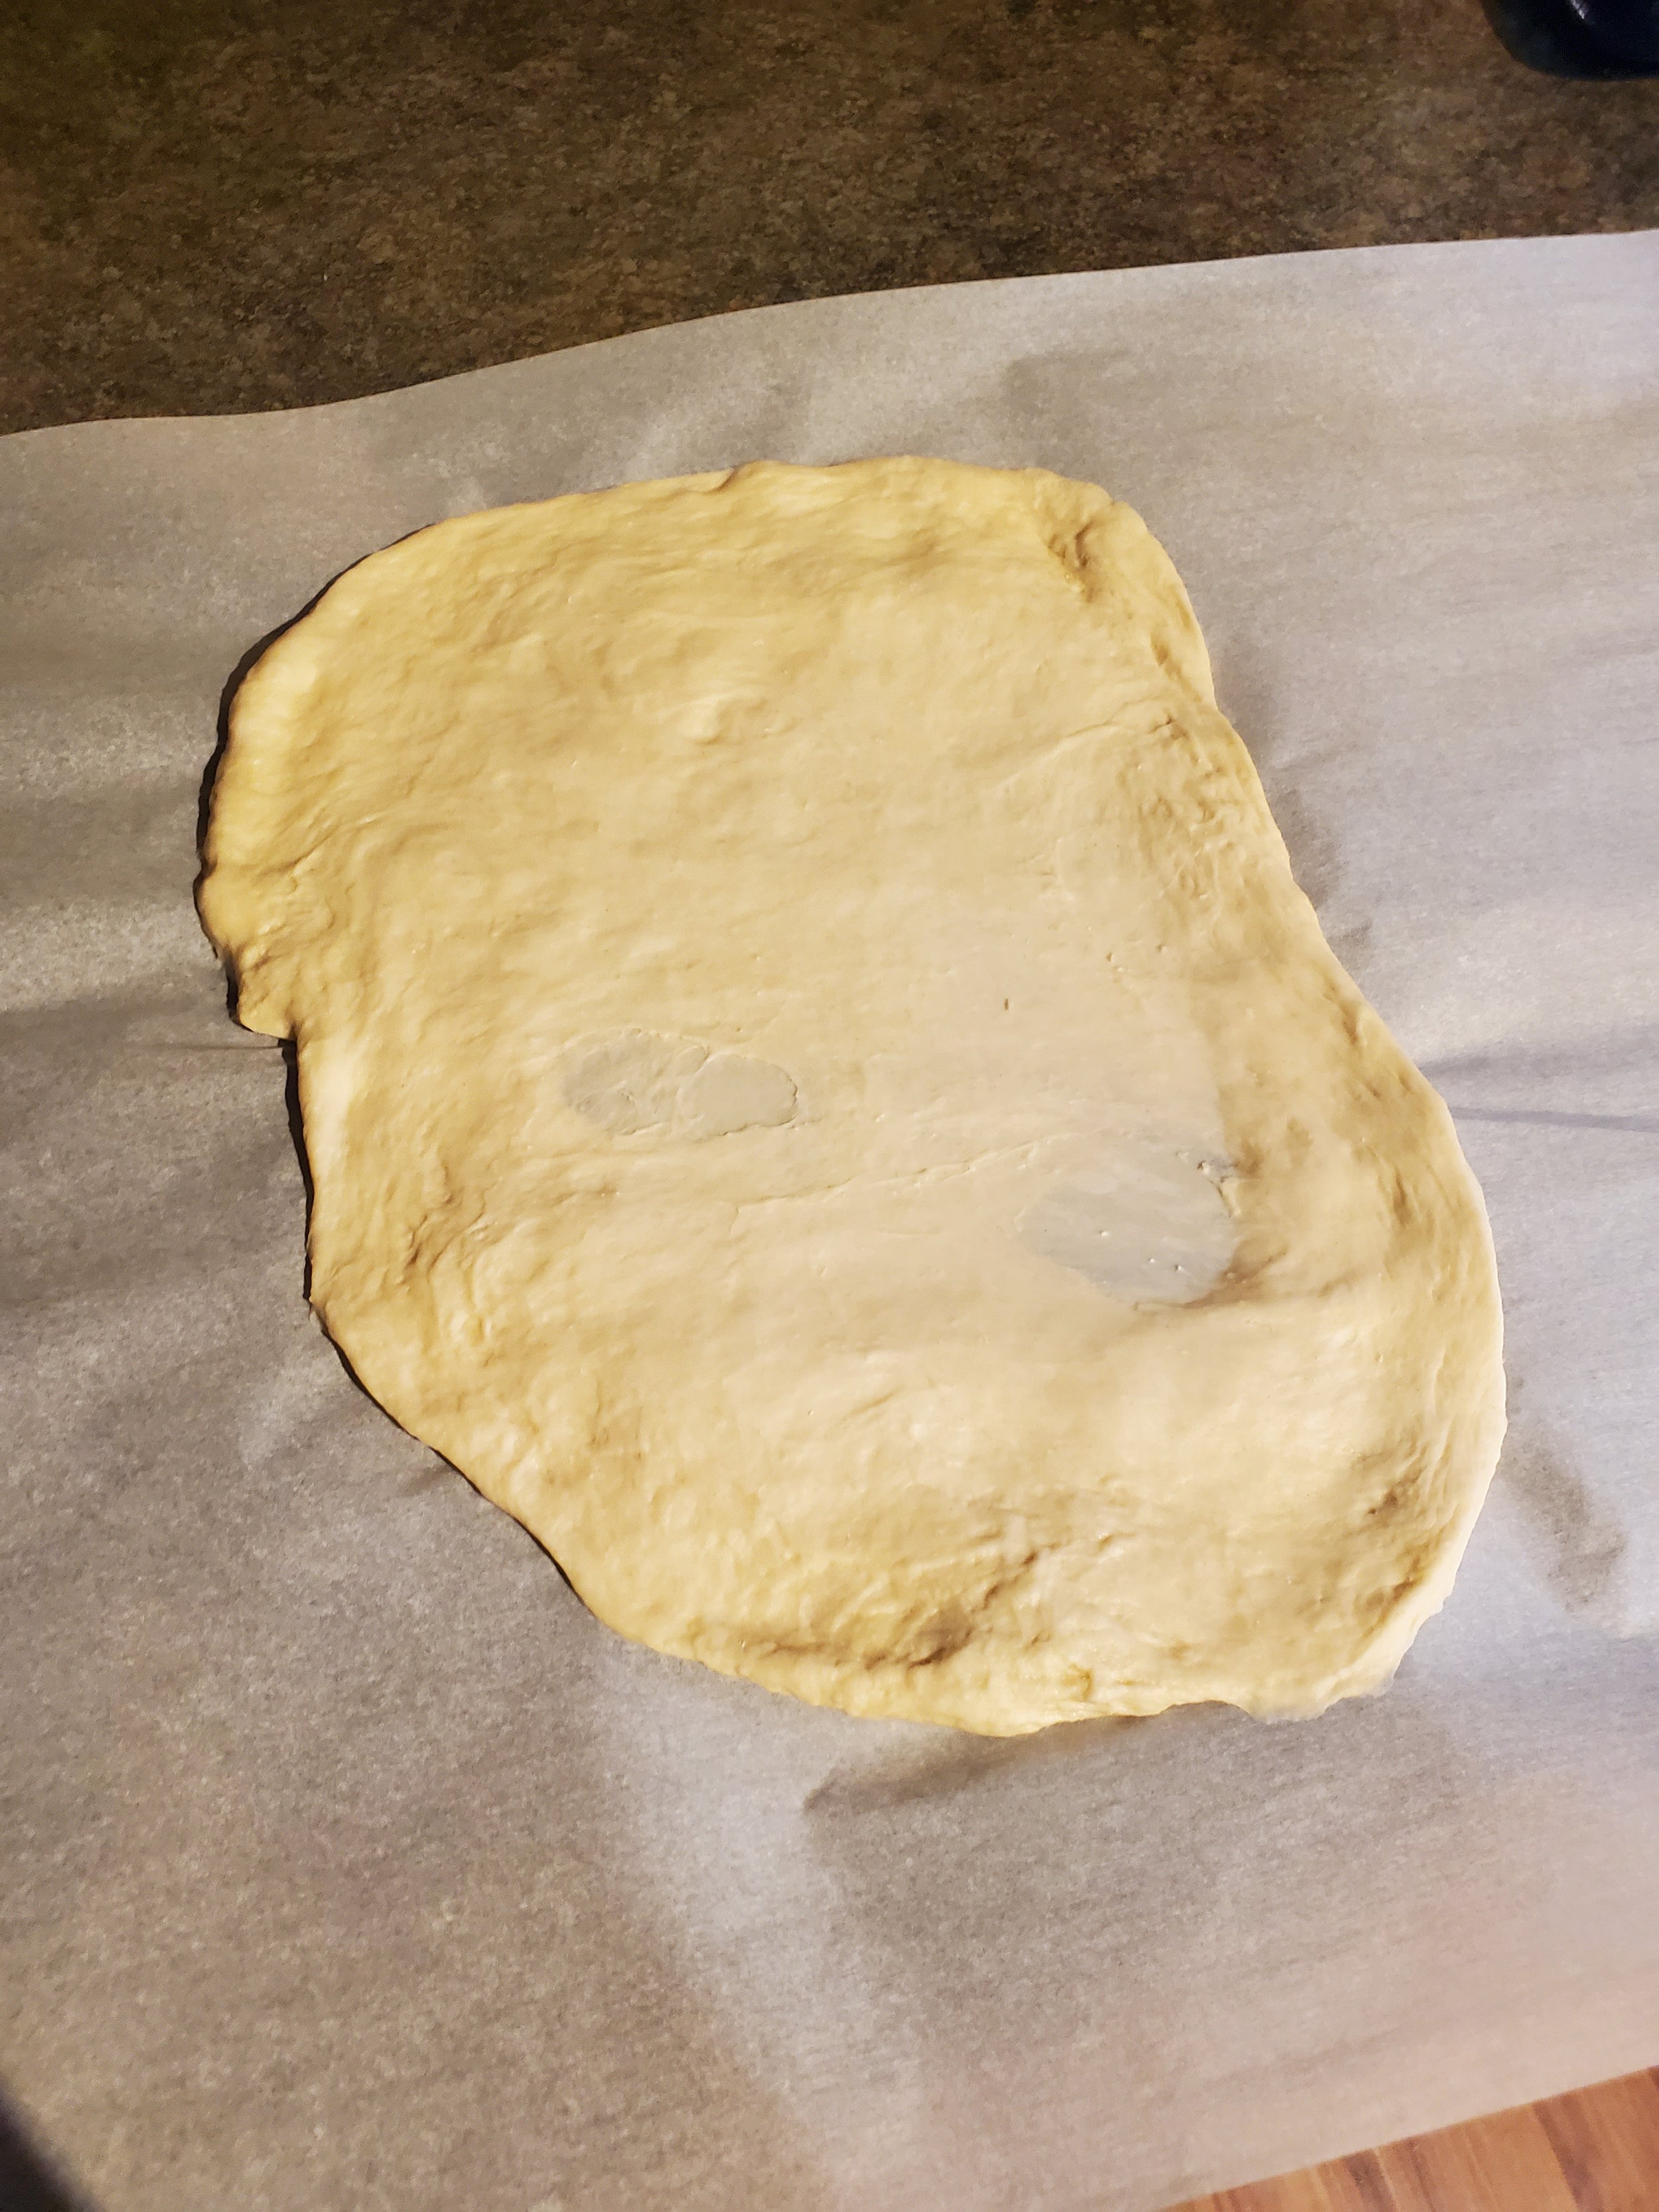
Turn your dough out onto your preferred work surface and make sure you've broken up any lumps to create a smooth ball of dough.


Your next step will be to shape this dough. You can make it a circle like you're working on a pizza, but we find a slightly more oblong or ovoid shape to be easier to work with when it comes time to fold it over. You can work the dough into a circle or oval right away if you like, but we often cover it with a clean kitchen towel and allow it to rest for ten minutes or so before we proceed.


If you're letting the dough rest a little, this is an excellent time to preheat your oven to 375. And if you prefer smaller pieces but have purchased the large slices of canadian bacon (the situation we found ourselves in), it's also a good time to grab a knife and chop those big slices up.


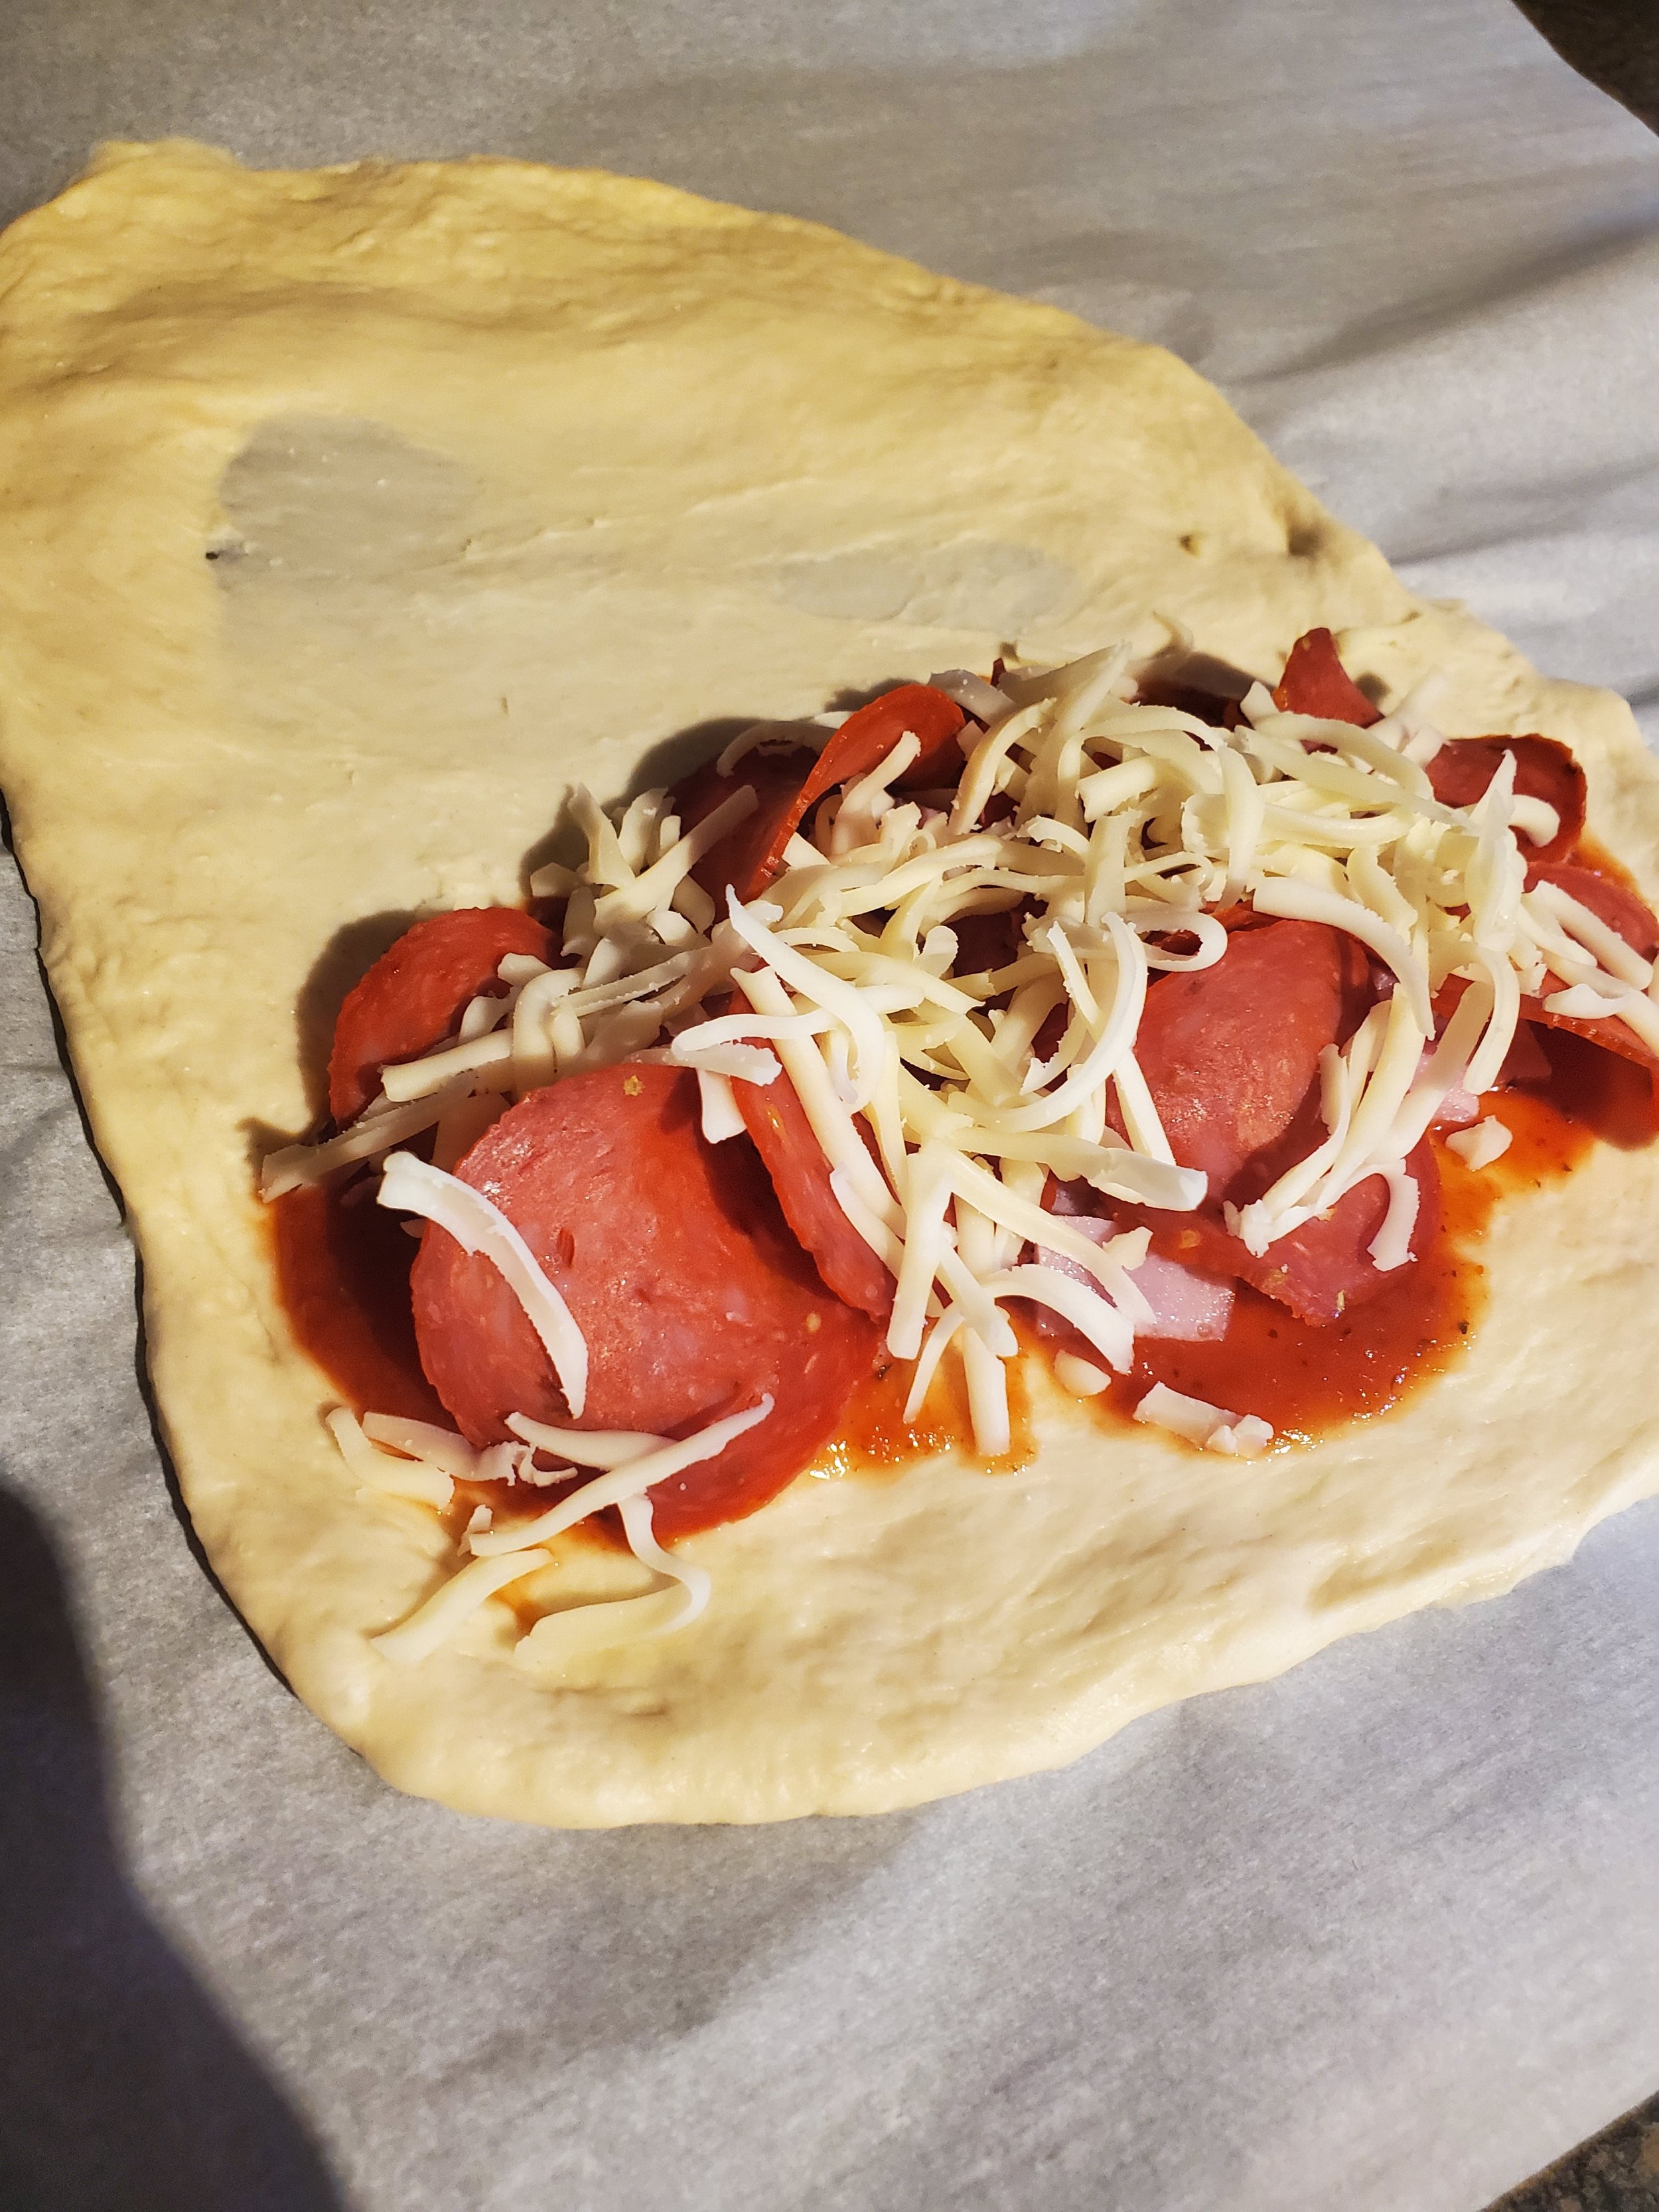
After you've stretched the dough out and it's staying where you've put it (which is why we mentioned a little stickiness being useful), kind of eyeball the halfway point of your shape. Spread a thin layer of pasta sauce on one half, and then add cheese and pepperoni and canadian bacon on top of the sauce. Be sure to leave yourself a little margin around the outer edge of the dough. You'll want plenty of filling there, but you also need to seal the two halves together into a half-moon shape before baking. Pasta sauce makes the dough too slick to seal, so if you drip some too close to the edge, be sure to wipe it up. Nobody wants all that melty cheese to ooze out the sides and go to waste.


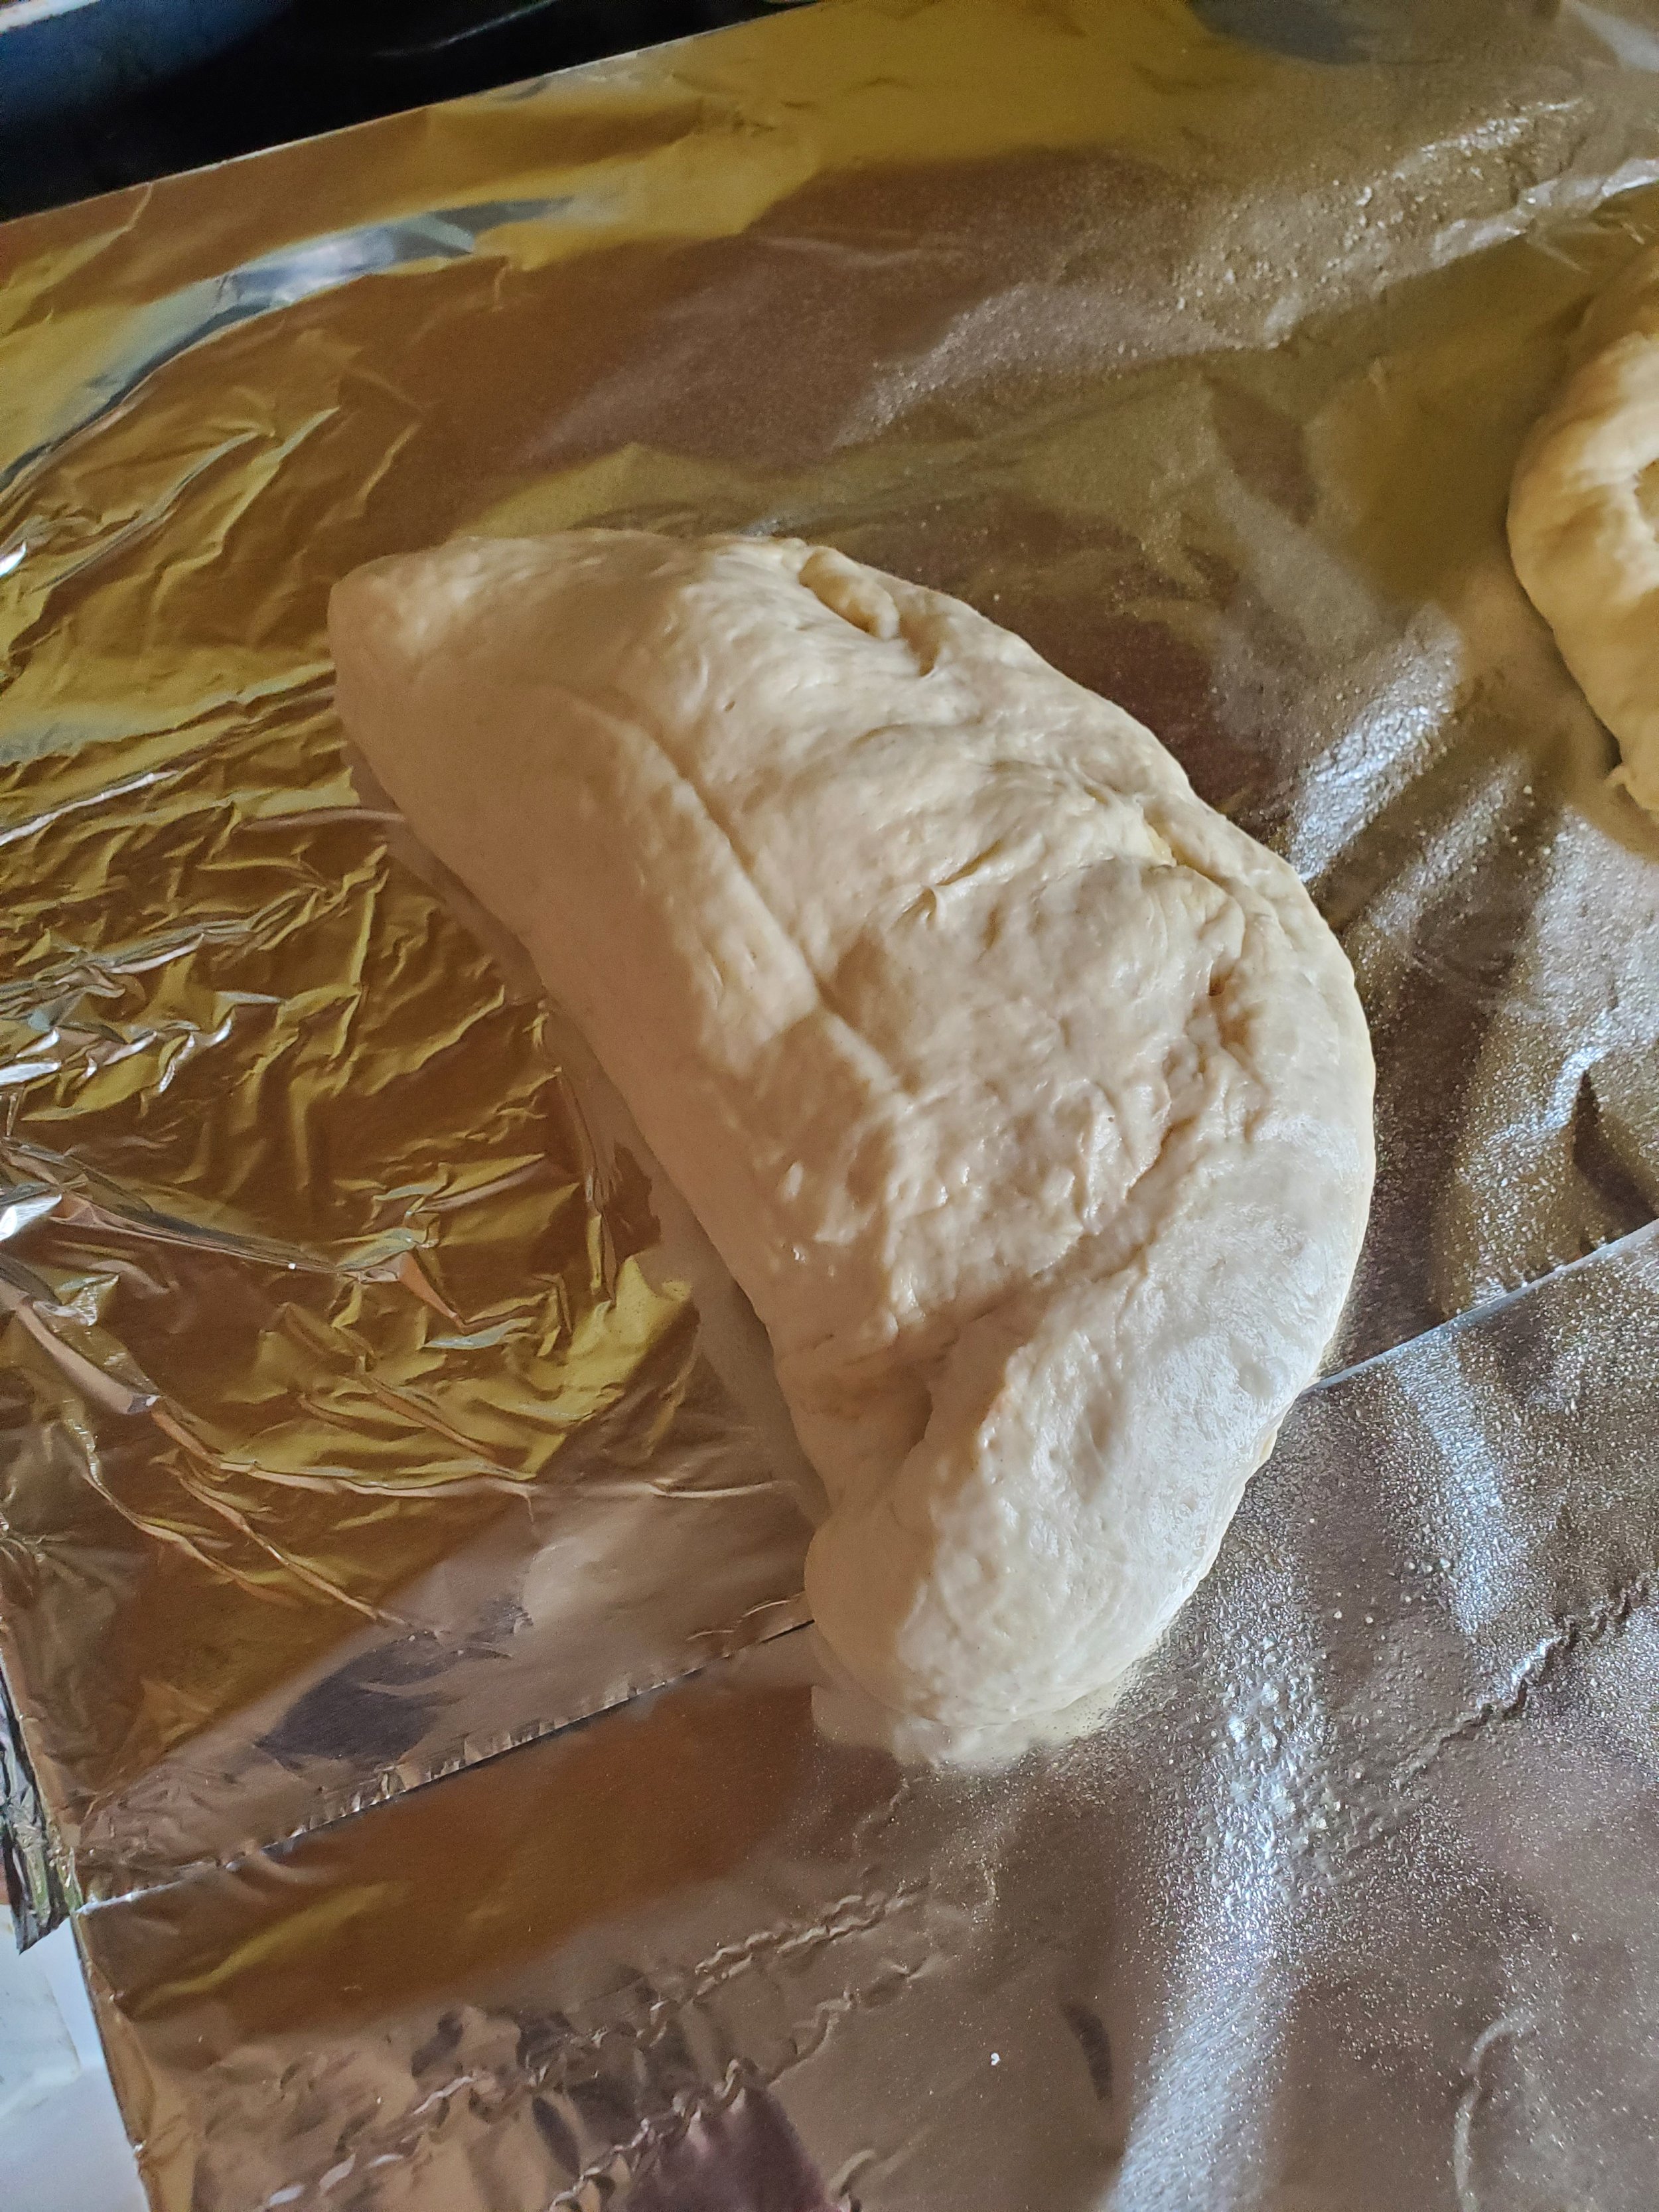
Make sure you work all the way around the open edge, pinching the dough together and folding that pinched portion underneath the bulk of the stromboli. Folding it under ensures the weight of the dough and filling will hold the seal together instead of just hoping for the best.


Now you've got a lumpy looking half-circle of dough. It doesn't look very appetizing at the moment, we know. But don't fret, your final product will be beautiful.


Place a sheet of parchment paper or aluminum foil on the baking sheet. If you're using foil, give it a quick spritz with some spray cooking oil to be sure you don't leave the whole bottom of the stromboli on the baking sheet later.


It's time to transfer your dough to the baking sheet - if you've worked on some kind of mat, board or sheet, pick the whole thing up to avoid opening up your seal. Turn it over onto your outstretched hand, and then flip it onto the baking sheet. 


If you've worked directly on the counter, make sure you lift gently all the way around the edges before you try to pick it up, and support as much of the center as you can. The dough will stretch quite a way before it breaks, but there's no saving a stromboli with a hole in it without making a whole new ball of dough.


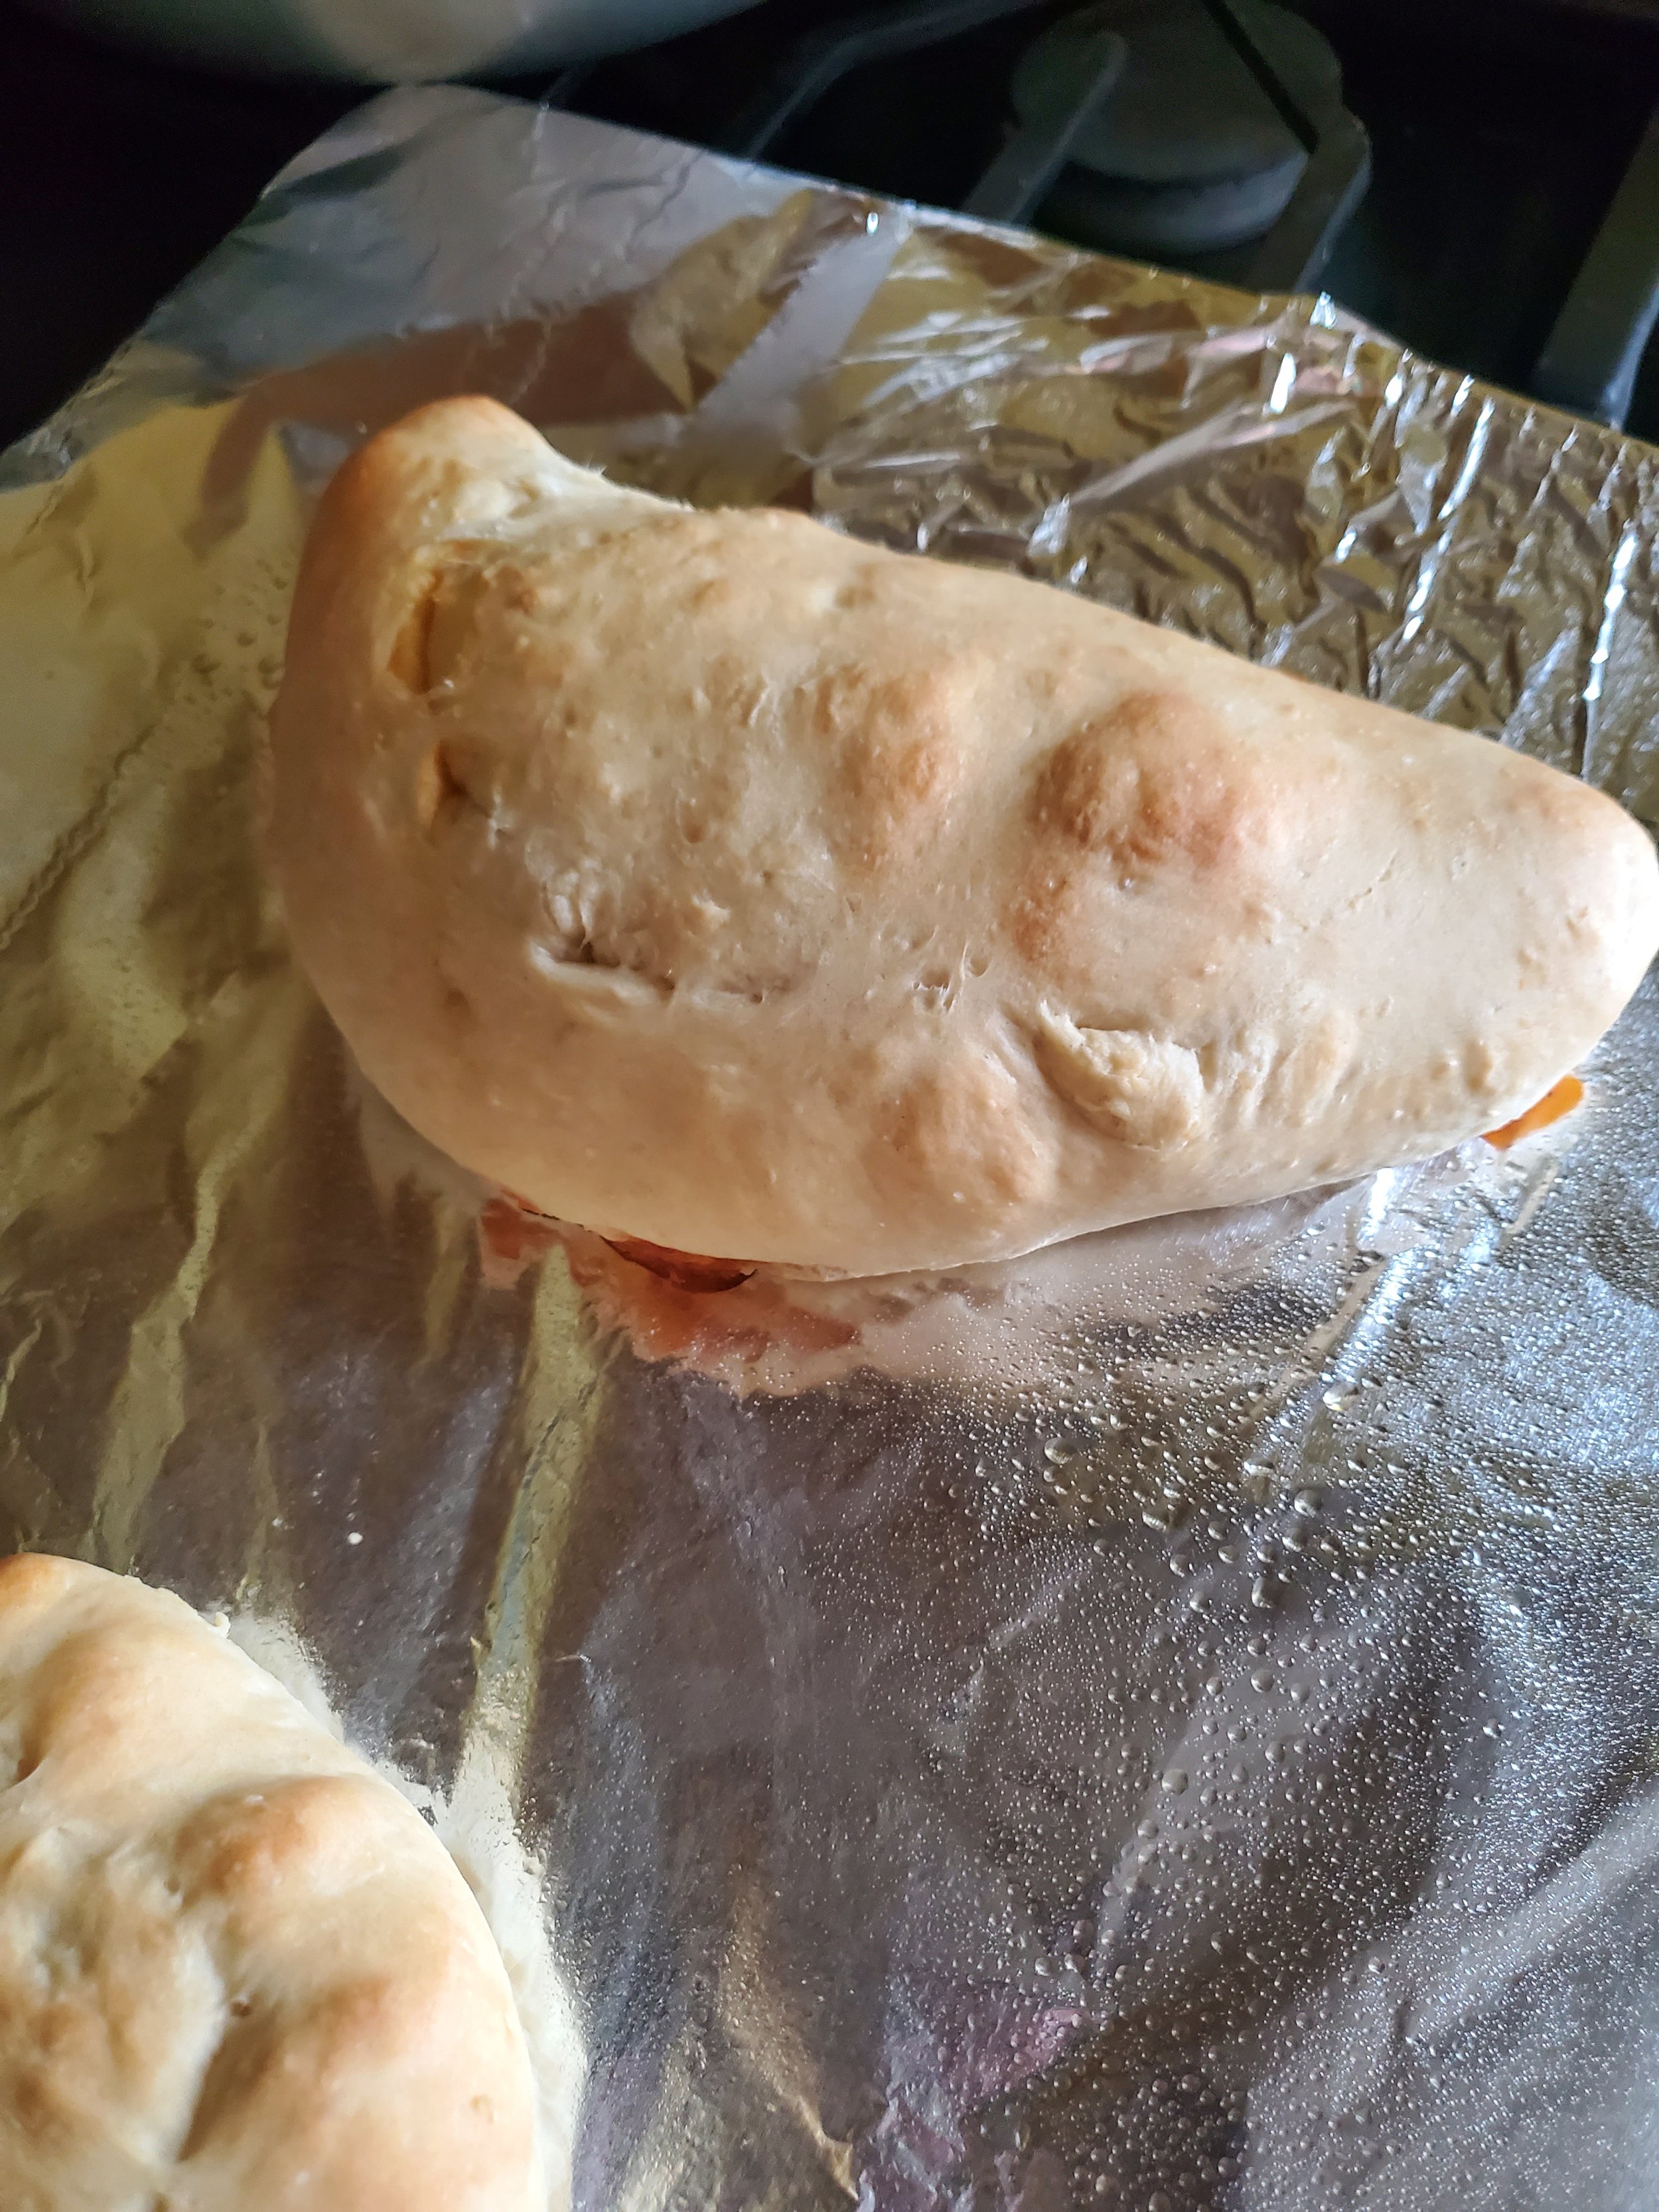
After you have the stromboli on the baking sheet, put it into the oven for 15-20 minutes.


Put that little bit of butter into the heat-safe dish and stick the dish somewhere close to the oven vent. This will allow the butter to melt without using any more energy than you already have to (and also prevents popping everywhere, like heating it in a pan or the microwave can sometimes cause).


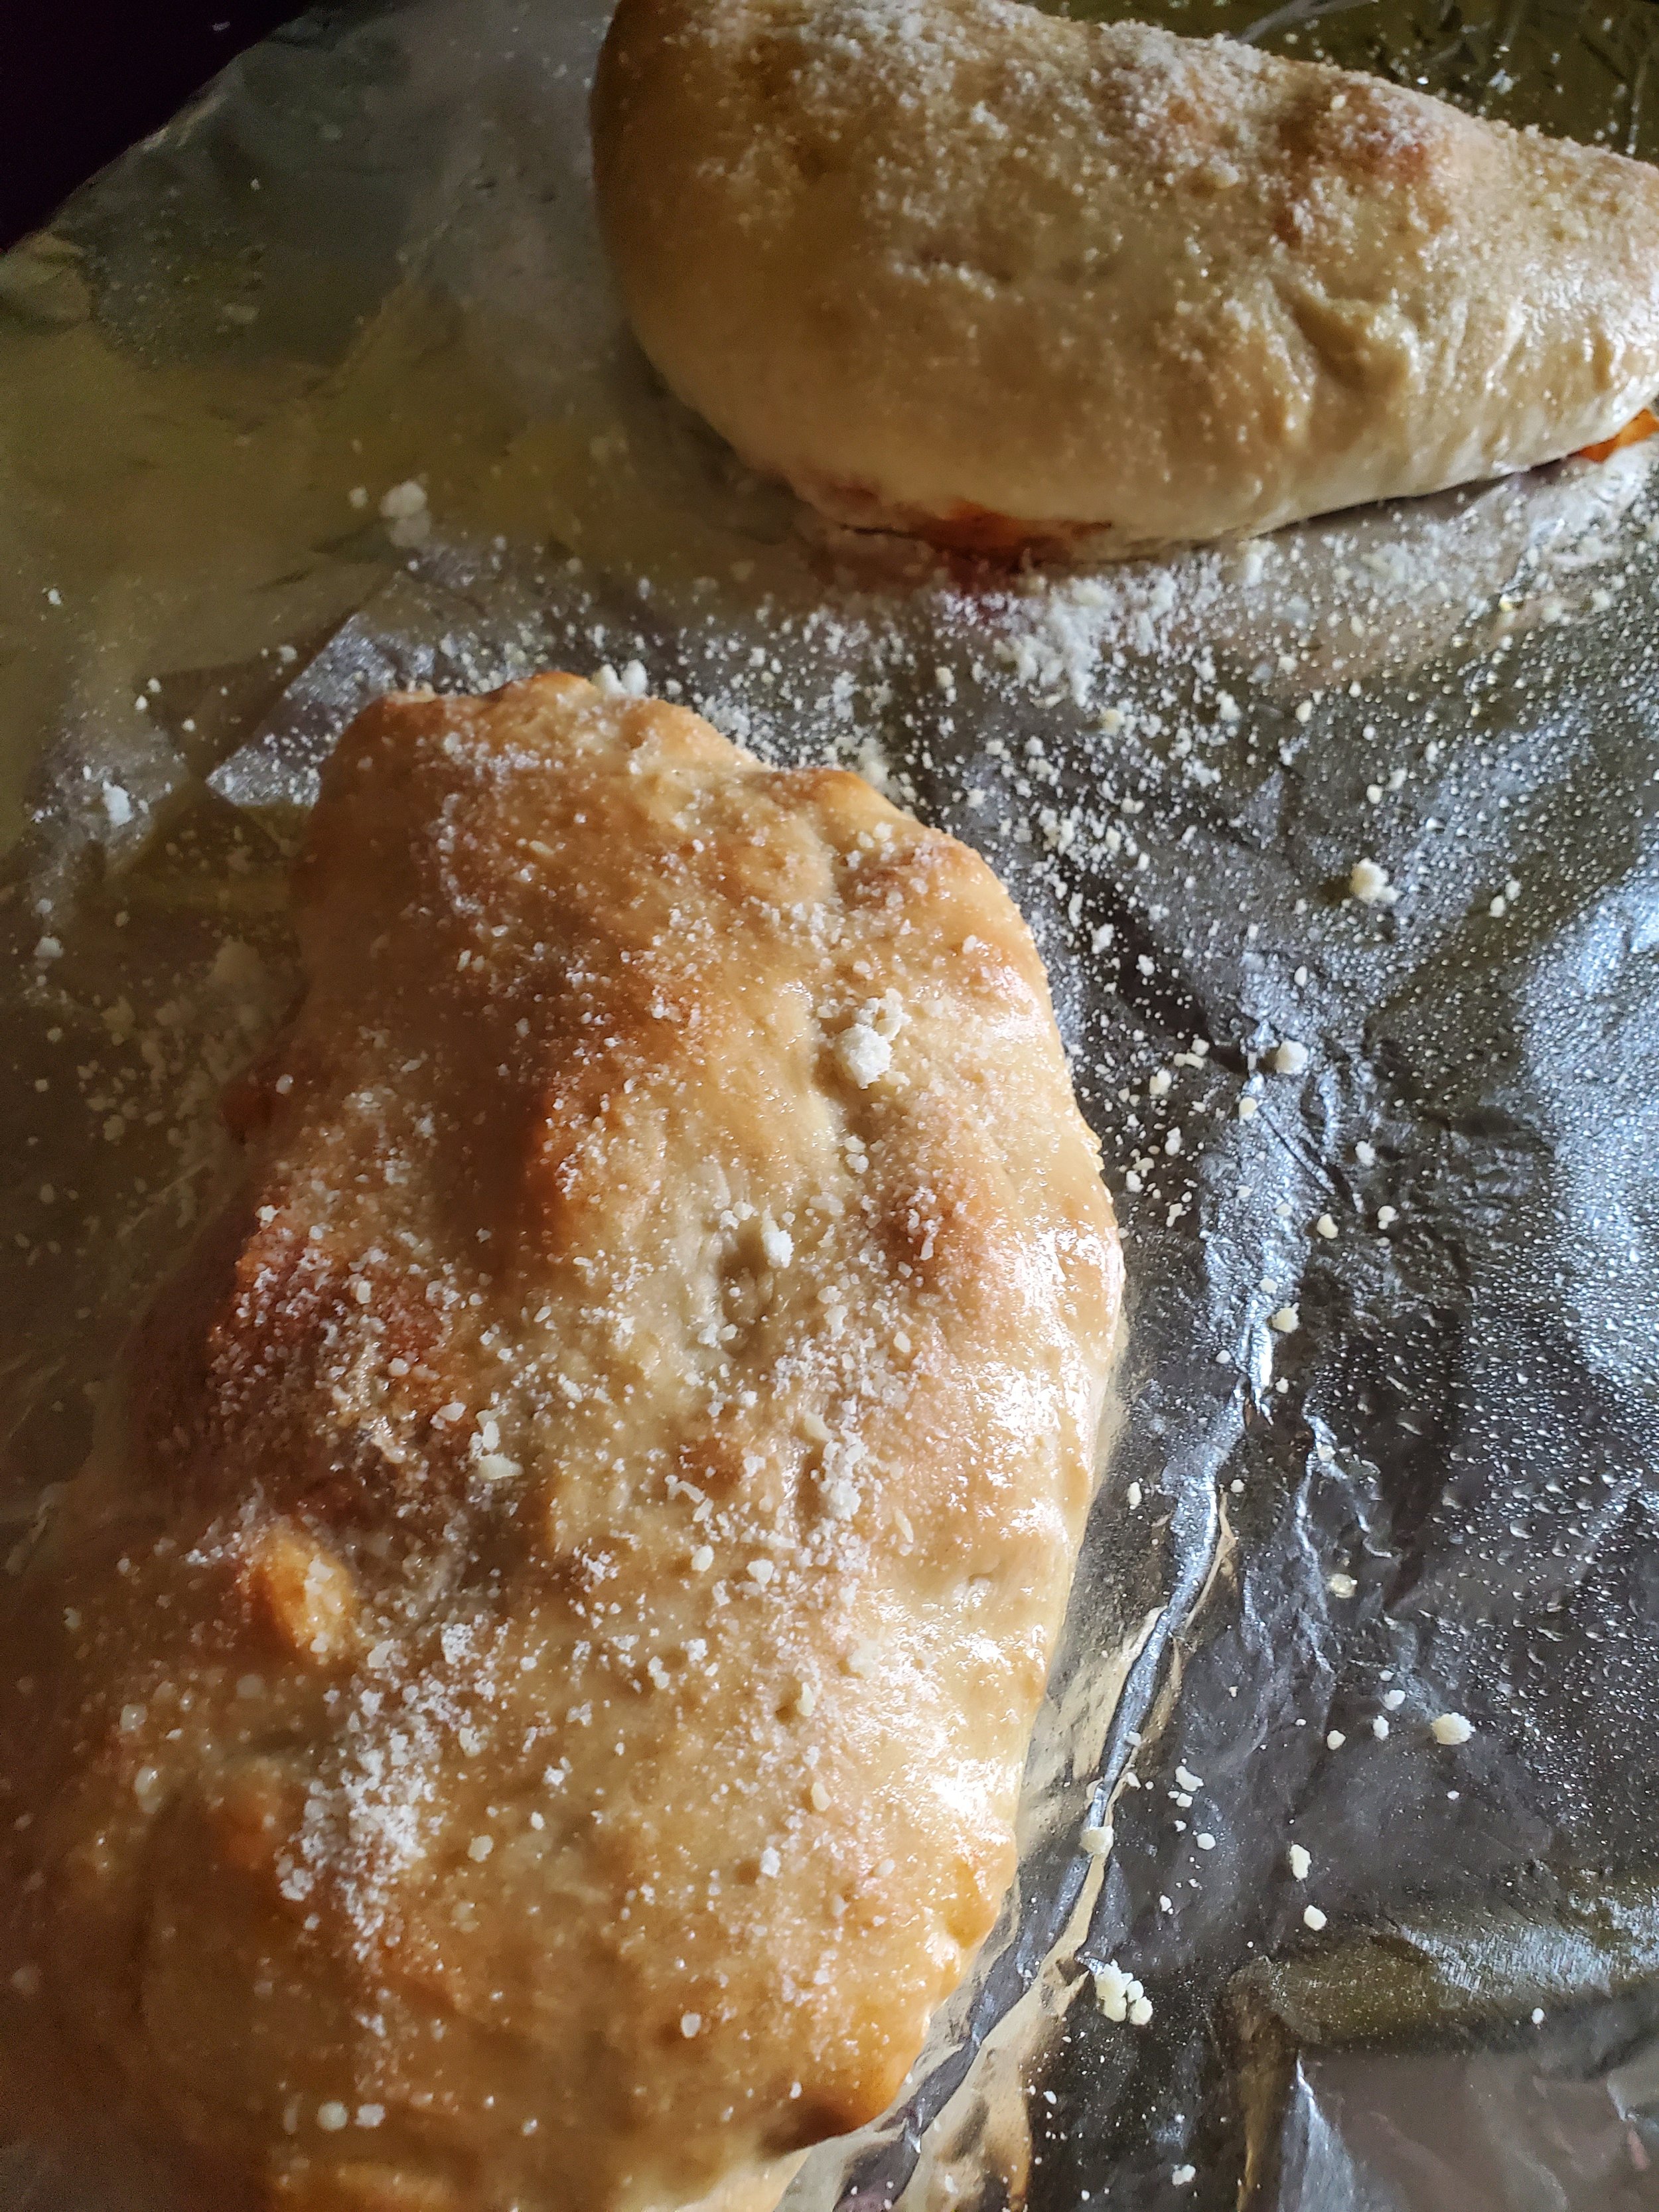
Check in at the 15 minute mark to be sure your oven isn't overzealous today. Once the top of the stromboli changes color to lightly golden, turn the oven off. Pull the baking sheet out of the oven and use a basting brush to coat the top of the stromboli with melted butter, then dust with parmesan cheese (you can also add herbs here, if your family doesn't panic at the sight of green things). 


Put the whole thing back into the oven for five more minutes, even though the oven is off. We just want the residual heat in the oven to melt the cheese into the butter so it sticks to the stromboli.


After the five minutes are up, remove your meal from the oven and let it cool a few minutes before serving.


Let us know what you think about this delicious meal over on our Facebook. We’d love to hear from you! 


6 Things You Need To Know When Planning Your Outdoor Kitchen

Make These Choices Before You Start PUrchasing materials

When planning your outdoor kitchen, there are a variety of factors that need to be kept in mind. A major one, before anything else, is deciding why you're doing this. 

Is your current home meant to be a permanent home for you and your family? 

Are you going to take pieces of your kitchen with you if you move, so everything has to be mobile? 

Are you the type of person who enjoys having the capability to rearrange furniture a few times a year? 

Or are you doing this to improve the market value of your home?

Each of these will have a deeply personal answer tied to how you look at your home.

Courtesy of maria-orlova


 For ones that aren’t as definitive, let's break down your choices from most to least complicated. 


Start by considering how many people do you want to make room for? What do you plan on doing in this space?  If this is an outdoor kitchen, are you doing it just so you can cook outside and have options during the year? Or is it so you can entertain outside? Do you tend to have a lot of people over, or do you prefer smaller, more intimate gatherings? Some options you might consider are a bistro table for two, a small island to hold 4 to 6 people: a large dining table, or an entire outdoor living room. 


 What about plumbing? Plumbing is definitely convenient, but it is costly. If you choose to add plumbing weather for washing up dishes, quickly getting water for recipes, or keeping yourself hydrated, each of these will present different options of what that might look like. However, all of them will require a licensed plumber or contractor. 


Courtesy of matheus-bertelli

You'll also have to winterize the pipes yearly to prevent them from bursting and destroying your yard and appliances. You'll almost certainly want somebody to check on them regularly to ensure everything is functioning properly. (Fortunately, Appliance Rescue Service does offer maintenance checks! It really is necessary, though, given how easy it is for something to get blown into places where it shouldn't be.)


You'll also need to ensure that any materials or appliances you choose are UV-resistant, scratch-resistant, and stain-resistant. 

UV-resistant materials mean that they're not going to degrade over time, thanks to continuous or heavy exposure to the Texas sun. 

Courtesy of enric-cruz-lópez

Scratch-resistant is important not only because of keeping what you purchase looking nice but also because scratches provide areas where food and bacteria can get stuck and thrive.

Stain-resistant is much the same. If you invest in building yourself an outdoor kitchen, you want it to continue looking nice. 

Some examples of materials that would work would be exterior quartz, porcelain, and weatherproof tiling.


No matter which decision you come to about your reasons for building an outdoor kitchen, modular cabinetry is a boon. You can choose exactly what you want in what configuration you want. With a few tips and tricks from a builder, it looks like it's built-in. And if you move or want to redo your backyard, you can easily pick it up and move it around. 

 Finally, you need to decide on what type of appliances do you want?

 Do you want to stop at a grill, or do you just think that you have to?

You can put in a grill.

You could add a smoker and not only use it for cooking but also to cure your own meats.

You can add in a pizza oven and offer homemade stone-fired pizzas.

Or you could put in beer taps and have your favorites always available.

You can easily add an outdoor refrigerator for easy food storage ahead of meals and to expand your storage space inside

Courtesy of Rachel Claire

. You can even put an induction stove outside, which is wonderfully safe when dealing with children. (The burners only heat up when in contact with the pot.)

All of these, of course, will be based on what you want to get out of an outdoor kitchen. Which means taking a look at how you cook.


We love cooking outside at Appliance Rescue Service. Working on a grill adds an entirely different flavor to your food. And although we love and have advocated for indoor grilling options, those don't add the charred smokey flavor. That's us, though. What about you? Tell us which you prefer over on our Facebook page. As always, we love to hear from you. 


 If you're concerned about the outdoor kitchen you already have, maybe the appliances aren't working quite right; we can help. You can set up an appointment with us that fits your schedule by contacting us via phone ((214) 599-0055) or our website. We'll send over our technicians at the time you've chosen to figure out what's going on and how to get everything running smoothly again. Appliance rescue service, our goal is always to work with you.


Modern Victorian: How To Achieve the Look In Your Home

Bringing the Historical To Your Home

Did you ever dream of the Victorian period's lavish balls and parlor rooms? Or watch a show or movie set in the time and wish you could decorate your home the same way? Well, you absolutely can. 


The Victorian period stretched from 1837 to 1901 roughly. You saw a certain style within the homes of the well-to-do, the aristocracy, and the nobles. It was easy to identify by an exuberance of ornamentation influences from throughout history and handicrafts. It was also often compartmentalized, breaking rooms into smaller pieces and rather dark, given the shape and space allowed for homes in England. Although the Victorian period has ended, our love of it hasn't. Victorian style has been mixed, remixed, and adapted in various ways, which is why it's still so popular.


Remember that you can still pull off a Victorian style even if you don't have a large Victorian manner or an old home. All you need is a few of these tips.


Highlight Good Bones, Don't Hide Them 


 Rather than hiding the bones of your home, bring attention to them. Do you have wood flooring, any marble, or dark framework? Great! And if you don't naturally have this, there's a decent way you can imitate it. You can also refurbish and draw attention to old brickwork fireplaces, radiators, and mantles.


Pair Ornamentation With Simplicity 

Victorian homes were packed to the brim with detail, which can be very overwhelming to modern comfort. Instead, try allowing room for each. Put a heavily detailed piece in the middle of an open wall.


Imitate The Look Of Bay Windows 


 Even if your home doesn't come naturally with bay windows, you can still have the look of these beautiful Victorian features. You can use a pair of double-door Shutters to frame an entryway, such as a solarium or orangery.


Yes, Your Lighting Does Matter 

As we said up top Victorian homes were often dark. This came from the time of the industrial revolution, at least if they were in London. The fog at the time was so thick that lamps would be lit by mid-afternoon. Add to that that most lamps were not electric yet but were instead still powered by gas. So lighting was either what little natural lighting you could get through your windows or provided by lamplight and candles. For the modern reader, though, you want something else. Instead, when choosing your lighting, think of each piece as part of the whole room. They can all be bold, sumptuous, and intricate but they should also work together. Choose pieces that mimic one another, even if it is in subtle ways.


Juxtapose Scales


 Victorian homes were often private collections of The eclectic and strange. If you're not interested in building your own cabinet of curiosities (if you are, we'll get to that further down), consider instead using scale. Pair large patterns with smaller paintings or oversized bookshelves in a small room. It gives you the same feeling of drama that the Victorians loved without needing your home to be so cluttered.


Work In The Natural


Victorians loved nature from their perspective of manicured gardens to their floor arrangements to their decor. If they could bring in the natural world, they did. It makes sense to find places you can do the same. Can you bring in accessories made from natural fibers? Can you bring in furniture made of wicker or rattan? Do you have a love for botanical drawings that you can frame and hang?


Carefully Curate Your Clutter

Remember how we were talking about curio cabinets? This is that concept. In a Victorian home, you curate what gets displayed, and the rest gets hidden in stylish cabinets. Feature finds from your latest vacation, favored books, or strange things you've discovered over time. 


Go For Bold

On a final note, don't be afraid to go big and bold. Victorian decor was much more colorful than today's styles. Bring in jewel tones and huge patterns; there's no limit. What matters is how you balance these things. 


Are you as in love with Modern Victorian as we are? Let us know over on our Facebook page! 


If you're here because "redoing your home" started because of a flood thanks to your washer, we can help. Reach out to us via phone at ((214) 599-0055) or our contact page, and we will work with you to find a date and time to send one of our expert technicians over. At Appliance Rescue Service, our goal is to help you and get your home running smoothly again. 


Healthy and Flavorful: A Caponata Recipe That You'll Love

Because who says you can’t have both in one recipe? 

Have you ever realized that a lot of companies that claim to make healthy food, also make it really bland? It’s flavorless and lacks texture, and the best you can say is that it doesn’t leave you feeling sick. 


Yeah, we know those meals, and we hate them. SO, we’re offering up this recipe for Caponata, an easy veggie recipe that is packed full of flavor and will leave you full. If you want you can also pair it alongside a smaller portion of pasta or polenta for a more filling meal, or as a lunch made up of leftovers. 

Ingredients:

1 lb eggplant

1 cup pine nuts

1 red bell pepper

1 yellow bell pepper

2 carrots

3 green onions

1 rib celery

1/2 cup currants

1/3 cup olive oil (+/-)

3 tablespoons red wine vinegar

2 cloves garlic

3 tablespoons tomato paste

2 tablespoons parsley

1 tablespoon basil

1 tablespoon sugar

salt and pepper to taste

Tools:

Baking sheet (1/2 size for toaster oven)

Cutting board

Knife

Bowl (x2)

Cheese grater (optional)

Large frying pan with lid

Measuring cups and spoons

Fine sieve or colander

Can opener

Timer

Serving spoon

Let us start off by saying that caponata is a very flexible recipe (sub things in or out as you wish), but it is not a picky eater approved recipe. Please do not attempt to feed this to fussy small fries or to the family members whose gut-check reaction to anything vegetable is "why?" or "ew." We will not be held responsible for the griping.

Be prepared to spend a good deal of time cutting vegetables for this recipe. We highly recommend toasting the pine nuts (just as they are, don't be tempted to oil or season them) in the oven for about 15 minutes while you chop your many veggies. At least that way you're making progress on two fronts while you bore yourself chopping, and it adds some nice depth of flavor to the final product.

As always: be sure to wash your produce!

Start with the eggplant. Trim the top off, and halve it down the center so you have a flat side to set it on while you cut. No one likes escaping veggies, or nicking fingers trying to catch them. Your goal is to cut this large, funny-looking vegetable into a half inch dice. Once you get it diced, move it to one of the two bowls.

Next up will be your green onions. Trim them up and just roughly chop them, then dump them into the bowl with the eggplant.

Mince or slice your garlic (some families have strong feelings about a preference here, but we don't much care as long as it lands in the pan), and toss it in with the eggplant and the green onion.

That lonely single rib of celery goes next. We find it easiest to cut it lengthwise into thirds before we start the widthwise cuts, that way the chunks of celery aren't so big they end up accidentally taking over the meal. Once it's cut, those pieces go in with the rest so far.

And the carrots you've got can either be chopped or shredded. The regular carrots at our grocery store were sad looking this week, so we subbed in a double handful of baby carrots and shredded them for uniformity. The carrots join the others in the bowl.

That bowl is looking pretty full, isn't it? Time to start on the next.

Take the tops off your peppers and remove and discard the seeds and ribs. Chop down to half-inch dice like the eggplant and move them to the second bowl. 

Now you're finally done with the cutting board and the knife, just in time to need a measuring cup!

Measure out your currants and toss them in with the peppers.

Take the capers out of their jar, but don't add them to the bowl yet. These little guys are STRONG, so plop them into a sieve or colander and rinse them thoroughly. Once they're drained, they can join the currants and peppers. 

Toss your parsley and basil on top of that second bowl.

And right about now, the timer should be going off for those pine nuts. Just turn off the heat and let them sit for a while; their turn will arrive soon enough.

Now we move our attention to the frying pan on the stove. Pour enough olive oil to coat the bottom of the pan and light the burner. Set to just over medium and heat until the oil starts to shimmer. Be careful not to set it too high - olive oil has a low smoke point, and you do not want the smoke detector to give you an unnecessary wake up call.

Once the oil is hot, dump the eggplant bowl into the pan. We know it looks like there's not going to be room for anything else - don't worry, it will cook down. Give it a quick stir, then cover the pan. Set a timer for six minutes. Stir occasionally during that time.

When your six minutes are up, push the eggplant mixture to one side of the pan. Add a little more oil, then the bowl of peppers. Stir again and let it cook, uncovered this time, for another three or four minutes.

As the peppers soften up, you're safe to add the pine nuts. Just pour them all in there and give everything another stir. You'll probably need to add another splash of oil at this point, along with the red wine vinegar, the tomato paste and the sugar. (Adding the sugar here offsets the funky smell of the vinegar and helps balance the acidic, tinny taste of the tomato paste.)

Stir. A lot.

We know that tomato paste looks like it's never going to stop being a blob in the middle of the pan... But give it time, and don't quit stirring.

Once everything is incorporated (finally!), use a serving spoon to scoop out a serving to enjoy. We put ours over polenta, but that part is totally up to you.


Let us know over at our Facebook page what you thought of this recipe. We love hearing how they turned out for you. 


And if you need new appliance performance, preferably also without the jumbo-sized price tag, maybe reach out to our service department. You can reach them through our contact page, or by giving us a call at ((214) 599-0055)


Blending Your Own Teas

If you were here for our post earlier this week, you'll be excited as this week's post is all about how to blend your own teas! Will be taking a look at several different varieties of herbal tea that you can make from the plants we mentioned in our last post.

Like we said in our first post, please do not take anything said within this post or are growing your own herbal garden post as medical advice, and Appliance Rescue Service is not to be held liable in the event that you do choose to do so under your own cognizance. 

However, many of these teas can help with various medical issues as much medicine derives from our natural world. Therefore we would suggest, if you do find yourself interested, to discuss it with your primary caregiver not as an alternative to medicine but to be used in conjunction as part of a whole-body healing approach.


We prefer not to repeat ourselves when it's possible to avoid it, so although many of the herbs and spices are used in several different teas we'll talk about the benefits of them when they're first mentioned rather than repeating it for each tea. If different benefits are used in different teas we will of course talk about them where relevant.


Courtesy of Frantiska Ambrozovya

Headache B Gone
1 part spearmint
1 part black tea
Orange zest to taste

Medicinal Properties – this tea is particularly good when you have headaches. The combination between the spearmint and the black tea would be similar to taking Advil or Tylenol. Spearmint specifically is good for treating headaches, while black tea adds a hit of caffeine that is seen in many headache treatments.


Lemon Sunshine
1 part lemon balm
1 part lemon verbena
½ part lemon thyme
⅛ part lemon zest

Courtesy of anna-pou

Medicinal Properties – this tea is a good all-around pick-me-up. Lemon balm, lemon verbena, and lemon thyme all have effects on various parts of the body. Working together, they can soothe everything from heart palpitations to soreness to indigestion and nausea. With all of these various lemon-flavored herbs Plus actual lemons zest, you also get a very nice morning tea to help you kickstart your day.


Lady’s Cup
1 part chamomile
1 part red raspberry leaf
½ part peppermint or spearmint
Just a pinch lavender

Courtesy of işıl-agc

Medicinal Properties – this soothing floral tea is wonderful at the end of a rough day. Although red raspberry leaf does aid in several feminine issues there is no reason that a male cannot drink the tea. All of these together have a very calming and relaxing effect on both the nervous system and the brain.


Courtesy of Bru-nO

Stomach Soother
2 cups of water
2 teaspoons peppermint leaf
½ teaspoon fennel seeds
1/2 inch knob of ginger 

Medicinal Properties – if you're having stomach issues such as nausea or diarrhea and can't stand to keep much down this is a good tea to turn to. As we mentioned in our garden post, Ginger is a fantastic stomach soother for most people. Combined with the fennel seeds and peppermint leaves into a tea that will perk up your appetite but it also will help in calming most stomach issues.


Elderberry Tea
2 cups of water
2 tablespoons elderberry syrup (or one heaping tablespoon dried berries)
1 cinnamon stick
2 cardamom pods
Simmer for 30 minutes.

Courtesy of pasja

Medicinal Properties – the cinnamon and cardamom in this tea are flavor additives rather than being part of the medicinal action. That comes from the elderberries which support a healthy immune system thanks to all of the antioxidants that are packed into the berries. Depending on how you decided to preserve your harvest you can use a syrup or a heaping tablespoon of the dried berries while making this tea. Many suggest drinking One 8 oz cup of this a day during flu and cold season.


 Rosemary-Mint Tea
Two (4 inch) sprigs rosemary or 2 teaspoons dried
About ¼ cup dried mint, either peppermint or spearmint
Pinch green tea

Medicinal Properties – Rosemary has been shown to have a positive effect on the prevention of aging in the brain as well as protecting the brain from damage due to free radicals. It has also been shown to help improve recovery in stroke patients. Combined with green tea and peppermint, this is a wonderful tea for studying and during a long day of work. 


Garden Tea
1 part Purple sage leaves
1 partLemon balm
1 part Peppermint or spearmint
1 part Rose petals 

Medicinal Properties – this tea is another general pick me up combining the benefits and flavors of several different herbs and spices. Sage is ideal for many different throat-related issues and is commonly used in gargles. It also acts as a wonderful digestive stimulant which means this could be an ideal after-lunch tea.


Lavender-Mint Midnight Tea
1 part lavender
4 parts peppermint (or spearmint if you like a milder mint)

Medicinal Properties – as we said earlier, peppermint is a very soothing and calming flavor, and combined with lavender, this is an ideal middle-of-the-night tea. If you're having trouble falling asleep or falling back to sleep after having woken up, this is a tea we recommend. Lavender is regularly part of different cures for insomnia, both as a tea and as aromatherapy. It helps to calm the mind, which is why many use it in this fashion. 


Summer Sunshine Tea
1 part chamomile 

¼ part lemon peel
1 part peppermint
1 part sage
Pinch clove

Medicinal properties: This is very much a calming tea while also feeling like you soaked up the sun. The warmth from the clove and lemon combined with the calming effects of the chamomile and peppermint make this tea a wonderful one to have on hand in the middle of winter.


Which one of these tees are you most eager to try? Let us know over on our Facebook page, as always we love to hear from you!


While you wait for your tea to brew, you might need someone to take a look at your ice maker to get you through the summer heat and cool down that delicious tea. (All of these can be served over ice! You'll just need to double the recipe to ensure the flavor isn't lost.) Fortunately, Appliance Rescue Service does indeed service ice makers. You can reach out to us via our contact page, or by giving us a call ((214) 599-0055). We'll work with you to choose a date and time that works best for your schedule.