Kickstarter in the Kitchen

 Bringing Innovation To The Kitchen 
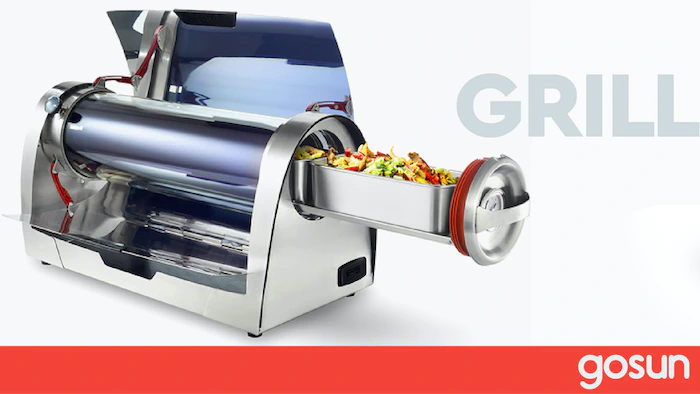
  • GoSun Grill

    Company Name: GoSun

    The GoSun Grill is very much what the name suggests, a solar grill. Think about the little charcoal grills that people take while traveling during the summers. Now replace it with a grill that doesn’t need any fuel. It doesn’t need chips, tanks, or fluid. All it needs is a mostly clear sky, and you can grill without having to worry about accidentally lighting your eyebrows on fire. (We haven’t done that, no, why do you ask?) You don’t even have to watch over it. Set the timer and go do hang out with your family while it cooks. We love this idea not only for the innovation but also because it is a very clean product with little mess or risk. They even solved the issue of being able to cook at night with a ‘thermal battery!’

    Min pledge & what you got: $1 or more would get you the Creation Book for the GoSun Grill. The ebook was not only a behind-the-scenes look at the story of the grill, from ideation to creation, but also how the company builds products that others haven’t thought of.

    Max pledge and what you got: At $3200, one person would be given the chance to meet and work with the team of designers for GoSun. They’d head to the company retreat in Mendocino County, CA to learn about the next project for GoSun, test out the latest tech and stay for three nights.
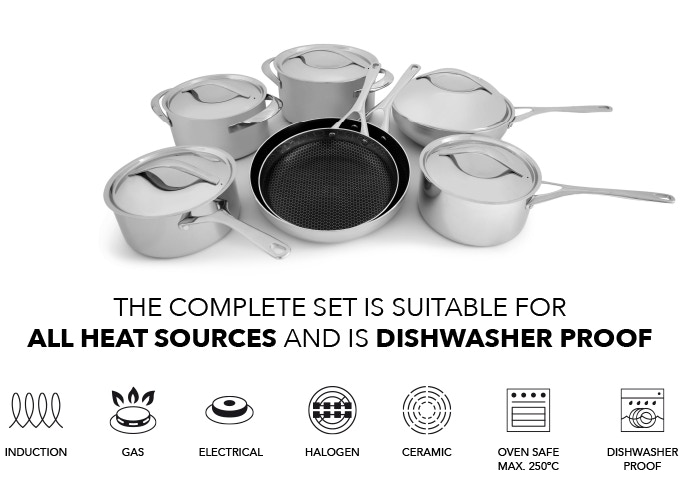
  • Blackbeard Cookware Set

    Crowd Cookware

    The Blackbeard pan was the first item that Crowd Cookware brought to market, and people wanted more, which brought this amazing set of pans to Kickstarter. They’re stainless steel and work for any heat source on the market today, including induction stoves. They’re even supported by Michelin chefs around the world.

    We love this one because it’s entirely made up of products that the company’s fans requested. Even the minimum pledge is made for people who wanted something very specific. Rather than offering a large number of items, or increasingly… spectacular pledge levels, you could get individual pieces that they were testing out or get the entire set at a greatly discounted price.

    Min pledge & what you got: For roughly $20, you’d get a lid that fit both their frying pan and wok.

    Max pledge and what you got: For roughly $306 you got the entire set of Crowd Cookware’s pans and dishes. A versatile pan set that every chef could use, without having to purchase multiples of anything you didn’t need.

    Queen Anne Saucepan ø16cm/6.3” - 1.7L

    Queen Anne Saucepan ø20cm/7.9” - 2.8L

    Concord deep casserole ø20cm/7.9” - 3.6L

    Concord deep casserole ø24 cm/9.5” - 7.5L

    The Blackbeard frying pan ø24 cm/9.5”

    The Blackbeard frying pan ø28 cm/11”

    The Blackbeard ø28 cm/11” wok

    Blackbeard’s Tricorne, lid for ø28 cm/11” Blackbeard frying pan and wok

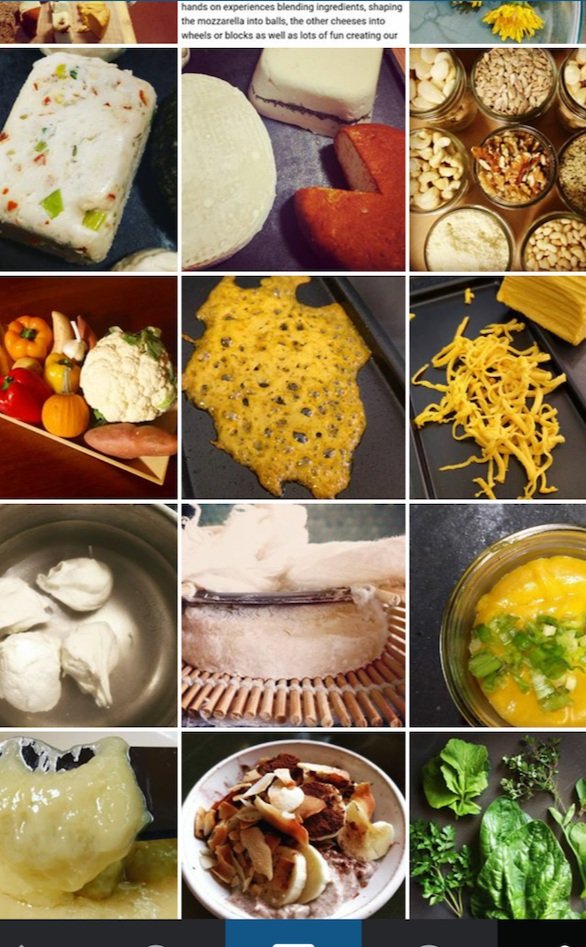
  • DIY Dairy-Free, Vegan, Paleo Cheese Kits

    Urban Cheesecraft

    Imagine a world in which you cannot have cheese. It’s a sad and horrible thing to think about, we know. Many people, due to dietary restrictions or personal beliefs, are unable to enjoy the wonders of brie, gouda, mozzarella or even provolone! Urban Cheesecraft said, “Why, though?” The owner Claudia came up with the idea of DIY kits and recipes that would allow anyone, anywhere, to create their own delicious cheeses without access to or need for a dairy cow. She had already made kits and a book for you to make it at home, and decided the next goal was to do the same for Dairy-free cheese! (and from what we can tell, the reviewers love both varieties!)

    Min pledge & what you got: $5 supported the product and got you a BIG CHEESY Smile!

    Max pledge and what you got: For $5,000 you got a travelling DIY cheese teacher! At this rate Claudia would travel anywhere in the United States to teach 20 students to make dairy-free cheddar, mozzarella, and to enjoy it along with a delicious spread of food at the same time. (As cheese lovers, we have to say this caught our interest immediately.)
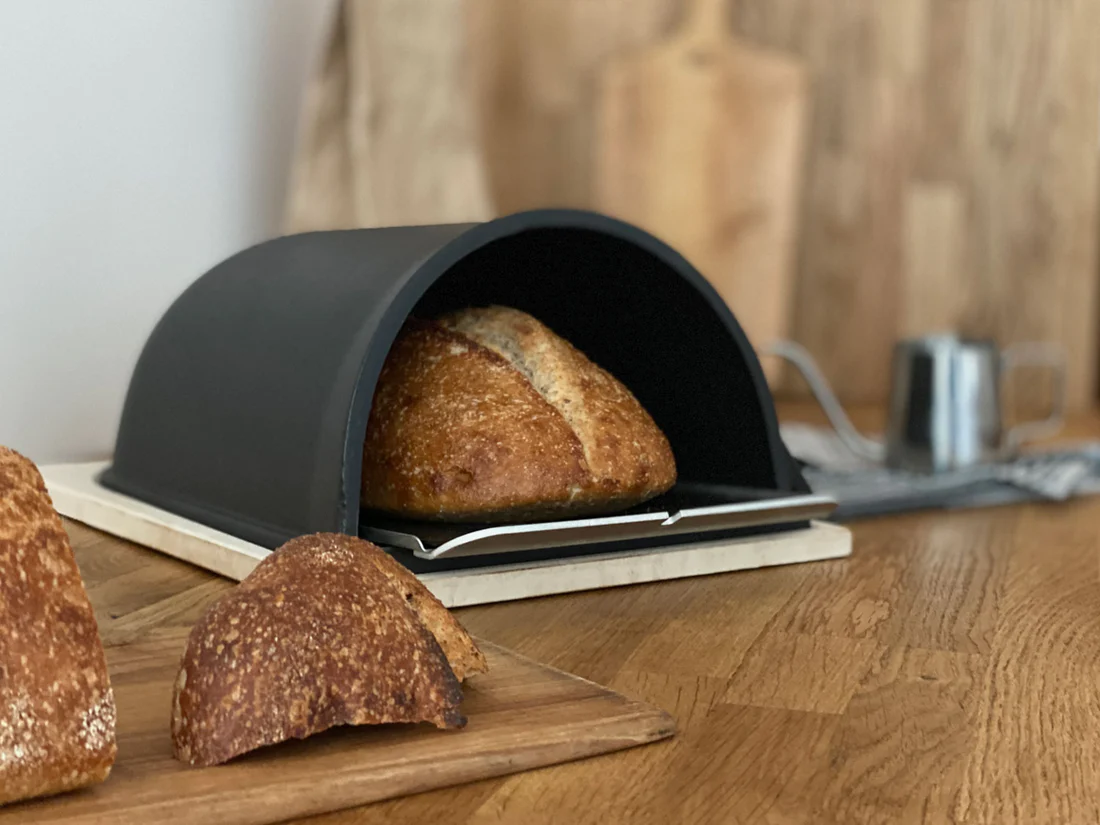
  • Fourneau Bread Oven 2.0

    Strand Design

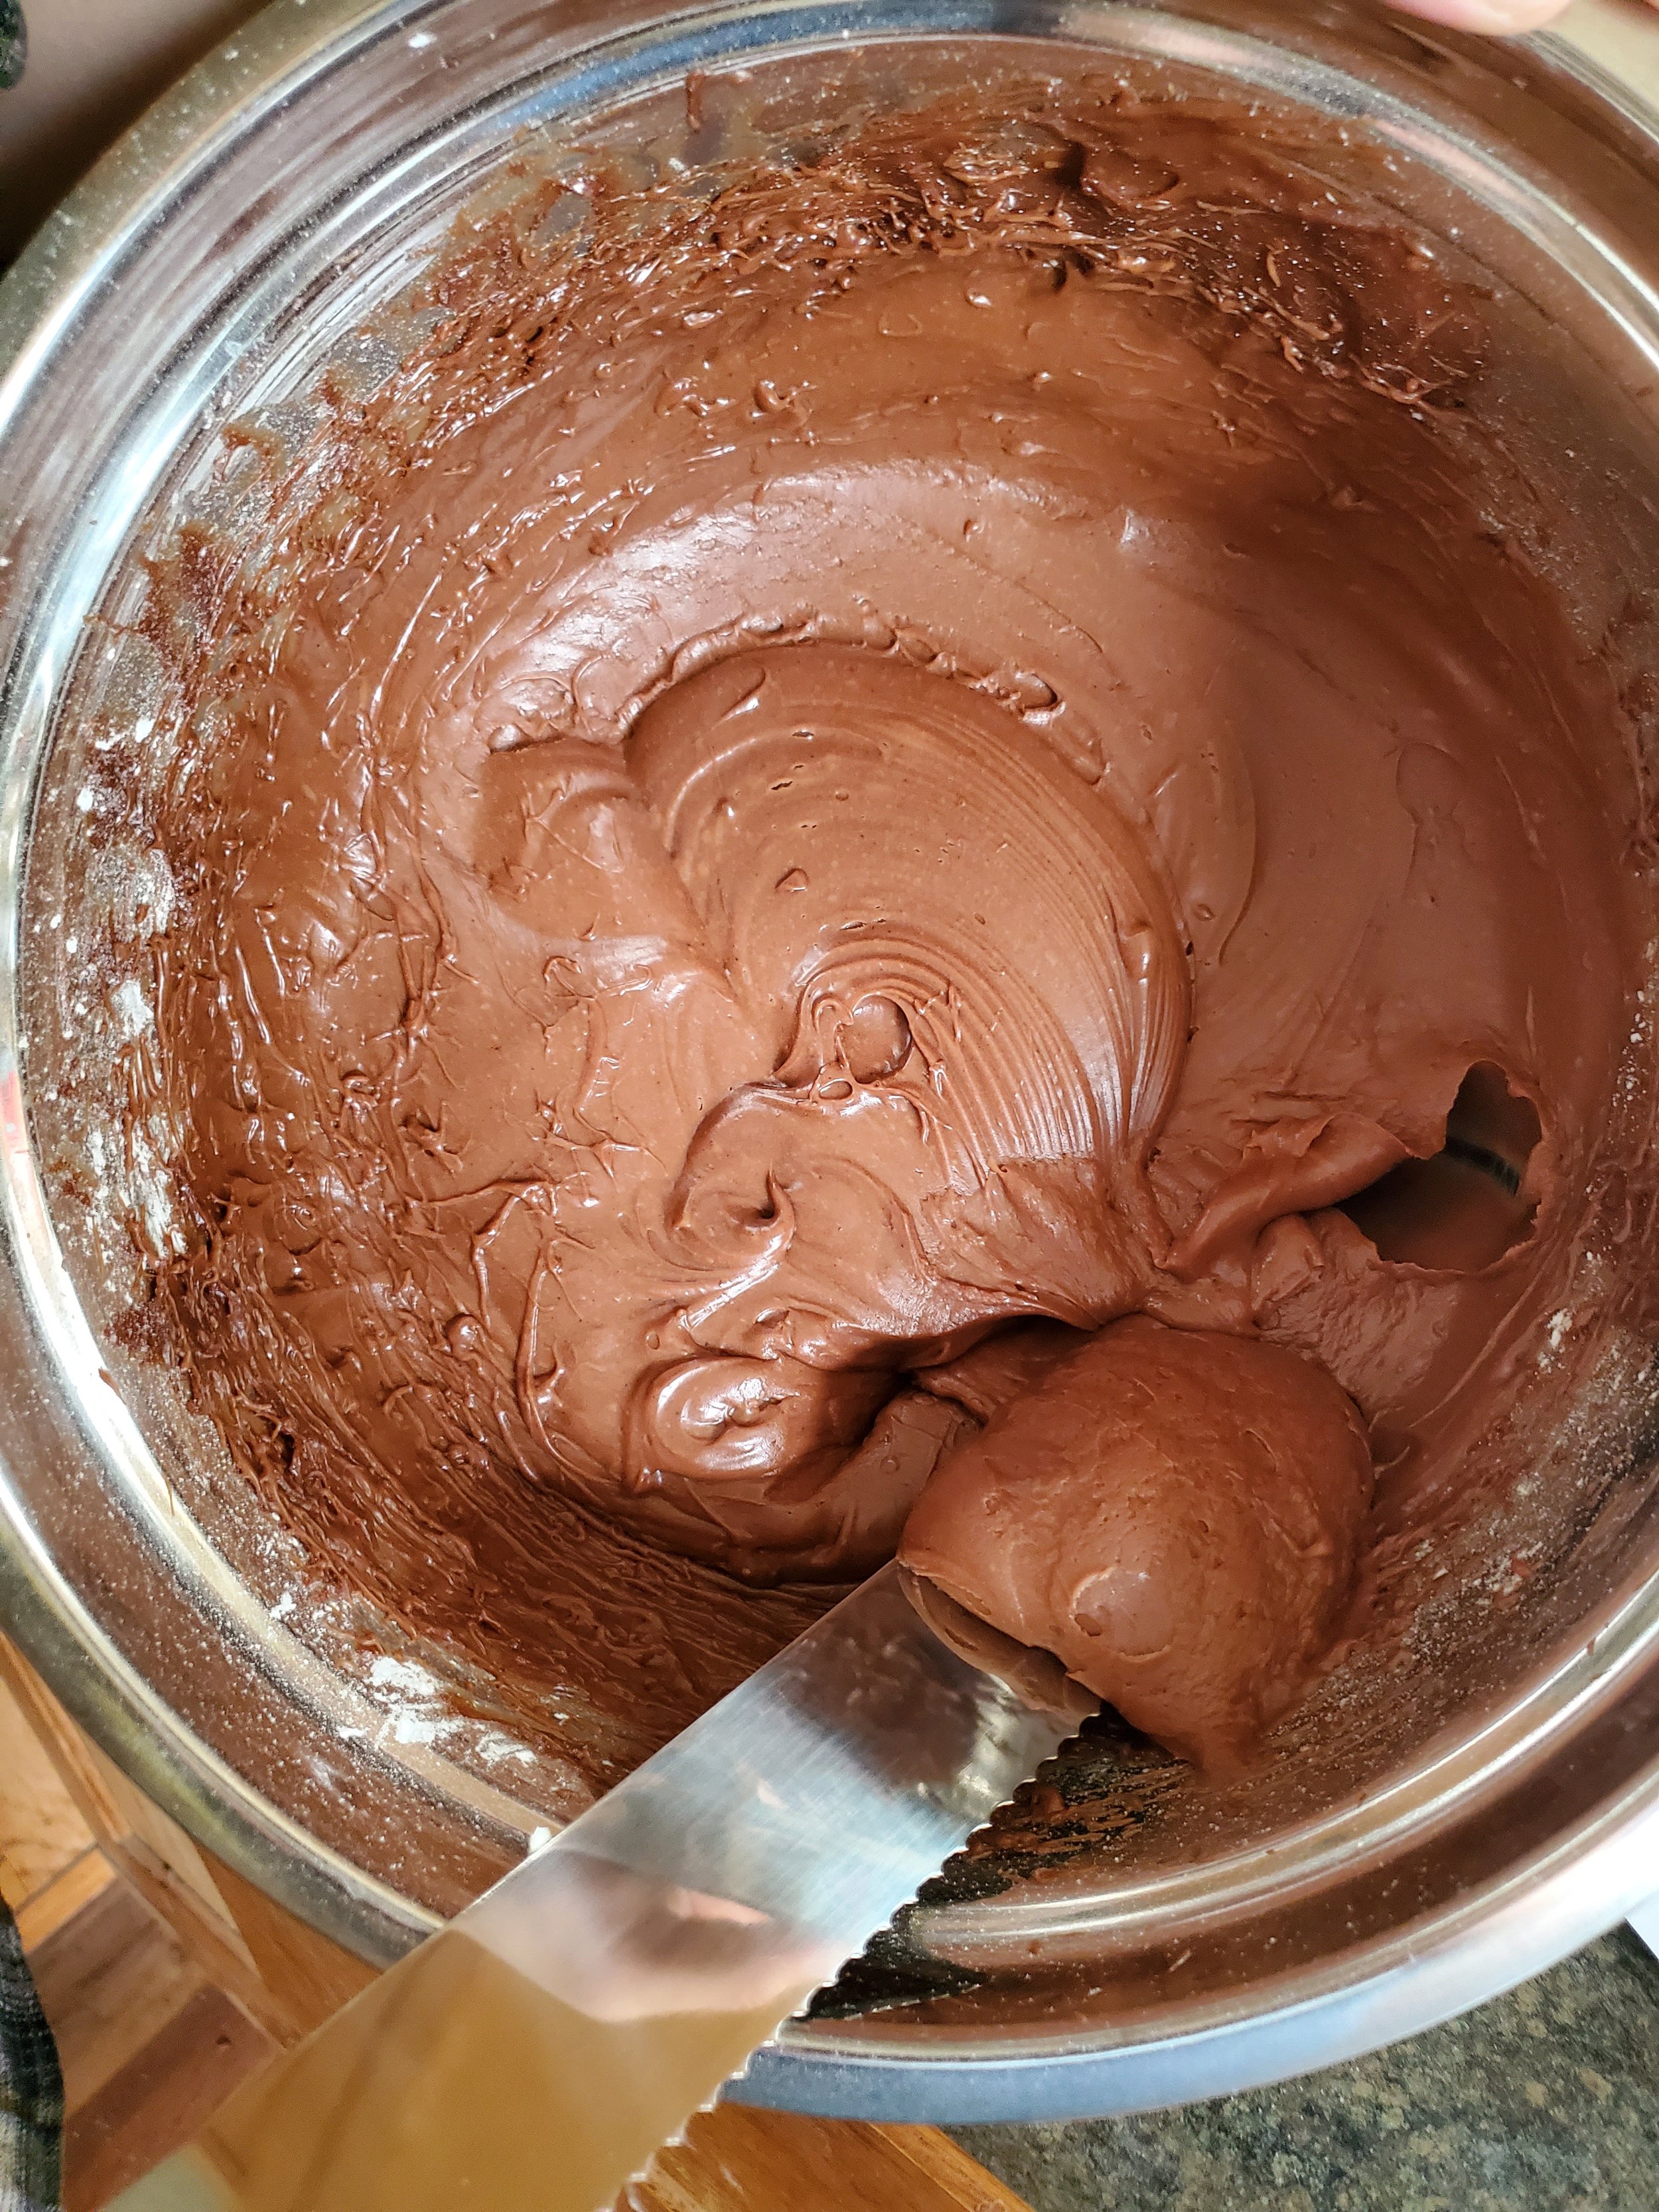
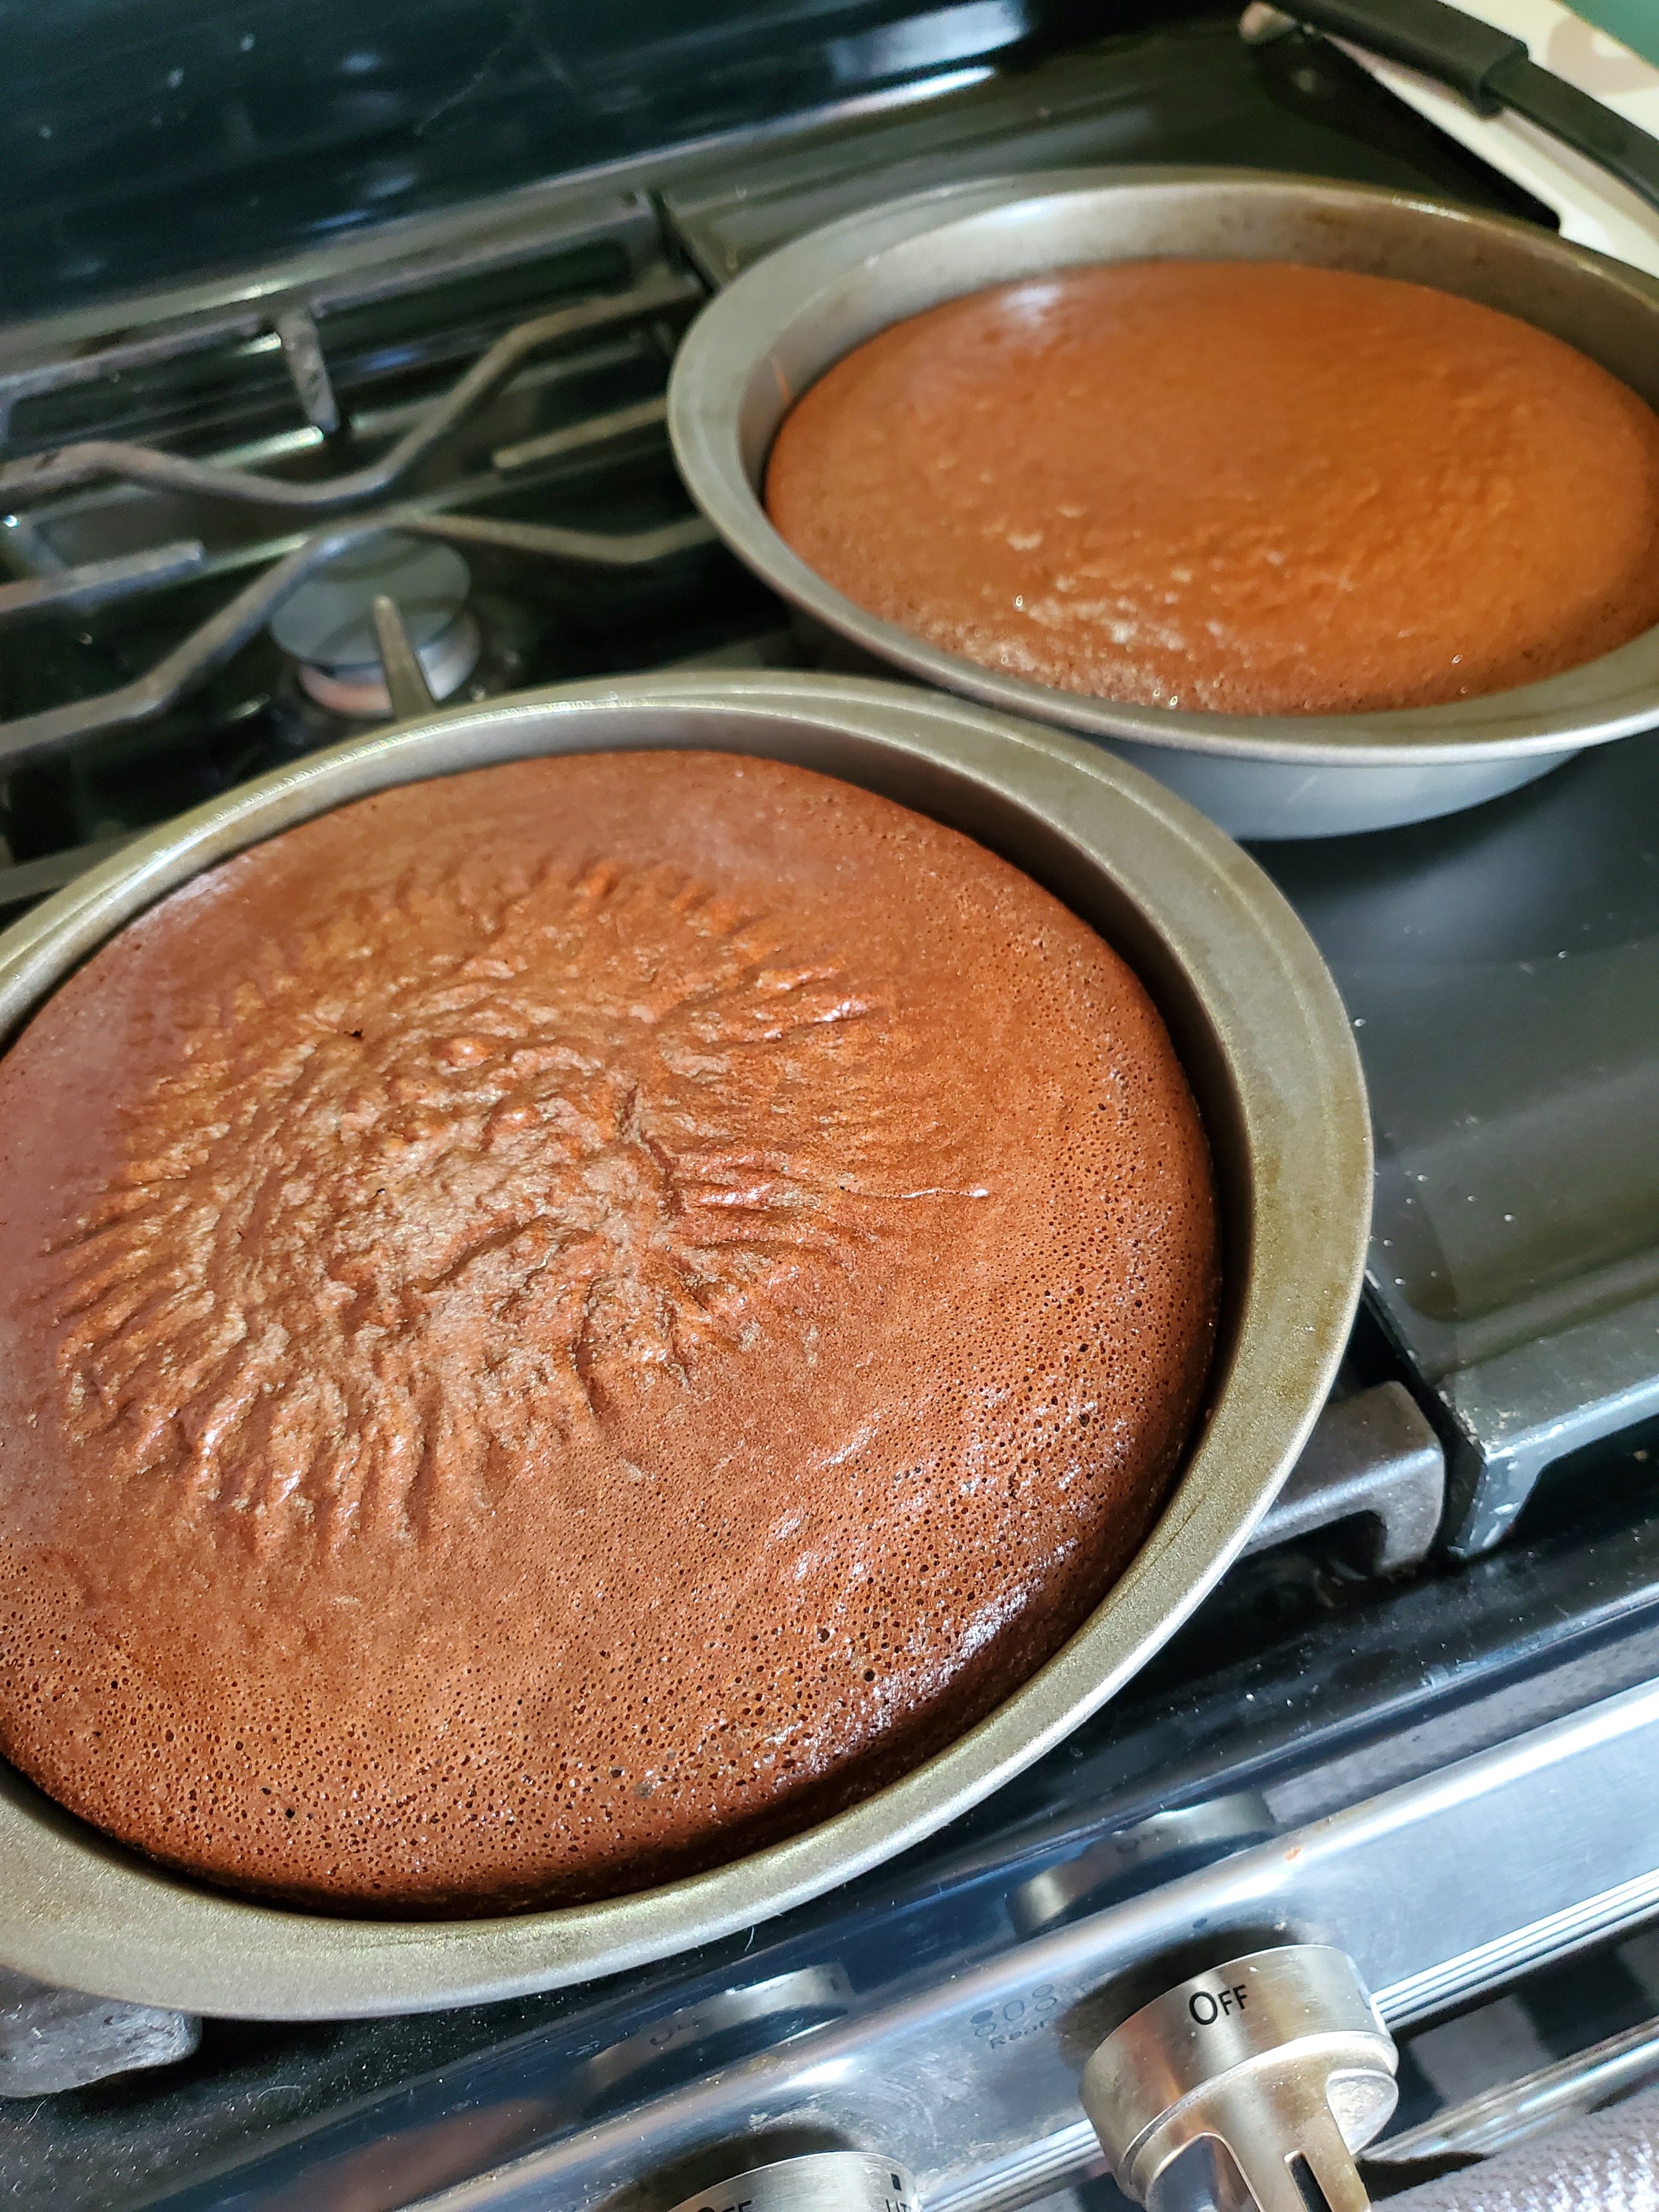
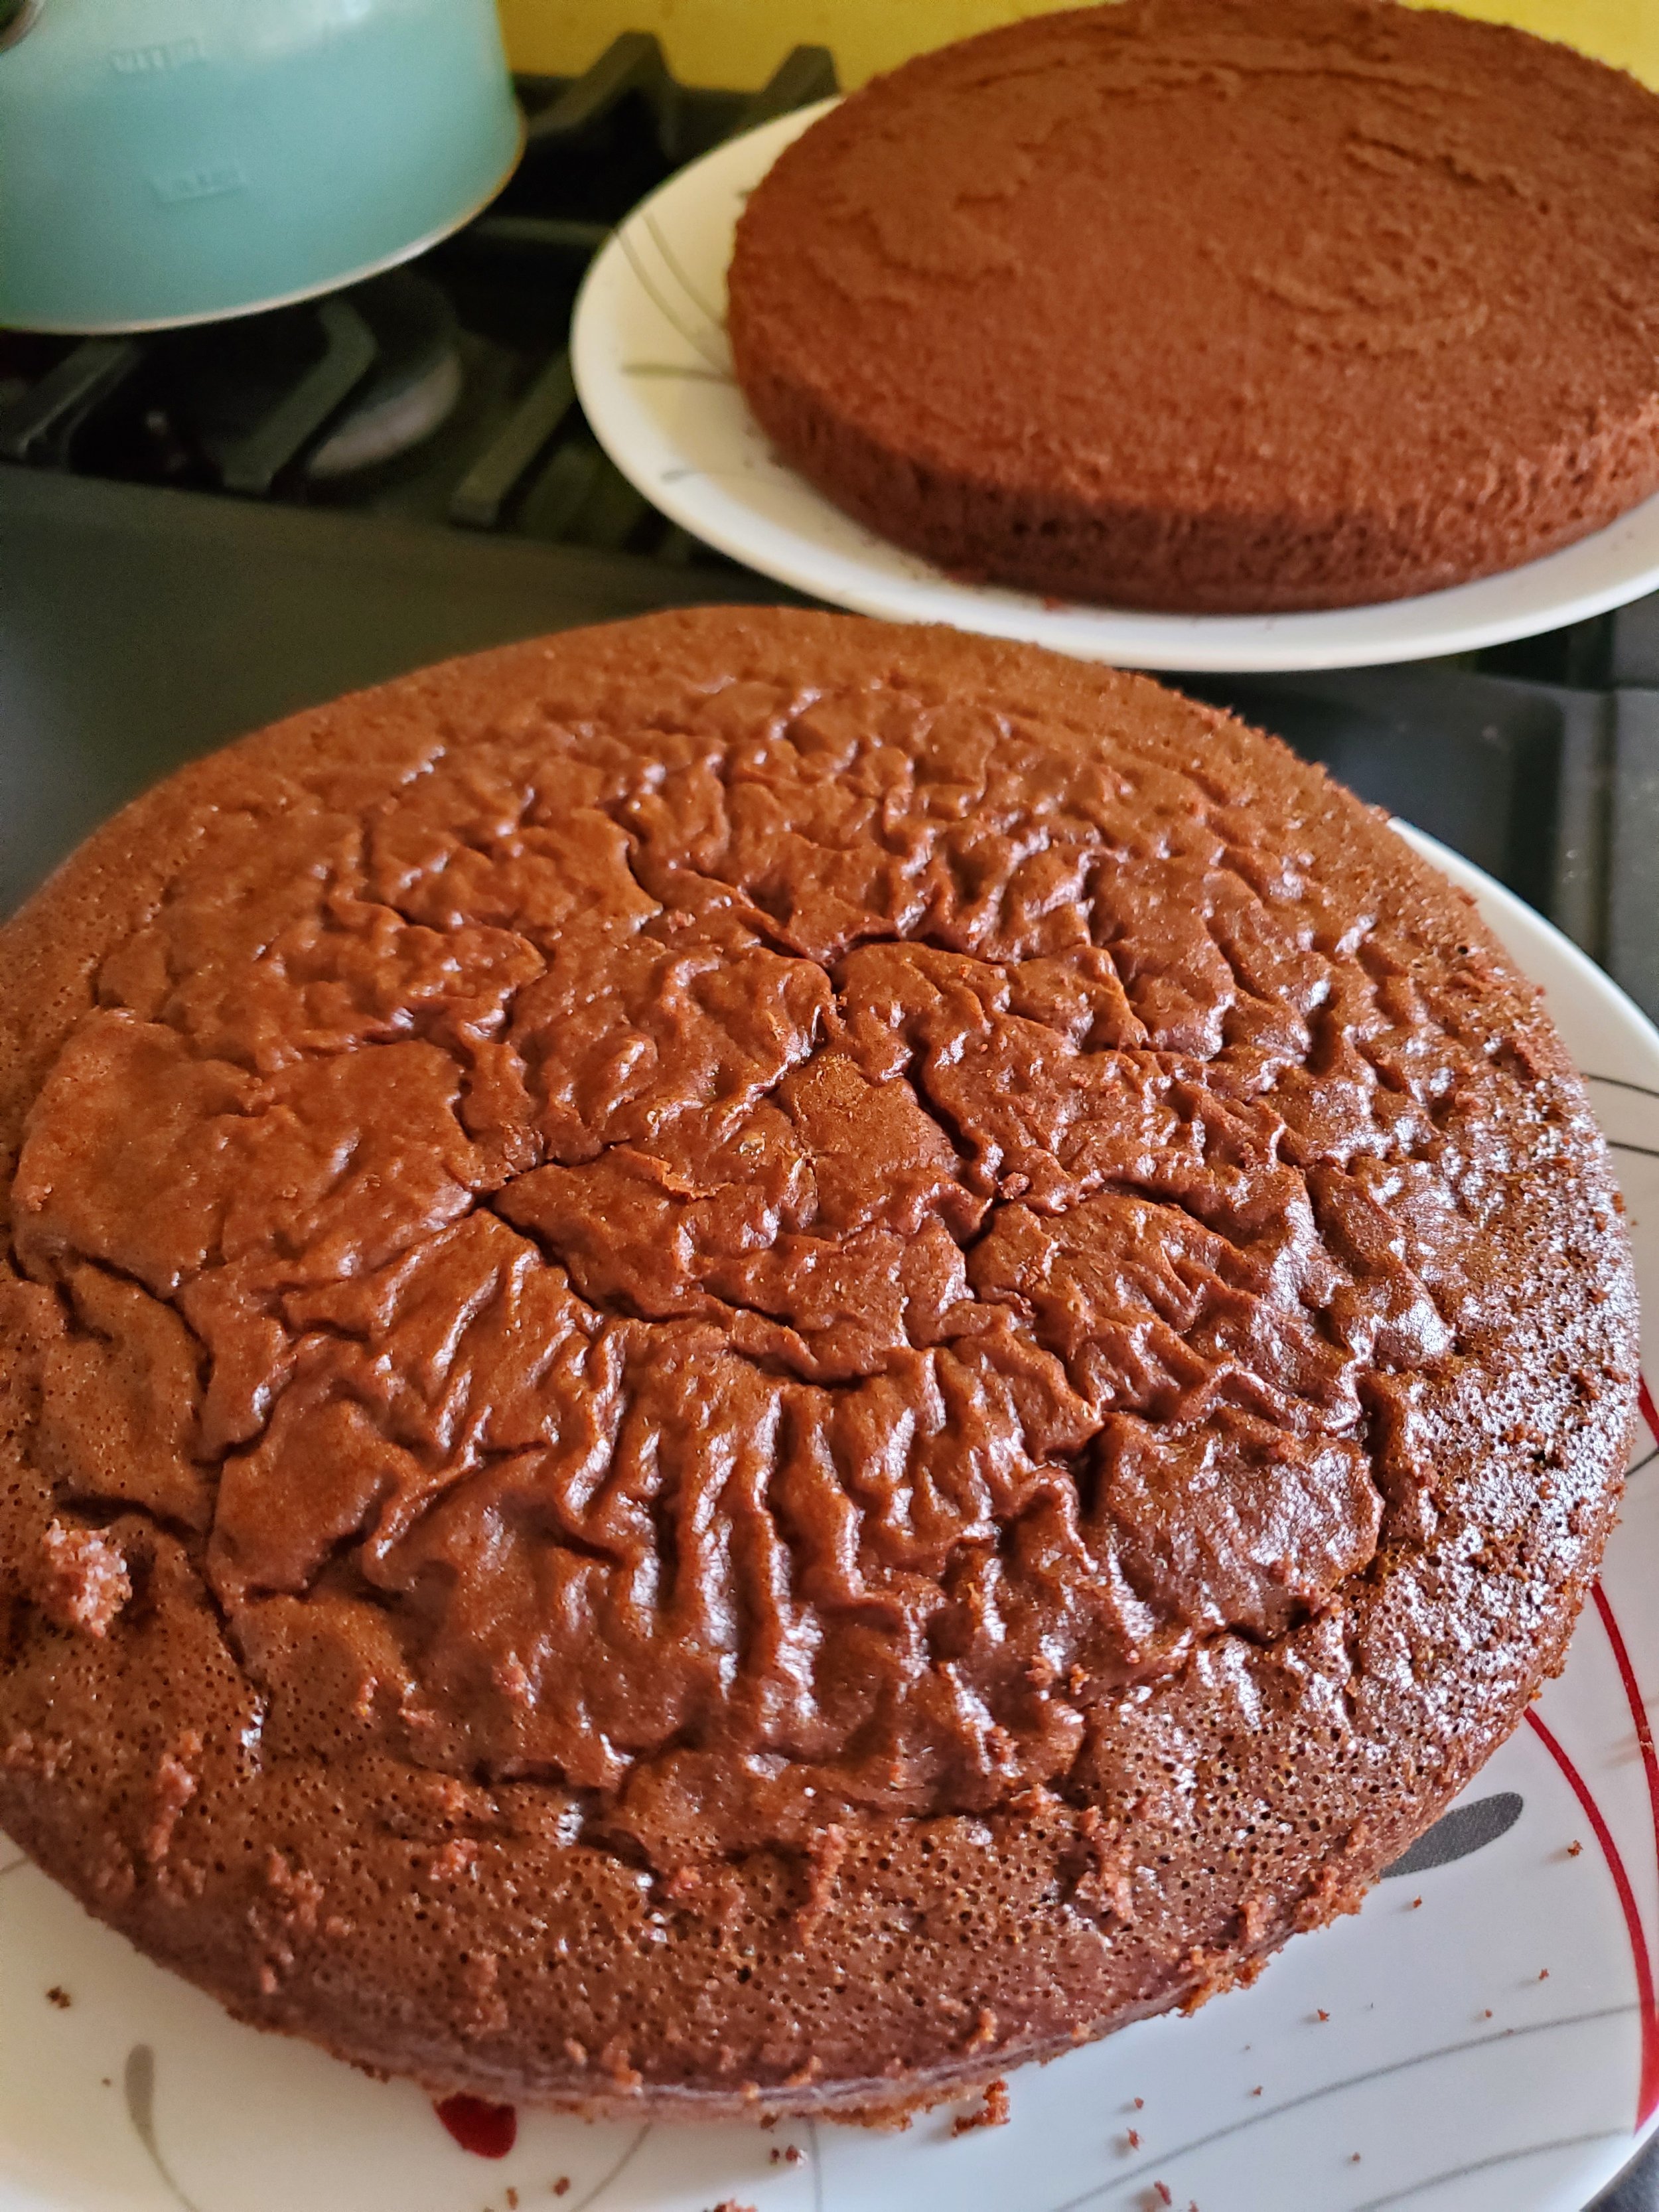
    Ahead of the curve by 3 years, Strand Design created the Fourneau Bread Oven 2.0, an upgrade on an earlier design of theirs. This oven works inside your regular oven, with a special base to generate steam and provide an even heating surface. The pan slots in easily over that, to give you an easy way to move the dough around, without having to assemble the bread oven around the dough. Then there’s the cloche that sits on the base to trap all the heat and air, and give you a perfect crust. All of this fits together to give you a wonderful loaf of bread every time, as if you were working with an old fashioned baker’s oven. It’s also safer than other options on the market, as the entire assembly stays inside the oven the entire time. Instead, the tray comes out, which is just as easy to remove as any normal cookie sheet. What’s not to love about being able to take your standard oven and get a perfect loaf of bread?

    Min pledge & what you got: For $5 you would get a digital cookbook for all sorts of bread recipes. Sure you might not be able to get the same quality as if you had the Bread Oven, but you could still experiment with making your own bread!

    Max pledge and what you got: For $280 you would get the Forneau 2.0, as well as an upgrade kit for your original Forneau Bread Oven. So, for that price (only $65 more than buying just the 2.0) you would upgrade the bread oven you had so you could work with two of them at the same time. That is a fantastic deal in our opinion. Think of all the bread you could make!

    (and it might even pair well with the Dairy-Free cheese kits, or even just DIY cheesekits.)
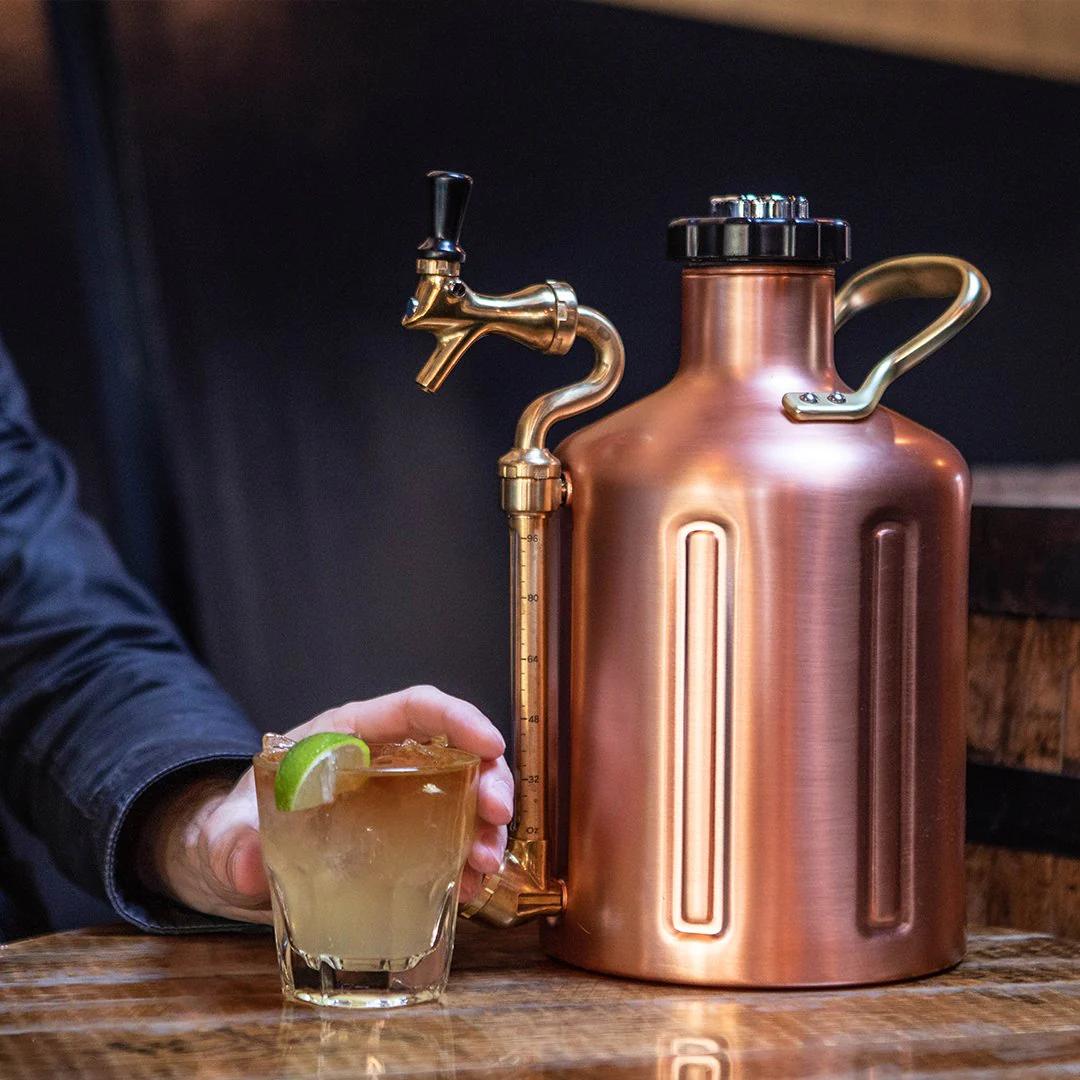
  • UKeg Pressurized Growler

    Growler Werks

    Last but not least we’ve got one that a lot of people in the Dallas area are going to love, a way to keep your microbrew fresh! Beer brewing is undergoing a renaissance right now, with people of all ages learning about one of the oldest crafts in the world. The downside to that is that once your microbrew is open, it goes flat. Really fast. GrowlerWerks wanted to solve that so they came up with the idea of the UKeg pressurized growler. “One that doesn’t let air into your beer, maintains perfect carbonation from the first pour to the last, and keeps beer cold for hours – all in a product you'll love showing off at your friend's next BBQ or party. GrowlerWerks was created by local Portlanders who love craft beer. We've drawn on a combined 47 years of engineering and product-design experience to make a better way to store beer, so it always taste exactly how the brewmaster intended.”

    Min pledge & what you got: $5 got you two GrowlerWerks coasters to show off and get people talking about beer.

    Max pledge and what you got: For $800 you got a brewery tour with the GrowlerWerks team in Portland, OR, as well as getting to pick your own uKeg from the design shop.

Kitchen Trends for 2023

What We See Happening In the Heart of Our Homes

What is in, in 2023, and what's on the way out? This week we're looking at the trends designers are predicting around our kitchens. We're looking at the cabinets, surfaces, paints, and materials. Everything is up in the air this year, with just one thing staying constant, the kitchen is the place to be. 


Cabinet Trends in 2023

Mixed Metals

Courtesy of Vivian Homewares

As we predicted last year, we're seeing lots of different metals and finishes mixing in the kitchen. Stainless is no longer the default; people want brass, bronze, nickel, and more, giving a rich, layered look.


Oversized Hardware

Courtesy of Kulpany Handle store

Many designers, both for cabinets and kitchens in general, are seeing more requests for oversized hardware in the kitchen. Since we are mixing metals so much, it's not surprising that people want the hardware for their drawers, shelving, and doors to get a spotlight.


Creative Cabinet Options

It's no longer about whether your cabinets are recessed versus floating. People are getting creative and going even further against the idea of cabinets being meant only to store and hide items. We're seeing unique and interesting outside designs for them, such as using butcher block cabinets.


Drawers Please! 

Building off the last point, the trend of having only lower cabinets is morphing into having only lower drawers. People want the ability to pull out what's inside the cabinets for easier access, and we don't blame them.


Furniture-Like Cabinets

Courtesy of Homebunch

Because we have more drawers and people want them to look like the rest of this house and make it appear more furniture-like. They're adding details like trim and specific styles of hardware that are seen in other rooms, such as bedrooms or bathrooms.


Sustainability is Going Strong

People also aren't hesitating to use unconventional materials. Sustainable materials are here to stay, and that trend is only getting bigger year after year. Materials like bamboo or wood that's harvested sustainably or built using scraps from other industries. All of these are being experimented with to see what brings the best look.


Surface Trends in 2023


'Soft' materials 

Although this one doesn't apply just to the surfaces within your kitchen, many people are going for more neutral and soft materials. In 2023 we see very neutral colors on the rise, like light oak, linen, and terracotta.


Stone 

Stone is everywhere we look this year. People are loving having stabilized stone in all sorts of unique colors. They're using them on the ceilings or to wrap around their Islands. And they are absolutely right to do so. These stones are gorgeous, and we cannot wait to see where else people use them.


Backsplashes In Solid Pieces 

Courtesy of MyGlassArtworks

Bouncing right off, the last point is using stone or other materials such as wood or resin in one giant slab for the backsplash. Subway tiles are considered to be officially out as of this year. And although we expect to continue seeing them as a trend, at least it seems that having a solid slab is on the rise.


Color Trends in 2023


Bold

With colors being chosen like Viva Magenta, we're seeing that people aren't scared to go bold in their kitchens. More and more unexpected and bold color choices and combinations are being shown off in homes large and small. And this is a trend we don't expect to go away any time soon.


Unexpected Places 

Courtesy of Christie Chase

Just like we called in an earlier post of ours, people are painting the most unexpected places to brighten up their kitchens. It's no longer just your walls or cabinets that deserve the chance to shine. It's your kitchen island. Or the insides of drawers. Or even your ceiling! All of these places and more are a chance to blend together to create a space that is uniquely yours.


Blues and Greens 

Blues and greens are still a very prominent color pairing within kitchen design. As we pointed out last year, people want their homes to be places to shelter to be safe in all aspects. And blues and greens are very calming and soothing colors for many of us.


Brights and Woods 

Right after that, though, there's nothing that says those blues and greens have to be pastels or muted tones. People are absolutely willing to take bright greens or vivid blues and pair them with rich woods. And the pairing works really well. We expect to see this one continue for quite some time as people try out different combinations and different woods come and go in popularity. 


Details and Miscellaneous Trends in 2023


Unique Finds

We've mentioned in the past that people no longer see the point in keeping their personality out of their kitchens; this is another factor that's proving true this year as people are bringing more and more of their art into the kitchen. Whether it's unique finds from their travels, things they've created themselves, or things they've picked up in thrift stores and antique malls, the kitchen is no longer seen as a sterile space. While we expect that pendulum to swing back at some point, it certainly isn't right now.


Statement Lighting 

You need to end custom lighting is another way people are looking to dress up their kitchens. 

Courtesy of Tomer Boutique

Instead of using recessed can lights, as has been done since the early 2000s, people see the value in having statement lights again. And when so many can be used to accentuate or highlights the colors and metals that surround them in the rest of the kitchen, it makes complete sense. We expect this one to stick around for quite some time. 


Recessed Outlets 

One thing that is being hidden away, though, is our electrical outlets! While having proper outlet placement in the kitchen is extraordinarily important, we find that the need for outlets that stick out is not nearly as appealing to us. We have showcased different options for recessed outlets in the past, and we're excited to see those and other options being made available to the common market.


What about you? What trends are you seeing in your neighborhoods? What are you excited about? What are you curious about? What are you bothered by? What trend do you wish would come back? Let us know in the comments below or over on our Facebook page. As always, we love hearing from you, and we want to know what your thoughts on the matter are.


If you've wound up on our site because your kitchen appliances are malfunctioning, fret not! Give us a call at ((214) 599-0055) or head over to our contact page. At Appliance Rescue Service, we'll work with you to find a date and time that works for your schedule. Our top goal is to get your home running smoothly again.

Chocolate Pecan Cake for a Special Date

Or Just For Whenever You Feel Like It, It’s Cake After All!

It’s almost time for the best day ever! No, we don’t mean Valentine’s Day, we’re talking about the day after, when all of the chocolate goes on sale! Now is the best time of year to snap up all sorts of delicious chocolates and make them into fun new desserts. This year, to celebrate, we made a layered chocolate pecan cake with frosting so rich and delicious you’ll have to force yourself to walk away.

  • 4 ounces unsweetened chocolate

    ⅔ c unsweetened, non-alkalized American-style cocoa powder (normally we’re all for substitutions, but due to the chemical reactions, you need to get specifically this type of cocoa)

    1 ¼ tsp baking soda

    ¾ c boiling water

    1 ⅓ c unsifted cake flour

    1 c all-purpose flour

    ¾ tsp baking powder

    ¼ tsp salt + a pinch

    2 ½ sticks unsalted butter, at room temp

    5 large eggs

    1 c sour cream

    2 ½ tsp vanilla extract

  • ⅔ c heavy cream

    ⅔ c granulated sugar

    1 Tbsp unsalted butter

    1 ½ Tbsp light corn syrup

    1 tsp vanilla extract + 1 ½ Tbsp vanilla

    8oz milk chocolate chips

    2 ½ oz unsweetened chocolate

    11 oz of cream cheese

    2 - 2 ½ c powdered sugar

    1-2 tsp water

  • Two 9 Inch round cake pans

    Sifter

    Heavy-bottomed sauce pot

    Several small bowls for ingredients

    Parchment paper

    whisk

    Electric mixer or stand mixer

    Silicon spatula

    Icing knife

    Wire racks

Making the Cake 

Let’s start by taking your chocolate, for both the cake and the icing and getting them chopped up and set into their own bowls. You don’t have to dice them or make sure they’re even, what matters is breaking it up so that the melting can happen more easily later. 


Next  up, let’s prep the pans and the oven. Set one of your oven racks into the middle of the oven and set it to preheat to 350*F. While that’s ticking away, take up your two 9-inch, round cake pans and parchment paper. You’re going to want to generously grease the bottom and sides of the cake pans and then insert rounds of the parchment into the bottoms. Then grease the parchment as well. Once you’ve done that, take up a little bit of all-purpose flour and dust the pans. Tip the pans from side to side, making sure you have everything covered, and then tap out the excess over the trash. 


Next up, pop your unsweetened chocolate (the 4oz you need for the  cake, not the amount needed for the icing) into the microwave. Microwave it on high power for 20 seconds, remove it and stir. Continue this process back and forth until your chocolate is almost melted. Once you can see the melted edges, stir continuously and allow the residual heat to melt the chocolate the rest of the way through. 


In a medium bowl, stir together your cocoa powder and baking soda until well blended. Pour your boiling water over the mixture, stirring consistently. It’s going to bubble up, and that is the reaction you want which is going to make the cake light and fluffy and so tasty. Let that cool while we move on to mixing the ingredients. 


Take a sheet of parchment paper and lay it down on your counter and grab your sifting mesh. Sift together your flours over the paper.

In a separate large bowl, using a mixter on medium, beat your butter until it’s light and fluffy. You’ll need to scrape the sides down a few times as you, as the butter gets tossed everywhere by the mixer. Next, beat in one egg at a time, until just blended. Then add in your cocoa mixture and continue beating, still at medium, until the mixture is free of lumps. Again, you’ll need to scrape the sides down as you go. The mixture might look kind of curdled at this stage, it’s ok. 


Now let’s grab the chocolate we melted earlier. If it’s still warm and runny, that’s great! If not, pop it back into the microwave for a few seconds until it is nice and fluid again. Then add it into the batter until it’s smooth and fully incorporated. 


Switch the mixer down to low and beat in half of your dry ingredients. Once those are mixed in, add both the sour cream and the vanilla. Mix that together for 1 minute, scraping the sides of the bowl down as needed. Then beat in the rest of the dry ingredients just until the batter becomes smooth. 


Split the batter between the pans, using the  back of a spoon to spread it to the edges. Back it in the oven for 25 to 35 minutes or until a toothpick inserted into the center comes out clean, but still moist and the cakes are starting to pull away from the sides of the pan. Transfer the pans over to a wire rack and let them cool completely. (Don’t do what we did and make the icing at this time.) 


When the cakes are fully cooled, carefully run a knife around the side of the pans and under the parchment. Go all the way around and then rap the pan on the counter to loosen the parchment from the bottom. Grab a plate and holding it tight against the top of the plan, flip the cake onto the plate and remove the paper. Once both cakes are out of their pans, give them a few more minutes to cool. 


Making the Frosting


Now that your cakes are on their way to being completely cool, it’s time to make the icing!

Take your 2-quart saucepan and put that on the stove, over medium-high heat. You’re going to add in, in order, your butter,cream, granulated sugar and then the corn syrup. (it’s best to do this quickly so nothing scorches, but that’s also why the butter goes in first.) Stir consistently while everything bubbles and melts and begins to blend. You can wash down the sides of the pan using a pastry brush in warm water, although we found this to be difficult. 


Once you’ve brought it up to a boil, keep it there for 3 minutes, stirring constantly. When the 3 minutes are up, remove it from the heat, add in the vanilla mixture and your chocolate until they completely melt. (It’s ok if they look slightly separated at this point.) 


Transfer the mixture to a large bowl and grab your mixer again. Turn it on to low speed and beat in your cream cheese, one chunk at a time. Continue beating until all of the cream cheese is mixed in, scraping down the sides as needed. 


Next up, add in one cup of powdered sugar at a time, beating just to incorporated each time. Now raise the speed to medium-low and beat until the icing is completely smooth, approximately 1-2 minutes. It should be cool to the touch at this point.

If the frosting is too thin, add in up to ½ cup more of powdered sugar, until fully incorporated and smooth.  Let it sit for 5-10 minutes, and then ice your cake. Because of the base, this is not a frosting you can make ahead of time and use later. 


Spread a tiny bit of icing onto your serving plate of choice and place your first cake layer centered on top of it. Add a dollop of icing on the center and spread evenly. Cover the icing in pecan halves and then add a slightly thinner layer of icing on top of that. Place the second layer of cake and then put icing on top of that. Spread the icing evenly on top, and then use it to coat the sides. When finished, wrap the bottom of the cake in a layer of pecans. 


Slice and enjoy!


With that, enjoy your cake, and eat it too! (After all, what’s the point of a cake if you can’t?) 

If you do make this one, let us know over on our Facebook page! We love to hear what y’all get up and what changes you make. 


If your oven is giving you fits in trying to make this, reach out to us on our contact page or by giving us a call at ((214) 599-0055). We’ll work with you to set up an appointment that works with your schedule. Our goal at Appliance Rescue Service is to get your home running smoothly again.

Energy Efficient Refrigerators: What Makes Them Tick?

And Which Ones Are Worth Your Money?

Did you know that out of all of your appliances, your refrigerator uses the most energy within your home? According to the department of energy, it uses about 5% of your total electricity every month. It doesn't sound like a lot, but in comparison to how much everything else uses, it is. The only things in your home that use more energy are your air conditioning, space heating, and water heater. Fortunately for you, there are options for improving your current fridge or replacing it. 


So how do companies make a refrigerator energy efficient? Currently, three options are commonly used among companies like LG, whirlpool, and Samsung.


The first is a little like Papa Bear in the story of Goldilocks. Manufacturers take the casing of the fridge and expand it so that they have more space to fill in with insulation. This does come with several drawbacks, though. 

-a larger refrigerator is going to draw more energy. 

-the larger the refrigerator is, the higher the price tag is. More materials are used to make the product, and manufacturers want to recoup it.

-If you're looking to replace your fridge with a newer one, you must keep that larger space in mind. It is possible and has happened more than once that a client will have to completely remodel their space to fit the new fridge.


Another way manufacturers increase their refrigerators' energy efficiency is a bit more like Mama Bear. Instead of making the case bigger, they keep it the same size and just stuff more insulation into the existing space. This keeps it a standardized size, but it decreases the internal capacity of the fridge. So it's a bit like swinging too far the other way.


Many homeowners, especially today, are looking for a blend of internal storage space and energy efficiency. And that's what brings us to the just-right version of a refrigerator. Instead of expanding the refrigerator or reducing the internal capacity, manufacturers look to new materials and technologies. Still keep the standard size case and fill the inside with more efficient insulation. Then they pair that with an energy-efficient cooling system that is more advanced. The downside is that since these materials are still not in common use, the price tag goes up accordingly.


We'll quickly take a look at some of the most energy-efficient refrigerators in different styles currently on the market. 


Best Top Freezer 

Model: Whirlpool WRT112CZJZ 

Price: $568

Biggest Pro: It's considered a very reliable refrigerator model that lasts for ages. 

Biggest Con: It's a very straightforward refrigerator and freezer, and there aren't any bells or whistles to it. 


Best Bottom Freezer

Model: LG LBNC15231V

Price: $1295

Biggest Pro: All shelves are adjustable, so you can set up the fridge any way you want. 

Biggest Con: For all that, it's only slightly larger than the previous model and doesn't have any additional features; it's double the price of the Top Freezer model. 


Best French Door Refrigerator

Model: LG LFC22770ST

Price: $1679


Best Side By Side Refrigerator

Model: LG LSXS26326S

Price: $1500

Biggest Pro: It has the most interior space of all of the refrigerators on our list today. 

Biggest Con: As we said in the first section, a bigger fridge means more energy usage. 


Best Built In Refrigerator

Model: Thermador Freedom Collection T36BB915SS

Price: $11499

Biggest Pro: This one offers the highest reliability, customer satisfaction, and ease of use on our list. 

Biggest Con: It has wifi.  


What if you don't want to replace your refrigerator, though? Instead, you might look at making your current refrigerator more energy efficient. To that end, we have seven tips that can help you out.


First, organize your fridge. It sounds like such a simple thing and something many of us consider cleaning or trying to make our lives a little faster and a little easier. But it can actually be really good for your refrigerator's health as well. Your refrigerator relies on its ability to pump air through the fridge, typically coming from the Top, cycling down to the bottom, and then out through the vents at the bottom of your fridge. When the vents are blocked, the motor has to work even harder to force more air in to continue circulating. This causes many problems, from cold air pooling and even freezing some sections of the fridge and other areas being only slightly cooler than the ambient temperature of the room.


To solve that consider grouping things together in bins and drawers. This way, things don't get shoved to the back of the fridge over time.

Our next tip is to look after the seals on your doors. These seals or gaskets protect your fridge from warm air coming in from outside. However, when you're constantly opening and closing the doors to grab ‘just one thing you forgot’ or to get water or ice, those seals give way. Well, your fridge might be able to last 15 years, but those gaskets will give out after just a few, especially with constant opening and closing. So check once a year. See if they are cracking, rotting, or pulling away. If they are, call up your favorite repair company to come and have it replaced. Not only does that help with your electric bill, but it also means you'll be cutting down on wasted food.


A third tip for you, keep the fridge away from high heat. While this is much harder in Texas Summers, you can take small steps to help your fridge. Don't position your fridge so that it's right next to your oven, your range, or your dishwasher. Make sure that the refrigerator doesn't stand in direct light for long periods of time. All of these things lead to the outside casing of the refrigerator heating up and the motor having to work harder to try and ensure the inside is cool.


Another cleaning tip, keep your condenser coils clean. Those coils are how the refrigerator breathes essentially, and when they're covered in dirt and dust, your fridge can't breathe. Just like you start drawing deeper, harder breaths, if you have something obstructing your lungs, your fridge does too. Working harder means that your electrical bill will go up now, and it will shorten the life of your refrigerator. This means you'll have to replace it far sooner than you wanted.


One final cleaning-oriented tip, clean up the ice inside your freezer. This is a summing that you have a freezer attached to your refrigerator. The motor works for both of them, and if the frost is building up in your freezer, then you'll have that motor working even harder, trying to circulate air on that side to get around the obstruction. So you can either regularly scrape off the ice that builds up or defrost your fridge and freezer on a regular basis. Both are options, and both will save you money in the long run.


Moving away from cleaning, try cooling your food before you put it into the fridge or freezer. So if you take food that is steaming hot right after dinner or right after you bake it, for example, and put it into the fridge, your fridge has to work to take the temperature down anywhere from 350° to 500° down to around 40°. On the other hand, if you let your food cool down on the counter prior to putting it away for storage, it only needs to bring it down from the ambient temperature of the room. Doing this means that the fridge doesn't have to work as hard, which cuts down on electricity usage. And that is what we are always hoping to do.


A final tip is to consider investing in a countertop ice maker. If you have an ice maker inside of your freezer or you use bottled water all the time, you have to constantly open your fridge and freezer. Instead, keeping an ice maker on the counter uses up a very small amount of energy in comparison to what your fridge draws every time you have to open it up. Given that we live in Texas, it might be more helpful to get an under-the-counter ice maker, which would be larger, but that is entirely up to you.


Wrapping all of that up, do you still have questions? Do you have any tips that maybe we missed? Let us know over on our Facebook page, as we always love to hear from you.


If you're here because your refrigerator just isn't getting cool enough even after you've tried to organize it or clean the coils, reach out to us. You can get hold of us by calling ((214) 599-0055) or by going to our contact page. Whatever the issue is, we'll work with you until you're satisfied that the problem has been fixed. Our top goal at Appliance Rescue Service is to get your home running smoothly again.

Hollywood Regency Decor: How To

How to Bring The Glamour To Your Home

If you’re looking for a new decor trend to match your outgoing personality, Hollywood Regency is it.  Even if you’re keeping your parties small, there’s nothing that says your style has to be. Hollywood Regency is all about glamour, sophistication and elegance in the home. 

Hollywood Regency style came about during the Golden Age of Hollywood and reflects the charm and sophistication of the 1930s. It mixes together the Art Deco glitz and glamor with  mid-century modern’s clean lines and throws in Victorian elements like velevets, tufting and bold color palettes. Roll all of that together and you’re starting to get the idea of Hollywood Regency. This isn’t a quiet design style. This is dramatic and bold, all about making a statement about who you are and what you like.  Hollywood Regency was inspired by the over the top interiors that designers created for the silver screen.


 The Hollywood royals loved the look of the polished glamour that they worked in and wanted to bring that into their homes. They employed iconic designers like Paul R. Williams, Dorothy Draper, and William Haines to create their homes, and they went big! They brought the same designs that looked great in black-and-white and brought in the attention to detail, color, texture, and finishes that make Hollywood Regency what it is. 


So how can you replicate it yourself? You might not be able to get Dorothy Draper or William Haines to decorate your home, but you can still get the looks that they created by paying attention to a few rules. 


1) There Is No Such Thing As Too Glamorous

This is the top rule for this style. Sumptuous fabrics, rich textures, layers of details, and luxurious accents. Think of it as opulent as a Queen’s jewel box and as comfy as you can make. Hollywood Regency doesn’t take itself seriously, so if you feel like you’re going over the top, you’ve nailed it. 

A room painted in black and framed in golden panels has three golden spiked lights hanging from the ceiling, with square cream sofas placed front and center. One is directly in front of the viewer and one is to the left and right.

Courtesy Inspiration Design Books


2) Be Strategic With Your Placement

Although you’re looking to create the opulent look, you don’t want your colors to clash. There should definitely be a singular color palette for each room so that it can be relished in, rather than run from.  Keep patterns to one or two in a space so that they don’t fight with each other, and stick to just one type of metal.  They look great on their own, so you want them to shine when you do highlight them. 


3) Keep Your Furniture Small-Scale

A golden frame of bars wraps around two cushions to form a chair with thin legs. It looks uncomfortable if we're honest.

Courtesy Everly Quinn

While it might sound strange, the furniture isn’t meant to be the feature point of the style. Hollywood Regency is all about open floor plans and parties, so having plenty of space to move is important. Instead, look to bright, glossy furniture with lacquered surfaces so that each piece pops. 


4) Pay Attention To Your Details

A mirror is framed in a bronze sunburst with irregular spikes making up the rays of th sun

Courtesy of Ballard Designs

Like we said in the last point, the furniture doesn’t command the space, so your decor is what does. Luxurious fabrics, metal hardware, crysta lights and objects de art are the requirement of the day. Velvets, silks and furs, Turkish rugs and golden hardware and patterns.  It’s about making things sparkle and shine. You can even bring in mirrors as wall decorations, shaping them into a larger sculpture or art piece. 


5) Don’t Be Afraid To Grab Inspiration From Other Eras

A golden wall panel in three parts is painted on the wall,  made up of three arches filled with curls and swirls and connected arches

Courtesy Simple Shapes

Hollywood Regency was inspired by a large number of different eras, so don’t be afraid to pull in other concepts. Rococo and Chinoiserie are both styles that mesh in nicely in different ways and blend well with the glamour of Hollywood Regency. 


6) Bring In The Black And White To Temper Things

Another key mark of Hollywood Regency is the use of black and white in different ways. Whether it’s checkerboard flooring, large photography or zebra prints even, there are many ways you can fit this into your home to create a quieter corner amid the opulence. 


7)  Don’t Shy Away From Lacquer

A deep teal lacquered cabinet with thin lower legs and an ocatagonal raised pattern on the doors

Courtesy of Ellen Quinn

With the love for all things shiny, lacquered finishes are just the thing to fit in with Hollywood Regency. Whether you apply this to furniture like tables, to room dividers or accessories like trays and vases, or to your walls or ceilings, get creative with it. There’s nothing that’s off limits for this one. 


You can probably tell we LOVE Hollywood Regency and the luxe feeling it brings. What about you? Do you think you’ll be doing up your home in Hollywood style this spring? Let us know in the comments below or over on our Facebook page! As always, we love to hear from you. 


If you wound up here looking for help with your dryer and not your decor, no worry, you’re still in the right place. Whether you’re in McKinney or The Colony, we’re here to help get your major appliances running again. We’ll work with you to find a time and date that works best for your schedule. At Appliance Rescue Service, our goal is to get your home running smoothly again. You can reach out to us via our contact page or by giving us a call at ( (214) 599-0055).