Pumpkin Soup From Picking to Serving

We'll Show You How To Do It All!

Halloween is right around the corner, and that means that our grocery stores have been invaded by two things. Pumpkins and candy. We're going to show you how to turn those pumpkins, not into Jack-o-lanterns to scare off the ghosts and goblins, but into a delicious soup. You will also have so much leftover puree that you can then use it next month to turn it into some amazing pumpkin pies, muffins, or cookies.


Ingredients: 

1 Large Pumpkin 

16 oz of cream cheese

6 cups of chicken broth 

Garlic 

1 small onion  or 1 Tbsp of onion powder

Salt to taste


Tools: Sharp chef's knife, cutting board, oven, parchment paper, aluminum foil, food processor, two large bowls, a large strainer, a spoon or metal measuring cup, a wide, large pot similar to a caldera or Dutch oven.


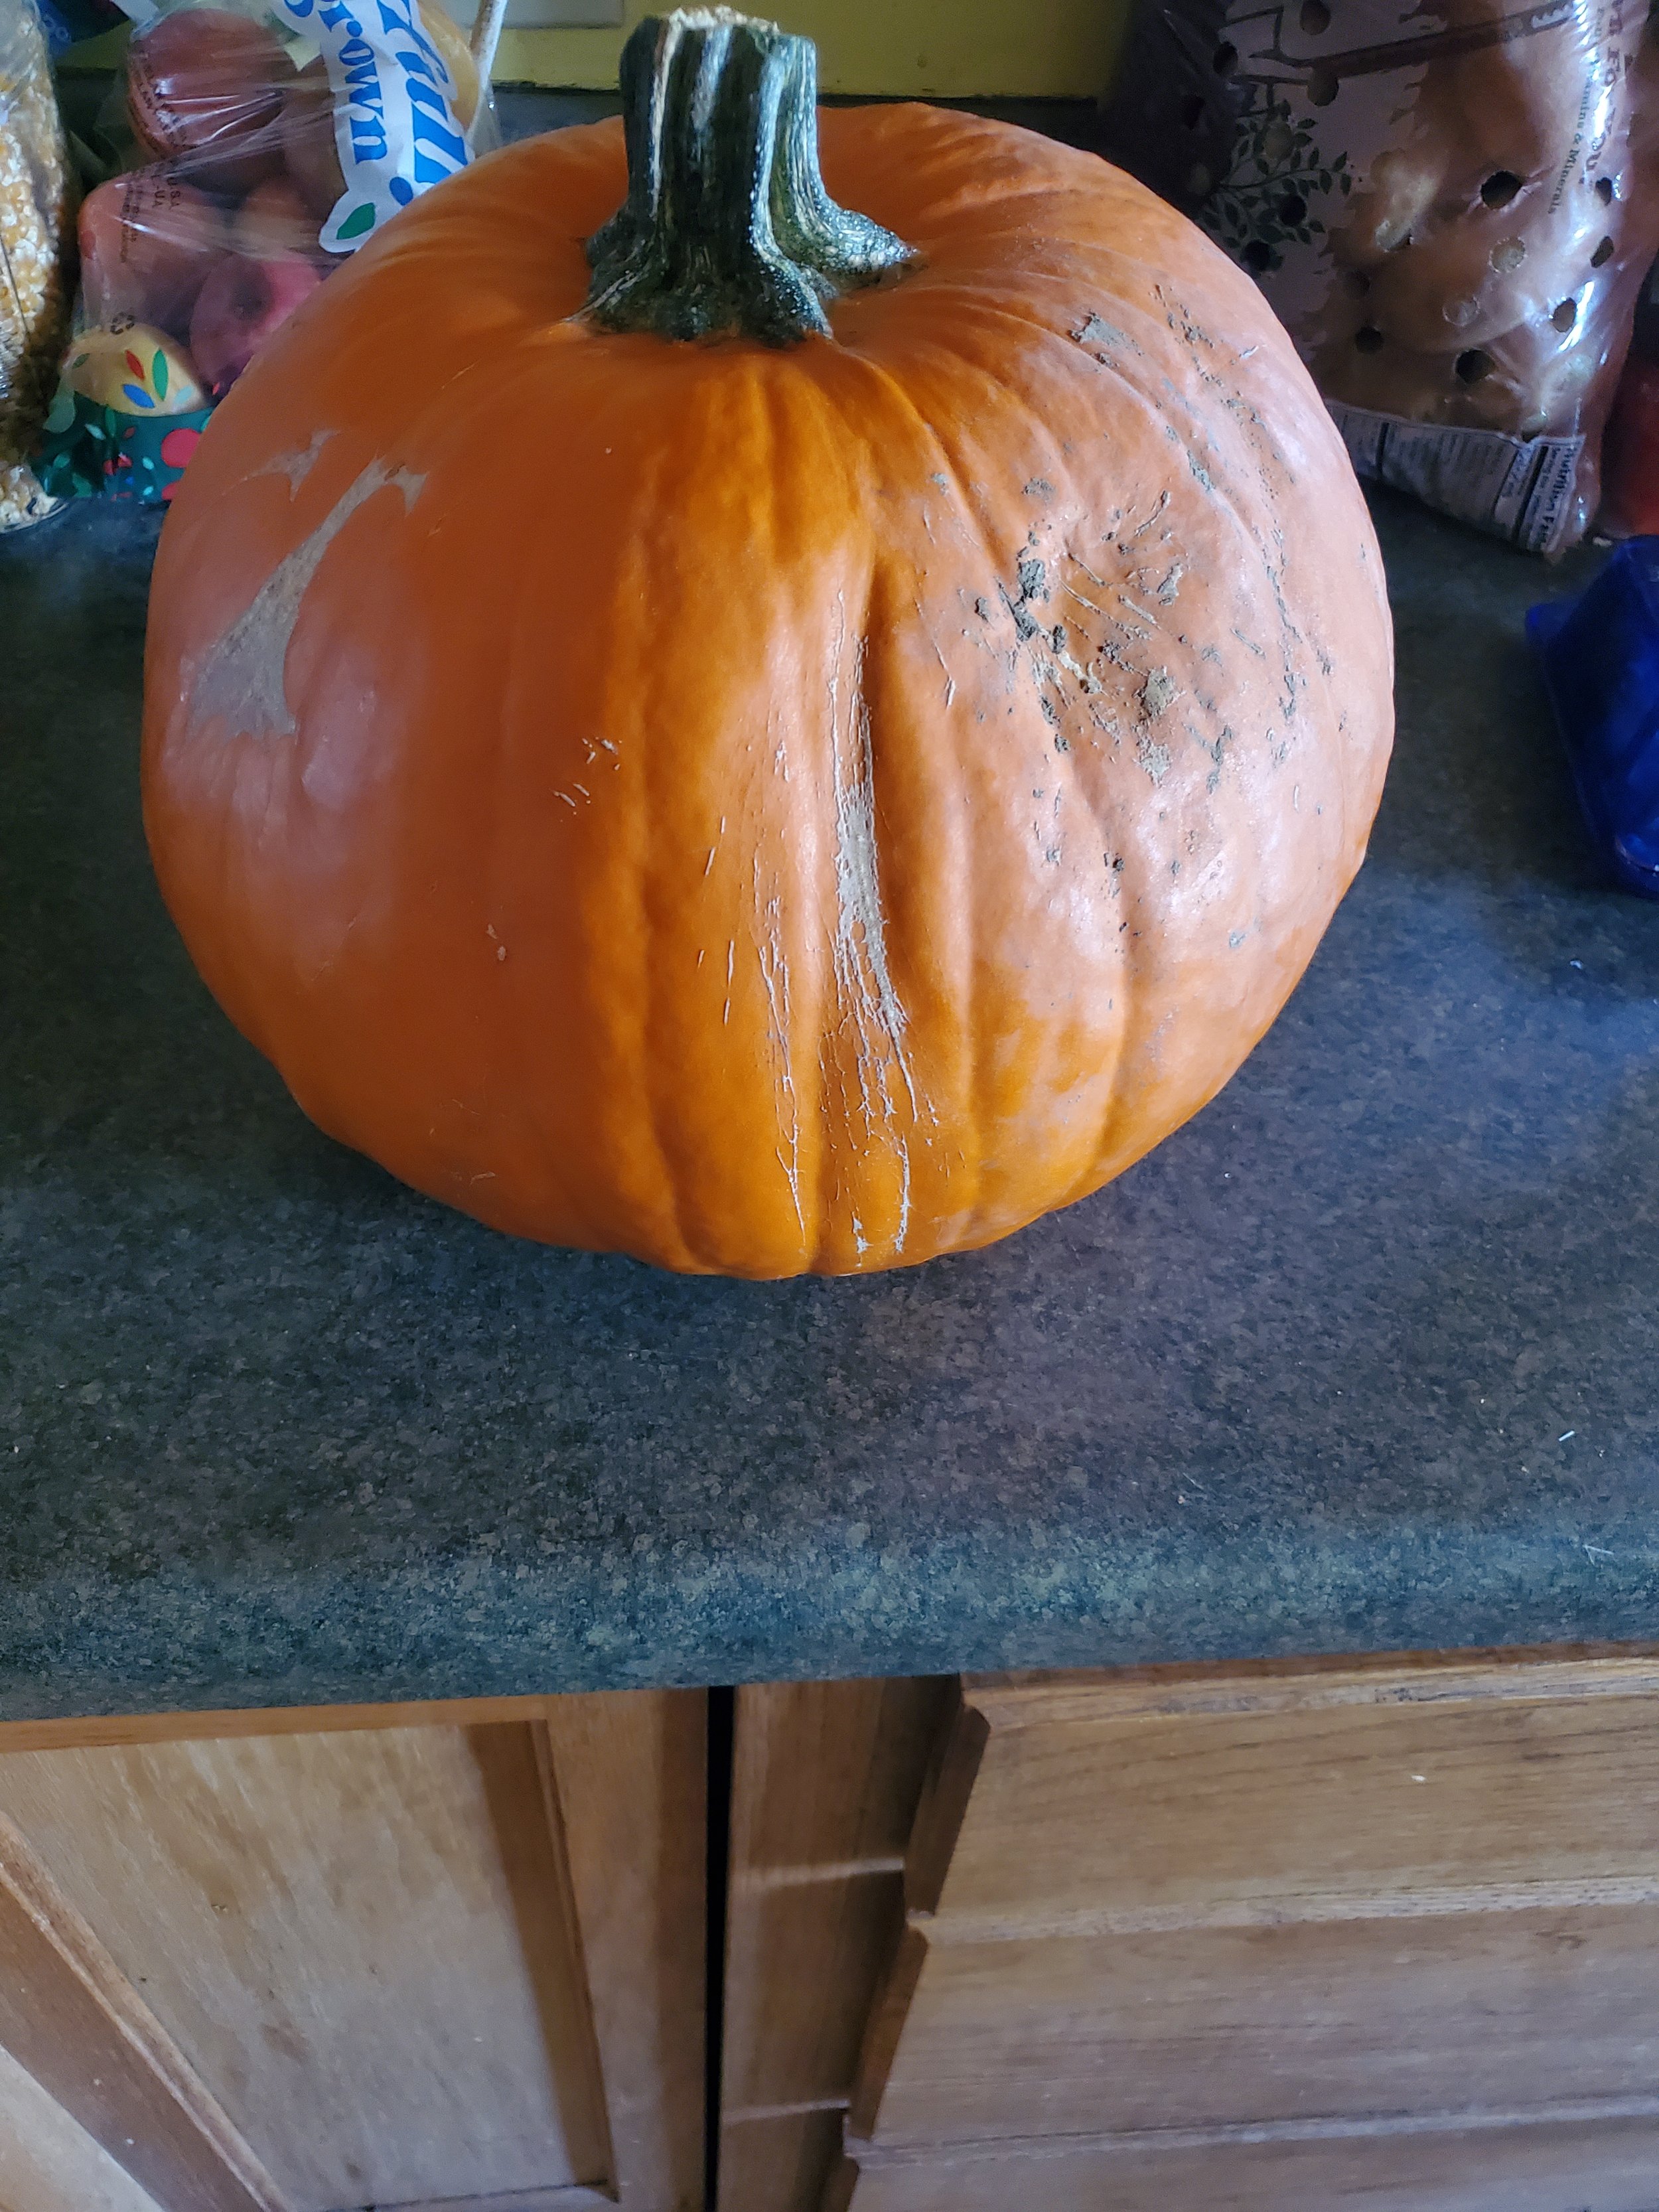
First things first. The type of pumpkin that's good for making a Jack-o-lantern is not the same one you want for food. Although your local grocery store will sell you the GIANT pumpkins without trouble, the tiny ones are not so easy to come by, and the ones of various colors are great for decor, not for eating.   Do not despair just yet, though. You don't need to go on an epic quest searching for the perfect pumpkin. You can actually search through the ones that are being sold for carving. You'll want to look for one that sounds only partially hollow and is hefty and solid. This should land you with a pumpkin that has thick walls and is still ripe but has not gone rotten. 


Once you get the pumpkin home, give it a quick wash and dry it off. You don't want it to be slippery when you start cutting it in a moment. Then snag a thick towel and your chef's knife and carefully stab your way into the pumpkin on one of the ridges. You want the knife to go all the way in for this first cut. It takes work, but going slow is the key.  You could, in theory, use the saw from your carving kit, but we don't actually want to get rid of the lid on our pumpkin. That's perfectly good food right there, rather than being in the way like with carving. 


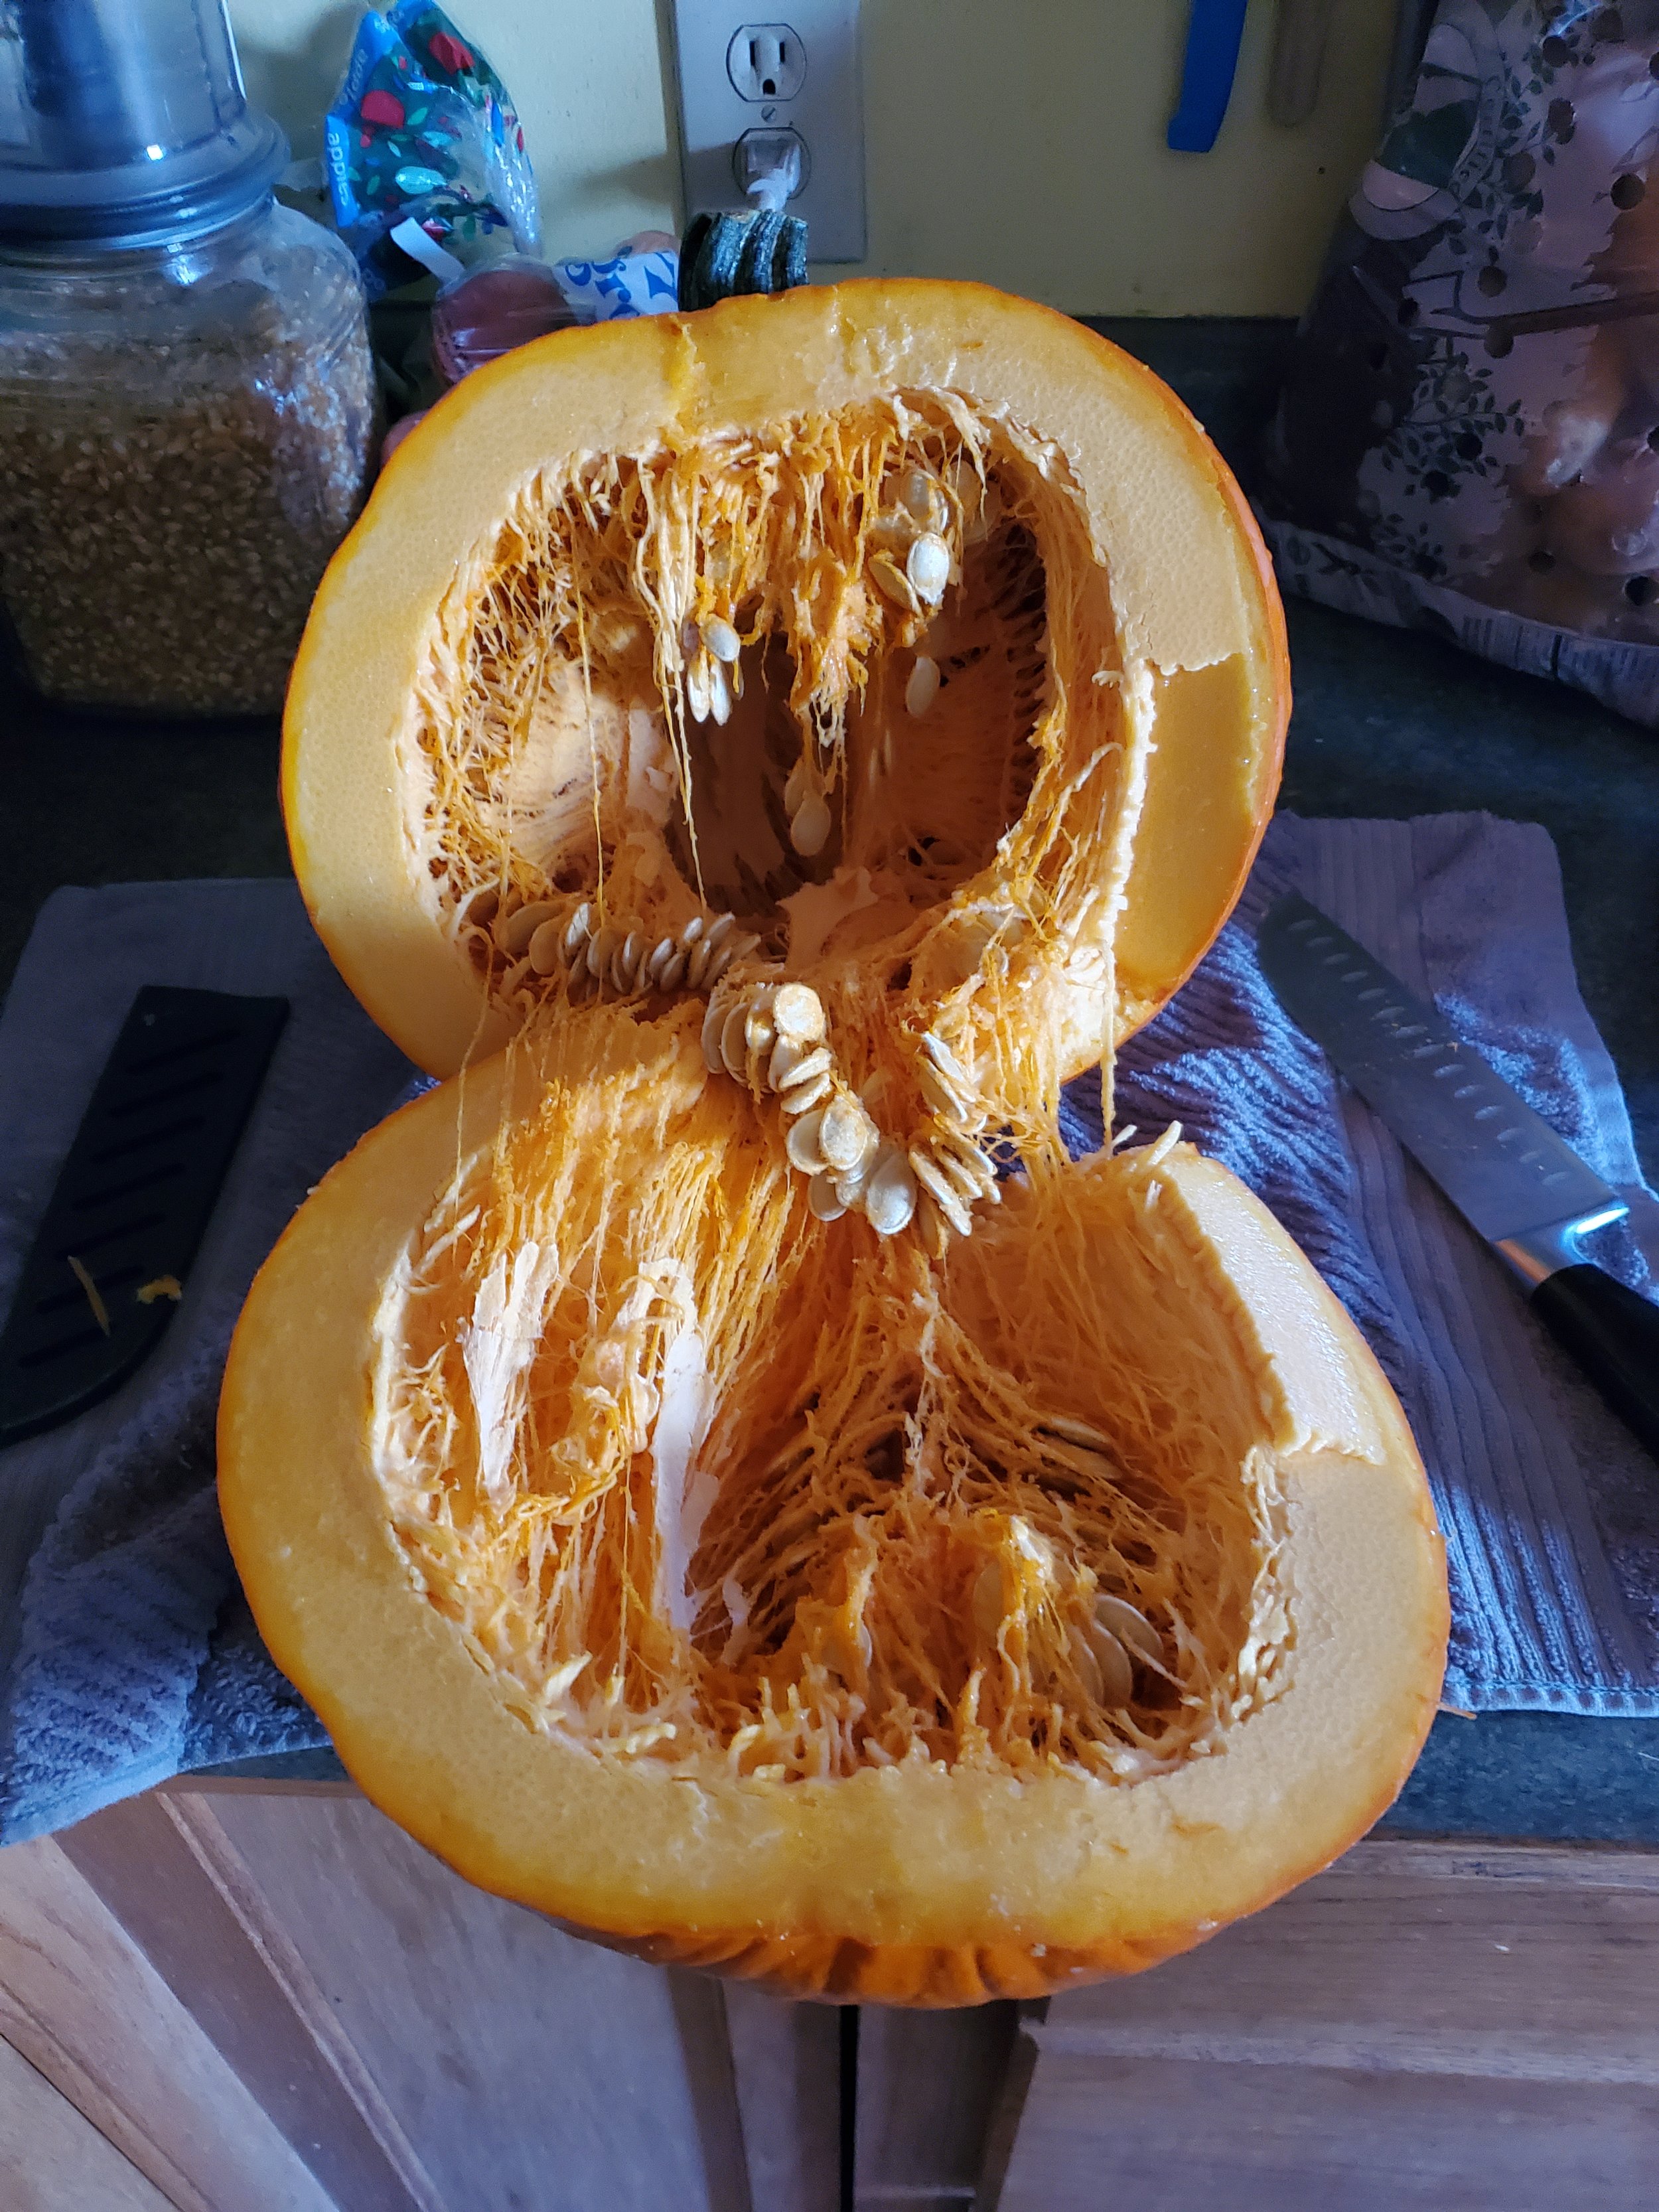
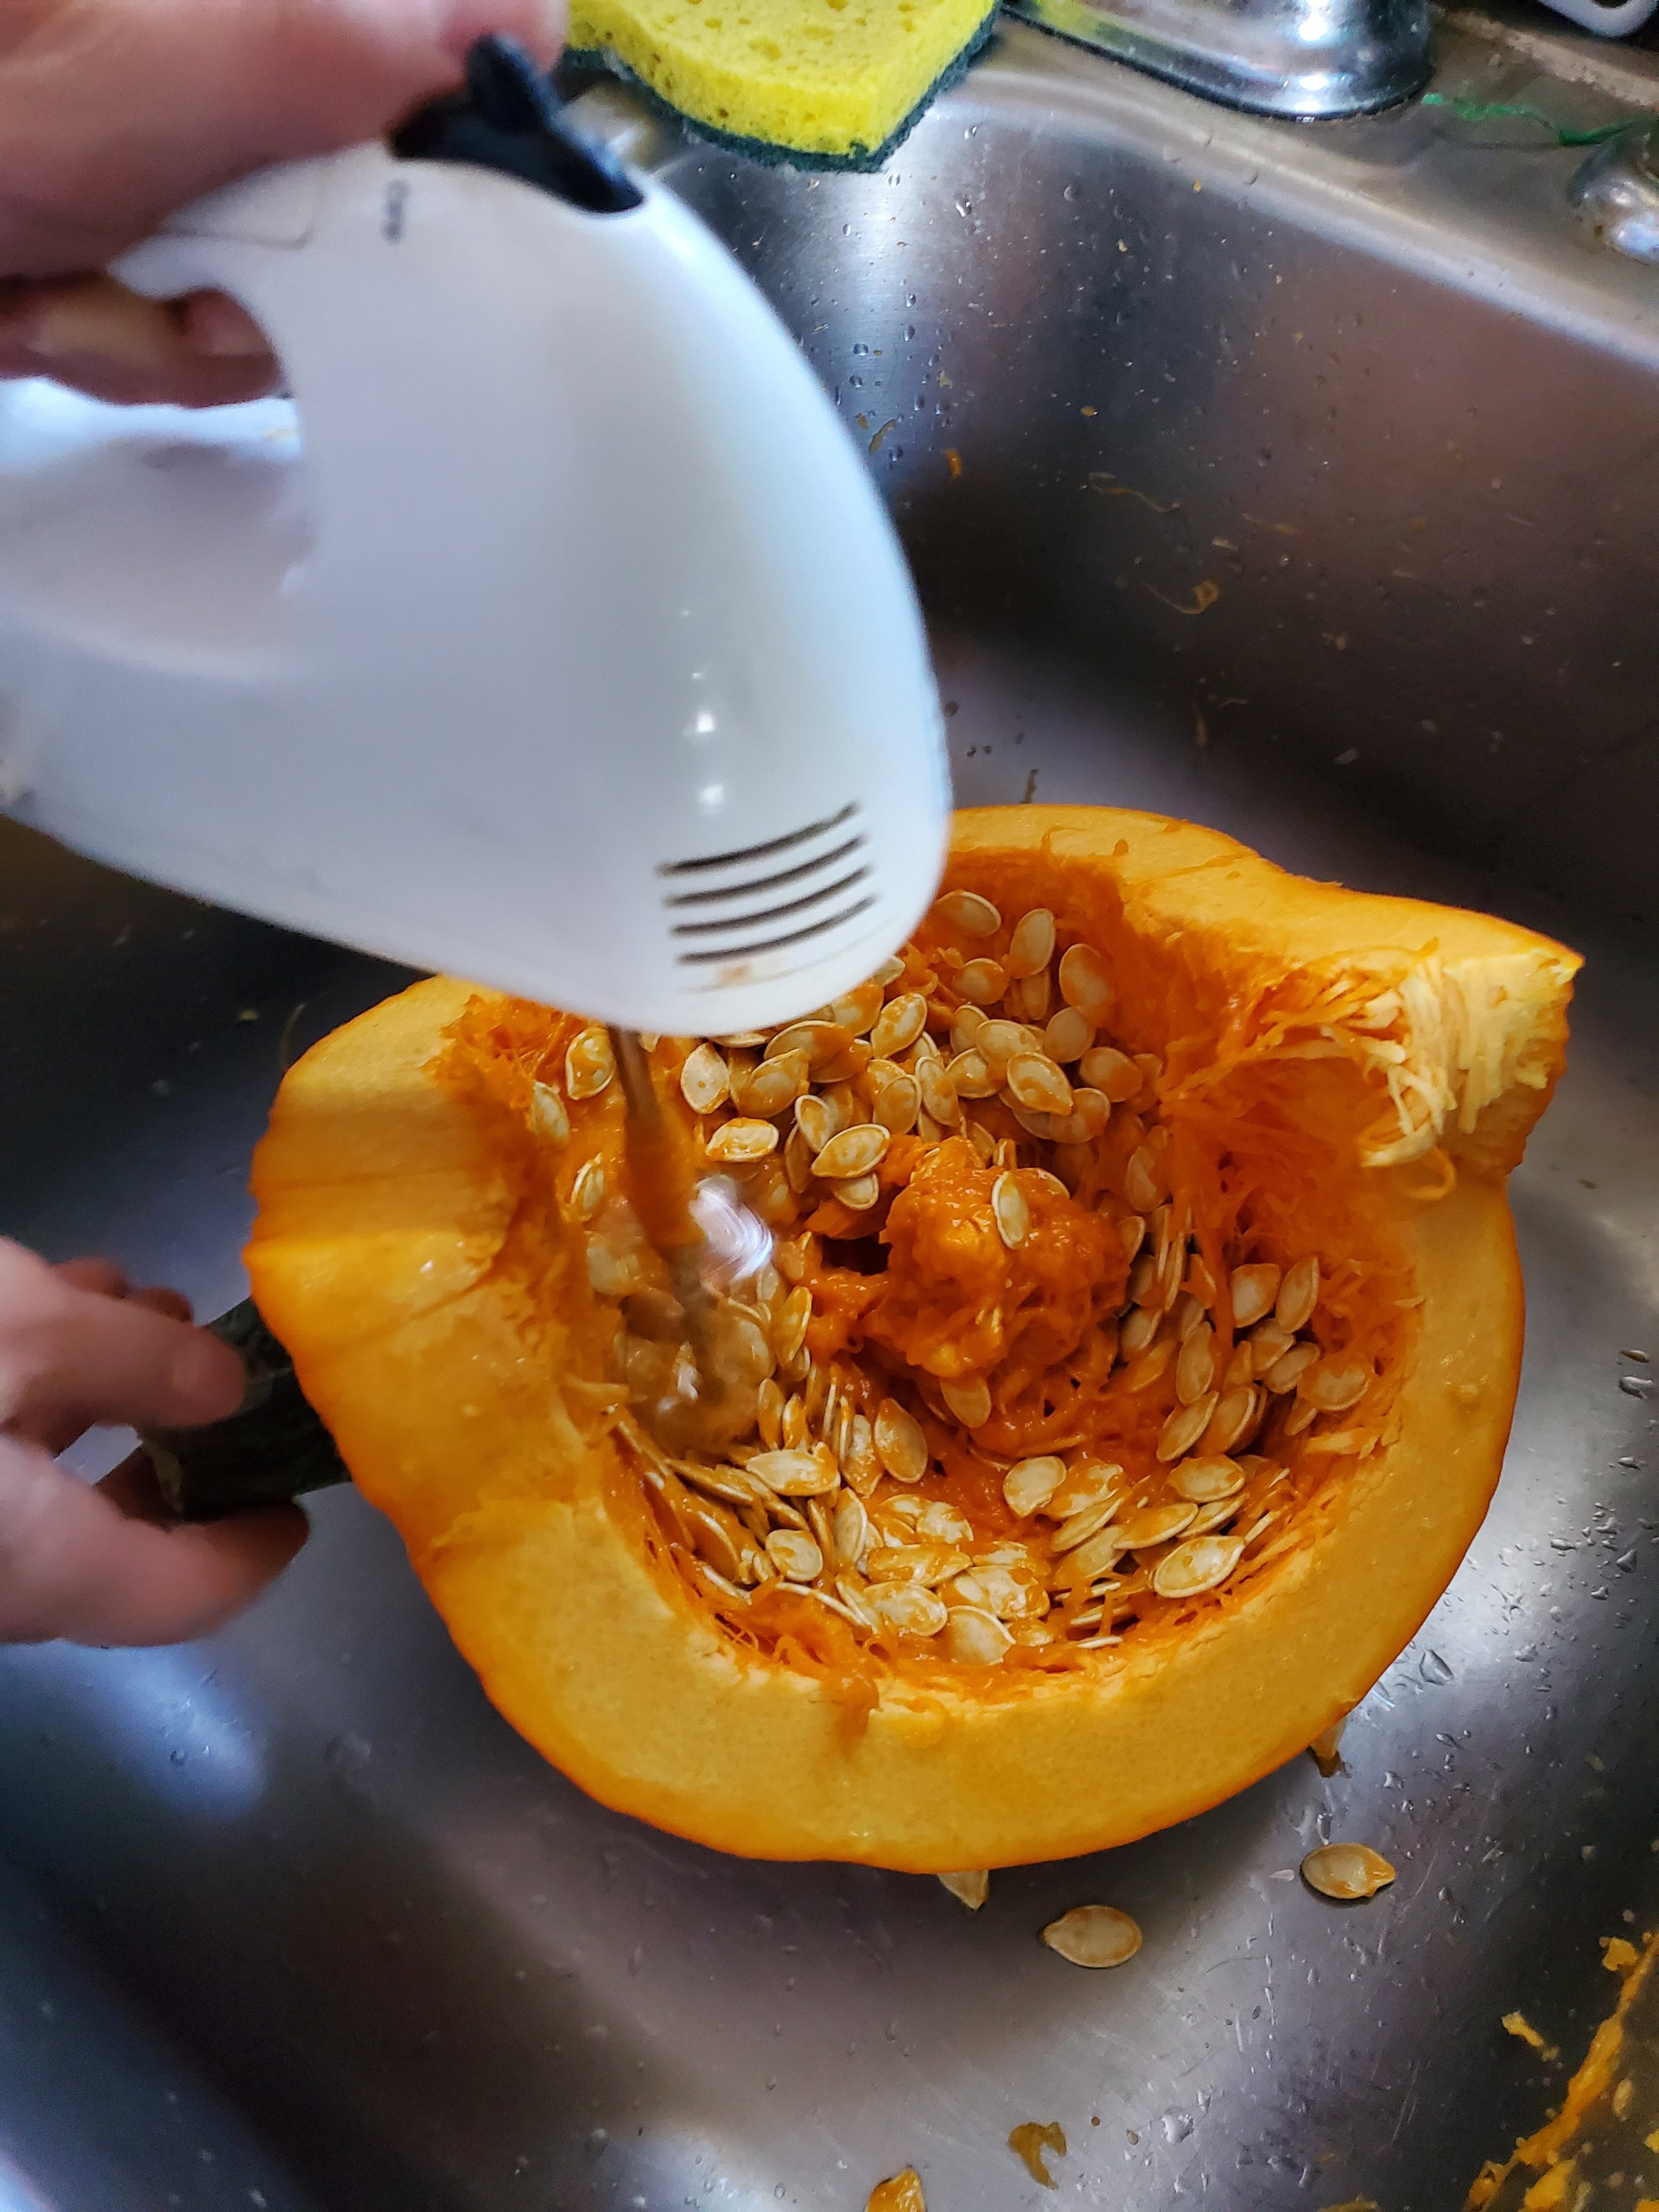
Once you've gotten all the way through, remove the knife, grab a sharpie and draw lines to quarter your pumpkin, as best as possible, without removing your pumpkin. You might want to cut around the top of it, but again, this is a preference thing.  Depending on the size of your pumpkin, we suggest splitting it into either two or three pieces. This allows for the inside of the pumpkin to steam rather than sear in the next step.  Your next step is to grab a hand mixer and input just one of the two whisks. Use that, set to a low to medium speed to quickly and easily gut your pumpkin. (When you're finished, you can set aside the seeds for roasting at a later point.) 


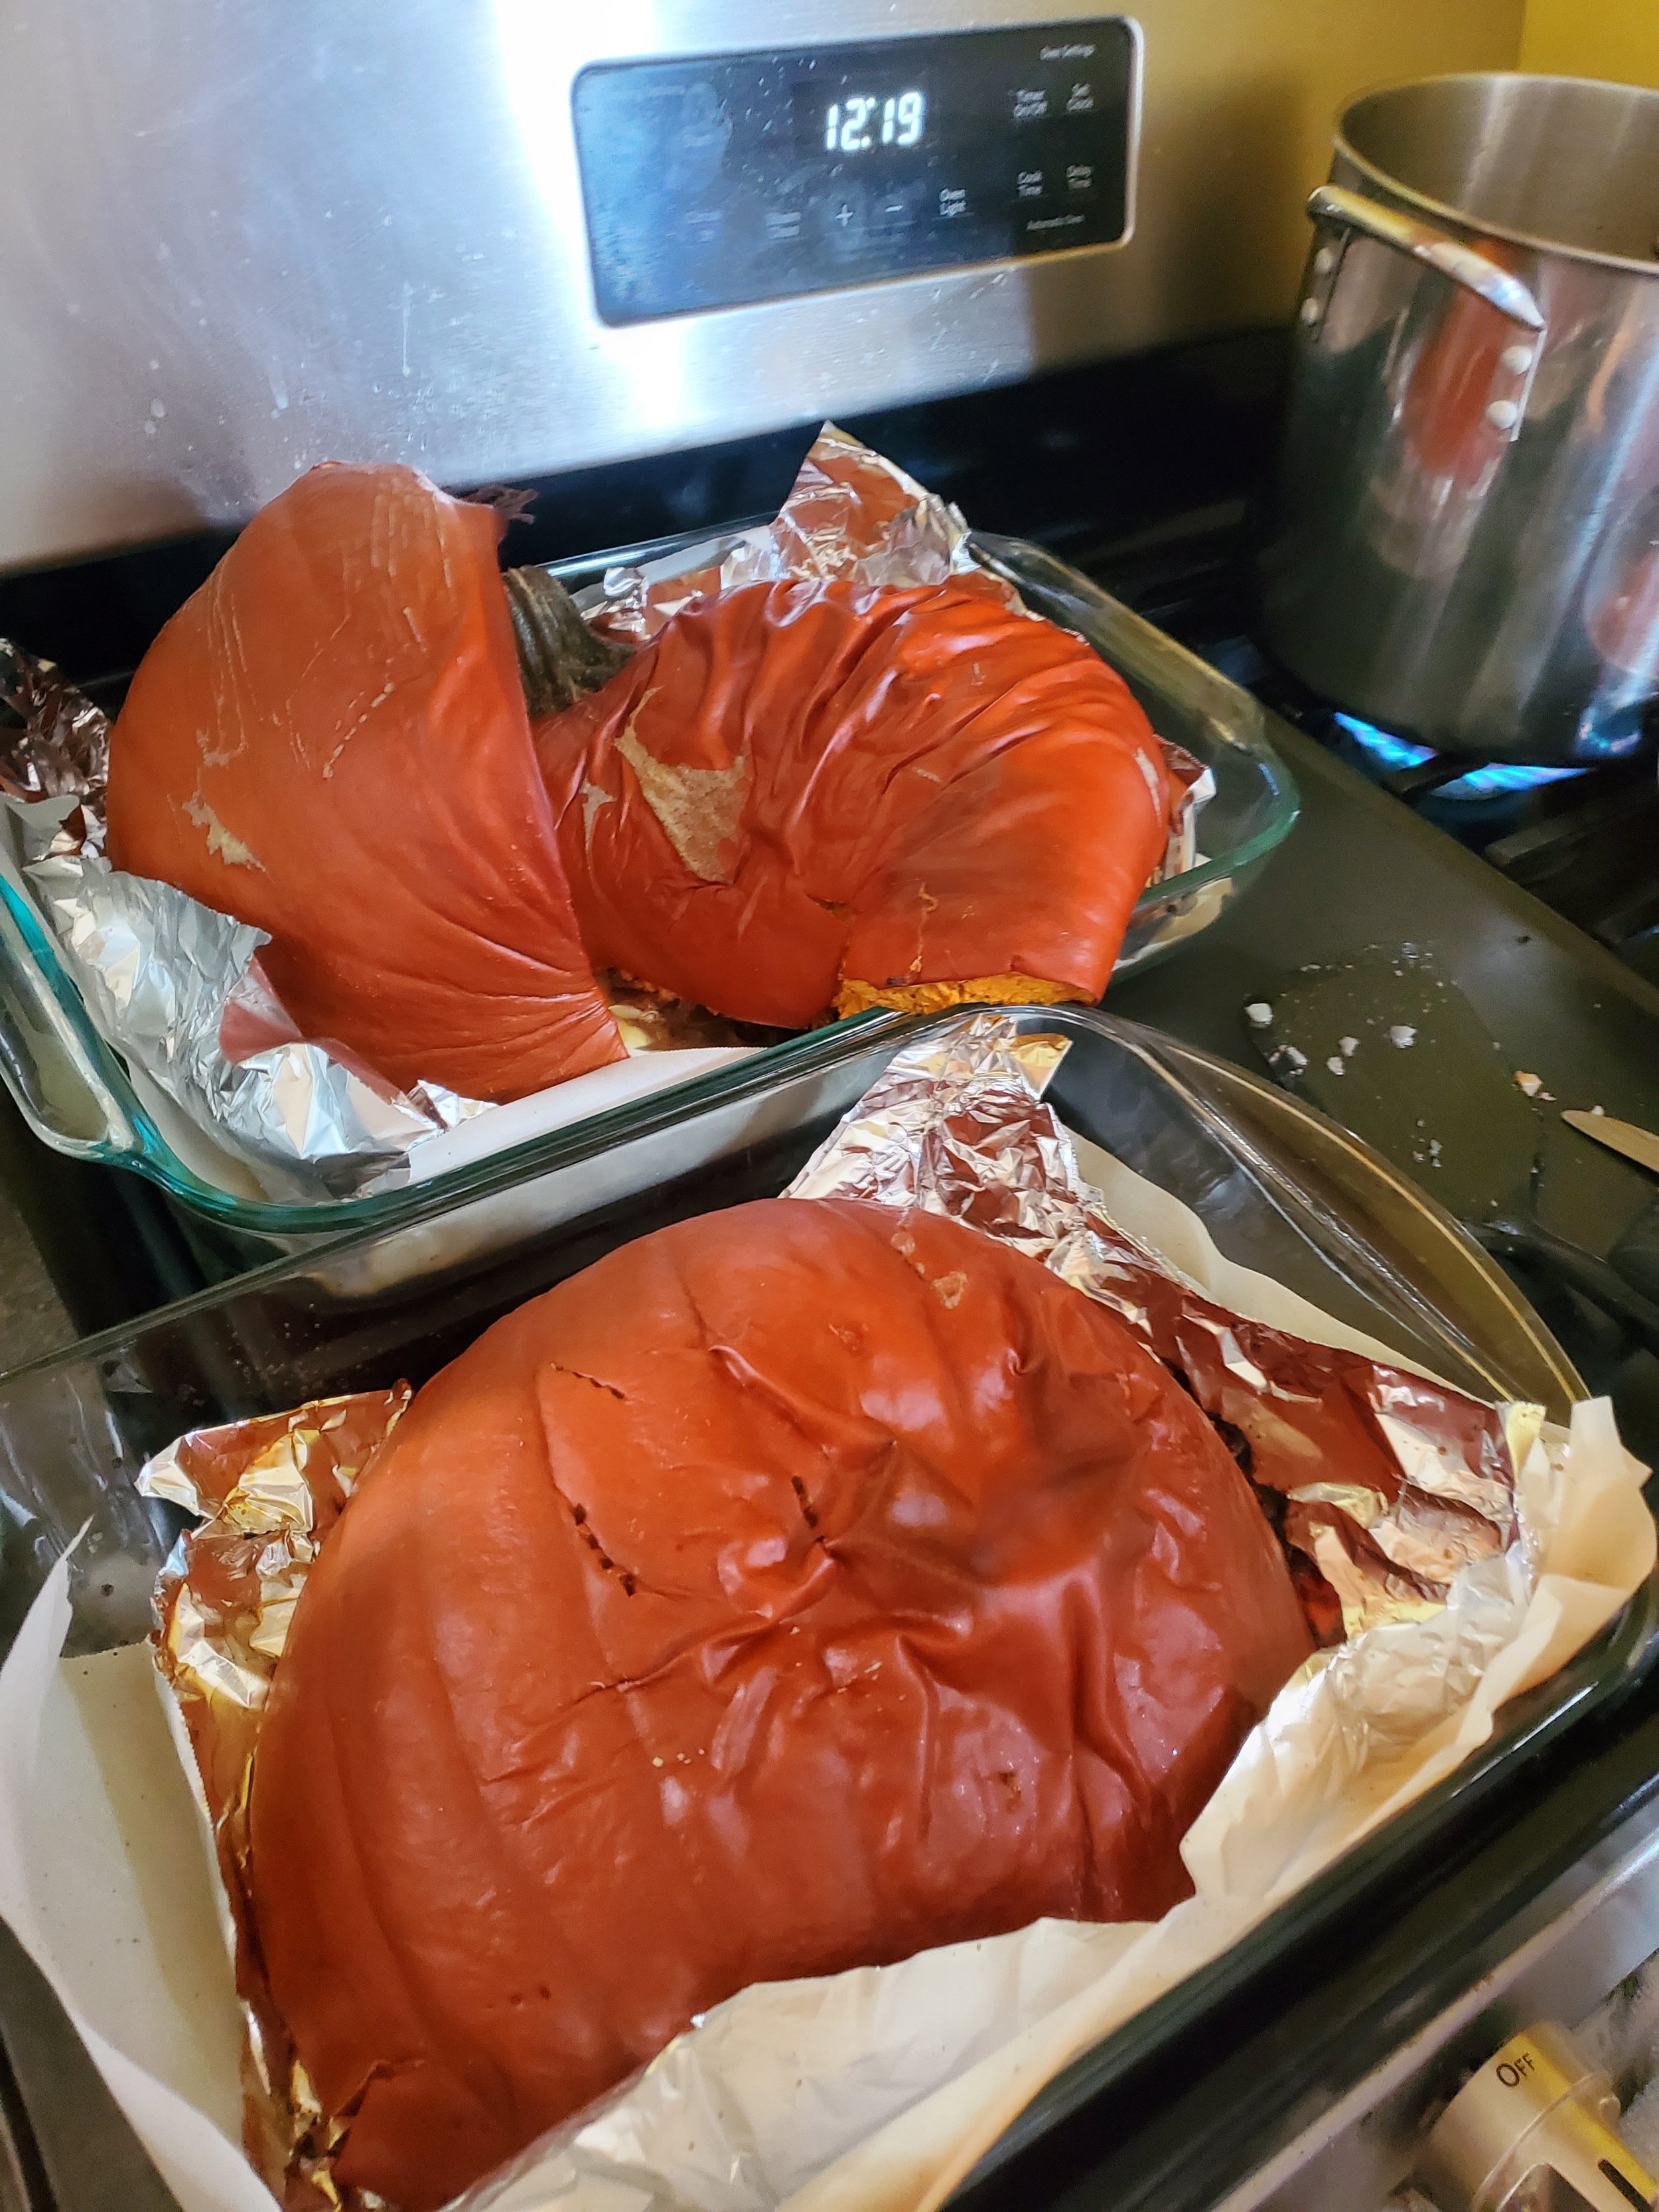
Once you've cut your pumpkin into the desired shape, grab a pyrex (or similar)  baking dish. You'll want to line the bottom and sides of it with parchment paper (not wax) and then a layer of tinfoil over that. You should end up with the tin foil pressed firmly into the sides of the pan and wrapped around the top edges. This way, you've got less of a mess when this is all over. 


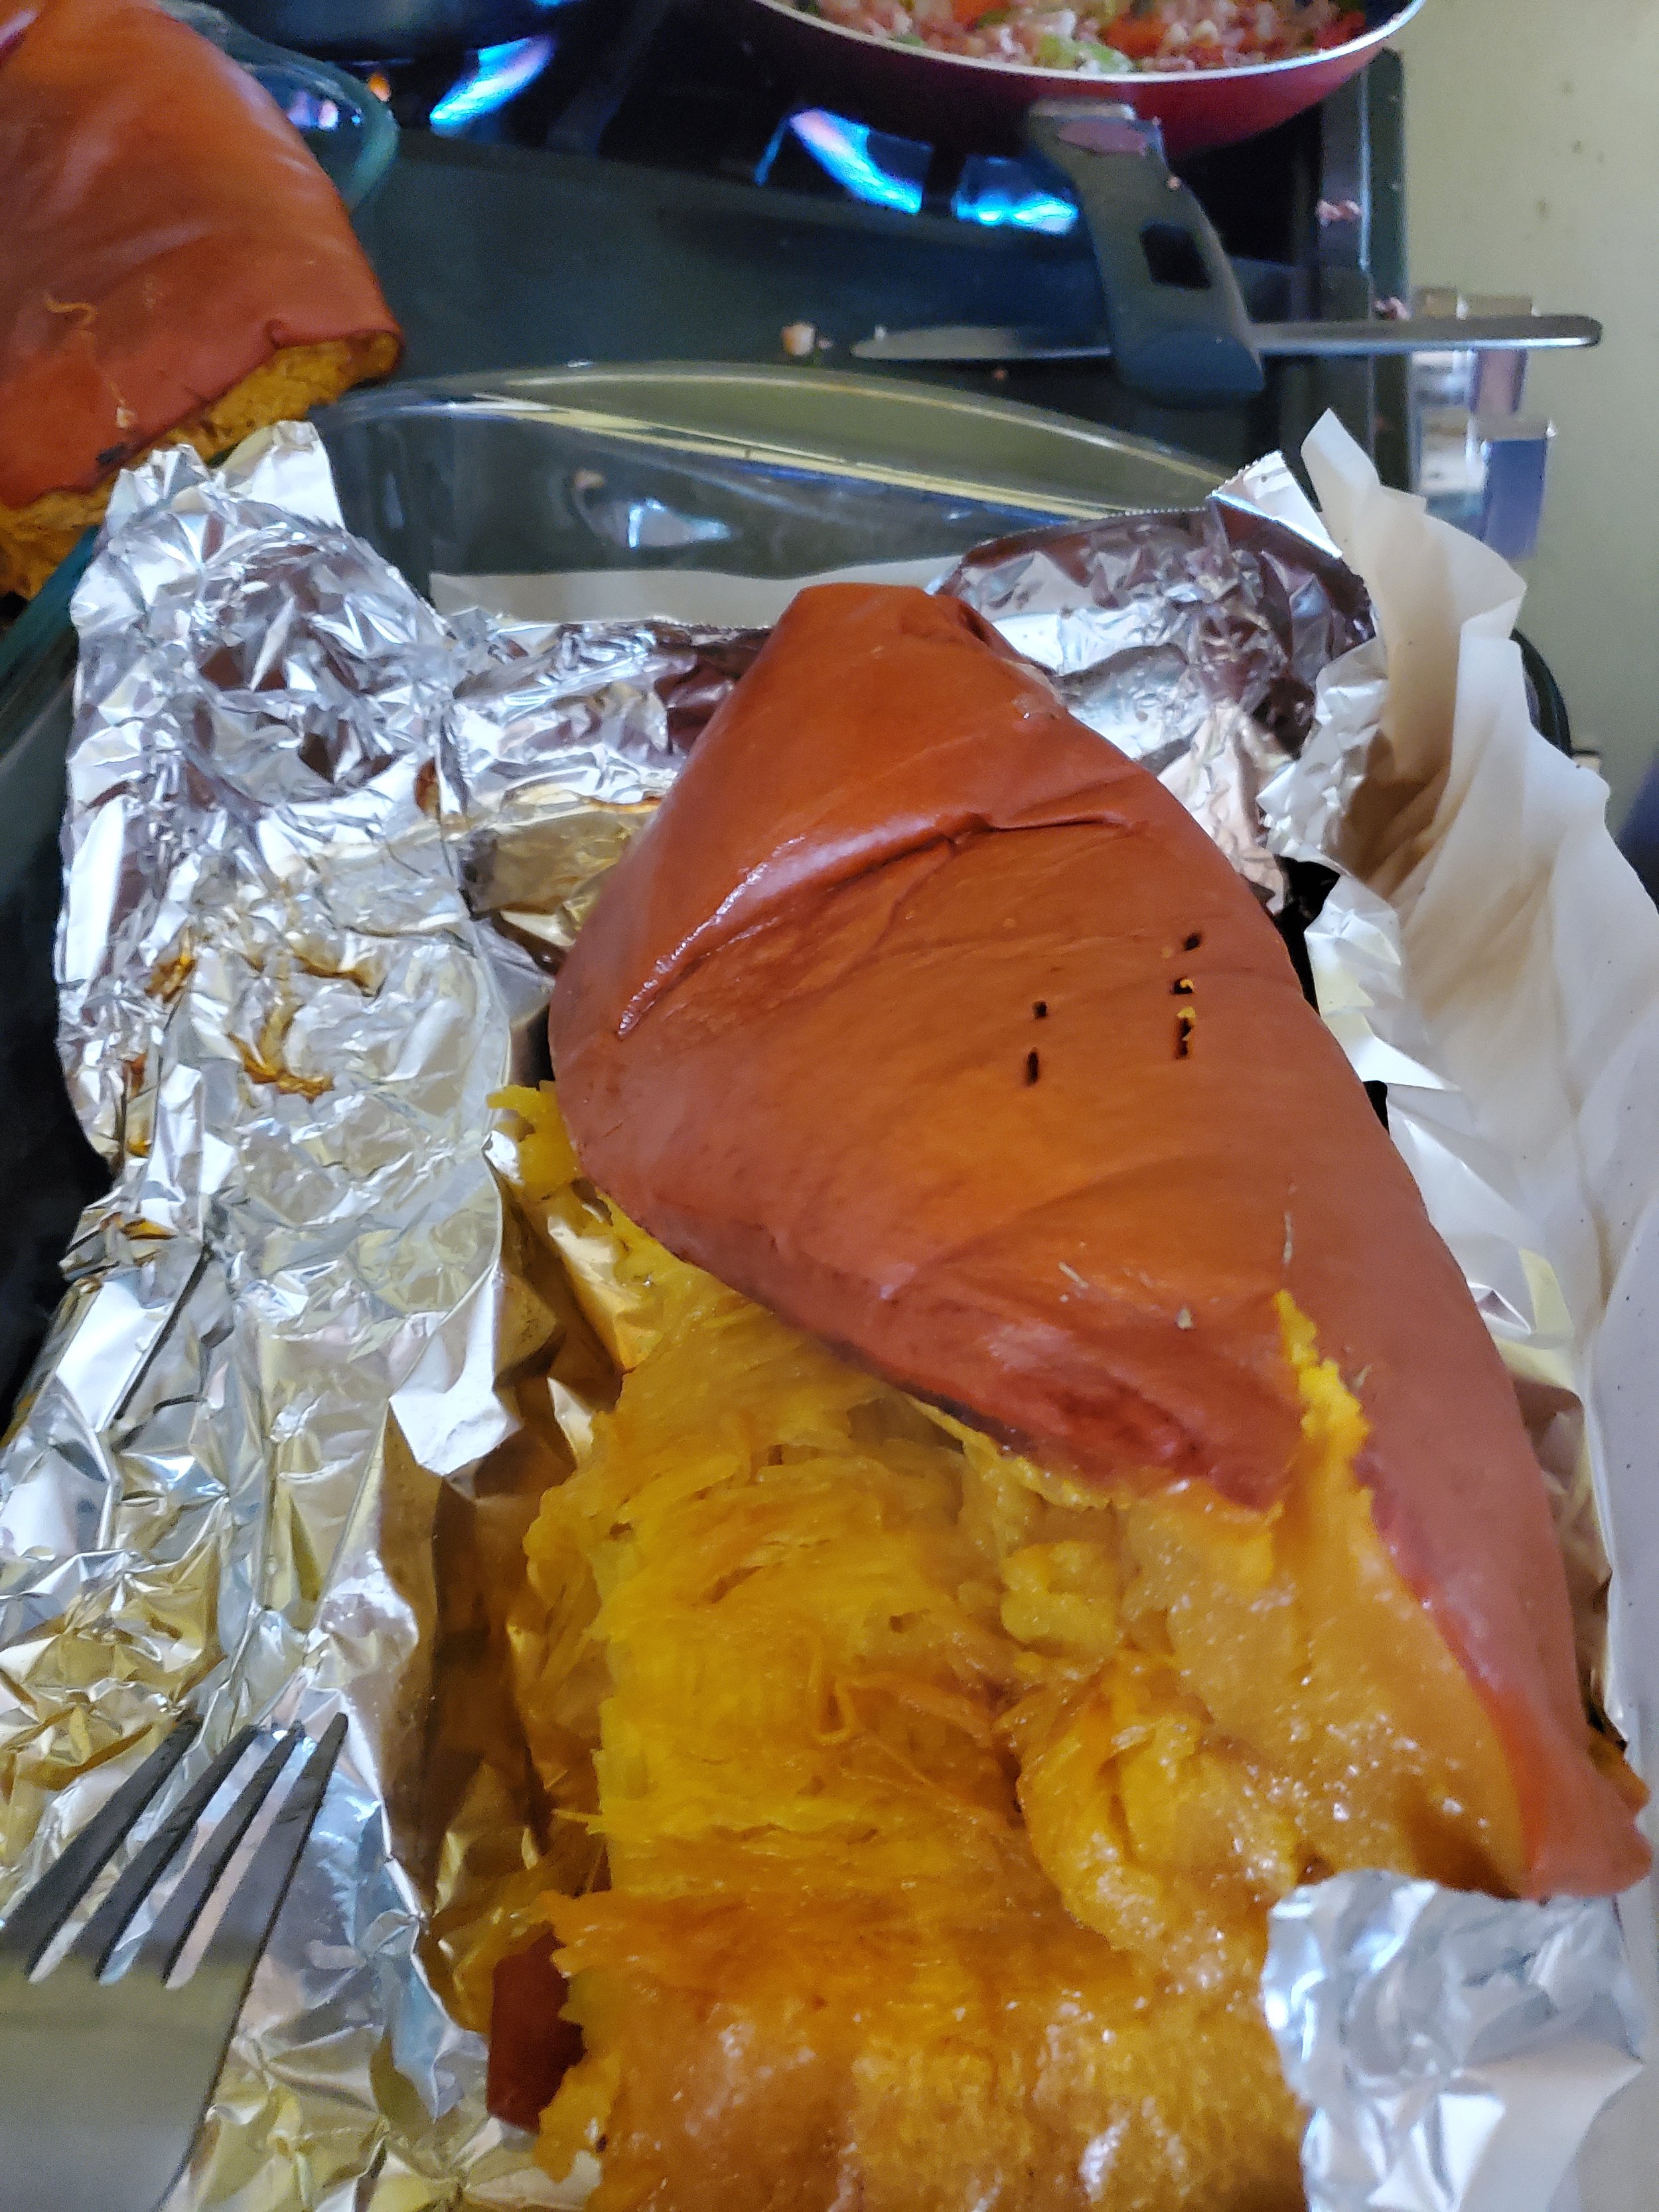
Preheat your oven to 400*F, and pop your pumpkins into the baking dish(es). You want the pumpkin to have enough room to sit flat on the bottom of the dish rather than having anything sticking over the sides. Once your oven is preheated, pop the pumpkin into the oven for 1 hour.  Make sure that your pumpkin is not touching the top of your oven, or it can catch on fire.  Once an hour has passed, you'll want to check on them with a fork. See if you can easily sink a fork into the flesh of the pumpkin.  If it goes in easily at first and then hits resistance, you'll know that you need more time. If you can cut into the pumpkin without trouble, congrats, go ahead and pull it out. 


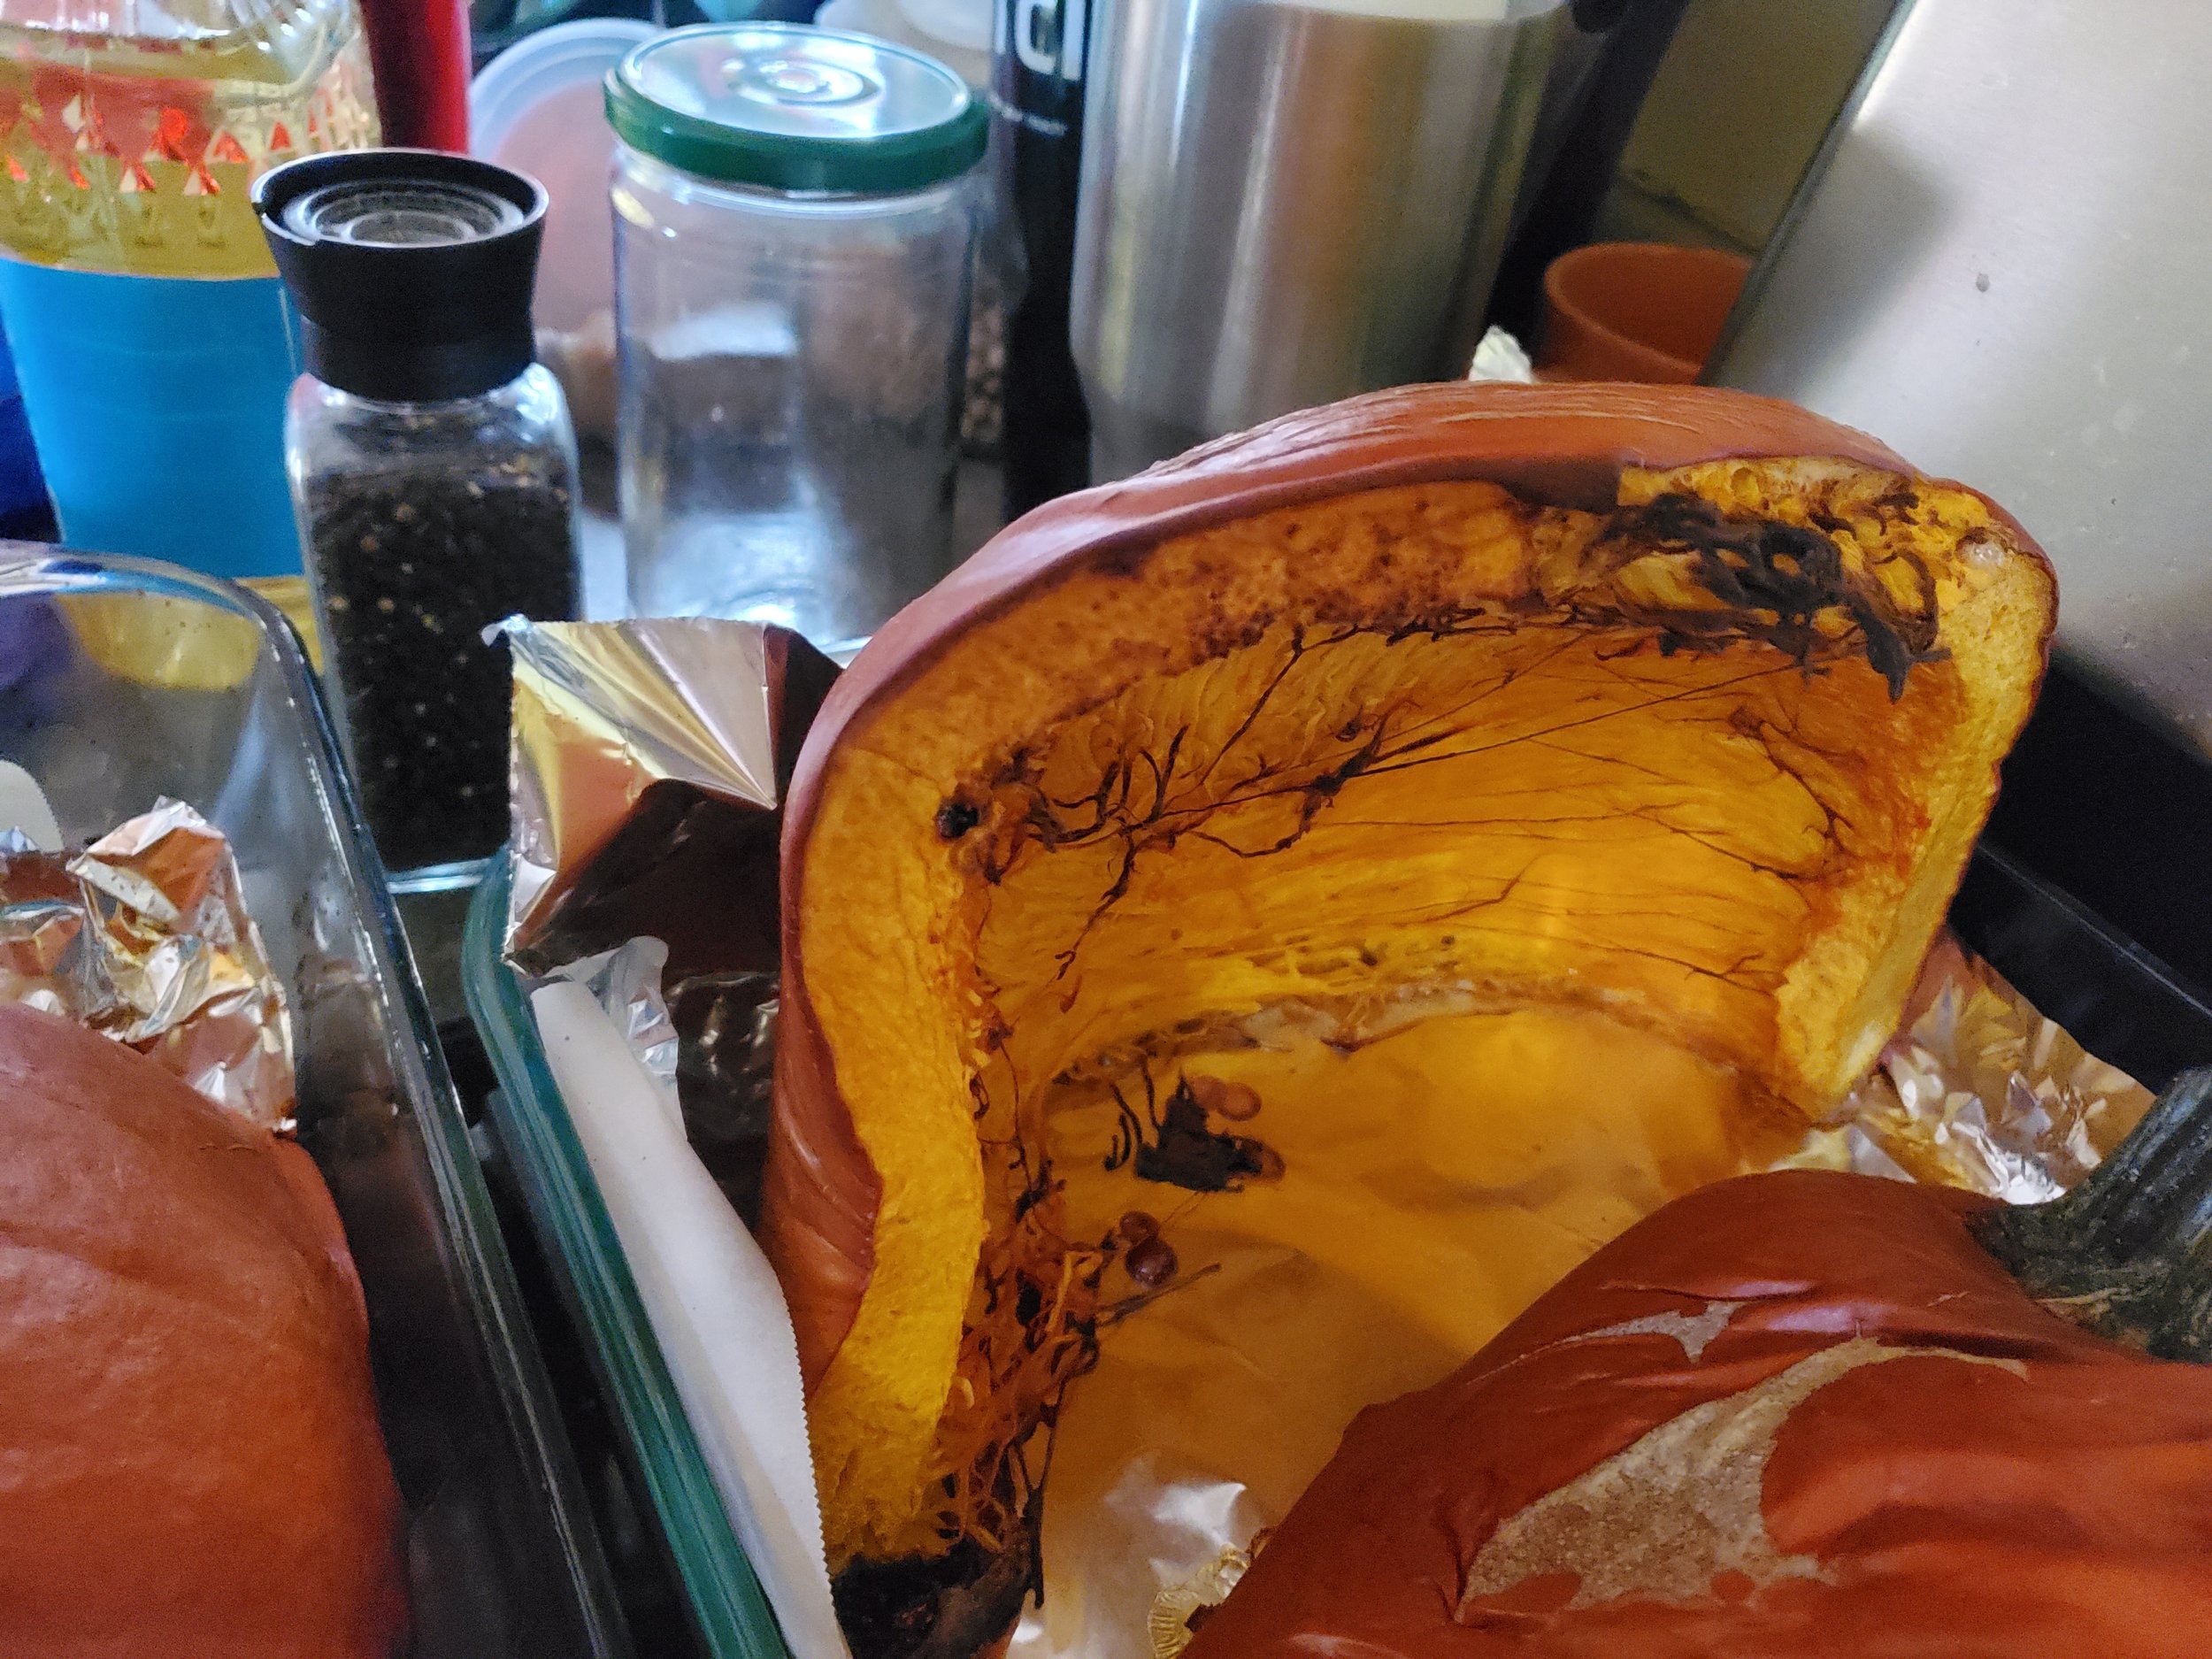
At whatever point you finish up your pumpkin, set the dishes on the counter, and leave them be for 30 minutes. Once they're just cool enough that you can handle them, carefully use something like a metal spoon or a pair of forks, to lift the pumpkin away from you. So, if you're looking at the pumpkin, lift the far edge and slowly bring that towards you. If your pumpkin was cut in half, this is going to release a LOT of steam, and it's going to be extremely hot. Please don't burn yourself. 


Now go ahead and wander off for an hour or so.  You want the flesh of the pumpkin cool enough that you can handle it without getting burnt. Once it's ready, come back and drag one half over to your counter, where you should have set up 1 large bowl, one medium bowl for scraps, and a large metal spoon. We're looking at a cooking spoon here, not a serving or eating spoon.  This will take too long otherwise. 

Depending on how long your pumpkin roasted, it might be just solid enough to be scraped apart, or it could be at the stage where if you look at it funny, the pieces fly apart. Grab the pumpkin and give it a careful squeeze to try and get out as much liquid from the pumpkin as possible. You want it to be down to just a few drops.  Then, start scraping apart the skin from the meat of the pumpkin. It's not a complicated process, but it does require you to focus to ensure you're getting all of the meat. 


Once you've finished one, go ahead and give your hands a good stretch, and then go and tackle the other one. If you're like us, this is the point when you realize that you might have purchased 3 pumpkins, but you're not going to be roasting all of them in one day. 


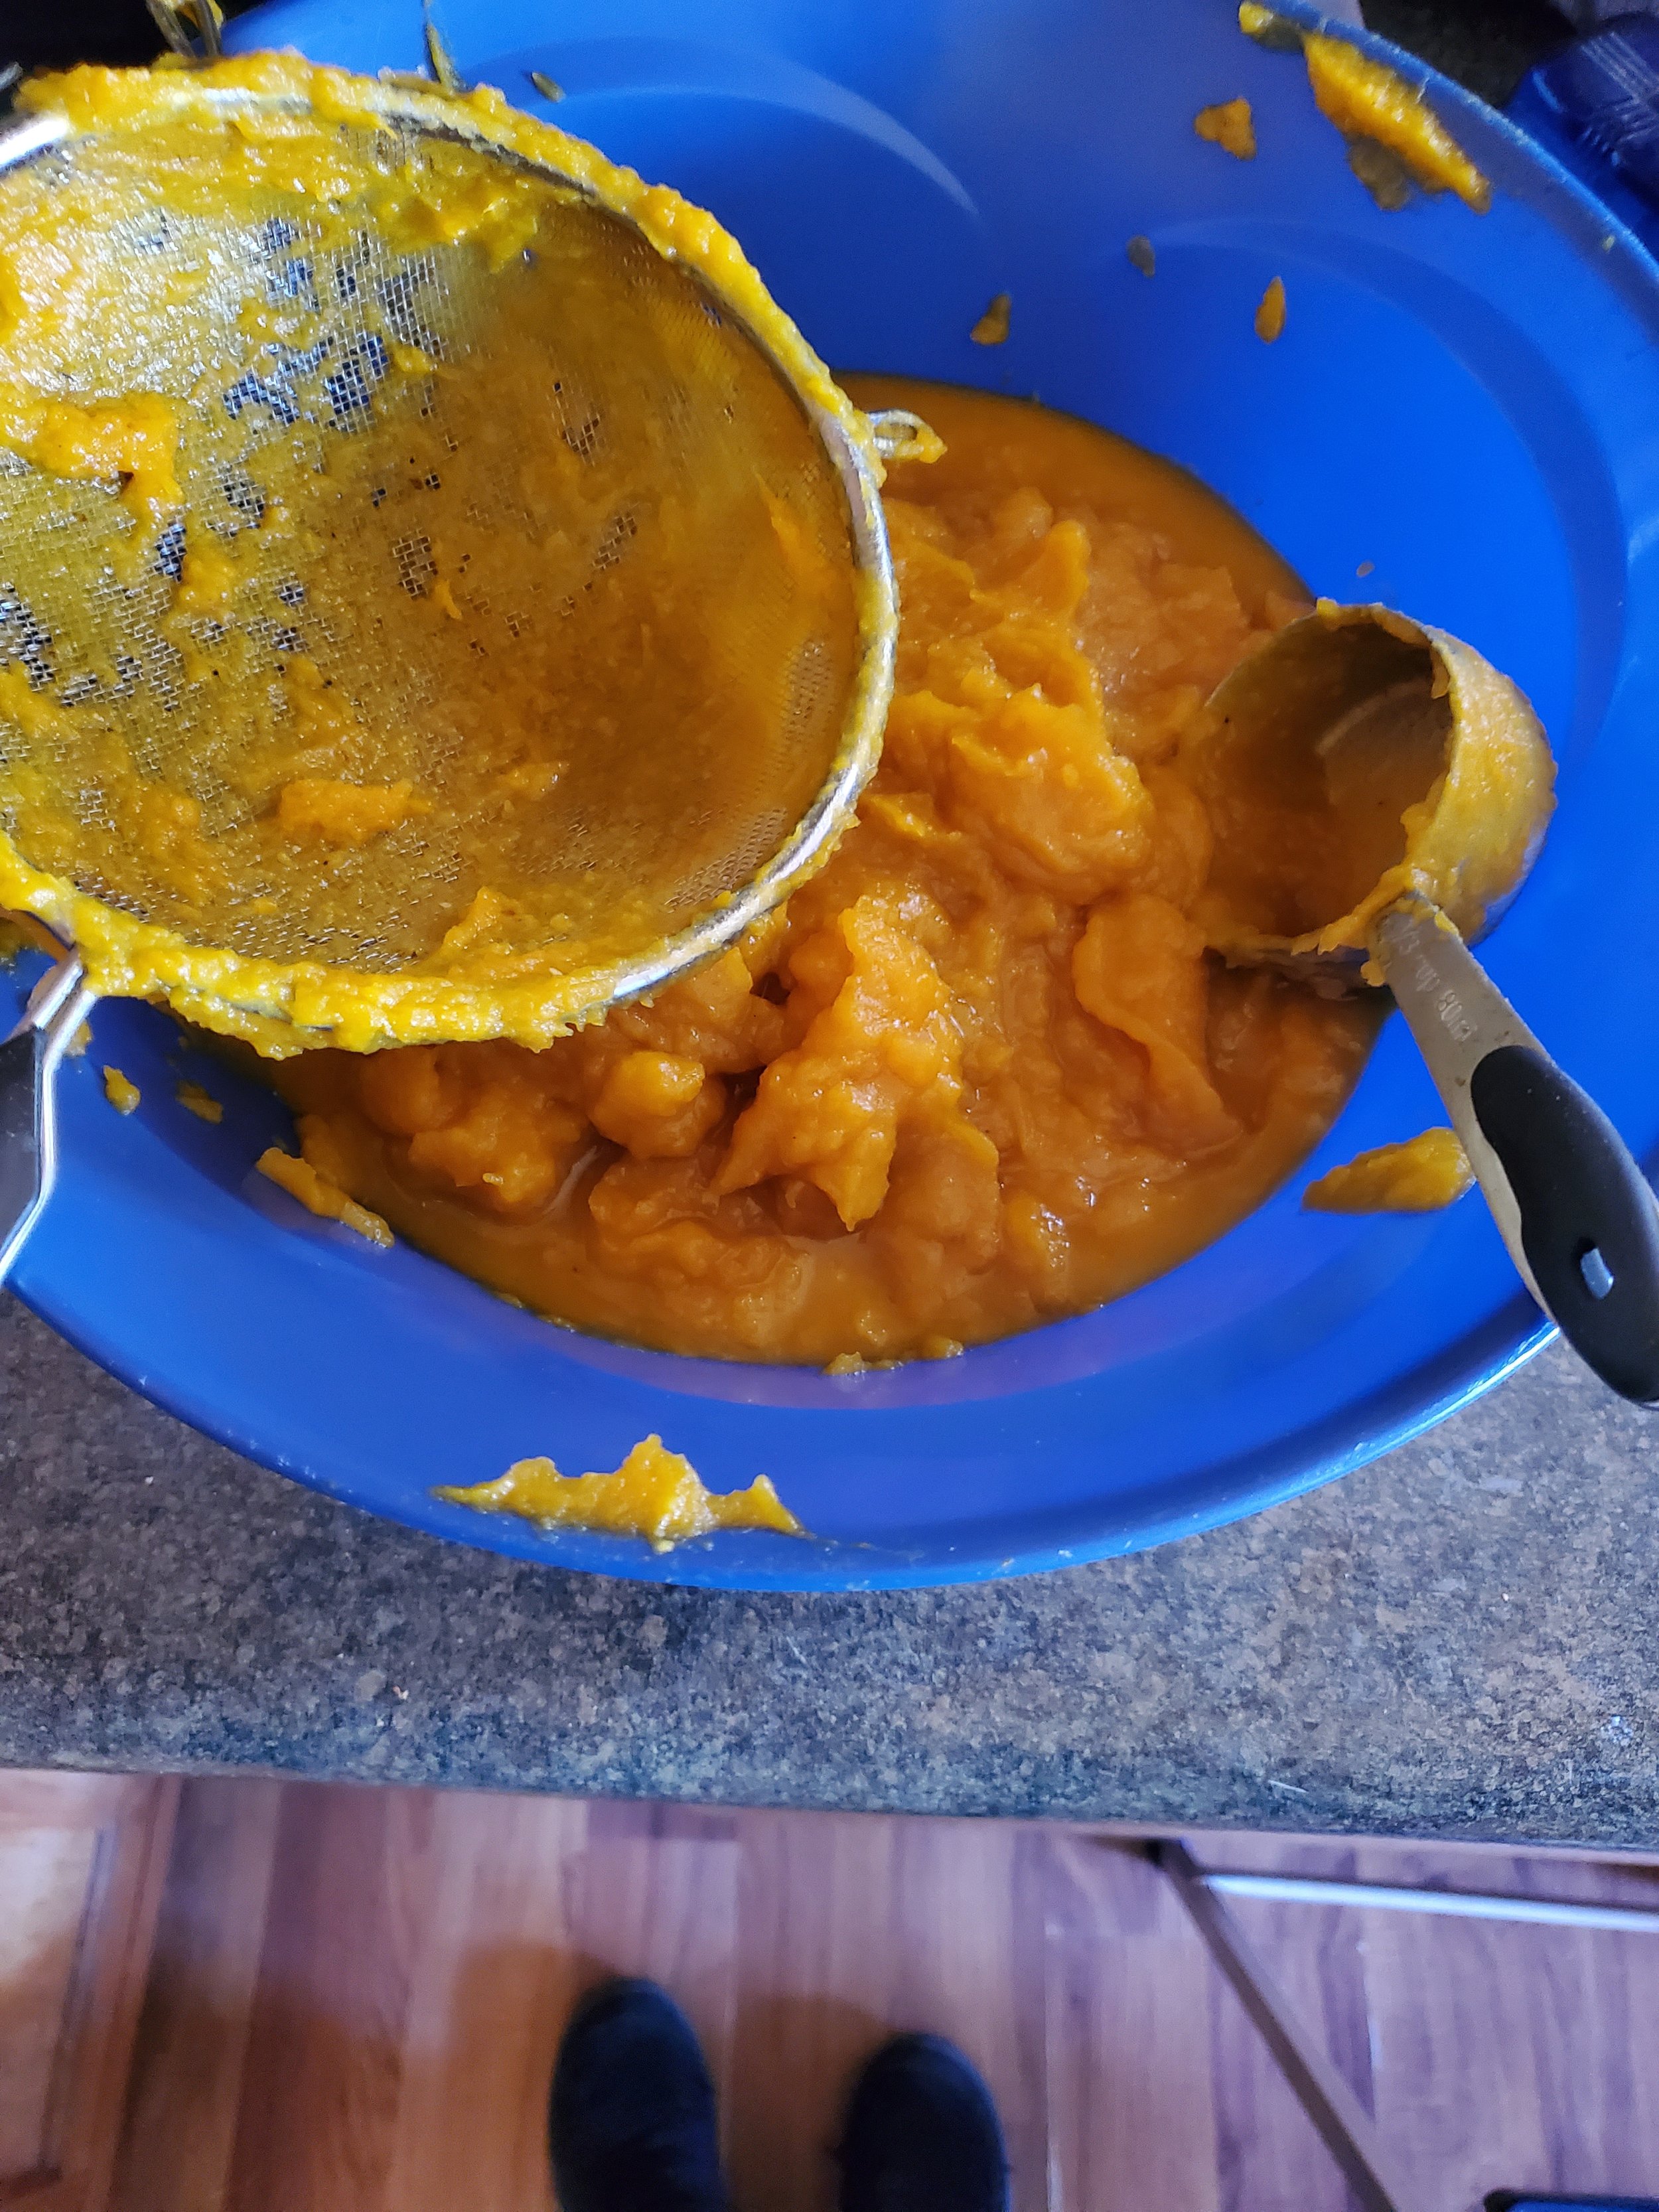
Once you've got all of the pumpkin flesh in one bowl and the skin in the other, toss the scraps and grab your sieve, the second large bowl, and your food processor. Now you're going to puree everything. Working in batches, transition the scraped flesh to the food processor and have at it. You should have just enough water for the processor to work but not so much that you end up with a thin puree. 


Once you've pureed the entirety of your pumpkin, give the first bowl a quick wash, and grab your sieve and metal spoon. You want to work the puree through the sieve, pushing and scraping as you go. Your goal is to get rid of any uncooked bits, seeds, skin etc. 


When you're finally done with that stage, you can do one of two things. (Three technically, but we don't count icing your wrists as an actual part of the recipe.)  

1)  You can be satisfied with the quality of the puree as it stands, and move forward with cooking! 

2) You can opt to make it thicker and use cheesecloth to remove some of the liquid. 


If you're going with option 2, here's a quick run down. Again, wash the emptied bowl, and then grab some cheesecloth. You'll work in batches over your sink to squeeze out about 50% of your liquid. So, just a gentle squeezing, not working to flatten all of it out. Add each batch into the bowl you washed, and repeat as needed until your puree is the thickness you prefer. 


At this point you can continue on to make this super simple soup, OR you can take a break for the day, set aside 3 cups of your puree, and portion the rest for freezing. That's up to you.  Frozen puree can last up to 6 months, if you don’t manage to use it all up before then.


If you choose to move forward with the cooking, let's get to it. 


Take a large, wide pot (we used a caldera at our home, but a dutch oven would work as well) and set that over low heat.  


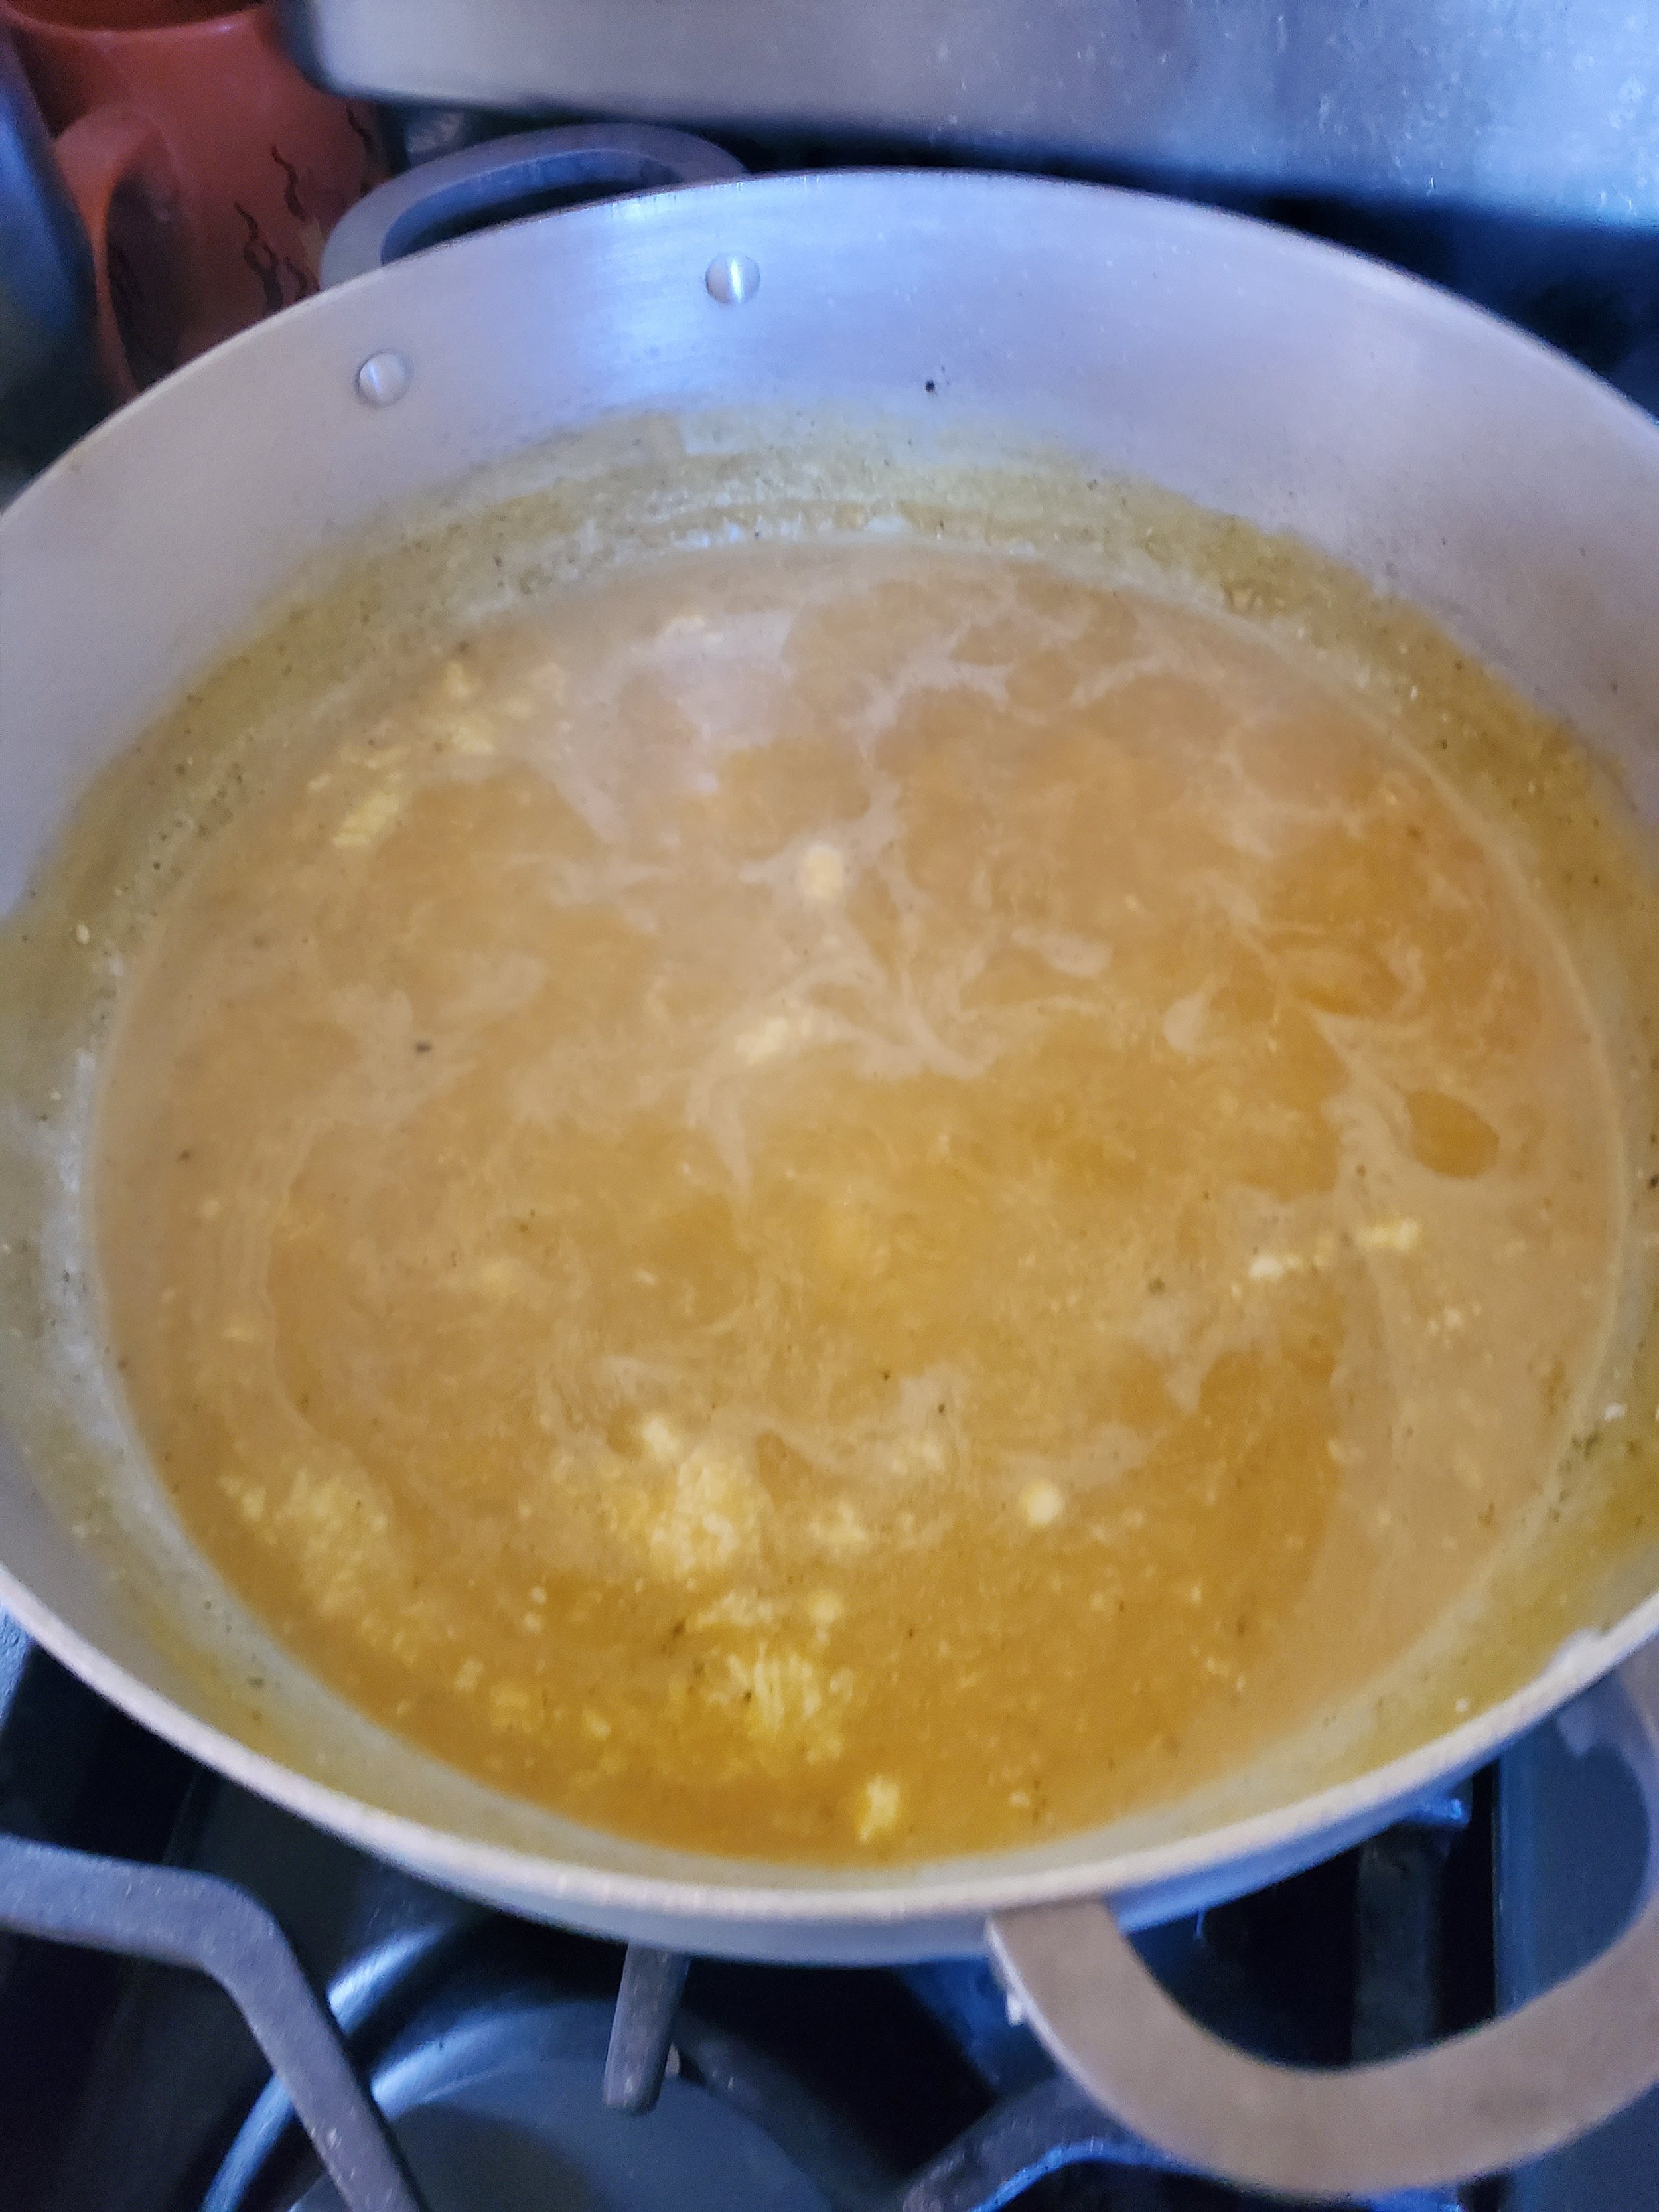
You can use already minced garlic, or you can mince your own. Either way, use at least 1 Tbsp. We say at least because in our home the rule is always "more garlic is better."  When your garlic is ready, turn up the heat to high and toss in the garlic. You can also add in 1 cup of diced white onion at this point, or just sprinkle your garlic with onion powder. That depends on how strong you want the taste of the onion to be.  You're looking for the garlic to soften and also start to turn just a little brown around the edges. 

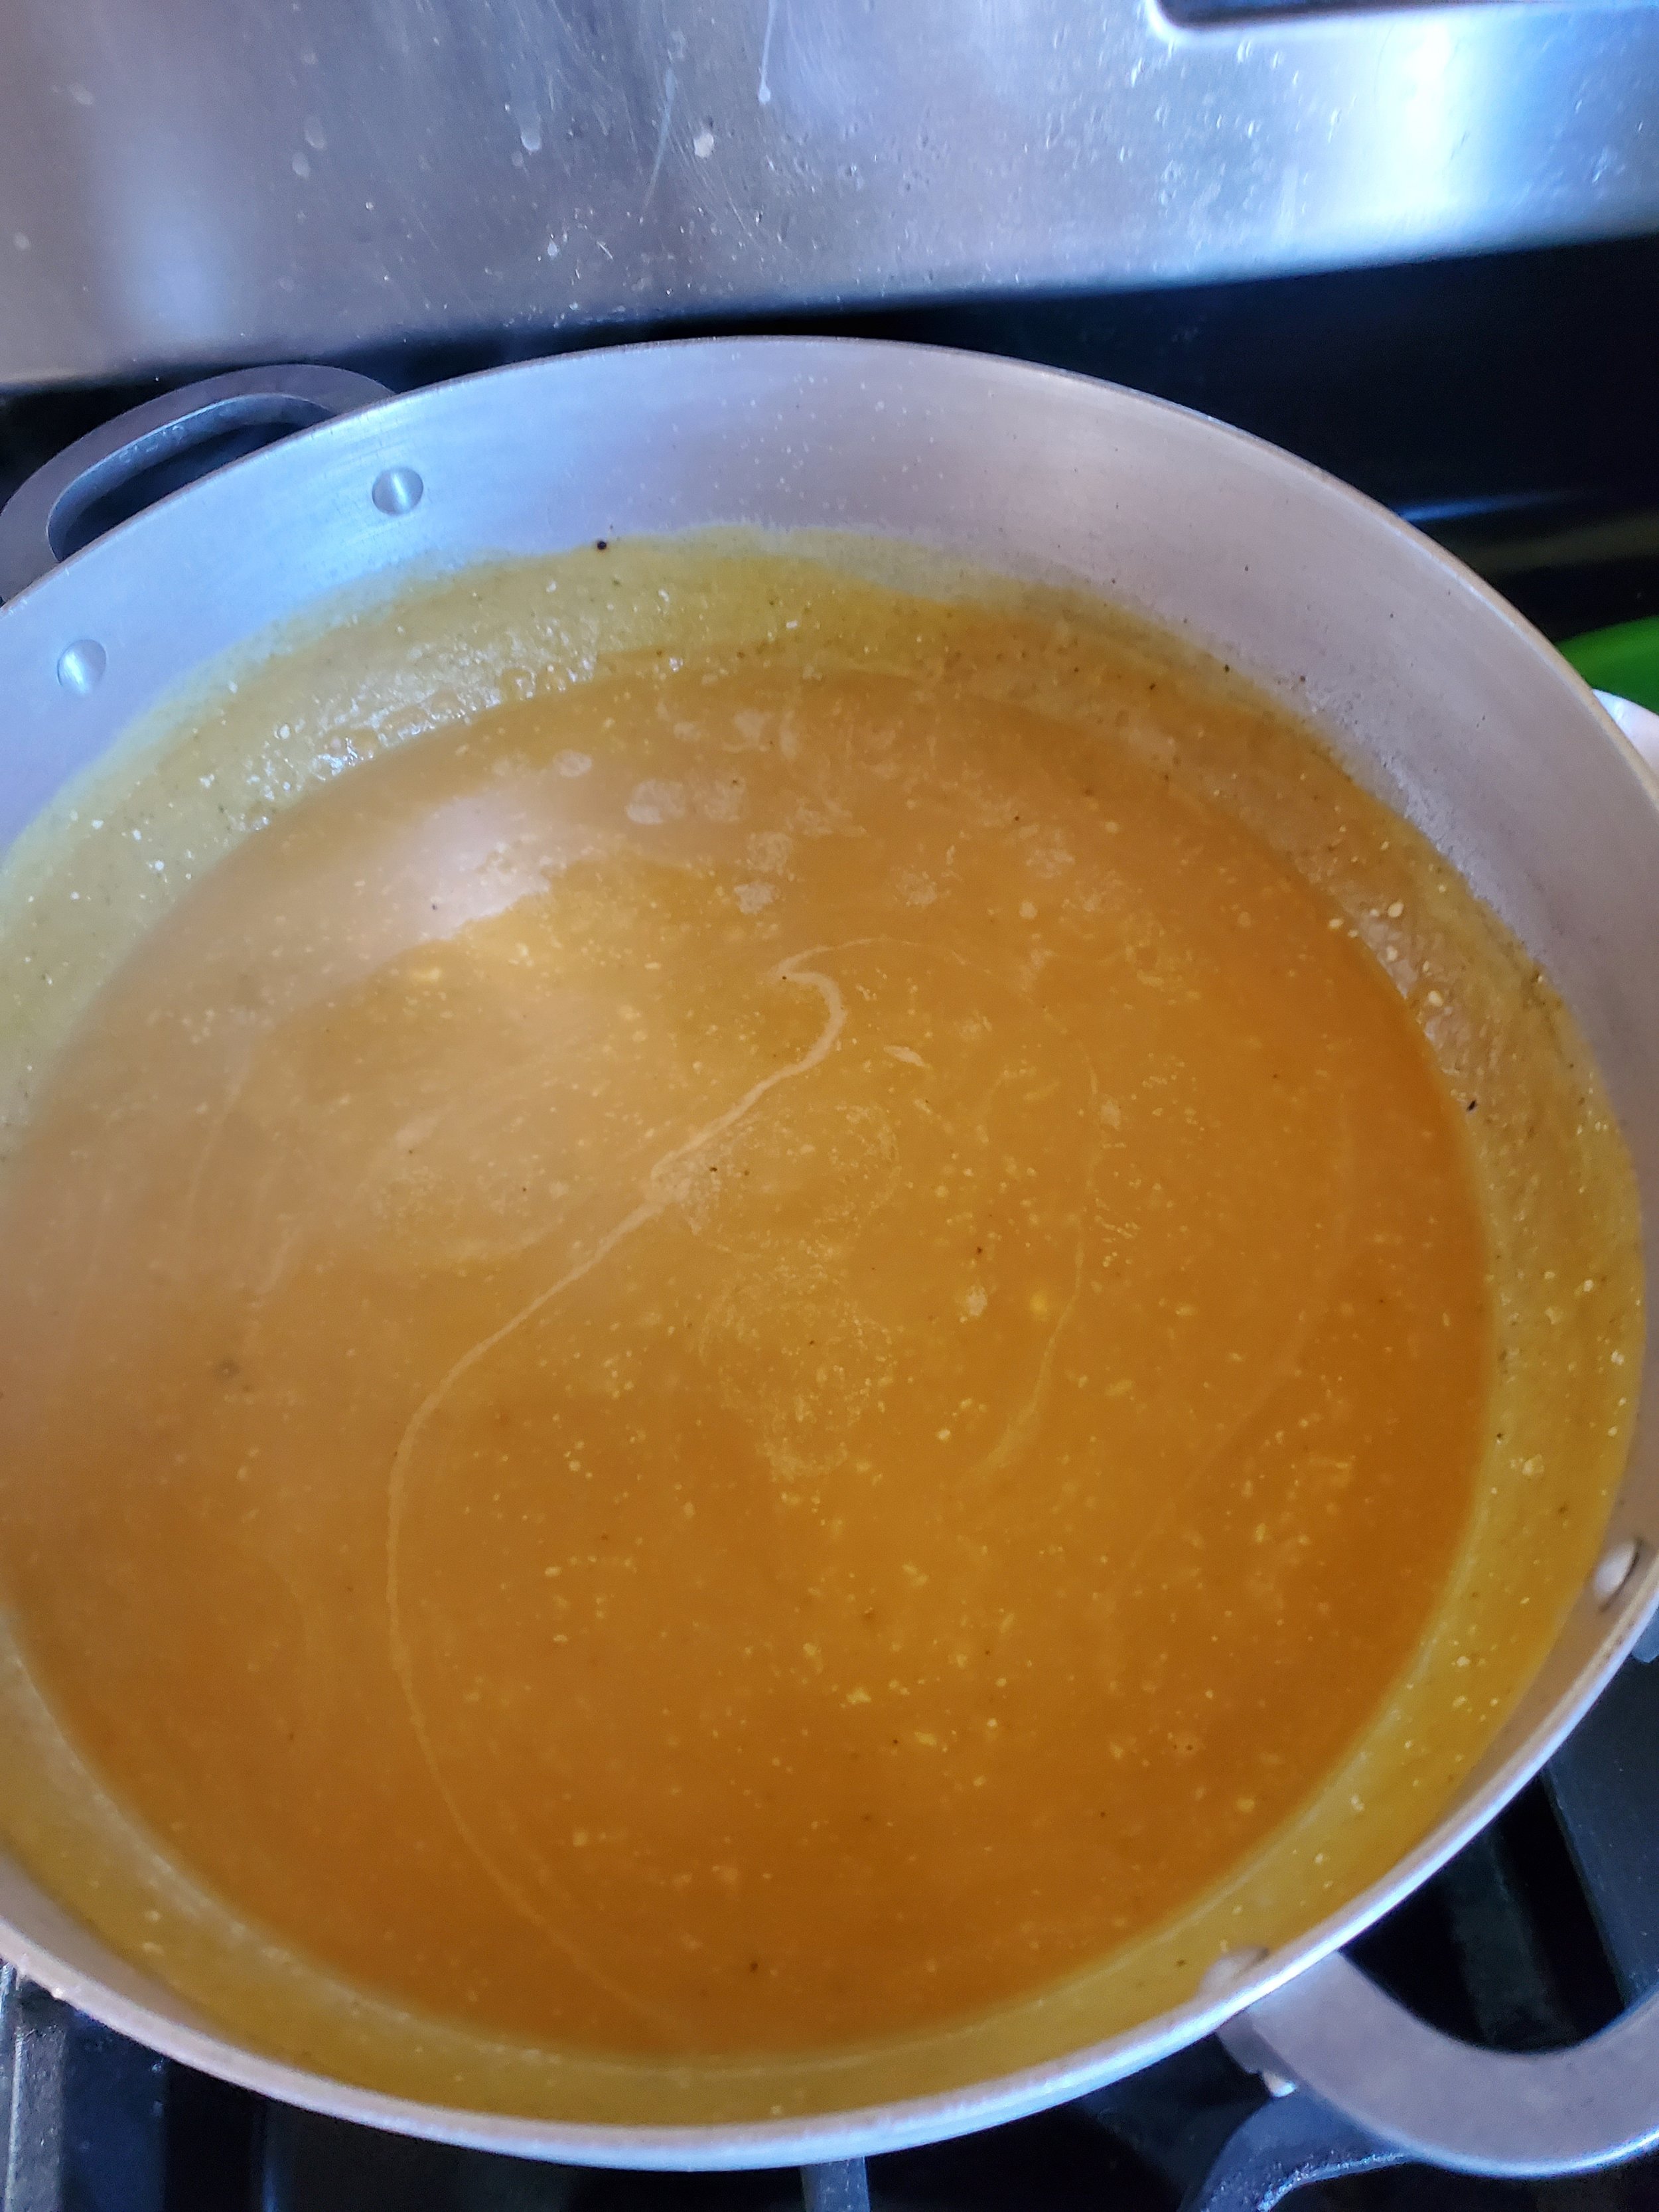
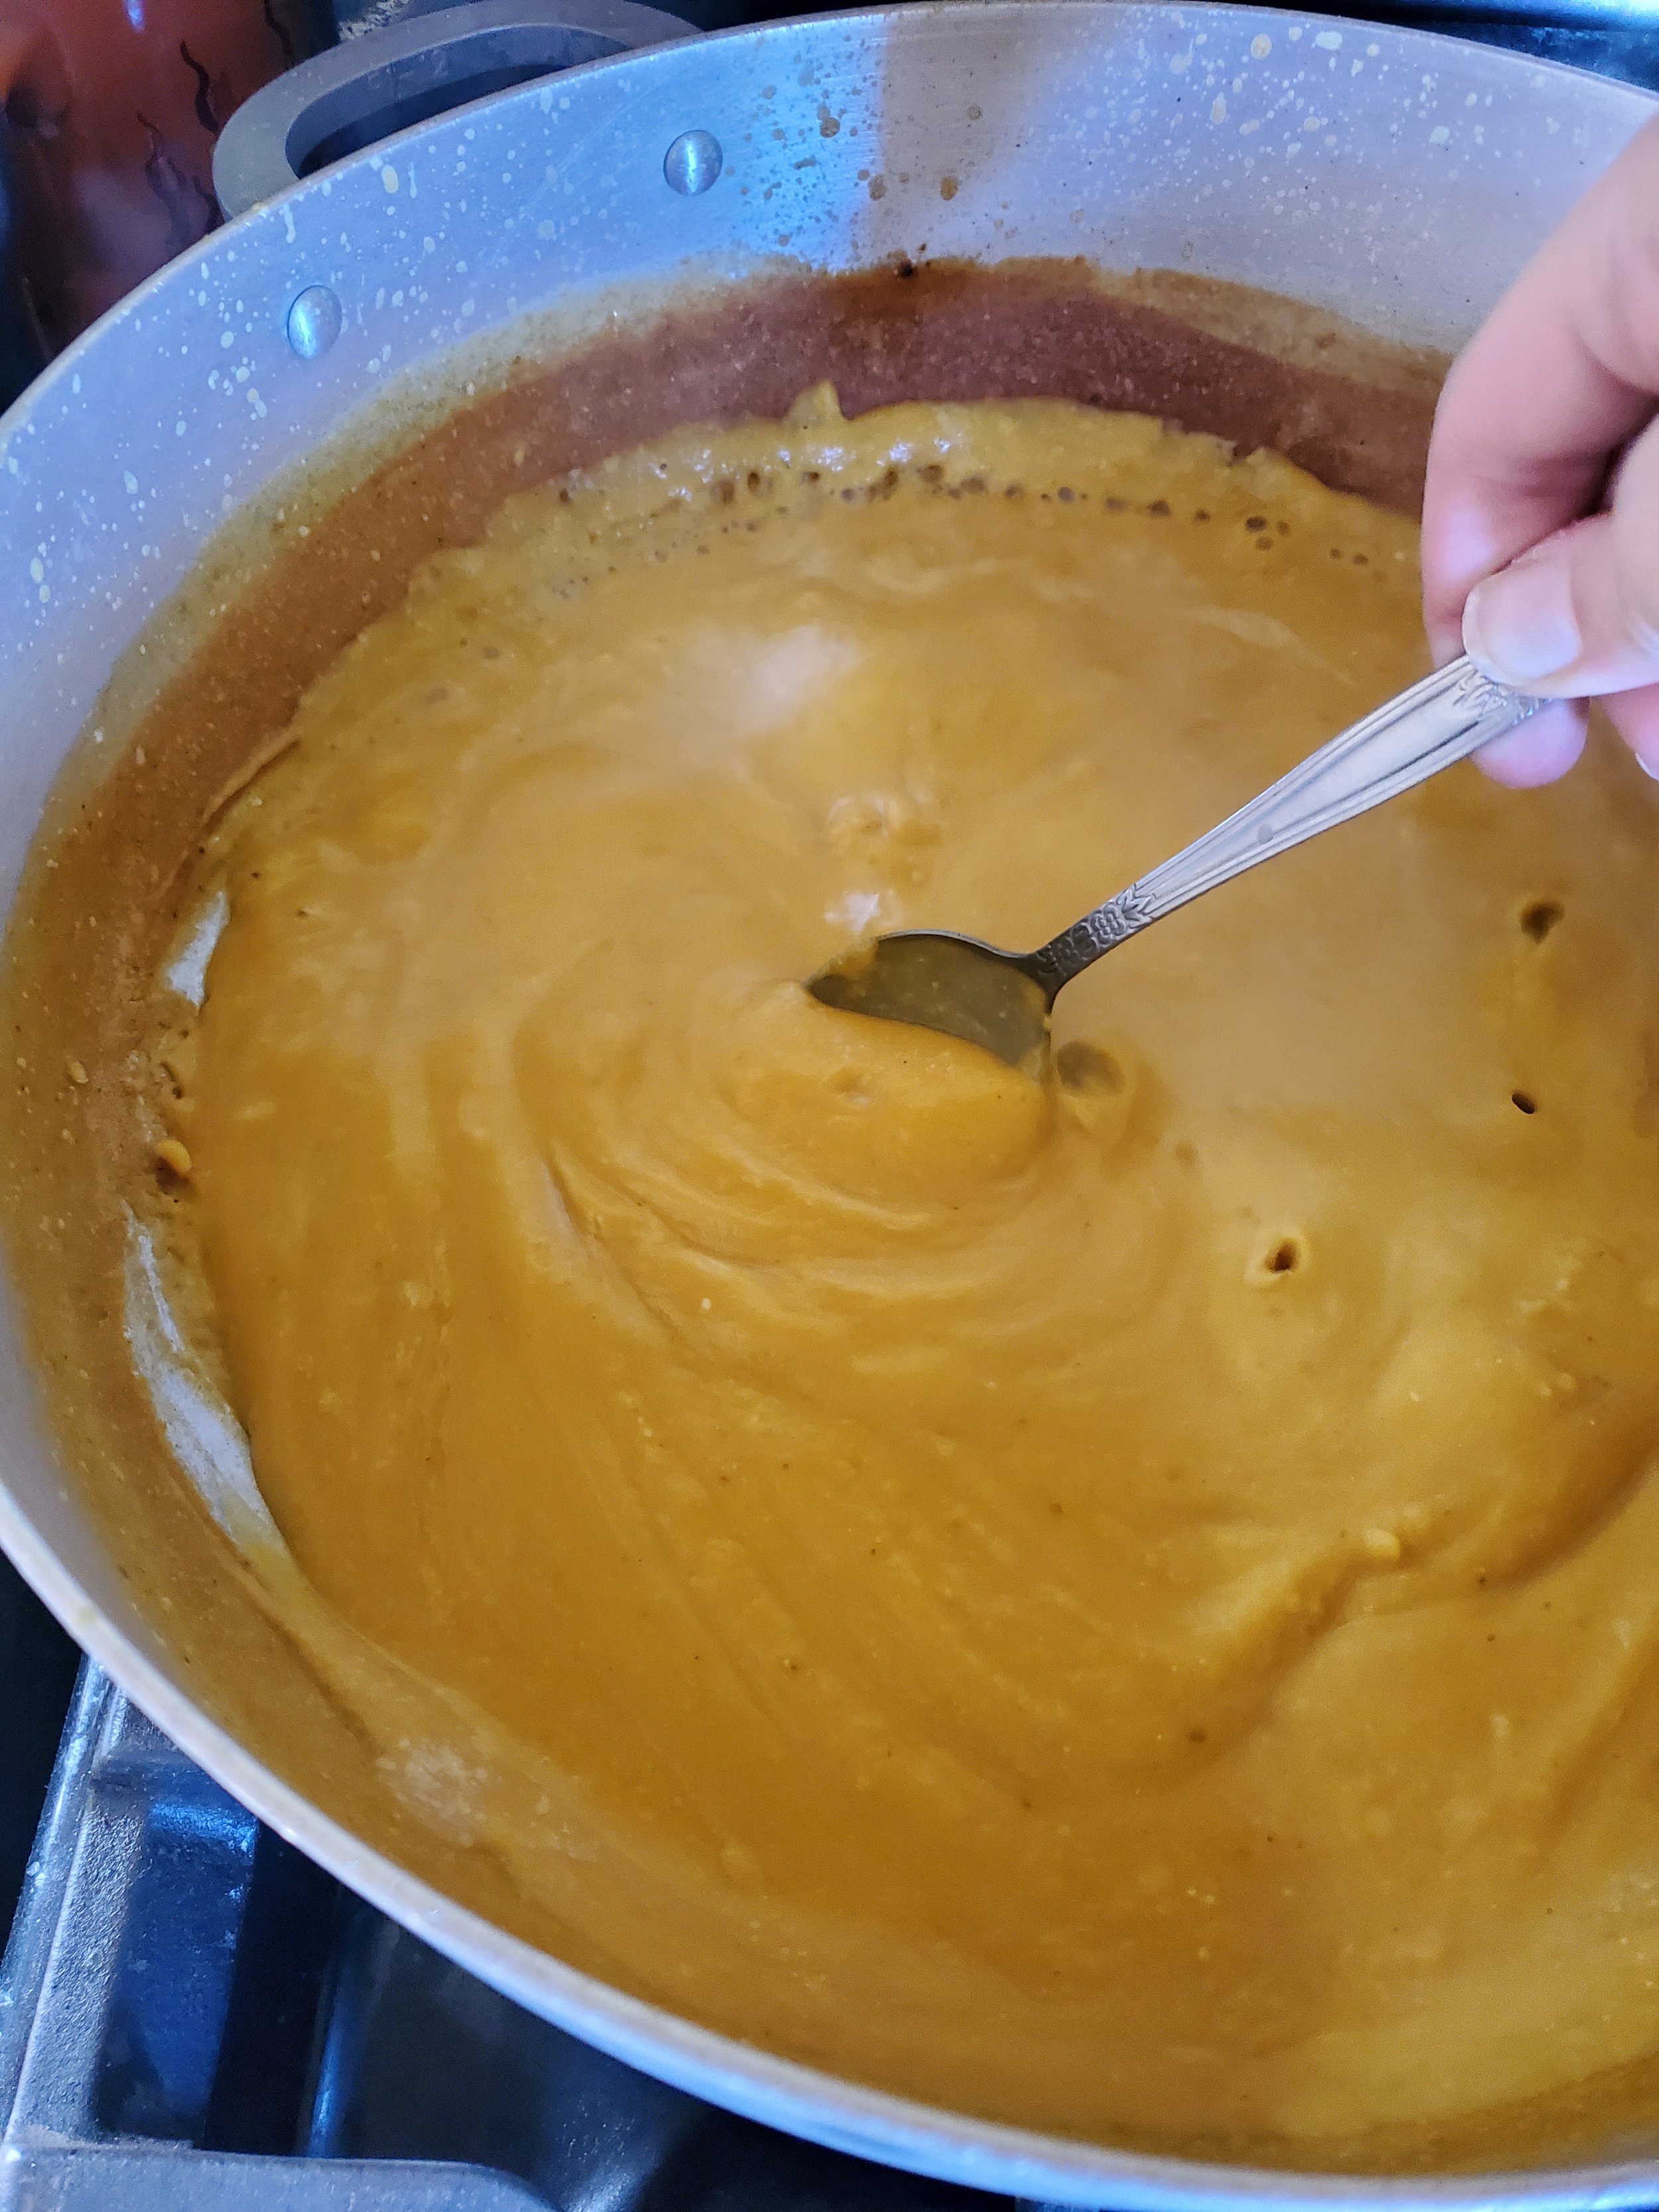
Mix in 6 cups of chicken broth, 16 oz of cream cheese, and 3 cups of your pumpkin puree.  Stir thoroughly and bring the mix up to a boil. 


Once your soup has come up to a boil, reduce it down to low and allow it to simmer away until it has reduced to a thick, creamy consistency. 


When you're done, turn off the heat and serve it up alongside some rolls or a rich chewy bread. It's not a complex recipe, but it is filling and delicious.  


An important note is that if you want to do this at other points throughout the year and you don't have any pumpkins just lying around, you can always pick up a large can of pumpkin puree from the store and use that. It won't taste /as/ good, but it's still an amazing soup. 


There you have it! You can now say you know how to select your own pumpkins, roast them and turn them into soup! What do you think? Are you interested in learning other recipes like this, where we show you how to prep different aspects of the meal ahead? Let us know over on our Facebook page or in the comments below. 


If you're here because your freezer is thinking it's still summer and working harder than an ox, we can help. You can give us a call at ((214) 599-0055) or reach out on our contact page. We'll work with you to  find a time that fits your schedule best to send one of our technicians to get your home running smoothly again. Whether you live in Dallas, Coppell, or Addison, Appliance Rescue Service is here for you. 


Energy-Efficient Washing Machines

What they are, how they work, and what the best are in 2022

What is the most energy-efficient washer? The one you do by hand! Yep, we're back at it again, looking at energy-efficient appliances. This time we're looking at washing machines. Will tell you about what makes a washer energy efficient, what the difference is between energy-efficient and high efficiency, what the best on the market is right now, and what you can do to make your current one more efficient.


We're happy to say that this article is more straightforward than our last one on ovens.


To start with, what is it that makes a washer energy efficient? According to Energy Star, in order for a brand to have the logo on their washer, it needs to meet two criteria. First off, it has to have a high Integrated Modified Energy Factor, and second, it has to have a low Integrated Water Factor. We know you're looking at us and going what the heck does that mean? An Integrated Modified Energy Factor or IMEF, is a measure of energy efficiency that considers the energy used by the washer during both the cycle and while on standby. An Integrated Water Factor or IWF, is a measure of the water efficiency in gallons of water consumed per cubic foot of capacity for the washer drum. The lower the IWF the more efficient the washer. So in order for a washer to get the energy star logo it has to use 25% less energy and at least 33% less water than what is currently standard on the market.


So then, what are the most efficient washers for 2022, according to Energy Star?


You have the best IWF, and that is the

LG WM9500H*A


Front load washer

A slate grey washer, with an all black panel, with digital buttons for the display

Has a volume of 5.8 cu.ft

Annual Energy Use: 120 kWh/yr

Annual water use: 4588 gallons/yr

IMEF: 3.1

IWF 2.7

Price: $1,799.00


Then we looked at the best IMEF.

Samsung- WF45A64*A*

Front load washer

A shot of a front loading washer, the door takes up most of the front panel, and the display is digital with a knob

Has a volume of 4.5 cu.ft

Annual Energy Use: 93 kWh/yr

Annual water use: 3807 gallons/yr

IMEF: 3.1

IWF 2.9

Price: $949.00

Our third washer is the best in terms of annual energy use.

Frigidaire - FWFX22D4EW

A close up shot of an all white front loading washing machine, with the door closed and a triangle shaped tumbler on the back wall

Front load washer

Has a volume of 4.4 cu.ft

Annual Energy Use: 50 kWh/yr

Annual water use: 4154 gallons/yr

IMEF: 2.76

IWF 3.2

Price: $700.00

Keep in mind that this one does have a lower IMEF and a higher IWF than others on the list so far, but for the amount of energy it uses, it seems like a fair trade-off.


The fourth one we looked at has the best annual water usage.

Asko- W2084.W.W

An all white front loading washing machine, very simple

Front load washer

Has a volume of 2.0 cu.ft

Annual Energy Use: 75 kWh/yr

Annual water use: 1728 gallons/yr

IMEF: 2.31

IWF 2.9

Price: $1499.00

We will note that if you look at the volume of the washer, that's the reason the annual water usage is so low. So it might be a good option if you're looking to take care of a family of two or if you're on your own. We wouldn't necessarily suggest it for a family of three or more, though.


Our final washer that we looked at is the direct opposite of the last one and has the largest volume.

Maytag- MVWB955F

Top load washer

Has a volume of 6.2 cu.ft

Annual Energy Use: 197 kWh/yr

Annual water use: 6735 gallons/yr

IMEF: 2.38

IWF 3.7

Price: $ 1170.00

Even with the IMEF and IWF being wildly different from any of the others on the list, we still have to point out this is still an energy star washer. We also want to point out that this one is no longer being sold by Maytag directly, but you are likely to find it on secondary sale sites still. 


Now let's take a quick look at what is the difference between a high-efficiency washer and one with the energy star logo.


A machine with the energy star logo is a great place to start. They are at least 33% more efficient than what's on the market. However, a high-efficiency machine goes even further. Due to the way they're designed, they need even less water than those with the energy star logo. That's not a flaw of your standard washers but a design feature of the high-efficiency ones. They use a more concentrated detergent that reduces the suds and penetrates deeper into the fabric. That then requires less water to be used to rinse the clothes. And they also use less energy because they keep your clothes constantly moving during the washing cycle instead of using a central agitator. We wouldn't say that we're for or against high-efficiency machines? We'll repair all of them, and it really is based on what your household needs.


What if you can't replace your washer with one of these Energy Star wars? Is there anything that you can do to make your washer more efficient as it stands right now? The answer to that is a resounding yes.


Tip Number 1

To start with, maintain your machine. Just like cleaning the coils on your refrigerator or the ducts on your dryer, residue buildup on your washer will reduce its efficiency and make it work harder. To do this, you can have a professional come out, or you can do it on your own with recipes from around the web. Make sure to look at whether you have a high-efficiency machine or a standard washer before you do this.


Tip Number 2

Avoid the sanitary cycle. Unless it is truly necessary, say you got exposed to covid, heaven forbid, just don't use it. The amount of energy that goes into the sanitary cycle is unnecessary a large portion of the time.


Tip Number 3

If you're not already doing it, wash full loads. Although there are washers out there that allow you to wash just one item when you need it, it's better to wash a full load. Although we won't say it's the same for all washers, most washers will still use the same amount of energy and water for a partial load that they do for a full load. So you might as well get the most out of spending that money.


Tip Number 4

And for our final tip, wash in cold water. It uses less energy because you're not heating the water. It's kinder on your clothes. And it's just as effective as hot water washing if you're using the right detergent.


And that's that! Let us know in the comments below or over on our Facebook page, did you have any further questions?


If not, or if you're looking to get your current washer looked at, give us a call at ((214) 599-0055) or reach out on our contact page. We'll work with you to find a time that fits your schedule best. Whether you're in The Colony or McKinney, Appliance Rescue Service is here for you.


10 Tips For French Country Decor

How To Bring This Calming And Simple Decor Style To Your Home

Have you ever looked around your home and thought, "I wish I could travel to France?" Well, we can't help with the travel part, but we can help redecorate your home to look like it. Whether you are planning out changes for next year or looking to do some redecorating before the holidays, join us in taking a look at French country decor. 


Use Natural Light Wherever You Have It.

A window is open over a kitchen sink, letting sunlight in

Photo courtesy of agata 822

Bringing in natural light is a part of what gives French Country the signature light and airy feeling, which means LOTS of windows and curtains. It’s a great thing if you can open your windows to let in the breeze. If you’re really devoted to the idea of this design, you could go so far as installing new windows that can be cranked open from the inside, giving you safety and a beautiful look. 


Keep Your Brick

A pale brick fireplace with a lamp on it, and a folding screen to the left

Courtesy of Engin Akyurt

If you've got an interior brick wall in your home, keep it. It brings a vintage look to your home that not many modern homes have. This is a part of many French country homes, although it was because it was actually part of necessity at the time.   If you want, you could go so far as whitewashing it to lighten up the space. Whitewashing isn’t a difficult process and only needs to be done once a year. Fortunately, Home Depot has a nifty tutorial


Bring In Wood Countertops Where You Can

Courtesy of American Lumbermill

 Bringing in natural materials is a key concept for a French country home, be it cotton, linen, wicker, or wood. And it doesn't have to be just for the countertops in your kitchen or if you have a bar. These can be table tops this can be mantle pieces, or side tables. You can do it for shelving, there are all sorts of ways to work in that warm natural wood into your home. Even better, there's nothing that says you have to go and use just one type of wood. Pick a couple of tones that you like, and you can work them in around the home and throw in some white-washed wood as well to go and get that extra authentic appeal. 


Use All Of The Copper! 

A bathroom sink with a marble counter and a dark copper sink, faucet and handles

Courtesy of Shon Flaherty

It used to be that copper was one of the cheapest metals you could use in your home. And then industrialization came, and we realized that copper as a whole just makes it look homier. Which is why if you're looking to imitate a French country home, bring in the copper. Door knobs, light fixtures, light plates, and cabinet handles. Don't be afraid to get creative with it, either. If you see somewhere that could use a bright pop of copper, do it! 


Save Your Cabinet Space, Hang Your Pots

Courtesy of David Marck

Let's talk about the kitchen specifically for a minute. Space is at a premium in the kitchen; why not hang your pots and pans? Hanging them above your kitchen island not only opens up your cabinets and makes it easier to find what you want when you want it, but it also adds to the rustic charm that we're going for throughout the house. (Especially if you don't have an induction stove and can use copper bottom ones.) 


Bring In The Green

A bedroom with the walls painted in a pale green similar to that of culinary sage

Courtesy of Freshouz

Going right along with the wood tones and the creamy whites, and the coppers, bring some green into your home. Since the decor is all about the country, soft sage green or a bright spring green works well to tie you into your surroundings. It's also helpful for those days when it's grey and cloudy to keep your mood bright. 


Love The Look Of Arch Ceilings

 If you have a room that is high enough where you can embrace it do it. This can be faked in a multitude of different ways, from clever lighting and panels to paint. Or if you know that this is a design you love and you have the space to do it, bring in a professional. Have them actually redo the ceiling and utilize the roof space to give an arched ceiling. 

A living room done in greys and greens has an arched ceiling similar to the inside of a barrel

Courtesy of Archways and Ceilings


Bring In Your Plants

a small plant is suspended from above in a glass vase

Courtesy of Pexels

We're not talking about a full greenhouse or replicating a jungle. But scattered here and there throughout the home, a few plants in every room. Not only does it literally and figuratively bring life to the room, but it also adds a certain lightness that is sorely needed. Plus, studies show that having more plants in your life helps with depression, and we are all for mood-boosting ‘plant children.’ 


Use Your Alcoves To Full Effect

A recessed alcove is backed with black subway title, with a bar built into it.

Courtesy of real simple

If you have little nooks and crannies and depressions around your home, use them! Make them a focal point instead of something hidden. Use a backsplash, or if you're feeling sneaky, you can use peel-and-stick wallpaper and change it up on a regular basis. Use these nooks to highlight something that's special to you or just to highlight a particular pattern or color that you're enjoying this month or this season. If your home has these spaces, make the best use of them.


Mix Up Your Seating

As much as we adore huge overstuffed sofas and chairs you can curl up in all day, there are other options. Bringing in rattan and wicker chairs pulls more of the natural vibe throughout the home and offers beautifully unique furniture. Rattan and wicker don't have to be just for outdoor settings, either. You can use furniture with rattan back, or mix in wicker chairs throughout the living room, alongside the others you have. 

A wicker chair is sitting next to a christmas tree in front of windows.

Courtesy of Fietzfotos


So? What do you think? Are you going to be doing a French country Christmas? Or is this just not for you? Let us know in the comments below or over on our Facebook page.


If you wound up here because you're needing help with your appliances, however, I'm not your decorating, we can still help. Reach out to us via our contact page or by giving us a call at ((214) 599-0055). Appliance rescue service we want to get your home running smoothly again. We will work with you wherever you live in the Dallas metro area.


Punchy Potato & Cheddar Rolls 

These potato rolls could be the star of their own meal.


Mashed potatoes are a great side dish, but in the case of these rolls, they are the star of the show. Not because you'll taste them but because of the light and crisp texture they give to the rolls.  Rather than dense and chewy bread, you end up with a light and airy roll that can be used alongside soups, stews, or hearty gravies or even used as a quick sandwich. 


Ingredients: 

1 pound russet potatoes  (roughly 2-3 good-sized potatoes) 

2 Tbsp unsalted butter 

2 1/4 cups all-purpose flour

3/4 cup sharp cheddar cheese

2 Tsp instant yeast

1 Tbsp sugar

2 Tbsp stone ground mustard

2 large eggs 


Tools: chef's knife, cutting board, a bunch of bowls, fork, saucepan, colander, potato masher, rimmed baking pan, cooking spray, plastic wrap, parchment paper, oven 


1. Skin your potatoes and chop them into 1-inch chunks. Shred your cheddar and set it to the side. Chop up your butter into 4 pieces. And last but not least, take one of your eggs, add 1 Tbsp of water and whisk it all together. Set the last one in your fridge for the time being. 

2. Take your potatoes and put them into a medium-sized saucepan, and cover them with cold water, plus an extra inch. Bring the pot up to a boil over high heat, and then reduce the heat to medium-low. At this point, you'll let the potatoes simmer until they're fully cooked, about 10 minutes. At the eight-minute mark, grab a fork and gently press into a potato. If you can cut into it easily, they're done. If not, let them continue cooking.  


3. When they are finished cooking, you'll pull the pan off the burner and reserve 5 Tbsp of the potato water. Set that to the side for now. If you have plants or a garden, you might want to save the rest of the water as well, but either way, you'll need to drain the rest of the water from your potatoes.  Now toss the potatoes back into the pot, and set them on low. Sit here for a minute, shaking the potatoes every few seconds. You're evaporating all of the water off the surface of the potatoes. When that's FINALLY done, remove your potatoes from the heat. 


4. Have you had a rough week? Or maybe just a bad day? Grab your potato masher and go to town.  You want to turn this into a very thoroughly mashed set of potatoes. No lumps or bumps left. When you're done, grab your 1 cup measuring cup and a second smaller measuring cup. Use the smaller one to scoop up the potatoes and pack them into the 1 cup. You want a firmly packed 8 oz of potato. done? Can't add anymore without it going over? Good. Set the rest of the potatoes aside. You can eat those while you let the dough rise later. 


5. Next up, grab yourself a small bowl, add the measured cup of potatoes to it, and mix in your butter until melted and fully incorporated. 


6. In a large bowl, combine your flour, 1/2 a cup of your cheddar cheese, yeast, sugar, mustard, and salt into a bowl. Add the warm potato mixture to this and mix it with your hands until well combined. At this point, some lumps are fine. Take your still whole egg and crack that into the mix. Mix your dough for 8-10 minutes by hand or until your dough is soft and slightly sticky. 


7. Shape the dough into a ball and place it in a lightly greased container. Cover the top of the bowl tightly with plastic wrap and set it to rise. If your kitchen is slightly cool (as ours was the day we made these), no worries. You can set this in front of a toaster oven or on top of your stove. Turn your choice of stove on 350* and let the dough rise until it has doubled in volume. If your kitchen is already warm,  it should take only 30-40 minutes; we ended up going for an extra 30 minutes, though, to make sure it had doubled. 


8. Once the time has passed, press down on the dough to deflate it. Turn it out onto a clean counter, and stretch it out into a 12-inch log. Cut that into 12 equal pieces and cover them loosely with greased plastic. 


9. While you let the dough sit, line a rimmed baking sheet with parchment paper. Then head back to your dough,  and grab one piece of the dough. Keep the others covered with the plastic as you work.  You'll form it into roughly a ball shape by stretching it around your thumbs and pinching the edges together.  When you do this, the top will be smooth. Place the ball seam side down onto your clean counter, and using your cupped hand, drag it in small circles until the dough feels round and tight.  When you're finished with one, place it back under the plastic until all of them are finished. 


Tip: If your dough is really sticky, you can lightly dust your fingers with flour. 


10. Arrange your rolls on the prepared sheet and cover them loosely with the greased plastic to let them rise again until almost doubled in size, another 30-40 minutes. (Here again, you can utilize the trick with your oven of choice.)  While the rolls rise, turn your oven to 425 and move one rack to the upper middle position. 


11. Brush the tops of the rolls lightly with the egg wash you made at the beginning, and sprinkle them with the remaining 1/4 cup of cheddar cheese. Bake the rolls until they're golden brown on top, roughly 14 minutes. (Make sure to keep an eye on them, and turn them halfway through the baking.)  When they're finished, transfer the sheet to a wire rack and let them cool for 5 minutes.  You can then serve them warm or at room temperature. Store them in a sealed container if any manage to survive. 


These were absolutely delicious when we made them, and we hope that you enjoy them just as much. One thing that we did note as we were baking was that the type and amount of mustard could be changed depending on preference. We used stone ground this time, but a spicy brown mustard and adjusting the amount could yield a punchier roll. Let us know your thoughts and ideas in the comments below or over on our Facebook page! 


If you're here instead because your stove isn't functioning correctly, you're still in the right place. At Appliance Rescue Service, we want to work with you to get your home running smoothly again. You can reach out to us via our contact page or by giving us a call at ((214) 599-0055). Whether you're in Frisco or Allen, we're here for you. 


Why Fall Is the Best Time For a Maintenance Check

3 Reasons Now IS the Best Time

Here's a riddle for you: Why is right now the best time to call and schedule a maintenance check for your appliances? Because it's October!  School is back in session, and everyone has settled into the routine. Now you're no longer trying to get used to the new year.  It's also well before the holidays, which means that you're not running around trying to get everything done.


Not quite following our logic? Let's take a closer look then and see why it might be perfect for you. 


Did You Travel Over The Summer?

Several of our posts in the past have talked about how to close down your house and disconnect everything before you travel.  If you did get to travel this summer, that means your appliances sat there. After you get everything reconnected is a great time to have all of the power cords and interior workings gone over to make sure that nothing was shorted or nibbled on by mice while you were gone.


Are You The Holiday Maven In Your Family?

If you're planning on lots of celebrating over the winter holidays, it's best to do a thorough check now. Taking a little bit of time out of your schedule now means that when it comes time to be prepping for everything, you're less likely to have an unexpected breakdown. It's also a lighter time in our schedule, which means you're not competing with 100 different families in the same situation.


Or Are You Excited For The Baking And Cooking The Cooler Weather Allows For?

If you like to bake more as the weather turns, we're right with you.  Very few of us want to bake or do a lot of food prep during the summer but fall is an ideal time to do those tasks. It's warm enough that you can open up the house but cool enough that you don't overheat. However you don't want your refrigerator or freezer, your stove or your oven, to give out in the middle of all this when you're trying to can several jars of fruit preserves for the next year, and bake all sorts of fresh pies as well. It just wont do. Which is why it's better to check everything over now to make sure everything is clean and running smoothly.


So how exactly does an appliance maintenance check work?


You start by giving us a call or reaching out to us on our contact page. Will work with you to find a time that works for your schedule for when one of our technicians will come to your home. We can either do a latchkey service or work with you to find a time that is best fit for when we can be there when you are. At this stage will also work with you to figure out what you want gone over. Are you wanting us to look at one or two appliances? Are you wanting us to go over all of your appliances?


When the day comes that you've chosen, our technician will come to your home and confirm the service you've chosen. They'll then ask that you guide them to where the appliances are and begin looking them over one by one.


At this point, our experience technicians are looking for anything and everything. Unlike with a repair call, where they'll be looking for the source of a problem and trying to solve exactly that problem, this is looking at everything. Are the power cords frayed or damaged or melted? Are all of the buttons functional? Are there any strange sounds or smells that might alert them to a problem now or down the road. Are there any puddles or signs of water damage? All of this and several dozen more issues are searched for.


After they've gone over everything, our technicians will point out what they found. This is the point when it's a good idea to get a sheet of paper and write everything down. They'll make suggestions on what can be fixed, and what might have to be replaced if anything is that bad. Naturally our hope is that by doing this on a regular basis for you we can prevent anything from getting to the point that it cannot be repaired. Our goal is to keep your appliances and by extension, your home running smoothly for as long as possible.

Power cord on fire with cables melted, frayed and otherwise damaged


If we've convinced you that now is the best time of year to schedule an appliance maintenance check for your home let us know on Facebook. Or tell your friends on Facebook.


If on the other hand you're wanting to schedule right now you can give us a call at ((214) 599-0055) or reach out to us via our contact page. Wherever you are in the Dallas metro area appliance rescue service is here to help.