Croque-Monsieur au Bleu (Or Very Fancy Grilled Cheese)

Fancy Pants Sandwiches to Keep You Running

I don't care! Take me to the Recipe!

When you're preparing for the holidays, you need a solid lunch to keep you going, this week's recipe provides just that. With a delicious grilled cheese that's dressed up enough that it'll leave you full, but not so over the top you're going to run out of steam just cooking it.

Sometimes you try a recipe the first time and it turns out fantastic. Sometimes you try it out as written and it ends up going horribly wrong. That's what happened with this week's recipe of "Very Fancy Grilled Cheese and Fancy Gravy" as our Tiniest Kitchen helper dubbed it. (If you want to be fancy though, you'll just call it a Croque-Monsieur au Bleu.

Initially, the recipe called for half of a sweet onion, only 1 slice of thinly sliced ham per sandwich, and only 1 cup of milk for the sauce. This... this ended very badly. Between the original recipe plus the poor choice of a black-coated nonstick pan, we ended up with a very dead set of sandwiches. (we'll share how to save those down at the bottom. *) So, we reworked the recipe and came up with this beauty to share with all of you. 

Ingredients: 

Sandwich

2 ounces blue cheese

2 ounces mozzarella

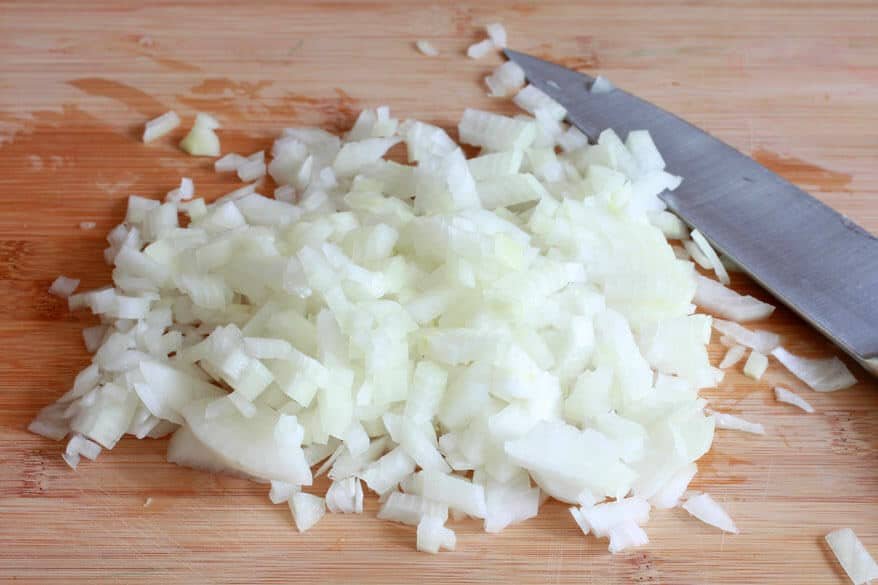
1/4 sweet onion minced

8 slices sourdough bread

8 slices of ham 

2 tsp Dijon mustard

coarsely ground black pepper, to taste

2 Tbsp unsalted butter, melted

2 Tbsp extra virgin olive oil 

Sauce

4 Tbsp unsalted butter

4 Tbsp all purpose flour

2 cups milk 

2 Tbsp Dijon mustard

grated nutmeg

cayenne pepper

salt

coarsely ground black pepper


Start off by coarsely grating your blue cheese and mozzarella using the largest size of your box grater, mix them together by tossing them lightly. Set that back in the fridge to chill while you work. 

Line the broiler tray with aluminum foil. Preheat your ovent o 300*F. 

Make your sandwiches first, as the sauce shouldn't be made too far ahead, it'll become too thick if left to wait. 

Take your cheese mixture and remove roughly 4 tablespoons from the bowl. Set that into a smaller bowl and set it aside for later. Now add the onion to the original mixture and toss a second time. 

Lightly toast your bread in the toaster. Lay ham slices on four slices of bread that have been lightly smeared with mustard. Pack the cheese mixture into a 1/2 cup measuring cup and then invert it onto a slice of ham, pressing down with your fingers to compress the cheese. Coarseley grind lack pepper over the top of the cheese. Repeat the process with the remaining slices. Top each with a slice of bread and press down gently to compact again. 

Using a pastry brush, pain the top slice of each sandwich with butter. (You want to be a little heavy handed with this.) Warm your olive oil in a skillet on low heat. (and whatever you do DO NOT use a dark coated nonstick pan. Just back away from it and go to the store to get a different skillet. A dark pan will  burn your bread. Ask us how we know.) Cook 2 sandwiches at a time on medium0low heat. Press down firmly with a spatula and brown for about 2-3 minutes or until the bread is crisp. Flip over the sandwiches, paint the top slice of bread with butter, and brown until the bottom slice is crisp and the cheese is starting to melt.


Place each sandwich as you make it in the oven on the baking sheet to keep warm. When all 4 sandwiches are in the oven, turn off the heat and preheat the broiler. 

Lay the sandwiches on the broiler pan, top each with the Mustard Cream Sauce and 1 Tbsp of the reserved cheese mix. Pop them under the broiler for 3-5 minutes or until bubbly and golden. Serve immediately with a fork and knife. 

Making the Mustard Cream Sauce

in the saucepan, melt the butter, add the flour and whisk well. Slowly whisk in 1 cup of milk and cook until thickened and bubbly. Whick in mustard, nutmeg, cayenne, salt and pepper. Take a taste and add more spices or milk as needed.  You don't want the sauce to be too thick with this, so add the second cup of milk as needed to keep it at a 'sauce' consistency rather than 'gravy.' 

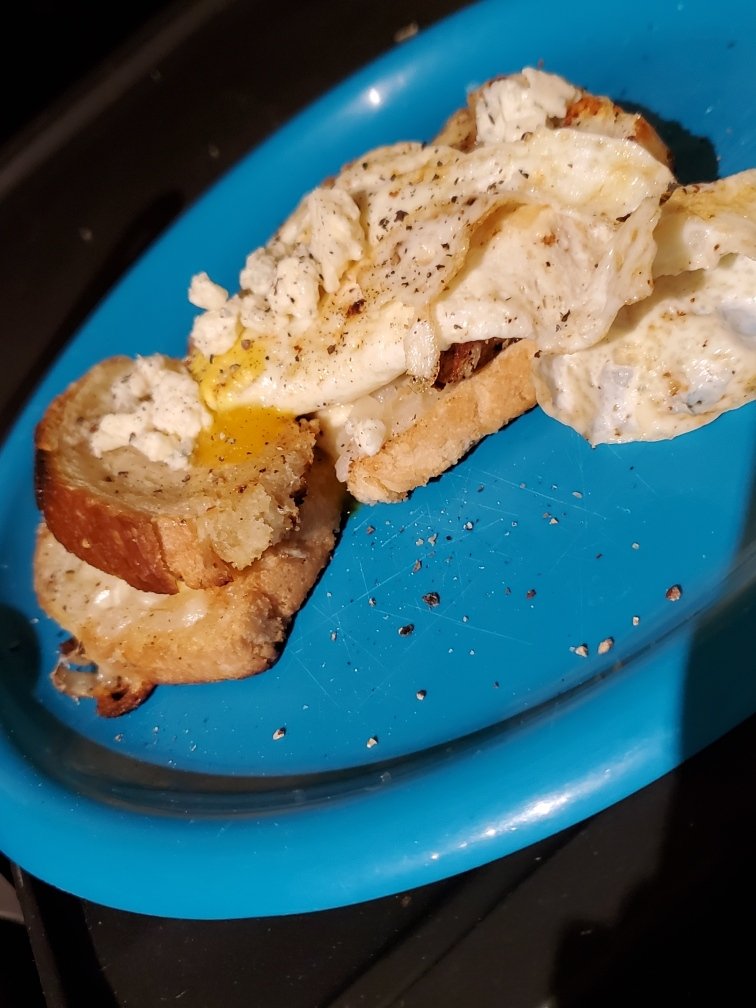
Let's say you've gone through all of this and you ended up with a murdered sandwhich anyway. Maybe you ignored us and used a black pan anyway. Maybe you put the heat too high. Maybe you thought "I LOVE onions and I don't want to use that little."  Or maybe you got called away to save your neighbor's cat up a tree. Whatever, your sandwich is blackened and it's too full of onion. It can still be fixed. Start off by pulling apart your sadwich and setting the ham to the side. Now apply a little melted butter to your pan and set it at the lowest possible heat. Put one slice of bread in it at a time, onion & cheese mixture on the pan. You want the cheese to become gooey and the onions to be translucent.  Now cover the pan and grab a second one. you're going to fry up an egg. However you and yours prefer your eggs to be fried, do that. (Personally, we think over medium goes very well with this.) Once your egg is done, put the sandwich back together, except this time you're not going to make a 'sandwich' out of it. Instead of having everything together in the middle, you want it to be cheese mix, bread, cheese mix, bread. This way you have a solid surface to put your egg on top of. Finally, take your sauce and drizzle that over the top. Yes, it sounds weird, we know, but it tastes amazing.  The tang of the mustard and the cayenne plus the gooey mixture of cheese, egg and onion? It's an amazing lunch. 

Oh, and if you wanted you could put your ham back in there somewhere too. 

What about you? What are some of your worst kitchen mishaps? Let us know over on our Facebook page or in the comments below. We'd love to hear from you.

Christmas Shopping for Your Favorite Chef

When You Just Aren’t Sure What to Get Them

Everyone is hustling and bustling, trying to find gifts that say 'I love you', 'you matter to me' or even 'I really love the food you make, even if we're just coworkers.' We're right with you.  Trying to figure out what the buy or make for people is complicated! So we've put together a list of potential gifts for the special chefs in your life. 

 Starting off with something every chef needs, a good set of knives. If you've ever listened to your chef-y friends talk then you know that with a proper knife there's almost nothing you can't do. On the other hand, if you're stuck with a poor quality knife, you're constantly having to sharpen it before you ever start to work.  This Wakoli 3 piece Damascus steel knife set is a fantastic gift for the favorite chef in your life. It comes with a 9-inch Santoku knife, a 7-inch Santoku and then a 5-inch paring knife.  If you want something that serves as both very pretty and a will be used for decades to come, this is a good bet. 

Price: $120

Next up we've got something that hits both 'cute' and 'useful' marks on your list. A set of Matryoshka dolls that serve as measuring cups. The dolls are made of white pressed plastic, and stack together when not in use. They range from 1 cup at the largest and each doll 'half' steps down by 1/4 cup. Absolutely adorable, easily stored and they can flavor to your kitchen. These might be perfect for a young nice or nephew who is just getting started in the kitchen or someone who loves cute things, but also practicality. 

Price: $13 

Think about the nonstick pans that you love. Now think about all the times when you're in the middle of cooking and you accidentally grab a metal spatula instead of a silicone one. By adding a few more tools to your kitchen and keeping them closer to the stove, you can fix that.  This set comes with 2 spoons, 2 spatulas, 1 jar 'spatula' and a brush for sauces, glazes etc.  It's also available in several different color options, and comes with a steel core so that it'll be more durable than some of the other silicone tools you can buy. 

Price: $20 


If your favorite chef is a lover of different spices, this can be a great gift. A stainless steel spice tower with solid glass jars, to make it easy to look at the different spices, as well as being clearly labeled.  This spice tower spins in place and easily holds of 20 jars of their favorite spices. The company also offers a 5 year spice renewal program. You can purchase the tower and register it with them and for 5 years you get free spices, all you have to do is pay shipping. It's two gifts in one, unlimited spices and a place to store them.  

Price: $50 


Following hard on the heels of our last gift, this one is a bit.. different. It's a label maker. For those of us that love cooking and baking you can end up with all sorts of unlabeled jars. You have friends that give you jars of spices from around the world, you experiment with different combinations, and sometimes labels just fall off. Then you're left staring at a jar going "I know I put some nutmeg in here, and I can taste a little anise, but what the heck is that third one?" Enter the label maker. Now it's easy to label your jars and you're not going to mix up your poultry seasoning with your baking spices. (Yep, we've done it. That's what happens when you don't sniff an unlabeled jar and just toss it into the pot instead.) 

Price: $35 


For the coffee loving chef in your life, you might consider this gift. An easy-to-use grinder that can handle enough beans for 12 cups of coffee at once. The center chamber is removeable to make for easy cleanup and pouring. You can also use it for spices if you prefer to grind your own before use.  And at this asking price, you could even go so far as to buy 3. One for you, one for coffee and one for spices! 


Price: $17

Sometimes you don't want to fight with finding the 'right' spot on your stove for your frying pan. You want to turn it on and get cooking. You also don't want to deal with food sticking to the pan and becoming scorched. Both of these problems are solved by the BELLA Electric Ceramic Skillet. It's able to heat smoothly and consistently in a way that your stove usually doesn't and keep food from sticking to it. You can use it to saute, fry, roast and steam, all without having to argue for space on your stove. Using the skillet also means that you can use it for a main dish while you use your stove to cook sides of your meal. Alternatively, this could be used if you're in a tiny home without much of a kitchen. 

Price: 35


If you're looking to find out what all of the fuss is over air fryers, this might be a good place to start. Not only can you use it for everything from frozen foods to donuts (fresh donuts! At home!) but you can also try it out for a wide variety of different recipes from everyone's favorite food & craft site, Pinterest. While this is a  slightly more expensive model, it's well worth it when you can cook 6qts of food in one go rather than having to do batch after batch. 

Price:  $120

What's worse than having to wait for your kettle to boil so you can wait to brew tea? Having to wait for that perfect cup of tea for whatever the day has thrown at you? Nothing. Nothing is the answer we're looking for.  Fortunately, this electric kettle from Mueller can help. Able to hold 1.8 liters or a little over 7 cups, it's perfect. It boils quickly, auto shuts off, and has 'boil-dry' protection. (Tell us you haven't accidentally turned the stove on without checking if there was water in the kettle at least once. No? We didn't think so. We get it though.) Best of all, there's no frustrating cord to fight with. The kettle sits on a plate that heats the water inside it, and can be removed and carried wherever you need once it's come to a boil. We'll take two. 

Price: $35 


For those of us that are coffee drinkers, whether that's solely coffee or in addition to tea, we've got a lovely French press maker. Made of borosilicate glass just like the electric kettle, the Cafe Du Chateau press also comes with a 4 level filter to ensure that you're only getting coffee in your cup.  Capable of brewing 34 oz of delicious coffee at a time, the French press is something that many coffee lovers swear by.  Plus, if, somehow, there's an issue with your press? Cafe Du Chateau will replace it. 

Price: $25


IF YOU WANNA SHRED MEAT LIKE THE WILD ANIMAL WITHIN, you should look at getting these lovely claw-shaped meat shredders. Great for making pulled pork LIKE A BEAST or just adding a bit of fun and ease to the cooking process, these will surely find a home within any barbecue master's kitchen. We love them because you can shred the meat more easily than trying to do many tiny shreds using a pair of forks. 

Price: $12 

If you want to have a nice, melted cheese to put on your food after it is cooked, rather than melting on during the cooking process, this is an excellent option for you. Offering a small pan that will accommodate 2 standard cheese slices side-by-side, this will allow for you to get your cheese to just the right consistency before putting it on your food.  And if you don't want to just use a slice of cheese? You want to mix your cheeses together? You can go for that too. Just make a small mound of the mixed cheeses and let them melt together. 


Price:  $10  

If you're still looking for Christmas gifts, we suggest booking an appointment for your loved one to have one of our technicians go over all of their appliances. Showing you love them by taking care of their favorite space, is a great way to show that you pay attention, and it will also make it so that any problems that might be there can be caught before they cause major trouble for the favorite chef in your life.  To set up an appointment you can call us at ((214) 599-0055) or go to our website to set up an appointment


Cheddar and Hard Cider Soup with Fried Shallots

Something to warm you up from your nose to your toes

What do you do when you’re tired of turkey and you need a fast, easy meal that’s still going to fill you up? Easy, you grab a few kitchen staples and make this soup. We’ve got a warm delicious soup that’ll keep you warm all day long, without overheating your kitchen. 

Ingredients: 

4 Tbsp Unsalted Butter

2 yellow onions, chopped 

1 celery rib, chopped

1 Yukon Gold potato, peeled and chopped 

  If you can't find any Yukon Golds at your grocery store an alternative would be Red Bliss potatoes, as these are the closest to the flavor of the Yukons for this recipe. 

2 cloves garlic, minced

2 Tbsp all purpose flour

2 1/2 cups chicken broth

2 1/2 cups hard apple cider

1 cup half-and-half

2 bay leaves

2 thyme sprigs

2 Tbsp applejack or Calvados brandy

3/4 lb English Cheddar cheese, shredded

salt 

fresh ground black pepper

Fried Shallots  (click here to skip to the recipe) 

Tools Needed: Cutting board, chef's knife,  two large pots, a blender, a cheese grater and a straining spoon. 

Yukon golden potatoes. Sadly they aren’t available by your blogger.


- In a large pot, melt 3 Tbsp of butter over medium-high heat. Add the onions, celery, potato and garlic and stir. Reduce the heat to low, cover and cook, stirring occasionally until the vegetables are softened, about 12 minutes. 

Sprinkle the flour over the vegetables and cook, stirring constantly, tumbling the vegetables around the pot so all sides are heated, until the flour is incorporated. 

While still stirring constantly, gradually add the broth, cider and half-and-half to the pot. Raise the heat back up to medium-high, add the bay leaves and thyme and bring the pot to a boil.  

-Turn your heat down to low and simmer for roughly ten minutes, to allow the flavors time to blend.   Make sure to leave the pot uncovered during this time period. 

Delicious Red Bliss potatoes.

-Remove the bay leaves and thyme sprigs from the soup and discard them. Remove the soup from the heat and let cool slightly, you want it still warm, but not piping hot. 

-Working in batches, puree the soup  in a blender. Pour the puree into a clean pot. Stir in the applejack. Off the heat, while whisking constantly, gradually add the cheese one handful at a time. Continue whisking until all the cheese is melted. Place over medium-low heat, stir in 1 tsp of salt and pepper to taste, and cook gently, stirring often, until heated through, about 10 minutes. 

Taste and adjust the seasoning.  

Serve, garnished with the fried shallots. 

We know we tossed a red onion into the picture. It rolled its way into the shot


Fried Shallots 

Ingredients: 

Fresh shallots, thinly sliced 

Oil - Peanut, canola  or sunflower works well 

A shallow pot for frying.


-In order to make your own fried shallots for this recipe, start off by slicing them thin, but not paper thin. Roughly .2 cm is a good size. 

Soak your shallots in salt water after you slice them, for ten minutes or so. Then remove them and pat them dry so that the oil doesn't splash when you add them. 

Take a pot and bring oil to heat. You want to be able to flick water at the surface and have it hiss but not boil. We advise a soybean oil for this. 

Now drop in your shallots a few at a time and fry them until they're crisp and golden.  

Alternatively, if you're not interested in making your own you should be able to find fried shallots in your nearest Asian grocery store. 

It's really easy and you might find all sorts of things that you can pair with them once you've given it a chance. 


There you go a soup to warm you up as the weather cools down and it's easy enough to make after work, so long as you have the fried shallots ready ahead of time. 

If you enjoyed the recipe, let us know! If you made some changes to it, let us know that too over on our Facebook page.


From our home to yours, we hope you have a good week. 


When and How to Winterize Your Home’s Pipes

And Why You Should Bother, Even in Texas


It’s not quite winter yet, although many of us are dreaming of it. That does mean that it’s the perfect time to winterize your pipes if you haven’t already though. We’re taking a look this week at what that means (because your blogger didn’t know prior to this week), why you should bother, and what that looks like. Let’s dig in. 


What does winterizing pipes mean? 

Winterizing your pipes means going through the steps of getting them ready for winter and freezing temperatures. Whether the temperatures are that low just overnight or for long weeks at a time, your pipes, and home, need to be protected.  Fortunately there are plenty of things that you can do to achieve just that. 


Why should you winterize your pipes in Texas?

Let’s start by reminding everyone of last February. 2 weeks of ice and snow, power outages and all of us going “But this is Texas!” 

Aside from the curveballs that Mother Nature likes to throw at us, there are still reasons to winterize your pipes. It might only get below freezing at night, but a few hours of that is still enough to cause damage.  While the worst case scenario is that you have your pipes burst and your home floods, there are other things that can happen. You can have cracks begin to form in the pipes that are going to seep during the summer into your foundation. 

We will say that while it’s necessary to winter your outdoor pipes, you can be more choosy about which of your indoor pipes to do the same to. 

Image by Tim Pierce on Flickr of a broken and frozen water pipe. This is what happens when you don’t winterize your pipes! :D


When is the best time to winterize your pipes?

The best time to winterize your pipes is before the first hard freeze. So… now would be a good time. Or maybe this weekend after you’ve slept off your Thanksgiving nap. Alternatively, you can push it out till the weather is staying in the 50-55*F range during the day. 


How do you winterize your pipes?

When it comes to winterizing your pipes, there are two ways you can go about it.  You can winterize your pipes for a long vacancy (say if you’re going away on a trip for Christmas) or for several months. Alternatively, you can do a ‘general’ winterizing for your home if you plan on staying in town all winter. 


If you’re going out of town for a Long Vacancy

Start by shutting off the main water valve, all water pumps and water heaters. You might question that last one, but think about leaving a pot on the stove with no water in it. The same thing can happen to your water heater. 

Now open all of your drain valves and taps. Start by making a list and check it as you go through the house. Make sure to check it twice in true Christmas spirit and check off each valve and tap as you go through the house. 

Go through all of the pipes and using an air compressor, blow out any remaining water. You know how if you turn off a hose during the summer it will still have some water in the pipe until it either evaporates or you hang the hose up? Same concept here, except its winter, so the evaporation is going to take a long time and you can’t hang up the pipes for your house. Better to blow them out rather than risk them having water freeze in the bends. 

Next, go to the drain valve for your hot water tank. Check to see if that is a floor valve or if it hooks to another pipe. If it is a floor valve you’ll need to run a hose from the valve to say your nearest sink, this way it doesn’t empty onto the floor. Now open it up and drain it completely.
Go ahead and empty all the water from the holding tank next. This is especially important if it’s a holding tank with a rubber diaphragm.
For extra safety, you might consider adding a small amount of antifreeze to the jet pump case.
Going back through the house, flush all of your toilets. You want to try and empty as much of the water from both the tanks and the bowls as possible. You won’t be able to get everything out, but you should be able to get the majority emptied. 


And you’re done with the inside of your home! Cross off your list, but make sure to hold on to it for when you get back so that you can reverse everything. 


Now let’s go outside.


Once again your going to start by shutting off the water supply valve. If new water can’t flow through, all you have to worry about is what’s left in the system.  Now disconnect any hoses or sprinklers and store them away for the winter. We like using racks in the garage for storing our hoses.
Once you’re back outside, turn all of the outdoor faucets on full and let them run. You want to keep them running until there is barely a trickle coming out, if anything. Now turn them all off and make sure to firmly close the valve.
As a final tip you might consider purchasing an insulated faucet cover. They look like a cow bell for the most part and use a string to stay firmly attached to the faucet and house.  Congrats! You’ve winterized the outside of your home as well! 


Some last general tips. 

Consider the insulation of your home. We’ve talked about the importance of it when you’re trying to keep your home cool, but it’s just as important for trying to keep your home warm. See if there are any crawl spaces over or under your home and if you can fill them or just better insulate them to keep cold air out. 

Take a look at your laundry room. Because they need to drain water out many laundry rooms are on the outside of the home, typically attached to our garages. They’re particularly vulnerable in these areas. Even just putting a door sock on the garage door can be a help in keeping the cold air from getting in. 

If you can, try to keep the heat on. The warmer the house is, the less likely it is that you’ll need to worry about the cold fingers of winter freezing your home’s plumbing. 


So that’s the process of winterizing your pipes. How much did you know before? Have you done it previously or is this your first year? Are you laughing that our blogger didn’t know how to winterize her home? Let us know over on our Facebook page and tell us if we missed anything! 


If you wound up here because your washer is damaged, we can help! All you need to do is call us at ((214) 599-0055) or reach out on our contact page. We at Appliance Rescue Service are here to help keep your home running smoothly. 


A Sweet-Tart Cake To Beat All The Pies

It’s got lemon, cherry, and cranberry all rolled into a moist, delicious cake.

Just Take Me To The Recipe! 

Thanksgiving is just around the corner and you're helping with desserts. Sure, you can go with the standard pies, apple, pecan and pumpkin. They're delicious, they're classics. What if you want something to knock people's socks off though. You really want to wow them with a beautiful cake, not another pie like Cousin Suzy is bringing. That's where this recipe comes in. Not only is it a wonderful blend of sweet and tart but it's also got a buttery texture that you're going to love. Plus, by using a bundt pan you can make it a very beautiful cake as well with minimal effort on your part. 

We came up with this recipe after thinking about some of our favorite fall flavors and wondering how we could mix them together into something new. The tartness of cranberries was our starting point and we started working out from there, seeing what else paired well with it. The addition of the pudding mix, rather than just using lemon zest or extract ensures that the cake stays rich and moist. 


Ingredients:

Cake:

1 box of yellow cake mix

3 eggs 

1 cup of water

1/2 cup vegetable oil

1/2 box lemon pudding mix 

1/2 cup chopped pecans plus extra for decorating. 

1/2 cup dried cranberries

1/2 cup dried cherries


Icing:


1/2 box lemon pudding mix

3 cups of icing sugar (also known as powdered sugar)

1 cup of milk

3 tbsp of heavy cream

1 stick of softened butter

1 tsp of lemon zest OR 1 tsp of lemon extract 


Start off by grabbing two large bowls, an electric mixer, a sieve and all of your ingredients.  You'll need a bundt pan as well, but that's for later. 


Set your oven to preheat at 350*F. 

In one bowl, dump in the box mix and the pudding mix. Grab your sieve and slowly work through all of the material. The goal is to break down any clumps in the mix and also to introduce some air. 

In the second bowl mix together your eggs, water and oil, slowly working your way up through the speeds on your mixer. Again, we're looking at  introducing lots of air into the mix so feel free to go at it till it's well combined and frothy. 

Now add the liquids to the dry stuff, going nice and slow at first with both the mixer and while pouring your liquids. Go too fast and we'll end up with egg mix all over the place. It's a pain to get out of your hair, ask us how we know.  

Once you've got the two thoroughly mixed together, fold in the pecans, cherries and cranberries. These are going to sink some as you bake the cake, which is why we're using a bundt pan. 

Now grab your bund pan and spray the inside with your choice of nonstick spray. We advise something light and tasteless, but you're welcome to get creative and see what you can come up.  We wouldn't advise using shortening for this one both because of the curves and crevices of the bundt pan, and also because it's difficult to keep it from soaking into the cake once you flip it out. 

Pour the batter into the cake pan and tap it lightly against the counter or a table. You want to work out any air pockets, without knocking all of the air out of the batter. Just once or twice is good enough to make sure that the batter is down into the groves of your pan of choice. 

Toss that into the oven and bake it for 40 minutes. If when that time passes it's not fully cooked, put it back in for another two minutes. You'll want to check it at two minute intervals until a toothpick inserted into the middle comes out clean. 


Now, while your cake is baking, let's make the icing. 


Start off by cutting your butter into chunks and then attacking it with a hand mixer. You'll want to whip the butter until it's light and fluffy with soft peaks forming. 

Once you've got it to that step, mix in the icing sugar, pudding mix and the lemon additive of your choice.  Mix until everything is incorporated. 

Add in the cream next and mix until the sugar is fully dissolved or the cream is fully absorbed.   

If the sugar is still grainy you can add in the milk a little at a time until you attain the texture that you want.  Once you've got that, chill the icing until the cake is done. 


When your cake is done baking remove it from the oven, and leave it in the pan until it's cool. Once it's cool you can flip it out onto a plate and spread icing over it. We like doing some around the top and letting it spread how gravity takes it and then also pouring some around the bottom edge so that you can crust it with chopped pecans. 


There you go one delicious, seasonal dessert that everyone will love and try to figure out how you did it. 

If you decide to make this for Thanksgiving, let us know! We'd love to see how yours turns out over on our Facebook page.  We'd also love to hear about any changes you decide to make to the recipe. 


From our home to yours, we hope you all have a wonderful Thanksgiving.