Hauntingly Good Meals To Run After

Spooky Biscuits for All Day Long

Sometimes the best thing you can do for yourself is make things easier on future you. This is especially true for a weekend holiday.


Here's a fast breakfast, lunch or dinner idea to get some food in the bellies of your trick or treaters before they wander off, or as they come back down from the sugar high... Or maybe into your stomach before the heathen horde comes knocking.


Let's make some quick and easy monster biscuits.


Ingredients:

1 can biscuits or 8 frozen biscuits

4 oz brick mozzarella cheese

Lunch meat of choice, or pepperoni 

1 can whole pitted black olives

1 jar strawberry or raspberry jam or jelly

White chocolate chips, sliced almonds, candy eyes, etc.


We know you're looking at this ingredient list and questioning our sanity. Don't worry. It's not all going together on one biscuit.


Tools:

Baking sheet, foil, oven mitt, cutting board, vegetable peeler, knife, fork, spoon, plate, spatula


Line your baking sheet with a layer of foil, because anything that makes your life easier today is worth it.


Preheat the oven according to the directions on your package of biscuits.


We used the Pillsbury brand southern homestyle biscuits in a can (because we already had them on hand and didn't want to make an extra trip to the store) and we found them to work well. We've also previously used the Great Value brand frozen buttermilk biscuits, but in our experience, they are prone to scorching on the bottom. If you use them, keep a close eye on them while they bake up so you avoid that problem.


Place your biscuits on the lined baking sheet - have their edges touching if you want them tall and fluffy, or give them room to expand if you would prefer them a little thinner - and pop them into the oven. Set your timer for HALF of what the directions say. Trust us here.


While your biscuits bake, pop open that can of olives. Drain them and give them a quick rinse so they won't transfer their color as easily when you assemble dinner. We're going to do this in reverse order for the meals, because of the three meal ideas we're covering, the dinner takes the longest to prep.


Fish out a few olives and put them on your cutting board. Slice a thin ring out of the middle of each. Your goal here is eight little rings. Feel free to eat all your mistakes - it's the best perk of being the chef.


Once you have your olives ready, scoot them to one side of the cutting board. Consider wiping up after them if they've left you a wet spot. Place your brick of cheese long side up on the board and grab your vegetable peeler. We know you're questioning our sanity again, and it's okay. Take the peeler and shave long, thin straps off the brick of cheese until you feel you have enough to put a double layer on six of your eight biscuits. 


You may have a cheese wire in a drawer somewhere that you want to use for this. We would advise you skip that urge. The goal here is the extra-thin strips and feathery edges a peeler creates. A cheese wire, even adjusted to as thin as possible, will still make a mostly clean cut. If that's what you'd prefer, go ahead, but we definitely think it looks more like a mummy bandage with the rough sides and broken looking ends.

Feathery, jagged cheese bandages.


By now you should be reaching the end of the timer you set. Pause and flip the biscuits. The directions don't say to in most cases, but if you flip them halfway through, you'll get nice, toasty tops and bottoms without either one becoming too thick or crispy. Put them back in the oven for the remaining half of the recommended time and reset your timer.


While they finish up their baking process, separate some slices from your lunch meats. It doesn't really matter what you choose to use, as long as you enjoy it. We used hard salami for ours, but it would work just as well with ham or turkey or roast beef if you have them on hand.


Once they're out of the oven, split them all evenly with a sharp knife.

Biscuits

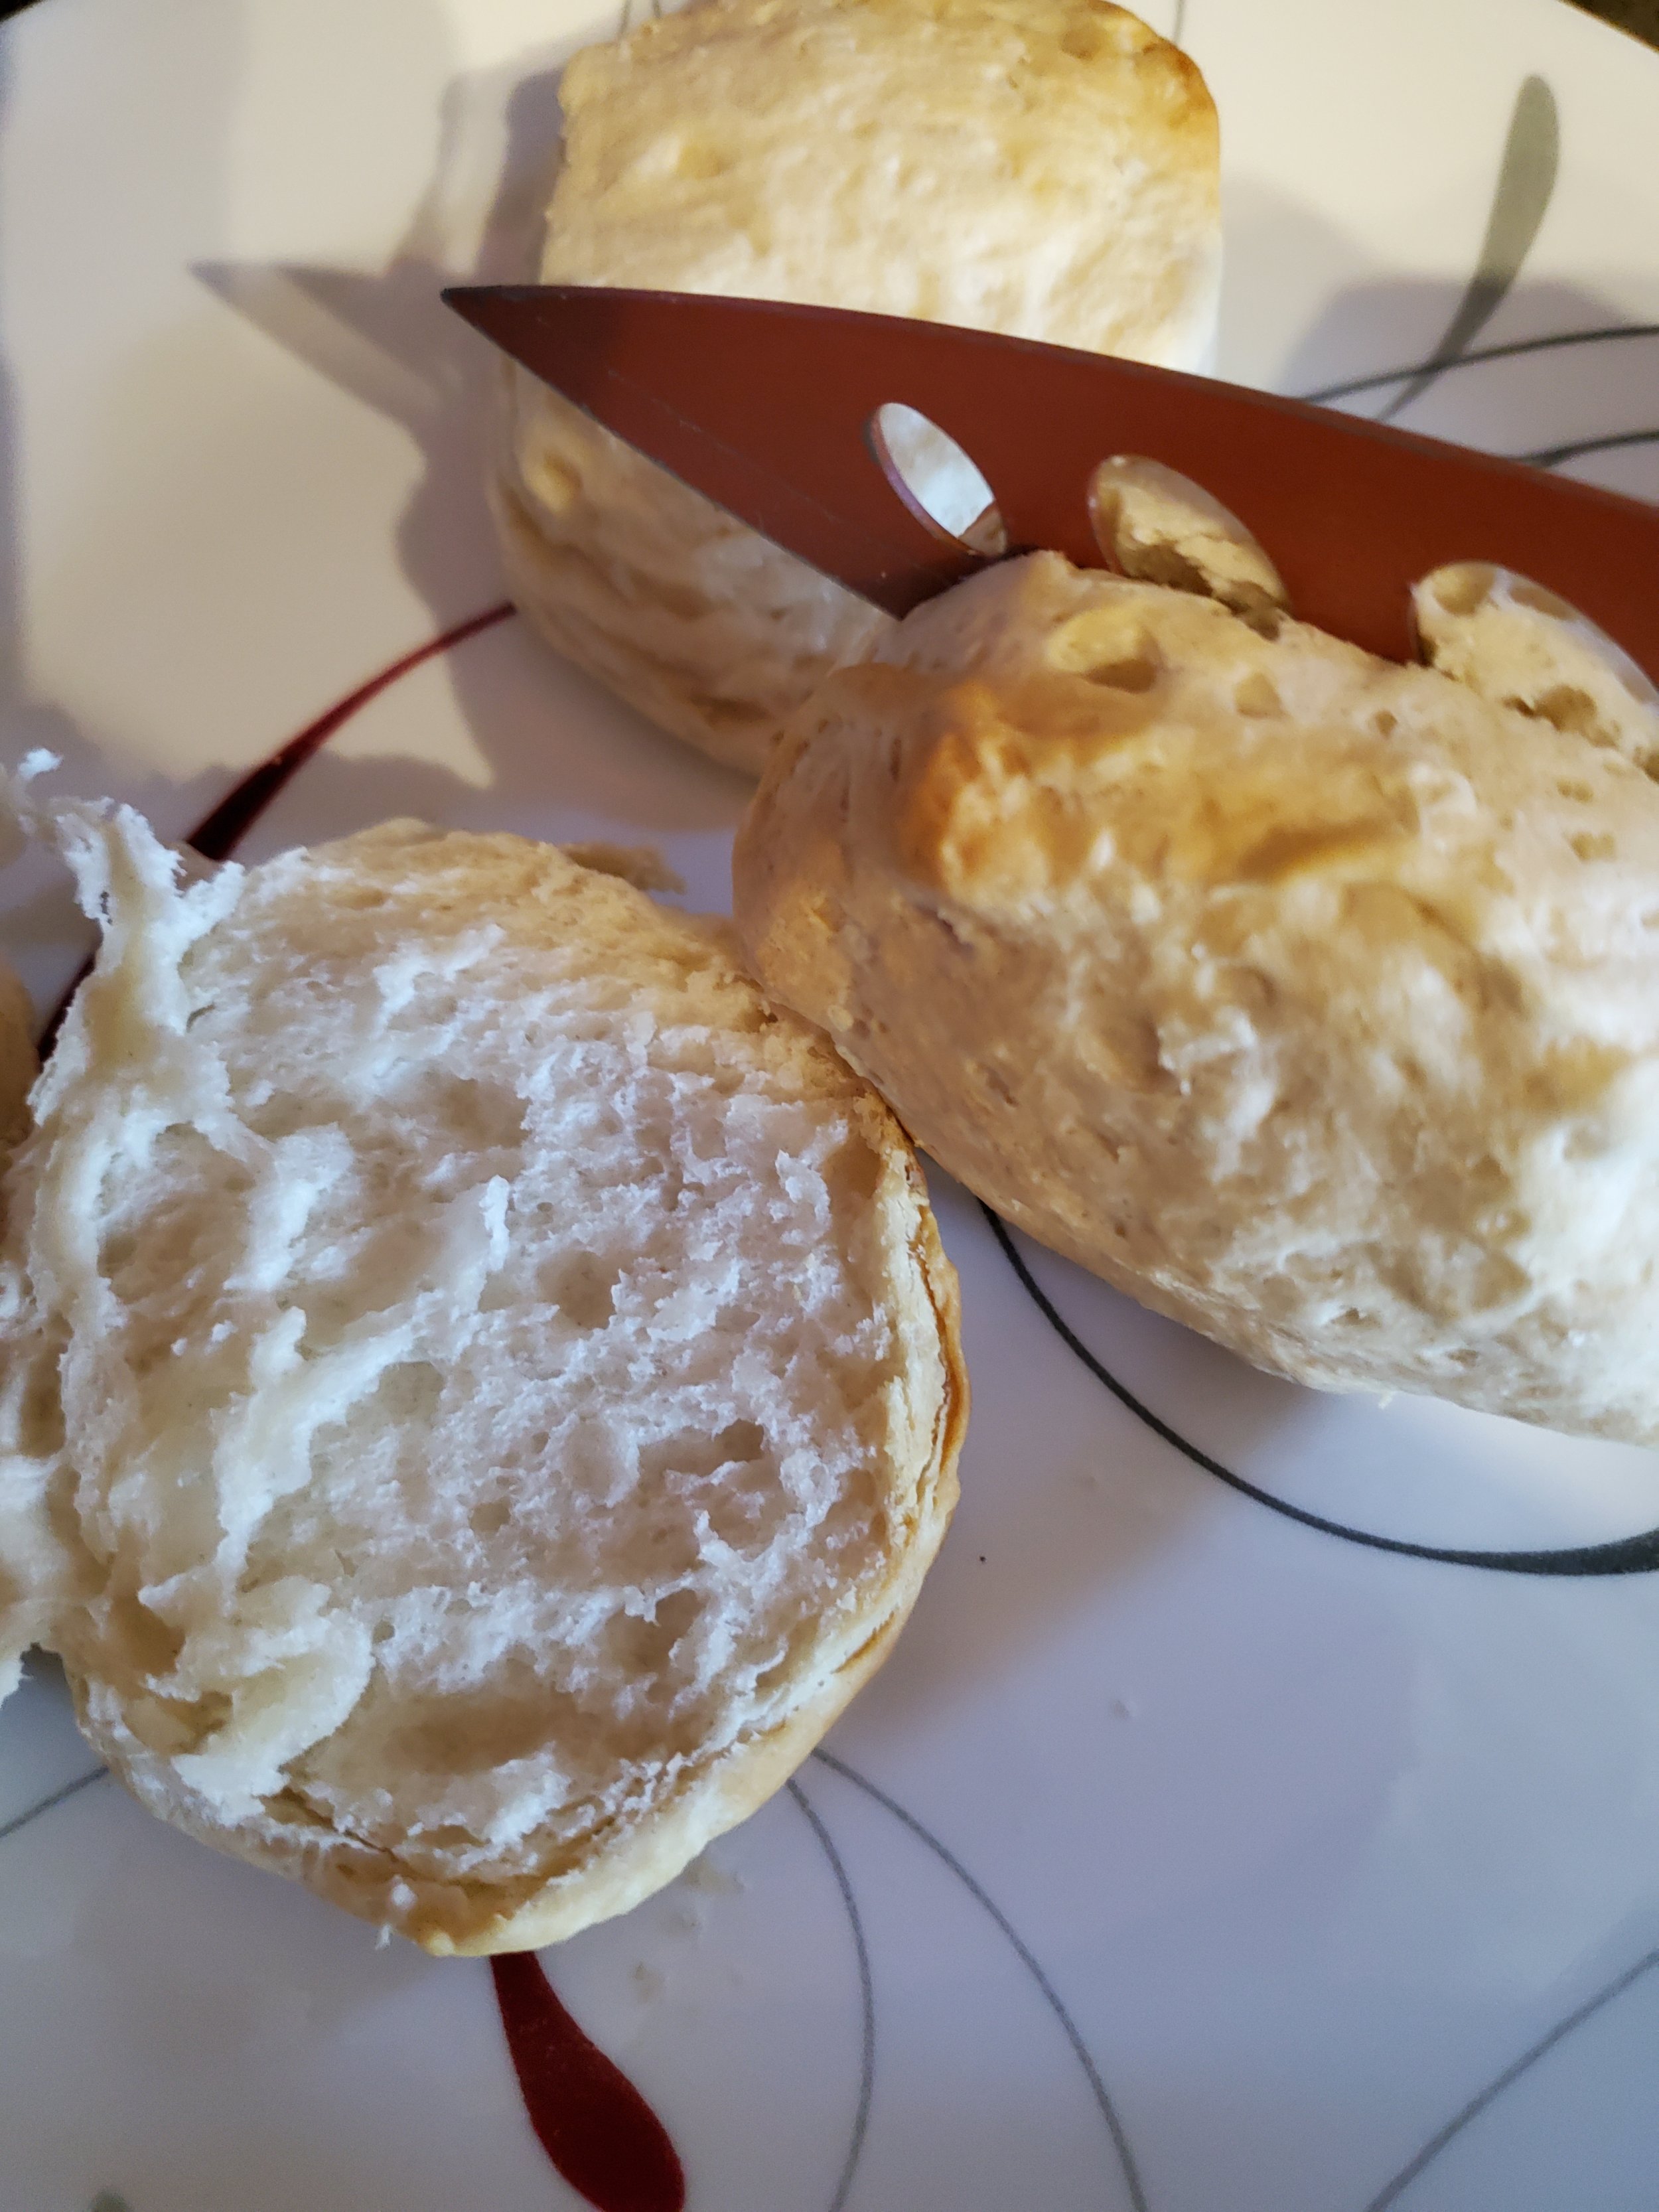
Fluffy, freshly baked and sliced biscuits.


Take two and plate them like an open-faced sandwich. Spoon a generous helping of jam or jelly onto each half and spread it a bit with the back of the spoon. Congratulations, you have a smashed monster! We had candy eyes left over from another project and used those for this, but slices of almond, white chocolate chips or mini marshmallows also can serve as a reasonable approximation of monster eyes. Just use whatever you have on hand.

Frighteningly delicious breakfast monster


Take your next two biscuits. Layer your lunch meats on them and add a few strips of cheese if you'd like.Grab two whole olives. Wrap a torn slice of lunch meat around each one, leaving the open end of the olive visible. Shut your biscuits into sandwiches and tuck your wrapped olives into the side, peeking out like a pair of creepy, unblinking eyes. There's lunch, easy to just grab and run if necessary.

Lunch timer watcher


And now for dinner... take your four remaining biscuits and plate them with their soft insides up. Place a layer of lunch meat on each half, then add those olive rings you cut earlier as eyes a little above the middle. Cover it all over with a layer of cheesy bandages, being sure to let at least one eye still peek out from beneath them.

Mummy’s out for dinner!


By the time dinner comes around, these will have gone cold - so be sure to lightly toast them and get your cheese melted before enjoying your new mummy bites.


And with just a bit of time, you’ve got three fantastic meals, sure to haunt anyone. If you test them out let us know over on our Facebook page! We’d love to hear from you. 


If on the other hand, you ended up here because your oven has decided to go to the grave, we might be able to help. We’d be willing to say that we’re better than Dr. Frankenstein, at least when it comes to bringing appliances back to life. Give us a call at ((214) 599-0055) or visit our contact page to get in touch.


Dishwasher Deep Dive

How does it work, why does it work and how can you break a dishwasher?

Table of Contents

Types of Dishwashers

  • Built-in

  • Portable

  • Drawer

  • Countertop

  • Integrated

Dishwasher Sizes

  • Full size 

  • Slimline

  • Compact

Dishwasher Features

  • Sound Reduction

  • Sensor Wash

  • Steam Prewash

  • Flexible Racks

  • Stainless Steel Interior

  • Plastic Interior


For many of us, having the option between a dishwasher and hand washing all of our dishes is a no-brainer. We’ll take the dishwasher any day. So, what happens if your current dishwasher breaks? As in we’ve come to your home, done everything we could and told you that the price to repair it would be more than replacing  it. Well, at that point, you might as well let your inner shopper out and go trawling websites to find that new dishwasher you were considering. This week we’re looking at what varieties dishwashers come in and what features you might see. Let’s dive in. 


Types of Dishwasher


Built-in Dishwasher

 A built-in dishwasher is the most common type of dishwasher in the modern American household. These are the ones that go under your bench or counters. These are built into your wall, piping, drainage, and all. Naturally, this means that they don’t move easily, if at all. (Apologies to those of you that love to rearrange your homes on a regular basis.) Two upsides to that fixed position though: 

-The noises are muffled by the surrounding cabinets and their contents. 

- Since they’re in the kitchen, they’re central to the cooking and dining process, making for easy access and clean-up. 


Portable Dishwashers

Portable dishwashers are a great option if you’ve got a more empty or pared-down kitchen. They’re freestanding devices that you can move around anywhere you need. They can provide extra countertop space when you need it, such as if you’re doing a lot of food prep. They work anywhere, and you can connect them to water and drainage. These are ideal for a couple or if you’re living on your own, as they are better at handling small loads. 


Drawer Dishwashers

Although we mentioned them in our tiny home post, we have yet to touch on these in-depth. Drawer dishwashers are relatively new to the appliance scene compared to built-ins. Instead of opening down and out, they pull out like a sliding drawer. They are very easy to use for those with difficulty bending as they load from the top. 

Open drawer dishwasher.

An open drawer dishwasher, showing multiple levels and space for six place settings.

They’re ideal for smaller loads, although they do come in single or double drawer formats. No matter which size you choose, they are still not as spacious as your standard built-in of today. 

One major downside is that because they are such a new concept, makers are still in the process of working the kinks out. Drawer dishwashers are harder to clean, more expensive, and are more prone to breakage than traditional washers. 


Countertop Dishwashers

A compact dishwasher on the counter.

A compact dishwasher on the kitchen counter, along with the rack sitting off to the right.

The supremely shiny countertop dishwashers are a very new concept. They come in several different sizes, but are still smaller than a drawer dishwasher. They don’t need to be builtin and can be moved around very easily. They don’t even need dedicated water o drainage and can instead be hooked up to your sink. 

They use very little water and so are ideal for places with ongoing water shortages. Due to their size, they may not be able to handle all of your pots and pans and probably not the majority of calderas or woks. 


Integrated Washers

A fully integrated dishwasher in the home.

A fully integrated dishwasher in the kitchen, with the control panel shown off. You can’t see the cabinetry panel as well, but you can see the drawer pull and the staining of the panel which match others within the kitchen.

Our last category of washer types is not based on size or shape, but on how wel it disappears. These are designed to fit in with a very uniform kitchen look. An integrated dishwasher might come with or be ready for panels that match the cabinets in your kitchen. They are built into the cabinetry, much like the built-ins are, but they are split into two categories. Either a ‘fully integrated’ dishwasher or a ‘semi integrated’ dishwasher. A fully integrated unit won’t be any different from a normal cabinet in appearance and instead will have all of your controls on the inside of the machine. A semi-integrated dishwasher on the other hand will have the control panel on the outside but it will still have the cabinetry panel as well. 


Dishwasher Sizes


Now that we’ve looked at the different types of dishwashers let’s quickly look at some of the most common size-related terms you’re likely to encounter. 


These are going to be applied to your built-in dishwashers, although not always. For that reason, we advise carefully checking descriptions before you purchase. 


Full Size

These are the most common variety of dishwasher. They’re designed to hold between 12 and 16 place settings at once. The idea is to cut down on how often you’re running the dishwasher by doing the largest load possible at once. These will usually measure in at 24” wide, 24” deep, and 35” high. 


A slimline dishwasher with an additional third rack.

Slimline 

Take the full-size dishwasher and shave off 6” or so. That’s a slimline. Measuring in typically at 18” wide, 24” deep and 35” high, they are great for a galley kitchen. 


Compact
A compact dishwasher is very small and will be roughly the size of your microwave in terms of counter space.  The smallest we found was the Faberware Portable dishwasher at 17'' wide,  16.5'' deep, and  17” high. 


Features


Sound Reduction

We’re starting off with this one because dishwashers can be noisy. If your bedroom is right across from the kitchen, you know what we mean.  This is built into the design of the dishwasher and dramatically cuts down on the amount of noise heard throughout the house. 


Sensor Wash 

This will run a scan over your dishes before the wash begins to assess how dirty they are and adjust the cycle accordingly. This not only saves energy and water, but it also saves on your bills. 


Steam Prewash 

A  steam prewash will heat water and fill the dishwasher with steam before the actual cycle starts so as to loosen up food debris, grease, and other detritus. 


Flexible Racks 

A flexible rack system lets you move the racks in your dishwasher around, simple, right? Sometimes you need more space on top, and sometimes you need more space on the bottom row. A great example is after doing a lot of cooking, and you don’t want to hand wash all of your large pots and pans. Now you can move your racks around to accommodate them. 


Stainless Steel Interior

A stainless steel interior is great because it’s more energy efficient and better sanitizing. They can run hotter temperatures because the steel can handle the heat. The downsides, though, are twofold. 

They’re more expensive. 

They will show hard water stains and calcium build-up.


Plastic Interior 

A plastic interior is the most common and more cost-effective interior option when purchasing a dishwasher. They’re easier to clean, and they last a long time. They have their downsides, too, though. 

They can’t run as hot as a dishwasher with a stainless steel interior because the plastic would begin to melt at those temperatures. 

They are noisier as plastic isn’t an excellent insulator of sound. 


That’s it for this month’s Deep Dive! Did you know about all of these features? Are there ones that you have questions about? Let us know over on our Facebook page; we’d love to hear from you. 


If, on the other hand, you wound up here not because you’re buying a new dishwasher but because you need your current one fixed, look no further. We service all types of dishwashers, and we can help with yours. Just give us a call at (214) 599-0055, or set up an appointment on our page. At Appliance Rescue Service, we’re here for you. 


Additional Reading

Dishwasher Dangers, What Doesn’t Belong

How To Deep Clean Your Dishwasher

7 Things You Never Knew You Could Put In Your Dishwasher

Dishwasher Making Noise?

Help! Something Melted In My Dishwasher!

Beer Cheese is the Best Fall Comfort Food

It can be a topping, a dip, a sauce, take your pick!

As the weather gets chilly, we often crave comfort food (which in our case is often made of cheese). Preferably the warm, melty kind we can put in a crock pot.

Sometimes the weather just calls for beer cheese.

To some of you, that's gonna sound... funny. People who grew up in certain parts of the U.S. are going to get it immediately, but the rest of us are going to have to think on it for a minute or so. We grew up in places where it wasn't a common thing, and moved to yet other places where it was also uncommon, so our household didn't get to try it until recently - but it is definitely a recipe worth sharing. We had to venture out of state to find it, but once we returned, the experimenting began.

There's a halfway decent chance you have most of the ingredients on hand, too.

Ingredients:

1 16 ounce brick Velveeta (or store brand equivalent)
1/2 brick (4 ounces) cream cheese (Neufchatel will work, but not as well)
1/4 cup heavy whipping cream (please do not sub half & half)
3/4 cup Guinness Nitro Stout
2 Tbsp coarse stone ground mustard

Tools:
measuring cup(s), measuring spoon(s), knife, spoon, cutting board, crock pot or heavy-bottomed saucepan with lid, serving dish (if not leaving in the crock pot)

Unbox and unwrap your cream cheese, leaving it on the foil. Place the foil on the cutting board and use the knife to gently divide the cream cheese brick in half. Try not to cut the foil, as you'll want to keep it. Slide one half off the foil and nudge the other half to the center of the foil. Re-wrap the half you won't need today and put it back into the fridge for some bagels later. Cut the half that's left on the cutting board into smaller pieces (this helps it melt faster and more evenly) and dump the pieces into the crock pot or sauce pan.

If you're using a crock pot, turn the heat on low and cover it. If you're using a sauce pan on the stove, turn the burner on as low as it will allow, but don't put the lid on it quite yet.

Take your sixteen ounces of Velveeta (we would not advise using the jalapeno one, but you're certainly welcome to experiment if you wish), and turn it out of its protective foil onto the same cutting board. Like you did with the cream cheese, take your knife and cut it into smaller pieces, then add it to your pot. Crock pot users, please make sure you cover the crock pot again, as that's the only way it retains heat effectively. Sauce pan users, please use a spoon to give everything a nice stir before placing the lid, and then turn the burner up to medium-low.

Now comes the waiting game. If you used a crock pot, you're probably okay to walk away and do something else for a few minutes. Crock pots are designed to heat gently and avoid scorching.

If you're working with a sauce pan, please be sure to watch carefully and stir often. You'll need to be a little more involved in the process to minimize the likelihood of burnt cheese accidents.

It's going to look funny and blob-y for a while as the chunks of cheese melt down. Make sure you've stirred them enough to encourage them to combine. Once you have it mostly melted and all one color, you can add in your heavy cream.

You may need to stand there with the measuring cup inverted over the pan for a minute or so, as the cream is often not in a big hurry to get to where you need it. Once most of it has dripped into the pot/pan, set the cup aside and grab your spoon again. The cream will simply rest on top of the cheeses if you leave it alone, so give it another thorough stir to make sure it gets mixed in properly.

After you've mixed in the cream, it's time to add the beer. We used Guinness because darker beers make for richer flavor in the recipe - but it's also what we keep on hand. You can pretty much use any dark beer you have, but we prefer Guinness, and it's also likely to be the beer you'll see used if you order beer cheese in a chain restaurant.

Adding in the beer is going to be an ugly and kind of gross looking step. The beer will foam on contact and turn the top layer of cheese into a bubbly, brown, goopy mess. Ignore this and push on, stirring until it's incorporated. It's worth it, we promise. You'll know when it's incorporated fully because the cheese itself will have darkened about two shades, and there will be no dark or foamy pockets left.

Now comes the mustard. We used Plochman's brand stone ground mustard because it's super coarse and chunky, and it's a really LOUD mustard flavor, but even just the Great Value brand will add significant taste and texture. On a slight tangent, Plochman's also offers a craft beer mustard made with pale ale - so if you're looking for more beer flavor and less mustard flavor without sacrificing the bite, you can definitely look into that. (No, Plochman's is not giving us any money for this - they just make really good mustard. We promise.)

Mixing the mustard in is going to take some time. It naturally wants to keep to itself in little chunks, but you'll want to break it up so every bite of your beer cheese has enough, but none of them are overtaken by it. Just keep stirring until it looks like it's even. And then stir it a little more, just to be sure.

Once you're satisfied with the distribution and mustard to cheese ratio, grab a pretzel or a cracker and scoop a little beer cheese onto it try it. This is a vital step - very, very important. You can't serve it to your friends or family without quality control, after all. And no one knows better than you if it will need your own special touch - a little white pepper or cayenne? A dash of hot sauce? A sprinkling of Parmesan? Garnish with parsley? Run with it. It's yours now.

Serve it as a dip with pretzels, crackers, or pita chips; use it as a spread on a sandwich or burger, sauce your chicken wings with it, work it into a meatloaf... We've even eaten it as a sauce over pinto beans. Once you've tried it, you'll have a dozen other uses for it right away. Trust us.


Adding cream to the beer cheese.

Now it’s officially beer cheese, we’ve added the beer!

And now we have added the mustard and the beer cheese is complete!

Why Should I Purchase A Steam Oven?

Pros and Cons To A Fantastic Kitchen Appliance


How often have you been faced with choosing between a junk meal you can cook quickly and a delicious meal that takes time? Exactly. We all face that problem time and again. Many of us face it several nights a week. There are entire industries built around how to avoid this very problem. Someone got sick of the idea and figured out how to invent a steam oven. Speed ovens take advantage of cooking quickly and thoroughly, without losing all of the taste and nutritional value of your food.

"Wait blogger," we hear you say* "we've been using steam for ages, that's not any faster than any other way of cooking." And you're right. Just steaming your food isn't particularly fast. Humans have been using steam for ages, so long in fact that historians bicker over who solved it first. Was it the Chinese who wove bamboo steamers? Or was it the people who would end up becoming the French, the Auriganeans who used wet leaves and embers? We're left asking 'why does it matter who did it first if both figured out how to make tasty food?' We might be biased though. Either way, you have food that is introduced to a wet environment, where the water is heated by application either of boiling water or directly by fire and cooked. You can use steam baskets made of bamboo or metal, or you can use double boiling where you place two pots that fit well together where the bottom pan is full of water and the top pan is heated by that boiling water, but no water comes into contact with the actual food. (Fun fact: Chocolate is melted best in this fashion so that the chocolate doesn't seize and become grainy and gross.) 

A steam oven though is an oven which either cooks just by using steam or has an additional steam function on top of other more 'standard' functions that it can switch in between. 


Steam oven with fish and vegetables, showing the reservoir.

Why Do I want a Steam Oven? 

You might want to purchase a steam oven for several different reasons. 

a) As a replacement for a standard stove.  

    If you're looking at replacing your current oven already, looking at the various functions you'll use or need makes sense. With a steam oven that has multiple modes, you can do many different things and incorporate steam into your life a little at a time. 

b) An addition to your kitchen, such as purchasing an on-the-counter steam oven. 

If however you're not sure about a steam oven, but you want to test it out, you might get a countertop one. This way you can take your time learning to use it and how to adjust recipes you already love to it. 

c) If you're doing a full dietary overhaul. 

While we won't say this can't fit into the other two categories, this is one that we think can also stand on its own as a reason to purchase a steam oven. As we mentioned already steaming your food can lead to tastier food that retains the natural vitamins and nutrients. 


Steam oven reservoir

Pros and Cons of Steam Ovens

Pro: You don't need to use oil with a steamer. The steam oven retains moisture both in and around the food as it cooks. This means that the food can't stick as easily to surfaces. (We will note though that this feature only works if you make sure to fill your reservoir before you cook each time.) 

Con: You're not going to get super crispy skin or browned foods. Because those reactions both rely on a 'dry' heat the steam oven can't provide that. (Unless of course, you're working with a multi-function oven like this one from Jenn-Air.)

Pro: Your foods retain more of their nutrients because they aren't leaching into cooking water or oils. Have you ever been told that baking broccoli or carrots is healthier than boiling them? The nutrients leaching into the cooking water is the reason for that. The majority of the vitamins and minerals end up in the water rather than in your stomach. 

Con: This doesn't mean that all of your food is instantly better for you because it was cooked in a steam oven. ((We know, we hoped it would make delicious breads healthier too.)) 

Pro: If you choose a full-sized oven with a steam feature, you can cook multiple foods at once without the flavors blending into each other. 

Con: There is a learning curve in adjusting or coming up with recipes.  (Fortunately, there are plenty of people over on Pinterest with recipes just for cooking with a steam oven! ) 

What do you think? Will you be looking into getting a steam oven sometime soon? Let us know what you think or some recipes you love over on our Facebook page. We'd love to hear from you. 


If you ended up on our site because your current steam oven is broken, we're sorry to hear that! We can still help. Appliance Rescue Service works on all major appliances and we'd be happy to work on yours. Just give us a call at ((214) 599-0055) or visit our website at https://appliance-rescue-service.com/contact-us to make an appointment today. 


* yes, we can hear you through the vast reaches of the internet in terms of this post. 


What Appliances Do You Need For a Tiny House?

And Which Can You Cut Out?

If you’re looking at building your own tiny house, either as a real estate investment, as a space for guests, or just as a home away from home, appliances are something to consider. Due to their very nature, a tiny house can’t handle full-size appliances for every single type of appliance. The question then becomes “well, which ones do I need to keep, which ones do I get rid of, and which ones can I get in smaller sizes?” Those questions are where we come in. For this post, we’re assuming that this is an actual ‘home’ with a kitchen of some sort, not just an extra bedroom, office, or hobby space. So let’s dig in and find out just how much you can squish into a tiny home! 


Dishwasher

We’re biased, we’ll admit this up front. To us, a dishwasher is a must-have. Fortunately, you can get dishwashers of all different sizes. You can have a full, cabinet size, or even drawer sized dishwasher. 

Full dishwashers usually measure in at = 24 x 35 x 24 (Lx Hx W

A ‘thin’ or ‘cabinet’ dishwasher typically measures about = 24 x 18 x 24

While a drawer dishwasher is a bit more flexible in its size, this one from Fisher & Paykel was 24 x 17 x 23. 


Sink

A sink is another nonnegotiable, but that’s due to food safety as much as anything. Especially if you give up having a dishwasher, you’re going to need somewhere to wash food, pots and pans, and your table settings. Not to mention all the other ways we use our kitchens. To us this is another one where you can’t really skimp, and we advise getting a double basin sink. However, if you just don’t have the space, the smallest kitchen sink we could find is this one from Kohler, which is 15 x 15 x 9. 


Refrigerator 

Refrigerators are one that you absolutely could get away with, but only under certain conditions. If you’re going to live mostly off of vegetables you eat the same day you buy them, or pantry staples, we could see that working. There are also several different sizes available, with the absolute smallest refrigerator being able to hold no more than a few cans of soda. For practicality’s sake though, let’s assume that you want a small, under-the-counter refrigerator. A good brand to look at here would be something like RCA. They have several different sizes and versions of mini-fridges. 

Freezer

Freezers are... Complicated. On one hand, if you’re not going to have a refrigerator, you will probably want a freezer of some sort for long-term food storage. You can also get a normal side-by-side or top and bottom refrigerator/freezer combination unit if you’re willing to give up the space for one. You can also get an under-the-counter freezer or a chest freezer. The benefit to a chest freezer is that you get right into the habit of a tiny homeowner, using a space for multiple things. Depending on how large a chest you get, you can put it to work as a table as well as storing food. Keep in mind though that you can’t put too much weight on the top or it can cause the lid to bow, ruining the seal. So it can be done, just check the manufacturer’s guidelines with your particular freezer. 


Washing Machine

In our Deep Dive on Washing Machines, we showed you many different varieties of washers, how they work and what makes them different from each other.  We stand by what we said then about all-in-one washer/dryers being an option, although not one we would typically suggest.  Instead, if you’re looking for something, we would suggest getting a standard or even a small washer. 

A standard washing machine is typically = 28 inches or 2 feet and 4 inches wide

A small washer might come in at = 20 or 21 inches.


Dryer 

For a dryer, this is entirely dependent on how much energy you want to spend on a regular basis. You could use a clothesline outside in good weather, and then a hanging system inside in cold or poor weather. Or you can get a dryer and have to find a way to work around it for space consideration. Like we mentioned in our Dryer Deep Dive, you’ll have to have double the amount of space in your dryer that you do in your washer or else you won’t be able to effectively dry everything from a single load. 


Stove

Here is where you really get to be creative. Options for a stove replacement are many and quite varied. It really comes down to how creative you can get. You could even replace many of your pots and pans, freeing up cabinet space for other things if you plan it right. With one or two multifunction Instant Pots you could replace the need for 90% of your pots, as well as a stove. 

Other options include one or two electric burners, which make for a portable stove. This way if it’s not in use, you can store it away. You can also use slow cookers to great effect, although we will point out that you can get an Instant Pot with the same function built-in. 


Oven 

Here again, you get to play around and get creative. Do you want a full oven? Or would you rather devote that space to cabinets? Do you have a wall that would otherwise be unused that you could install a built-in oven into? What about a toaster oven that doubles as a rotisserie? Toaster ovens can be surprisingly large and serve remarkably well as replacements to a standard oven.  


When it comes to outfitting a tiny home, it proves to be as much of a creative puzzle as the rest of the house is. What can you give up? What can you live without? What do you have to have in order to accomplish the basics of life? Let us know in the comments below or over on our Facebook page. We want to hear from you--what could you live without OR how have you structured your tiny home? 


If on the other hand your kitchen has gone kaput or your washing machine has washed out, we’ve got your back. We can repair any and all of your major home appliances whether it’s full size or meant for a tiny home.  You can get hold of us by calling us at ((214) 599-0055) or you can set up an appointment on our contact page.  


Additional Reading
Washer Deep Dive

Dryer Deep Dive


This tiny kitchen has a small oven and an under the counter refrigerator. Instead, they opted for a large farmhouse sink to make cleaning up easy.

This tiny kitchen has a small oven and an under the counter refrigerator. Instead, they opted for a large farmhouse sink to make cleaning up easy.

This tiny home on the other hand has a full size sink, but no oven whatsoever. It has just a stove top, as well as an interesting pull-out counter at the end.

This tiny home on the other hand has a full size sink, but no oven whatsoever. It has just a stove top, as well as an interesting pull-out counter at the end.

This example has a smaller sink, but they have a full oven and stove top built into the cabinet, along with a vent hood.

This example has a smaller sink, but they have a full oven and stove top built into the cabinet, along with a vent hood.