Appliance Rescue Service.

White Bean and Mashed Potato Soup: A Cozy Solution to Leftovers

Turn your leftover ingredients into a creamy, filling soup

You know how we recently made an excessive amount of mashed potatoes? ...We also made an excessive amount of white beans when we made quesadillas. So now we have slightly less in the container of potatoes but also a large pot of beans to work through. Time for us to get creative and combine them!


Not so long ago, we tried a white bean soup at a local restaurant. Theirs was very tasty and very filling, and it became a jumping-off point for what we've done here.


In the event you aren't starting with a bunch of leftovers like we did, please take the time to prepare potatoes and beans as needed. Using instant potatoes and canned beans are totally options if time is tight and you need food on the table soon!


Ingredients:


2 cups cooked white beans

1 whole yellow onion

1 rib celery

3 tablespoons minced garlic

1 cup mashed potatoes

1/2 cup milk

2 tablespoons butter (optional; see notes)

3 tablespoons dried parsley

1 bay leaf

2 tablespoons better than bouillon variety of choice (we used chicken)

5-6 cups water

salt and pepper, to taste


Tools:


large stock pot with lid or Instant Pot/pressure cooker

food processor or blender

measuring cups and spoons

serving spoon or ladle

knife

cutting board


Any produce you plan to work with that isn't washed and ready to eat will, of course, need a quick bath before you get to chopping. You already know this, we're sure, but we'd feel like we failed you if we didn't give you the reminder each time. If you’re making your beans from scratch for this recipe, make sure to consider whether you want to soak them or not, and how that will affect the recipe as well. 


Open up the food processor or blender, checking for loose pieces because you really don't want to find out the bottom ring of the blender jar is loose or that the food processor blade isn't seated /after/ you've already put food in... Ask us how we know.


Rough chop your onion (we were a little lazy and just quartered it, which was enough to fit the chunks between the blades) and add it to the food processor. Dice and add your celery, then measure in your minced garlic. Put the lid in place, make sure it's secure, and pulse until you have a vegetable slush of mostly uniform consistency.


You can add your potatoes at this point if there's room in the food processor. We ran out of space and ended up mixing those in by hand later, so we hope you've got some space to spare.


Take your cooked beans and transfer them to the stock pot or pressure cooker. Add your mashed potatoes and the contents of the food processor and stir. If the food processor couldn't take care of the potatoes for you, reheat them before adding and melt in the butter - cold mashed potatoes have a tendency to be congealed and lumpy, and this will help them mix better


Measure in your dried parsley, Better than Bouillon, bay leaf, salt and pepper. As you can see in the photo, we used a LOT of pepper, but that's a preference thing. (Probably don't use that much. We just like pepper here.)


Add the milk and water, put the lid on the pot and bring it up to temperature.


If you're doing this on the stove top, set the burner to medium and bring the contents of the pan up to a simmer. Cover and cook for at least 30 minutes, stirring occasionally.


If you're using a pressure cooker, set to low pressure for 20 minutes and allow natural pressure release. Also, watch out for the "food burn" warning; our Instant Pot can be annoyingly sensitive, and it set off the warning alarm twice because of, as far as we could tell, a lump of potato stuck to the edge. May you have fewer headaches with yours.


This soup works great as a main dish or as a side along with something else. It would even work great as an easy lunch for the week, if you’re into food prep. We enjoyed it served alongside some slices of thick bakery bread. 


If you’re working specifically with your Instant Pot (or similar small appliances) because your oven is giving you trouble, we’re here to help. At Appliance Rescue Service, our goal is to get your home running smoothly again, whether it’s your oven or your dryer, your refrigerator or your dishwasher. You can reach out to us via our website below or by giving us a call. We’ll work with you to find a date and time that works best for your situation. 


Website
Call: (214) 599-0055


Additional Reading

Punchy Potato & Cheddar Rolls 

 Layered Veggie Bowl

Chocolate Raspberry Thumbprints


Spring Into Energy Savings: Smart Appliance & Habit Changes

Spring is here! Refresh your home’s efficiency with these energy-saving strategies.

When it comes to preparing your home for spring, people don't always think about the way that your energy usage changes from season to season.  This week, we’ll take a look at different changes you can make to your appliances and your habits to keep your home energy efficient. 


Energy-Efficient Appliance Changes

Check to see if your appliances are ENERGY STAR certified. That is going to help you in figuring out how efficient they are capable of being.  Energy Star appliances are designed from the ground up to use less electricity. 


Next up, let’s look at one of the most important tips we have, keeping your appliances clean externally and internally. The harder your appliance works to breathe, the more energy it consumes. The more the various coils are caked in dirt, dust, and pet hair, the harder they have to work to bring keep cool. So making sure that all sides of your appliances are clean, directly relates to your bill. This also applies to your dryer, as making sure that the lint screen on your dryer is clean affects how hard it works. 


Once you’ve gotten your appliances clean, there are appliance specific changes that we can run through to get your entire suite in fighting shape. 


Refrigerator & Freezers

Courtesy of Darrien Staton


You want to keep your fridge and freezer full but not packed to the brim, which is a hard line to define. A full unit will retain the cold better, but too much will restrict airflow. In addition to having to work harder, having limited airflow leads to pockets in the unit that are warmer and colder.. These pockets make it harder to keep your food at the right temperatures.  This concern also applies to the amount of frost buildup in your freezer. You’ll want to defrost it regularly to ensure the frost doesn’t block airflow.   Once you have everything arranged properly, check your manufacturer pamphlet for what temperature is recommended. It should be somewhere around 40*F for the refrigerator and 0*F for the freezer.


Dishwasher

When it comes to your dishwasher, you’ll want to start by skipping the rinsing of your dishes. It sounds weird, we know. But your dishwasher, if it’s a modern one, is designed to handle food residue. So all you need to do is to scrape it off. Next up, make sure to run full loads. We don’t mean that you need to pack every dish in that you own. Merely that you need to ensure that you’re utilizing the space that is there. Doing this is going to cut down on your water waste, as well as your energy usage. Finally, skip the heated dry. Letting your dishes air-dry is perfectly acceptable.  


Oven & Stove

Let’s move on to your range and take a look there at how we can pare down. Use your toaster oven (or your microwave) to reheat your food, instead of the oven. Not only do these take less energy, but they also will keep your home cooler. Which, a useful tip is to avoid preheating unless it’s needed. Although all of us work hard to keep our burners clean, it’s probably not because we’re looking at efficiency. However, it turns out that keeping your burners clean is just as useful as keeping your fridge clean to allow better efficiency.  


Washer & Dryer

Courtesy of Bia Sousa

When it comes to your laundry, start by washing with cold water whenever possible. It might not seem like a big change, but it can save you a surprising amount on hot water costs. Next up, always run full loads or adjust the water level if you’re doing a smaller one. This helps make the most of every wash cycle. If you have a high-efficiency (HE) washer, be sure to use HE detergent—it’s designed to work best with these machines. On the drying side of things, clean the lint screen after every cycle to keep airflow strong and drying times short. Drying similar-weight fabrics together helps, too, since everything will dry more evenly. If your dryer has a moisture sensor, use it—this will shut off the machine when your clothes are dry instead of running longer than needed. And if you really want to cut down on energy use, consider line drying. If clothes feel too stiff, just toss them in the dryer for a few minutes on a low or air-dry setting to soften them up.


To round things out, we do want to point out an important if less enjoyable fact.
Unless your appliances are 10 years old or younger, you’re not working with ‘the most’ efficient home appliances. It’s a fact of research and development. You don’t have to purchase all new appliances, you do have to be aware that your mileage may vary. The amount of efficiency you will be able to improve your appliances will vary based on how old they are. The tips we’ve provided will absolutely help in reducing your energy usage and your bills. We just want to be upfront in regards to how much you can realistically expect. 


Energy-Saving Habits for Everyday Use

Beyond appliance-specific tips, changing daily habits can significantly impact your energy consumption.

  • Run major appliances at night to reduce strain on the power grid and keep your home cooler.

  • Unplug electronics when not in use or use power strips to cut phantom energy usage.

  • Use ceiling fans to circulate air and reduce heating/cooling needs—run them counterclockwise in summer for a cooling effect.

  • Replace or clean filters regularly in HVAC systems, range hoods, and dryers to prevent overworking your appliances.

  • Keep blinds closed on hot days to reduce cooling costs; open them on sunny winter days to let in natural heat.

  • Adjust your thermostat—set it to 78°F in summer and 68°F in winter for optimal savings.

  • Be mindful of appliance placement—keep heat-producing electronics away from thermostats to prevent unnecessary cooling.

Managing Increased Summer Usage

Warmer months often mean more frequent fridge openings and heavier appliance usage. Here’s how to stay ahead:

  • Declutter your fridge before summer to make space for seasonal grocery hauls.

  • Increase maintenance—clean coils and check seals more frequently.

  • Monitor performance for signs of strain, such as unusual noises or longer cooling times.

By making these adjustments and adopting energy-conscious habits, you’ll be well on your way to a more energy-efficient home this spring—and beyond.


By making a few simple changes to how you use and maintain your appliances, you can keep your home running efficiently while cutting down on energy waste. Whether it’s adjusting your daily habits, keeping your appliances clean, or optimizing their performance, every small step adds up to big savings over time. And if you ever run into appliance issues that maintenance alone can’t fix, our team at Appliance Rescue Service is here to help. From repairs to expert advice, we’ll make sure your appliances are working at their best—so you can enjoy a comfortable, energy-efficient home all season long.


Website
Call :(214) 599-0055


Homeowners Beware: LG Recalls Electric Ranges Due to Safety Risks

 If you own an LG electric range, you may need to act fast. Get the details on the latest recall and what it means for you.

 What Happened? 

A new recall has been announced for LG  Slide-In and Freestanding Electric Ranges sold from 2015 to January of this year, 2025.  


Over 500,000 of these units have been sold in that time period. The consumer product safety commission has received at least 86 reports of unintentional activation of the front-mounted knobs. They have been involved in dozens of fires, injuries and pet deaths according to the CPSC. 


The products were manufactured in both Mexico and Korea and imported by LG  Electronics USA in New Jersey. They were sold in a variety of major stores, including Best Buy, Costco, Home Depot, and Lowe’s across the United States. Depending on the model, they retailed for between $1,400 and $2,650.


 It is important to note, that this is not a refund or even a repair that is being offered by LG. Instead, they are offering a warning label which reminds users to turn on the Control Lock / Lock Out feature before stepping away from the stove. They also have a video which guides owners on how to use the feature. 


Who is Affected? 

The recall includes LG Slide-In and Freestanding Electric Ranges sold between 2015 and January 2025 at major retailers like Best Buy, Costco, Home Depot, and Lowe’s. Depending on the model, they retailed for between $1,400 and $2,650.

You can check the full list at www.tinyurl.com/LGRecall.

Courtesy of LG


What is a Recall? 

A recall occurs when a manufacturer or regulatory authority determines that a product poses a safety risk or fails to meet regulatory standards.  (In the United States, this is most often the U.S. Consumer Product Safety Commission.) This action is taken to protect consumers from potential harm and ensure the integrity of the product.


Recalls can be initiated for various reasons, including defects in design or manufacturing, safety concerns, or failure to meet regulatory requirements. In the case of appliances like stoves or ranges, recalls may be issued due to problems with components such as burners, electrical systems, or structural integrity.


When a recall is initiated, the manufacturer typically works with relevant regulatory agencies to notify consumers of the issue and provide instructions on how to address it. This often involves contacting affected consumers directly, issuing public announcements through various channels, and coordinating efforts to repair or replace the affected products. 


Why is a Sticker  Enough? 

In 2024, Samsung recalled over 1.1 million ovens for a similar hazard, and the CPSC has warned that unintended burner activation has resulted in serious fires, injuries, and even fatalities. 


Also in 2024 we had the Kenmore / Frigidaire recall. Here we had 203,000 ovens which were affected. Again with reports of fires occurring and people and property being damaged


So, why is LG allowed to only offer a sticker as a “repair”?


To begin with, the LG ovens are being turned on, although unintentionally, bye the user or pets.


Additionally, there are three different tiers of safety features, according to LG.  The first is a burner on light, the second is an alert beep that goes off when a knob is turned off, and finally there is the Control Lock / Lock Out feature. In a statement to USA Today, Senior Vice President of LG Electronics USA, John I Taylor emphasized that the affected products have a proven safety feature. 


Additionally, LG was sued over this issue in 2022 with a US district Court dismissing the class action lawsuit in 2023 citing that the ranges were still under a 1-year warranty. 


 According to the Consumer Product Safety Commission, the sticker and a reminder to use the built-in feature is enough.


What Do I Do? 

Start by locating the model number on the inside of your oven door or the bottom storage drawer and compare it against the list at this link


Next up, whether or not you have one of the affected models, it would be beneficial to review LG's video for how to use the control lock/lock out function.  www.vimeo.com/1037322282.


Fire safety professionals are recommending installing stove knob locks to prevent unintentional activation. They also recommend keeping objects off the stove when not in use as well as double checking burner knobs before you leave home or go to bed.


We feel it is important to note that while LG and the CSPC believe the features listed are in fact enough to rely on consumer diligence, accidents can happen as has been shown; pets and small children can easily activate these knobs when left unattended. Given these dangers we ask that you consider the situation with all due caution and what safety precautions best fit your home. 


If you realize that your range has been acting oddly and it's not because of this recall, reach out to us at Appliance Rescue Service. There should never be a time when you fear leaving your home because your oven is turning on at random, or that your pet might accidentally bump it. We will work with you to find a date and time that fits your schedule so that we can get to the bottom of any issues. Our technicians are experienced in working on all sorts of appliances, new and old. Our top priority is always ensuring that your home is running smoothly.


Website

Call: (214) 599-0055


courtesy of StockSnap

Spring Home Maintenance Checklist: Avoid Costly Repairs with These Must-Do Tasks

Spring is the perfect time to refresh your home—inside and out. Here’s what every homeowner should do this season.

Although it feels like winter has already left us here in Texas, in theory spring is not here yet. But as the days grow longer, it's the perfect time to refresh your home and shake things out after being inside all winter. The transition isn't just about spring cleaning, it's about ensuring your home is in top shape to prevent expensive repairs down the line. From the roof to the foundation inside and out here's our spring guide for getting your home ready for warmer months.

Exterior Maintenance: Protecting Your Home’s First Line of Defense

Roof & Gutters: Inspect and Clear Winter’s Aftermath


After months of exposure to harsh winter weather, your roof and gutters need attention. Inspect the roof for missing or damaged shingles, as these can lead to leaks that compromise your home’s structure. If you do  notice sagging, or any signs of water damage, call a professional before small issues turn into costly repairs.

Courtesy of 123switch

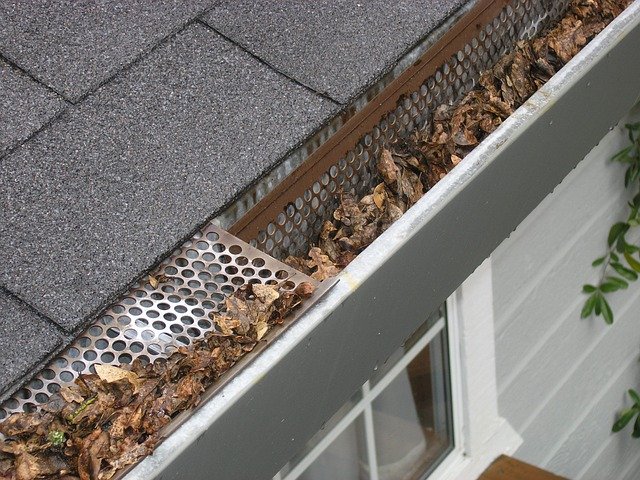
Gutters and downspouts also take a beating during winter. Here, you'll need to clear out leaves, twigs, and other debris to ensure proper drainage. Clogged gutters can lead to water damage, including foundation problems and basement flooding is left in tended.  If you haven't already, consider installing gutter guards to make upkeep easier.

Windows & Doors: Improve Efficiency and Let in the Light

Let's move on to windows and doors. With warmer weather approaching, it’s time to prepare your windows and doors for fresh air and sunshine. Inspect seals, weatherstripping and caulking for cracks or gaps that could allow cool air to escape, leading to higher energy costs. Re-caulking these areas helps maintain a comfortable indoor temperature. (And given our location, we need all the help we can get.)

Courtesy of Pexels

Give your exterior windows a thorough washing to remove winter grime and improve natural light. Also, check window and door screens for any tears or damage—repairing them now will prevent pests from sneaking inside when you open your home to spring breezes. The great news is that if there are any small tears, you can now buy patches instead of having to replace the full screen. 

Driveway & Walkways: Repair Winter’s Wear and Tear

A tree is torn up from the sidewalk with roots exposed thanks to water damage and wind.

Most cracked sidewalks will be smaller than this, but it's worth checking.

Cold temperatures and moisture can wreak havoc on your driveway and walkways. You'll need to look for cracks, potholes, or uneven surfaces that could become safety hazards. Sealing and repairing these issues early will prevent further deterioration and ensure safe passage for your family and guests. 

Outdoor Faucets & Sprinklers: Restore Water Flow

If you turned off exterior water sources for the winter, now’s the time to turn them back on. You'll also want to remove any foam protectors that you placed, as during warm months, those can be top homes for bugs and mice. Check for leaks in outdoor faucets and hoses, and ensure your sprinkler system is working properly. If you do have a sprinkler system, take the time to adjust the coverage to make sure all of your lawn gets water. 


Yard & Landscaping: Refresh and Revitalize

Winter can leave your yard looking a little worse for wear. Before you start gardening, you'll want to get it cleaned up. Start by removing debris such as fallen branches and leaves. Prune overgrown trees and hedges, especially those near your home, to prevent damage from high winds during spring storms. Adding mulch and ground cover will help to retain moisture and suppress weeds—refresh these areas for a polished, healthy landscape. 

Interior Maintenance: A Fresh Start for Your Living Spaces

HVAC System: Prepare for Warmer Days

Courtesy of Chad Populis

Let's get the biggest task out of the way first. Before the heat of summer sets in, you will want to schedule a professional inspection and tune-up for your air conditioning system. Regular maintenance keeps your HVAC system running efficiently and prevents breakdowns during peak usage. While you wait for that date to roll around, you can replace your HVAC and furnace filters to improve air quality and keep your home comfortable.

Kitchen & Appliances: Deep Clean and Maintain for Efficiency

A dirty vent hood that needs to be cleaned this spring.

Your kitchen appliances work hard year-round, and spring is a great time to give them a little TLC. Clean the range hood and vent filters to prevent grease buildup, which can be a fire hazard. (Especially after all of the heavy foods from the holidays.) You'll also want to check and clean your dishwasher and washing machine filters to ensure they operate at peak efficiency.

Courtesy of Kristoferb

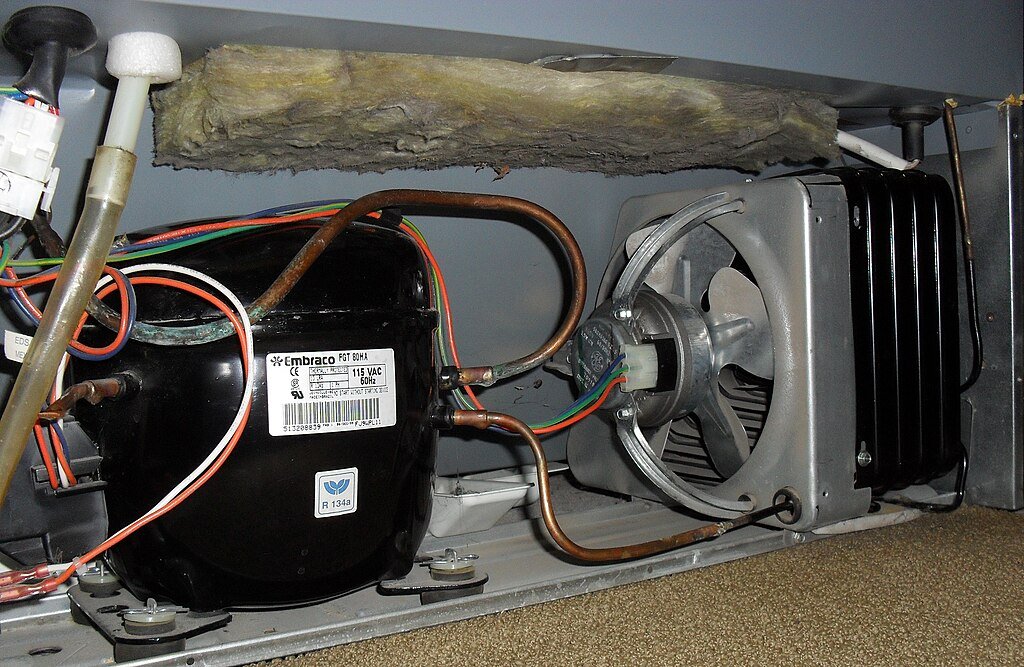
Your refrigerator also needs attention—vacuum the coils to improve efficiency and check that the seals are intact to maintain proper cooling. If you have a chest freezer, warmer days mean it is easier to defrost it if ice buildup exceeds 1/4 inch. After all, spring is a great time to start laying in pre-made meals for less cooking during summer. 

Bathrooms & Plumbing: Prevent Costly Water Damage

A few simple checks can help avoid plumbing headaches down the road. Start off by inspecting your pipes for leaks and weak water pressure. You'll also want to clean the sink and shower drains to prevent any clogs. It's also an ideal time to descale your shower head, as it should be done once a quarter. 

General Home Upkeep: Refresh Your Space

Spring cleaning isn’t just about tidying up—it’s about maintaining your home’s condition, especially after being inside and with guests all winter. Take this time to wash sofa covers, wipe down walls, and remove scuff marks. These small touches can make your home feel bright and renewed.

By tackling these maintenance tasks early in the season, you’ll ensure a smooth transition into spring and summer. A little effort now can save time, money, and stress in the long run—helping you enjoy the warmer months with peace of mind.

If you find that any of your appliances are giving you trouble, you can reach out to us at Appliance Rescue Service. While we aren't great at spring cleaning, we are fantastic at keeping your appliances running while you do. Even better we will work with you to find a time that best fits your schedule this spring for our technicians to visit. You can reach out to us at our website or give us a call to get started on scheduling a maintenance visit.


Website

Call

Courtesy of Monika

Stay Cozy This Winter: Key Chores for Your Home

Essential tips to prepare your home for winter weather.


Winter is just around the corner and we’re excited!  Finally our favorite time of the year, when it might finally be cold enough we don’t have to have the HVAC on all day! No, no, we’re joking. We know as much as you do that winter in Texas can be a bit weird. Some years we don’t drop below freezing, and other years we get tons of snow dumped on us. Since we can’t tell what winter will bring, we’re going to go over the full list of ways to prepare your home for winter. 

This time, we’re starting inside the house. We’re looking at everything that  needs to be done at least once a year, since we really don’t want to go outside right now. 


Let’s start by tackling the fans. If you forgot to do it in the fall (or didn’t need to yet) now is the time to switch your fan to rotate clockwise. This will force the warm air downwards and help keep you warmer. 

Next up, let’s hit the kitchen for a few things.

Here you’re going to want to 

Change the air filter on your refrigerator. It should be done at least every six months, and since we last did it in summer, now is the ideal time.  Look inside your refrigerator towards the back top of the inside, and that is where most filters are located. 


Change the water filter on your refrigerator. This one is an every six months task in most households, but for some it’ll be every six. Either way, for most you’re still going to be looking inside the refrigerator towards the top.  Many times it’s a matter of popping down a hatch and twisting to remove the old filter. Keep a cloth handy as it can make a bit of a mess. 


While we’re still poking at your refrigerator, take a few minutes to clean the coils. This is another one of those quarterly tasks, and somehow we still forget it. All you need is your vacuum and a brush attachment to be able to reach back behind the fridge and brush everything down. Once you’ve given them a good scrub, you’re good to go for another three months. 


Now let’s go over to your furnace and change the filters there. Since we don’t handle furnaces we can’t give you any generaltieis on where a filter will be located, but your manual should have it handy. 


Now let’s take a wander around the house. If you’re easily chilled you can do this without anything, if not, you might want to bring a candle with you. We’re going to be looking for drafts. 

As you wander see if you find any areas near doors, windows or exterior walls that are unusually cold, or where your candle flame wavers. You want to find the drafts, mark them with a pencil and then when you’re done you can come back and start the next step.
That next step is going to be one of three things. 

  • Caulk or patch the hole in question. 

  • If there isn’t a hole, it’s just an old window, you might consider putting up some window film for the winter. 

  • If it’s a wall rather than a window, you might consider that the insulation in that area is poor and you’ll need to find out a) why it doesn’t have any, such as pests, and b) how to go about replacing or adding it.


Adding in various forms of insulation will make a huge difference in keeping your home warm this winter. Even just small tips like patching interior holes and putting film over or in the windows can as well. You’ll also notice the change that it makes in your electric bill, as the insulation will make it easier to stay at a set temperature. 


Courtesy of justynkalp

One area that does need to be looked at, but we understand if you’re not wanting to do it, would be the attic. Heat rises, and if there is no insulation in your attic, all of the heat that goes up is going to be coming out. For that reason, we firmly believe in checking it every three to six months. While up there, you’ll also want to look for any pests, holes or mold 


 Test Smoke, Carbon Monoxide Detectors

One last thing is that if you didn’t change the batteries in your smoke and carbon monoxide detectors in the fall, you need to do them now. Not only iis it a good habit, but if you’re relying on heaters or a fire place to keep warm, you need to be able to keep an eye on these levels.
While you’re at it, check on the fire extinguisher, to make sure that it’s still in date.

With that, we’re done! Well. With the inside. Now it’s time to throw on a coat and take a walk around outside, as it’s time to check the house out on the outside. 


We might as well work top to bottom while we’re doing this, so it’s up to the roof for you or whatever helpers you can wrangle for this.  

Start by taking a look at the shingles.. You’ll want to look for any that are curling or cracked, and keep an eye out for any that are missing. You’ll also need to take a look at the metal flashing around your chimney, pipes and any skylights. If any of these are an issue, you’ll need a roofer before the winter rains really hit. 


Courtesy of stux.

Next up, you’ll want to take a look at the gutters. Are there any breaks or leaks in the gutters or the downspouts?  Clean out any leaves or debris that have built up, and patch any damage you can find now. 


A final step for on top of the roof is seeing if any trees need to be trimmed back to keep pests like mice, raccoons or squirrels from making a winter home in your roof. While we don’t recommend doing it yourself unless you’re trained to do so, it does help to have an idea of whether or not it’s an issue in the first place. 


Courtesy of Marc Pascual

Once back on the ground,  let’s keep pests in mind. With colder weather coming, they’re going to look for places to keep warm. Go around looking for food and water sources they can get at, as well as any cracks or crevices. You’ll want to get rid of any water sources like dripping faucets, as well as any food they can easily get at, and patch any cracks you come across. 


While you’re looking around for water, it’s also a good time to drain your sprinkler system and any outdoor water features you have. Having those pipes explode in the depths of winter is not fun, and the damage afterwards is annoying to clean up. 


To protect your outdoor faucets from freezing, start by disconnecting any attached hoses and storing them away. Next, drain any water remaining in the faucet by opening it fully. If your faucets have shut-off valves inside the house, turn those off as well. For extra protection, cover the faucets with insulated covers, which you can find at most hardware stores. These simple steps can help prevent frozen pipes and costly repairs during the winter.


Since you have the water features and faucets cleaned up, we might as well take a look at the landscaping. Trimming back unwanted plants isn’t just a matter of pulling out things that you didn’t want growing, it’s also a matter of reducing hiding spots for pests, and protecting the foundation of your home if they’re growing too close.  All of this is most easily done during colder weather. 


Next up, we’ll want to tackle the dryer exhaust duct. It’s one that you need to do at least once a year, as too much build up can prevent your dryer from not only drying efficiently, but it can cause house fires. If you can access it on your own, you might not need to call in a professional. Make sure to vacuum every nook and cranny though, or you’ll have to do this again much sooner than next winter. 


Our final two tips are to clean out and cover your grill.
It’s time to give it a good deep cleaning before you put it away for the winter. Scrub the grates, scrub the outside and make sure to follow any of the manufacturer’s instructions. 


Now that your home is winter-ready inside and out, you can enjoy the season without worrying about unexpected surprises. Whether you’re relaxing by the fire or spending time with loved ones, knowing your home is prepped can bring peace of mind.


If you discover any issues with your appliances along the way—whether it’s a refrigerator coil that won’t stay clean or a dryer duct that needs professional attention—our team at Appliance Rescue Service is here to help. We’ll ensure your appliances stay in top shape, so you can focus on what truly matters this winter. Reach out today and let us handle the rest!


Website

Call: (214) 599-0055


Additional Reading

Common Appliance Issues That Could Ruin Your Holiday – And How to Prevent Them

Prepare Your Home for Fall: Essential Maintenance Tips

Beat the Heat: Preparing Your Texas Home for Summer

 37 Reasons To Have Your Appliances Maintained Regularly