Frigi-Know: Your Guide to Refrigerator Troubleshooting

Unlocking the Cold Truth: Your Essential Guide to Refrigerator Repairs and Myths

We get a lot of questions about refrigerators and how to go about repairing them both before and during a maintenance call. We’ve been asked all sorts of things from the normal ‘can’t you just repair a compressor?” to “can my fridge explode??” and everything in between. So we’ve rounded up the ones we get most often while working on refrigerators and are answering them here. 


Repair-oriented questions 

Can Refrigerator Doors Be Removed/ Replaced/ Adjusted?

Fridge doors can indeed be easily removed, and when you’re done you just pop them back into place. They can also be adjusted. Most shops will have screws to help you align the doors properly, they might even be included when you purchase a fridge. If not, or if you’ve had your fridge for a while, you can always ask at a nearby hardware store.  As to replacing doors, this one is more.. Dependant on you. There are shops that can replace a door for you, we can even do that if you like. However, we will say that you might want to look at the fridge you have and consider if it’s worth it. If you’ve spent 10-15k on your refrigerator, then yes, replacing a door is absolutely a good call. On the other hand, if you only spent a third of that? Then you might as well buy an entirely new fridge for the price of getting a new door. 


Can A Refrigerator Compressor Be Repaired?

Yes! However, we will say that it’s not typically cost-effective to repair them. There’s two reasons for that. The first point is that repairing a compressor isn’t a guaranteed way to extend the lifespan of the part. You can often repair the part only to have it break again before long. Additionally, not all compressors can be repaired at all. Some are built so that once they break, that’s it, you’ll have no choice but to replace it. 


We will also point out that while a pro can replace a compressor,  attempting to do it on your own is ill-advised. Most refrigerator compressors are not cross-compatible and you’re more likely to do further damage to your fridge in attempting to replace it. It is a complex job with many potential failure points if you aren’t intimately aware of what you’re doing. 


Additionally, the failure isn’t always the compressor. It might be your fans, it might be that your refrigerator is frozen over, or it might be that the poor thing is choking on dust bunnies. While some of our other posts have pointed out ways to tell what the issue is, it’s not always easy. 


 Can You Add Freon To Your Refrigerator?

Can you the individual? No, or at least not easily. Additionally, if you’ve replaced your refrigerator since 2020, it’s no longer freon. Can a professional add freon to your refrigerator if that’s the type of coolant it uses? Yes. 


 Can My  Refrigerator Leak Freon?

Most assuredly it can, and we hope that yours never does. Freon is a gas, so the only thing you’ll smell is a slight chemical odor. Additionally you won’t see the freon itself it is leaking, instead you’ll have an oily residue that’s leftover from the freon. The only reason it will be leaking though is if something got a hole poked into it. Have you recently done a DIY repair that went wrong? Or were you a bit too pushy with making scraping out some built up frost? These are the reasons that having a professional come in is important, because you don’t want to have a freon leak. 


Can Your Refrigerator Explode 

Yup, we’re going to answer this one, so that next time a small child in your life asks, you can answer it. 

The surprising answer here is yes, a refrigerator can actually explode. HOWEVER it’s exceedingly rare. So, this is a thing that can only happen with newer fridges. Older fridges used freon, and freon doesn’t explode. R-600 however is flammable. So, to make this one happen, you’d have to a) have a newer fridge utilizing R-600 as the coolant, and b) it would have to have a hole in the line, c) it would need to have very little circulation around it and d) you’d need something with a spark. While the first one is more common these days between older fridges failing due to age, and rebates being offered to shift away from freon-based refrigerators, the rest aren’t. So long as you take care of your fridge, having a hole in the line and little air circulation isn’t likely to happen. Or if they do, you should be calling in a repair technician to fix one or both issues. As to the last, we hope and trust that all of our readers know how to be safe around fire. 

So yes, technically, your refrigerator can explode. BUT it’s such a rarity that it’s more likely that any time you hear of it you should suspect foul play rather than a natural occurrence. 


In conclusion, refrigerators can be a source of many questions and concerns, both for those looking to repair them and for those curious about their potential dangers. From adjusting doors to the complexity of compressor repairs and the use of refrigerants like freon, we've covered some of the most common queries surrounding these essential appliances. It's important to remember that while refrigerators technically have the potential to explode under specific circumstances, it's an exceedingly rare occurrence, especially with older models. By ensuring proper maintenance and addressing any issues promptly, you can keep your refrigerator running smoothly and safely, reducing the likelihood of any unexpected and dramatic outcomes.


If you find yourself in need of professional assistance with your refrigerator or any other appliance, don't hesitate to reach out to Appliance Rescue Service. Our expert technicians are ready to help you with all your appliance repair needs. You can give us a call at ((214) 599-0055) or visit our contact page to schedule an appointment. We're here to rescue your appliances and provide you with peace of mind.


Additional Reading:
Refrigerator Cooling Issues? Check These 5 Things!

Why Is My Refrigerator Making Weird Noises!?

How to Time Your Next Appliance Purchase For the BIGGEST Impact

When to Shop for Appliances to Get the Best Price 

In the not-so-distant past, choosing new appliances was a straightforward affair. You could stroll into a store or browse online, comparing prices and features at your leisure. The real challenge lay in deciding what you truly wanted. 


Then, along came Covid. It disrupted lives, decimated workforces, and sent shockwaves through global supply chains. Suddenly, the once-simple task of buying an appliance became a high-stakes game of availability. It didn't matter if it was the color, model, or features you desired; the key question was, did the store have it, and did your wallet agree?  


Adding to the complexity, inflation reared its head, driving prices upward. Now, even if you were comfortably well off, you needed to do research to ensure that the appliances you were considering were worth the money and would hold up. It's why we often advocate repairing appliances whenever feasible instead of rushing into new purchases.


 In this ever-evolving landscape of appliance shopping, consumers face new challenges and opportunities that have emerged in recent times. The COVID-19 pandemic brought about disruptions that forced us to rethink how we approach buying appliances. However, despite the challenges, there's a silver lining for the savvy shoppers who are willing to adapt and strategize.


Right now, a hybrid shopping experience is emerging, offering hope to that savvy consumer. The patient and the discerning can unearth hidden deals. There are three levels to this shopping mastery, each requiring a varying degree of research and patience. As we delve deeper into the world of smart consumerism, it's crucial to understand that each level of shopping mastery comes with its own set of advantages and trade-offs. Whether you are a Holiday Shopper, an End-of-the-Year Shopper, or an Off-Season Shopper, your success will largely depend on your ability to research and exercise patience. 


Level One: The Holiday Shopper


Meet the Holiday Shopper, the master of waiting for strategic moments throughout the year. They keep an eagle eye on sales flyers, marking their calendars for keywords like "President’s Day," "Memorial Day," "Fourth of July," "Labor Day," and the ever-enticing "Black Friday." Shopping during these events yields discounts on the latest models, spanning a wide array of appliances. The only downside? You can't predict what will be on sale or if your coveted model will remain in stock. 


Level Two: End-of-the-Year Shopper

For those who desire something new but don't want to gamble, the End of the Year Shopper is the expert choice. By biding their time until the final quarter of the year, they increase their chances of snagging a current-year appliance or one just a year or two old. As manufacturers make room for new arrivals, retail stores gleefully slash prices on older stock. The catch? Hoping that the appliance you want is available and on sale. 


Level Three: Off-Season Shopping


Enter the apex of savvy shopping - the Off-Season Shopper. These aficionados research beyond the obvious seasons, such as buying heaters in July or air conditioners in December. They've discovered that grills can be purchased in December/January, ranges and ovens in May, and refrigerators in September and October can be prime deals. Why? We can't say for sure, but the data confirms these as the best times to score the biggest discounts.

Here are some crucial shopping tips, regardless of your Savvy Shopper level:

Talk with store employees to uncover insider information on upcoming sales and product availability.

Do your homework in advance and act swiftly when holiday deals emerge, as they tend to vanish quickly.

However, it's essential to acknowledge that this type of shopping demands patience, a commodity not everyone can spare. When your oven gives up the ghost just days before a big dinner, time isn't on your side.


Remember, purchasing new appliances isn't your sole option. There are many instances when repairing is in fact, a far better choice, both from a financial standpoint and an availability standpoint. That is where we come in. You can reach out to Appliance Rescue Service, the most trusted appliance repair service in the Dallas Metro Area. We're here to work with you, whether it's extending the life of your current appliance or fixing a malfunctioning one. Contact us at  (214) 599-0055 or come over to our contact page to schedule a technician visit that suits your schedule.


Additional Suggestions: 

6 New Appliances To Consider In 2023


5 Tips for DIY Appliance Repair

Polish-Style Mac and Cheese: A Savory Twist on a Classic Dish

A Hearty and Delicious Meal You Can't Resist

In the realm of comfort food, few dishes can rival the satisfying embrace of creamy pasta. This recipe for kielbasa and macaroni and cheese is a delightful fusion of flavors and textures that promises to transport your taste buds to a world of culinary bliss. With the heartiness of kielbasa, the earthiness of spinach, and the luscious creaminess of egg noodles, each bite is a harmonious symphony of comfort. Whether you're seeking a quick weeknight dinner or a comforting meal to share with loved ones, this dish will not disappoint. Join us in the kitchen as we unravel the secrets to creating this savory masterpiece that's sure to become a beloved addition to your repertoire of home-cooked favorites.


Ingredients:


1 pound dry egg noodles

1 cup sour cream

2 cups cottage cheese (full fat preferred)

1 whole onion, diced

1 pound kielbasa, chopped

2 tablespoons butter

1 whole package spinach

2-3 teaspoons spice mix


Spice Mix


spice mix:

1/2 teaspoon allspice

1 teaspoon white pepper

1 teaspoon black pepper

1 1/2 teaspoons garlic powder

1 1/2 teaspoons marjoram

1 teaspoon ground mustard

1/2 teaspoon oregano

1/2 teaspoon cumin

1/2 teaspoon salt

1/2 teaspoon coriander


Tools:


knife

cutting board

slotted spoon

measuring cups and spoons

stock pot with lid

colander

covered frying pan or dutch oven


Fill your stock pot up with water (or broth, if you're feeling a little like an overachiever) and bring it up to boil.


While you wait for the water in the pot to boil, grab a little dish. Measure out and stir together all the spices for the spice mix. (We recycle glass yogurt jars for spice mixes, as they're just the right size to hold a few tablespoons of dry spices and leave us some space to stir.)


Once the pot is boiling, add the egg noodles and set a timer - but whatever the package directions say is the recommended cook time, cut it down by half and add one minute. As an example, if the package says 8 minutes, cook them for only 5 minutes. We only want the noodles par-cooked so they won't fall apart later.


Peel, quarter and roughly chop your onion. Dump it all into the pan or dutch oven with the butter, but don't crank up the heat just yet.


Cut your kielbasa (or any other suitable rope sausage) into bite sized pieces, and add them to the pan with the onion. Now you're safe to turn the heat on. Let them cook together, covered, for about five minutes over medium-low heat. Stir occasionally.


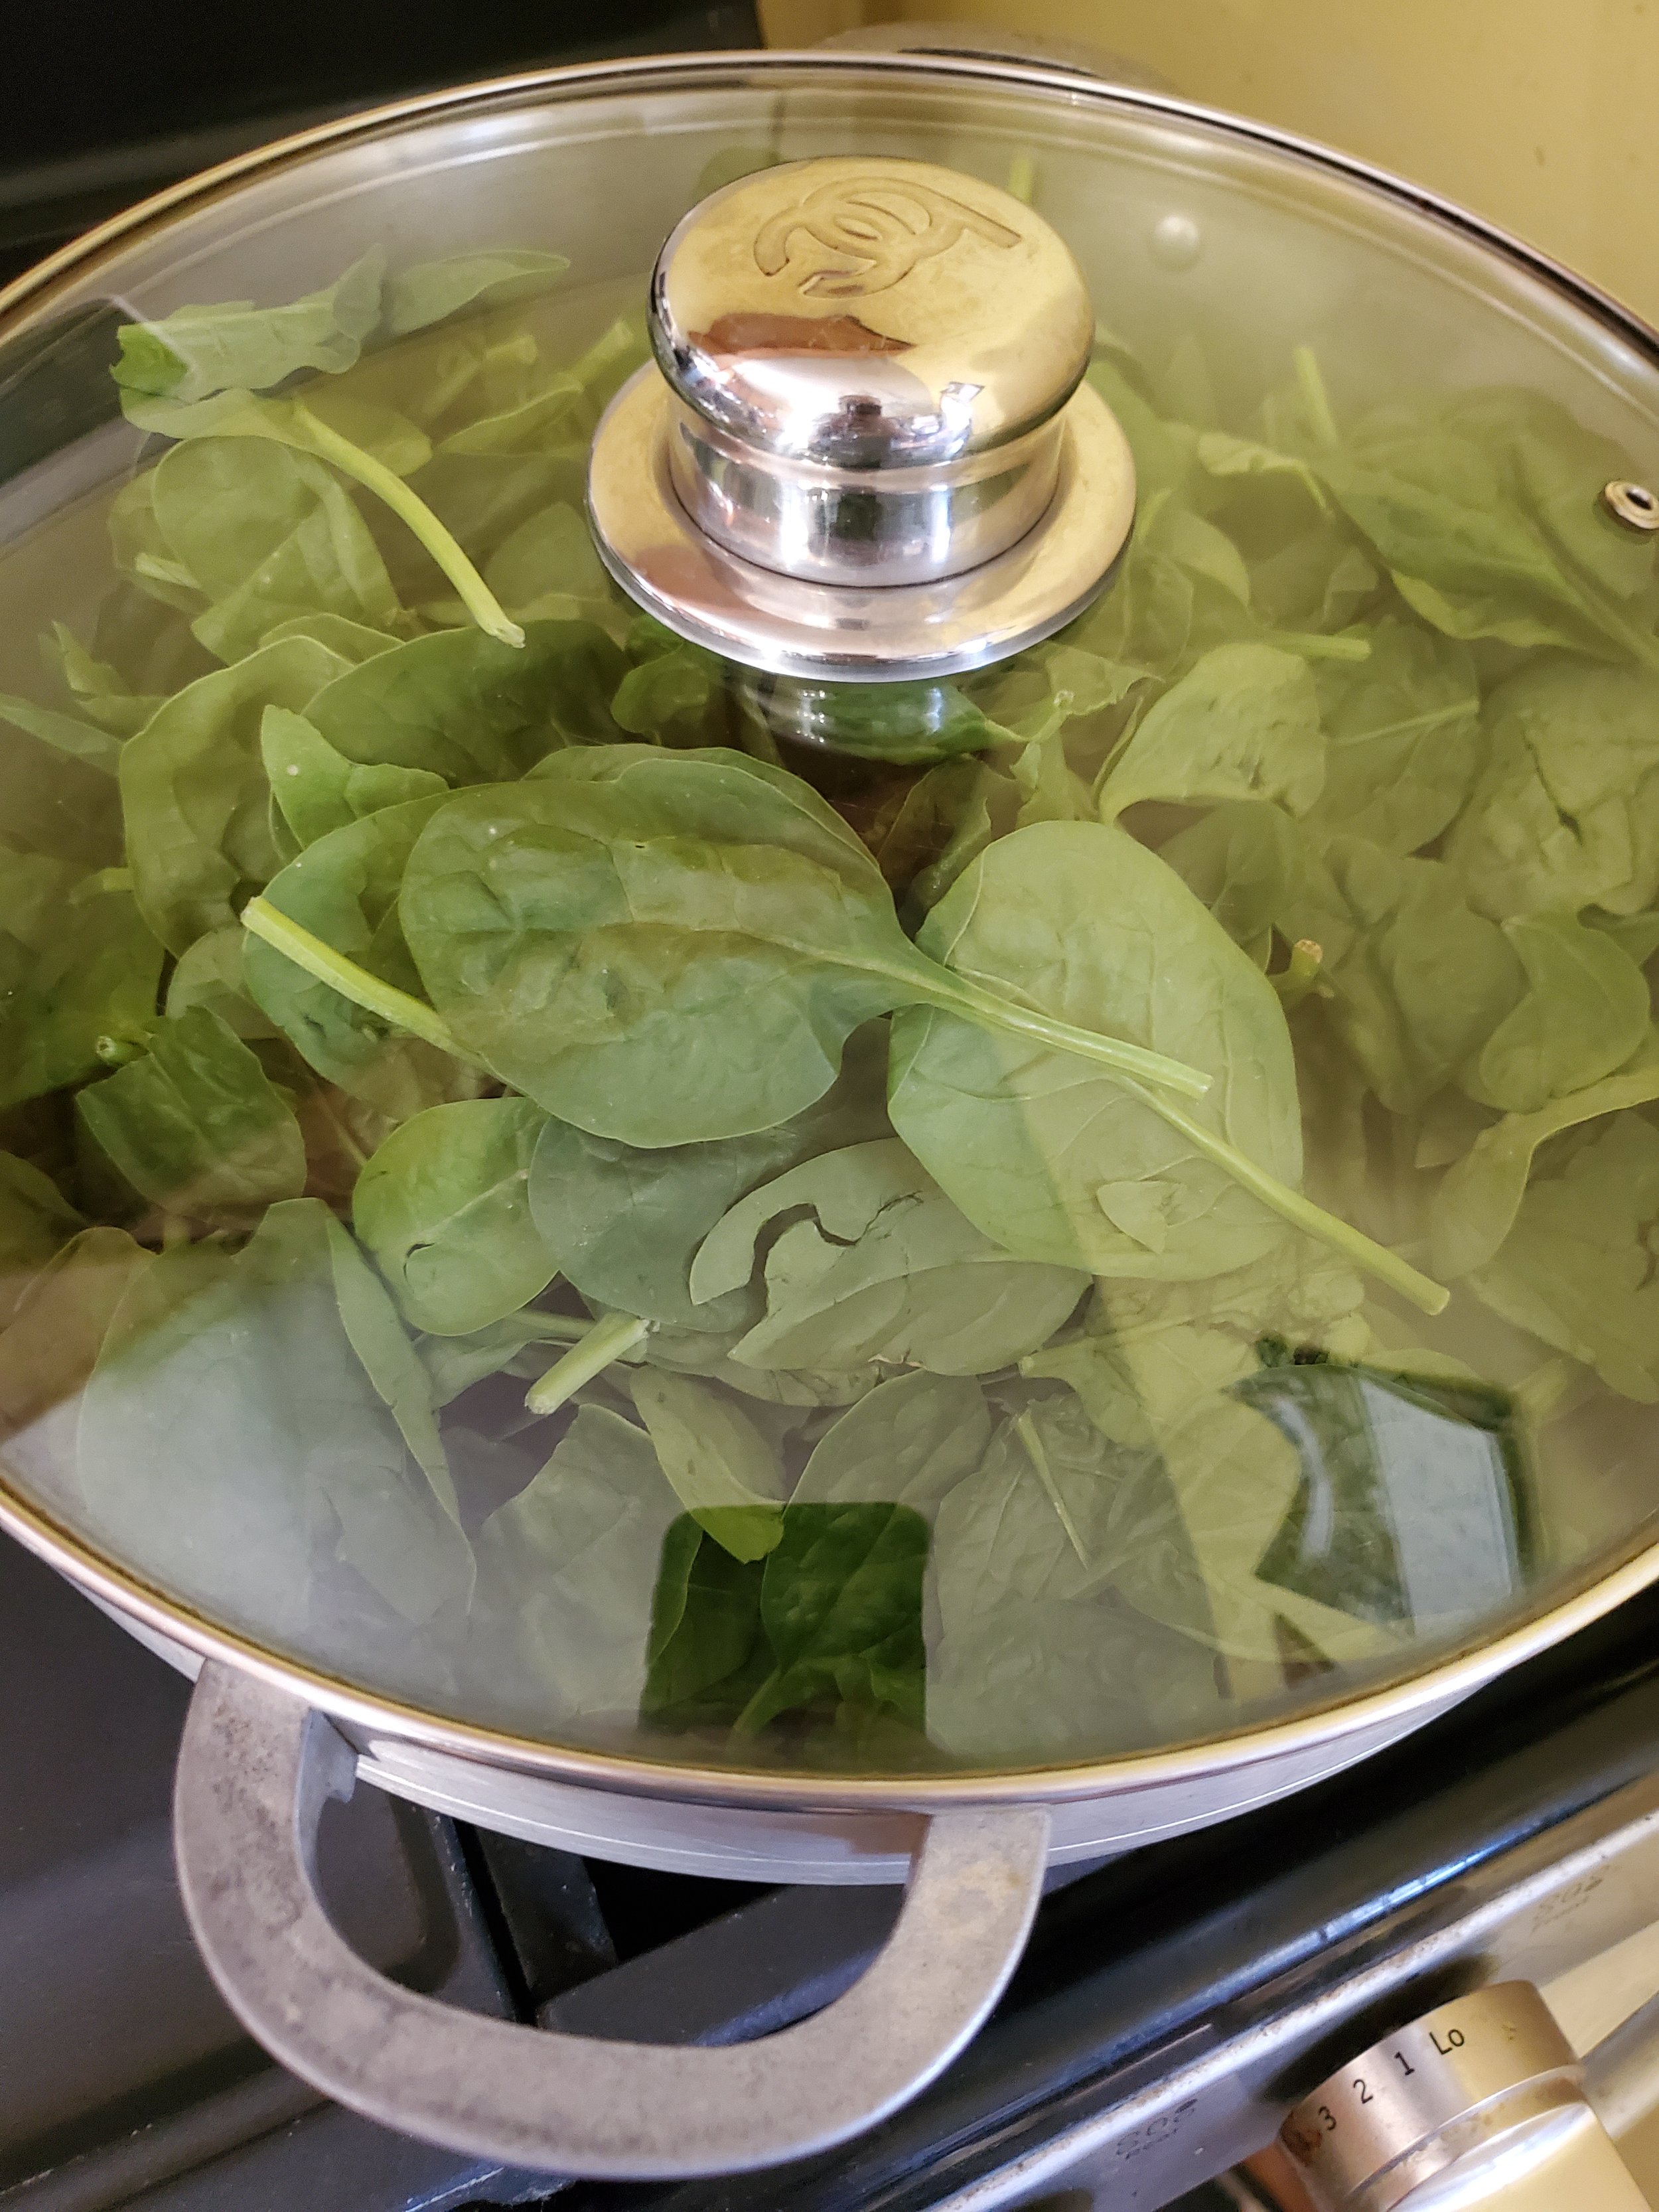
Once the onions are translucent and the fat has rendered out of the sausage, add the spinach. Add so much spinach it looks like the lid won't stay on. Trust us here. Stick the lid on (shove it down if necessary, making sure the spinach stays inside), reduce the heat to as low as it will go, and turn your attention back to the noodles.


By now, the timer's making irritating noises and wants you to do something. Drain the noodles and put them right back into the stock pot, and measure in your sour cream and cottage cheese. Stir like crazy, then slap the lid on it. This is why we only par-cooked them - they need to hold up to vigorous stirring, and they'll soak up the moisture and steam in the covered pot.


Looking back at the onions, sausage and spinach - hey, wasn't there a lot more spinach a minute ago? - remove the lid and stir gently. Once the spinach is all uniformly wilted, feel free to cut the heat. Make sure it stays covered so it retains its warmth while you go back to working on the noodles.


Those lumpy curds from the cottage cheese should have melted down some by now. Remove the lid, stir like crazy some more, and consider adding some milk or heavy cream if you used low fat cottage cheese. (Full fat cottage cheese works much better for this recipe, but we used what we had on hand.) Your goal is a thick, sticky sauce covering egg noodles that have absorbed the excess moisture.


Add a couple teaspoons of your spice mixture and stir well one last time. Serve the noodles with or topped by the sausage and vegetable mixture.


This recipe is a testament to the joy of home-cooked comfort food, where simple ingredients come together to create something truly extraordinary. We hope it has inspired you to embrace the art of cooking and explore the endless possibilities that await in your kitchen. Reach out to us over on our Facebook page if you decided to give it a try! 


If you wound up here because you’re in need of an appliance repair technician, we can help. You can get hold of us by calling ((214) 599-0055) or by going to our website


Additional Reads:  

Pepperoni & Canadian Bacon Stromboli  


Jalapeno Chicken Bowtie Pasta  


7 Most Common Issues With Your Ice Maker & Their Causes

 Pin Down What’s Wrong With Your Ice Maker With Our Handy Guide 


For all that, it has a very simple job, your ice maker can become messed up in some truly unique ways. All you want is to be able to get a cup of ice, but your ice maker isn’t working the way that it’s supposed to. Maybe the ice is too small, or it’s hollow, or it’s not producing ice at all. When this happens, it helps to have a diagnostic sheet. Consider this post your handy diagnostic sheet to figure out why your ice maker is acting up. 


Whether you’ve got a standalone freezer or a built-in one, these will almost all apply. 


A quick note, some of these are easy enough to fix on your own, and we’ll tell you how to do it. Others, due to difficulty of access, or difficulty to test, we’re going to recommend you reach out to your preferred repairtech for that. 


Why Is My Ice Maker Is Not Working Or Not Making Enough Ice? 

There are several reason why your ice maker might not make enough ice, or any ice at all. To start off with you’ll want to check the control arm. This is the bar that senses when the ice maker has made ‘enough’ ice and it tells the freezer to stop. Make sure that yours isn’t loose, broken or accidentally caught in this off position first. The next step is to check out if your freezer or standalone ice maker is too warm. Just like your refrigerator, if your ice maker or freezer can’t ‘breathe’ or their internal temperatures are set too high, you’re not going to get a happy machine. So, you’ll want to make sure that there’s nothing blocking your compressors or vents, and that you have the temperature set around 0*F. A final one that you can check for yoursel fis whether or the water filter is clogged. If it’s been more than a year since your last changing, it’s time to get that done. Ideally you should change the filter every six months, but if you can’t we understand. (Although whether your ice maker does is a different matter.) 

Courtesy of Meruyert  Gonullu

Finally the two points that can cause your ice maker to not make enough ice that require professional help is if you have a defective water inlet valve or if your water inlet tube has frozen. For the first you need to check and see if the water inlet valve is working properly, and that requires testing the pressure of the flow. The second requires very carefully apply enough heat to defrost the tube, without damaging it. 


Ice Maker Is Making Ice, But Is Not Dispensing

Fortunately when it comes to the ice maker making ice but not dispensing, it’s much easier to deal with than your ice maker not making ice at all. 

Courtesy of Meruyert  Gonullu

If your ice maker has a clump in either the bin or the chute, you aren’t going to be getting an ice out of the ice maker until that melts. Your best bet is to lay down a towel and allow it to melt naturally. Or, if you’re impatient and very precise, you can choose to use an ice pick to try and chip at it to get it out. We don’t advise this one as it can damage your ice maker if you miss, but it is an option. The other option is that the auger, the spiral arm, that drives the ice towards the chute and breaks up clumps, has had the motor freeze over. If you don’t use your ice machine regularly, this can happen.  If this happens, it’s going to be behind the freezer wall, and it won’t actually be easy to see. You’ll only be able to guess that that is the issue by watching and seeing the auger isn’t moving, which not all freezers will allow. This is another one that’s delicate and requires a professional. It’s too easy for water to damage the motor further, and we really don’t want that. 

The Ice Maker Is Making Ice Cubes That Are Too Small

Courtesy of Vlad Samoylik

You might also have it that the freezing rods for your ice maker, if you have a standalone, have accumulated a large mineral deposit and this can cause issues. What happens is that the minerals stay between the freezing rod and the water, creating a barrier that keeps your ice from freezing properly. In that case you’ll need to defrost your ice maker, empty it, and descale the machine. That is going to look different depending on the machine, but if you’re uncertain you can always check the manual.  If you’ve got poor water flow to your ice maker on the other hand, if you have poor water flow, that’s going to be a different matter. If the water isn’t flowing easily, you’ve got several different causes to check out. First, go back to your water filter, hasn’t it been changed recently? (Are you seeing how many issues are caused by a poorly maintained filter?) After you’ve checked that, check out the water line on the back or sides of your freezer or ice maker. You want to make sure that there aren’t any twists or kinks in the line. Finally,  you’ll want to check if your freezer or ice maker is level. It might sound odd, but if your unit isn’t level then the water won’t flow properly into the tray and that is going to give you cubes that are too small/misshapen/hollow. 


The Ice Maker Is Making Too Much Ice

Courtesy of Cottonbro Studio

This one isn’t one we encounter too often, but occasionally we do get calls of “help my ice maker is making too much!” Fortunately, these are quick to diagnose. Start off by checking the bin for your ice maker. If the bin isn’t placed right, then the control arm (or other sensor) won’t be able to tell if ‘enough’ ice has been made. So, do a quick check to see if the bin is sitting properly. After that, you’ll want to take a look at the control arm itself. Earlier we talked about how a broken control arm could cause your ice maker to make no ice. This is the opposite problem. If the control arm is outright broken, it could cause the machine to produce continually. Finally, some freezers have a shelf that sits under the ice bin. You’ll want to make sure that you have one if you’re supposed to, as that links to how well your control arm works. If you don’t have one, but are supposed to, you can either reach out to a repair shop to purchase one, or see if the manufacturer of your freezer has one still in stock. 


The Ice Has An Odd Taste

Courtesy of Enrique Zafra

There’s nothing worse than getting your ice and discovering that it tastes terrible. There’s a few different reasons that can happen, and your water filter is one of them. If your water filter is expired or full of contaminants, it is reducing the ability to keep that out of your water. Old ice cubes are another issue. If you don’t use your ice maker regularly, ice can sit in the bin and acquire tastes from the freezer or the minerals left in the filter.  Last but not least, if your ice maker is within your freezer, poorly wrapped freezer items can lead to your ice picking up scents and tastes. 


The Ice Maker Is Leaking

Courtesy of Enrique Zafra

If your ice maker is leaking, you would naturally look to see if any of the lines are cut or buttons are pressed in. And that’s a good start. However, you might also be looking at ice clumps getting stuck and melting or your refrigerator not being level. These are common issues and easy enough to fix. 


The Ice Maker Itself Is Frozen

Our final issue is when the ice maker itself freezes. This might be that the entirety of the ice maker freezes up, or that the motors do. In either case, it points to one of two issues. Either your temperature is set too low, or your water inlet tube has frozen over. If it’s the first one, it’s easy enough to fix. If it’s the latter though, you’ll want to call in a professional to assess the situation and bring the proper tools to warm things back up without damaging the freezer. 

Some issues are easy to fix when it comes to your ice maker not working, others require a professional to look into. Whichever camp you’re in at the moment, Appliance Rescue Service is here.  We understand that you don’t always have time to break an issue down and fix it, and that’s why we work with your schedule to send out one of our technicians. We want to help get your home running smoothly again. 

Did we answer your question? Let us know over on our Facebook page! 

If you’re having issues with your ice maker, or any of your other major appliances, you can reach out to us via our contact page or by giving us a call at ((214) 599-0055). 


Additional Posts To Read 

Refrigerator Troubleshooting    

Ice Maker Maintenance     

Embrace the Bold: A Guide to Maximalist Decor

 How To Go Big In Your Home And Bring In Color, Pattern, And Texture 

This week, we’re going big, we’re going bold, we’re going maximalist. If you’re tired of coloring inside the lines or always being told only keep what you need, this decor style might be for you. Learn what maximalism is, what the elements are that make it up, and how you can bring it into your home. 

Courtesy of decoredoo.

Courtesy of ksenia-chernaya


What is Maximalist Decor

Maximalist decor is a style that’s best summed up by “Be vivid, be bold, and show off your passions! ” It’s the dead opposite of minimalism. It’s about pattern and texture, color and light, and most of all, it’s about showing off the interests of the homeowner. It’s about taking what you love and showing it off, making it the highlight of the room or your home rather than just on a shelf here and there.  


Maximalism can be said to have started in the Victorian era, although people argue about when and where exactly. Although it wasn’t called maximalism at the time, it was all about showing off your wealth by displaying treasures, luxurious fabrics, textures, and your collections. What’s important to understand is that although it was initially a way to show off just how rich you were, it has evolved beyond that point. It’s a fluid, individualistic style that focuses on your joy.  It’s about making bold decisions on color, pattern, texture, and form when it comes to your space, blending them together into something that represents you and is striking and playful. 


Some of the people most known for maximalism today are Kelly Wearstler, Martin Brudnizki, and Dorothy Draper.  All of them get that maximalism isn’t just about showing off something impressive and enviable but about creating a space that is fun and brings joy. 

What are some specific elements of Maximalist Decor?

- It’s clean and curated

Maximalism walks a thin line between showing off what you love and being a chaotic clutter.  It’s not about filling every available space, and it’s actually better if you keep working areas like coffee tables, desks, etc., relatively clear. This bit of practicality makes the space more practical to live in rather than just look at. Part of the joy of the style is the intentional curation, after all. 

- Having one or two leading features that will shape the rest of the room. These are the pieces that are going to catch the viewer’s eye. Whether it’s vivid furniture, ornate carpentry, a statement light fixture, or plant life, pick one or two to be the highlight of the room. 

- Coordinating layers. Layer in the things that you love around those fixture pieces so that they echo it.  It’s all about curation at this stage, so feel free to go slowly. 

-Go bold in your color choices. When it comes to colors and maximalism, it’s all about being bold. This doesn’t necessarily mean neons; instead, it’s about choosing rich and sumptuous colors. Patterns are also always a plus, especially if you can coordinate patterns. 


How can YOU bring Maximalist Decor into your home?

If you want to redo your home with maximalist decor, we suggest taking a 5 step process. 

- Stop and think about it. Look at the different inspiration pictures you’ve saved and consider if you would be okay with the entirety of your home being done that way. If the answer is no? Or you’re thinking you can just do a little bit in that direction? We suggest looking at a similar style but not maximalism. Maximalism doesn’t have a ‘light’ setting. It’s all or nothing, which is sort of the point. 

- Do you want each room to be a separate theme, or do you want everything to connect together? If it’s the latter, consider what your thread will be; what is going to be the same throughout every room? 

Courtesy of decoredoo.

- Pick out central colors and sort things accordingly. Whether you decide to have each room be different or have a common thread, you want the rooms to be cohesive, rather than dizzying or overwhelming. We know it’s a fine line to walk, but it can be done, and part of that is picking out your united colors or color palette. 

- Focus on comfort before anything else. You’re the one living here, you need to be happy with it. 

-Be vivid, be bold, and show off your passions!


What about you? Do you think you could go with the maximalist look in your home? Let us know why or why not on our Facebook page! 


If you wound up here because you need help with your appliances and not your interior decor, you’re still in the right space. Appliance Rescue Service serves the DFW area from Dallas to McKinney, from Coppell to Garland and everywhere in between. You can reach us by calling ((214) 599-0055) or by going to our contact page


Some additional links you might enjoy 

Pantone Color of the Year

Hollywood Regency Decor

Art Nouveau Decor