Chocolate Pecan Cake for a Special Date

Or Just For Whenever You Feel Like It, It’s Cake After All!

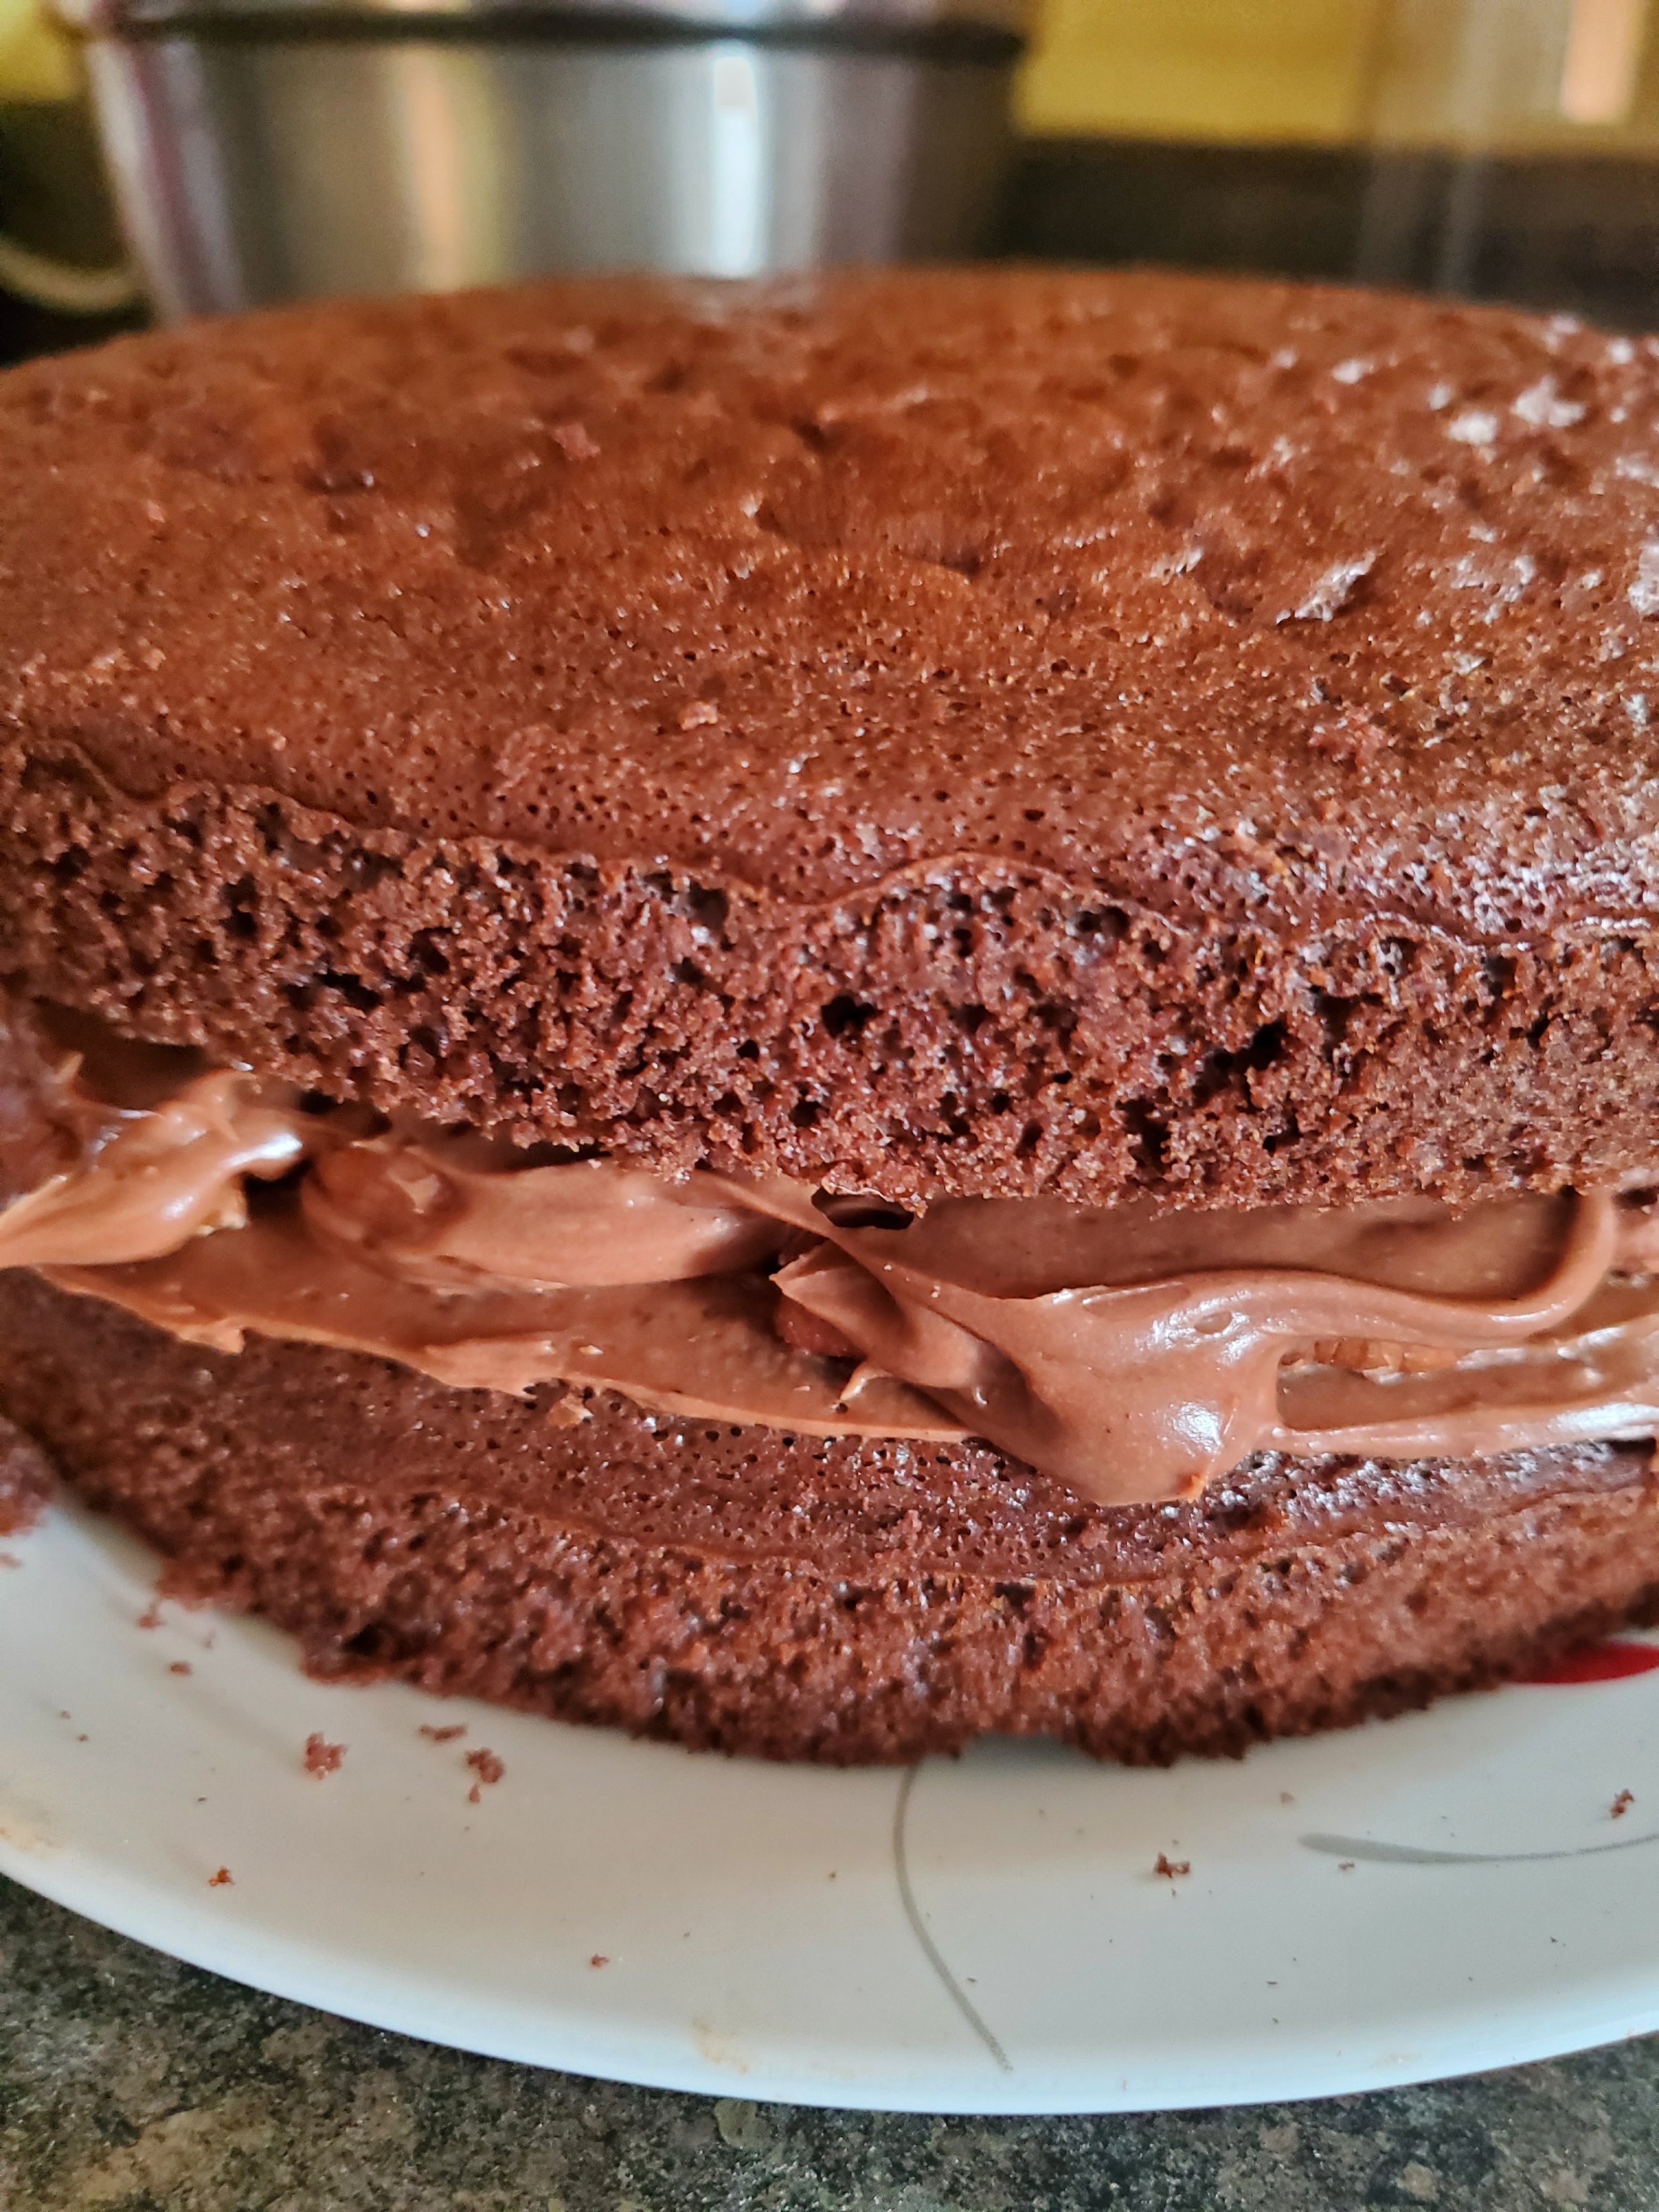
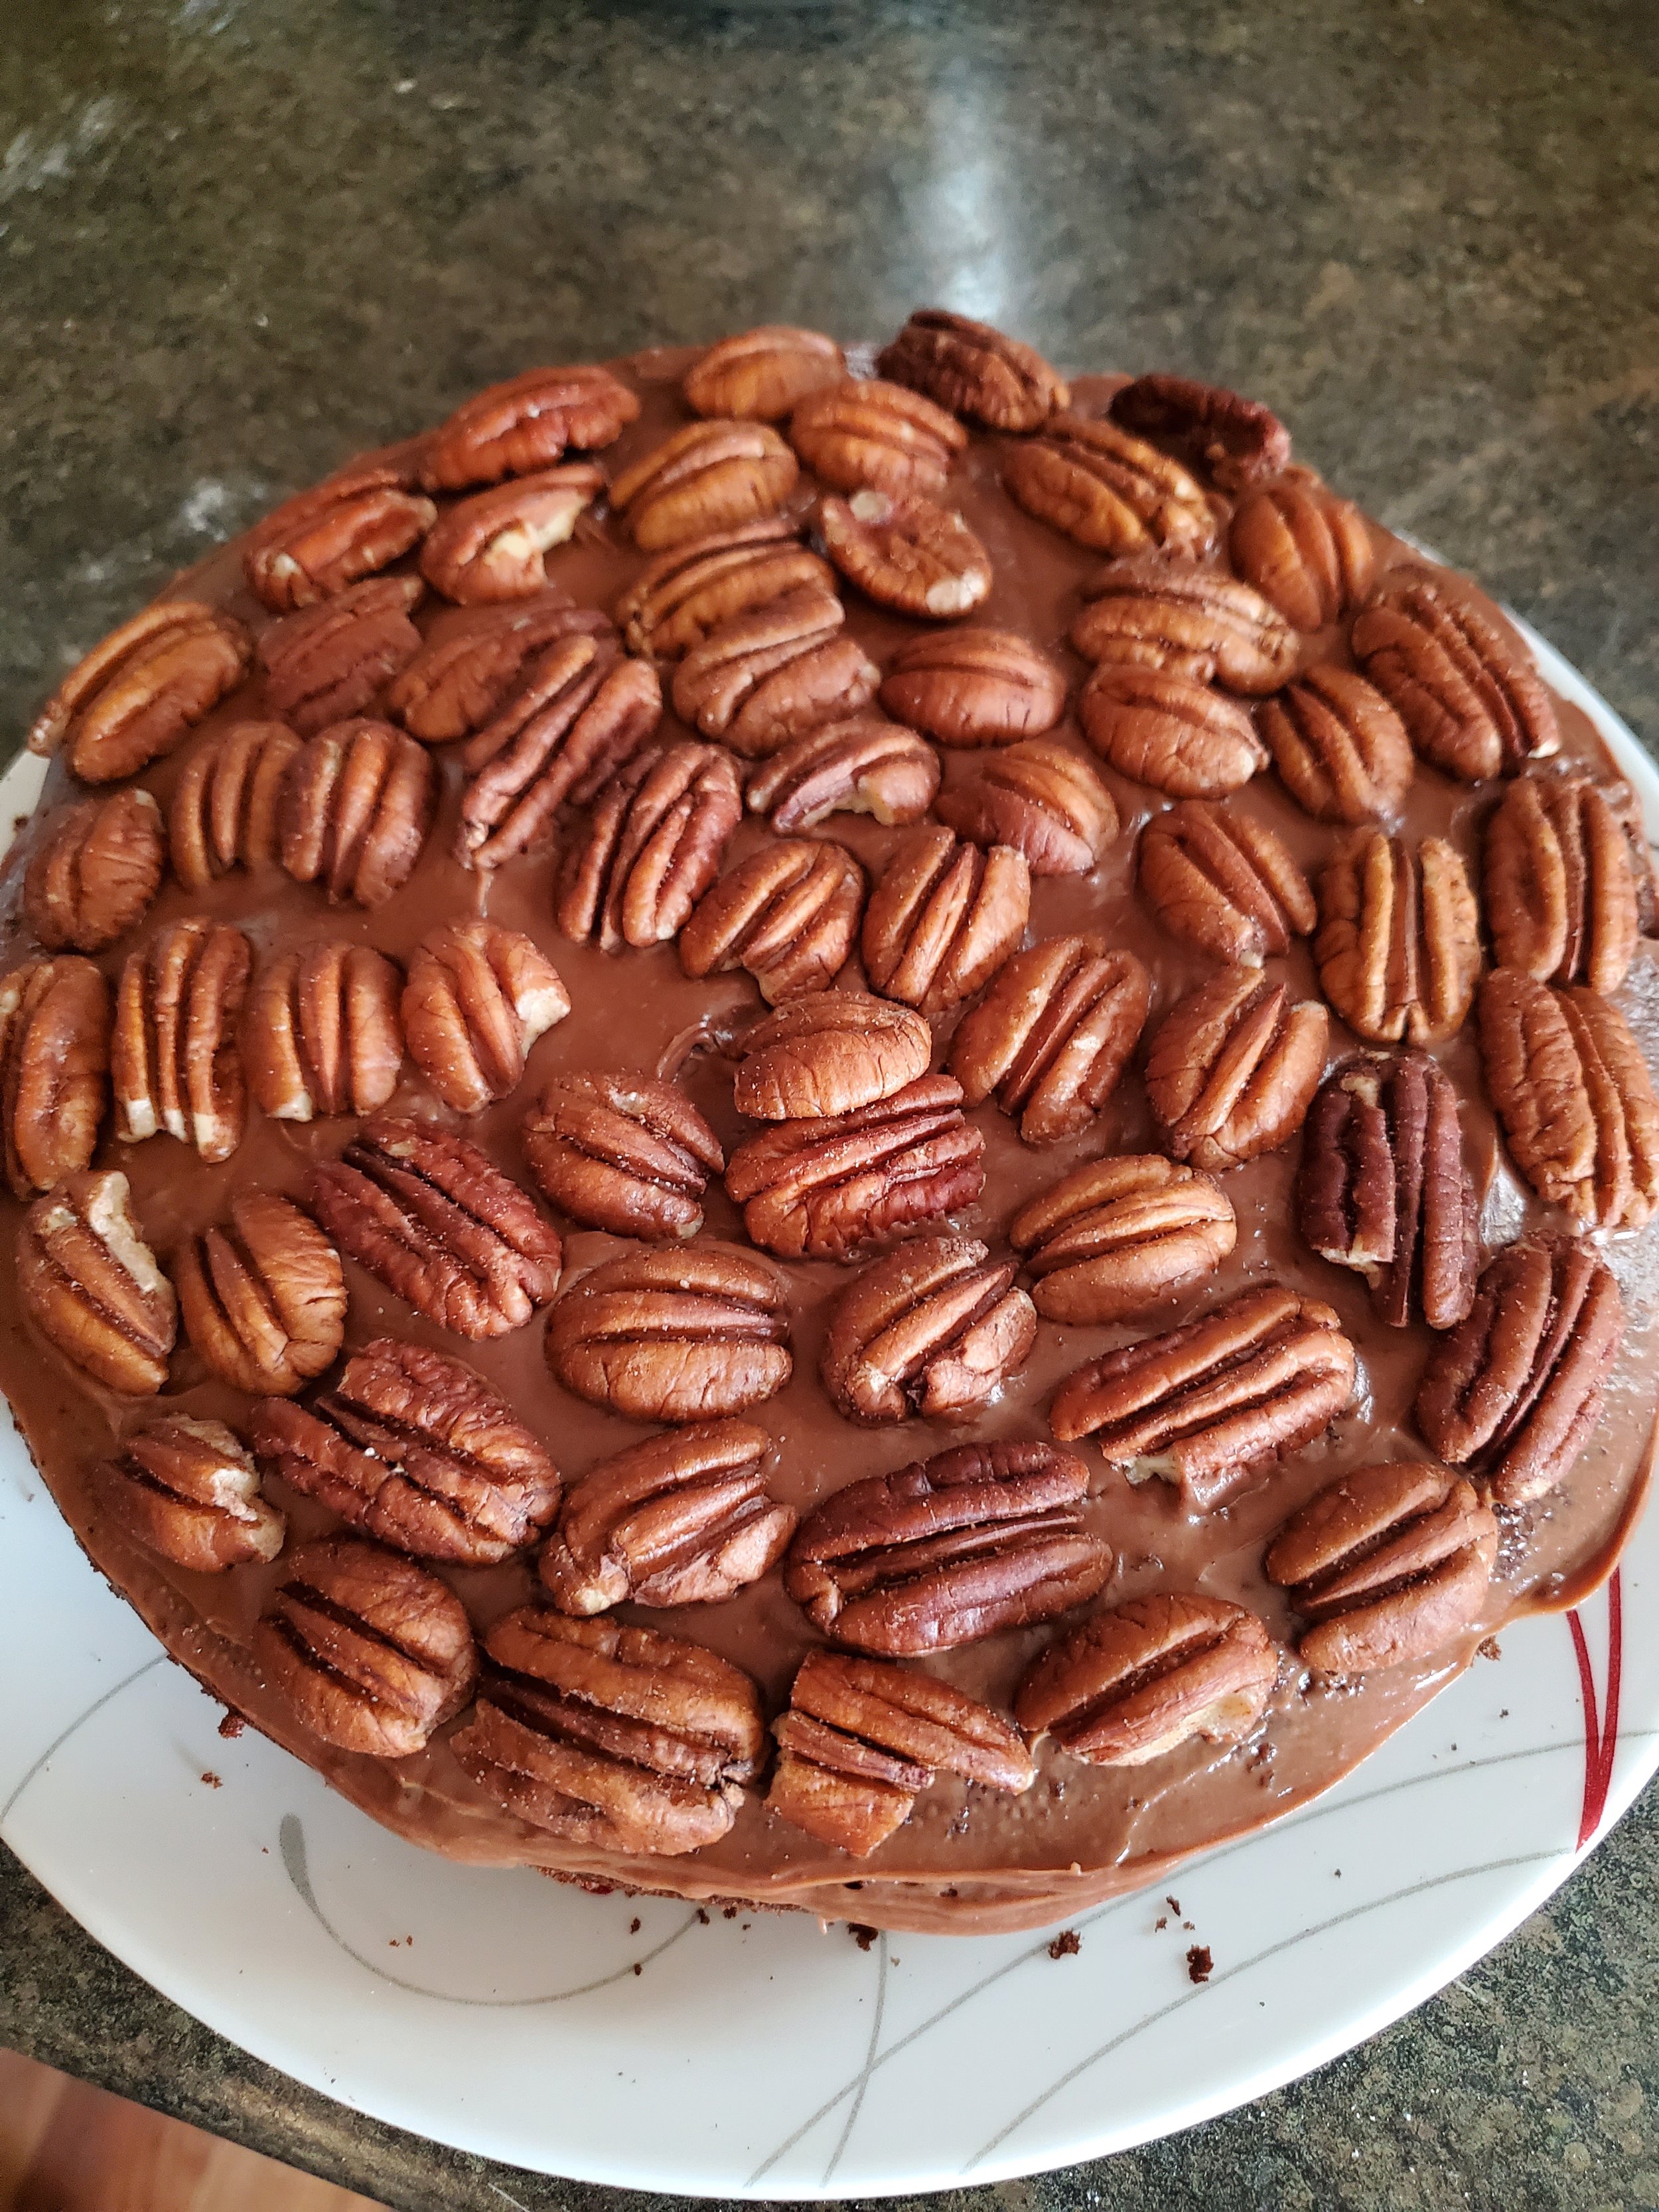
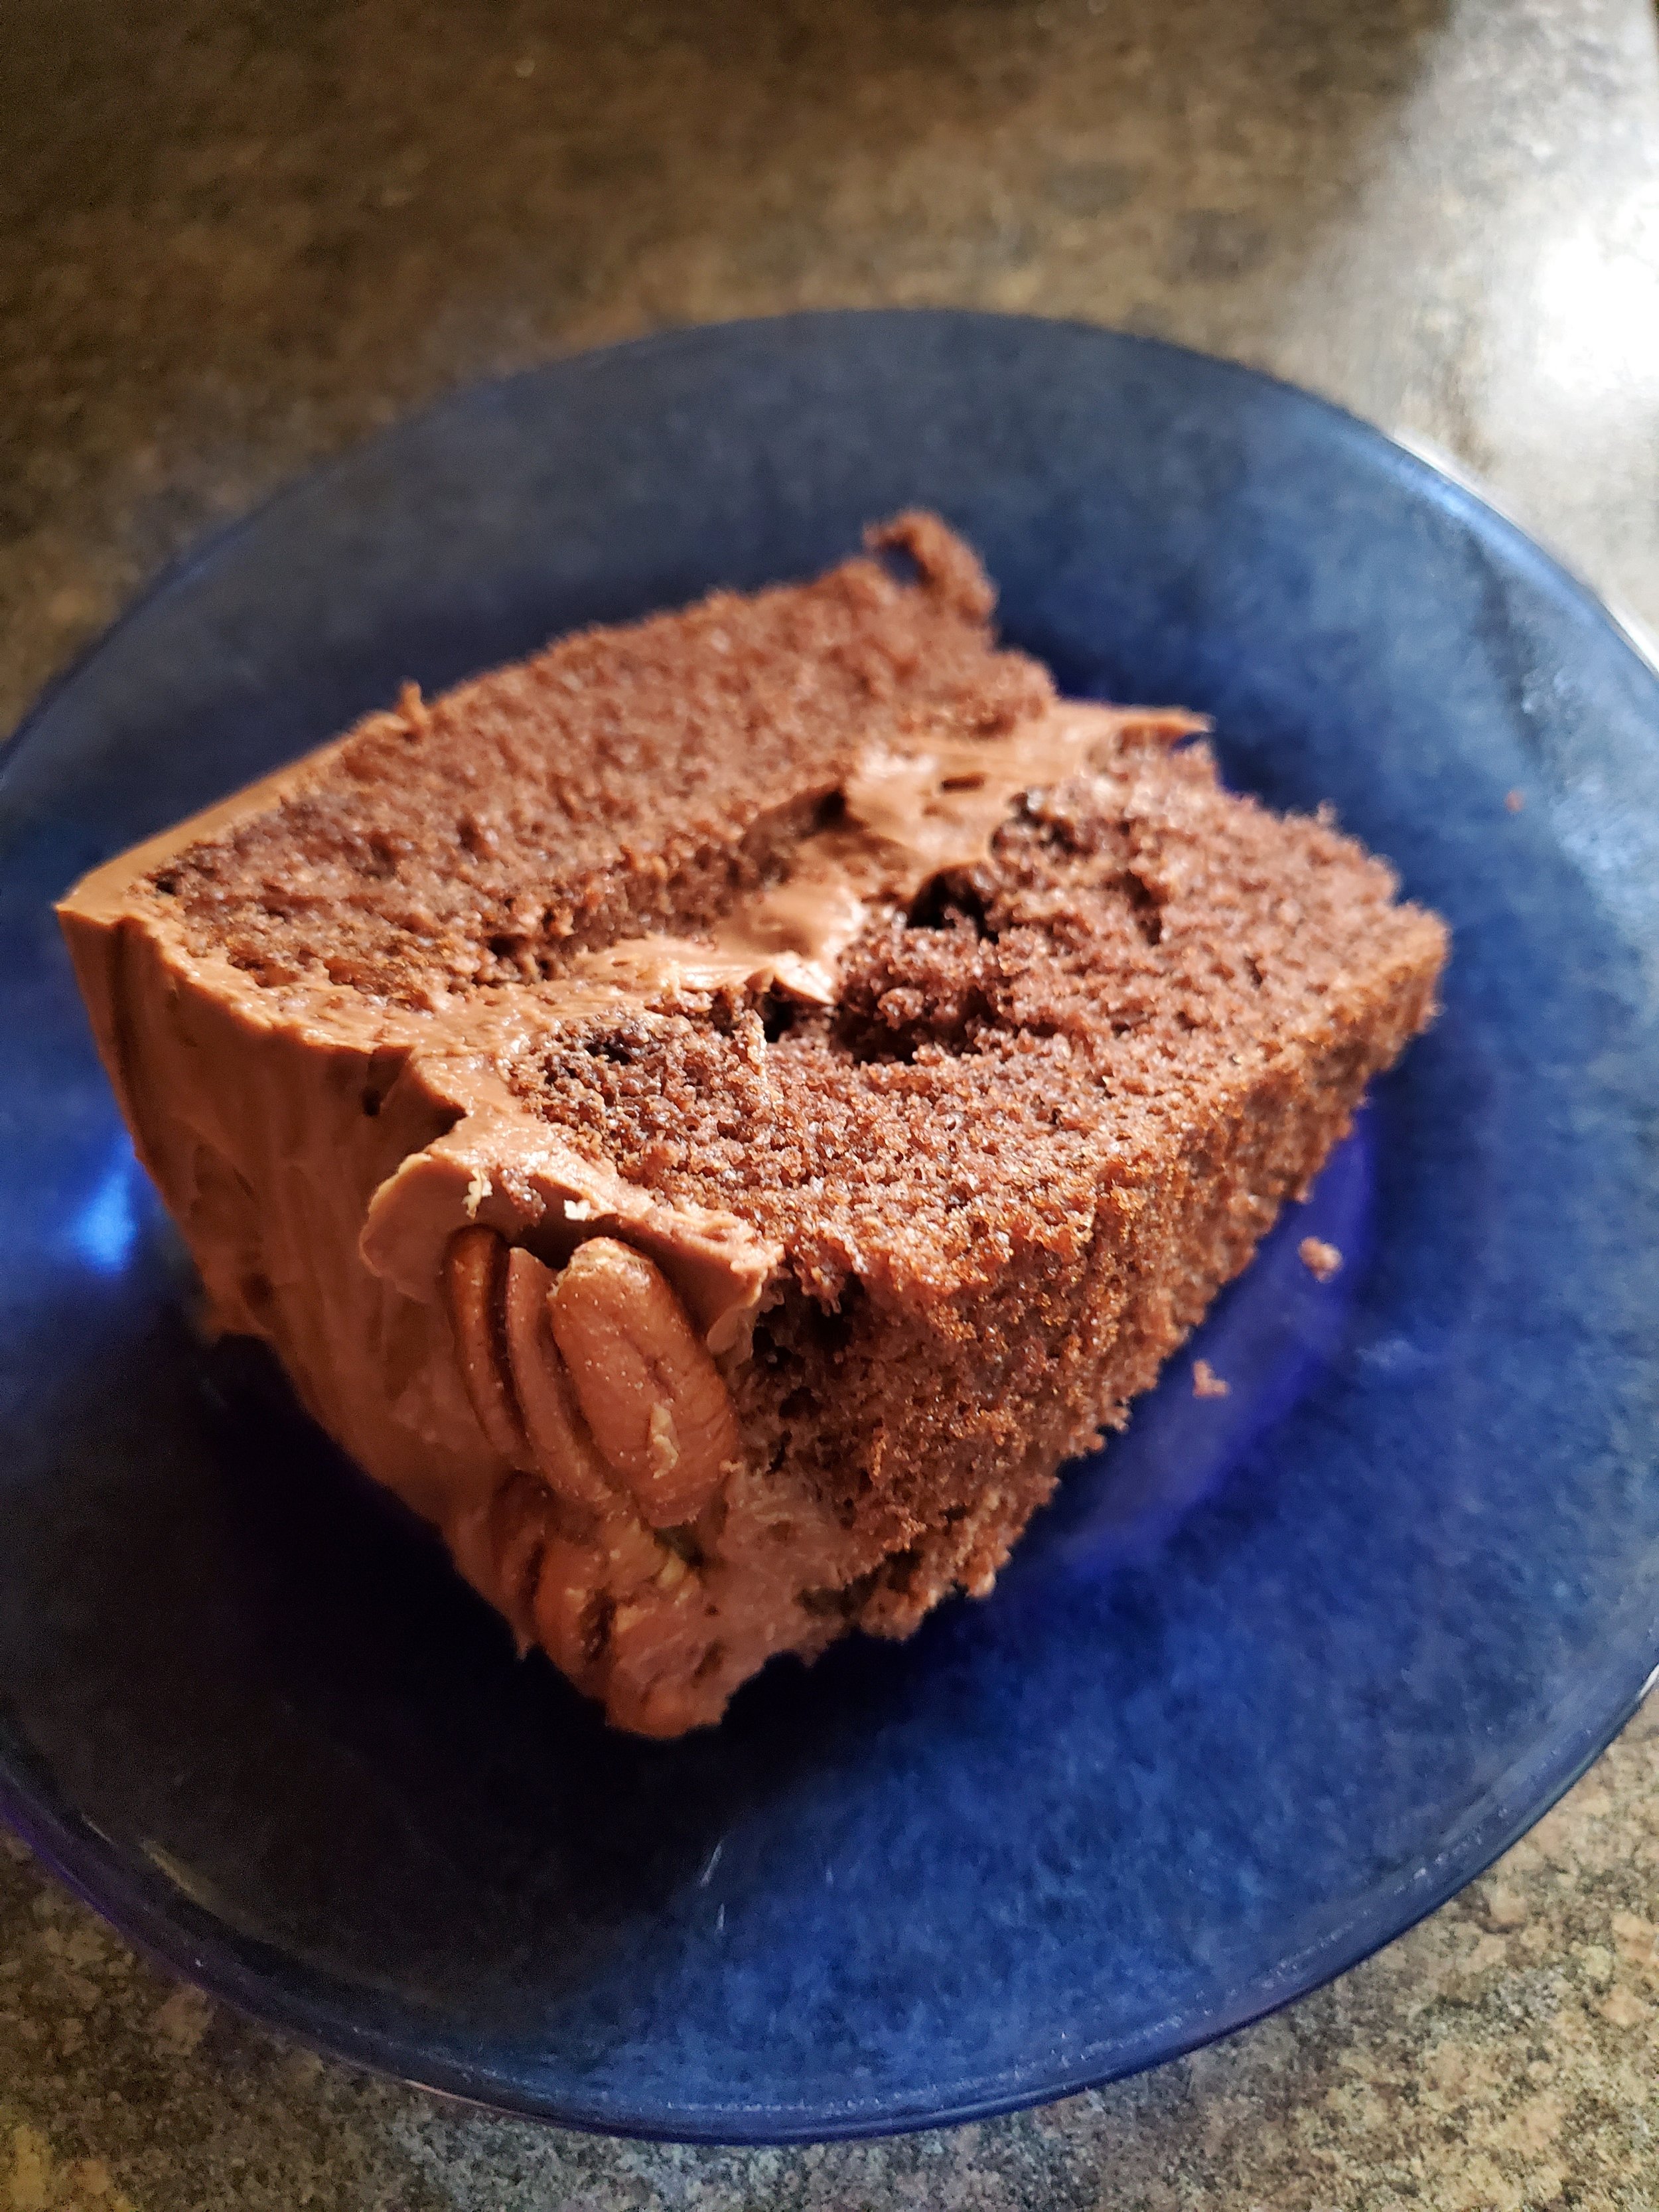
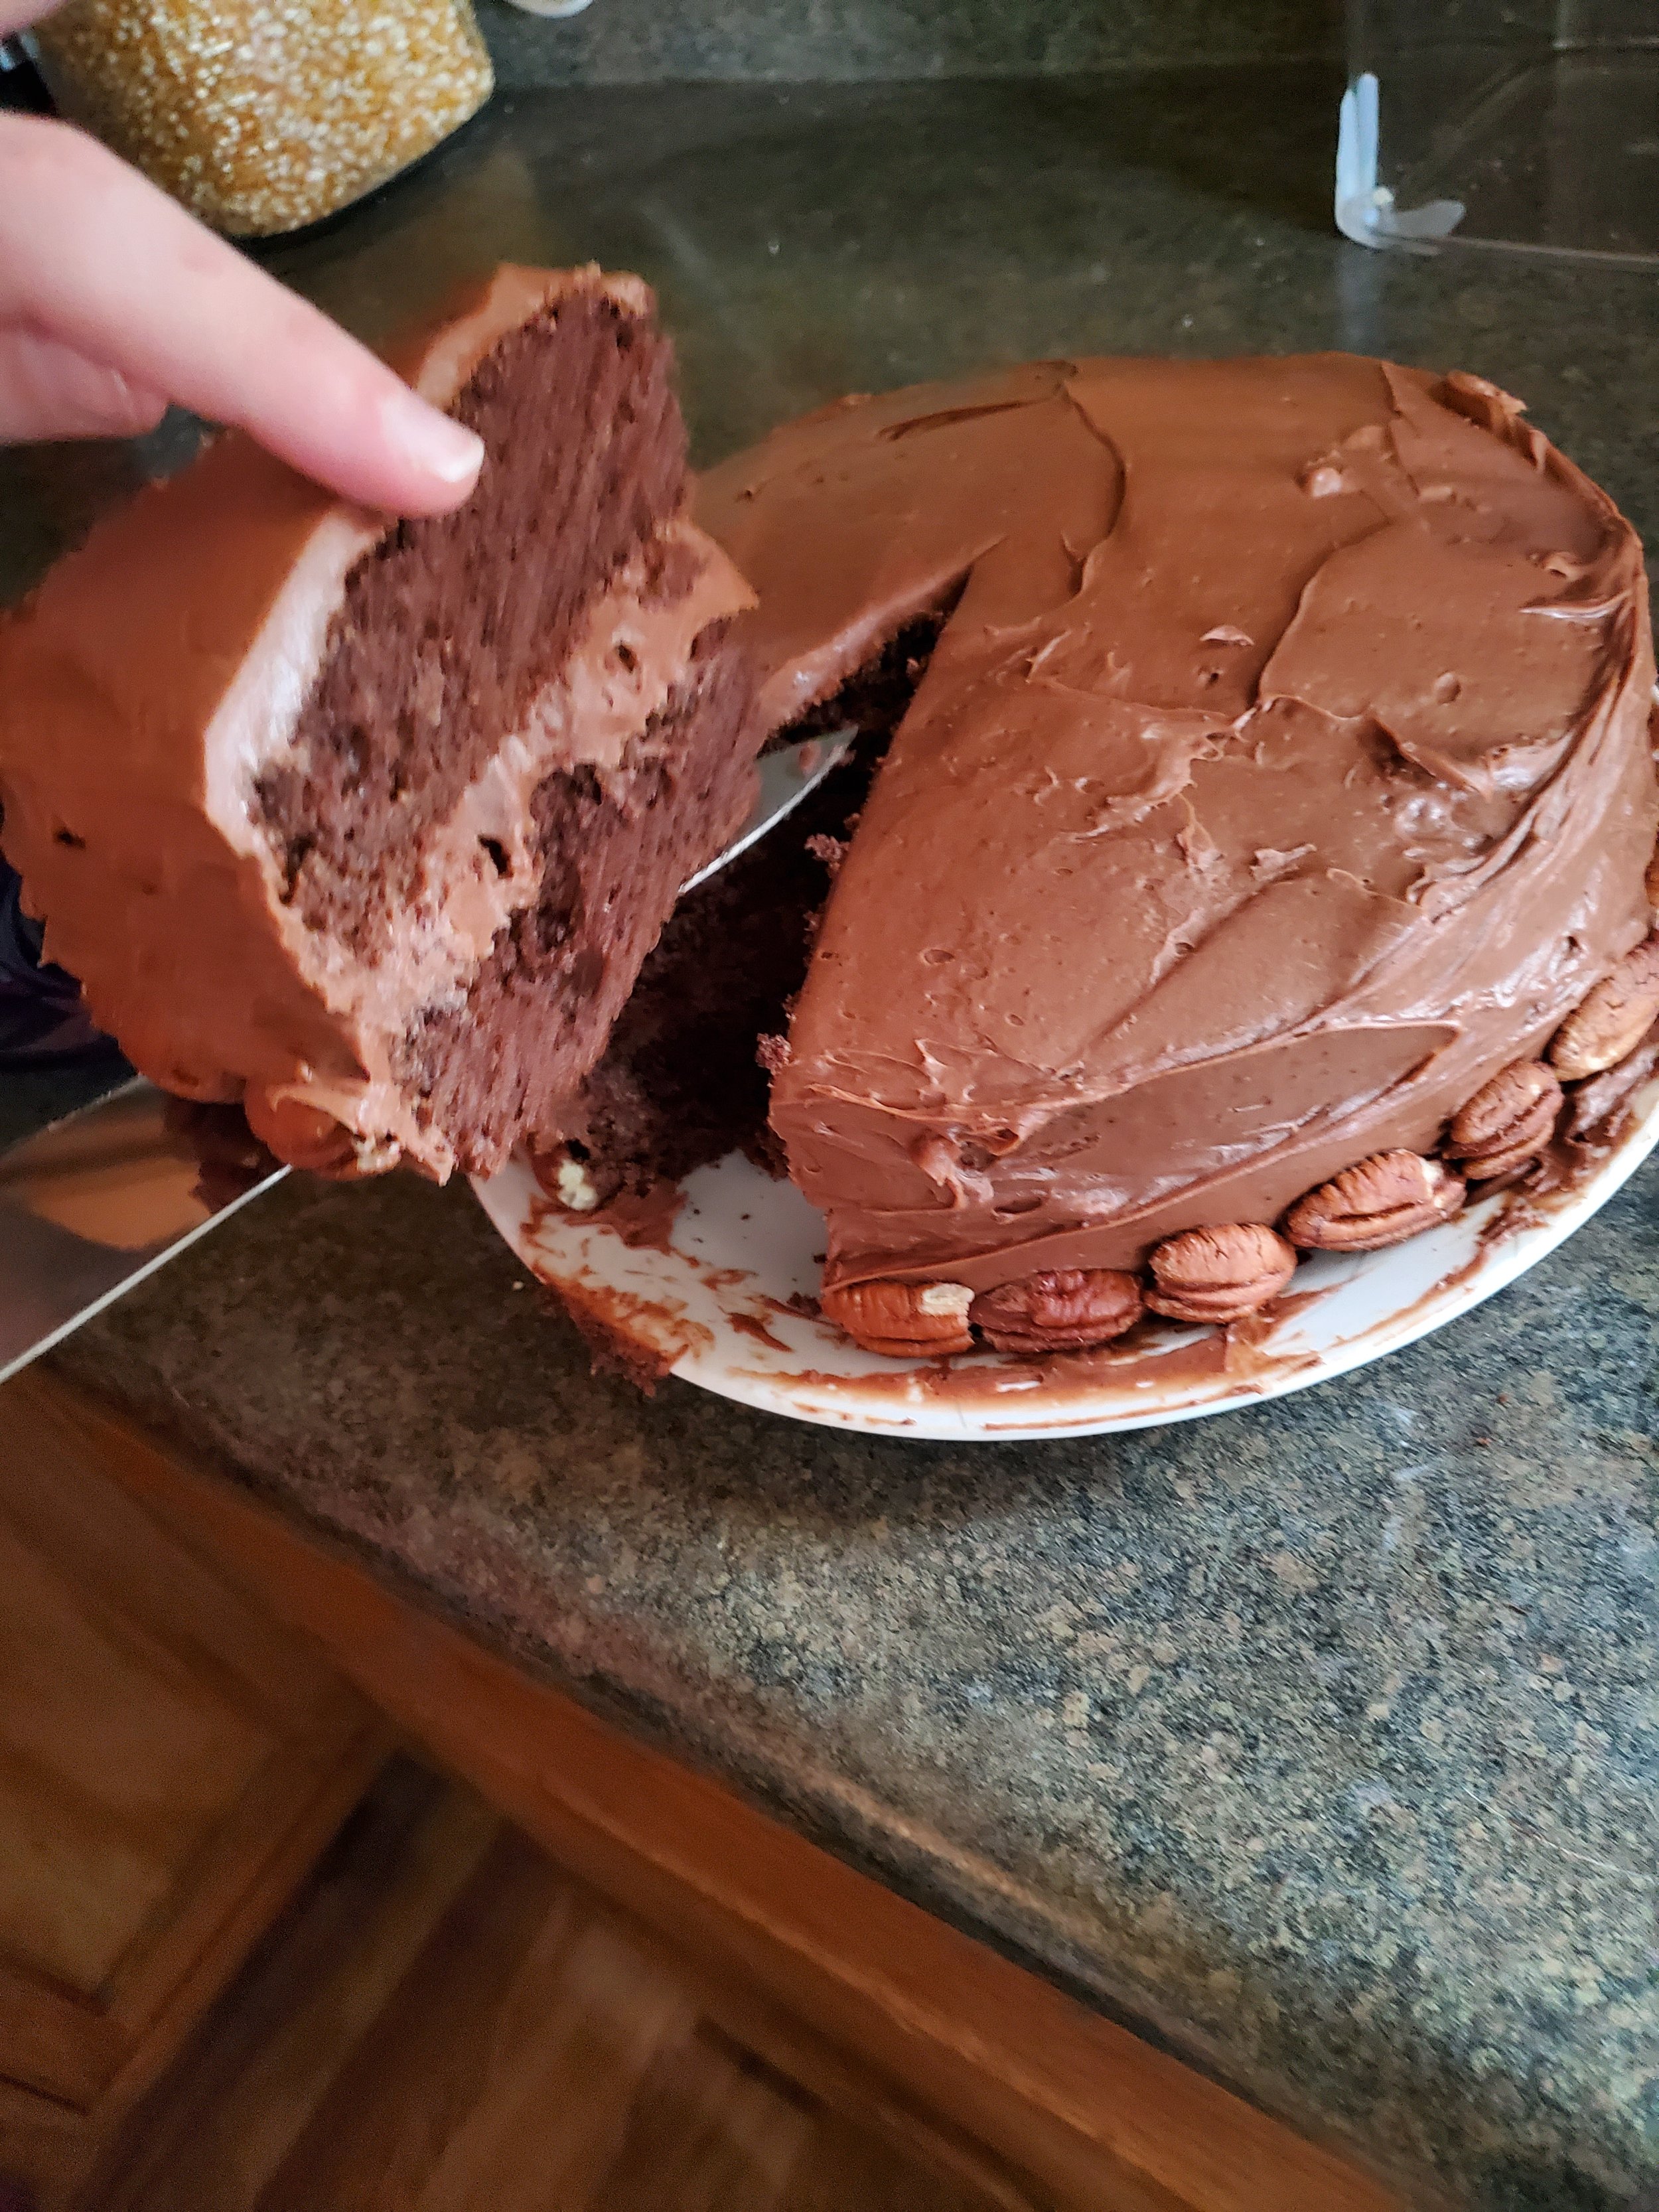
It’s almost time for the best day ever! No, we don’t mean Valentine’s Day, we’re talking about the day after, when all of the chocolate goes on sale! Now is the best time of year to snap up all sorts of delicious chocolates and make them into fun new desserts. This year, to celebrate, we made a layered chocolate pecan cake with frosting so rich and delicious you’ll have to force yourself to walk away.

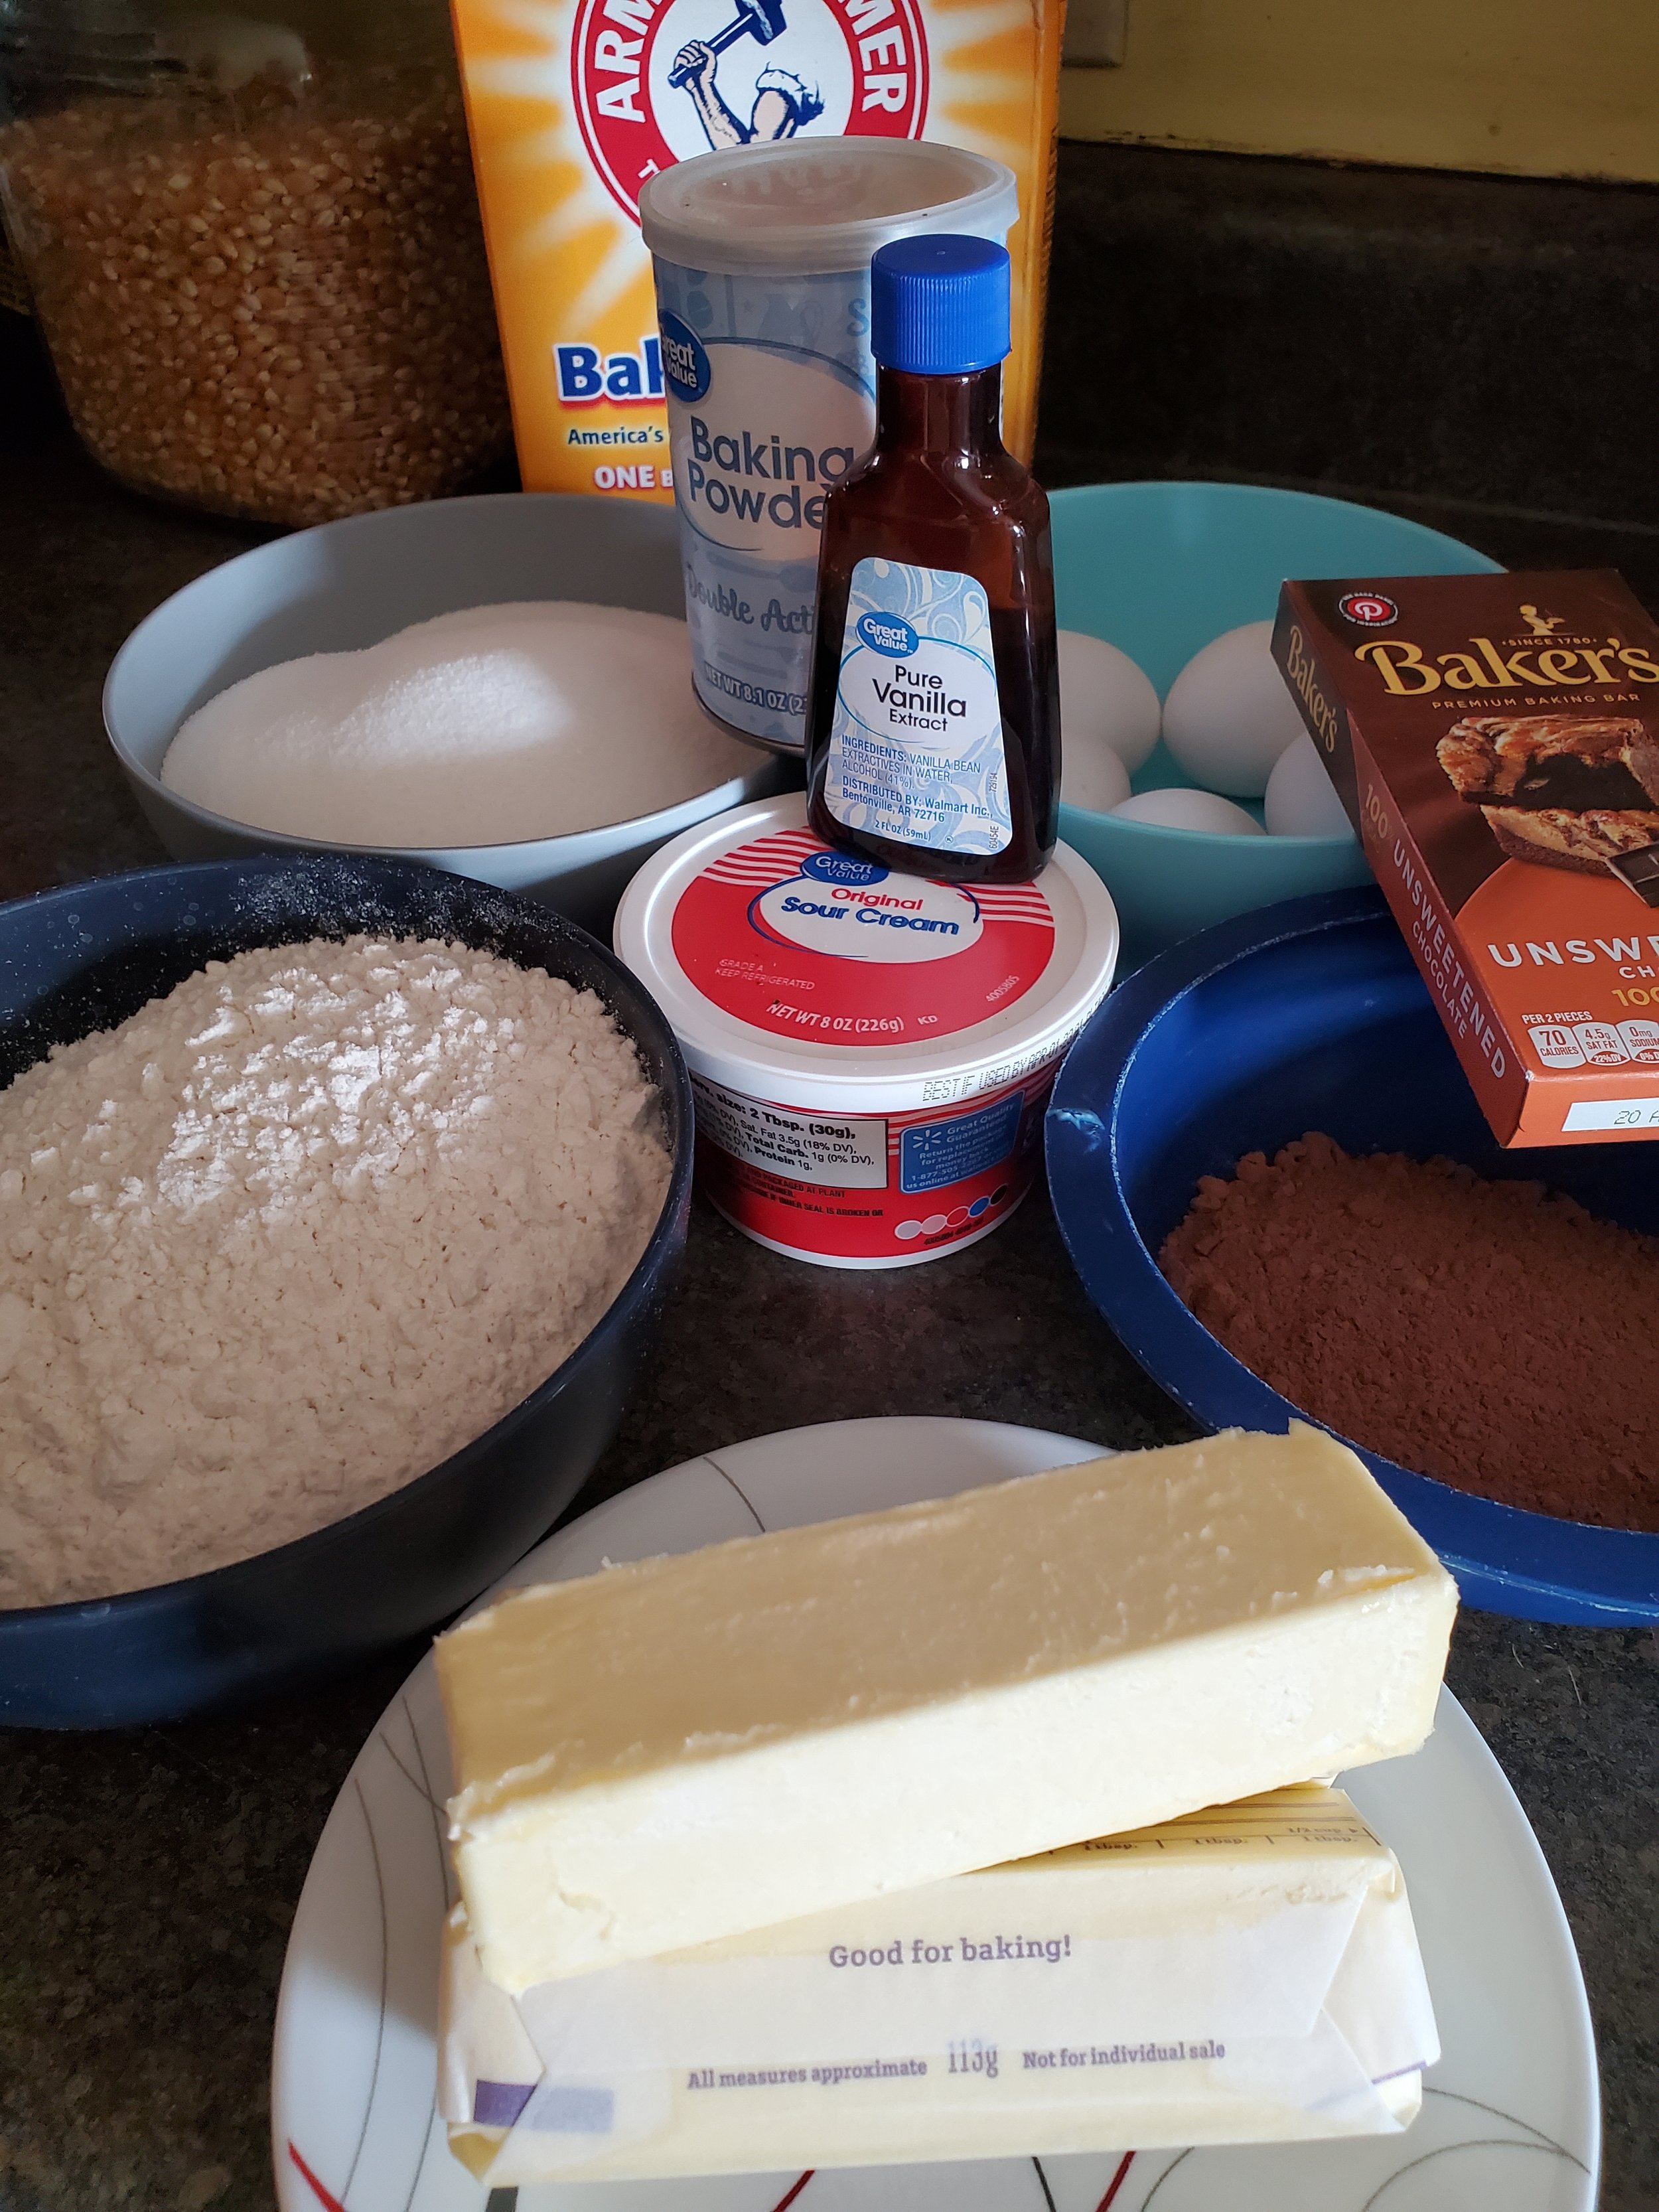
  • 4 ounces unsweetened chocolate

    ⅔ c unsweetened, non-alkalized American-style cocoa powder (normally we’re all for substitutions, but due to the chemical reactions, you need to get specifically this type of cocoa)

    1 ¼ tsp baking soda

    ¾ c boiling water

    1 ⅓ c unsifted cake flour

    1 c all-purpose flour

    ¾ tsp baking powder

    ¼ tsp salt + a pinch

    2 ½ sticks unsalted butter, at room temp

    5 large eggs

    1 c sour cream

    2 ½ tsp vanilla extract

  • ⅔ c heavy cream

    ⅔ c granulated sugar

    1 Tbsp unsalted butter

    1 ½ Tbsp light corn syrup

    1 tsp vanilla extract + 1 ½ Tbsp vanilla

    8oz milk chocolate chips

    2 ½ oz unsweetened chocolate

    11 oz of cream cheese

    2 - 2 ½ c powdered sugar

    1-2 tsp water

  • Two 9 Inch round cake pans

    Sifter

    Heavy-bottomed sauce pot

    Several small bowls for ingredients

    Parchment paper

    whisk

    Electric mixer or stand mixer

    Silicon spatula

    Icing knife

    Wire racks

Making the Cake 

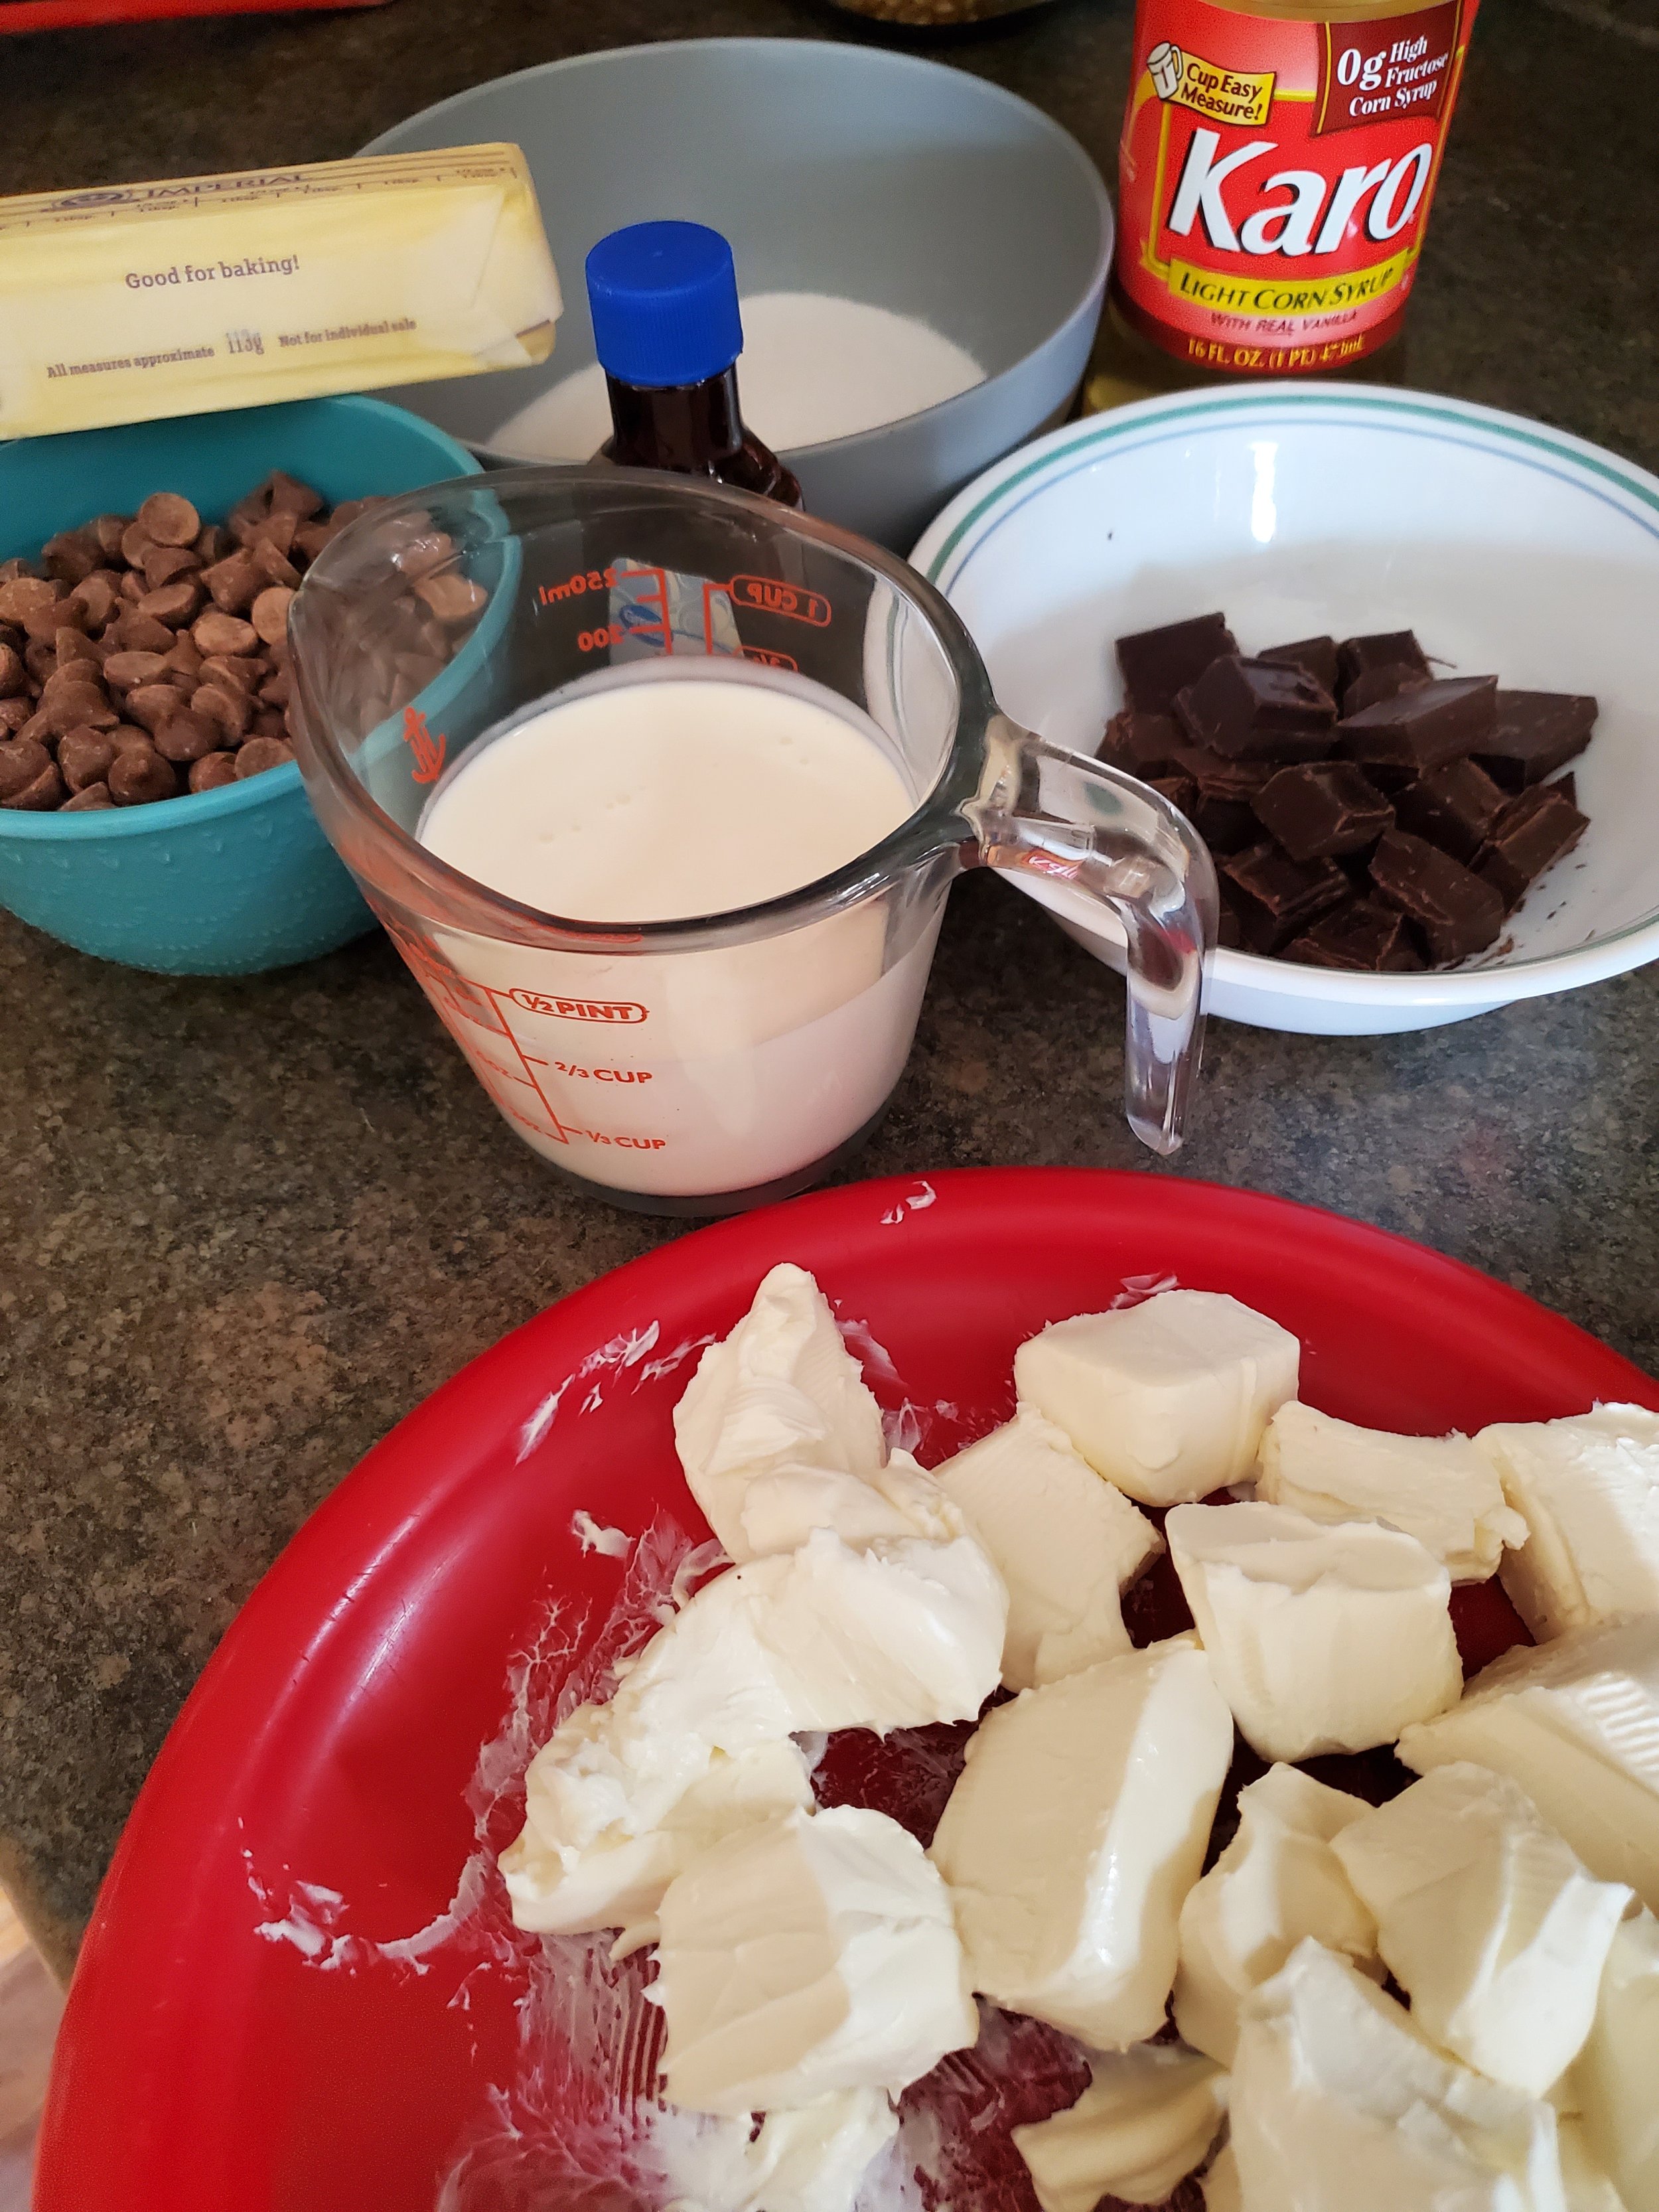
Let’s start by taking your chocolate, for both the cake and the icing and getting them chopped up and set into their own bowls. You don’t have to dice them or make sure they’re even, what matters is breaking it up so that the melting can happen more easily later. 


Next  up, let’s prep the pans and the oven. Set one of your oven racks into the middle of the oven and set it to preheat to 350*F. While that’s ticking away, take up your two 9-inch, round cake pans and parchment paper. You’re going to want to generously grease the bottom and sides of the cake pans and then insert rounds of the parchment into the bottoms. Then grease the parchment as well. Once you’ve done that, take up a little bit of all-purpose flour and dust the pans. Tip the pans from side to side, making sure you have everything covered, and then tap out the excess over the trash. 


Next up, pop your unsweetened chocolate (the 4oz you need for the  cake, not the amount needed for the icing) into the microwave. Microwave it on high power for 20 seconds, remove it and stir. Continue this process back and forth until your chocolate is almost melted. Once you can see the melted edges, stir continuously and allow the residual heat to melt the chocolate the rest of the way through. 


In a medium bowl, stir together your cocoa powder and baking soda until well blended. Pour your boiling water over the mixture, stirring consistently. It’s going to bubble up, and that is the reaction you want which is going to make the cake light and fluffy and so tasty. Let that cool while we move on to mixing the ingredients. 


Take a sheet of parchment paper and lay it down on your counter and grab your sifting mesh. Sift together your flours over the paper.

In a separate large bowl, using a mixter on medium, beat your butter until it’s light and fluffy. You’ll need to scrape the sides down a few times as you, as the butter gets tossed everywhere by the mixer. Next, beat in one egg at a time, until just blended. Then add in your cocoa mixture and continue beating, still at medium, until the mixture is free of lumps. Again, you’ll need to scrape the sides down as you go. The mixture might look kind of curdled at this stage, it’s ok. 


Now let’s grab the chocolate we melted earlier. If it’s still warm and runny, that’s great! If not, pop it back into the microwave for a few seconds until it is nice and fluid again. Then add it into the batter until it’s smooth and fully incorporated. 


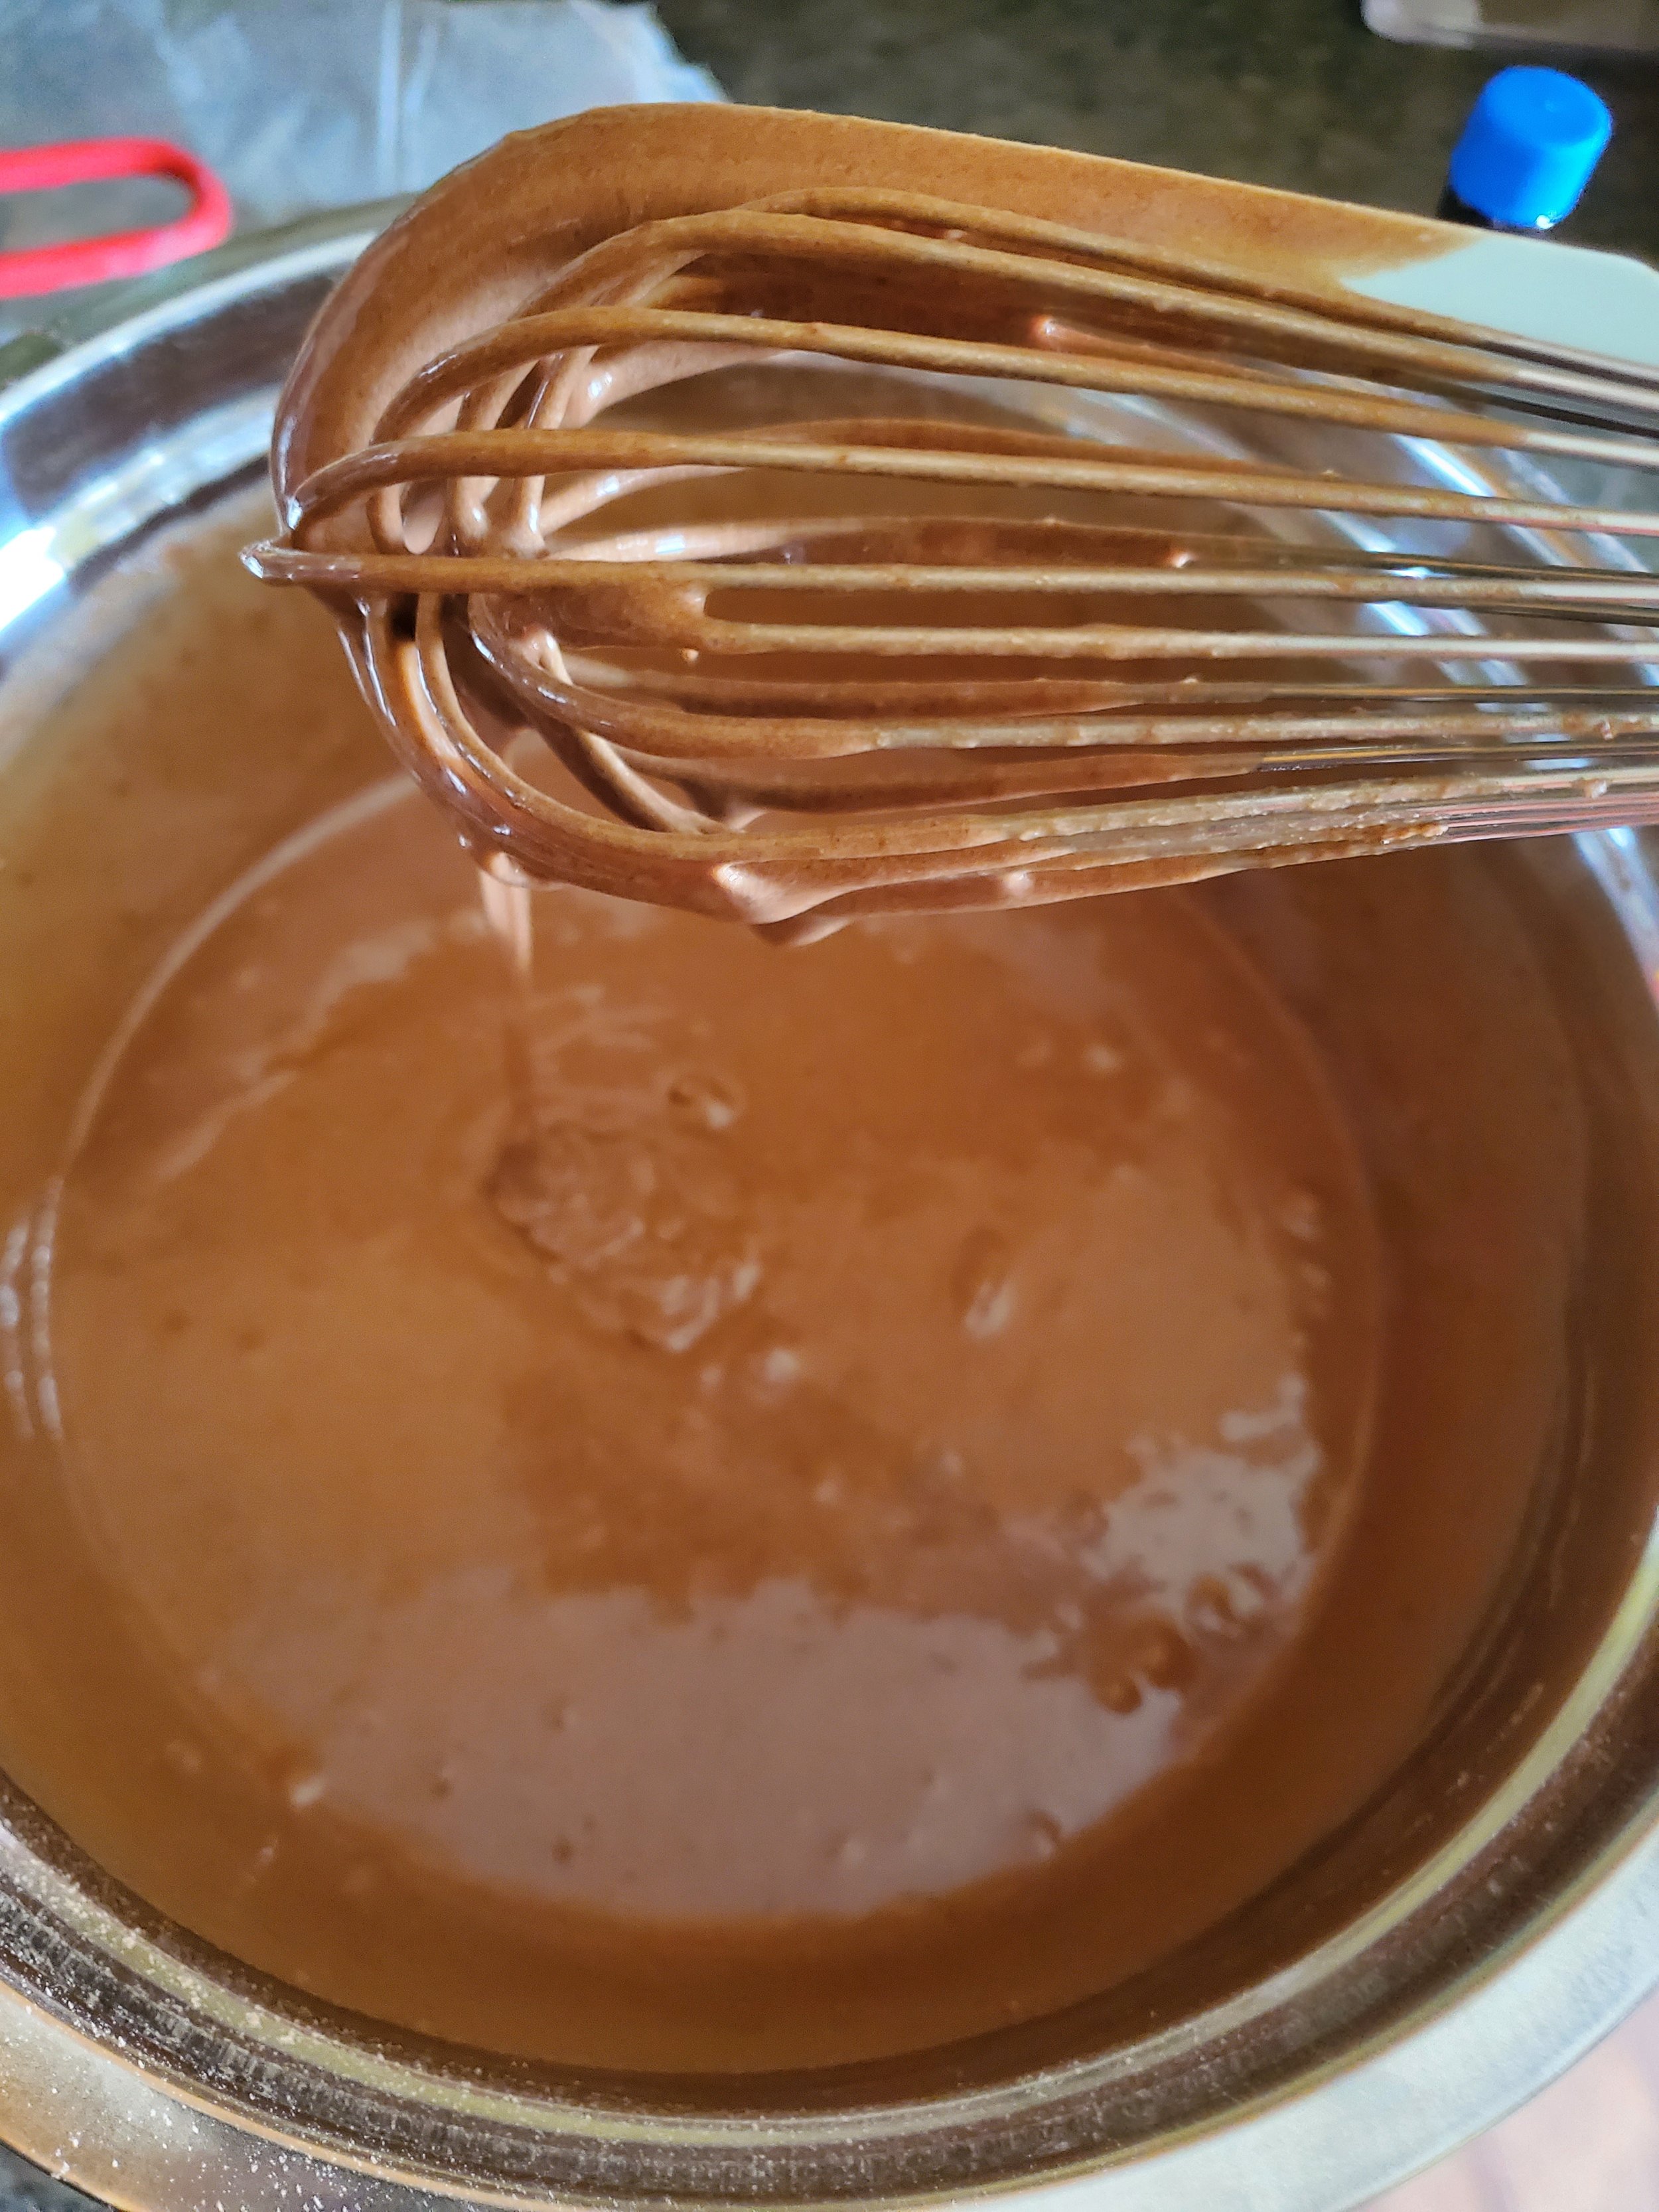
Switch the mixer down to low and beat in half of your dry ingredients. Once those are mixed in, add both the sour cream and the vanilla. Mix that together for 1 minute, scraping the sides of the bowl down as needed. Then beat in the rest of the dry ingredients just until the batter becomes smooth. 


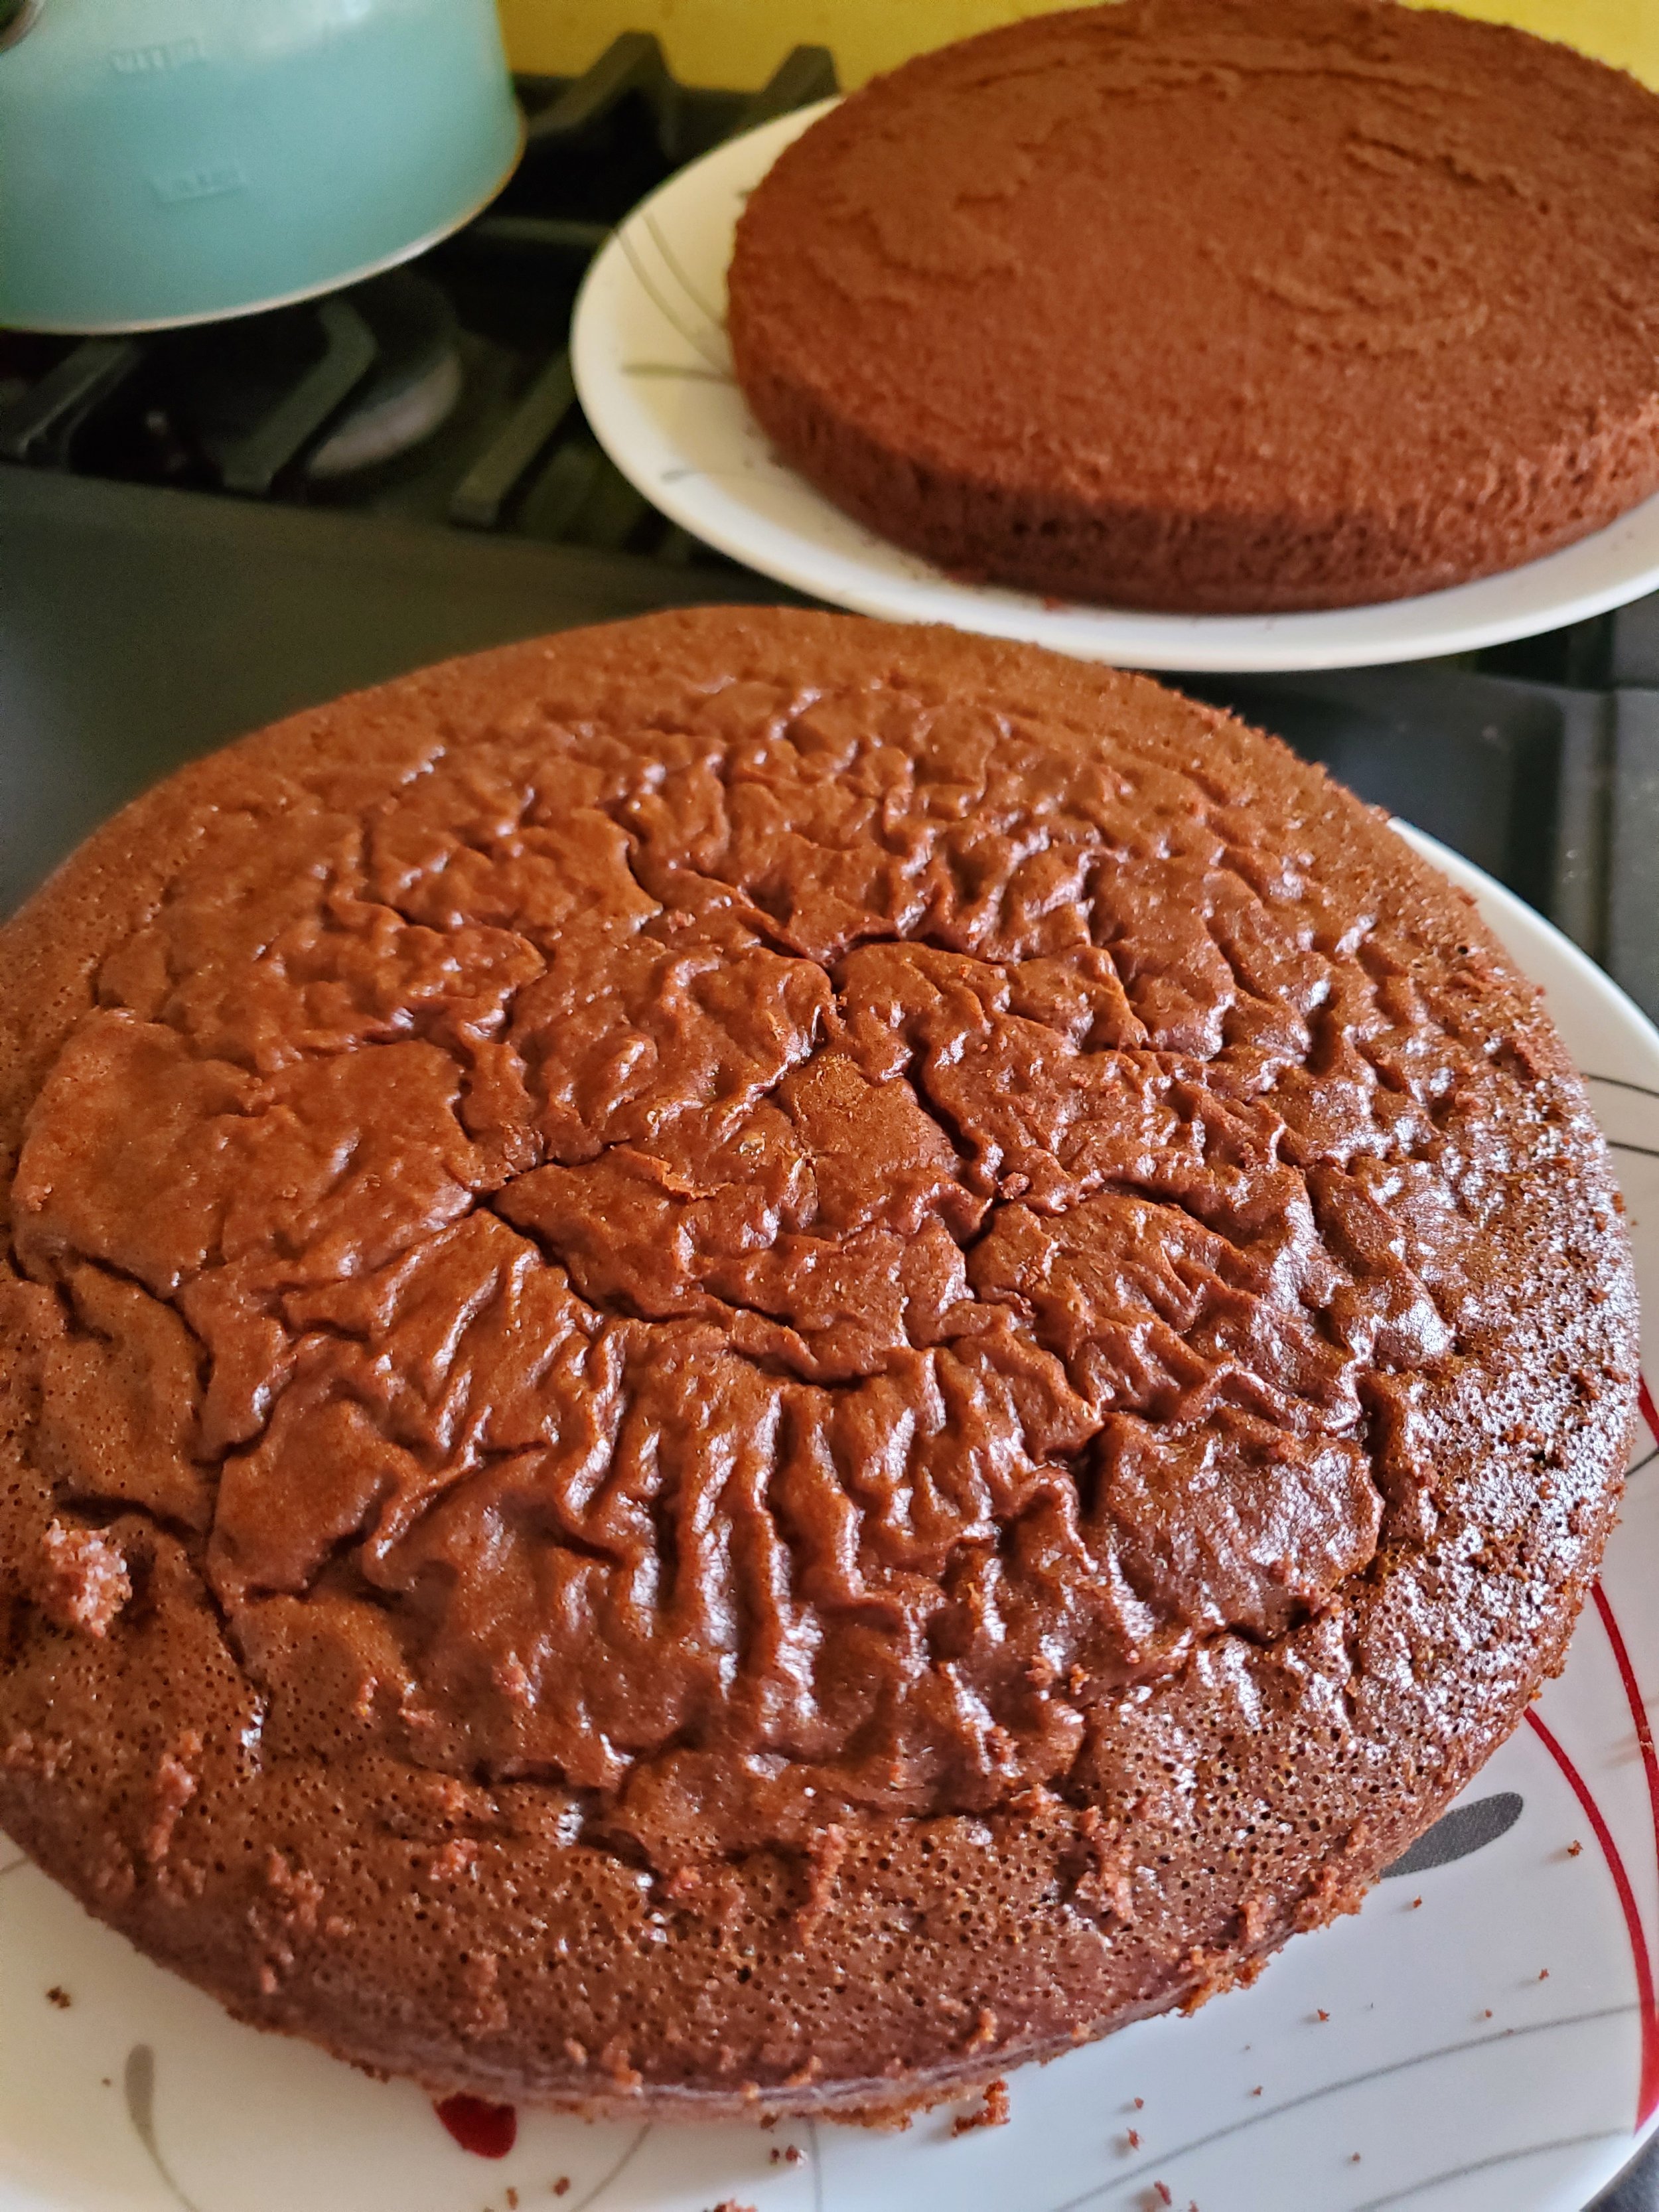
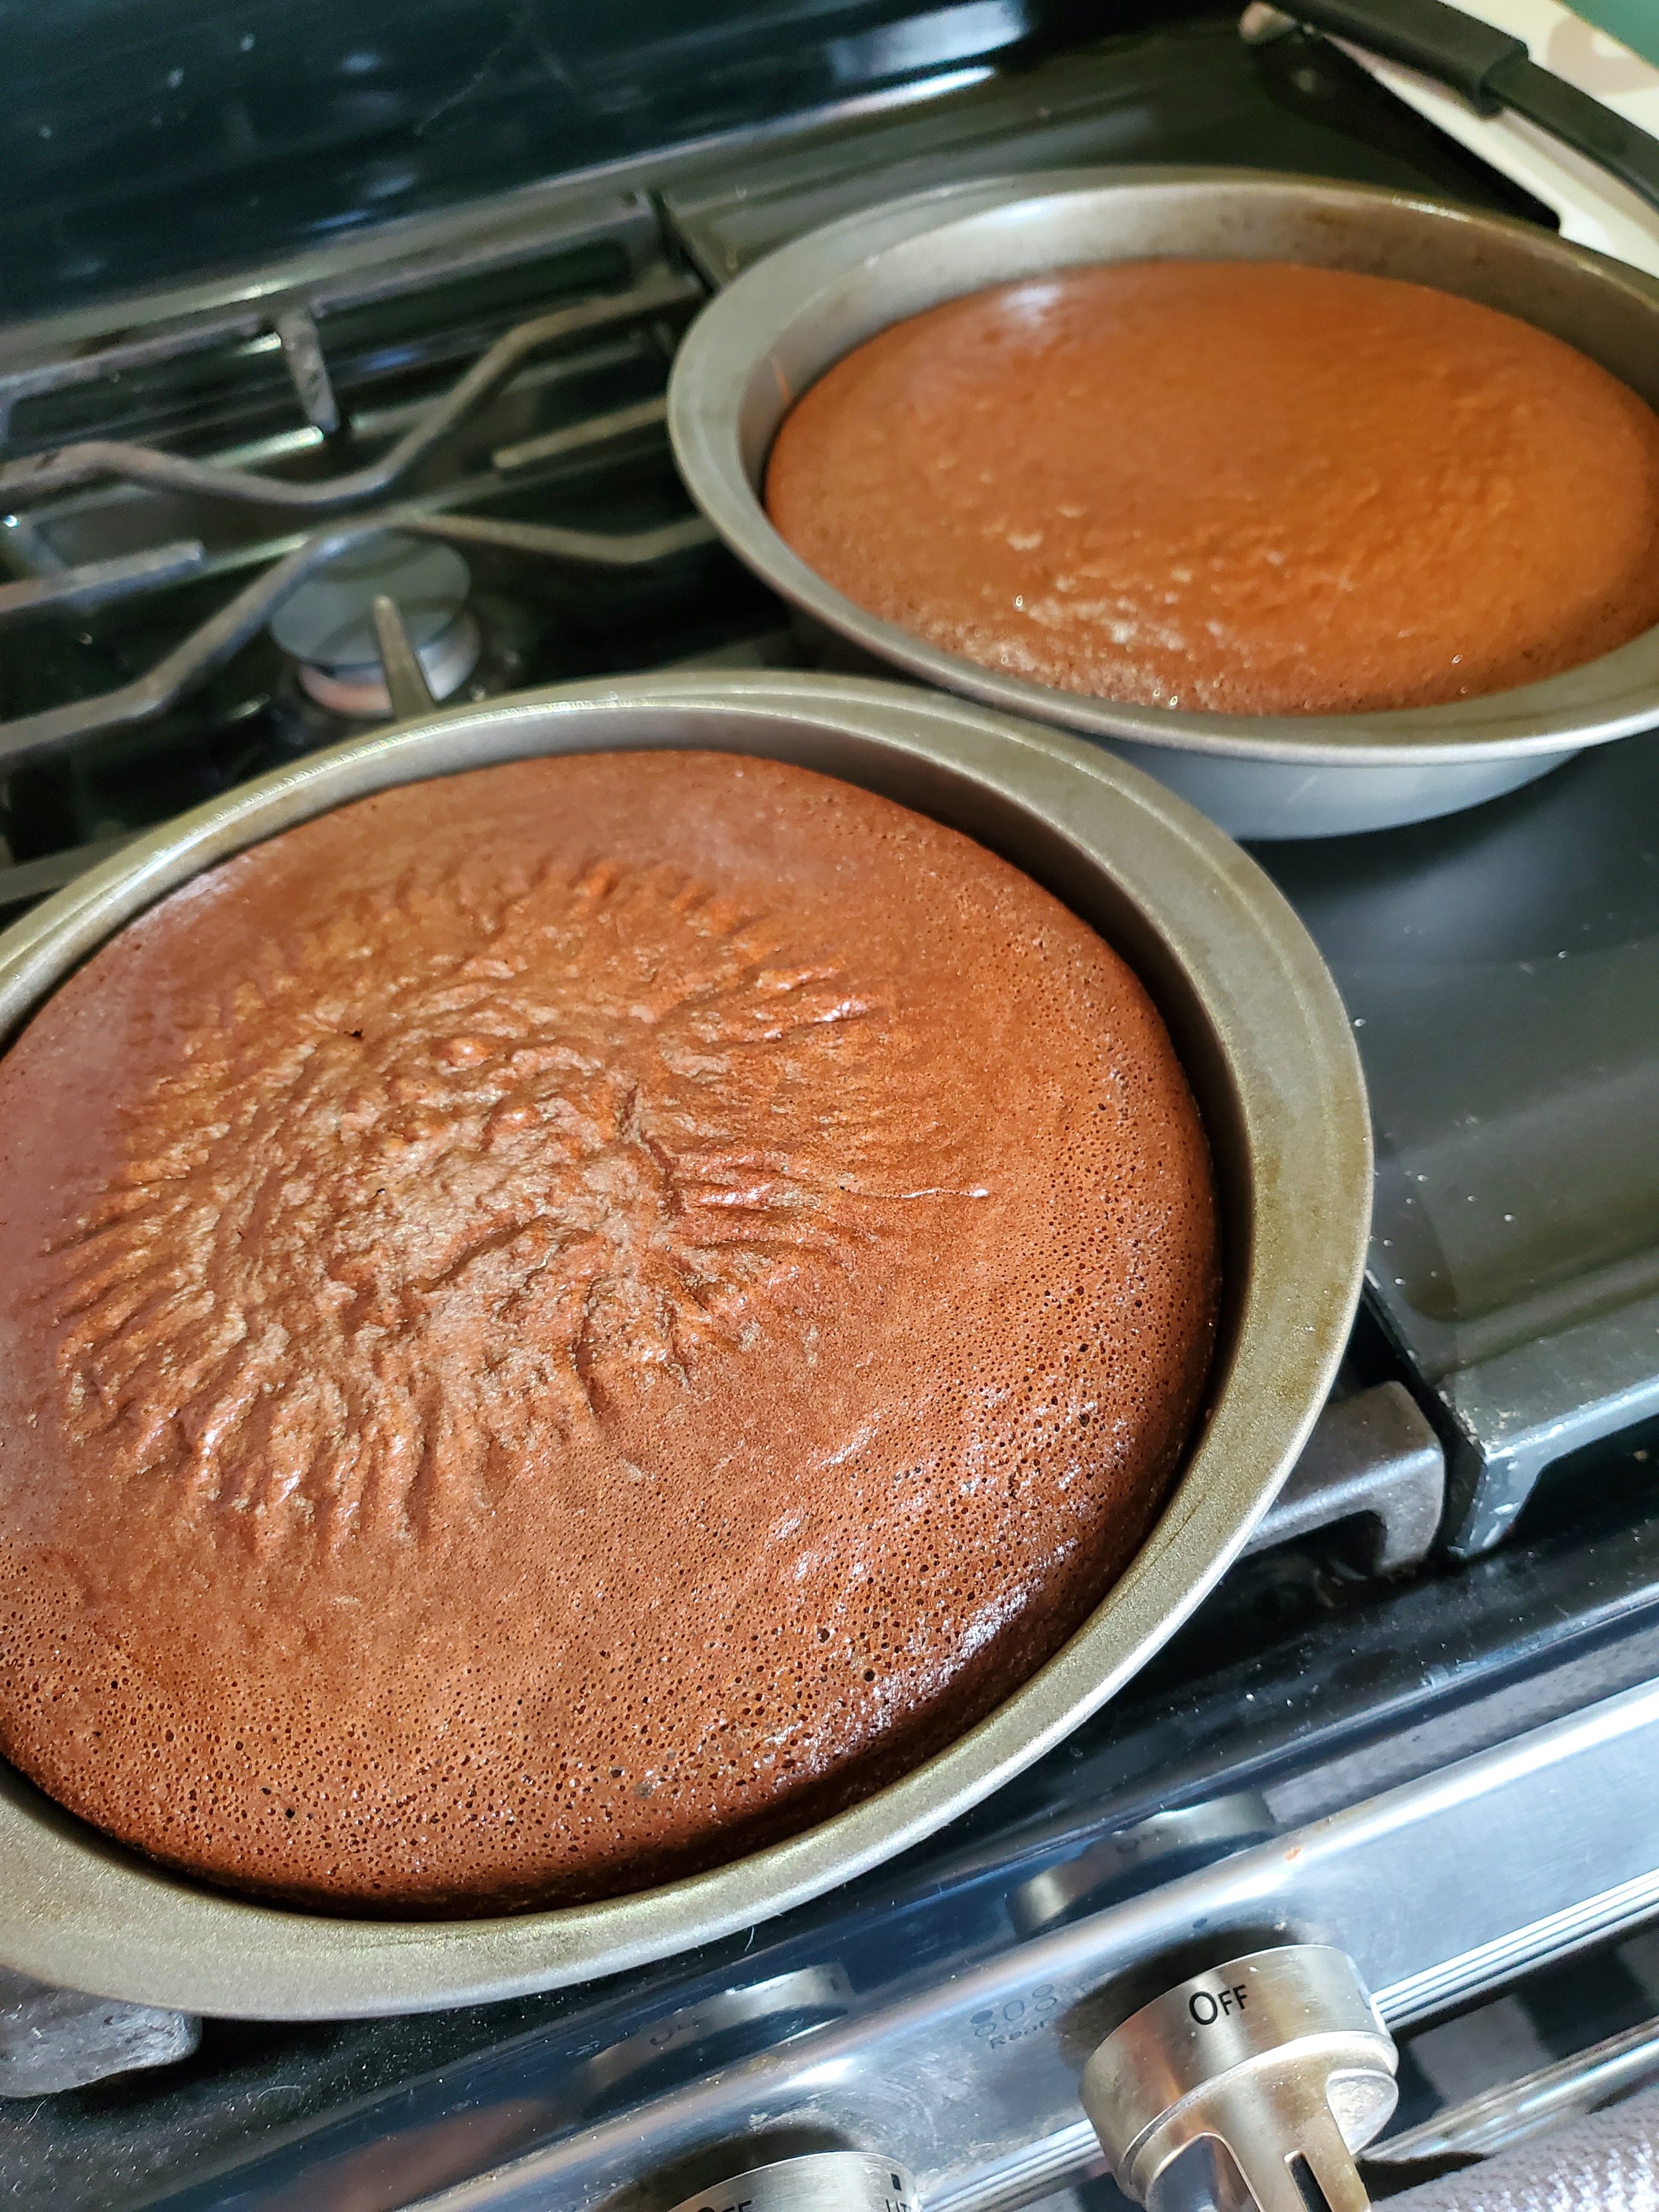
Split the batter between the pans, using the  back of a spoon to spread it to the edges. Back it in the oven for 25 to 35 minutes or until a toothpick inserted into the center comes out clean, but still moist and the cakes are starting to pull away from the sides of the pan. Transfer the pans over to a wire rack and let them cool completely. (Don’t do what we did and make the icing at this time.) 


When the cakes are fully cooled, carefully run a knife around the side of the pans and under the parchment. Go all the way around and then rap the pan on the counter to loosen the parchment from the bottom. Grab a plate and holding it tight against the top of the plan, flip the cake onto the plate and remove the paper. Once both cakes are out of their pans, give them a few more minutes to cool. 


Making the Frosting


Now that your cakes are on their way to being completely cool, it’s time to make the icing!

Take your 2-quart saucepan and put that on the stove, over medium-high heat. You’re going to add in, in order, your butter,cream, granulated sugar and then the corn syrup. (it’s best to do this quickly so nothing scorches, but that’s also why the butter goes in first.) Stir consistently while everything bubbles and melts and begins to blend. You can wash down the sides of the pan using a pastry brush in warm water, although we found this to be difficult. 


Once you’ve brought it up to a boil, keep it there for 3 minutes, stirring constantly. When the 3 minutes are up, remove it from the heat, add in the vanilla mixture and your chocolate until they completely melt. (It’s ok if they look slightly separated at this point.) 


Transfer the mixture to a large bowl and grab your mixer again. Turn it on to low speed and beat in your cream cheese, one chunk at a time. Continue beating until all of the cream cheese is mixed in, scraping down the sides as needed. 


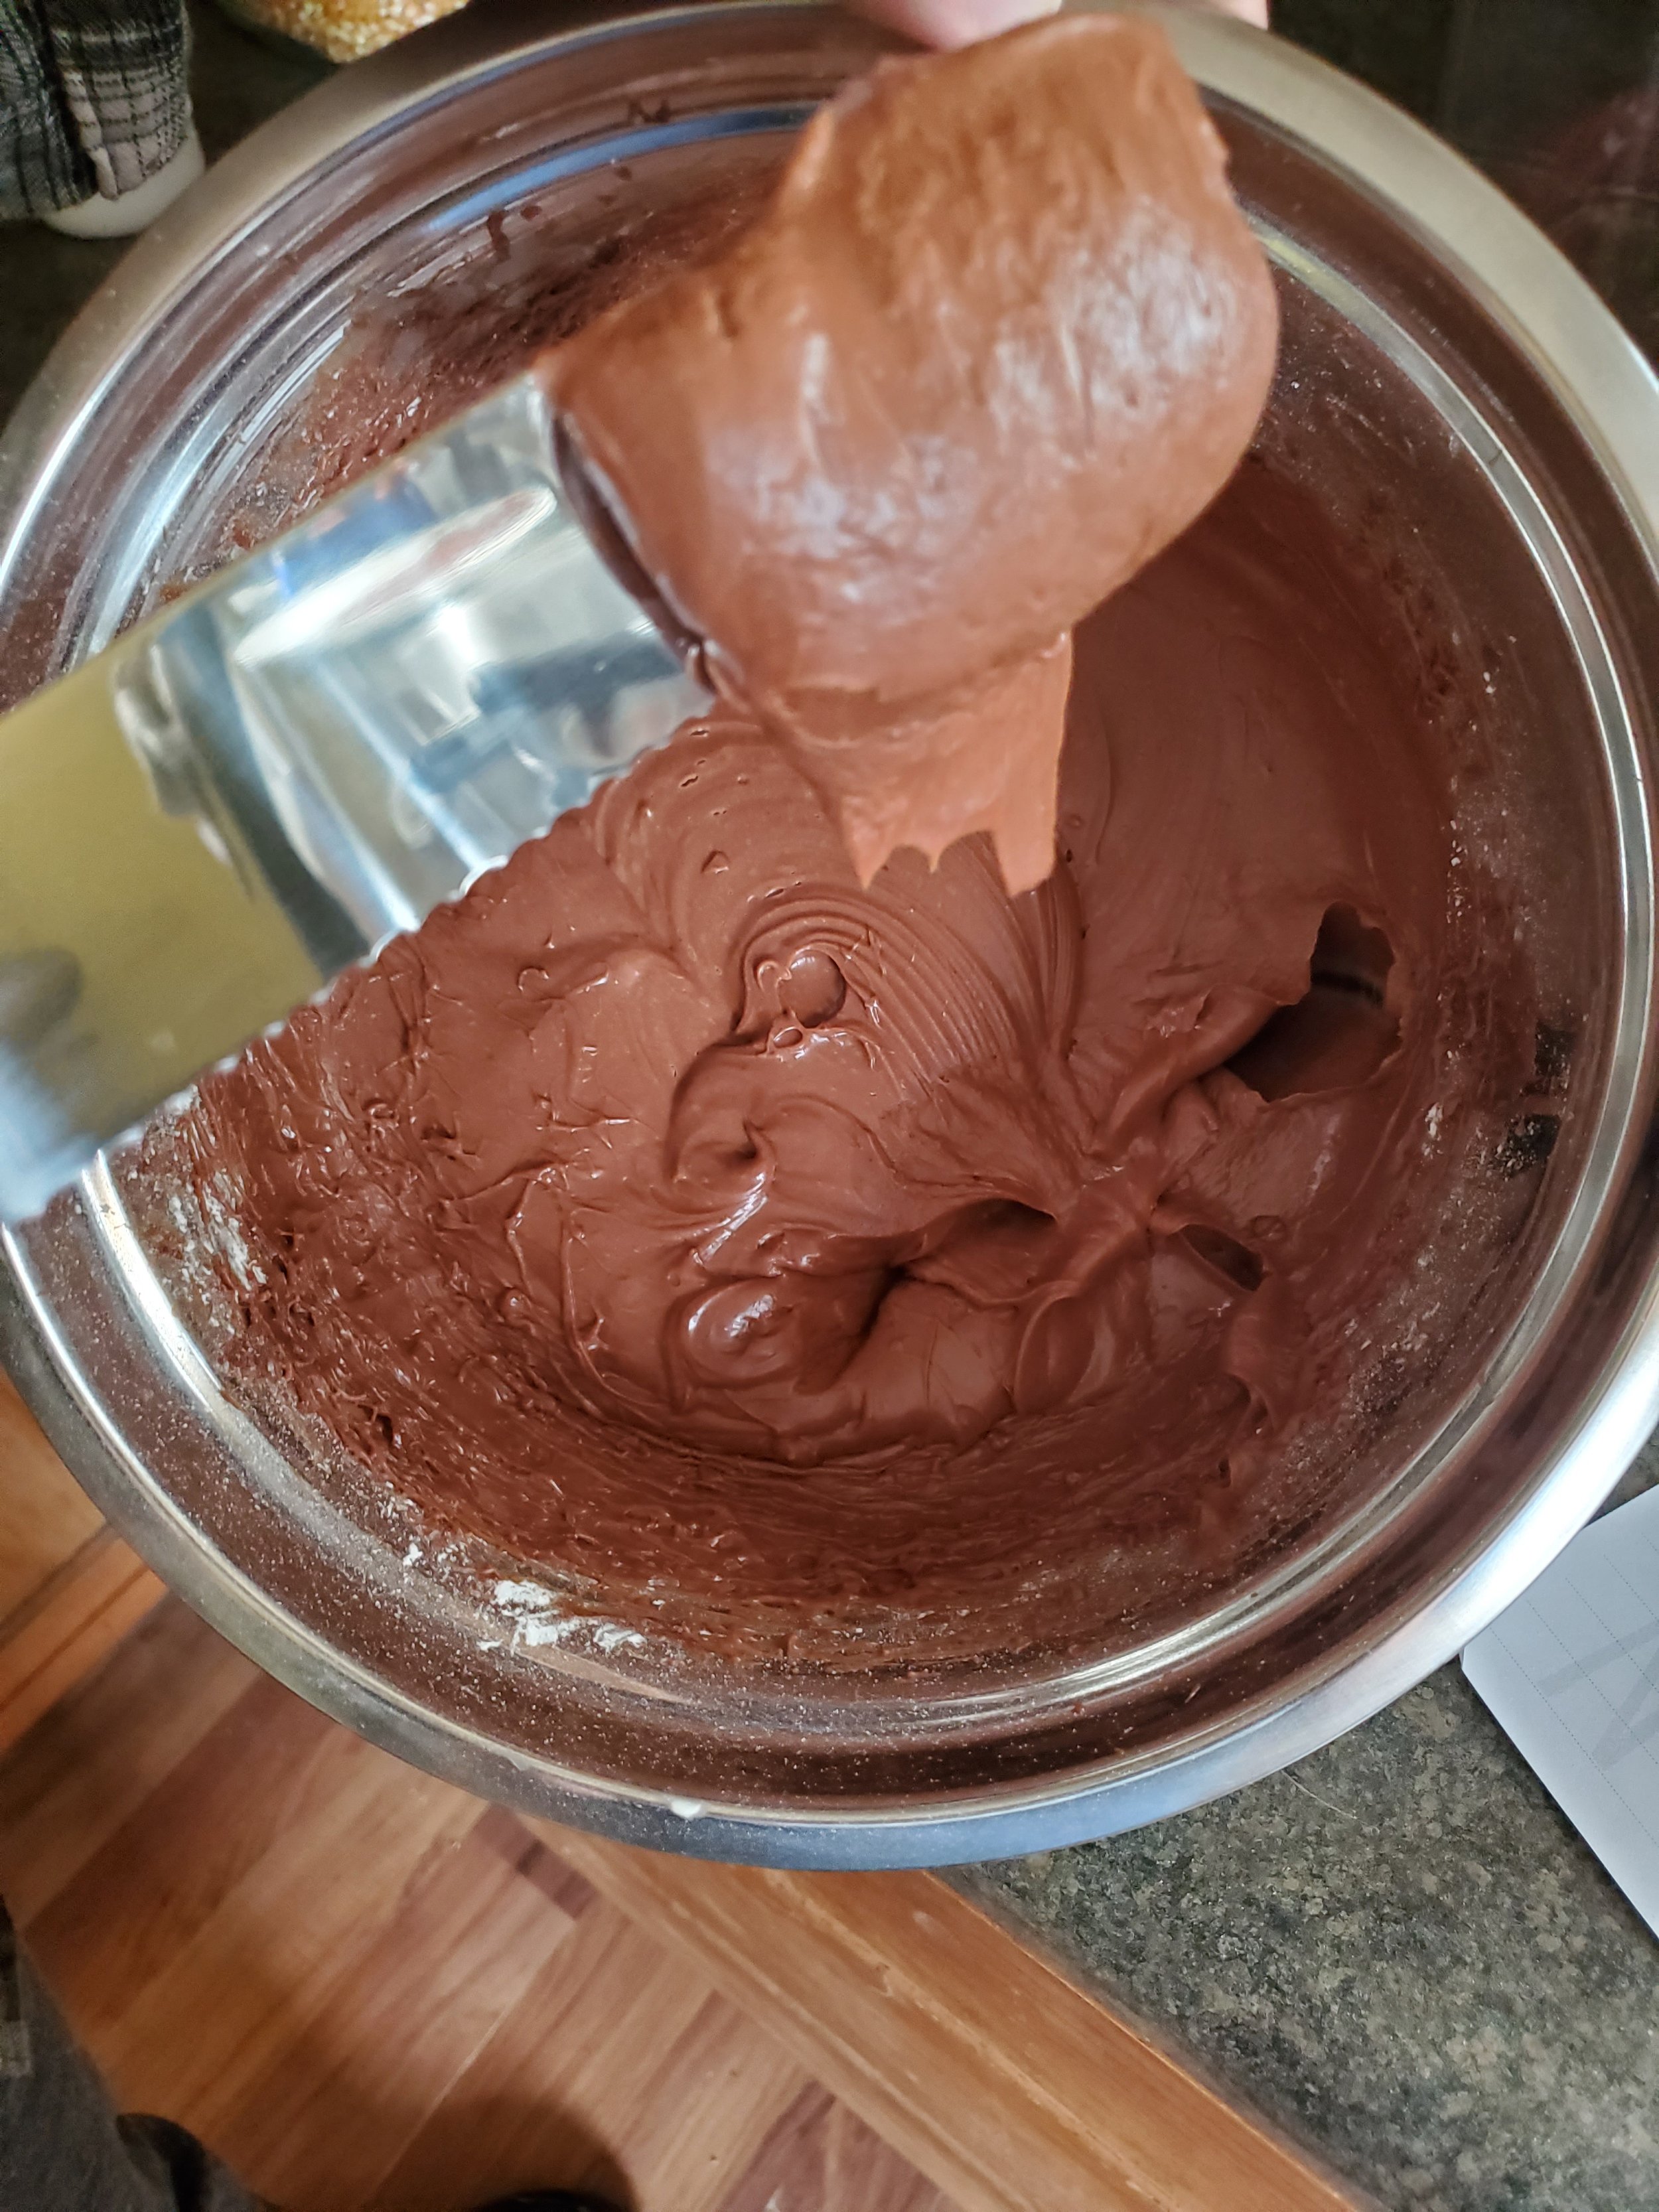
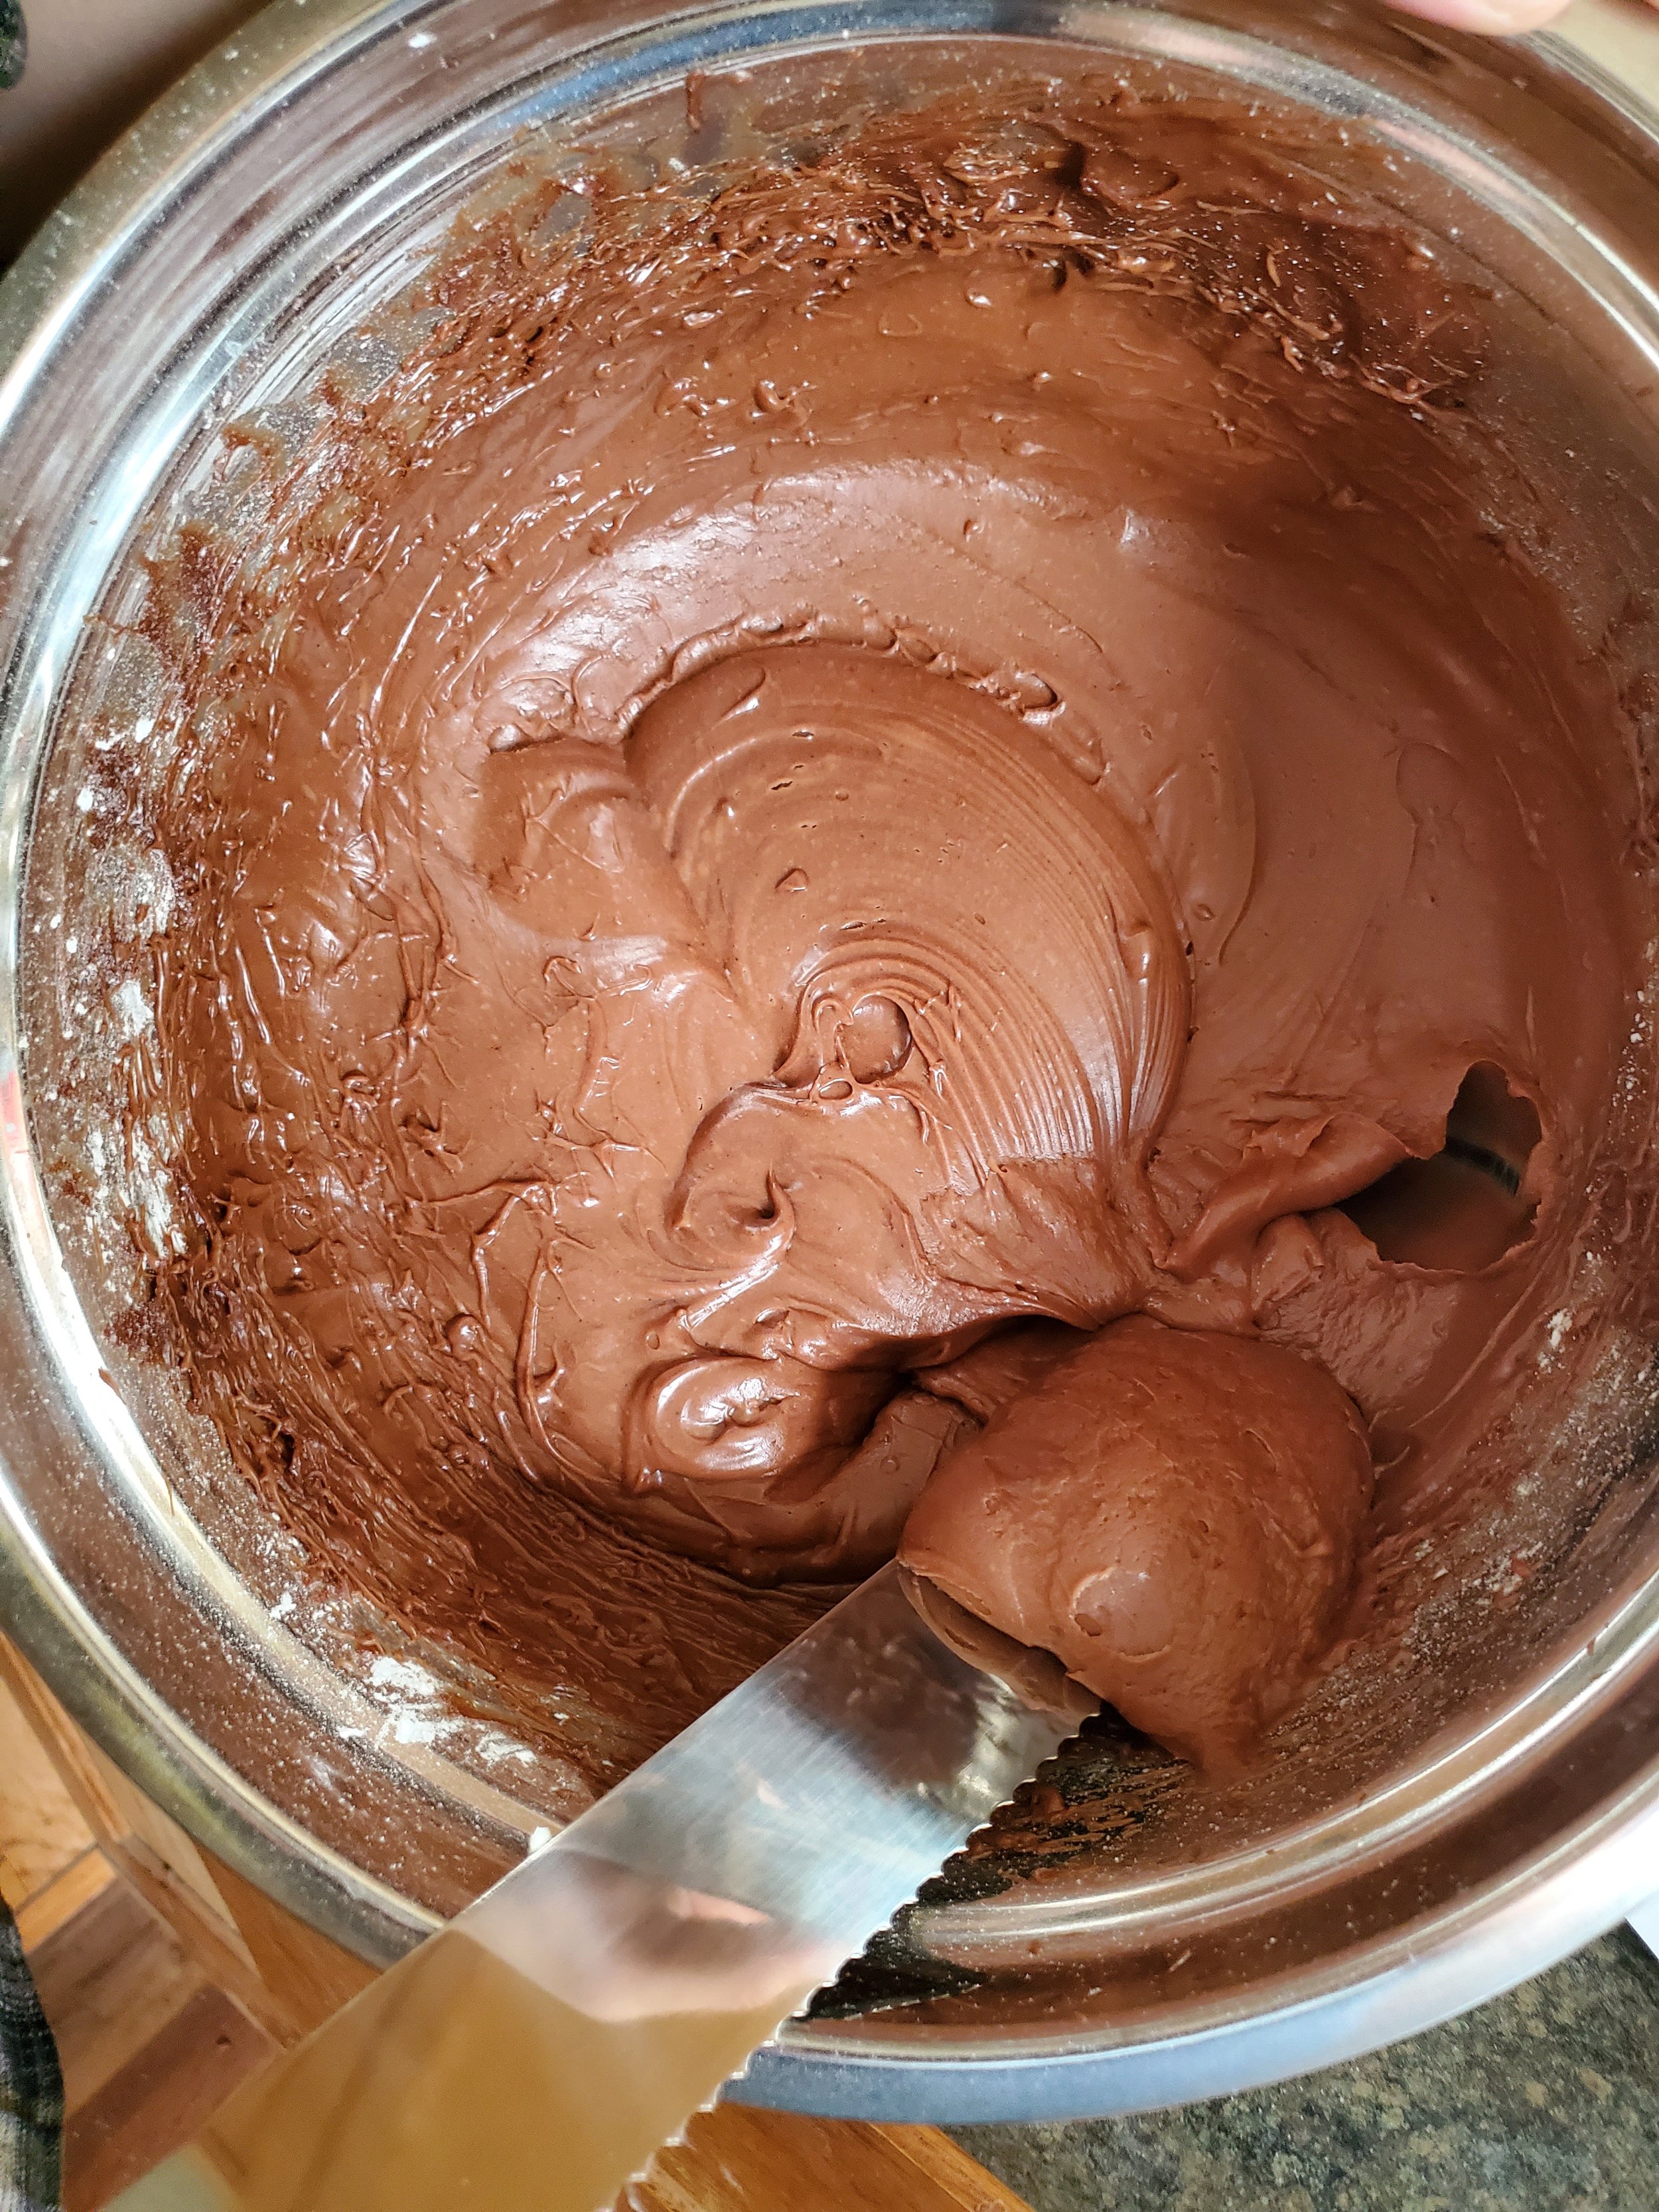
Next up, add in one cup of powdered sugar at a time, beating just to incorporated each time. Now raise the speed to medium-low and beat until the icing is completely smooth, approximately 1-2 minutes. It should be cool to the touch at this point.

If the frosting is too thin, add in up to ½ cup more of powdered sugar, until fully incorporated and smooth.  Let it sit for 5-10 minutes, and then ice your cake. Because of the base, this is not a frosting you can make ahead of time and use later. 


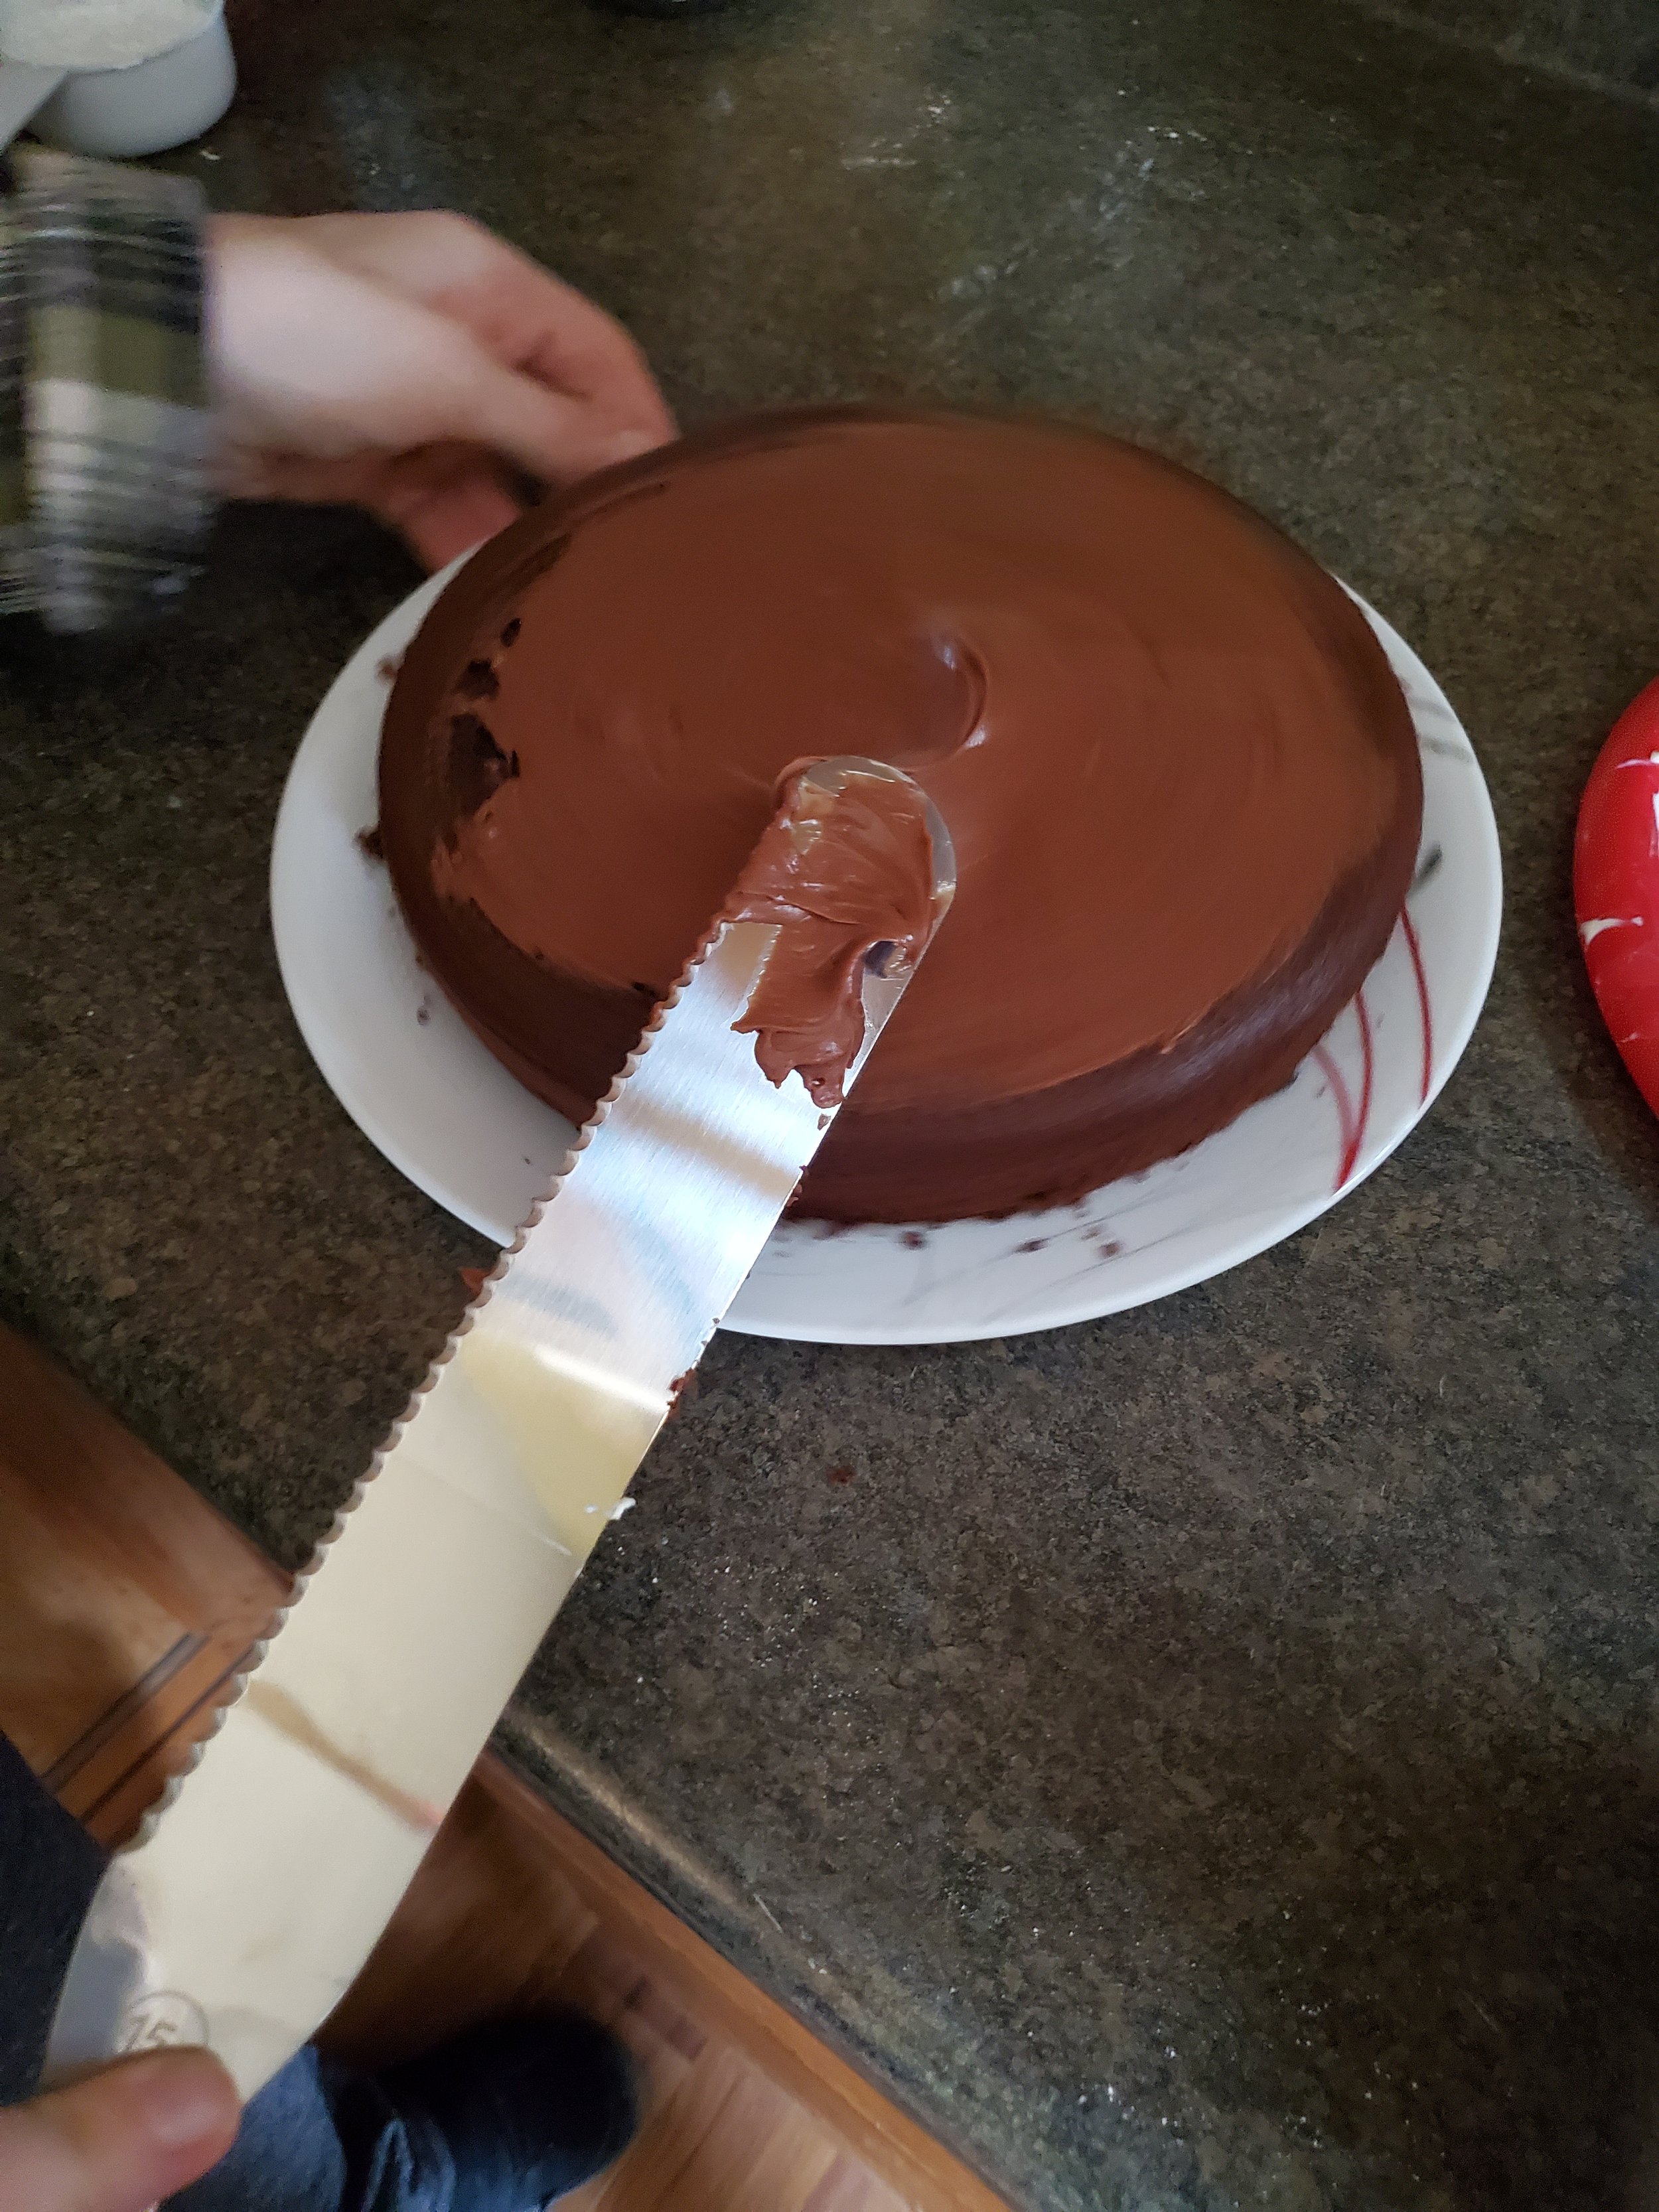
Spread a tiny bit of icing onto your serving plate of choice and place your first cake layer centered on top of it. Add a dollop of icing on the center and spread evenly. Cover the icing in pecan halves and then add a slightly thinner layer of icing on top of that. Place the second layer of cake and then put icing on top of that. Spread the icing evenly on top, and then use it to coat the sides. When finished, wrap the bottom of the cake in a layer of pecans. 


Slice and enjoy!


With that, enjoy your cake, and eat it too! (After all, what’s the point of a cake if you can’t?) 

If you do make this one, let us know over on our Facebook page! We love to hear what y’all get up and what changes you make. 


If your oven is giving you fits in trying to make this, reach out to us on our contact page or by giving us a call at ((214) 599-0055). We’ll work with you to set up an appointment that works with your schedule. Our goal at Appliance Rescue Service is to get your home running smoothly again.

Energy Efficient Refrigerators: What Makes Them Tick?

And Which Ones Are Worth Your Money?

Did you know that out of all of your appliances, your refrigerator uses the most energy within your home? According to the department of energy, it uses about 5% of your total electricity every month. It doesn't sound like a lot, but in comparison to how much everything else uses, it is. The only things in your home that use more energy are your air conditioning, space heating, and water heater. Fortunately for you, there are options for improving your current fridge or replacing it. 


So how do companies make a refrigerator energy efficient? Currently, three options are commonly used among companies like LG, whirlpool, and Samsung.


The first is a little like Papa Bear in the story of Goldilocks. Manufacturers take the casing of the fridge and expand it so that they have more space to fill in with insulation. This does come with several drawbacks, though. 

-a larger refrigerator is going to draw more energy. 

-the larger the refrigerator is, the higher the price tag is. More materials are used to make the product, and manufacturers want to recoup it.

-If you're looking to replace your fridge with a newer one, you must keep that larger space in mind. It is possible and has happened more than once that a client will have to completely remodel their space to fit the new fridge.


Another way manufacturers increase their refrigerators' energy efficiency is a bit more like Mama Bear. Instead of making the case bigger, they keep it the same size and just stuff more insulation into the existing space. This keeps it a standardized size, but it decreases the internal capacity of the fridge. So it's a bit like swinging too far the other way.


Many homeowners, especially today, are looking for a blend of internal storage space and energy efficiency. And that's what brings us to the just-right version of a refrigerator. Instead of expanding the refrigerator or reducing the internal capacity, manufacturers look to new materials and technologies. Still keep the standard size case and fill the inside with more efficient insulation. Then they pair that with an energy-efficient cooling system that is more advanced. The downside is that since these materials are still not in common use, the price tag goes up accordingly.


We'll quickly take a look at some of the most energy-efficient refrigerators in different styles currently on the market. 


Best Top Freezer 

Model: Whirlpool WRT112CZJZ 

Price: $568

Biggest Pro: It's considered a very reliable refrigerator model that lasts for ages. 

Biggest Con: It's a very straightforward refrigerator and freezer, and there aren't any bells or whistles to it. 


Best Bottom Freezer

Model: LG LBNC15231V

Price: $1295

Biggest Pro: All shelves are adjustable, so you can set up the fridge any way you want. 

Biggest Con: For all that, it's only slightly larger than the previous model and doesn't have any additional features; it's double the price of the Top Freezer model. 


Best French Door Refrigerator

Model: LG LFC22770ST

Price: $1679


Best Side By Side Refrigerator

Model: LG LSXS26326S

Price: $1500

Biggest Pro: It has the most interior space of all of the refrigerators on our list today. 

Biggest Con: As we said in the first section, a bigger fridge means more energy usage. 


Best Built In Refrigerator

Model: Thermador Freedom Collection T36BB915SS

Price: $11499

Biggest Pro: This one offers the highest reliability, customer satisfaction, and ease of use on our list. 

Biggest Con: It has wifi.  


What if you don't want to replace your refrigerator, though? Instead, you might look at making your current refrigerator more energy efficient. To that end, we have seven tips that can help you out.


First, organize your fridge. It sounds like such a simple thing and something many of us consider cleaning or trying to make our lives a little faster and a little easier. But it can actually be really good for your refrigerator's health as well. Your refrigerator relies on its ability to pump air through the fridge, typically coming from the Top, cycling down to the bottom, and then out through the vents at the bottom of your fridge. When the vents are blocked, the motor has to work even harder to force more air in to continue circulating. This causes many problems, from cold air pooling and even freezing some sections of the fridge and other areas being only slightly cooler than the ambient temperature of the room.


To solve that consider grouping things together in bins and drawers. This way, things don't get shoved to the back of the fridge over time.

Our next tip is to look after the seals on your doors. These seals or gaskets protect your fridge from warm air coming in from outside. However, when you're constantly opening and closing the doors to grab ‘just one thing you forgot’ or to get water or ice, those seals give way. Well, your fridge might be able to last 15 years, but those gaskets will give out after just a few, especially with constant opening and closing. So check once a year. See if they are cracking, rotting, or pulling away. If they are, call up your favorite repair company to come and have it replaced. Not only does that help with your electric bill, but it also means you'll be cutting down on wasted food.


A third tip for you, keep the fridge away from high heat. While this is much harder in Texas Summers, you can take small steps to help your fridge. Don't position your fridge so that it's right next to your oven, your range, or your dishwasher. Make sure that the refrigerator doesn't stand in direct light for long periods of time. All of these things lead to the outside casing of the refrigerator heating up and the motor having to work harder to try and ensure the inside is cool.


Another cleaning tip, keep your condenser coils clean. Those coils are how the refrigerator breathes essentially, and when they're covered in dirt and dust, your fridge can't breathe. Just like you start drawing deeper, harder breaths, if you have something obstructing your lungs, your fridge does too. Working harder means that your electrical bill will go up now, and it will shorten the life of your refrigerator. This means you'll have to replace it far sooner than you wanted.


One final cleaning-oriented tip, clean up the ice inside your freezer. This is a summing that you have a freezer attached to your refrigerator. The motor works for both of them, and if the frost is building up in your freezer, then you'll have that motor working even harder, trying to circulate air on that side to get around the obstruction. So you can either regularly scrape off the ice that builds up or defrost your fridge and freezer on a regular basis. Both are options, and both will save you money in the long run.


Moving away from cleaning, try cooling your food before you put it into the fridge or freezer. So if you take food that is steaming hot right after dinner or right after you bake it, for example, and put it into the fridge, your fridge has to work to take the temperature down anywhere from 350° to 500° down to around 40°. On the other hand, if you let your food cool down on the counter prior to putting it away for storage, it only needs to bring it down from the ambient temperature of the room. Doing this means that the fridge doesn't have to work as hard, which cuts down on electricity usage. And that is what we are always hoping to do.


A final tip is to consider investing in a countertop ice maker. If you have an ice maker inside of your freezer or you use bottled water all the time, you have to constantly open your fridge and freezer. Instead, keeping an ice maker on the counter uses up a very small amount of energy in comparison to what your fridge draws every time you have to open it up. Given that we live in Texas, it might be more helpful to get an under-the-counter ice maker, which would be larger, but that is entirely up to you.


Wrapping all of that up, do you still have questions? Do you have any tips that maybe we missed? Let us know over on our Facebook page, as we always love to hear from you.


If you're here because your refrigerator just isn't getting cool enough even after you've tried to organize it or clean the coils, reach out to us. You can get hold of us by calling ((214) 599-0055) or by going to our contact page. Whatever the issue is, we'll work with you until you're satisfied that the problem has been fixed. Our top goal at Appliance Rescue Service is to get your home running smoothly again.
Hollywood Regency Decor: How To

How to Bring The Glamour To Your Home

If you’re looking for a new decor trend to match your outgoing personality, Hollywood Regency is it.  Even if you’re keeping your parties small, there’s nothing that says your style has to be. Hollywood Regency is all about glamour, sophistication and elegance in the home. 

Hollywood Regency style came about during the Golden Age of Hollywood and reflects the charm and sophistication of the 1930s. It mixes together the Art Deco glitz and glamor with  mid-century modern’s clean lines and throws in Victorian elements like velevets, tufting and bold color palettes. Roll all of that together and you’re starting to get the idea of Hollywood Regency. This isn’t a quiet design style. This is dramatic and bold, all about making a statement about who you are and what you like.  Hollywood Regency was inspired by the over the top interiors that designers created for the silver screen.


 The Hollywood royals loved the look of the polished glamour that they worked in and wanted to bring that into their homes. They employed iconic designers like Paul R. Williams, Dorothy Draper, and William Haines to create their homes, and they went big! They brought the same designs that looked great in black-and-white and brought in the attention to detail, color, texture, and finishes that make Hollywood Regency what it is. 


So how can you replicate it yourself? You might not be able to get Dorothy Draper or William Haines to decorate your home, but you can still get the looks that they created by paying attention to a few rules. 


1) There Is No Such Thing As Too Glamorous

This is the top rule for this style. Sumptuous fabrics, rich textures, layers of details, and luxurious accents. Think of it as opulent as a Queen’s jewel box and as comfy as you can make. Hollywood Regency doesn’t take itself seriously, so if you feel like you’re going over the top, you’ve nailed it. 

A room painted in black and framed in golden panels has three golden spiked lights hanging from the ceiling, with square cream sofas placed front and center. One is directly in front of the viewer and one is to the left and right.

Courtesy Inspiration Design Books


2) Be Strategic With Your Placement

Although you’re looking to create the opulent look, you don’t want your colors to clash. There should definitely be a singular color palette for each room so that it can be relished in, rather than run from.  Keep patterns to one or two in a space so that they don’t fight with each other, and stick to just one type of metal.  They look great on their own, so you want them to shine when you do highlight them. 


3) Keep Your Furniture Small-Scale

A golden frame of bars wraps around two cushions to form a chair with thin legs. It looks uncomfortable if we're honest.

Courtesy Everly Quinn

While it might sound strange, the furniture isn’t meant to be the feature point of the style. Hollywood Regency is all about open floor plans and parties, so having plenty of space to move is important. Instead, look to bright, glossy furniture with lacquered surfaces so that each piece pops. 


4) Pay Attention To Your Details

A mirror is framed in a bronze sunburst with irregular spikes making up the rays of th sun

Courtesy of Ballard Designs

Like we said in the last point, the furniture doesn’t command the space, so your decor is what does. Luxurious fabrics, metal hardware, crysta lights and objects de art are the requirement of the day. Velvets, silks and furs, Turkish rugs and golden hardware and patterns.  It’s about making things sparkle and shine. You can even bring in mirrors as wall decorations, shaping them into a larger sculpture or art piece. 


5) Don’t Be Afraid To Grab Inspiration From Other Eras

A golden wall panel in three parts is painted on the wall,  made up of three arches filled with curls and swirls and connected arches

Courtesy Simple Shapes

Hollywood Regency was inspired by a large number of different eras, so don’t be afraid to pull in other concepts. Rococo and Chinoiserie are both styles that mesh in nicely in different ways and blend well with the glamour of Hollywood Regency. 


6) Bring In The Black And White To Temper Things

Another key mark of Hollywood Regency is the use of black and white in different ways. Whether it’s checkerboard flooring, large photography or zebra prints even, there are many ways you can fit this into your home to create a quieter corner amid the opulence. 


7)  Don’t Shy Away From Lacquer

A deep teal lacquered cabinet with thin lower legs and an ocatagonal raised pattern on the doors

Courtesy of Ellen Quinn

With the love for all things shiny, lacquered finishes are just the thing to fit in with Hollywood Regency. Whether you apply this to furniture like tables, to room dividers or accessories like trays and vases, or to your walls or ceilings, get creative with it. There’s nothing that’s off limits for this one. 


You can probably tell we LOVE Hollywood Regency and the luxe feeling it brings. What about you? Do you think you’ll be doing up your home in Hollywood style this spring? Let us know in the comments below or over on our Facebook page! As always, we love to hear from you. 


If you wound up here looking for help with your dryer and not your decor, no worry, you’re still in the right place. Whether you’re in McKinney or The Colony, we’re here to help get your major appliances running again. We’ll work with you to find a time and date that works best for your schedule. At Appliance Rescue Service, our goal is to get your home running smoothly again. You can reach out to us via our contact page or by giving us a call at ( (214) 599-0055). 


Jalapeno Chicken Bowtie Pasta

Warm enough to get you through winter, hearty enough to keep you healthy in spring.

We’re well into the coldest part of winter, getting hammered from all sides with cold weather and we need something to warm up! This week’s recipe is a great recipe if you’re fighting off a cold or are just sick of the cold. It’s got the same basics as a good chicken noodle soup with some extra added kick to it. 


Ingredients

1 medium yellow onion

3 large carrots

3 celery stalks 

salt and pepper

3 garlic cloves 

2 Tbsp butter

3 chicken breasts

1 pt of heavy cream

1 bay leaf

Fresh parsley

1 tsp of thyme 

chicken bullion 

1 lb bowtie pasta 

jalapeno slices 


Tools: Two large pots, a blender or food processor, a cutting board, slotted spoons and a few bowls 


Recipe: 

To get us started, grab a paper towel and wet it with cold water in your sink. Lay it next to your cutting board, and then grab your onion. Chop the onion into large quarters, remove the outer skin, and be amazed that your eyes aren't watering, thanks to the paper towel. Does it sound weird? yes. Does it work? Also yes. This is a trick we use all the time in our own kitchens for the ARS staff. Put the onions aside into a large bowl, and take up your carrots. You can choose to skin them, or just give them a quick scrub, it's up to you. Once you've prepped them, go ahead and give your carrots a few rough chops, breaking them down into thirds.  Do the same with your celery in terms of prep, and make sure not to leave any of the leaves on. 

Go ahead and turn your stove on high and place your large pot on the stove, tossing in 2 Tbsp of butter. Let that melt down, and then add salt and fresh cracked pepper to the pan. While that's going, take your garlic cloves, nip off the top, bottom, and the skins, and then quickly mince them. Toss that into the pan, and stir until the garlic is aromatic. At that point, add in your onion, carrots and celery, turn the heat down to medium, and let it sit. You're going to let the vegetables simmer for 10 minutes, stirring every few minutes, to allow them to start softening and cooking. 

Once your onions are halfway to translucent, fill the pot with water and add in the chicken. Cook until the chicken is cooked through and the water has reduced by half. 


Turn the burner off and grab two different bowls. One bowl is just for the chicken. The second bowl is for all of the vegetables. Take up your slotted spoon and remove all of the vegetables from the stock. Make sure to lose as little stock as possible, as it's the base for the sauce.  From here, grab your blender or food processor and pour in your vegetables. You might have to do this in batches, you might not. Either way, add about 1/2 cup of stock to the blender, just to make it easier, and set the machine to chop. Once you've got the vegetables much smaller, you can switch over to blend and let the machine work until you have a smooth puree. Pour your puree back into the pot, and return the pot to medium heat. 


Pour 1 pint of heavy cream into the pot, give it a stir, and taste. This is the stage to add spices in. Add in 1 bay leaf, a few sprigs of fresh parsley, and 1 tsp of thyme. Give that a stir and let it bubble for a few minutes, then taste. At this point, we realized we needed more chicken and add in 1 tablespoon of chicken bullion, but you might not. Let the pot continue to bubble, reducing further until you have a thick sauce that stays on the spoon when you lift it out. As this works, you'll also want to skim the top and scrape the bottom occasionally to remove anything from building up. 


When the sauce is nice and thick, grab a second pot and add water, plus enough salt to make it as salty as the ocean. Bring that to a roiling boil and add in your bowtie pasta. Set a timer for six minutes, and go back to your cutting board. This time you're going to be tackling the chicken and being much more uniform than we were earlier in the recipe. Chop the chicken into bite-sized chunks, or you can shred it depending on how easily it's falling apart. Eitherway, once that's done, toss it into the sauce pot and give it a good stir to incorporate it. 

By now your pasta should be done, take that off the burner, strain it and add the pasta to the sauce. Give that a stir and let it simmer until the pasta is fully cooked. 

While that's finishing up, you've got one final choice to make. Do you like your food spicy or really spicy? If you like it just a little spicy, dish out the jalapenos in small dishes set to the side of each bowl. If you like it really spicy, add the jalapenos and the juice they come in into the main pot and let that mix. 

Either way you prefer it, once your pasta is fully cooked, congrats! You've got a healthy and delicious meal that no one will suspect has a whole bunch of veggies hidden in it. 


Let us know over on our Facebook page if you plan to give this one a try! We'd love to see how it turns out. 

If your appliances are giving you trouble, you can reach out to us via our contact page or by giving us a call at ((214) 599-0055). At Appliance Rescue Service, we're here for you and want to help you get your home running smoothly again.
Decluttering In the New Year

 5 Tactics To Get the Clutter Under Control

It's the end of January, and that means the buzz of the holidays is wearing off and now we're well into the "need for getting things done." Your resolutions for the year may or may not have fallen by the wayside, but the gifts you were given are still scattered around your home. Some have found places where they belong, some might not have. So what are you supposed to do? The 'easy' answer is to do what many busy people do, ignore it. The more realistic answer might be to stare at it until you get annoyed and chuck it out. For some, though, there is a third option. 'Organizing' or 'decluttering' depends on your search term of choice. Many of us struggle with it, so we're tackling 5 different ways you can declutter your home as we go through the new year. 


Courtesy: Andrea Picacquadio

A quick note. Some or all of these methods might not work for you. They might work for specific types of items and not for others. The point of this article isn't to force you to stick to one method for the rest of the time. The point is to help you to find a method that works for you and your home. To find organization and peace with what you have in a way that is uniquely yours. 


The Ski Slope

Let's start off looking not at individual items but at the mess as a whole. For many of us, that's overwhelming and can lead to putting off cleaning for longer than you meant to. One way to tackle that is the Ski Slope method. This method was developed by therapist-turned-interior decorator Anita Yokota. Instead of focusing on one type of item, Anita suggests working your way across a room from one side to the other the way you might tackle a mountain. You let your brain focus on tidying up and decluttering one area before you cross the room and work on a different area. As you go from area to area, you'd be sorting things into one of three categories, keep, give or dump. You can have boxes, or you might label different items with sticky notes. Whatever works for you.  As you work your way through, you not only declutter your space, but you also end up decluttering your brain as well. 


The Flow Method

Courtesy: Tatiana Syrikova

The Flow Method is our next concept. This one focuses on organizing what you have instead of decluttering. Here, we're working under the idea that you already have your room decluttered, and now you're trying to put everything into a specific place. The flow method works from the concept that every room has a certain 'flow' to it, the way a river would. You flow around a room, moving from place to place working in different areas at different times. You might go back and forth between areas, but you'll still keep the relevant items near to where an area is. So if you're working in your kitchen for example, you might keep your dishes near your dishwasher, all of your pots and pans near your stove, and all of your spices in the same area you do your food prep. This keeps everything together for when you're working on specific projects. 


One In One Out 

Courtesy Emre

This one is an interesting take compared to the others as it's a much slower way of looking at things. For every new item you bring in your home, you need to remove something else. Now, this doesn't apply to things like food, or repairing something. But books? Clothes? Shoes? Blankets and pillows? All of those can have this rule applied to them and it helps you to question "do I need this, or do I just want to splurge on something?"  


Quarantine Method

Although the term might not appeal to many of us, the concept is one we're all familiar with at this point. Take a selection of things you can't quite get rid of and pack them up. Write a date on the outside of the box and set a reminder in your calendar of choice, say six months. If after that time has passed and you can't remember what's in the box, and you haven't needed what's in it? Then feel free to donate it or gift it to someone else who can make better use of it. 


KonMari Method

Courtesy Andrea Piacquadioa

This might be the most popular method currently. Between her books and her tv show with Netflix, and the various magazine articles, many people know Marie Kondo's philosophy of "does it spark joy?" Now, the question is, what does that mean for those of us that haven't deeply interacted with Ms. Kondo's world? The idea is, "does this thing make you happy?" For every item in your home, you should ask this, and if the answer is "no," then you donate it. Now, for the items that you say "yes" to, you find a place for them. The idea is to go through every 'category' of item over time and remove anything that doesn't make you happy. From there, you will find a place for each of these items. In theory, you will end up with far fewer items to find space for. The flip side, though, and the one that many people miss, is that you're not getting rid of everything. You're just getting rid of things that you don't love. If you love your entire library? Then keep it. If you love all of the tiny ceramic frogs that you own? Keep them. It's not a matter of "keep only the best" or "keep only X number of things." That is why this method seems to have gained so much attention, at least from where we're sitting. 


Do you think any of these will work for you? Which one are you interested in trying? Let us know in the comments below or over on our Facebook page. As always, we love to hear from you! 


If your appliances are driving you insane and not the items scattered around your house, we can help with that. You can reach out to us via our contact page or by giving us a call at ((214) 599-0055). We'll work with you to find a date and time that works with your schedule to ensure we get your appliances running again. A stove smoking when you're just preheating the oven? Is your refrigerator not getting cold enough? Is your dryer sounding like it's trying to shake the house apart? It doesn't matter. At Appliance Rescue Service, we aim to get your home running smoothly again.