Mushroom & Asparagus Crepes

Easy and fast to make, and so delicious you’ll be fighting for a second share.

We won’t mince words with y’all this week. We’re too excited to get to the recipe. This week we’re making a delicious summer end mushroom and asparagus recipe. You can make this now and save the crepes for a later date or you can make only enough for a dinner and enjoy it tonight. 
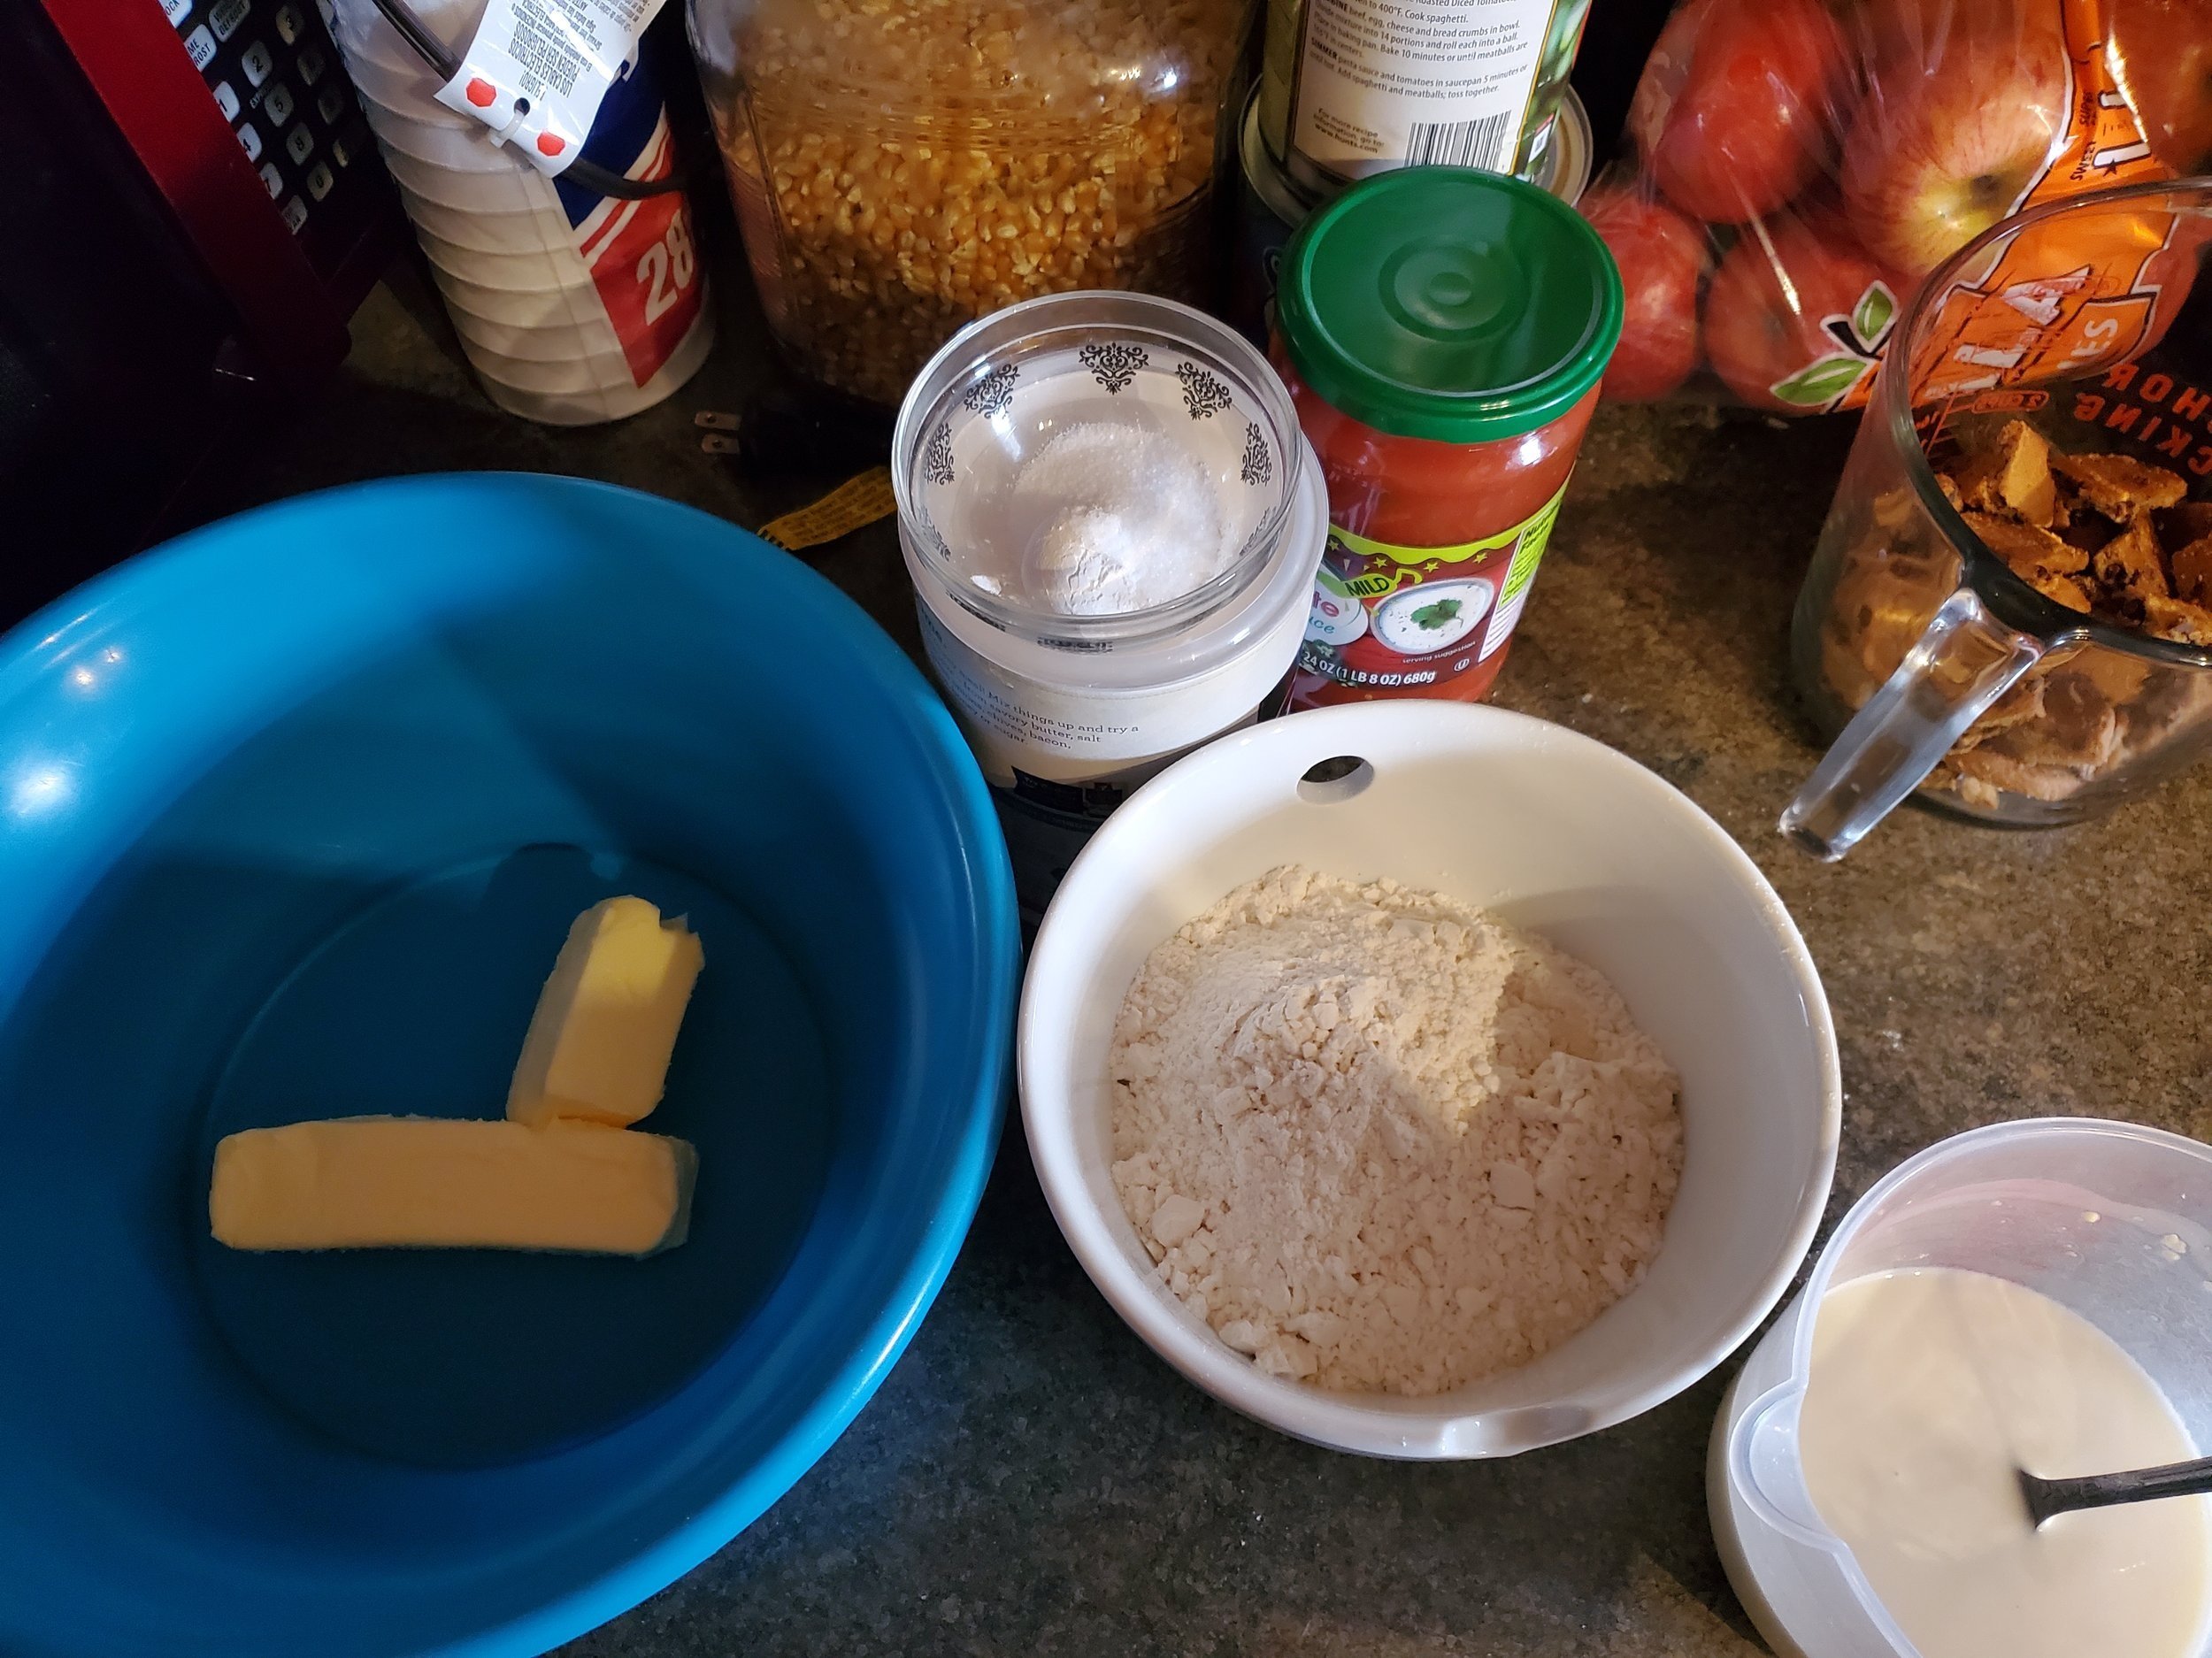
Ingredients

Crepes


½ tsp vegetable oil

1 c whole wheat flour

½ tsp salt

2 c milk

3 large eggs

4 Tbsp unsalted butter, melted and cooled to room temp


Filling


1 ½ lbs cremini mushrooms mixed with ½ lb shitake mushrooms if you want to add another layer

¼ c water

½ tsp vegetable oil

1 Tbsp unsalted butter

1 shallot, minced

½ tsp salt

¼ tsp fresh pepper

8 oz asparagus

⅔ c heavy cream

6 Tbsp Pecorino Romano cheese


Start off by prepping your mushrooms and asparagus. You’ll want to trim your mushrooms and chop them to ¼ inch thick. Your asparagus will get the same treatment, trimming off the woody bits, and cutting diagonally. 


For the crepes - 

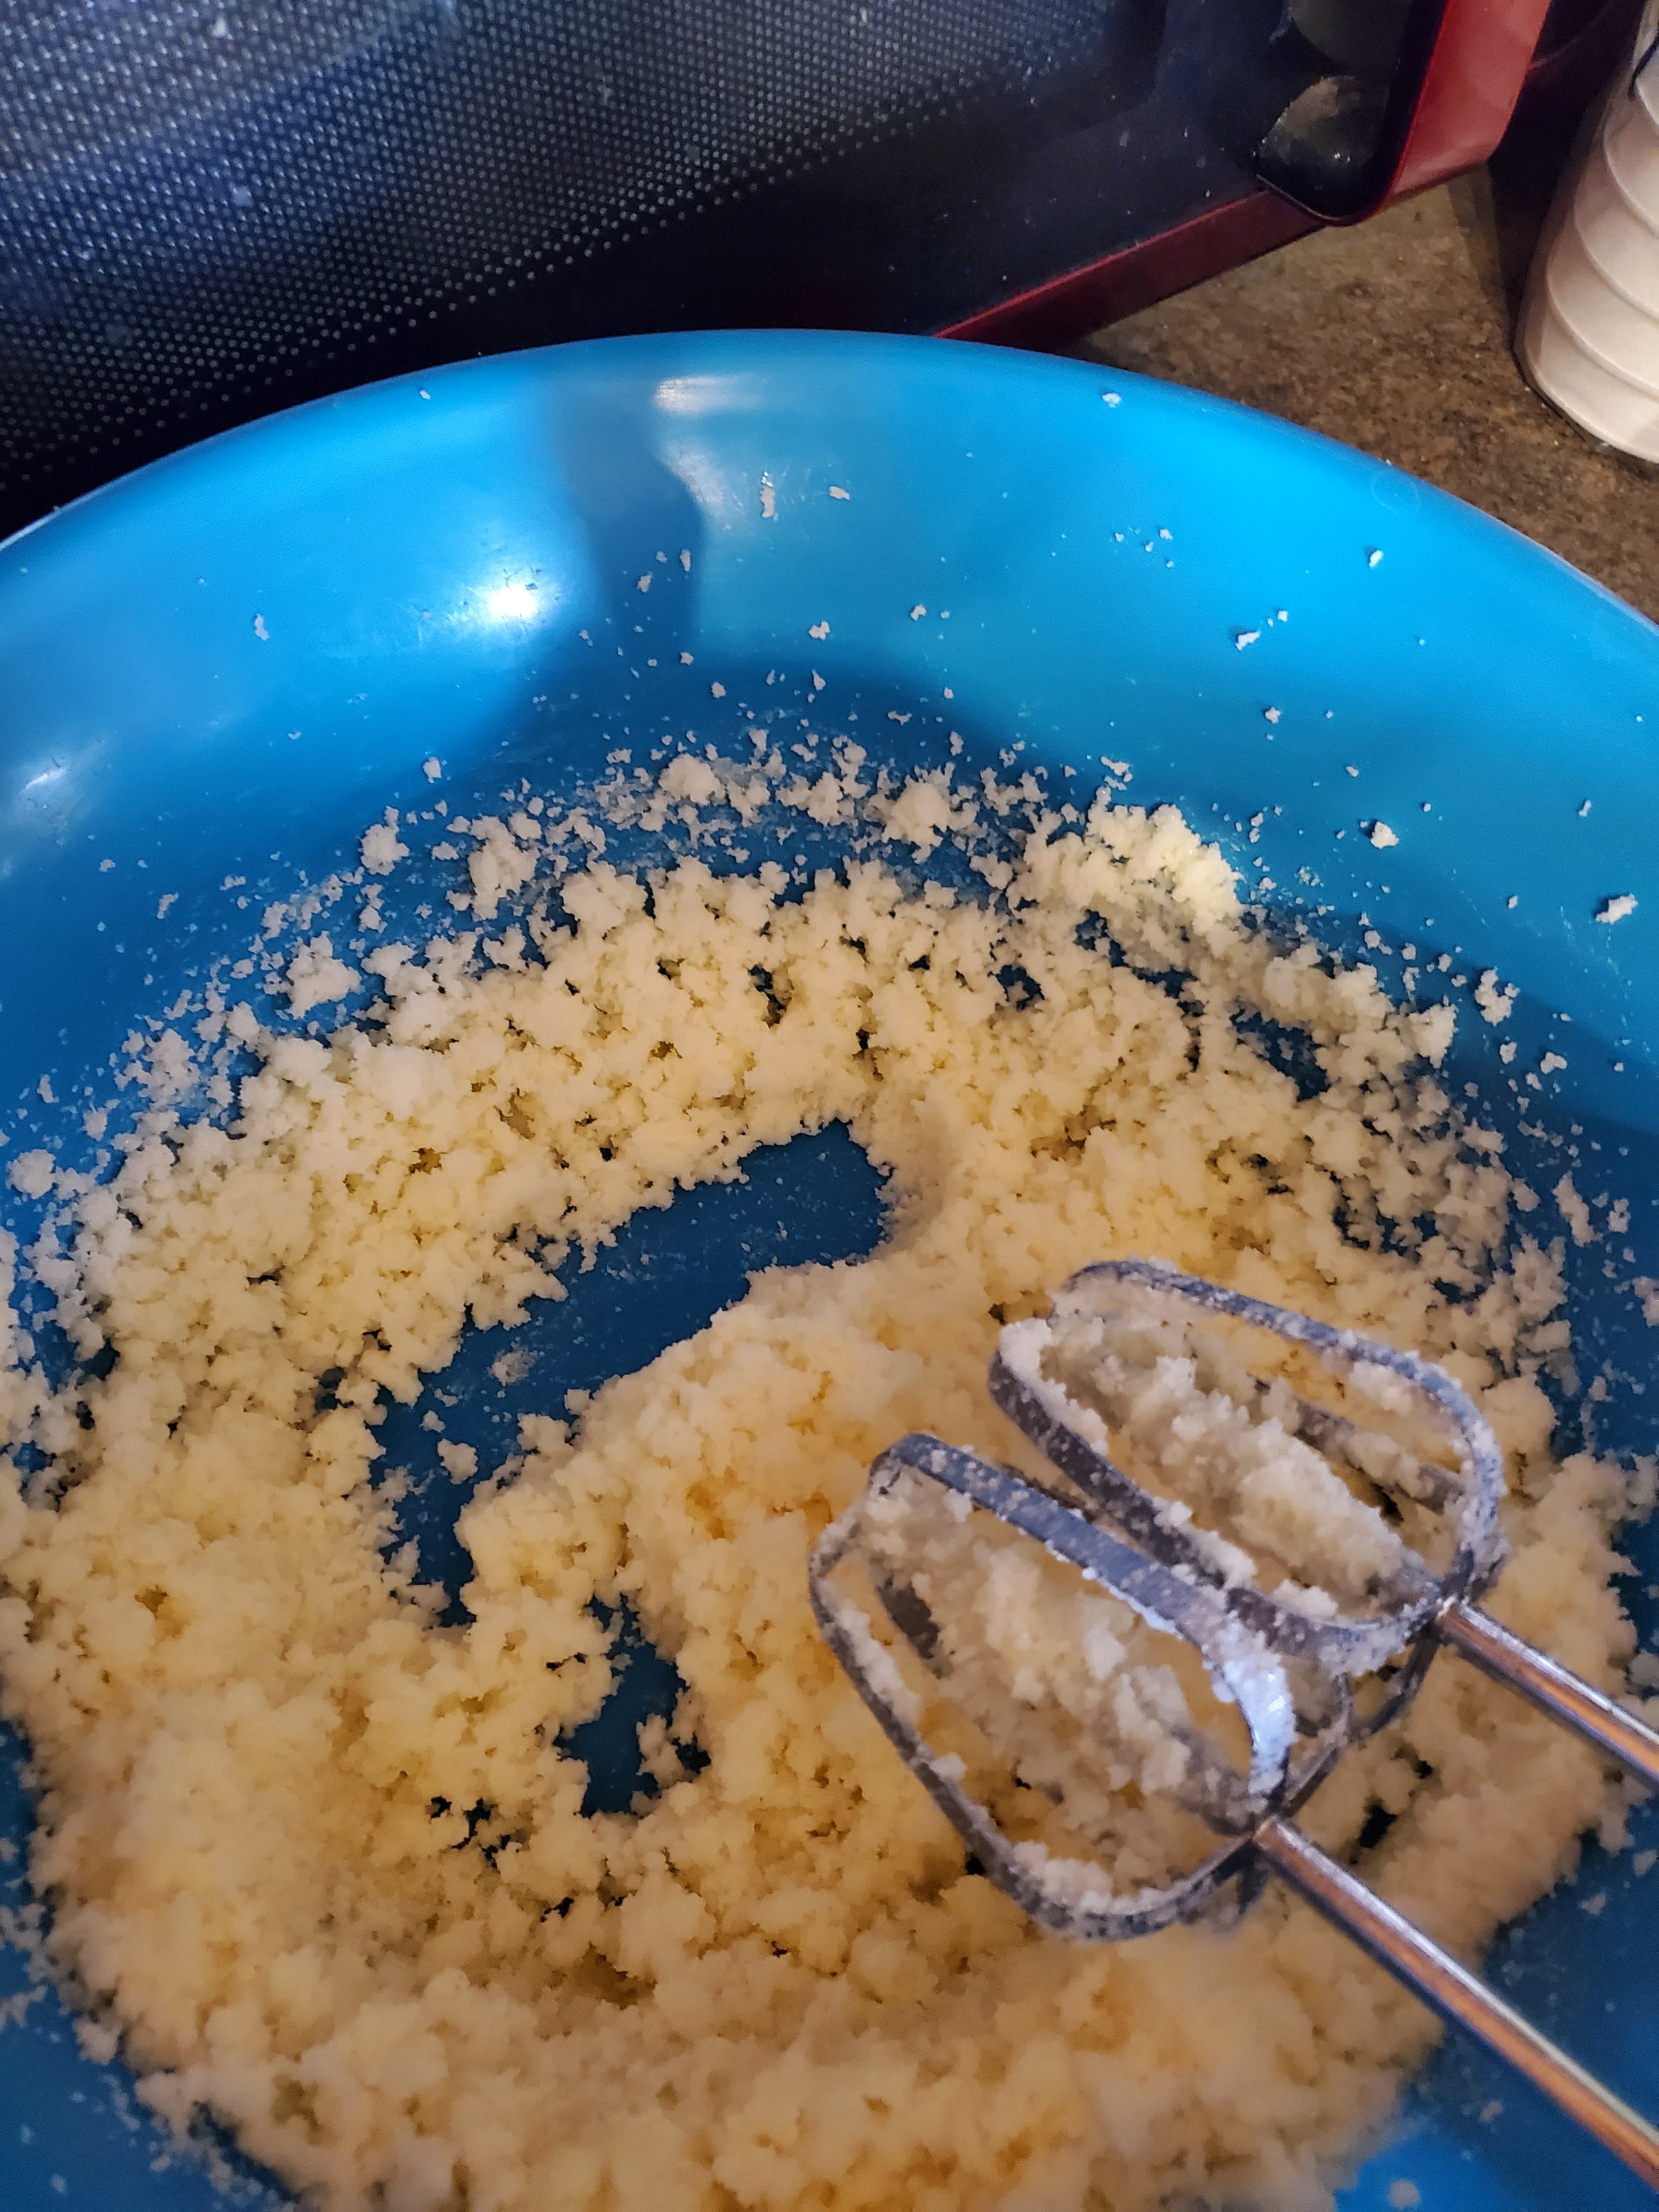
Grab your nonstick skillet and put it on low heat for 5 minutes, and pour the oil in. While that’s heating up, grab two bowls. In one, mix your flour and salt. In a separate bowl, mix together your milk and eggs. 


Next pour in half of your milk mixture to the dry ingredients and whisk until smooth. Pour your melted butter in next and whisk that until it’s mixed in. Whisk in the remaining wet ingredients and mix until that’s free of any lumps, clumps or bumps.


Once your batter is ready, it’s back to the skillet. Grab a paper towel and wipe out the skillet. You want just a film of oil on the bottom and the sides. Turn up the heat on your stove to medium and let the skillet heat for another minute. You’ll test the heat by pouring 1 tablespoon of batter into the skillet and cook it for 20 seconds. If your mini crepe is golden brown on the bottom, your skillet is at the perfect temperature. If it’s too light, or too dark, adjust the heat and test again. 


Remove your skillet from the heat and pour in ⅓ of a cup of batter into the far side of the skillet. (So whichever side is farthest from you.) Swirl the skillet gently in a circle until you have covered the bottom evenly. Place your skillet back on the stove and cook the crepe, without moving the skillet, until the top of the skillet is dry and the crepe starts to brown at the edges. Wait for 30 seconds or so to pass and then grab your rubber or silicone spatula. Run it around the edges of the skillet and then gently slide the spatula underneath the edge. Grab the edge with your fingertips and flip the crepe. Wait another 20 seconds and the top of the crepe should be lightly spotted. Yay, it’s done! 


Take your skillet off the heat, and transfer the crepe to a wire rack. Return the skillet to the heat for 10 seconds before you repeat everything with the remaining batter. As your crepes are finished, transfer them to the  wire rack. 


*Crepes can be wrapped tightly in plastic wrap and kept refrigerated for up to 3 days. Alternatively, if you’re in a baking mood, you can stack them between sheets of parchment paper and freeze them for up to a month. Make sure to allow the frozen crepes to thaw completely in the refrigerator before you decide to use them. 


Now it’s time for the filling!

Combine your mushrooms and water in your skillet and cook them over high heat. Until the skillet is almost dry and the mushrooms have begun to sizzle, it should take about 4-8 minutes. Reduce  the heat to medium-high and add oil to the pan. Toss until the mushrooms are evenly coated. Continue to cook, stirring occasionally until the mushrooms are well browned, another 4-8 minutes. Turn the heat down to medium.


Now, toss those mushrooms to the side of the skillet. You want them to stay warm, but now it’s time to focus on the asparagus.  Add butter to the center and once it’s melted, add the shallot, salt and pepper to the center and cook, stirring until fragrant. Add your asparagus  and cook for a minute. Now turn the heat down to medium-low, add in cream and cook, stirring occasionally, until the mix has reduced by half about 1 minute. Turn off the heat and add in the pecorino keep stirring until the cheese is melted and the mushroom mix is creamy. 


Take two plates, place the crepes on one and invert a plate over the top. Microwave this whole mixture until the crepes are warm, no more than 30-45 seconds. Working with 1 crepe at a time spread ⅓ of a cup of the mushroom mix across the bottom half of a crepe. Fold the crepes in half and then fold it over again. Transfer them over to a plate and serve warm. 


So, what do you think? Are you liking the idea? Let us know in the comments below or over on our Facebook page. As always we love to see what you make . 


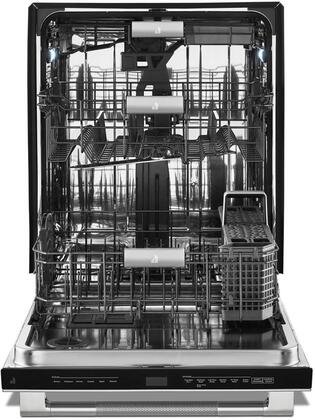
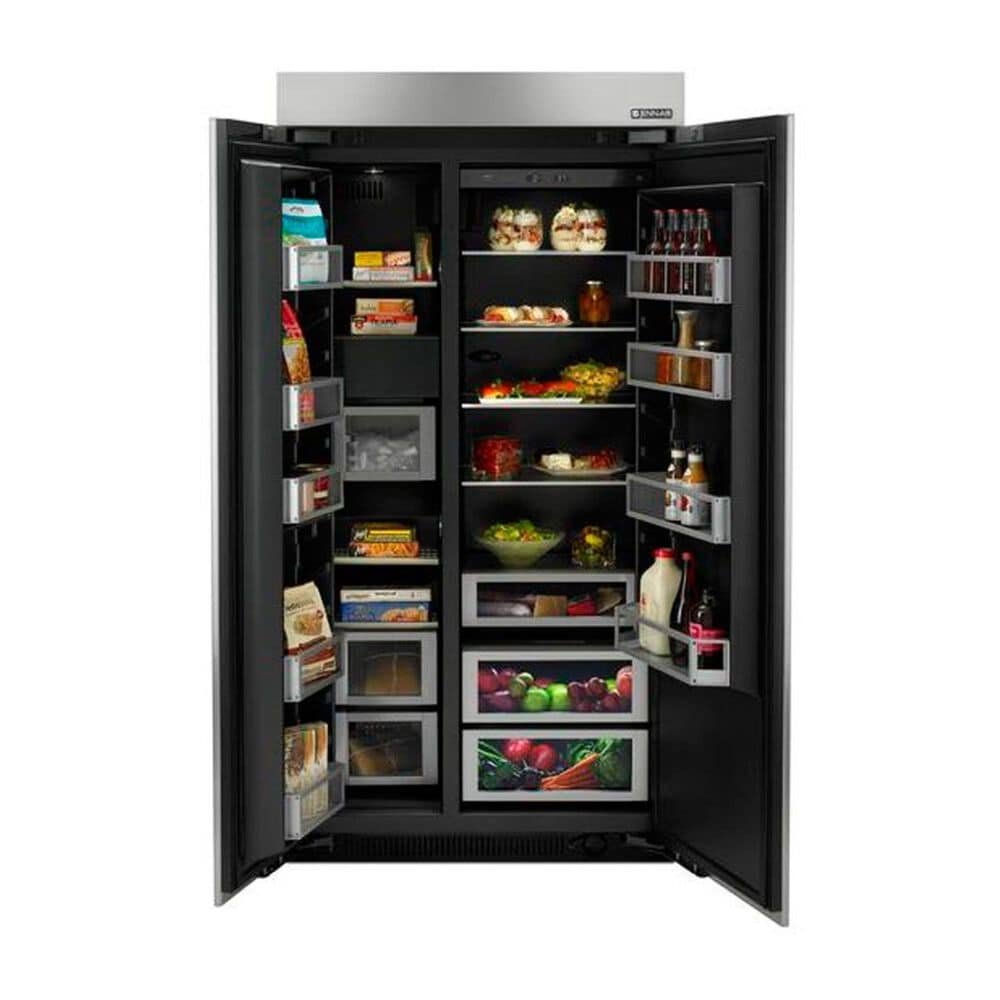
If you’re not here because of that, but maybe because you would prefer to have a functional stove or dishwasher, we get it. You can reach out to us on our contact page or by giving us a call at (). Wherever you are within the Dallas area, Appliance Rescue is here for you. 


Owner vs Blogger: Part Two- Shopping for Reliability

  Because experience means more 

Welcome back, everyone! This week we're covering the other half of our Blogger vs Owner faceoff of 2022. This time we'll be looking at what an experienced professional has to say about the appliances on the market and why she chooses what she does.  If you're looking for new appliances or just want to check out what the differences might be, this is the post for you.  


Dishwasher - Jenn-Air JDPSS246LL

Price: $2199.00

Starting off with the dishwasher, I liked the RISE series the best, not only because of everything it can handle but because it's energy certified, it's quiet and it has a stainless steel tub. 


High-Capacity 3rd Rack with Wash

The largest 3rd Level Rack in the luxury industry glides with quiet and ease, even when fully loaded with tapas bowls, large rocks glasses and cocktail shakers.

RISE Series 24 Inch Built-In Dishwasher with 6 Wash Cycles, 15 Place Settings, Energy Star Certified, 38 dBA Quiet System, Enhanced Cinematic Interior Lighting, Stainless Steel Tub, TriFecta Wash System, Condensation Dry in Stainless Steel

Jenn-Air Dishwasher open to display the three different racks and foldable tines


Enhanced Cinematic Lighting

Shine a spotlight on clean. Packed with 18 LED lights that ramp up to full intensity, JennAir brand’s best lighting coverage chases away shadows to illuminate daring Obsidian racks.


Daring Obsidian Racks

A JennAir® signature, these dramatic black racks are inspired by the beauty of volcanic glass—showcasing clean dishes in striking contrast.


3-Stage Filtration

A coarse filter, large filter screen and fine filter cup keep oversized and fine food particles out of the pump and helps prevent them from being recirculated onto dishware.


Cooktop Jenn-Air 48" Rise Professional Gas Rangetop in Stainless Steel

Price: $ 5299.00

“For the cooktop, I'm like many Texans and cooks, I prefer having a gas range. Fortunately, Jenn Air carries them and the professional variant at 48" is my pick. “

Jenn Air 48" cooktop with a griddle and grill on the side


14 Rangetop Configurations 

Bend fire to your will. Grills, griddles, brass burners. Three Widths. With 14 unique configurations, it's up to you. Cast off porous, superficially plated options. Go deeper. Infused with chrome, our griddle cleans up well after heavy usage. Underneath, a serpentine element powers out best griddle preheat. Fire up the grill for indoor entertainment on your terms. 


Wall Oven    Jenn-Air Rise 30" Combination Smart Electric Microwave and Wall Oven in Stainless Steel

Price $6549.00

Although I absolutely love the wolf oven our Blogger picked, it is gorgeous(!) I'm sticking with Jenn Air and that's the oven microwave combo. I prefer it when things have multiple functions when at all possible. This one really appeals to me not just because of how it looks, but also everything it can handle. 

Dual microwave and convection oven set in the wall

An upper convection microwave helps you create chef-inspired meals quickly. Below, the lower cavity's vertical dual-fan V2 convection system precisely directs heat to caress each ingredient - transforming prepped food into date-night-worthy dishes. With curated recipes and full-color doneness images on the Culinary Center, an intelligent culinary experience awaits.

  • 7-inch full color LCD display

  • Alexa enabled device

  • Google assistant enabled device

  • SOFTEN/MELT CYCLE Ribbons of molten chocolate. Butter that yields to your knife. Melt and soften with delicate heat that ignites passionate appetites.

  • AUTO CONVECTION CONVERSION Bake with abandon. The oven automatically converts temperature and cook time to make any recipe a convection recipe.


Refrigerator Jenn-Air 42" Built-In Side-by-Side Refrigerator

Price : $9,699.00


.... you guessed correctly - Jenn Air - I am actually putting this in my house beginning of next year, although I've already put in an order to try and guarantee that it will be available then. Like we mentioned last year, it's better to schedule what you're wanting ahead of time, and increase your chances of getting what you want given the shortages.

open refrigerator and freezer doors with an all black interior and neatly (absolutely fake) set of shelves inside


The exclusive Obsidian interior brings a luxurious finish to the inside of this Jenn-Air® integrated built-in refrigerator. The refrigerator achieves a seamless look with a flush design that features concealed hinges and trim pieces. With optional custom panels, it blends completely into cabinetry, a luxury detail that designers appreciate.


  • Precision Temperature Management System

  • Advanced Climate Control Drawer

  • Produce Preserver

  • Multi-Point LED Theater Lighting

  • Capacitive Touch Controls with LED Display

  • Soft-Close Crisper Drawers


Washer & Dryer Combo  Maytag 4.5 Cu. Ft. Front Load Washer and 7.3 Cu. Ft. Electric Dryer in White

Price:  $1998.00 

"The washer and dryer, this is the toughest choice for me. With the amount of use these appliances go through, that makes them extremely hard to spend the large amounts of money for them. I consider a washer or dryer to be "disposable" after 3-4 years and would be happy if they make it 5 years. (Sadly many on the market currently aren't built to last beyond that, even if I wish they were.)

I choose the ones with less features, a deep fill option and an agitator if at all possible, which means they're going to be top load washers. Sadly, the "pretty" laundry room you can find on Pinterest all focus on the front-loading ones, which doesn't work for me. 

I recently replaced my 4-year-old GE set with a Maytag set mainly because it was in stock (even those of us in the business have to fight with getting things with the current supply chain issues.) 


Washer features:

12 hr Fresh Spin Option

Quick Wash Cycles

Late Add Feature

Steam Option

2 Rinse Options

10 Wash Cycles

Automatic Temperature Controls


Dryer features: 

Advanced Moisture Sensing

Quick Dry Cycle

Wrinkle Prevent Option

Reversible Door

Automatic Dry Control

Powder Coat Drum

4 Temperature Options

3 Dryness Levels

Stackable

A side by side set of front loading washer and dryers  from Maytag in all white


When we sat down with Lisa and asked her what it was about these products that affected her choices, this was what she had to say. " Jenn Air is a high end made by Whirlpool, which makes them service friendly and easier to obtain replacement parts.  If I'm going to purchase something for my home, which many of these are, I want to know that I'll have an easy time working on it.  You can't say something will never break. Even the best on the market eventually have issues. So why make it that I'll have to wait even longer to get it fixed? I also love the black interior of the refrigerator, that appeals to me.  The microwave/oven has the ability to black out the panel when not in use which is what absolutely sold me on it.  And then the dishwasher and range top match the oven, and I admit, I do love having things match. 


So, what did you think? Is this what you were expecting to hear from a professional? What did you agree or disagree with? Let us know over on our Facebook page or in the comments down below. We love hearing from y'all. 


If you're here because you haven't given up on your current cooktop (we don't blame you, it's so pretty) we can help. Our owner isn't just experienced with finding the best appliances, she's also got over 30 years of experience in repairing them. Whether your cooktop won't ignite or your dryer is making insane creaking sounds (you know the ones), Appliance Rescue Service is here to help. You can reach out to us via our contact page or by calling us ( (214) 599-0055 ) to set up an appointment. We'll work with you based on your schedule to find a time that works to have our experts come to you and not only diagnose the problem but fix it. At Appliance Rescue Service, getting your home running smoothly again is our top priority. 


*Note : anything said on this blog is a matter of opinion and shouldn't be taken as a slight against any of the companies stated.


** All prices are current as of posting but are subject to change, especially since we don't control them. :) 

Are Your Appliances Overheating Due To Problems? Or Is It Just The Weather? 

What Causes Overheating in Appliances and How to Fix It When You Can 


 Even though we're heading into September, we all know that summer isn't done with Texas just yet.  As you go around your house you might notice that your refrigerator is too hot, or that your stove is hot in an area that shouldn't be.  We'll often blame the summer heat, but is that really the answer?  Sometimes, there's more to it than that and it takes a closer look to fix the issue, rather than setting it aside for another day. 


Some of these you'll be able to fix for yourself, some of them will require professional help. If you suspect that the problem is there, please don't hesitate to call a professional as the damage can be much larger than the appliance just being too warm. 


An improperly connected outlet can cause appliances to overheat

General Tips 

Before we dive into specifics, let's start with general issues that can lead to an appliance overheating, whether it's large or small.  

Yup, that's the first point. Every appliance in your home is at risk of overheating, although the reasons vary. Your dryer, your washer, your refrigerator and freezer, your stove, your oven, your microwave, your HVAC system, all of them can overheat. 

With that in mind though, there are warning signs that you can regularly look around for if you notice that the area around an appliance is warmer than is normal.  Some things to look for include, frayed cords, discolored outlets, broken outlets, cracked outlets, or smoke. 

If you do see any of these signs, turn it off, whatever it is, immediately and unplug it.  The problem can all too easily go deeper than the appliance itself. It might be that the electrical connection for the outlet is drawing too much power and is causing the appliance to overheat because of that excess. 

Burned outlet

Courtesy of wikimedia commons


Is Your Refrigerator Overheating?

The harder the condenser works to keep the inside of the refrigerator cool, the more heat is released in the process. If your refrigerator is old or dirty or if your kitchen is enclosed, all of these can lead to the whole room heating up OR the refrigerator overheating.  

Clean the condenser coils 

Over time, the coils on your refrigerator gather dust. The coating of dust isn't just about your allergies or your kitchen looking nice. it's also about the health of your refrigerator.   Condenser coils rely on exposrue to the air both on hot and cold sides and the dust blanket prevents that access to air for the dispersion of heat. 

Check these three places

- The back of your refrigerator 

- Under a back panel inside of the fridge 

- Behind the bottom vent. 

If you can't get to it yourself, there's no shame in calling in a friend or a professional for some assistance. 


Clean or change the air filter (if it has one, not all of them do) 

Some refrigerators are built with an extra filter that sits between the coils and the rest of the kitchen. Keeping that filter clean improves the performance over time. An important note is that unlike your car or your HVAC unit, this isn't typically a mesh or fabric filter. Instead it'll be a metal screen that can be removed and cleaned in your sink using the sprayer. 

If the screen is damaged or the metal is corroded in some way, it needs to be replaced. 


Check the fan 

Your refrigerator also has fans that directs the air flow around and through your refrigerator. The fan draws air over the cold coils and directs the hot air out of the lower vent (that's why it's always warm there, even in winter>) Just like everywhere else though, it means that dust can accumulate. Find the fan and give it a close look. It might need to be cleaned, repaired or replaced. It's actually a good idea to regularly turn your refrigerator off and wipe down the fan, once a quarter or so. 


Is Your Freezer Overheating?

Much like your refrigerator, the outside of your freezer being warm sometimes is normal. Having it hot all the time, or to the point that you're scalding yourself, is not. 
Your freezer also has condenser coils and a fan just like your refrigerator that need to be checked and cleaned regularly. The difference here is that in order to clean either of these you'll need to turn off the freezer so that you can get access to them. The coils will most often be near the bottom front of the unit, and behind a base grill. You'll want to use a vacuum hose with a soft brush for cleaning them.

The fan on the other hand, is something that either works or it doesn't. If the fan isn't activating or isn't running when it is activated, it won't cool the coils, this in turn means that the refrigerant never cools off, and your freezer will get extremely hot to the touch. In that case, the fan needs to be replaced. 

A final thing that can cause issues is the sealant for your freezer. The rubber seal around the door of your freezer, no matter what style it is, is there to keep all of the cold air in. If the seal is cracked, damaged or removed, it won't seal properly, and your freezer starts working overtime to try and keep things cold. An easy way to check if the seal is an issue is to see if you have cold air leaking out of the doorframe. If that's there, you probably need to replace it. 


Is Your Stovetop Overheating?

It sounds silly to say that a stovetop can get too hot, but it's true. Although they're meant to reach fairly high temps, they shouldn't be hot enough to make your kitchen warmer.  Some of the reasons they might though are the following.

Placed Too Close to a Wall

If you have a stove that is placed directly against a wall, it will reflect that heat back at you, the stove and the rest of the room. 

Covered or Clogged Stove Vents

Your stove vents are meant to be one of the ways your stove cools off, but if the  the air vent has become clogged by debris, dust or food, your stove will continue growing hotter instead.  

To fix it, remove the filter from the range. That's going to be underneath the hood and shouldn't be difficult to remove. Then set the filter in your sink and hose it off with your sinker's hose.  If that doesn't remove everything, look for an all-purpose degreaser and follow the directions. 

Melted or Warped Burners 

As odd as it might sound, the burners on your stove, whether gas or electric, can become warped. They're designed to direct the heat of your stove, but if they've become damaged, they'll heat unevenly. Repeatedly using a burner even after this can cause patches and hotspots on your stove making it too warm. Sadly, this isn't one that can be fixed with a cloth and some good soap. Instead, you'll need to call in a professional if you suspect a warped or damaged burner. 


Damaged Oven Insulation

And a final one that can cause your stovetop to overheat is if the oven's insulation is damaged or breaking down. As odd as that might sound, its true. The insulation for your oven keeps the internal temperature of your oven consistent and keeps the heat from escaping into the rest of the room.

If your oven's insulation is breaking down, you need to call a professional in to replace it or get a new oven. Continuing to work with damaged insulation means that insulation can get into your food, into your lungs, or if you're unlucky, catch fire.   

There might be hope other than the the insulation though. If it's the seal to the door of your oven that's busted, and not the internal insulation, that could be what's venting the hot air up towards your stove and causing the confusion. That is a much easier fix, and can be done by someone handy or by calling in a repair tech. 


Ovens can Overheat too

Just like your stove, it sounds odd to think that your oven might get too hot. But as we've mentioned when it comes to the self-clean feature of older models if your oven gets too hot, it can become toast. 

Some ways to check if your oven is overheating is to compare the internal temperature to the temperature you set it to using a digital thermometer.  You can also take a look at the heating elements and the heat sensor. And you can make sure the the oven fans are working properly.  


Unfortunately, other than unplugging your oven and making sure that everything is properly cleaned (not utilizing the self-clean button...) there's not much you can do at home. if your oven is overheating, that's a definite time to call in a professional. 

An electrical dryer with wildly exaggerated flames spill out of the front loading dryer


Is Your Dryer Overheating?

Your dryer is much the same as your oven, whether it's gas or electric, it can cause serious problems if it's overheating. On a scale from bad to worse, you could cause damage to your clothes, you could cause damage to the dryer, or it might flat out catch fire. So, it's not one to fool around with. If you notice any of the following, please unplug your dryer and call a professional. 

Shutting down

Many dryers today have a built-in safety, if they get too hot, they automatically shut off. Unfortunately, it doesn't always trigger and it's not a guarantee to prevent a fire. 


Error Codes

If you're getting an error code of E3 or HE it can indicate overheating, but you'll need to check your manual or the manufacturer's website to be certain. 


Burning Oder

If something smells like it's burning, it is probable that the dryer is overheating, and your lint might also have caught fire. Don't ignore that one. Check the drum and air vent for smoke and empty out the lint trap even if you don't see any. It's better safe than sorry. 


Tips for Keeping Your Appliances From Overheating

Not all of these are going to work all of the time. Appliances break, parts wear down, vents or fans are clogged, and you might not notice it. BUT there are still steps you can take to lengthen the life of your appliances and help them to keep cool. 

Keep it clean 

Give it a rest

Check out the condenser

Your refrigerator, your freezer, and your dryer all can have condensers in them, so keep an eye on them especially during the summer months. 

Don't overload your outlets

Call for repair if you have frayed cords 


As you've seen by now, there's nothing wrong with the outside of an appliance like your refrigerator or freezer being warm, even on a cold day. And it's perfectly normal to worry about it, even when you know it's normal. The best thing you can do is to let that worry guide you in keeping a cleaning schedule for your appliances, as well as a regular maintenance visit. Doing these two things you're more likely to spot minor issues before they become major problems.


As we said at the top, please be cautious and don't underestimate the danger that some of these present. If you see something or smell something, investigate as that can be the difference between needing to call a repair technician or needing to call the fire department. 


Have you had issues with your appliances overheating? Have you seen causes that we missed out on? Let us know in the comments below or over on our Facebook page. As always we love to hear from you. 


If it turns out that your freezer is more than you can fix, or your dryer is shutting off on it's own, give us a call at ((214) 599-0055). Or you can reach out to us via our contact page. We'll work with you to not only set up an appointment time that works for you but also to get your home running smoothly again. At Appliance Rescue Service we're here for you. 


Fire and smoke pour out of a set of buildings in front of a setting sun, with a column of fire billowing towards the sky

Courtesy of Ben Schumin


"Sugar Bomb" Cake

Or You Might Call It Death by Delicious

This isn't a cake for a birthday. This isn't a cake for a little get together. This is cake for a crowd, when you have a ton of people and you want all of the ones that enjoy sugar to walk around in a daze after trying it. This is one of those cakes where you make only once a year. Not because it's difficult. Not because it doesn't taste amazing (it does. We have it on the opinion of a ten-year-old that this is "the best cake in the whole world.") It's because this cake is so overwhelmingly delicious that you can only handle it once a year.  

It started off as an experiment.  We wanted chocolate chip cookies, but we didn't want just cookies. We wanted cake too. And then we thought about cookie dough. Except, it's not smart to eat just cookie dough. You need the crunch to balance it out. We took all of that and the urge for some chocolate milk as well ( we might have been egged on by that same 10-year-old helper) and started brainstorming how to smash all of it together. This is the outcome. Cake. Cookies. Cookie dough. Chocolate milk. All together in one glorious, amazing, and possibly death-defying sugar bomb cake. 

We’re putting all of the photos at the end of the article just to make it easier for y’all, so if you’re looking for those, keep on scrolling down. :)

Cake Ingredients: 

2 1/4 c all-purpose flour plus a bit extra 

2 tsp baking powder

1 tsp salt

1 1/2 c sugar 

3/4 c butter, at room temperature

3 large eggs

4 tsp vanilla

1 1/3 c buttermilk*

1 c mini chocolate chips, tossed in flour 

Chocolate chip cookies 

Tools Needed For all sections: a glass baking dish 9x13, a hand mixer or stand mixer of your choice, a small sauce pan, several bowls to mix in, a sieve, measuring cups and spoons, a cooling rack, toothpicks, and a heat proof glass dish, a rolling pin or mallet, a ziploc bag 

Set your oven to 350* F.

Set your chocolate chip cookies to the side until it's time to assemble the cake.

Take your glass dish and spray it with canola oil, evenly on all sides and the bottom.

In a small dish, pour in your chocolate chips and about 1 Tbsp of flour. Toss to coat. If you feel like not all of the chips are coated, add another tablespoon at a time and repeat until all of the chocolate chips are evenly coated.

In a large bowl combine together your flour, baking powder and salt. If you like, you can experiment and sift the flour to see how that will affect the density of the cake. (It's us, we regularly encourage experimentation when it won't ruin the food.) 

In a separate bowl, cream together your butter and sugar until it's fluffy. You can do this with a stand mixer, a hand mixer, or if you're feeling the need for a workout, you can use a hand whisk. 

Add in one egg at a time, mixing thoroughly and then add your vanilla.

Next up alternate between adding in the flour mix and the buttermilk until everything is combined.

Fold in your chocolate chips 

Pour the mixture into your pan and bake for 45 minutes OR until a toothpick inserted in the middle will come out clean. 

Make sure to rotate the pan halfway through.   

After you've removed your cake from the oven, let it rest five minutes and then run a knife around the edge of the dish to loosen it. Then allow it to cool to room temperature before removing it from the dish and place it on a cooling rack.  Make sure you don't wait more than ten minutes after removing it from the oven to remove it from the dish. It will stick to the pan and then you'll be fighting with your cake to get it out in one piece. You'll find out why we know this later. 

Cookie Dough Filling:

1 1/2 c brown sugar, packed

1 c butter at room temperature

3 tsp vanilla extract

2 1/2 c all-purpose flour

1 tsp salt

1/2 c heavy cream

1 c mini chocolate chips 

Mini chocolate chip cookies 

Beat the brown sugar and butter till fluffy, again you have the choice to use a stand mixer, a hand mixer, or a hand whisk. 

Beat in your vanilla extract, flour and salt till combined. 

Add the cream a little at a time till it reaches the consistency you want. This might not use all of your cream, or it might use more of it like ours did.  

Fold in the chocolate chips.  

If it's a hot day, set this in the fridge until you're ready for it to be used on the cake. If it's cool in your home, it's safe to leave it out on the counter, covered. 

Chocolate Malted Milk Syrup: 

1 c heavy cream

1/2 c sugar

2 tsp vanilla

2 Tbsp chocolate malted milk powder **

In a small saucepan, combine heavy cream, sugar, vanilla and chocolate malted milk powder, whisking until you no longer have bumps. Set your stove to medium-high (or medium if you're working on a gas stove). Put your saucepan on the stove and continue stirring, pressing any lumps against the side to break them up. Bring the pot to a boil. 

Remove from the heat and pour into a heat safe glass dish. Allow it to cool to room temperature and then store it in the fridge until it's time to assemble the cake. (We want to make a reference to a certain group of superheroes, but it doesn't really fit here does it?) 


Assembling the cake:

When your cake has come to room temperature, flip it out onto a cutting board, so that the bottom of the cake is now the top. 

If the dish you used was curved at the edges, cut off those ends of the cake and set aside for munching later.  

Next, measure the remaining cake, we want to create three even rectangles. Cut the cake across the width, so that you have three separate short rectangles. 

Coat each rectangle on the top with the malted syrup. (Don't forget this step, it really does matter for binding the cake top down and keeping it from 'peeling' off during the next stage.) 
Pick a layer and top that with the filling, spreading it carefully. Although you might have tried it with other frosting sorts, we don't advise doing it with this one given the amount of butter in the filling. It will make a mess and you'll end up with something very unappetizing. 

Once the filling is as thick as you want it, add the next layer of cake, top it with more of the syrup if needed, and then the filling. Repeat again with the third slice. 

Once you've got all three slices stacked together, cover the top and sides with the remaining filling/frosting.  

To the top of the cake, add equidistant whole cookies, for decoration. Then take some of the remaining ones and smash them up.  Bag them in a gallon sized bag and grab your rolling pin, and give them a few good whacks. You don't want crumbs, but you don't want whole cookies. 

Once that's done, coat the sides of the cake in your cookie bits. You can do just the bottom 1/3 or you can do the entire side.  

Now if you want to really go crazy, or if the previous steps haven't worked out quite as you imagined, there are ways to save it and still make your cake look as tasty as it will be delicious. That is the baker's secret weapons of chocolate and caramel syrups. Turn your cake so that you're facing a corner of it and drizzle first one syrup and then then other over the top of it, making wide sweeping arcs across your platter.  Surprisingly, it works well. 

As a wrap up, sometimes a cake doesn't look /pretty/ and you need to have a backup plan, like that last step. That's what happened with us, and it was the syrup that ended up making it work in our opinion. Keep in mind though that no matter how this looks, it's still going to be a delicious, overpowering sugar bomb of a cake. We hope you love it and whoever you share it with also loves it.  Let us know how it goes over on our Facebook page or in the comments below. 

If you still have the ability to focus after making this cake, and you actually came to our site because one of your appliances is giving you trouble, we can help. Give us a call at ((214) 599-0055) or go to our contact page to set up an appointment. We'll work with you to find a time and date that works for your schedule to figure out what the problem is and how we fix it.  

*If you can't get your hands on buttermilk at home, there are ways to make your own, or you can use a powder if one of your local stores has it. That gets mixed together with water to give you the needed amount. 

** We know that it might sound weird to have chocolate malted milk powder and still call for vanilla extract, but it brings a very nice depth of flavor that we're fond of. 

Owner vs Blogger: Part One  - Shopping for Luxury

When it comes to shopping for luxury and reliable appliances, who does better?

 In light of all of the issues with the chip shortages and appliance delays, we wanted to also delay our yearly appliance shopping comparison. This year your blogger is going to be taking a look at appliance brands known for being reliable while still being some of the best. We've chosen one option for every appliance after looking closely at the features offered and how well they reflect the lives of our clients. Even if you'd rather repair than replace, take a look with us at some of the options for a new kitchen, if only to ogle the new features. 


DishwasherDacor - 24" in Stainless Steel

Model : DDW24M999US 

Price: $1,199 

Photo Courtesy of Dacor


"With the capacity to hold up to fourteen place settings and the largest cleaning zone available, innovations like WaterWall™ and ZoneBooster™ technologies ensure that when the AutoRelease door opens, every pot, pan, plate, and glass will be ready for the spotlight."

The Dacor dishwasher focuses on making sure that your appliances are clean. Which sounds pointless, since isn't that the goal of all dishwashers? Yes, but if you're looking for who is going to be the best option, you want the one that is going to do the job best. We think that that is the Dacor. Their Waterwall technology combines with  with a 'zone booster' to ensure not only do you have a wall of high pressure water going back and forth washing your dishes, but you also have a phase that makes use of high power jets to attack stuck on bits of food or other debris.  To us that is the best part of the Dacor dishwasher.

Although we also enjoy the autorelease door to release steam at the end of a cycle as well as reducing the need for a dry cycle, as well as the flush design that allows the Dacor to fit seamlessly into your kitchen 


Range Dacor 48" Range Top with Griddle with Natural Gas in Stainless Steel


Model: $4,999

Price: DTT48M976LS

Photo Courtesy of Dacor

"Refined looks and visionary performance in perfect harmony. With a lineup of features that ignite your imagination, our Pro Rangetops turn up the heat on what’s possible."

We chose the Dacor range for two reasons. The first is that it's still available with gas, despite many companies offering fewer models with it. And because of the reliability and precision of that gas. Their range is built from the burners and their function up. Instead of engineering from the space or style limits, Dacor starts with how they wanted to do best, offer a consistent, fast burner, that would last a lifetime. That's why all of their burners are brass, with a dual valve system. It's also why although there are six different burners on this stove, they all have different sizes and specialties. To us, that's focus and very impressive. 

We won't lie, we also greatly appreciate the built-in cast-aluminum griddle, because heck yes easy omelets every morning, as well as the Auto connected hood. We've talked about vent hoods several times before, but one of the most important posts we tackled has been the dangers of not using your hood while you're cooking. The Dacor range turns on the ventilation at the same time as the cooktop and monitors it based on temperature, ramping up the speed of the fans as it becomes needed. To us, that's a very useful bit of technology as it protects your health.  


Oven -  Wolf  30" M Series Contemporary Stainless Steel Built-In Double Oven

Model: DO30CM/S

Price: $9,830

"Wolf ovens are precisely engineered with chef-tested modes that, once mastered, practically guarantee delicious results. "

This time we're looking at a Wolf double oven that's meant to be a built in and we have to admit, your blogger drooled. This set of ovens has 11 different modes with three of them making it possible to ditch other appliances in place of this one.  It's also Wolf's largest capacity oven so that if you need to make three different sets of cookies at the same time, or a large amount of a recipe, you can do just that.  (We would suggest that you can make multiple different recipes, but it's a pain to try and select ones that all work at the same temperature, and your blogger knows it.)  

Photo Courtesy of Wolf


Refrigerator Gaggenau  36" Vario Refrigerator  400 Series 

Model: RC492705

Price: $15,499


We looked at a brand we haven't reviewed for the blog before for both the refrigerator and the freezer, Gaggenau. They're a German company that was established in 1683.  If you're looking for reliability and history, this is the brand you're looking at. 

In addition to being supremely well made, the biggest thing your blogger was impressed by was the attention to the little details. The fridge is engineered to be a quiet close so that it doesn't disturb you or your household.  Each of the compartments is adjustable separately to ensure the best freshness and separation for your different foods, and the door is completely customizable. This is a refrigerator that is meant to fit into your home and life, not the other way around. 

Photo Courtesy of Gaggenau

Freezer - Gaggenau 24” Vario Freezer 400 series

Model: RF461705

Photo Courtesy of Gaggenau

Price: 6,999.00 


We separated out the freezer for two reasons. One, you don't always want to compromise when it comes to space. If you have a large family, or you cook a lot, it's very useful to have your freezer and refrigerator separate.  We also wanted the same precise attention to cooling zones that Gaggenau brings to their refrigerators, so the choice was a no-brainer for your blogger. 

Two features that stood out were the automatic defrost and the the swift freeze. The Gaggenau will regularly cycle into a defrost mode, but instead of melting everything and leaving you with a block of ice at the bottom, it has defrost water evaporation. The freezer is also capable of getting down to -22 without accumulating frost because of how swiftly it drops down to that temperature.   So all around it's an amazing freezer that does what it does very well. 


Washing Machine - Miele TDos & IntenseWash   front-loading washing machine
Model: WXR860 WCS  

Price:  $2,299.00 

Photo Courtesy of MieleUsa


Where do we even start with this one? For our washer and dryer we wanted to make sure that they were compatible, and would both have the same level of attention to them. So your blogger went with a brand that has been recommended several times on the blog, Miele.  Like the others in this list, their attention to detail is one of the reasons we love them. With this model they've offered several new styles of wash programs that your blogger hadn't actually seen previously. You have the usual modes like delicates, normal and towels. Then you have ones like darks and denims, meant to keep them from losing color, sneakers and a mode just for baby clothes. Or if you have linens that you want washed, there's a mode for that, and one for your high-tech outerwear as well. All of that has been considered and separated out as something that needed special consideration. 

This model also really focuses on efficiency and being friendly to the economy. From making sure that you can see and control exactly how much energy and water the machine uses on any given cycle, to being able to wash just one item if the need calls for it. They've also made it so that every load is weighed and considered so that only the exact amount of water and detergent is used for each wash. To your blogger, that was fantastic. 

And did we mention that it has a soft steam feature? To make ironing easier for those of you that have to iron regularly.  


Dryer Miele Eco & Steam Heat Pump Dryer 

Model: TXR860WP

Photo Courtesy of MieleUsa

Price:  2,299.00

Matching our washer choice, the Miele Eco & Steam Heat Pump dryer was an easy pick for your ever curious blogger. It's ventless, it  has several easy to access filters which cut down on the frequency of needing to clean different areas, and it has a hose to drain the water into a sink or outside depending on your preference. Plus, it' s a heat pump dryer which we've talked about previously, along with their gentleness on both your clothes, your wallet, and the temperature in your home. (All benefits for Texas as far as your blogger is concerned.) 


The biggest  point of interest though wasn't any of the features. It's the amount of testing they put their dryer through. "Tested for 20 years of perfect laundry care. Some car engines are tested over 3,000 hours – but we test [our dryers for] constant performance over as much as 10,000 hours." How many other companies do that? 


So what do you think? Did you like the appliances we chose this year? Or are you more curious to see what our owner comes up with? Let us know in the comments below or over on our Facebook page. As always we're eager to hear what you think.  Check back soon for part two when our owner makes her call on what she thinks are the best options for new appliances. 


We understand that not everyone wants to replace their appliances, and honestly, we'd be out of business if you did. We offer posts like this to keep you, our readers and our clients, aware of some of the new technologies in the field, and how they can be worked into your home in the event that you do have to replace an appliance. Our technicians will work with you until you're satisfied that we've tried everything to fix your appliance, whether that means one visit or many. At the end of the day, we want the same thing you do, to get your home running smoothly again. 

If you are in need of someone to look at your appliances, whether that's a maintenance check or fixing a specific issue, you can reach out to us through our contact page or by giving us a call at ((214) 599-0055). We'll work with you to find a time that fits your schedule so we can get your home running again.