5 Portable Air Conditioners to Fight the Heat

When you’re desperately in need of something to keep you from melting

We're hitting the dog days of summer, and it's far too hot to rely on just your central air. With temperatures regularly breaking triple digits,  all we can hope to do is to drink plenty and hide indoors until the worst of the heat has passed. What if your area is struggling with rolling brownouts though? Or if you're not trying to freeze your entire house, you want to focus on just the room you're in? Whatever your reasons might be, and we know there are plenty we've missed, we're taking a look at 5 of the best-rated portable air conditioning units. 


This week we're taking a look at 3 Frigidaires, a Whynter, and a relatively new contender, Amazon.  All five of them have been compared on a five-star system both in labs and by consumers. 


Amazon Basics MPPDB-09CRN1-BCG5 - Just Starting

Price $446

White portable air conditioner with a fan that can be tucked away on top, in front of the control buttons.

Let's start off with the Amazon Basics. This is the first time we're taking a look at an Amazon Basics appliance on the blog, and we weren't sure what to expect. On the site it has four stars out of five for reviews.  Half of the reviews on amazon for this are at 5 stars. On the other hand, in lab settings, we testers weren't all that impressed with the model. When tested for being able to cool a room sized for that particular unit (400 sq ft) on high, it only rated a 3/5 stars. It took far longer than testing felt that it should have given the size of the room. It also didn't do great at keeping the room at the temperature it was set to when the air was measured with a thermometer.  It's also rather noisy, both at high fan settings and low, something that isn't great if you're looking to have conversations, or keep your napping children asleep during summer. Finally, it doesn't let you know when the filter needs to be cleaned. Which admittedly, isn't the end of the world, but it is something that all of the others we're looking at offer. 


Opinion: We think that this is a good option if you're looking to get a portable unit /today/ or if you're looking for something for a dorm room. Otherwise, give Amazon some time to work the kinks out with this one. 


Frigidaire FHPW142AC1 - Cheapest Option

Price $484 - $529

Portable air conditioner in with a sleek black top with a recessed fan and several buttons spread across the top in a line.

Now we're taking a look at our cheapest option. Before you discount it based on that, this is still a step up from the Amazon. Although the rating by our testers is still 3/5 and customer ratings on Amazon rank it  as 4/5 we would have to argue that the availability of a reliable customer support team makes up for issues in that department. Much like the Amazon, this Frigidaire is rather noisy both on high and low settings, The second biggest difference in our opinion is that it does let you know when the filter needs to be cleaned out. It might not seem like a large issue, but when it reduces the effectiveness of the unit, it really is. 

Opinion: Better than the Amazon, but only by a smidge. Go for it if the name brand or customer support matter more to you. 


Frigidaire FHPC132AB1-Easy to Buy, Easy to Move

Price $490 - $519

A portable air conditioner on wheels with a slick top, a row of buttons and a recessed fan as well as a depression around the entire frame.

Another Frigidaire this time, but it's a step up in comparison to the last. 4/5 in lab conditions with a 4/5 on Amazon, and 57% of that being 5 stars. People like this one. It's easy to buy, easy to move around, and it works. What's even better is that unlike our last two units, this one is actually quiet on it's low setting. It's still a  noisy when set to high, but at least when you've got in on low you'll be able to have a decent conversation.  This one is also the lightest out of all five units that we looked at only 75 lbs. Even better, it only uses 13,000 BTUs an hour, compared to 14,000 as most of the others do. 

Opinion: Solid middle of the scale unit. It's easy to get your hands on and it works hard at keeping your home cool, while still keeping it as noise free as possible. 


Whynter ARC-14S - Consistent Price, Consistent Service

Price $599 

A thin portable air conditioner with a fan on top and the buttons on the front panel of it.

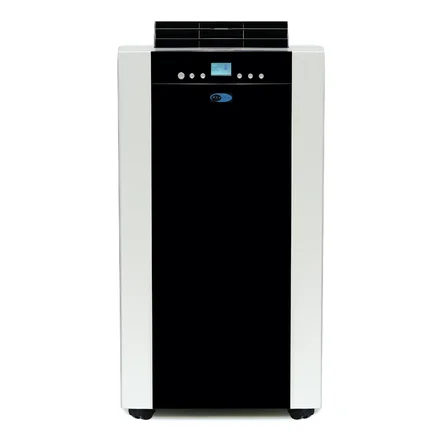
Finally, not a Frigidaire. Starting off by looking at the ratings, this one scored 5/5 for customer reviews and 4/5 in lab testing. The only point where it didn't do outstanding in terms of how quickly it was able to cool a room down to the specified temperature. That isn't to say that it didn't get there (or else it wouldn't have 5/5 stars.) Its simply that if you're going from a room that is extremely hot and asking it to get to 70* it's going to take time, even with the 14,000 BTUs.  It was ranked as the best overall portable air conditioner by Good Housekeeping, which had us surprised, after we took  a look at our best rated unit. The thing we loved best about this one is that when set to low, it's almost silent. It's still noisy when on high, but we're beginning to think that there aren't any portable ac units that can be quiet when cooling off a house in Texas. 

Opinion: A fantastic option with a glowing review from one of the best known companies in American homes. 


Frigidaire Gallery GHPC132AB1 -Biggest Variable in Price, and Best Rated

Price $549 - $856

And for our last one, we're back to a Frigidaire. Oops.  

However, this one is also the best on the list. 

A portable air conditioner on wheels with a beveled edge around the top, a recessed fan and a slick top with buttons set in.

It's rated 4.5 out of 5 in lab tests and 4.5 out of 5 on Amazon. It is wi-fi connected so that you can turn it on when you're on your way home and make sure that the room is cool when you get there. (Honestly, that is one of the only times we can say we absolutely get connecting an appliance to wi-fi.) It also is easy to clean and care for with the easy to clean air filter and the tank that you take out for the dehumidifier. It's even quieter than any of the others on the list when set to high. It's not silent, but it's working on it. Best of all, if allergies are kicking your butt as much as the rest of us, this model offers a clean air ionizer to reduce particles and kill bacteria. 

Opinion: Although it's not rated as the best option by Good Housekeeping, we had to disagree. With how quiet it is at both high and low settings, the ability to reduce airborne particulates and get your home cool before you come home, this is our favorite out of the five we looked at. 


What do you think? Are you going to add one of these to your arsenal to fight back the heat and get through the dog days? Let us know in the comments below or over on our Facebook page. As always, we'd love to hear from you. 

If you wound up here because your dryer is overheating and making your house hotter, not because of the summer heat, we can still help. At Appliance Rescue Service, we are experts in finding out why your appliances are on the fritz and getting them back into working order. Whether you're fighting with your dryer or your refrigerator, your oven or your dishwasher, give us a call at ((214) 599-0055) or reach out to us on our contact page. Our goal is to get your home running smoothly again.

5 Energy Efficient Dishwashers for Your Home

 5 Dishwashers Across The Board In Terms Of Price And Efficiency, With All Sorts Of Features. 

With prices for energy set to go up this year and again next year, we're thinking quite a bit about what "energy efficiency" means to us. We're looking at different appliances and methods around our homes and office to see what we can do to make things better. This week we're looking at energy-efficient dishwashers with 5 of the best on the market. 

Each of the different dishwashers we're looking at has two additional ratings we wanted to consider in addition to their price. The first is the kilowatt per hour per year average. This is not actually how many kilowatts per hour you're using, as your blogger initially thought. A kilowatt-hour measures the energy an appliance uses in kilowatts per hour. For example, if you clean your floors with a 1,000-watt vacuum cleaner for one hour, you consume 1 kWh of energy. When you see kWh on your monthly energy bill, it’s a measurement of your electric appliances’ wattage and the amount of time you use them. So if you use that vacuum for 1 hour a week, for a full year, by the end of the year, you'd have used 52 kWh just for that vacuum. 

The second rating is the water factor. The water factor is the number of gallons used per cycle per cubic food of the dishwasher. The lower that factor is, the more efficient the dishwasher is, and the lower your water bill... at least in relation to this.   But every bit counts, right? 

So since we're looking at Energy Efficiency this week, we wanted to include these numbers so that you can get a feel for not only what a dishwasher might cost you now but also over time. 

LG 24-inch LDF454HT - Longest Warranty  & Uses the least amount of water 

Price $698 - 849    

Energy Use (kWH/Year) 258 kWh/Year

LG 24 inch front control dishwasher, with the door open and all three racks pulled out to display.

Water Factor: 2.9

Quad wash - Washes from four different angles at once. 

Silent work - Has a 3 stage filtration system to trap food particles as it works to reduce noise and make the dishwasher more efficient. And it tops out at 48 dBA. 

Dynamic Dry - dries dishes faster and more thoroughly 

3rd Rack- Offers a third rack for storing ladles, spatulas, knives, and the like. And with the careful setup of grooves, it protects your knives from being tossed and banged around. 

App Connectivity - This title is so much more than just that. There is an NFC tag on the dishwasher that you can tap your phone against to transfer new cycles from your phone to your dishwasher. And more important, in our opinion, you can troubleshoot your dishwasher the same way. 

We like this one for the silent work feature. The quieter a dishwasher is, the better, in our opinion.

Samsung StormWash DW80R5061US - Best Overall 

Price  $899–$1,100 

Samsung Stormwash dishwasher with the  door open displaying the top and bottom shelf

Energy Use (kWH/Year): 239

Water Factor: 3.5

Storm Wash - Powerful rotating spray jets clean at every angle for tough-to-reach spots. 

Auto Release Door - At the end of a wash cycle, the door opens to allow air to circulate more freely. 

3rd Rack -  A third rack for utensils, and it has extra teeth so that they don't rattle around. 

Quiet Wash - 42 dba 

Adjustable racks - The top rack can be moved up and down when washing larger items like pots, pans, and glassware.


For the Storm Wash, we were most interested in the Storm Wash feature. The dishwasher is supposed to be powerful enough to use rotating jets to reach everywhere, delicate enough that it doesn't damage your dishes. However, it's still got a water factor that is low enough to be considered energy efficient.  We find that rather impressive. 

Bosch SHE3AR72UC Ascenta 24" White Full Console Dishwasher - Strongest Brand Name & Best Budget Option

Price $549

Energy Use (kWH/Year) - 269

Water Factor: 3.2 

PrecisionWash - precision arms target all of the stuck on  food so that you don't have to do multiple washes. 

Bosch Ascent in white with the door open and showing off the front panel controls

Sanitize Options- The Sanitize Option operates at a higher temperature and can be selected to achieve the National Sanitation Foundation (NSF) standards of cleanliness, eliminating 99.9% of bacteria, and enhances your drying results as well. 

Goes though almost 500 different quality checks before being sent to market. So the price might not be as high as others on the list, but the quality is. 

Sometimes you really do get a good option at lower prices. Although the Bosch doesn't have any of the features that our other dishwashers do,  it's still a solid option that will last you for years, without breaking the bank, and that includes your electric and water bills. 


Miele G 7366 SCVi SF AutoDos

Price: $2,199

Energy Use (kWH/Year)- 230

Water Factor: 3.2

AutoDos With Power disk - Analyzes the amount of dishes within a load and dispenses only the amount of detergent needed. 

Miele AUtoDos dishwasher open showing off the top and 3rd rack, with the top panel as well.

FlexLine Basket design -  Racks have extra flexibility for dealing with dishes of different sizes. 

Quick Wash - Washes dishes in 1 hour

All Dry Feature- Opens the door when a cycle is done 

Offers Washing cycles for general dishwashing, fine china, children's dishes, high sanitization, for pots & pans, and for grates and filters. 

Ecofeedback: Shows you the estimated amount of electricity and water used when you select a program on the display. 


The Miele dishwasher has been on our radar for a while, and we're intrigued by the AutoDos feature the most. Although it's not a revolutionary concept in general, this is the first time we can think of it being applied to your dishwasher. 

Frigidaire FGID2479SF 24" Energy Star Fully Integrated - 

Price $1079 

Energy Use (kWH/Year) - 270

Frigidaire dishwasher with a stainless steel front

Water Factor: 3.5

OrbitClean® Wash System Clean dishes with OrbitClean® Wash System, which uses four times more water coverage for a complete clean. 

3rd Rack Serving utensils and tools are mealtime-ready with our Store-More™ removable third rack, which offers easy loading and unloading access.

Automatically Adjusts Cycles

DishSense™ Technology automatically adjusts the cycle time based on the level of clean that your dishes need for an efficient clean.

Status Indicator Floor Beams

Convenient LED Floor Beam Indicators illuminate the floor with a blue light when your dishes are washing and a green light when they are clean.


We swear we're not a bunch of cats pretending to be appliance technicians. We're just impressed by the status indicator and find it useful. 

Which of these was your favorite? Which one fits your needs best? Let us know in the comments below or over on our Facebook page. As always, we'd love to hear from you. 

If you're not happy with the idea of buying a new dishwasher and would rather just fix the one you have, we can help. You can reach out to us on our contact page or by giving us a call at ((214) 599-0055). At Appliance Rescue Service, we're here to help. 

Sunday Chicken Parmigiana 

Intensively Delicious, AND Well Worth the Wait! A Dinner Worth the Effort.

You've got the house to yourself and you want something to  make that will be delicious. You're also stressed though, which might explain why you have the house to yourself. So you need something that will make you feel better too. Check out this recipe for chicken parmigiana shared from our family to yours. 

We won't fib. There is a bit of work that goes into this one. BUT not only do you get the chance to beat up something, you also get a meal that is positively delicious and if you're in the mood for it, you can scale up to fit any number of people. (Or you can just freeze the extras for when you want to treat yourself in the future! Who says you have to share?) 


Note: This recipe is set up for 1 chicken breast, so that it can easily be sized up, or be made for yourself if you want a nice night on your own. 

Ingredients for Chicken Parmigiana

1 egg

1 boneless chicken breast

1/2 tsp fresh ground black pepper

pinch of salt

1/2 c Italian bread crumbs

 1/4 c all-purpose flour 

1 tsp Oregano 

1/4 cup veggie oil

1 tsp butter

1 tbsp shredded Parmesan cheese


Coating Ingredients for Chicken Parmigiana

2 Tbsp of tomato sauce

1/4 cup shredded mozarella cheese (unless you can get it fresh, we suggest using the skim variant)

1 tsp basil 

1 tsp oregano

1/2  tsp minced, fresh garlic

1/2 tsp parsley

1/2 tsp parmesan cheese 


A plastic dish contains a mix of flour and spices as well as a coated chicken breast

Crack your egg into a dish and beat egg smooth.  If time allows, separate the whites and yolk and beat separately with a fork to ensure they're fully blended and there aren't any stringy bits left. Then recombine and add a pinch of salt and pepper. 

Prepare your flour by placing it in a bowl large enough to hold 1 breast cut. Add the ground pepper and a pinch of oregano, mix well with a fork, making sure to go up and down in your mixing as well as side to side. 

Prepare the breadcrumbs by placing them in another bowl, big enough to hold 1 breast. Add 1 tsp oregano and 1 Tbsp parmesan, mix well to combine. 

Put your frying pan on the stove and turn it to heat on low, then add in your oil. 

Prepare the Chicken breast. 

While your oil is heating, lay the breast on your cutting board, ugly side up. Make a cut 3/4 of the way through the breast from left to right. Open the breast making small cuts until the breast lays flat. Lay the breast between 2 sheets of wax paper and, using a rolling pin, press the breast until evenly flat. You can roll it or you can smack it, let your mood for the day decide. It's a good way to get some stress out when you need to.  Make sure not to toss the wax paper, you'll need it in a minute. 

Coat the breast on both sides in the flour mixture. You can use a fork here, or just use your fingers to toss the flour.

Dip the breast in the egg wash making sure to cover it completely, you'll probably want to use your fork for this one, as just shaking the bowl isn't very effective. 
Coat in breadcrumbs on both sides. 

Coated and rolled out chicken breast for chicken parmigiana

Place the breaded chicken back between the sheets of wax paper and roll it, pressing the breading to the chicken.  This makes it less likely that you'll lose the breading during the cooking process. 

Frying: Increase the heat under your pan to medium and add your chicken breast to the pan. Cook for 2 minutes on one side.  Add butter to the pan to oil around the edges before you flip the chicken. After turning it, cook for another minute. (If you're cooking more than one breast, reduce the heat at this point.) 

Preheat your oven to 375* F 

fried and draining chicken breast for chicken parmigiana   Coated and rolled out chicken breast for chicken parmigiana


Place your chicken breast on a baking sheet. Mix together the garlic, basil and parsley in a small bowl. 

Top it with tomato sauce. Add the garlic, basil and parsley on top. Don't mix with the sauce, allow it to be a light layer. 

Add mozzarella cheese, don't be too generous. You want the cheese to stay on top of the sauce, and to be able to taste the spices. 

Sprinkle the top with oregano. 

Bake for 15 minutes till the cheese is melted. 

Remove from the oven and top a final time with parmesan cheese. 

Enjoy!  

Now sadly, we didn’t get a photo of the final dish, as our cook was rather hungry upon finishing making the dish. Our apologies!

Well? What did you think? Let us know in the comments below or over on our Facebook page if the time this one takes was worth it. We always think that it is (and thank our resident cook every time he makes it.) 


If you ended up here because your oven is giving you fits though, or maybe your stove is refusing to stay hot, that is an entirely different sort of problem, and one we know how to help with. You can reach out to us via our contact page or by giving us a call at ((214) 599-0055 ). As always, we'll work with you to set a time and date that works best with your schedule and your family.  Whether you live in Frisco, Carrollton, Addison or Coppell, we work with you to get your home running smoothly again. 

10 More Kitchen Gadgets That Shouldn’t Be Connected To Wi-Fi

We’re Still Trying To Figure Out Who Thought This Was A Good Idea.

With every passing year, more and more products are connected to the Internet of Things that just.. Don’t make sense to us, and to many of you as well.  When we reviewed our last list of IoT gadgets, you wanted more. So we’re looking at another 10 kitchen gadgets that don’t make any sense for being connected to the internet, having an app or being ‘smart’ in some fashion. 


Name: HidrateSpark TAP

Price:  $20 

A black water bottle has a smart phone leaning against it with a bluetooth symbol behind the both of them.

What It’s Supposed To Do: HidrateSpark TAP - the smart water bottle that tracks your water intake through the HidrateSpark App and glows to remind you to drink. Our powerful Tap To Track technology updates your water intake on the HidrateSpark App by simply tapping your smartphone to the NFC Tag. HidrateSpark TAP glows to remind you to drink and with our Tap to Track technology you can easily track a full bottle when you tap your phone to the NFC tag on the bottle. Keeping your daily goal updated as you go. Opt in for our fun HidrateSpark App notifications to help you stay on track. Compete with friends in fun hydration challenges and earn trophies for your collection.

Why We Don’t Care For It: Why do we  need a water bottle to glow or vibrate? There’s bullet journals, there’s phone apps, there’s even the old school method of just making a mark somewhere. What’s the need for an NFC tag attached to bottle? Although the price isn’t bad, it still doesn’t make much sense to us. 

Link: https://hidratespark.com/


Name: Lg CLOI. 

Price:  Price currently unknown. 

What It’s Supposed To Do: CLOI for the home is meant to be an all in one system, connecting your thermostat, your appliances and the rest of your home. 

Why We Don’t Care For It:  When showing off the CLOI for the first time, the poor thing didn’t function. It wasn’t a matter of misunderstanding the commands given, nor was it an issue of the wi-fi not working.  CLOI flat out refused to respond to the presenter. As of right now, although the CLOI guide bots and server bots are both functional, the CLOI home hub hasn’t been introduced to the market, and we’re grateful for it. 

Link: LG ROBOTIC PRODUCTS | LG NEWSROOM 

LG CLOi robots will be working together to improve our life - Personal Robots


Name: Revolution InstaGLO R270 Toaster

Price: $400 

A toaster with a bagel in the slots, and a second sitting next to it on a plate with cream cheese and jam? Who combines the both of them?  And on the toaster there is a screen showing different toasting options and colors.

What It’s Supposed To Do: The InstaGLO toaster has a special diamond shaped heating element inside that quickly toasts the outside of any food, and leaves the inside sweet and soft. It also has a touchscreen that can handle 34 different types of bread and save 10 of your favorites. 

Why We Don’t Care For It: This is another “just why?”  It’s not that we’re against it so much as us wondering why we need it. Sure you can test out all of the functions and find out precisely how toasted and crisp you want your bread, but.. Why? 

Link: Revolution InstaGLO R270 Toaster | Williams Sonoma (williams-sonoma.com)


Name: ANOVA Precision Oven

Price: $600

What It’s Supposed To Do:  The ANOVA is a combi oven, or a combination of steam and convection cooking, as well as offering a sousvide setting.  It has a quick start menu that allows you to quickly select what you want it to do, be it convection baking, broiling, baking, proofing, air frying or steam. It can also connect to Google or Alexa, although it does offer more capability when working with Alexa. 

Why We Don’t Care For It:  Can turn itself on in the middle of the night & it advertises itself for you to be able to set your food to cook in it at the beginning of the day and set it to cook when you’re ready. The problem here is that many of us will typically include a fish or meat with our dinner. Which can’t be left out all day. 

Link: Anova Precision™ Oven - Anova Culinary


Name: Barsys 2.0 +

Price: $1,500

A black cabinet has slots for five bottles on top and an cut back underneath that, that has a conveyor belt for drinks to be moved along it, with a mirror reflecting the drinks.

What It’s Supposed To Do: The Barsys is a product we’ve covered in the past, but in theory, it’s been updated and improved! It’s meant to be a self-contained system where you load in liquors of your choice and use the app to tell it what type of drink you want. The app controlling the system is now better than before, and it’s easier to mix your own drinks using the app for precise amounts.

Why We Don’t Care For It: The app controlling the system seems to be the primary thing that’s been worked on in the ‘+’ version, but since that was our primary concern, we’re good with that. Unfortunately, the bluetooth connecting it to your phone still seems to be buggy and the app still has its detractors even since the update. 

Link: Barsys 2.0+ (thebarsys.com)


Name: SAMSUNG BESPOKE Cube Air Purifier,

Price: $549

What It’s Supposed To Do:  The Samsung Bespoke Cube is an air purifier that’s designed to fit into your home. It has interchangeable front panels that make it easy to blend into your home.  More importantly it can sense impurities and automatically boosts the purification intensity. On the app it will show the real time levels within your home by monitoring its micro air sensor. Better, it has a multi-layered HEPA  system to help trap dust, pollen and pet dander as well as odors. Easily check and manage your purification settings and filters with the SmartThings App and use the app to buy replacement filters when needed 

Why We Don’t Care For It:  We’re not averse to the concept. It’s a filter for your home that helps whether it’s tree pollen or smog. What bugs us is that it’s connected to Wi-Fi and voice connected. Why? Why is it needed? 

Link:  Amazon.com: SAMSUNG BESPOKE Cube Air Purifier, Odor Eliminator, Home System w/ HEPA Filtration, 360 Degree Purification, Pet Mode, Smart Control, Traps Dust, AX350A9350N, Grey : Everything Else 


Name: Tyent Undercounter 

Price: $3,250

What It’s Supposed To Do: The Tyent UC11 is an under the counter water ionizer. It requires its own plug and offers ionized water after filtering it. It allows you to set your water to be more acidic, alkaline if you dont care for the taste of minerals or metals in your water. 

Why We Don’t Care For It:  We love the concept. Having the ability to alter your water to your taste, or having a guaranteed filtration system is fantastic. What bothers us is the idea that everyone is going to use all of the different features. When faced with something with 55 different options (yes, that’s their claim) how many are you going to use? And if you don’t know which ones are what you or your family need?  It seems like something that is more complicated than what it needs to be in our opinion. 

Link: Amazon.com: Tyent Undercounter-11-Plate Turbo Extreme by Tyent : Tools & Home Improvement


Name: 4T7 Smart Cutting Board

Price: $169

a layered image, showing four layers. the base layer is black with an inset and a scale and timer combo on the left. Above that is a defrosting metal tray. Above that is a plastic board for chopping. And then on top of it all is a wooden board

What It’s Supposed To Do: The 4T7 cutting board is multiple pieces of kitchenware in one. It comes with a cutting board, a defrosting board, a digital ingredient scale, a timer, and a magnetic knife holder on the back. Plus, it has its own app with recipes, guides and a community to connect to as you learn, or just to try out different recipes with others. 

Why We Don’t Care For It: It’s the app. The rest of it is amazing. It’s the app we can’t get our heads around. Was it just a way to tack on an additional fee? To set up what sounds like a digital cookbook? To us, it seems like if you’re a home cook who finds a cutting board like this useful, you’re already going to have a wide number of recipes that work for you. 

Link: 4T7 Muti-function Smart Cutting Board Built-in Scale and Kitchen Timer


Name: Zega Intelligent Cookware

Price: $149

What It’s Supposed To Do: This is a double wall insulated pot that can have the heat turned off after it comes up to temperature. It keeps cooking the food inside of it and alerts you when its done. 

Why We Don’t Care For It:  The knob is connected to Bluetooth. This means that it can connect to your phone, and tell you that your food is done cooking. Which is nifty. But once again, why? The idea of not needing to tend your food also leaves us concerned. Too many dishes need to be watched over to keep them from boiling over or sticking to the bottom of the pot. And you have to charge the knob when all is said and done. So, we’re saying nifty, but not necessarily needed. 

Link: Zega Intelligent Cookware – Zega Cookware US

How it works – Zega Cookware US


Name: Nespresso Prodigo 

Price: $266

What It’s Supposed To Do: The Prodigo is a coffee machine. It has a built in milk frother for all sorts of recipes,  a rotating water tank and automatic cartridge ejector. It also keeps track of how many k-cups you have, and when it needs water or maintenance. 

Why We Don’t Care For It:  well.. We can’t actually find a reason for it. It’s coffee after all, and that’s something many of us love. We will say though that we question why the smart options are needed. We have had coffee machines that could keep track of when to make your coffee for decades. As to making ones that are meant for keeping track of what k-cups you need, that’s pretty easy too? So it’s less of a “we don’t like it” to “How necessary is it?” 

Link : Prodigio Coffee Machine | Nespresso


Most of these for us seem to boil down to “why??” Why attach these things to the internet when it’s not /needed/ for the item to do its work. Some of them are fantastically useful, but the connection to the Internet of Things doesn’t make much sense to us. Let us know in the comments below or over on our Facebook page what your thoughts are and which if any of these you would purchase. 


If it’s your Core Appliances that are giving you hell, we can help. Reach out to us on our contact page or by giving us a call at ((214) 599-0055  ) to set up an appointment that works for you. Whether it’s a smart appliance or one that’s as old as you, we’ll work with you to 

Handpies for Every Meal!

Handpies for Dinner, Dessert, Breakfast and Lunch!

The greatest thing about making handpies is that they can be made for any meal of the day! Breakfast, lunch, dinner or dessert, the possibilities are endless! Sweet or savory, eating at a table, on a picnic or as you rush out the door on your next adventure, handpies are a fantastic option for meals. 

We admit, we might have gone a wee bit overboard with the number of recipes we put together in this post, but with as many possibilities as there are, we couldn't stop ourselves. So for this post, we've made it so that each recipe collapses into itself so that you can look at them one by one, rather than trying to wade through the entire article at once. 

We'll start off with the crust for your pies, and then move on to the fillings. 

  • 6 cups of Bread Flour

    2 tsp salt

    1 cup + 1/2 Tablespoon cold butter

    1 cup cold water

    2 egg yolks

    5-7 cups of your filling of choice, see below

    Combine flour and salt into a mixing bowl.

    Cut your cold butter into tiny pieces, and work it into the flour, ideal using a fork or your fingers. (or an assistant, that works too!)

    in a separate bowl, mix the water and one of your egg yolks together until well blended. Pour that into the flour and mix everything until it comes together.

    Turn the dough out onto your counter and knead it lightly until it becomes a dough, rather than a mess of ingredients. The best way to knead the dough is to push forward and away from you with the heel of your hand, then fold the dough back towards yourself. Rotate it 90 degrees and repeat.

    Wrap the dough in plastic wrap and let it chill for at least 30 minutes, or up to a day.

    When you're ready to bake your hand pies, preheat your oven to 445*F. Grab two baking sheets and line them with parchment paper *

    Take your dough out of the fridge and set it on your counter. Cut it into 10 equal pieces of dough. Feel free to use a scale if you want, or just measure by eye and feel if you're feeling adventurous.

    Set all of the pieces to the side but one, and roll that one into a 7 inch circle.

    Add a rounded half cup of your filling to the center of the circle and fold the edges over so that you have a half moon.

    With the edge you can get creative. Start by pressing the dough firmly together all around the filling. Then choose your crimping design of choice. The easiest method is to pinch and fold back the dough on itself so that you get a 'crimped' edge. You can also check out Pinterest to see what other nifty options you have. We don't advise using just a fork for this dough because of how much filling you have.

    Place five pies on each of your baking sheets, and mix up your remaining egg yolk with 1 Tbsp of water.

    Use a pastry brush and generously apply the wash to each pie.

    Bake your pie for 20 minutes at 445* and then, without removing the pies from the oven, turn the heat down to 345* for another 15-20 minutes until they're crispy and browned.

    *Important note here: Parchment paper is NOT the same as wax paper. Whatever you do, don't try and bake wax paper you will ruin your baking sheet if you're lucky and hurt your oven if you're not.

    This is your basic pie dough. You can make this and freeze it once you've kneaded the dough, once you've cut the dough into sections, or once you've got it rolled out into rounds. All we suggest is making sure to wrap it in wax paper or plastic wrap and then putting it into a freezer safe container.

    Important Note: In our pictures down below, we made a half batch and mini pies, rather than the full size ones you get with this recipe.

  • 1 Tablespoon Unsalted Butter (you won't need additional salt thanks to the salt and the cheese)

    1 Cup Yellow Onion, diced

    2 ½ Cups Baby Bella Mushrooms sliced

    ½ teaspoon Ground Pepper, fresh

    ½ teaspoon Sea Salt

    2 Tablespoons fresh Thyme chopped

    2 ½ Cups Fresh Baby Spinach chopped

    1 ½ Cups Gouda or Gruyere Cheese, grated

    ______________________________

    Add mushrooms, onions, salt, pepper, and thyme in a skillet with 1 tablespoon of butter. Cook for 3-4 minutes until softened. Don't go based off the onions being transparent as further cooking will happen while you bake the handpies.

    Stir in spinach while warm and remove from heat. Let cool and drain any excess juices.

    Once cooled, add in your cheese of choice and mix thoroughly to combine.

    Split your filling evenly between your pie rounds and bake to enjoy.

  • 16- oz cooked ham, chopped

    ¾ cup shredded cheddar cheese

    ¾ cup shredded Swiss cheese

    1 (8-oz) package cream cheese, softened

    1 Tbsp Dijon mustard

    1 Tbsp Worcestershire sauce

    1 Tbsp brown sugar

    ¼ tsp onion powder

    ______________________________

    In a large bowl, mix your ham, swiss cheese, cheddar chees and cream cheese, mixing until thoroughly combined.

    In a smaller bowl, mix together your dijon mustard, Worcestershire sauce, brown sugar and onion powder until blended.

    Add the two together and mix thoroughly.

    Split your filling evenly between your pie rounds and bake to enjoy.

  • 2 lbs chicken breast

    1.5 tbsp olive oil

    1/2 cup yellow onion, finely diced

    1 Red pepper, finely diced

    1 Yellow pepper, finely diced

    10 cloves of garlic, minced

    2 cup chicken stock (split in half)

    1 Tbsp tomato paste

    3/4 tsp salt

    1/4 tsp pepper

    ______________________________

    Grab your Instapot or crockpot and place your chicken and 1 cup of the chicken stock into it. Mix in 4 of your 10 garlic cloves.

    Put the lid on the pot and cook for 20 minutes if you're using an Instantpot or 6 hours if you're using a slow cooker.

    In a large skillet, heat the olive oil over medium heat.

    Add onions, 6 cloves of minced garlic, and peppers, and sauté for about 5 minutes until softened.

    Add chicken, tomato paste, 1 cup of chicken stock, salt and pepper.

    Simmer, stirring often, allowing some of the liquid to evaporate, about 10 minutes.

    Allow to cool to room temperature or in the fridge for 2 hours. If you're doing this in stages, you can chill overnight in the refrigerator too.

    Split your filling evenly between your pie rounds and bake to enjoy.

  • Fair warning on this one. There are Zero hard and fast amounts because we weren't given hard amounts. It's more of a "guess and test" recipe like we've done in the past.

    Unsalted butter

    corn - we advise fresh or frozen as it's easier to get them.

    red onion, finely diced

    limes- juice in one bowl and zest into another so you can add as much as you like.

    red bell pepper, finely diced

    cilantro

    jalapeño, we suggest starting with 1 jalapeno to start with, finely diced without the seeds or pith

    sour cream

    Cotija cheese, and if you can't get hold of that, you can go with queso fresco

    ______________________________

    In a large skillet over medium-high heat, add your butter and frozen corn. Cook for 8-10 minutes stirring often until the corn is cooked through and has a charred look to it. The high heat will cook it quickly and the char adds a nice smokey flavor to the recipe.

    Remove from skillet and pour into a large bowl. Add the red onion, lime juice, lime zest, bell pepper, cilantro, and jalapeño. Stir to combine.

    Add the sour cream and the cheese and stir to mix. At this point we suggest tasting the mix and seeing how you like it, adjusting different flavors as needed so that it's just right before you move on.

    Once you've got the flavors right, split your filling evenly between your pie rounds and bake to enjoy.

  • 1 Tbsp olive oil

    1 Tbsp unsalted butter

    1 white onion, finely diced

    1 carrot, peeled and finely diced

    1 rib celery, finely diced

    Salt to taste

    Black pepper, freshly ground to taste

    4 cloves garlic minced

    1 pound ground beef

    1 ½ tsp Italian seasoning

    ½ tsp white pepper

    1 Tbsp tomato paste

    2 Tbsp Worcestershire sauce

    3 level Tbsp all-purpose flour

    1 ¼ cups beef stock or broth

    1 medium russet potato, peeled and diced into ¼ -½ inch cubes

    2 tsp fresh thyme leaves

    1 Tbsp finely chopped parsley

    ¼ cup green peas

    ______________________________

    Start by gathering up your onion, carrot, celery, potato and parsley and chop them as stated above, keeping them separate as you finish working with them.

    Take your skillet and put it down over medium- high heat, and add in the olive oil and butter. Once your butter is fully melted, stir it together with the olive oil and add in your onion, carrot and celery plus salt and pepper. Saute the vegetables until they're softened, but not transparent.

    Add in your garlic and once you can smell it, add in the ground beef, Italian seasoning, white pepper, and a few more dashes of salt and black pepper. Cook the ground beef until it's no longer pink, using a spatula to crumble the beef.

    Once the beef is finely cooked, if you're having a hard time getting it to crumble, you can remove it from the heat and once it's cooled enough, use your hands to break everything up. This is an optional step, and will require bringing the pan back up to heat before moving on.

    Once your beef is finely crumbled, add in your tomato paste and the Worcestershire and stir that into the pan, and top with the flour. Stir everything together to blend well.

    Add in your beef broth and the potato and stir to combine everything. Put the lid on the pan and allow it to simmer until the potatoes are tender, approximately 30 minutes. When a fork pressed gently against a potato cube slides through easily, you know they're done.

    To finish it off, add in your thyme, chopped parsley and the peas and mix to combine. Make sure no other spices are needed, and then allow the filling to cool completely.

    Once you've got the flavors right, split your filling evenly between your pie rounds and bake to enjoy.

  • 12 oz of fresh Blackberries

    1/4 cup sugar

    1 tbsp lemon juice (the bottled stuff is just fine)

    1/2 tsp cinnamon

    1 egg, beaten

    Additional Sugar for Topping

    ______________________________

    Rinse your blackberries well, and dry them with a clean towel, carefully or you'll end up dying your towel.

    Cut them in half, and toss them into a medium-sized bowl. Add in your sugar, lemon juice and cinnamon and mix well so that there is very little liquid left in the mix. Add a tiny amount of sugar at a time if there is too much liquid after adding in the initial 1/4 cup.

    Use an egg wash to help seal the pastries as you make them, to ensure they don't pop open while baking.

Notes on Freezing Your Handpies

There are several points throughout this process where you can stop and freeze what you've made.

- You can roll the dough around wax paper and then wrap the roll in plastic wrap.

- You can cut out your circles, layering them with squares of wax paper and freeze them at that point.

- You could make the handpies and freeze them prior to baking them.

- You could bake the handpies and then freeze them after they've cooled.

For any of these options, make sure to label and date what you've made so that you can use them within two months. For us we think the best options are either making the handpie circles or going ahead and making the pies up but not baking them. 

And that is six different handpie recipes that you can use for any meal throughout the day whether you're at home or on the go. They freeze great and they taste even better. When you give these a shot, please let us know over on our Facebook page or in the comments below. We love hearing from you and all about your cooking adventures. 


If you're contemplating handpies for meals because your stove isn't working properly, we can help. You can reach out to us at our office by calling ((214) 599-0055) or by going to our contact page to set up an appointment. We'll work with you to find a time that fits your schedule before sending one of our experienced techs to solve the issues. We work with you every step of the way to get your home running smoothly again.