Beat the Heat With This Spicy And Sweet Set of Ribs

Sweet and Spicy BBQ Ribs 


Welcome to this month’s first recipe, all about sweet and spicy ribs. Texas is known for its grilling, right? With the heatwave that’s melting us, we wanted to get out of the kitchen and work outside where there’s hopefully going to be a breeze.  So we went digging and found this great recipe tucked into the back of the recipe book that sounded perfect to share. It’s even got a delicious side of grilled (or broiled) peaches to pair with it and tame some of the heat. 


4 pounds  pork spareribs

½ cup chili sauce

½ cup hoisin sauce

¼ cup packed brown sugar

¾ tsp ground allspice

½ tsp hot pepper sauce

4 medium size ripe peaches

2 Tbsps peach preserves


Grilled pairs of ribs - Photo credit goes to Joshua Bousel

About 2 hours before serving or a day ahead 

Take your rack of ribs and cut them into two-rib portions. This means you won’t be fighting as much for space later, and they’re easier to flip with tongs. 

Put an 8-quart saucepot over high heat, add in the ribs, and enough water to cover. Bring it to a boil. Put a lid on top of that and turn the heat down to a simmer. Leave that there for an hour to get the meat tender. 

Using tongs, remove teh ribs from the saucepot and put them on a platter. 

If you plan to grill right away, go start the barbecue. If you’re cooking the ribs later, put them in the fridge covered in foil. 


About 1 hour before serving 

Prepare your outdoor grill, remember, coals need at least 30 minutes to heat fully. Meanwhile, mix chili sauce, hoisin sauce, sugar, allspice and hot pepper sauce.  (If you want to check out how to make your own chili or hot pepper sauces, check out the notes below.) 

Cook your ribs over medium heat, 15 to 20 minutes to heat them through. Brush with the sauce frequently during the last 10 minutes to keep them from charring. (Unless you’re like our bloggers and prefer a bit of char on your ribs. Then just be careful.) 


Cut all of the peaches in half and discard the pits. Grill the peach halves with ribs, turning and brushing them with preserves until hot and browned. This should take roughly 5 minutes. Remove ribs and peaches from the grill, transferring to a platter and enjoy.


When you’re done and it’s time to clean  up, throw your grill grates into the dishwasher for an easier cleanup. 


If you can’t grill, due to weather or what have you, try broiling your ribs. 

Start off by precooking the ribs and prepping the sauce same as we did above. 

Roughly 30 minutes before you want to serve, preheat the broiler. Arrange the ribs on a rack in the broiling pan and brush with the sauce. Broil ribs 5 to 7 inches from the heat for 20 minutes, turning and brushing with remaining sauce every 5 minutes. 


Remove the ribs from the broiler and transfer them to the platter. 


Grab your peaches, and just like above, cut them all in half, chucking out the pits. Place peach halves with the cut side up on the rack in the broiling pan. Brush the peaches with preserves and broil for 5 minutes.  


Transfer the peaches to the platter with the ribs and enjoy a sweet and hot treat. 


Let us know what you think over on our Facebook page! We’d love to hear from you and how your ribs turned out! 


If this isn’t your thing, we have something completely different coming out in two weeks, so be sure to check back then. 


Remember, if your appliances are giving you trouble, or if you just want someone to give them a once over, give us a call. We want to help keep your home running in tip top shape. 

Call ((214) 599-0055) 

Set an appointment online.


Notes: 

We know that most people don’t like to go and make their own chili and hot pepper sauces. It’s a lot of work after all. For those of you that do though, these recipes are for you. Please let us know how they turn out! 


Chili sauce

Check out this recipe straight from Ball’s own Fresh Preserving site. This recipe is a classic and with good reason! The flavor is rich and complex and goes great anywhere you’d typically throw in chili sauce (and even a few places you hadn’t considered yet.) 

The ingredient list looks like this 16 cups chopped cored peeled tomatoes (about 16 medium)

6 onions, chopped

6 green bell peppers, seeded and chopped

`2 red bell peppers, seeded and chopped

2 cups white vinegar

1 cup lightly packed brown sugar

1 clove garlic, finely chopped

1 Tbsp. freshly grated or drained bottled horseradish, optional

1 Tbsp. celery salt

1 Tbsp. mustard seeds

1 Tbsp. salt

1 tsp. ground allspice

1 tsp. ground cinnamon

1 tsp. ground mace or nutmeg

1/4 tsp. ground clove


Hot Pepper Sauce 

If you’re looking to make your own hot sauce, a great place to start is at Wholefully. Her ingredient list looks like this. 

1 1/2 pounds peppers of your choosing (a mix of sweet peppers and hot peppers), tops/stems removed, halved

6 cloves garlic, peeled

4 cups filtered water

4 teaspoons sea salt

1/3 cup apple cider vinegar

1 tablespoon honey or maple syrup, optional


If on the other hand you’re an aficionado and want to go a step further you can take a look at this guide we found that takes you from the very beginning, through multiple different recipes and up to creating your own business if you’re so inclined. That is over at Chili Pepper Madness

Creole Bread Pudding Souffle

This week we needed something sweet to round out the month. Let’s face it, June has been a long month. Creole Bread Pudding Souffle was just what the doctor ordered.  You can make it for an event or you can save it all for yourself. We certainly did. 


Ingredients 

½ cup butter, softened

1 cup sugar

5 large eggs

2 cups whipping or heavy cream

1 Tbsp vanilla extract

⅛ tsp ground cinnamon

¼ cup raisins (optional) 

12 slices French bread (1-inch thick) 


1 Tbsp butter

1 ½ tsp sugar

6 large eggs, separated

½ cup sugar

½ cup powdered sugar, sifted 


Whiskey Sauce 


The night before, slice your bread and lay it out on a baking sheet in your oven. Don't turn the oven on, don't cover the bread. You want to give the bread time to become a little stale so that it absorbs the mixture without disintegrating into it. 


Using an electric mixer, beat your 1/2 cup of butter at medium speed. Slowly add 1 cup of sugar beating well. The sugar should be fully incorporated before you begin to add the eggs one at a time. Once the eggs are fully beaten in, add cream, vanilla, cinnamon, and raisins (if desired.) Lightly grease a 13 by 9 by 2 pan, preferably a clear casserole dish. 


Remove your bread from the oven, and transfer the slices to mixture, laying them flat; let them stand for 10 minutes. Flip the slices over and let them sit for another 10 minutes.  During this time, set your oven to 350*F to preheat. 

Cover the pan with aluminum foil and place into a larger shallow pan. Pour hot water into the larger pan to a depth of 1 inch. Transfer the entire thing to the oven and bake for 40 minutes. Remove the aluminum foil and bake for an additional 10 minutes.


Place 2 1/2 cups of the baked bread mixture into a large bowl and set to the side. Reserve the remainder for something else. (We think it's an easy breakfast if you reheat it, or  a quick  dessert if you throw on any remaining whiskey sauce.) 


Grease a 1 1/2 quart souffle dish with 1 Tbsp butter; coat the sides and bottom with 1 1/2 Tbsp sugar and set it to the side. 


Combine egg yolks with  1/2 cup sugar in the top of a double boiler; place over simmering water and beat at high speed with an electric mixer for 4 minutes or until the mixture thickens. (You can do this section by hand if you want to, but your wrists will hurt after.) Add the yolk mixture to the bread that you reserved and beat at medium speed until smooth.  Set aside, and take the time to preheat your oven up to 375*F. 


Beat your egg whites at high speed with an electric mixer until foamy. Slowly add powdered sugar, beating until stiff peaks form; fold the egg whites into a bread mixture. Pour this into your prepared souffle dish. Bake the entire thing for 40 minutes at 375*F. 

Serve warm with whiskey sauce. 


Whiskey Sauce

1 cup sugar

1 cup whipping cream or heavy cream

⅛ tsp ground  cinnamon

1 Tbsp butter

1 ½ cornstarch 

¼ cup water

1 Tbsp bourbon 


Combine sugar, whipping cream, cinnamon, and butter into a heavy saucepan. Cook over medium heat until the sugar dissolves, stirring often. In a separate dish, combine the cornstarch and water, then pour into the cream mixture and bring to a boil, stirring constantly. Keep it at a boil for 1 minute. Remove from heat and stir in the bourbon. Serve warm. 

Be careful while making the whiskey sauce as melted sugar is ridiculously hot and burns like mad if you manage to get it on you.


NOTES 

When talking about egg whites, 'foaminess'  and 'stiff peaks' what are we talking about?  Foamy egg whites should be slightly opaque, mostly made of liquid but with some bubbles. Stiff peaks on the other hand are when you can pull your whisk out of the mixture and have it form a little mountain top, that doesn't fall over once you fully remove the whisk.  Still confused? Check out this page from The Spruce


Bourbon can be bought in small bottles from your local liquor store if you don't want to buy a large bottle just for one recipe. 

three different types of bourbon in their very different bottles.


Let us know what you thought of the recipe over on our Facebook page, we would love to hear from you.  Or show us pictures, that would be awesome too! You can also leave a comment if you have any questions about the recipe, ideas for future recipes or questions that you have about your appliances at home. 


On that note, if you are having issues with your appliances, and Youtube hasn't been helpful (let's face it, they're not often) you can call us at (). Or you can set up an appointment and we'll have one of our technicians come out to help you. 

Credit for this photo goes to Louisiana Cookin’


Try Eggs Creole for Sunday Brunch

Welcome back everyone! With summer just around the corner, we wanted foods that make us think of lazy summer mornings. We went digging through our family recipe books and found this week’s recipe for Eggs Creole. 


Ingredients

3 ¾ cups water

¾ cups  regular grits, uncooked

1 cup diced smoked sausage - ¼ inch pieces

¼ cup shredded Cheddar cheese

2 Tbsp butter

¼ tsp salt

¼ cup all-purpose flour

1 large egg, beaten

1 Tbsp milk

¾ cup Italian-seasoned breadcrumbs

Vegetable oil

Poached Eggs

Creole Sauce

Instructions


-Bring your  water to a boil in a large saucepan; then gradually stir in grits and return to a boil. 

-Cover, reduce heat, and simmer, stirring occasionally, 10 minutes or until done. (Where done here means: the grits are soft and tender, and ‘feel’ different when you stir a spoon through them. ) 

-Remove the pot from the heat; stir in sausage, Cheddar, butter and salt. Spoon into a lightly greased 13 x 9 x 2 inch pan, pressing firmly and smoothing the surface. Cover and chill for 24 hours. 


-Turn grits out onto wax paper. Cut out 12 (2 ½ inch) rounds with a biscuit cutter, reserving remaining grits for other uses. 

-Sprinkle the rounds with flour, a light dusting, not a thick coat. 

-Combine egg and milk; dip rounds into egg mixture and dredge in breadcrumbs. 


-Pour oil to a depth of 1 inch into a large, heavy skillet. Fry the grits rounds in hot oil over medium-high heat 1-2 minutes on each side or until lightly browned. Drain on paper towels. -Place 2 rounds on each plate; top each with a poached egg and Creole sauce. Serve immediately. 


Poached eggs 

Not sure how to poach an egg? Here’s how the process works. 

-Start by checking how fresh your eggs are. The fresher they are, the better they will hold together. You can see how to do this over at The Kitchn


-Next up, grab a pot with tall straight sides, and fill it with 3 inches of water. 

-Set your water to boil and add a mild vinegar to the water, for example rice wine. It won’t flavor the egg, but it does help it to stick together. 

-Wait until you see tiny bubbles at the bottom of your pot,but not a full roiling boil. Now reduce the heat low enough that you’ll keep that simmer going. 


-Now crack your egg into a bowl or a ladle and slip it gently into the water. 

-Leave it in the water for 2 minutes if you want the yolk to be still runny, or 3 minutes for a firmer yolk. Timing is crucial, so a timer on your phone or stove would be helpful. 

-Using a slotted spoon remove the egg from the water and set it to the side. 

-Repeat the process with the remaining eggs. 


Creole Sauce

1 medium onion, cut into thin strips

1 medium green pepper, cut into thin strips

2 stalks celery, cut into thin strips

2 cloves garlic minced

1 bay leaf

2 Tbsp butter 

2 tsp paprika 

2 medium tomatoes, diced

1 cup tomato juice

1 ½ tsp Worcestershire sauce

1- 1 ½ Tbsp hot sauce

1 ½ Tbsp cornstarch

½ cup water


Cook the onion, pepper, celery, garlic and the bay leaf in butter in a large skillet over medium-high heat, stirring constantly, until vegetables are tender-crisp. Stir in paprika, tomatoes, tomato juice, Worcestershire, and the hot sauce; simmer for 5 minutes or until moisture is reduced by one-fourth. 

Combine the cornstarch and water, whisking rapidly. Stir into sauce and return to a boil, stirring constantly. Boil, stirring constantly for 1 minute. Remove from heat. Remove and discard bay leaf. Serve warm. 


Notes 

If you don’t have any Italian-seasoned breadcrumbs on hand, you can make your own. 

This video from Alton Brown over at the Food Network is our favorite way of doing it. (And not just because he’s amusing to watch!) 


What do you think about this week’s recipe? Let us know over at our Facebook page, we’re eager to know what you think. Or if you have any suggestions for themes or recipes you want us to check out, let us know in the comments! We’re always interested in hearing from you. 


Don’t forget, if you have any problems with your appliances, you can always give us a call ((214) 599-0055) or set up an appointment with one of our technicians.  We care about our clients in Garland and the surrounding areas, and if you need assistance with your appliances, we want to help. 


Green Bean And Chayote Squash Casserole With Fried Onion Strings

Recipe: Green Bean Chayote Squash Casserole with Fried Onion Strings


Welcome back ladies and gents!  This week's meal is one your blogger recent tried and wanted to share. It's a surprisingly rich dish,  while also being full of vegetables. This recipe is based on the one from The Texas Cowboy Kitchen by Grady Spears and June Naylor. This book is absolutely amazing. It's full of stunning photos and history on top of delicious recipes. 


There is one ingredient we don't expect everyone to be experienced with, and that's the chayote squash.  Check down in the notes for an explanation of what that is and how to prepare it. 


Ingredients

1 pound fresh green beans, ends trimmed

½ pound chayote squash, peeled, seeded and julienned strips need to be roughly the size of your green beans in both length and diameter. 

3 Tbsp Butter

2 Tbsp vegetable oil 

1 pound bacon, diced

1 cup diced red onion

1/3 cup unsalted butter

1/3 cup all purpose flour

1 3/4 cups heavy cream

1 2/3 cups grated asiago cheese

Kosher salt and freshly ground black pepper


Instructions


-Prepare the vegetables by blanching the green beans and chayote in a large pot of water for 5 minutes. Set them to the side in a colander after you've let them fully cool in the ice bath. 

-Meanwhile , butter a shallow 4 quart casserole or a 13 by 9 by 2 inch glass baking pan with butter and set aside. 


-Preheat your oven to 350*F

-Heat the oil in a large skillet over medium heat. Add the bacon, stirring as necessary to separate the pieces so they cook evenly. Drain the grease as it accumulates so the bacon won’t be swimming in grease.  -You won't need the grease later, so feel free to dispose of it.  

-When the bacon is half cooked, add the onion and continue to cook, stirring occasionally , until the bacon is done and the onion is soft. 

-Allow to cool  before you transfer to the buttered casserole dish. Set the mixture aside. 


-In a separate pan, heat the unsalted butter over medium heat until melted, but not bubbling. 

-Whisk the flour into the butter to create a roux, stirring constantly. Cook for several minutes until the roux becomes fragrant but does not brown. 

-Add the cream slowly but whisk steadily to prevent lumps. 

-Turn down the heat so that the sauce is simmering, not boiling, add salt and pepper and cook for about 5 minutes or until thickened. Put the green beans and chayote squash into the casserole dish and cover with white sauce. 

-Top with the grated cheese and place it in oven to bake for 20 to 25 minutes or until the mixture is bubbling. 

-Remove the casserole from the oven and top with the warm, crispy, fried onion strings. 

-Serve immediately. 


Notes: 

 
chayote squash light green wrinkly and indented

Chayote squash - The chayote squash can also be found under the name  the mirliton squash. Originally a Mesoamerican plant, the chayote squash is handled like a summer squash. While the fruit is what we use in this recipe, the  root, stem, seeds and leaves are all edible as well. The fruit is roughly pear shaped, growing between 10 to 20 cm long. It looks like a green pear, has flattened sections, coarse wrinkles, and green to white flesh. The flesh of the fruit is fairly bland and tastes like a cross between a potato and a cucumber. It's.. curious but still tasty.   


Blanching - Blanching is a pretty basic technique, but it's still really important to know. It can be done to preserve the color and texture of vegetables, to prep them well ahead of when you need to cook a meal or to prepare vegetables for freezing.  

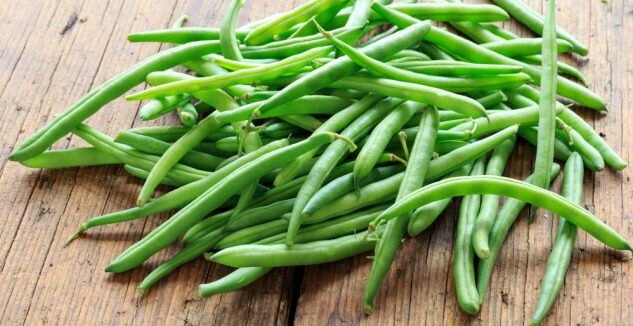
Pile of green beans with ends still on


What you'll need:  

A large bowl of  water 1/3 full of ice

A large slotted spoon

A large pot of water


-Bring your water to a boil over high heat . 

-Chop your vegetables so that they're uniform in size. This ensures even cooking and cooling. 

-In small batches add the vegetables to the water. Doing it this way keeps the water at a boil. Make sure that you don't  cover the pot with a lid.  

-After 30 seconds remove one piece and dip it into the ice bath, then taste for doneness. Repeat this stop every 30-60 seconds until the vegetable is cooked to your preference. Most vegetables will take between 2-5 minutes. 

-When the vegetables are done, quickly turn off the heat and using the slotted spoon transfer them to the ice bath to stop the cooking process. 

-When the vegetables are completely cool, remove them from the ice bath and  let them drain on paper towels. 


Crispy Fried Onions-  A quick and easy recipe for these is here. They turned out amazing and tasted so good on top of the casserole.  Just look at how amazing they look in the photo that Miss In The Kitchen did! They are absolutely drool-worthy.


Thank you very much for joining us this week! We hope you enjoy this post as much as we did, and please share your photos over on Facebook!  We'd love to see how your dishes turn out. 


If your stove isn't working right, or any of your appliances, please reach out to us.   We want to help keep your home running in tip top shape. You can click here to schedule an appointment or you can call us at  214-599-0055. We care about our clients in Carrolton and all of the surrounding areas.


Recipe modified from the one in The Texas Cowboy Kitchen. All rights belong to Grady Spears and June Naylor 


Go buy the book at Barnes & Noble, it’s most certainly worth it.

Lunch or Dinner, Falafel is fast and delicious!

Let’s face it, things are chaotic across the country right now, and many of us are looking for ways to make food go a bit further. What if I told you that you could get an easy lunch or dinner thrown together in less that 30 minutes of work? 

Not enough? What about the fact that it provides the same amount of protein and nutrients as a burger? 

And you get to fry it, and it stays healthy? 


Yes it does exist. This week’s recipe is for falafel. We found this recipe from Nourishing Days’ new book Traditional Meals for the Frugal Family. It’s a great book and teaches a variety of ways to get healthy food into your family, without a ton of prep work. 


Credit for this photo goes to Marco Verch

Credit for this photo goes to Marco Verch


Ingredients 

2 cups dried chickpeas, sprouted or soaked in water for 24 to 48 hours

1 large red onion, roughly chopped

1 small bunch of parsley

1 small bunch cilantro

2 tsp sea salt

1 tsp red pepper flakes

8 cloves garlic

2 ½ tsp ground cumin 

2 tsp baking powder

1 to 2 tbsp garbanzo bean flour

Lard, ghee or coconut oil for frying in

Wraps or bread 

A tangy sauce for topping 


Instructions

Start by draining and rinse the sprouted or soaked chickpeas and place them into a food processor. Add the onion, parsley, cilantro, salt, red pepper flakes, garlic and cumin. Pulse until everything is roughly chopped and well combined. Be SURE to stop before it begins to puree. It should be coarse and similar to bread crumbs in both size and texture. 


Scrape the mixture into a large bowl and sprinkle with the baking powder. Mix well. Test the consistency of the mixture by forming it into a walnut sized ball in your hands. It should be tacky and moist but should no longer stick to your hands. Add 1 to 2 tablespoons of flour, at the most,  if it is still too wet. Mix well to incorporate the flour, keeping in mind that the resting period will help the mixture absorb more moisture.


Cover your bowl with a plate or plastic wrap and refrigerate for at least 2 to 3 hours before frying. 


To fry: Place a 10-inch cast-iron skillet over medium heat and add enough of your frying medium to a depth of 1 inch in the pan.. Allow the medium to heat to roughly 375* F. 

You can test this by: 

Placing a tiny piece of the falafel mixture in the skillet and making sure it sizzles.

Flicking water on the surface of the oil to see if it sizzles. 

Using a thermometer. 


Scoop up about 2 tablespoons of the falafel mixture and loosely form an oval shape. Be careful not to compact the dough. You want to give it room to spread and form that signature fluffy interior. Carefully place  the mixture in the oil and repeat. (We suggest using a spatula. Your quirky blogger got splattered with oil at this stage after not being careful enough.)  Fill the pan but leave about ½ inches between the falafel. 


Continue to fry in batches until you have as many freshly fried falafel as you desire. Any remaining mixture can be refrigerated for up to 4 days or frozen. If you opt to freeze the mixture, make sure to squeeze all of the air out of the bag. Alternately, you can turn them into individual servings by making them into patties and wrapping them in wax paper before you place them into the storage bag. 


Serve the falafel in a wrap, a sandwich or atop a salad with sauce as  you please. 


Notes 

On Soaking 

When it comes to soaking, this is the fast and dirty method. This is the “shoot, I didn’t think about a meal for tomorrow when I was out shopping, what do I have on hand.” Easy, throw your chickpeas into a pot with enough water to cover them, and then another inch on top of that.  Let them soak overnight, rinse them once and then you’re good to go! (If you’ve really planned ahead, you can soak them for 48 hours, rinse after the first 24 hours and then once more before you use them.)


On Sprouting

When it comes to sprouting, there’s a couple of different reasons to do this. 

-It  adds more flavor if you let them sprout for a day or so.

- It goes from being a creamy texture to a more of a  vegetable flavor. 

-Its proven to be easier on your stomach and digestion. 


For this  what you’ll need is 2 cups of your grain or bean of choice (in the case of falafel, that’s going to be chickpeas)  

And water. Lots of water. 


Place your grains into a  ½  gallon sized jar or a bowl of equal size. Add 6 cups of water and let it soak for 12 hours. 


After 12 hours, drain and rinse the grains or beans. If you’re using a jar, put a fine mesh over your lid and rest your jar in a bowl at a 45* angle and allow the liquid to drain into the bowl. 


And that’s that!  We hope that you like this recipe as much as we did! If you are interested in more meals like this one, let us know over on our Facebook page. We love to hear from you and what you’re interested in. 


If you’re looking to continue working in the kitchen, and maybe using up some leftover bananas you have around, check out this post for banana bread


And last but not least, if any of your appliances are acting strangely, or are flat out broken, please reach out and schedule an appointment.  We want to help you and keep your home running smoothly.