Recipe: Green Bean Chayote Squash Casserole with Fried Onion Strings
Welcome back ladies and gents! This week's meal is one your blogger recent tried and wanted to share. It's a surprisingly rich dish, while also being full of vegetables. This recipe is based on the one from The Texas Cowboy Kitchen by Grady Spears and June Naylor. This book is absolutely amazing. It's full of stunning photos and history on top of delicious recipes.
There is one ingredient we don't expect everyone to be experienced with, and that's the chayote squash. Check down in the notes for an explanation of what that is and how to prepare it.
Ingredients
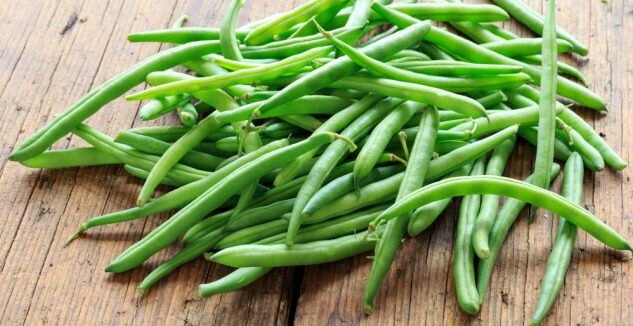
1 pound fresh green beans, ends trimmed
½ pound chayote squash, peeled, seeded and julienned strips need to be roughly the size of your green beans in both length and diameter.
3 Tbsp Butter
2 Tbsp vegetable oil
1 pound bacon, diced
1 cup diced red onion
1/3 cup unsalted butter
1/3 cup all purpose flour
1 3/4 cups heavy cream
1 2/3 cups grated asiago cheese
Kosher salt and freshly ground black pepper
Instructions
-Prepare the vegetables by blanching the green beans and chayote in a large pot of water for 5 minutes. Set them to the side in a colander after you've let them fully cool in the ice bath.
-Meanwhile , butter a shallow 4 quart casserole or a 13 by 9 by 2 inch glass baking pan with butter and set aside.
-Preheat your oven to 350*F .
-Heat the oil in a large skillet over medium heat. Add the bacon, stirring as necessary to separate the pieces so they cook evenly. Drain the grease as it accumulates so the bacon won’t be swimming in grease. -You won't need the grease later, so feel free to dispose of it.
-When the bacon is half cooked, add the onion and continue to cook, stirring occasionally , until the bacon is done and the onion is soft.
-Allow to cool before you transfer to the buttered casserole dish. Set the mixture aside.
-In a separate pan, heat the unsalted butter over medium heat until melted, but not bubbling.
-Whisk the flour into the butter to create a roux, stirring constantly. Cook for several minutes until the roux becomes fragrant but does not brown.
-Add the cream slowly but whisk steadily to prevent lumps.
-Turn down the heat so that the sauce is simmering, not boiling, add salt and pepper and cook for about 5 minutes or until thickened. Put the green beans and chayote squash into the casserole dish and cover with white sauce.
-Top with the grated cheese and place it in oven to bake for 20 to 25 minutes or until the mixture is bubbling.
-Remove the casserole from the oven and top with the warm, crispy, fried onion strings.
-Serve immediately.
Notes:
Chayote squash - The chayote squash can also be found under the name the mirliton squash. Originally a Mesoamerican plant, the chayote squash is handled like a summer squash. While the fruit is what we use in this recipe, the root, stem, seeds and leaves are all edible as well. The fruit is roughly pear shaped, growing between 10 to 20 cm long. It looks like a green pear, has flattened sections, coarse wrinkles, and green to white flesh. The flesh of the fruit is fairly bland and tastes like a cross between a potato and a cucumber. It's.. curious but still tasty.
Blanching - Blanching is a pretty basic technique, but it's still really important to know. It can be done to preserve the color and texture of vegetables, to prep them well ahead of when you need to cook a meal or to prepare vegetables for freezing.
What you'll need:
A large bowl of water 1/3 full of ice
A large slotted spoon
A large pot of water
-Bring your water to a boil over high heat .
-Chop your vegetables so that they're uniform in size. This ensures even cooking and cooling.
-In small batches add the vegetables to the water. Doing it this way keeps the water at a boil. Make sure that you don't cover the pot with a lid.
-After 30 seconds remove one piece and dip it into the ice bath, then taste for doneness. Repeat this stop every 30-60 seconds until the vegetable is cooked to your preference. Most vegetables will take between 2-5 minutes.
-When the vegetables are done, quickly turn off the heat and using the slotted spoon transfer them to the ice bath to stop the cooking process.
-When the vegetables are completely cool, remove them from the ice bath and let them drain on paper towels.
Crispy Fried Onions- A quick and easy recipe for these is here. They turned out amazing and tasted so good on top of the casserole. Just look at how amazing they look in the photo that Miss In The Kitchen did! They are absolutely drool-worthy.
Thank you very much for joining us this week! We hope you enjoy this post as much as we did, and please share your photos over on Facebook! We'd love to see how your dishes turn out.
If your stove isn't working right, or any of your appliances, please reach out to us. We want to help keep your home running in tip top shape. You can click here to schedule an appointment or you can call us at 214-599-0055. We care about our clients in Carrolton and all of the surrounding areas.
Recipe modified from the one in The Texas Cowboy Kitchen. All rights belong to Grady Spears and June Naylor
Go buy the book at Barnes & Noble, it’s most certainly worth it.


