Green Bean And Chayote Squash Casserole With Fried Onion Strings

Recipe: Green Bean Chayote Squash Casserole with Fried Onion Strings


Welcome back ladies and gents!  This week's meal is one your blogger recent tried and wanted to share. It's a surprisingly rich dish,  while also being full of vegetables. This recipe is based on the one from The Texas Cowboy Kitchen by Grady Spears and June Naylor. This book is absolutely amazing. It's full of stunning photos and history on top of delicious recipes. 


There is one ingredient we don't expect everyone to be experienced with, and that's the chayote squash.  Check down in the notes for an explanation of what that is and how to prepare it. 


Ingredients

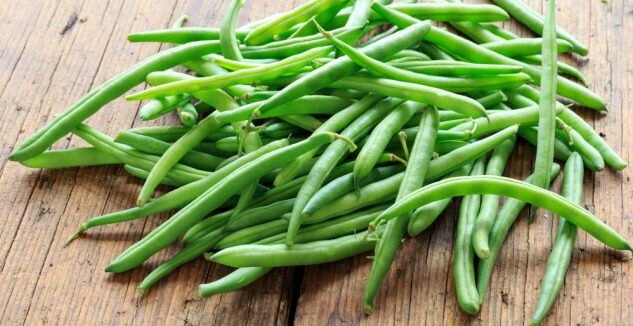
1 pound fresh green beans, ends trimmed

½ pound chayote squash, peeled, seeded and julienned strips need to be roughly the size of your green beans in both length and diameter. 

3 Tbsp Butter

2 Tbsp vegetable oil 

1 pound bacon, diced

1 cup diced red onion

1/3 cup unsalted butter

1/3 cup all purpose flour

1 3/4 cups heavy cream

1 2/3 cups grated asiago cheese

Kosher salt and freshly ground black pepper


Instructions


-Prepare the vegetables by blanching the green beans and chayote in a large pot of water for 5 minutes. Set them to the side in a colander after you've let them fully cool in the ice bath. 

-Meanwhile , butter a shallow 4 quart casserole or a 13 by 9 by 2 inch glass baking pan with butter and set aside. 


-Preheat your oven to 350*F

-Heat the oil in a large skillet over medium heat. Add the bacon, stirring as necessary to separate the pieces so they cook evenly. Drain the grease as it accumulates so the bacon won’t be swimming in grease.  -You won't need the grease later, so feel free to dispose of it.  

-When the bacon is half cooked, add the onion and continue to cook, stirring occasionally , until the bacon is done and the onion is soft. 

-Allow to cool  before you transfer to the buttered casserole dish. Set the mixture aside. 


-In a separate pan, heat the unsalted butter over medium heat until melted, but not bubbling. 

-Whisk the flour into the butter to create a roux, stirring constantly. Cook for several minutes until the roux becomes fragrant but does not brown. 

-Add the cream slowly but whisk steadily to prevent lumps. 

-Turn down the heat so that the sauce is simmering, not boiling, add salt and pepper and cook for about 5 minutes or until thickened. Put the green beans and chayote squash into the casserole dish and cover with white sauce. 

-Top with the grated cheese and place it in oven to bake for 20 to 25 minutes or until the mixture is bubbling. 

-Remove the casserole from the oven and top with the warm, crispy, fried onion strings. 

-Serve immediately. 


Notes: 

 
chayote squash light green wrinkly and indented

Chayote squash - The chayote squash can also be found under the name  the mirliton squash. Originally a Mesoamerican plant, the chayote squash is handled like a summer squash. While the fruit is what we use in this recipe, the  root, stem, seeds and leaves are all edible as well. The fruit is roughly pear shaped, growing between 10 to 20 cm long. It looks like a green pear, has flattened sections, coarse wrinkles, and green to white flesh. The flesh of the fruit is fairly bland and tastes like a cross between a potato and a cucumber. It's.. curious but still tasty.   


Blanching - Blanching is a pretty basic technique, but it's still really important to know. It can be done to preserve the color and texture of vegetables, to prep them well ahead of when you need to cook a meal or to prepare vegetables for freezing.  

Pile of green beans with ends still on


What you'll need:  

A large bowl of  water 1/3 full of ice

A large slotted spoon

A large pot of water


-Bring your water to a boil over high heat . 

-Chop your vegetables so that they're uniform in size. This ensures even cooking and cooling. 

-In small batches add the vegetables to the water. Doing it this way keeps the water at a boil. Make sure that you don't  cover the pot with a lid.  

-After 30 seconds remove one piece and dip it into the ice bath, then taste for doneness. Repeat this stop every 30-60 seconds until the vegetable is cooked to your preference. Most vegetables will take between 2-5 minutes. 

-When the vegetables are done, quickly turn off the heat and using the slotted spoon transfer them to the ice bath to stop the cooking process. 

-When the vegetables are completely cool, remove them from the ice bath and  let them drain on paper towels. 


Crispy Fried Onions-  A quick and easy recipe for these is here. They turned out amazing and tasted so good on top of the casserole.  Just look at how amazing they look in the photo that Miss In The Kitchen did! They are absolutely drool-worthy.


Thank you very much for joining us this week! We hope you enjoy this post as much as we did, and please share your photos over on Facebook!  We'd love to see how your dishes turn out. 


If your stove isn't working right, or any of your appliances, please reach out to us.   We want to help keep your home running in tip top shape. You can click here to schedule an appointment or you can call us at  214-599-0055. We care about our clients in Carrolton and all of the surrounding areas.


Recipe modified from the one in The Texas Cowboy Kitchen. All rights belong to Grady Spears and June Naylor 


Go buy the book at Barnes & Noble, it’s most certainly worth it.

Lunch or Dinner, Falafel is fast and delicious!

Let’s face it, things are chaotic across the country right now, and many of us are looking for ways to make food go a bit further. What if I told you that you could get an easy lunch or dinner thrown together in less that 30 minutes of work? 

Not enough? What about the fact that it provides the same amount of protein and nutrients as a burger? 

And you get to fry it, and it stays healthy? 


Yes it does exist. This week’s recipe is for falafel. We found this recipe from Nourishing Days’ new book Traditional Meals for the Frugal Family. It’s a great book and teaches a variety of ways to get healthy food into your family, without a ton of prep work. 


Credit for this photo goes to Marco Verch

Credit for this photo goes to Marco Verch


Ingredients 

2 cups dried chickpeas, sprouted or soaked in water for 24 to 48 hours

1 large red onion, roughly chopped

1 small bunch of parsley

1 small bunch cilantro

2 tsp sea salt

1 tsp red pepper flakes

8 cloves garlic

2 ½ tsp ground cumin 

2 tsp baking powder

1 to 2 tbsp garbanzo bean flour

Lard, ghee or coconut oil for frying in

Wraps or bread 

A tangy sauce for topping 


Instructions

Start by draining and rinse the sprouted or soaked chickpeas and place them into a food processor. Add the onion, parsley, cilantro, salt, red pepper flakes, garlic and cumin. Pulse until everything is roughly chopped and well combined. Be SURE to stop before it begins to puree. It should be coarse and similar to bread crumbs in both size and texture. 


Scrape the mixture into a large bowl and sprinkle with the baking powder. Mix well. Test the consistency of the mixture by forming it into a walnut sized ball in your hands. It should be tacky and moist but should no longer stick to your hands. Add 1 to 2 tablespoons of flour, at the most,  if it is still too wet. Mix well to incorporate the flour, keeping in mind that the resting period will help the mixture absorb more moisture.


Cover your bowl with a plate or plastic wrap and refrigerate for at least 2 to 3 hours before frying. 


To fry: Place a 10-inch cast-iron skillet over medium heat and add enough of your frying medium to a depth of 1 inch in the pan.. Allow the medium to heat to roughly 375* F. 

You can test this by: 

Placing a tiny piece of the falafel mixture in the skillet and making sure it sizzles.

Flicking water on the surface of the oil to see if it sizzles. 

Using a thermometer. 


Scoop up about 2 tablespoons of the falafel mixture and loosely form an oval shape. Be careful not to compact the dough. You want to give it room to spread and form that signature fluffy interior. Carefully place  the mixture in the oil and repeat. (We suggest using a spatula. Your quirky blogger got splattered with oil at this stage after not being careful enough.)  Fill the pan but leave about ½ inches between the falafel. 


Continue to fry in batches until you have as many freshly fried falafel as you desire. Any remaining mixture can be refrigerated for up to 4 days or frozen. If you opt to freeze the mixture, make sure to squeeze all of the air out of the bag. Alternately, you can turn them into individual servings by making them into patties and wrapping them in wax paper before you place them into the storage bag. 


Serve the falafel in a wrap, a sandwich or atop a salad with sauce as  you please. 


Notes 

On Soaking 

When it comes to soaking, this is the fast and dirty method. This is the “shoot, I didn’t think about a meal for tomorrow when I was out shopping, what do I have on hand.” Easy, throw your chickpeas into a pot with enough water to cover them, and then another inch on top of that.  Let them soak overnight, rinse them once and then you’re good to go! (If you’ve really planned ahead, you can soak them for 48 hours, rinse after the first 24 hours and then once more before you use them.)


On Sprouting

When it comes to sprouting, there’s a couple of different reasons to do this. 

-It  adds more flavor if you let them sprout for a day or so.

- It goes from being a creamy texture to a more of a  vegetable flavor. 

-Its proven to be easier on your stomach and digestion. 


For this  what you’ll need is 2 cups of your grain or bean of choice (in the case of falafel, that’s going to be chickpeas)  

And water. Lots of water. 


Place your grains into a  ½  gallon sized jar or a bowl of equal size. Add 6 cups of water and let it soak for 12 hours. 


After 12 hours, drain and rinse the grains or beans. If you’re using a jar, put a fine mesh over your lid and rest your jar in a bowl at a 45* angle and allow the liquid to drain into the bowl. 


And that’s that!  We hope that you like this recipe as much as we did! If you are interested in more meals like this one, let us know over on our Facebook page. We love to hear from you and what you’re interested in. 


If you’re looking to continue working in the kitchen, and maybe using up some leftover bananas you have around, check out this post for banana bread


And last but not least, if any of your appliances are acting strangely, or are flat out broken, please reach out and schedule an appointment.  We want to help you and keep your home running smoothly. 

Easter Feasts From Around The Globe

As promised, this weekend we are checking out Easter feats from around the World! Even if Easter isn’t something you celebrate, join us anyway! After all, everyone loves food! We’ll be travelling all over the world for this post so grab you notebook and buckle in. 

To make things easier on your poor pilot this weekend, we’re going alphabetically down our list.

Feel free to click any of the sections below to skip around.

Argentina

Bermuda

Brazil

Bulgaria

Colombia

Czech Republic

Denmark

England

Ecuador

France

Germany

Greece

Italy

Mexico

Netherlands

Norway

Poland

South Africa

Spain

Sweden


Argentina

 First up is a quick stop in Argentina. 

In the traditionally Roman Catholic country, even the well known empanadas are given a makeover for Lent. Called empanadas de vigilia the usual fillings of chicken or meat are swapped out for tuna, white fish, or a  mix of blue cheese and walnut. From Argentina with Love has shared a delicious recipe for these that we had to try out! 


After the period of Lent has ended though , everyone wants to celebrate! This means gathering around with all of your family and friends invited for a barbecue, which the Argentinas call an asado. There’s lamb, chicken, beef, chorizo and all the malbec you could want. There’s also homemade chocolate eggs, although that tradition is sadly waning with time.  

Argentina- Empanadas with Roquefort.jpg
 
Bermuda- cod fish cakes.png

Bermuda

When you go to Bermuda for Easter, there are two big traditions, when it comes sto food at least. Cod fishcakes and hot cross buns.  It’s customary to have the fishcakes before you go off to church on Easter Sunday. The former is thought to have arisen from an old superstition that your home would burn down if you didn’t eat one. (If you are from Bermuda, please let us know more about this one in the comments? We are curious!)  The Bermudian has an amazing recipe for cod fishcakes, as well as other Good Friday traditions over on their blog.


Brazil 

While this recipe initially came from Portugal, it has become an Easter tradition in Brazil. Called Bacalhau, or salt cod, it is to Brazilians and Good Friday what ham is to Americans on Easter Sunday.  While the salted cod is eaten year round, at Easter it is paired with wine, which is special for a country that usually opts for beer. Check out this recipe over at Oliva’s Cuisine to try it for yourself. 

Brazil - bacalhau-a-gomes-de-sa.jpg
 

Bulgaria 

One of the most popular traditions of Easter week in Bulgaria is the making and eating of the braided loaf kozunak. This sweet loaf is made with the juice and zest of a lemon and rum soaked raisins. On Easter Sunday the kozunak takes center stage along with a feast of all the other foods prohibited during Lent. For an absolutely amazing recipe and step by step photos check out the link for Viktoria’s Table.


Colombia 


Easter both is and isn’t a large holiday in Colombia. On one hand, the entire country shuts down for Maundy Thursday and Good Friday.  On the other hand, events, feasts and the exchange of sweets aren’t much of a thing there. There is one traditional meal though and that is  potaje de la vigilia . This recipe is closer to its roots in Castille, but the recipe is still similar. The Happy Foodie has a lovely recipe for it.

 
Czech - Beranek.jpg
 

Czech Republic

While this baked lamb is the cutest recipe on here, the story behind it comes from ingenuity, making it even more special. Many times it wouldn’t be possible in the Czech Republic to get hold of lamb for the Easter meal, and so families would bake this  sweet bread in its place.

Go see the recipe for it over at Gourmetpedia.


Denmark

If you get the chance to go to a Danish Easter feast, you’ll find roast meats and herring paired with sliced cheeses and meats.  Most people pair schnaps and beer with the meal, although the breweries make a special Easter beer that is stronger than normal. You’ll also find these delicious tarteletters which are pastry shells filled with chicken and asparagus. We found the recipe for them over at Gourmand Trotter.

Denmark -Tartelette Danish chicken and asparagus tarts
 
England - Simnel cake with 11 marzipan balls

England 

Next up, England! Here the traditional feast is similar to others we’ve encountered, centering around roasted lamb at the center. The dessert is what we’re here for though, which is the delicious simmel cake. It’s a fruit cake that is covered over with a layer of marzipan and 11 marzipan balls to represent the 11 faithful apostles of Jesus.

Our recipe for this one comes right from the BBC where you can learn even more of the history behind this tasty cake.


Ecuador 

If we hop over to Ecuador, we’ll find another soup for our feast called Fanesca. Made from cod, beans and squash the soup originally came from Spain. The Ecuadorians have made it their own though by mixing in local ingredients  like hot peppers and Andean grains not to be found in the original recipes.

You can find this delicious looking recipe over at Laylita.

Ecuador - Fanesca.jpg
 

France 

Heading back to Europe we find France where instead of the Easter Bunny they have the blessed bells. Church bells ring every day of the year in France, except for the three days of Easter. During these three days, as legend holds, they are making a trip to Rome to be blessed. On Easter Sunday the bells make their return and tour the country leaving chocolate eggs and other treats in gardens all over.  A traditional luncheon meal is Pate de Paques Berrichon, which while delicious is also equally simple to make. A dough wrapped around meat and eggs then baked, and you have a delicious lunch and handy lunch. 


Finland 

If you go up to Finland you can try out their bread pudding that’s only made for Easter, Mämmi. It’s a soft and chilled rye flour ‘cake’ that’s made with orange zest and dark molasses then served with milk or cream.  Check out the Finnish Food Girl to learn how to make this delicious treat.


Finland - mammi.jpg
 
Germany - Seven herb soup.jpg

Germany  

Although this is technically eaten on Gründonnerstag or ‘green Thursday’ before Easter Sunday, we found this recipe so interesting we had to share.  Called Seven Herb Soup, this is just one of many entirely green dishes that Germans consume on this day. Go over to Curious Cuisiniere to learn how to make your own. 


Greece

 If you’re going to Greece, you have to start your Easter feast with Magiritsa, a special soup made from lamb, dill, lettuce and onion, served in an egg and lemon juice broth. My Greek Dish has an amazing recipe on their blog. 

Greece - Magiritsa stew of  lamb
 
Italy - torta-pasqualina-easter-pie-egg.jpg

Italy  

Heading over to Italy, if seeing all of the bread arches doesn’t make you hungry, the smell of this Torta Pasqualina will. Filled with eggs, herbs and cheese, this is a dish that is sure to fill you up.  Check out how to make it over at Eataly. You can also try out the famous dove-shaped cake called colomba pasquale.


Mexico

If you make it to Mexico on Good Friday, be prepared to try out their capirotada. A sweet bread pudding that’s covered in a sugary syrup with fruits, berries, nuts and cheese, this isn’t something to be missed. Make sure that you have plenty of room for this delicious treat as you won’t want to eat anything else after you’ve had it. You can find a recipe for it over at Muy Bueno Cookbook. 

Mexico -capirotada.jpg
 
Netherlands - Paasstol.jpg
 

Netherlands

In the cold and dark of the Netherlands, family and food are what bring people together and light to our hearts before spring (finally) comes.  This means many enriched breads and pastries including paasstol. A tasty, fruity loaf that’s filled with an almond paste center it’s not to be missed. They also serve braided loaves, pumpernickel, egg cakes and jodenkoeken or buttery shortbread. Alongside these are pats of butter mouled into animal shapes, cheeses and smoked fish.  Over at In My Red Kitchen you can find a fantastic recipe for paasstol.


Norway  

Going to Norway now, a traditional Easter table is laid out with lamb, eggs, cakes, yeasted breads and more oranges than you know what to do with. The tradition of eating oranges, according to some, dates back to the when merchant ships would have brought the first of the harvest from Southern Europe during Easter. Over at Thanks For The Food, they have a traditional Easter orange cake that you can check out.

Norway - Orange cake.jpg
 

Poland 

On to Poland, to try out their White Sausage or Biala Kielbasa. This traditional meal is surrounded on the table  by rye soup, cakes with poppy seeds or cottage cheese and a very special centerpiece. A loaf of butter that has been shaped into a lamb with peppercorns for the eyes and a red bow around its neck. If you want to try out making your own Biala Kielbasa, head over to Polish Your Kitchen for their recipe.


South Africa 

Going down to South Africa, we find a very interesting take on ‘no meat for Lent.’  Here they enjoy pickled fish. Their version here is lightly curried served with onions and fresh bread.  

While pickled fish is enjoyed the world over, the South African method is unique to them. It starts with frying portions of fish that have been seasoned with salt and pepper. Separately they’ll cook a mix of onions,  and spices before adding vinegar and sugar. This mixture is then poured over the cooked fish where it is allowed to refrigerate for at least 24 hours. 

After this time has passed the fish  has achieved a delicious, sweet and tangy flavor. My Anos Kitchen has a recipe so that you can try this amazing dish for yourself.

South Africa- Pickled Fish.jpg
 
Spain -Three different Torrijas covered in milk chocolate, powdered sugar, and honey
 

Spain

Our second to last stop is Spain, to test out their Spanish Toast or  torrijas. Similar to French toast, it’s made from thick slices of bread that are soaked in milk and a beaten egg, then fried in olive oil. It’s served cool and paired with honey, powdered sugar or coated in  milk chocolate. Spanish Abores shared a recipe that she had found after her time teaching in Spain and mentions adding cardamom to the mix. Our own encounters with cardamom lead us to agree, this spice would really make your Easter dish sing. 


Sweden 

The final stop on our journey, Sweden! While many people talk about pickled herring or salmon at Easter, there is another very popular dish that we found on the country’s own website. Called Janssons Frestelse or Jansson’s Temptation, this is a creamy casserole made with potatoes, onions and anchovies. It’s usually washed down with a glass or two of aquavit. 

Sweden - Janssons Temptation a potato casserole
 

Thank you very much for checking out this journey with us! We hope that you learned something new or found a recipe to try. 

If you did, let us know over on our Facebook page? And if we missed anything, tell us that too! 

Or, if one of your appliances is acting strange, or outright broken, please give us a call. We want to help you and yours. Reach out to us by phone ((NUMBER HERE)), or you can schedule an appointment over here. ((INSERT LINK)) 

Thank you again for joining us and we hope to see you in two weeks time,  when we’ll be checking out a recipe for Soaked or Sprouted Chickpea Falafel. We look forward to seeing you then!

All  credit for photos belongs to the amazing bloggers who created our recipes this week. 

Irish Lamb and Sweet Potato Shepherd's Pie

Now that you’re through gorging yourself on all of the fake Irish food (or maybe you aren’t - we’re not going to judge if there’s still some corned beef in your freezer), we wanted to share something more authentic. We hunted high and low and found one that we enjoyed and wanted to share.

Lamb and Sweet Potato Shepherd’s Pies.

We started with a recipe from Food and Wine, and modified it as needed for our tastes. Feel free to tinker with it for your family as well. This is a meal to pull out when you want to impress people - or when you just feel like having something out of the ordinary. 

Fair warning: if you do not like lamb, please do not attempt this recipe at home. We would hate to disappoint.  

As belated as this might be, here’s a meal from our table to yours. 


© Dana Gallagher

© Dana Gallagher


Time from Prep to serve - 2 hours and 30 minutes. 

Time you’re working -  40 minutes 

Serves Four 

Ingredients

  • 3 tablespoons extra-virgin olive oil

  •  2 pounds boneless lamb shoulder, cut into 1/2-inch pieces

  •  Salt and freshly ground pepper

  •  5 garlic cloves, minced

  •  1 large onion, finely chopped

  •  2 carrots, cut into 1/4-inch dice

  •  1 1/4 teaspoons ground cumin

  •  1 1/4 teaspoons hot paprika

  •  1/2 teaspoon ground allspice

  •  1/4 teaspoon turmeric

  •  1 1/2 tablespoons all-purpose flour

  •  3 1/2 cups water

  •  5 cups baby spinach 

  •  2 pounds sweet potatoes, baked and peeled

  •  1 1/2 ounces soft goat cheese

  •  1/2 cup milk

  •  1 tablespoon unsalted butter

How to Make It

Note: Before you cube your lamb, take the time to whack it some. This breaks down any connective tissues and helps to bring out the flavor later on. 

Step 1

Gather your necessary supplies. For this recipe, we would suggest an enameled cast iron casserole or a good Dutch oven. You’ll also need four small ceramic baking dishes, about the right size for a single serving each.

Step 2    

Over medium heat, warm 2 tablespoons of olive oil till shimmering. Raise the temperature to medium high. Toss the lamb with salt and pepper. Working in batches, cook until the lamb is browned on all sides. Transfer the lamb to a shallow bowl as you finish each batch. 

Step 3    

Add your remaining tablespoon of olive oil to a casserole dish along with the minced garlic and onion. Turn the heat down to medium and cook till the onion is soft and translucent. Add the carrots and other spices, stirring constantly, until fragrant. This should be roughly two minutes. 

Step 4 

Add the flour to the casserole, and allow it to become lightly golden before you add the lamb and water (congratulations, you’ve just made a roux!). Bring to a boil, stirring occasionally. 

Step 5

Reduce the heat to low, and simmer uncovered, stirring occasionally until sauce has thickened and the lamb is tender. This step will take roughly an hour and a half. Grab a book or an episode on Netflix while you wait! 

Step 6

Bring the heat back up to medium-high and stir in your spinach until it wilts. 

Step 7

Dish the stew into your 4 shallow ceramic baking dishes. Each one should hold roughly 2 ½ to 3 cups. 

Step 8

Preheat the oven to 425*. In a medium saucepan, mash the sweet potatoes over high heat until warmed through. Mix in the goat cheese, milk and butter, then season with salt and pepper to taste.     

Step 9

Spread the mashed sweet potatoes over the lamb stew and bake for 10 minutes, or until the edges are bubbling and the entire thing is hot.

Step 10 

Preheat the broiler. Broil the dishes 4 inches from the heat for 1 minute or until golden. Serve at once.

What did you get up to for Saint Patrick’s Day? Did you do anything? Do you have any recipes that you’d be willing to share? Let us know over on our Facebook, we’d love to talk with you! 


Remember, if your oven (or any of your other major appliances) starts giving you trouble, schedule an appointment with one of our techs today. We’re always here to help, and we’d hate to hear a cranky appliance has stalled your culinary journey.


Coming to a computer near you for the next major holiday: Easter feasts from around the globe! If you have one that you’d like to suggest or share, let us know either in the comments or over on our Facebook! 

Celebrating Pi Day with Rhubarb Maple Meringue Pie

Today we celebrate Pi Day! No, not Pie day, that is January 23rd and we were rather sad when we saw that we had missed that one. 


pi-1453836_1920.jpg

“First and foremost, Pi Day is a celebration of the mathematical constant, π (pi), or 3.14159265359.”  You can see that the first three numbers are the date that we celebrate it on, if you’re writing the date 3/14.  


I know, I know, it’s math, and you are here for food. But! Don’t leave yet!


 Thankfully many people have made the association between Pi and pies. If Pi is used to work out the diameter of a circle, it naturally lends itself to pies of all sorts. Not just the sweet variety, but pizza pies too! So many delicious circular foods to explore and 3.14 makes it all possible. 


Pi Day was first celebrated on a large scale in 1988. Larry Shaw, a physicist who worked at the San Francisco Exploratorium at the time organized the event, bringing together both the public and museum staff. The assembled marched around the circular spaces of the museum and then tucked into a bunch of pies, according to a piece by Newsweek. 


We’re joining in on the celebration with a recipe from The All American Desserts Book by Nancy Baggett for a delicious Maple Rhubarbe Meringue Pie. This sweet and tart mix makes a delicious combination no matter when you choose to share it.The mild, light meringue topping adds a slight sweetness, which helps balance the tang of the rhubarb and the richness of the pastry. And really, who’s to say that pi cannot be celebrated every time you bake a pie? 

Bunches of rhubbarb and  purple artichokes at a market


Single crust All-Purpose Pie Pastry Dough

All purpose flour for dusting dough

Filling


4 ½ cups ½ to ¾ inch long pieces of rhubarb ( which is roughly 1 ½ to 1 ¾ pounds with the stalks trimmed) 

¾ cup granulated sugar (divided) 

1 ½ teaspoons fresh lime or lemon juice

¼ -⅓ cup orange juice if needed *

3 ½ tablespoons cornstarch

Pinch of salt

⅔ cup maple syrup, preferably light amber 

2 large egg yolks 


Meringue


4 large egg whites, completely free of yolk and at room temperature *

Generous ¼ teaspoon cream of tartar

Pinch of salt

¾ cup plus 2 tablespoons powdered sugar

½ teaspoon vanilla extract 


Rolling Out The Pastry

Lightly grease a regular 9-inch pie plate or coat with nonstick spray. 

If the dough is cold and stiff, let it warm up until slightly pliable but still cool to the touch. Generously dust it on both sides with flour. 

Roll out the dough between large sheets of baking parchment into a 13  inch round. Occasionally check the underside of the dough during rolling and smooth out any wrinkles. Gently peel off the top sheet of paper, then pat it back into place. 

Flip the dough: peel off the bottom sheet. 

Center the round, dough side down, in the pie plate. 

Gently peel off the remaining paper.

 Smooth the dough into the plate and patch any tears, if necessary.

 Using kitchen shears of a paring knife, trim the overhang to ¾ inch. 

Fold the overhang under to form an edge that rests on the lip of the plate.

 Finish by fluting with your fingers or pressing on the edge with the tines of fork. 

Prick the pastry all over with a fork. 

Loosely cover the pastry and place in the freezer for 15 minutes or  in the refrigerator for at least 30 minutes and up to several hours

Baking the Pastry

Position a rack in the lower third of the oven and preheat to 400 degrees F.

 Insert a large square of aluminum foil coated with the nonstick spray (or use non stick foil) oiled side down into the chilled shell, smoothing the foil over the bottom and sides and folding it out over the rim to cover the pastry. 

Fill the foil with dried beans, spreading them so they extend up the plate sides. 

Set the pie shell on a rimmed baking sheet. 

Bake for 25 minutes. 

Carefully remove the foil and beans from the shell. 

Continue baking for 5-10 minutes longer, or until the shell is nicely browned all over.

 If the edges brown too rapidly, cover with strips of foil (or a pie shield). 

Transfer the pie shell to a wire rack to cool. 

The pie shell will keep, covered at room temperature for up to 24 hours. 

Mixing Up the Filling

In a large nonreactive saucepan, thoroughly stir together the rhubarb, ½ cup of the granulated sugar, and the lime juice. 

Let stand, stirring once or twice for about ten minutes or until the sugar is mostly dissolved and the mixture looks wet. 

Bring to a boil over medium high heat, stirring. 

Cook, stirring until the rhubarb pieces exude some juice and just begin to soften but still hold their shape, about four minutes. 

Remove from the heat and let cool for about ten minutes. 

Put the rhubarb in a sieve set over a large glass measure. 

Press down hard on the rhubarb to extract as much juice as possible. 

You should have ½ to ¾ cup juice, necessary, and enough orange juice to yield ¾ cup.

Reposition the rack in the middle of the oven and preheat to 350 degrees F. 

Rinse and dry the saucepan.

 Put the remaining ¼ cup granulated sugar, the cornstarch and salt in the pan and whisk until well combined. 

Add the rhubarb juice, whisking vigorously until the mixture is completely smooth. 

Bring to boil over medium- high heat, whisking. 

Lower the heat slightly and cook, whisking constantly until very thick, smooth and translucent, about 1 minute. 

Remove from the heat. 

Vigorously whisk in the maple syrup until the mixture is completely smooth. 

In a small deep bowl, whisk the egg yolks until lightly blended. 

Pouring slowly and whisking constantly, add about ¼ of the maple mixture to the yolks. 

Add the yolk mixture to the saucepan, whisking. 

Cook over medium high heat, stirring constantly and frequently  scraping the pan bottom with a wooden spoon, until the mixture boils for a full 1 ½ minutes. 

Do not undercook, or the filling may thin out later.

 Stir the reserved rhubarb into the maple mixture. 

Cook, stirring just until the rhubarb is piping hot: the filling will be fairly thick. 

Cover and set aside. 


Whipping Up The Meringue

In a completely grease free and dry large bowl, combine the egg whites, cream of tartar and salt. 

Using a mixer on low speed with a whisk shaped beater if available, beat the mixture until frothy. Raise the speed to medium and continue beating until the mixture is smooth fluffy and opaque, but still too soft to hold peaks.

 (Check by stopping and lifting the beater)

 Immediately add the powdered sugar 2 tablespoons at a time, beating for about 20 seconds after each addition. 

Add the vanilla. 

Raise the speed to medium high and beat for 2 minutes, scraping down the sides of the bowl as needed. 

Raise the speed to high and beat for about 1 minute longer or until the meringue is fluffy and stands in firm but not dry peaks. 

Assembling the Pie

Turn out the hot filling into the pre-baked pastry shell. 

Set the pie on a rimmed baking sheet. 

Spread half the meringue over the filling, making sure the meringue touches the pastry all the way around.

Top with the remaining meringue, mounding it in the center. 

Attractively swirl the meringue with a table knife or the back of a large spoon. 


Time to Bake! 


Bake for 12 to 17 minutes or until the meringue is evenly tinged  with brown all over. 

For even browning, rotate the pie from front to back after six minutes. 

Transfer the pie to a wire rack.

 Let cool for at least two hours and preferably three or four hours before chilling or covering to minimize any beading of the meringue. 

The pie will keep, covered, at room temperature for up to twelve hours (some beading may occur after the first few hours) or refrigerated for up to 2 days.  The crust will soften with longer storage. Let come to room temperature before serving. 

Additional Notes

For the orange juice, make sure that you have it on hand, but don’t measure it out until you’ve seen if you need it or not.  


For separating egg yolks and whites, check out this video here! It’s really easy this way, and you’re less likely to end up with a punctured egg yolk than if you did it using the shells. (Although if you can do it that way, go you!) 


Rhubarb has a lot of juice that can make the bottom of the pie soggy and gross. The rhubarb is briefly boiled ahead of time with sugar to release those juice. That is then drained off, reduced down and cooked with the rest of the filling. 


If you don’t want to fuss with making pastry dough, or prebaking one, you can always pick up a premade one at the supermarket. 


So that’s our contribution to Pi Day! Let us know what some of your favorite pies are over on our Facebook page! 


If you notice during this process (or before or after haha) that there are issues with your oven, reach out! We can send one of our technicians to come out to you based on your schedule and help get your oven back in tip top shape!