Quick and Cozy: Beef and Veggies with a Sesame Twist

A quick and satisfying meal that’s perfect for busy weeknights.

After a long day, nothing beats a dish that feels like a warm hug. You have the scent of garlic in the air, mingling with sesame oil, rich scents hinting at the delicious dinner to come. Tender beef sizzling next to a variety of vegetables, each adding their own balance to the savory flavor. Then you top it with a dash of soy sauce, a sprinkle of sesame and nest it on a bed of rice. And the best part? It comes together in just a few steps, so you can unwind after a long day at work. Ready to make tonight’s meal something truly special? Let’s get started.


Tools:

Fry pan with lid

Knife

Cutting board

Measuring spoons 

Tongs

Ingredients 

1 pound beef (your choice of cut)

1 yellow onion

1 bunch green onions

3 mini sweet peppers (or 1 sweet bell pepper)

2 cloves of garlic, minced

2 tablespoons white sesame seeds

2 tablespoons toasted sesame oil

1 tablespoon soy sauce

6 ounces baby spinach 

Salt and pepper to taste

As always, remember to wash your produce!

Since we're working with both fresh vegetables and raw meat, it's a good rule of thumb to work with the vegetables first to prevent cross contamination. Everything will be cooked in this dish, but it's better to get into the habit and stay in it, rather than realize later you've goofed and have to stop to wash everything before you can continue chopping.

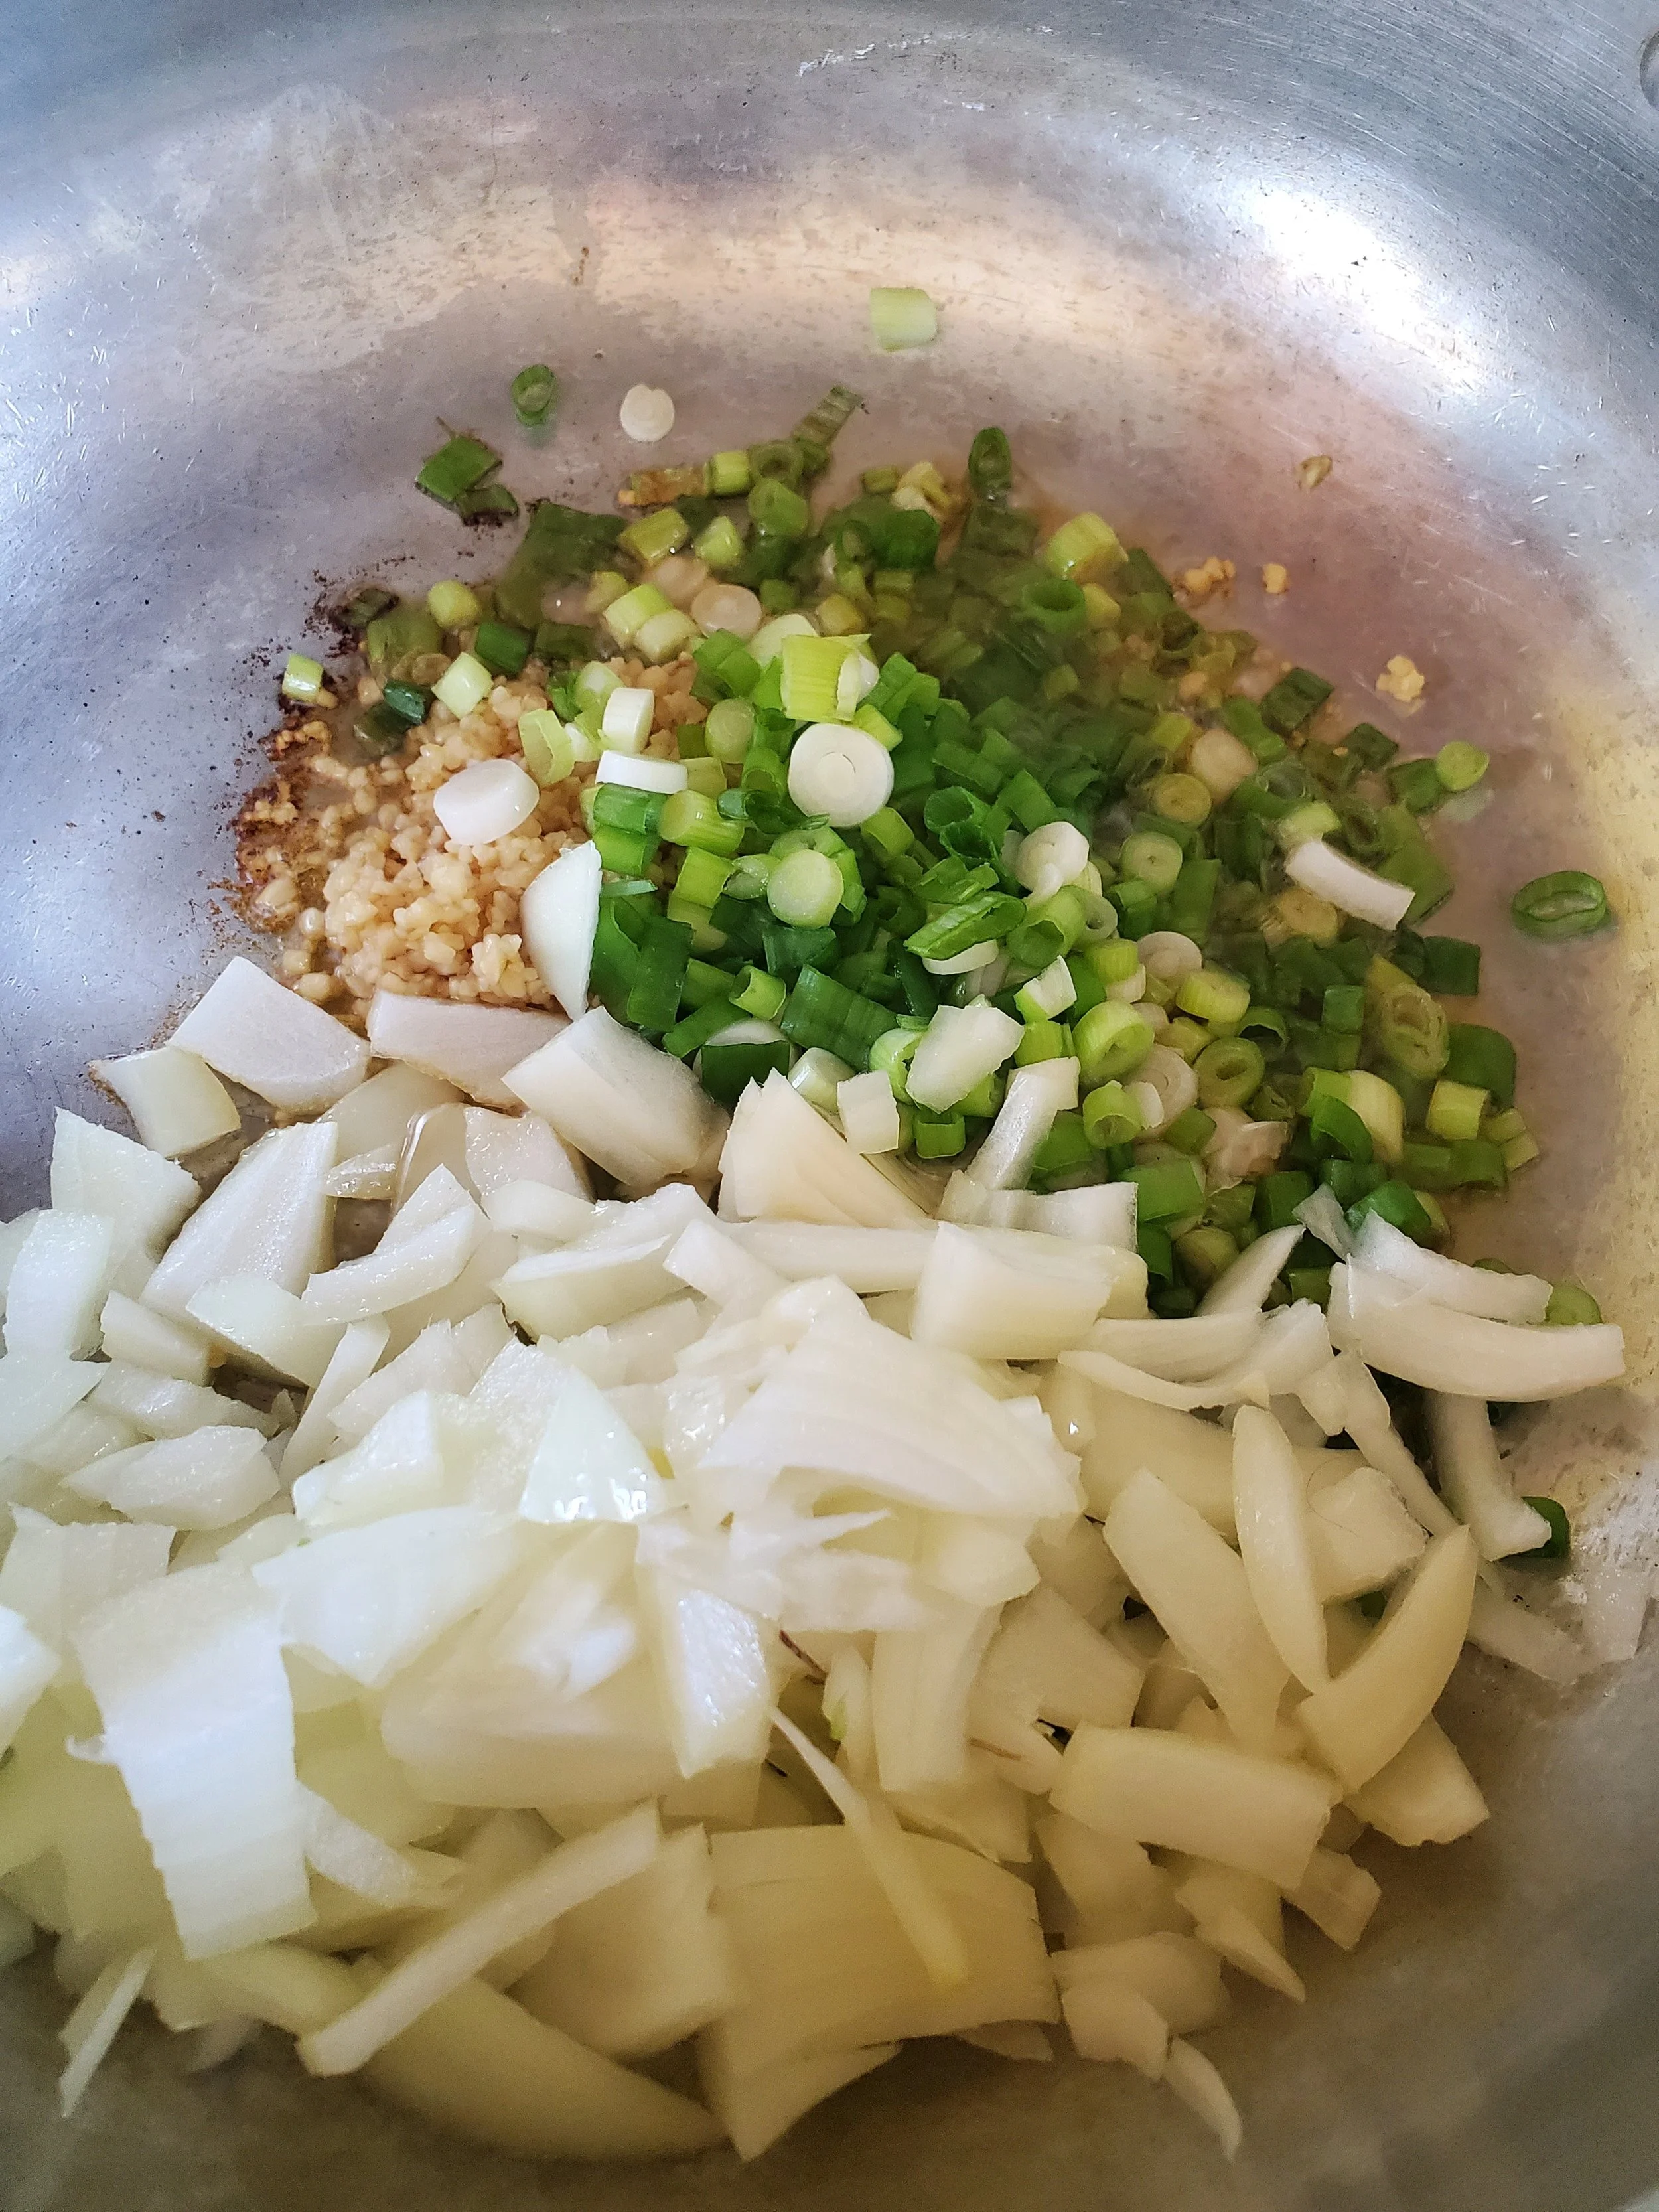
Add your sesame oil to the pan and set the heat to medium-high. Allow it to heat up while you mince your garlic. You could also just use the jarred stuff, whatever you like best. Add it to the pan once the oil has had a chance to get hot.

Dice up your yellow onion and add it in, then slice your bunch of green onions into thin rounds (omit the roots and any sad looking, wilty ends of the shoots) and add that to the pan. Give everything a stir to get a little oil on it all, and let it cook while you move on to the next item.

Remove stems and seeds from your sweet peppers. Slice them however you like - we chose minis and cut them into rounds - and add them to the pan. 

Now that the vegetables are finished, take your chosen cut of beef to the cutting board.  Trim any excess fat and slice the meat into strips, or cut it into small chunks if you'd rather. The only goal here is small pieces with minimal fat that will cook through quickly and evenly.

Add the beef to the pan, measure in your sesame seeds, stir to evenly distribute everything, and put the lid on the pan.

Allow it to cook undisturbed for at least two minutes, at which point you can remove the lid, add your soy sauce, and check the beef for doneness. Depending on the size of the pieces, you may need more direct cooking time.

While the beef is still a little on the rare side, add your spinach, put the lid back on the pan, and remove it from the heat. We want to allow the trapped heat to wilt the spinach and finish cooking the beef. This should only take between two and four minutes.

Add a little salt and pepper, maybe even some more soy sauce, depending on your family's preferences, and serve over rice.


With dinner served and the scent of sesame still lingering in the air, it’s easy to appreciate the simple pleasures of a homemade meal. This dish,  is proof that it doesn’t take much effort to make an amazing Meal. With its tender beef and well-seasoned veggies, its also an easy way to get lots of vegetables into your diet, without having to stress. Enjoying it with family, or as a quiet night to yourself, this recipe makes a great addition to the rotation, that you can enjoy any time of year.. So, next time you’re looking for a comforting, flavorful meal, remember this one—and let it bring a little warmth to your evening.


And just as this meal brings comfort and ease to your evening, our team at Appliance Rescue Service is here to ensure your home runs just as smoothly. From routine maintenance to those unexpected repairs, we’ve got you covered so you can focus on what truly matters—like whipping up delicious dinners for your loved ones. Next time you need anything, remember to give us a call. We’re here to help keep your kitchen and your home in perfect working order.


Website
Call ((214) 599-0055)

Additional Reading

Comfort Food: Smoked Sausage and Egg Noodles
Sensational Apple Pork

Berry Bliss: A Delectable Mixed-Berry Clafouti Recipe


Pre-Vacation Appliance Prep: Protect Your Home While You’re Away

Avoid Returning to a Mess: Easy Pre-Travel Appliance Prep

The end of summer is almost here, but there’s still plenty of time for a quick vacation if you’re dying to get out of the heat. While you’re away enjoying cooler weather (or maybe an island, we don’t know what you prefer) your house still is here. Unless we’re going away for months, we tend to leave our homes connected to water and electricity, gas and internet.  All of this is to say that while you’re gone, your home continues on as it normally does. What about your appliances though? We’ve all heard horror stories about people going away on vacation only to come back to a fridge full of mold and slime, or a flooded laundry room. How do you protect against those sorts of things? 


The answer is that like may things, an ounce of prevention is worth a pound of cure. We’ll walk you through everything you’ll need to check on or adjust in  the week before you head on vacation to ensure you come back to a house as perfect as you left it. 


Simple Steps To Start You Off


Unplug Small Appliances - 

Small appliances like your toaster oven, your instant pot, your coffee maker, they all eat up energy whether they're in use or not. If they're there using them every day this makes sense to keep them plugged in. But while you're gone why not save a few bucks on your electric bill? 

Equally important although rare, these can cause fire if left unattended.


Turn Off Your Water Supply 

courtesy of JuraKovr

This solves several different problems at once, although we're not saying that you should go to your water main and turn that off. This can be a hassle, and not something you’ll want to deal with right after returning from vacation. Instead turn off the water supply at the different appliances especially your dishwasher and washing machine. If either were to get a cracked line while you're gone you can come home to water damage or flooding depending on how long you're gone for.


Don’t Turn Off Your AC 

Courtesy of overjupiter

Unlike with your appliances, you don’t want to turn off your ac. The reason is mold and mildew, and heat damage around the home. With your home heating and cooling in accordance to the temperatures, it can easily get warm enough to allow mold and mildew to begin growing while you’re gone. Additionally, anything around the house that is temperature sensitive can be damaged. A few quick examples include medicines, cleaning products, and your spices. Instead, set it to around 80* while you’re gone to use less energy, but not risk anything becoming damaged while you’re gone. 


Time to Tackle Your Major Appliances 


Run The Dishwasher

Running the dishwasher before you go kills two birds with one stone. One, you’re not going to come back to a sink of moldy or sentient dishes, and two, if you leave the dishwasher door open after running and emptying it, the dishwasher itself won’t smell musty. You also want to make sure that it is completely drained before you leave. Unwanted guests love stagnant water, and yes we're talking about bugs and mosquitoes.


Washing Machine

Many travel lists will tell you to do laundry before you leave home. We feel that this is an unnecessary step if you don't need to already do laundry. However whether you do laundry or not you do need to leave the washing machine door open. Just like with your dishwasher you don't want it to develop a musty smell while you're gone. 

Courtesy of Courtesy of planetcar

Additionally, you want to make sure to inspect all hoses for any blisters, bulges, cracks, or leaks. Taking the time to do this now means you can spot problems before they grow into something much larger. 


Dryer 

Take a minute to clean out the trap and you’ll be good to do as much laundry as is needed on your return. Since it won't be running while you're gone, there's little to worry about with this one.


Oven and Stove

Whether gas or electric, these are the easiest to handle prior to going on vacation. 

You don’t need to unplug it, or turn off the gas, just make sure that all burners are off before you leave. Other than that, the only rthing you’ll need to worry about is cleaning up any residue or burnt food before you leave, to avoid attracting any unwanted pests. 


Water Heater

Although not an appliance, we do recommend turning down or even powering off, your water heater, as one more way to cut down on bills while you’re away. 


Finally, Check Smoke Detectors And Carbon Monoxide Alarms 

Ensure that all smoke detectors and carbon monoxide alarms are functioning correctly before you leave. Replace batteries if necessary to guarantee your home’s safety in your absence. 


Courtesy of Rudy and Peter Skitterians

Now that you’ve taken all the right steps to protect your home while you’re soaking up the sun or savoring cooler breezes, there’s just one more thing to check off your list. Before you head out, make sure your appliances are in top shape with a quick inspection from our expert technicians at Appliance Rescue Service. Whether it's checking for potential issues or giving your appliances a little extra care, our team is here to help ensure everything runs smoothly while you’re away.

Don’t leave it to chance—schedule an appointment today by giving us a call or visiting our website. That way, you can truly relax on your vacation, knowing your home is in good hands. Safe travels, and we’ll see you when you get back!

Website
Call ((214) 599-0055) 

Additional Reading
Appliance Deep Dive Round Up 

Why Is My Refrigerator Making Weird Noises!?

Taking the Pain Out Of Melted Plastic


Top 9 Appliance Issues to Watch Out for Before Buying a Home

 Avoiding Appliance Surprises: Key Issues to Watch for When Buying a Home

Are you dreaming of homeownership? It’s easy to get swept up in the excitement of picking out paint colors and deciding which room will hold your favorite furniture. But before getting too comfortable, it’s important to face a hard truth: those shiny appliances may not be as reliable as they look.

Every home comes with its quirks, and the appliances are no exception. Knowing what to expect can make all the difference in your home-buying experience, and that’s where we come in. With years of experience helping our clients repair both new and new-to-them appliances, we’ve heard our fair share of horror stories. Here’s what you need to know to avoid a few of your own.


One:

Do not exhaust your savings just to get into the house. You'll end up borrowing either money or trouble, and you'll probably borrow both if you panic about it.


Something will always come up. Even if you're buying the well-maintained, paid-off family home from your great granddaddy for the princely sum of a single dollar, something will come up. Sometimes it's paperwork, sometimes it's appliances, sometimes it's an outright disaster.


Possible nightmares:

The assessor will come back with a much higher valuation and your closing costs will skyrocket because you have to front a portion of property taxes. The homeowner's insurance will decline to issue you a policy because you don't have a handrail on your two steps to the front door. The line to the washer will disconnect or rupture spontaneously, and because you haven't moved in yet, the laundry room will flood before anyone finds it. A mouse will get in and eat something critical, frying the brand built-in fridge even though there have never been mice.


It's always something. Probably something ridiculous, at that.


And then, once you've handled that, with homeownership comes... more bills. Expect the bills. Don't drain your savings.


Two:

Every home is different, but all of them have some kind of headache.


As everyone knows, the first home is usually a case of "what can I afford?" rather than "what do I want?" Subsequent homes land somewhere in between those two, usually one step closer to the "wants" side with each purchase.


From our experience, the first home we bought was an absolute dumpster fire. Former rental, pest infestation, broken appliances, damaged floor, rotting subfloor, plumbing problems, leaking roof, busted central air, holes in drywall and interior doors, yard in disarray and full of junk... If you can dream up a problem, we probably faced it with the first house. And we faced it on fumes - the bank account was dry. It took us years, and every spare penny, to make it livable. That first piece of advice we just imparted? Learned that the hard way.


The second home was a family property, a beautiful recent renovation with new-old-stock matching appliances. Stellar, as opposed to the home we moved out of. But it had its own headaches: poor wiring, not grounded, drafty windows, no air conditioning at all, an old well prone to freezing in winter, no access to utilities like home internet. Learning from past mistakes allowed us to hire a pro and knock out the pressing issues much more quickly. This house is the one we consider our permanent residence; we'll return to it eventually. Life has simply necessitated a relocation for now.


The third home was a lesson in problems not readily apparent. It passed inspection with flying colors, but our hurdles there were the kind only revealed after living there for a while. It was a dry climate, but it turned out the storm windows and back door leaked in the event of rain. Previous water damage had been patched, but the underlying problem remained. The fridge squawked and squealed, mostly in the dead of night. The garbage disposal quit almost right away. The central A/C unit needed to be repaired in the first six months, too. The stove never worked quite as expected - slow to preheat, hot spots, cold spots, etc. Even the porches needed work - they had been repaired, but not well. Just another short term, band-aid fix, in a neighborhood full of them. Pretty on the surface quickly became a money pit, and the other houses nearby seemed to use the same low-cost handyman (or at least follow the same philosophy) as the previous owner. Learned from this experience: declining property value is not just a boogeyman. It is real and it can bite you in the behind.


The fourth home? Location, location, location. We have finally learned not to compromise on things like school districts, primary care and hospital access, and accessible recreation. They're not obvious things on the surface, but Lord are they important. This house taught us damage can be fixed, appliances and fixtures and flooring can be replaced, the yard can be modified, but the house is literally not going anywhere else. And with a teenager in the house, keeping the kiddo educated, healthy, and entertained/out of trouble have moved to the uppermost priority slot.


Three:

You may have paid extra for the appliances. That doesn't make them worth anything.

Used appliances are always a lotto situation. Sometimes you hit the jackpot: it's all pretty new, it matches, it's what you would have bought for yourself, it's been maintained well, the previous owner has all the paperwork, the manufacturer warranties are all intact and transferable... It's a unicorn situation, but it could happen.


It usually doesn't.

Go in knowing you might have just paid a premium for something you could find unusable, even if your inspector says it does what it should. Our stove in the third house, for example. We bake A LOT. A slow preheat isn't a problem for people who don't prioritize baking, and since it does heat to temperature, it technically works. (Works like shit, that's for sure.)


We're also really, really choosy about washing machines and dryers. The washer and dryer that came with the fourth house went right out the door on our first day. They worked, but they didn't work up to our standards and had to go to make room for a set that did.


Four:

Cruddy appliances do not warrant pushing for seller concessions.


Do not waste your - or anyone else's - time quibbling about the appliances. The process of asking to adjust the sale price of the house for things like this isn't worth the time or effort, and may end up costing you the house when your offer gets rejected. Negotiating is not exactly appealing when there's someone else willing to pay full asking price. 


Five:

Your inspector is there to help, but is not omnipotent.


S/he cannot tell the future, nor is s/he paid enough or given enough time to catch everything. The inspector will walk through and assess things like doors and windows and lights and plumbing, check for mold or pests, and test the appliances if they convey with the house. The report is simply the inspector calling it as it is - here's where you find out one burner on the stove doesn't work, or the shower diverter is jammed. Do not try to push the seller into fixing every little thing. However, big things like mold remediation are sometimes worth fighting over.


The inspection on home four tipped us off to the examples above. We've been here a while now, replaced the jammed diverter on day one and are still using the stove that came with the house. Three burners are enough for now, and there were other priorities (like the washer and dryer).

The inspectors are not to blame for things like appliances kicking the proverbial bucket. They know if it works when they're there. They don't know what's happening a day, a week or a month from now any more than you do. First time home buyers often seem to think the inspector should have a crystal ball or something and warn them the dishwasher will lose the plastic clip on the detergent door next Thursday, or that the built-in microwave will only cook two more bags of popcorn before it gives up the ghost. Give everyone a break. Also, see tip number one again.


Six:

Your appliance preferences and needs are yours - know your situation and adjust priorities accordingly.


We know plenty of people who would have prioritized replacing our apartment-sized fridge over getting a better washer and dryer, and just gone to the laundromat until they could afford the washer and dryer they wanted. This is a valid solution for lots of people. It's not for us.


We do an egregious amount of laundry. We do so much laundry that in a month, the money spent at the laundromat would have bought a nice used washer with a warranty. Also, our trip to the nearest laundromat is much longer than the trip to the grocery store. We decided we could get by with a tiny fridge and freezer by making more frequent grocery trips, and adjusted accordingly. 


Seven:

Assume the previous owner of any used appliance did not know the word "maintenance."

Any one! One that comes with the house, one you found on Craigslist or Facebook Marketplace, one you bought from the neighbor, one you picked up from a reseller shop... It cannot be stressed enough. Any appliance you buy used will at bare minimum need a scrub before you welcome it into your home.


It is safer to assume the previous owner had many long haired cats, at least one alligator, several unsupervised toddlers and had never heard of Lysol or vacuum cleaners.


Don’t expect it to look like this. This is after HOURS of work.

You will find signs that it's used. Scratches, dents, bite marks, loose alphabet magnets stuck in strange places, fur (oh golly, the fur), dust, dirt, lint, mystery caked-on stains, and other assorted nightmare fuel.


Be ready and willing to put in the work, or be prepared to fork over more cash.


Eight:

Do you see lights out in an appliance? It's telling you something.


If you see an easily replaceable appliance bulb out, say the one in the fridge or under a built-in microwave, that's a good sign the person before you didn't prioritize simple maintenance. They would rather live without it and/or work around it than exert the effort to pick up a bulb at the store and change it out.

Be ready to deep clean these appliances, and be on the lookout for more overlooked simple maintenance projects elsewhere in the house. Check to see if there's lint trapped in the dryer or dryer vent hose - another five minute project, but one that may prevent a serious fire hazard. Check your water valves under sinks, behind fridges and washers, and behind toilets; turn them on/off a time or two annually to prevent them from locking up (but only do this when you have a hardware store open or a replacement on hand in case it's already seized by scale or defective). Check the smoke/CO2 alarms and make sure they have batteries and function. Clean the filters in the vent fan over the stove and in the dishwasher. Check HVAC filters and be ready to replace them all.


Nine:

Homeowners insurance doesn't specifically cover your appliances.

The vast majority of homeowners policies consider your appliances just another thing under the personal property category. If one or more kick the bucket on you, your policy won't do much about it. However, if they're stolen or damaged by a storm, your policy may pay to replace them. Read your policy, and if you struggle to understand it, make sure you ask questions of your insurer. There are other warranties and insurance policies you can explore if you are interested in appliance breakdown coverage.


Shopping for a new home is full of surprises, and the appliances that come with it can often be one of the biggest unknowns. But with a little preparation and the right support, you can handle whatever comes your way. At Appliance Rescue Service, we’re here to help when those unexpected appliance issues arise. Our experienced technicians are just a call away, ready to ensure your new home remains as comfortable and functional as you dreamed. Don’t let appliance troubles dampen your excitement – trust us to keep your new space running smoothly. 

Website 

(214) 599-0055


Additional Reading

5 Simple Ways to Get Rid of Your Old Appliances

Outdated Kitchen Appliance Trends


From Summer to Fall: Thai Curry Sweet Potatoes You’ll Love

A flavorful twist on a fall classic that will keep you coming back for more.

Even as the summer sun lingers, our taste buds are leaping ahead to the cozy comforts of fall.It’s still August, but we’re craving fall foods already. We want warm, cozy dishes and sweater weather already! With that in mind, we came up with this recipe for sweet, savory and subtly spicy sweet potatoes.  These have a lot of wiggle room to make them your own, that is sure to become a family favorite. 

Ingredients:

1 1/2 pounds sweet potatoes

2 tablespoons butter

3 tablespoons Thai red curry paste

1 cup coconut milk

+/- 1 tablespoon light brown sugar

Sea salt to taste

Tools:

Peeler

Knife 

Cutting board

Stock pot

Colander

Potato masher

Measuring cups and spoons

Square baking dish

Spoon

As always, please wash the produce! You don't need dirt in your dinner. We're going to peel these anyway, but dirt on the outer surface can still transfer during the peeling process.

Grab the vegetable peeler and peel the sweet potatoes. Move them to the cutting board and rough chop them. Make sure you're using a very sharp knife and keeping your hands clear, as fresh sweet potatoes are dense and can be difficult to cut.

Transfer them to the stock pot and add enough water to cover. Put the pot on the burner, crank it up to medium-high, and let the water come up to boil. Cook your sweet potatoes until they're soft enough to mash.

Keep in mind that the smaller you cut your sweet potatoes, the quicker they'll cook. We had fairly large pieces that took about 15 minutes at full boil to soften. Yours may be ready in 10 minutes, or take 20 or more. The simplest option is to just test a piece each time you stir, and cut the heat when you can cut through the piece with the edge of the spoon.

Once the sweet potatoes are soft, use a colander and drain out the water. Return them to the pot and take the potato masher to them. You can mash them until they're creamy or leave them lumpy, whatever you prefer. In this case, we mashed them a little longer than we usually would and got to a very-small-lumps kind of consistency. 

Before the sweet potatoes lose too much of their retained heat, toss in those two tablespoons of butter and mash the butter into the sweet potato. Measure in your Thai red curry paste and stir it in very thoroughly. The red curry paste has a bit of a kick; you may end up with a hot spot in your sweet potato if you don't ensure a complete mix.

Once the curry paste is mixed, pour in the coconut milk and stir until you have one uniform consistency.

Transfer everything into the square baking dish - there's no need to grease the dish in this case - and level it with the back of the spoon. 

After smoothing it out to a level surface and making sure to get it right up to the edges of the dish, measure your brown sugar and sprinkle it lightly over the top of the sweet potato mix. Adjust the amount down if you want a savory dish, or add a little extra if you're so inclined. Add a little sea salt at this stage if you'd like.

Turn on the broiler and set the baking dish close to the heating element. Broil at 450 degrees for 15 minutes.

After the 15 minutes are up, the dusting of sugar across the top should have caramelized. If it hasn't, feel free to keep it on broil a little while longer, but be careful not to scorch it. No toasted marshmallows in this dish.

When the sugar is fully caramelized to your liking, carefully remove the baking dish from the oven and set it to cool; don't try to serve any until it's had at least a few minutes' rest. You'll end up with some runny, sad sweet potatoes if you don't allow them to steam and settle.

And there you have it! A delightful twist on classic mashed sweet potatoes, infused with the bold flavors of Thai red curry and the richness of coconut milk. Whether you're serving it as a standout side dish or the main event, this recipe is sure to impress with its unique blend of sweetness and spice.

If you're looking to keep your kitchen running smoothly, don't forget that our team at Appliance Rescue Service is here to help with all your appliance repair needs. From ovens to refrigerators, we make sure everything's working like a charm so you can keep creating delicious dishes just like this one. Bon appétit!


Website

Call (214) 599-0055


Additional Reading

Punchy Potato & Cheddar Rolls  

Sausage Bread to Get You Rolling 

Sweet Veggie Tropical Curry


Signs Your Appliances Are Overheating—and How to Handle It

Simple steps to protect your home and appliances from overheating damage.

Appliances are the backbone of a modern home, working tirelessly to keep our lives running smoothly. But what happens when they start overheating? It might seem like a minor inconvenience at first—an extra-warm dryer load or food that browns too quickly in the oven. Yet, these small signs can indicate much larger problems brewing beneath the surface. Left unchecked, overheating can lead to serious malfunctions, costly repairs, and even potential safety hazards.

Understanding the early warning signs of overheating is crucial for maintaining the health of your appliances. By catching the problem early, you can avoid unexpected breakdowns and extend the lifespan of your household staples. In this guide, we’ll walk through common scenarios where overheating becomes a concern, showing you what might happen if you don’t address the issue—and how taking preventative steps can lead to a better outcome for your home.


Before: A Warm Back and Buzzing Noises

Picture a typical summer day in Texas. You reach for your fridge to get a cold drink and realize that the sides are feeling warmer than they should. You brush it off, thinking it's Texas. What else is new? However, you notice over the next few days that there are other things going on, and the heat hasn't diminished. Your milk is spoiling faster, and the food at the front of your fridge isn't as cold as it should be. You notice a persistent buzzing whenever you come into the kitchen. Then your energy bill arrives, and it's much higher than it should be, even though you're taking active steps to reduce your energy usage.

These are the classic signs of an overheating refrigerator. They all indicate that your fridge's compressor is working overtime and struggling to maintain temperature. If left unchecked, this can lead to a breakdown of the appliance.


After: Cool and Quiet


Now, let's see what that scenario can look like when you take action. Noticing the signs, you unplug your refrigerator and grab a broom to clean off the condenser coils. The coils being covered in dust prevented your fridge from cooling itself. While you're back there, you decide to check the fan and find that debris was obstructing it, also keeping it from cooling. Finally you check out the air filter and notice it was just as dusty and was choked because the refrigerator didn't have ventilation space.

After plugging your fridge back in, the buzzing noise vanished! Even better, the sides of the fridge are cool to the touch, and your next electric bill has gone back to normal. Congrats, you have successfully prevented a major appliance failure.


Before: Microwave Shuts Down Unexpectedly

Picture this: you're heating up some lunch in your microwave. Halfway through, the microwave suddenly shuts off. You try to press various buttons and power it back on, but it doesn't respond. You notice that the kitchen is warm but surely that's just because it's summer. You know that there had been a faint of buzzing before it shut off, but you thought that might have just been the tray getting stuck. It does that sometimes. It's annoying because all you want is to eat your lunch and go back about your day.

Having your microwave shut down suddenly like this suggests that the microwave has overheated. That shutdown is actually an automatic safety feature that kicks in when your microwave gets too hot. There are a lot of different reasons that can cause this, from faulty components to block ventilation to running the microwave for too long. And if you had your microwave for several years, wear and tear take a toll, making overheating much more likely.


After: Smooth
Operation and Safe Heating

What happens if you take steps to prevent this though? After the microwave cools down you check around the sides of the microwave and notice that it's partially blocked by other appliances on your counter. You clear the space around it to ensure it has proper air flow next to you grab the vinegar and clean the microwave thoroughly paying extra attention to the vents to get rid of all the dust. Then you make a mental note, or if you're like us a sticky note, to not run the microwave for extended periods of time without breaks.

Making these adjustments and having taken the time to let it cool down, your microwave starts working again. And you avoid further unexpected shutdowns because I can breathe better too. Plus you've extended the lifespan of your microwave by keeping up with a little maintenance.


Before: Dishwasher Overheats and Fails to Clean Properly

You start your wash cycle and continue going about your nightly routine. You hear strange sounds coming from your kitchen. You put it off until the next morning when you notice it's not cleaning the dishes as thoroughly as it should. In fact it hasn't been for a few weeks. It also seems to have been running very hot at times steam has been billowing out and when you open after it finishes some of the dishes have been scalding hot. Eventually a warning light or an error code pops up. And still your dishes are coming out dirty and you don't know why.

These are all signs that something has gone wrong with your dishwasher and it's overheating. The most common cause for this is a malfunctioning heating element which might have shorted out. This can raise the water temperatures beyond normal levels. Another possibility is that the thermostat that limits The heat is no longer working. Which means your dishwasher can't tell how hot the water has become. Alternately if the thermostat is malfunctioning or positioned wrong, it might not shut off the heating element which then causes the appliance to overheat.

After: Efficient Cleaning with Proper Temperature Regulation

What happens though when you work to address these issues? All three of those issues will typically require a professional to get involved. You can do it yourself, but it is fiddly work, and often difficult to get to. However you go about it, you've fixed your dishwasher. You noticed that the appliances running smoothly, the the steam has stopped billowing out, and the noises have stopped. You can now go back to loading your dishwasher without worrying about burning your hands or dishes not coming out clean.


Before: Clothes and Dryer Overheating


It's the start of your weekend and you are determined to get things done. You started drawing cycle for the laundry you're doing and keep on grooving. And then when it finishes you come over and yank your hand back because you realize that the exterior is too hot to touch. You wait a few minutes and open it up and find out your clothes are also unusually hot. This isn't right and you start to worry. Even more concerning there is a strange smell in the air. These are signs that your dryer is very probably overheating. It's frustrating and worrisome because you are on a roll and now you need to figure out what to do about this.

Several different issues can cause overheating. The most common culprit is a reduction of the airflow

through your dryer. Unfortunately, that can also be caused by several different sources. This can be due to a blockage in the internal duct or a kink in the transition hose that links your dryer to the wall. You could also have a blockage in that transition hose. Another problem that can cause overheating is excessive lint buildup either inside of the dryer or the exhaust outlet. Finally the exhaust outlet could also be not opening fully. And if it's not blocked airflow it could be a faulty heating element, a defective cycling thermostat a broken or missing felt seal, or an obstructed blower wheel. These are all mechanical elements that could be causing a problem.

After: Efficient and Safe Drying

What happens though when you've addressed those issues? You start by inspecting your vent system and find that there was a kink in the transition hose as well as a tiny sock. Is that what happens to all of them? Maybe. You also had excessive lint buildup in the vent. You clear that out and straighten the hose making sure that the air flow is now unrestricted. Next you check the exhaust outlet on your roof and that's fine it's opening completely without issue. You also check out the various mechanical parts, relying on our Good Friend YouTube to see what you're looking for. 


With these changes in place your dryer goes back to normal. The air flow moves smoothly through your dryer and it stops overheating the sides and your clothes. You can now get back on the roll and enjoy the rest of your weekend, without worrying about your clothes catching fire.


Before: Overheated Oven and Undercooked Meals

It's a Sunday and you are excitedly trying out a new recipe for cookies is that you've been looking forward to all week. The recipe calls for them to come out soft and golden brown. However when you open up your oven you find their a dark brown, dry and crumbly. You start wondering whether it is you and did you follow the recipe correctly? But then you think that it happened last night too with the chicken you made, it was tough but also cooked unevenly. You also noticed that the oven is unusually hot even for summer. This could be a sign that your oven is overheating, which leads to poorly cooked food and safety concerns.

There are several issues that could cause your oven to overheat. You might have a broken temperature sensor that's not accurately measuring the internal temperature. A faulty thermostat can also fail to regulate the temperature properly. Damaged heating elements or a loose thermostat knob can also contribute to the problem. Additionally a blocked vent, a faulty cooling fan, or a malfunctioning selector switch can all interfere with airflow and temperature regulation


After: Perfectly Baked and Well-Maintained Oven

Some of these issues you can fix on your own. Let's tackle those first. You start by cleaning your oven thoroughly, removing any food residue and grease that could block any of the vents. Be it on top on the sides or inside, you scrub everything. While you're at it you look at your ovens manual to find and clean the cooling fan. You also look over the heating elements by hand to see if you can find any obvious damage. 


 For the rest of it, though, you need a professional who knows what they're looking for. Especially if you're dealing with a gas oven. So you call them and they look at your broken temperature sensor and thermostat to ensure that it's working properly. If there was any damage to your heating elements they go and replace those. They also check out the loose thermostat knob making sure it's placed securely, and repairing the selector switch if it was needed.


With these fixes, your oven goes back to working properly for you. Your cookie recipe comes out perfectly golden, and your dinner that night is not a dry husk. Taking care of your oven and addressing any issues swiftly ensures safe and delicious cooking every time you turn it on.


Keeping your appliances in check can make all the difference in ensuring they run efficiently and safely for years to come. Whether it's preventing an overheated dryer or tackling a malfunctioning oven thermostat, the right steps can turn potential disasters into minor inconveniences. But sometimes, despite your best efforts, professional intervention is necessary. That’s where Appliance Rescue Service comes in.

Our team of expert technicians is ready to step in when things get complicated. From diagnosing tricky overheating issues to providing long-term maintenance solutions, we’re here to help you keep your home running smoothly. If any of your appliances show signs of overheating, don’t wait—give Appliance Rescue Service a call. We’ll make sure your appliances are back in top shape, so you can focus on the things that matter most.


Website

Call: ((214) 599-0055)


Additional Reading

Wondering How to Clean Your Appliances Sustainably? Eco-Friendly Methods Unveiled

Don't Let Your Dryer Become a Fire Hazard

The Labyrinth of Limescale