Elevate Your Culinary Experience: The Quad Door Refrigerator Advantage

Discover the Ultimate Blend of Style, Functionality, and Convenience

Unlocking Luxury: The Quad Door Refrigerator Experience

Welcome to the epitome of luxury living, where every aspect of your home reflects sophistication and discernment.  Today we’re embarking on a journey into the realm of luxury living, where every detail, every appliance, serves as a statement piece, seamlessly blending functionality and elegance. If you’re a homeowner with a taste for the finer things in life, allow us to introduce you to the epitome of refrigeration elegance: The quad door refrigerator.


In a world where kitchen appliances are not merely tools, but expressions of the self and your lifestyle, the quad door refrigerator stands as a beacon of innovation and elegance. Let’s delve into why discerning homeowners with luxury on their minds find themselves drawn to this remarkable piece of technology. 


Unparalleled Design 


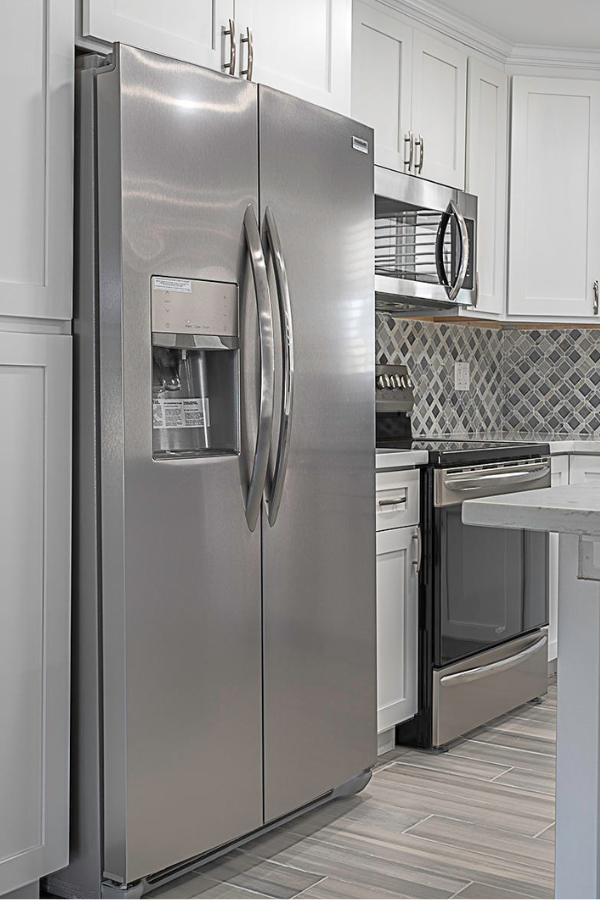
Imagine stepping into your kitchen, greeted by a masterpiece of stainless steel and glass. The sleek, contemporary design of the quad door refrigerator effortlessly elevates the ambiance of any kitchen space. Every aspect of its design is meticulously crafted to enhance the culinary experience, from adjustable drawers to customizable shelves and door shelving. With the quad door refrigerator, chaos gives way to order. 


But it’s not just about aesthetics; it’s about functionality seamlessly woven into elegance. The quad door configuration offers unparalleled access to your culinary goodies, ensuring that every ingredient is within arm’s reach, all while maintaining optimal freshness and temperature control. 


Ample Storage Space

For the homeowner who refuses to compromise on storage capacity, the quad door refrigerator delivers in spades. With its expansive interior and customizable shelving options, organizing groceries becomes a delight rather than a chore. From fresh produce to fine wines, from artisan cheeses to decadent desserts, there can be a designated space for everything your heart desires.

No longer will you find yourself juggling items or struggling to make room for that last-minute addition to your pantry. With a quad door refrigerator, ample storage space is not just a luxury, it’s a way of life. 


Efficiency Redefined


In the pursuit of luxury, efficiency should never be overlooked. The quad door refrigerator stands as a testament to this principle, offering not only unparalleled organization and flexibility but also remarkable energy efficiency. With its innovative design, this appliance minimizes energy consumption by allowing you to open individual sections without affecting the entire refrigerator’s temperature. This thoughtful approach not only reduces your carbon footprint but also translates to lower utility bills, further enhancing the allure of the quad door refrigerator for the environmentally conscious luxury homeowner. 


Advanced Features for Ultimate Convenience 

In the realm of luxury appliances, innovation reigns supreme. The quad door refrigerator is no exception. From touchscreen controls to built-in water and ice dispensers, from temperatures zones for precise preservation to smart connectivity for remote monitoring, every feature is designed to enhance your kitchen experience. 


Picture yourself effortlessly customizing temperature settings for different compartments, receiving notifications when it’s time to shop for your favorite ingredients, or even remotely access recipes while standing in front of your fully stocked refrigerator. With the quad door refrigerator, convenience is not just a luxury-  it’s a given. 


If you’re interested in seeing a stunning example of a quad door refrigerator, check out the additional reading section below for our article on the MoodUp refrigerator from LG. 


A Commitment to Quality

At Appliance Rescue Service, we understand that luxury isn’t just about extravagant features; it’s about reliability and longevity. That’s why we take pride in offering top-tier repair and maintenance services for all of your major appliances, including the crown jewel of your kitchen - the quad door refrigerator. 


Our team of expert technicians is dedicated to ensuring that your appliance continues to perate at peak performance, year after year. Whether it’s a minor adjustment or a major repair, you can trust Appliance Rescue Service to deliver prompt, professional service with a smile.

In a world where luxury is synonymous with lifestyle, the quad door refrigerator stands as a testament to the art of indulgence. From its unparalleled design t its advanced features, it represents the pinnacle of culinary sophistication.

So why settle for anything less?  Elevate your culinary toolkit with a quad door refrigerator and experience the epitome of luxury living. 


And remember, should your kitchen ever require a touch of expert care, Appliance Rescue Service is here for you. Visit our website or give us a call ((214) 599-0055) today, and let us help get your home running smoothly again. We will work with you to find a time and date that fits your schedule to have one of our experts come and find what’s going wrong, to return your home to the oasis you’ve created. 


---


Additional Reading
The MoodUp Refrigerator to Shake UP Your Kitchen

An In-Depth Look At Refrigerators

Energy Efficient Refrigerators: What Makes Them Tick? 


Sensational Apple Pork

Experience the Magic of Tender Pork and Crisp Apples, Perfectly Balanced

Are you ready to embark on a culinary journey that tantalizes your taste buds and leaves you craving more? Look no further than our delightful Apple Pork recipe—a harmonious blend of savory pork, crisp apples, and a medley of spices that will elevate your dining experience to new heights. Picture succulent pork loin infused with the sweet essence of gala apples, complemented by tender baby carrots and a splash of apple cider. As the aroma fills your kitchen and anticipation builds, you know you're in for a culinary masterpiece. Join us as we explore the art of creating savory delights and discover how simple ingredients can come together to create extraordinary flavors.


Ingredients

2 Tablespoons shortening

Pork loin (1.5 lb)

2 large gala apples, sliced

10-15 baby carrots, halved

2/3 cup apple cider (any brand, hard cider or non-alcoholic)

One tablespoon lemon juice

One tablespoon honey

Salt

Pepper

one teaspoon fennel 

one teaspoon smoked paprika

two teaspoons dried parsley 

one teaspoon dried basil


Tools

Measuring cups and spoons

Knife

Cutting board

Shallow dishes

Tongs

Heavy oven-safe skillet

Meat thermometer


We know you're probably tired of hearing this, but... wash your produce. We never know when we'll have a new reader, so it's better to be safe and add it at the beginning each time.


Do not peel the apples. Cut your lovely clean gala apples into half-inch slices and discard the core. Set them aside in a dish and sprinkle them with a very minimal amount of salt, then add enough water to cover them so they won't brown up on you while you take care of other things.


Take your baby carrots and halve them longways, and set them aside as well.


Preheat the oven to 450 degrees.


Mix together your measured paprika, fennel, and parsley. Add a little salt and pepper (to taste), then use this blend of spices to season the pork. Make sure you get some all the way around the loin. Let it sit with the spices while you move to your skillet.


Place the skillet on the stovetop and set the heat to medium. Drop in your shortening and allow it to melt. If you're working with an oversized skillet, you can add some extra shortening to ensure you'll have enough to coat the bottom of the pan.


Once it's melted and you've got a good sizzle on, move the pork from the cutting board (or in our case, plate*) to the skillet. 


Add the carrots, distributing them around both sides of the pork, then drain your apples and place them in with the carrots. You can give them a little stir, but don't disturb the pork at this stage. Cut the heat.


Don some oven mitts and move the skillet from the stovetop to the oven. Set a timer for 15 minutes. We like to use this time to clean the cutting board so we can use it again when it's time to rest the cooked pork.


When your 15 minutes are up, remove the skillet from the oven, flip the pork and stir the apples and carrots. Slowly pour 1/3 cup of cider over the whole thing at this point, sprinkle with the dried basil, and return it to the oven for another 15 minutes.


After the next 15 minute window is done, take everything out of the oven again and use your meat thermometer to test the pork. Make sure the center of the thickest part of the roast is at least 145 degrees. If it isn't, put everything back into the oven and cook it a few minutes longer. No sense ruining everyone's week with food poisoning.


After the pork loin has definitely reached 145 degrees, remove it from the pan and let it rest.


Put the pan full of apples, carrots and cider back onto the burner over medium-low heat. Add your remaining 1/3 cup of cider, the honey and the lemon juice. Stir to make sure everything is incorporated. Allow it to simmer for five minutes.


While the pan is simmering, return to your pork loin and chop it into pieces an inch or two across. Toss the pork in with the apples and carrots, stir everything to coat in the cider mixture, and be ready to enjoy.


* - we spill spices if we work on the cutting board and prefer to have the rim of the plate to slow us down)


As you reflect on the culinary adventure that was our Apple Pork recipe, remember that Appliance Rescue Service is your trusted ally in the kitchen. With our dedication to excellence and commitment to customer satisfaction, we're here to ensure that your cooking experiences are nothing short of exceptional. From washer repairs to freezer maintenance, we have the expertise and resources to keep your appliances in top condition, so you can continue creating delicious meals with confidence. Reach out to us today at our website or by phone at ((214) 599-0055) and let Appliance Rescue Service help you unlock the full potential of your kitchen.


Additional Reading


Sausage Bread to Get You Rolling

Turkey Tetrazzini Takeover!


Unlocking Your Dishwasher: A Troubleshooting Guide

From Delayed Starts to Electrical Mysteries, Navigate Common Issues Like a Pro

Welcome to our troubleshooting guide for your dishwasher! Picture this: you've just finished loading your dishwasher, ready to kick back and relax while it takes care of the dirty work. But wait—why won't it start? Before you panic or resort to hand washing, let's delve into the common reasons why your dishwasher might be stubbornly silent. We've got you covered, from simple settings mishaps to more intricate electrical mysteries. Whether you're a seasoned homeowner or new to the game, understanding why your dishwasher isn't cooperating can save you time, hassle, and potentially a call to the repair technician. So, let's roll up our sleeves and get your kitchen cleanup back on track!


Broadly speaking, there are three reasons that your dishwasher might not be starting. It could be something with the features or settings. It could be a basic electrical issue. Or it could be a more complicated electrical issue involving the interior workings of the appliance. Now, while it is possible for you to check the more advanced issues, we do advise safety first and stress that if you have any questions, it is better to call a professional rather than injure yourself. 


Features And Settings That Might Cause Your Dishwasher Not To Start.


Delayed start

As surprising as it might sound it is entirely common for people to engage the delayed start feature on a brand-new dishwasher not realizing that that's what they're doing. It might be an accidental press of a button. It may be that the appliance is arranged differently than the previous one. Or it could be that it's not obvious when the delayed start is engaged on some models. We have seen all of them happen. Grab your owner's manual to check out how to disable the delayed start feature or you can try waiting as it should eventually start on its own.

Child lock 

Much the same as the delayed start a child lock can be easily pressed without realizing. Sometimes, the dishwasher will flash to show that it is not able to start at the time, or it simply won't respond when you're attempting to change the wash setting. If you've never used this feature on your dishwasher, congrats. Many people have though and subsequently get confused about why their dishwasher is blinking instead of running as expected. Just like with the delayed start, grab your owner's manual to find out how to turn it off and get your dishwasher back to doing its job. 


Door latch

A door latch is the physical latch that tells your dishwasher that it is closed and keeps the door shut. If this is malfunctioning often the dishwasher won't turn on at all. The door latch assembly not only prevents leaks but also tells the dishwasher control panel that it's safe to begin the wash cycle. If the door can't close properly and activate the switches, the dishwasher doesn't start. Look at the latch and the seal for visible signs of damage. 


 Basic Electrical Issues That Can Cause Your Dishwasher Not To Start

Is it plugged in? 

We know this one sounds like a ridiculous question. But there are a number of different situations where a dishwasher can come unplugged from the wall and because of the way it is built you wouldn't even notice. A machine that is vibrating can wiggle itself loose without you ever noticing. Your dishwasher might vibrate during the washer cycle or it could be another appliance causing it to move. That's not a fault of user error or even an issue with the dishwasher necessarily, it just happens. So pull or wiggle your dishwasher out from where it is and double-check that it's plugged in properly. 


Did a fuse blow in the plug itself?

Once you've made sure that your dishwasher is plugged in, your next question is to find out whether or not the plug is functional. While you’ve got your dishwasher pulled out, you can do this by plugging in something small like a blender or a toaster. If the unit works, congratulations. Your plug is fine. If not, it's possible that a fuse in the plug itself blew and you need to replace that or call an electrician to have it replaced, depending on your local codes. 


Did the breaker flip?

If your dishwasher is plugged in and the plug itself is working fine, your final basic electrical question to answer is whether or not the breaker flipped. The only situation when this can be difficult is if your breaker box isn't properly labeled, and you need to guess and test which switch activates the breaker, otherwise, it should be a simple matter of seeing which one is flipped and resetting it.


Advanced Electrical Issues That Can Cause Your Dishwasher Not To Work.


Have you tried resetting the dishwasher? 

If your dishwasher does have power but it still won't start the issue could be that it's stuck between cycles. Essentially your dishwasher is trying to figure out what it's supposed to be doing and can't decide. 

Some machines have a specific reset button or require a set procedure to initiate a reset. You'll want to check your owner's manual to find out how to reset a dishwasher that has power but won't start.


Is it the control panel malfunctioning?

The control panel for your dishwasher is all of the buttons, the settings, and the mini computer inside the door that regulates the various wash cycles and settings. If something goes wrong with your control panel, your dishwasher will either start giving you problems or become a very fancy brick.   


Does the selector switch work?

A selector switch is the switch that determines the wash cycle and the settings that you want for each load. If the selector switch or the connection to the control panel from the selector switch is damaged, you may need to disassemble the dishwasher door and replace them.


Is the timer working?

The timer is another piece connected to the control panel. It determines when the wash cycle starts and stops. If the timer is broken, your dishwasher might not start because the first timer never started.


Is the motor start relay working properly?

The motor start relay is best thought of as the gun at the beginning of a race. It sends the starting signal to your dishwasher's motor. If the start relay doesn't function, your dishwasher doesn't get the ready-set-go signal.


Is the thermal fuse working properly?

The thermal fuse protects your control board. It helps prevent the control board from overheating. If that fuse blows out, electricity can't get to the control board. This helps to stop fires or electrical pieces from getting burned out. If that piece is blown, it will need to be replaced before the dishwasher starts again.


Is the drive motor broken?

The drive motor is what powers the internal components of your dishwasher. It provides the power that drives the control arms. If your drive motor gets burnt out, at best, the water doesn't move around much, and at worst, the dishwasher doesn't start at all.


In the whirlwind of modern life, a malfunctioning dishwasher can quickly throw a wrench into your routine. However, armed with the knowledge gained from this guide, you're equipped to tackle the most common issues like a seasoned pro. Remember, safety first—when in doubt, it's always wise to seek the expertise of a professional. By troubleshooting your dishwasher with confidence and care, you'll have those plates sparkling again in no time. Here's to smooth sailing and squeaky-clean dishes ahead!


If your dishwasher is giving you problems, you can reach out to Appliance Rescue Service. We will work with you until you’re satisfied that the problem has been solved. Our number one goal is to get your home running smoothly again. 

You can reach us by going to our website or by giving us a call at ((214) 599-0055). 


Additional Reading

The Labyrinth of Limescale

 37 Reasons To Have Your Appliances Maintained Regularly

Appliance Deep Dive Round-Up

Demystifying Refrigerator Types: Choosing the Perfect Fit for Your Home

Exploring Refrigerator Types: A Comprehensive Guide

Navigating the realm of refrigerator options can be a daunting task. With a myriad of choices available, from top freezers to French doors and column refrigerators, the decision-making process can feel overwhelming. In this article, we strip away the complexities of features and hone in on the fundamental types of refrigerators, each suited to different needs and lifestyles. Join us as we explore the diverse landscape of refrigeration options, offering insights into which style might best complement your household requirements.


When you have a ton of options, it's not always easy to compare different refrigerator types. Not only do you need to look at how the refrigerator is put together but you also have all of the various features that you have to pick and choose from. We are putting aside the features in this article. Instead, we're looking at just the different types of refrigerators that you can purchase and what they might be best for.


Top Freezer

The top freezer is straightforward, just with the label says. You have your freezer on top and a larger refrigerated cabinet underneath.

Pros and cons for a top freezer

Pros

Basic

Easy to find

You don’t need a ton of space

Cons

Very bare bones in design

Rarely comes with additional features

A top freezer is great if you need to have a refrigerator yesterday. Or if you are looking to add an extra refrigerator to your household but it doesn't need to be the main refrigerator. You may want one for a guest house or for the man cave you're putting together. A top freezer refrigerator is great when you need something simple.


Bottom Freezer

A bottom freezer is what happens if you take a top freezer and put it on its head. Voila, bottom freezer. Typically, the bottom freezer will be a drawer rather than just a door opening the way a top freezer is .

Pros and cons for a bottom freezer

Pros

Has more space than a top freezer

Costs less on average than other fridge options

Cons

Hard to keep organized

Fewer shelves or compartments

A bottom freezer, in our opinion, is the best if you're looking to expand your storage. Maybe you now have teenagers in the house, and they eat a lot. You may be combining households and you need a way to store all of the extra food. Whatever the case, bottom freezers are fantastic for maintaining your sanity and adding storage. 


Side by Side Refrigerator


A side-by-side refrigerator is the same dimensions as a standard refrigerator but with a split all the way down. This separates one side as a freezer and one side as a refrigerator.

Pros and cons for a side-by-side refrigerator

Pros

No stooping for items in your freezer

Has a lower door clearance

Lots of organization options

Cons

Fridge and freezer are thinner than standard

Difficult to store wide objects like sheet pans

Due to design, many will have issues with temperature differences between the top and bottom of the fridge side.

This is dangerous for items up top if the fridge is too full.

We think a side-by-side refrigerator is a good first step if you're looking to move beyond that first dorm room fridge. You want something a little nicer but you're not ready to go for some of the other models just yet. Or if you don't need to store a ton of food, a side-by-side is great.


French Door Refrigerator

A French door takes a bottom refrigerator and combines it with a side-by-side You have the larger refrigerator compartment but the ease of opening only one door at a time. You also have a lovely large bottom-drawer freezer. 

Pros and cons for French door refrigerators

Pros

Full size or larger fridge and freezer

Most common variety of freezer

Manufacturers make them with lots of different feature options

Has better temperature control than other varieties

Cons

Most will have drawer freezers

Often are wifi enabled by default

This is great if you've got a large family. Not only do you have the larger space of your refrigerator, but you also have more features and better temperature control, which means your food is going to last longer. It's also great for those times when “but I don't know what I want” ends in leaving one door open for ages, staring at the food. 


Column Refrigerators

Finally, we have the ultimate in customization, the column refrigerator. You can choose whatever you want it to be and almost any size. Whether it's a refrigerator, freezer, or wine cellar, it's all possible. The difference is that each column will be an individual unit. It's not a two-in-one.

Pros and cons for column refrigerator

Pros

Built-in

Concealed behind panels

Can be modified for whatever you want

You can control the temperature, humidity, and even vibration

Cons

Customizability = price hike

You have to have at least 2, one for a refrigerator and one for a freezer

We see more and more clients leaning towards the column refrigerator because they are so very customizable. If you want the ultimate in refrigeration, this is what you're going to be looking at.


Finally, we want to touch on a few different terms.

Counter depth 

This isn't actually a type of refrigerator, it's more of a feature. What it means is that you have an open enclosure in your kitchen it will slot in and be flush with your counter, not counting the doors and handles. If this isn't something you specifically need though, we advise not bothering. They're fantastic if you're looking for an aesthetic. But they really cut down on the amount of space that you have.

Freestanding 

A free-standing model is all about versatility. These are the ones where you go to a store and pick out the exact features you want. Depending on how much food you need to store, you might choose a counter-depth one or a full depth. They're designed to be relocated as needed and are chock-full of features so that you do become attached to them.

Pros and cons for a freestanding refrigerator

Pros

Lots and lots of features

Some customization

Can have counter-depth or full depth

No need for professional installation

Less expensive

Width options, up to 36”

Door style options

Easy to relocate

Cons

Shorter lifespan, compared to built-in

36” in width isn’t always enough

Even if you get a 24” depth refrigerator, due to the doors and handles, it won’t actually be flush with your counters.

Built-in 

Built-in refrigerators, on the other hand, are any type of refrigerator that is built into your kitchen. Your cabinets, your counters, all of these wrap around your refrigerator and make it extremely difficult to remove. But if you're building your dream home and you have no intention of moving, then the mobility of the refrigerator doesn't matter much.

Pros & Cons for a built-in refrigerator

Pros

Typically taller

Fully Customizable

Cons

Doesn’t move if you do

Only 24” deep to match your counters

Costs far more

Must be professionally installed

As you weigh your refrigerator options, remember that Appliance Rescue Service is here to support you beyond the selection process. Whether your appliance is in need of repair, maintenance, or restoration, our team specializes in servicing a wide range of major appliances. With our expertise and dedication to quality craftsmanship, we ensure that your appliances remain in optimal condition, serving your household for years to come. Don't hesitate to contact us today to schedule a repair appointment or visit our website for more information on our services. Trust Appliance Rescue Service to keep your appliances running smoothly.


Additional Reading
Frigi-Know: Your Guide to Refrigerator Troubleshooting

An In-Depth Look At Refrigerators

Spice Up Dessert: Walnut Cayenne Tahini Cake

A Flavorful Twist on Classic Baking

Get ready to tantalize your taste buds with our Walnut Tahini Cake recipe! Brace yourself for a flavorful journey where nutty walnuts, creamy tahini, and a hint of cayenne collide in a symphony of taste sensations. Despite its fiery name, rest assured, this cake brings the perfect balance of sweetness and spice. So, roll up your sleeves and let's dive into baking bliss!


Ingredients

1/4 cup butter

1/2 cup shortening

1 1/2 cup sugar

3 eggs

1/2 teaspoon baking powder

1 1/2 cup flour

1/4 lb walnuts

1 tablespoon tahini

1/2 teaspoon ground cayenne

1/2 teaspoon ground cinnamon

1/2 cup milk


Tools

mixing bowls

spoon

measuring cups and spoons

mixer (hand or stand)

knife

cutting board

nonstick 8-inch pan

plastic butter knife

parchment paper

pencil

scissors


Yes, it says "cayenne" in the title. No, the cake is not spicy. No need to panic.


For best results, start with all ingredients at room temperature, and do not preheat the oven!


Set your round pan on a sheet of parchment paper and trace around the base with a pencil. Trim off the excess with the scissors. Set your parchment circle into the bottom of the baking pan as a liner to prevent sticking. The cake you're about to make gets awfully comfortable where it is and doesn't like to leave the pan again without an assist, so skip this step at your own risk.


Dump out a comfortable amount of walnuts onto your cutting board, grab your knife and chop them as fine as you like. Due to picky eaters in the household, we went extra fine with ours. Scrape the cutting board off into a mixing bowl and repeat the "comfortable amount of walnuts" thing as many times as necessary to get through a quarter pound. We used a small cutting board and did it in three waves. If you have a larger board - maybe one of those comically huge industrial ones - surely the whole quarter pound at once is no obstacle for you.


Measure your flour, baking powder, cayenne, and cinnamon into the mixing bowl full of walnut pieces and stir them all together until everything is fully incorporated.


In another mixing bowl, cream together your softened butter and shortening. Add the sugar slowly, mixing all the while. You'll get a granular, fluffy, pale concoction in a minute or two.


Add one egg and your tahini. Run the mixer until you have one uniform color, then proceed to add the other two eggs. Try not to overmix, but don't leave any yolky spots.


Add your dry ingredients slowly and stir them into the wet ingredients by hand until everything has been dampened. Now you're safe to add your milk - again slowly, and again mixing by hand.


Feel free to bring back the mixer now to finish it off and get rid of any lumps. (We just didn't want the high speed with the thin liquid sitting on top of lumpy mush.)


Pour your batter into your lined baking pan, pop it in the oven, shut the door, start the oven heating  to 350 and set a timer for one hour and ten minutes. Do not open the oven door - at all! Not even to check on it! Turn the oven off when the timer finishes, but leave the door closed another ten minutes before removing the cake so it can cool.


After it's had a chance to cool for 20 minutes or so, work around the edge with a plastic knife. Again, this cake likes where it is and will need to be convinced to move. The parchment should ensure the bottom just pops free after you've loosened the sides.


Serve warm.


As you savor the last crumb of our Walnut Tahini Cake, consider the magic that lies within your kitchen. Yet, even the most beloved recipes encounter hiccups along the way. Should you find yourself facing challenges with your major appliances, like your stove or oven, remember that Appliance Rescue Service is here to lend a helping hand. Don't let appliance woes disrupt your culinary endeavors. Schedule a maintenance appointment via our website or give us a call, and let our expert technicians ensure your kitchen runs smoothly. Until next time, happy baking!

Contact Page

(214) 599-0055