Savor Every Bite: Mastering Pork Chops with Baby Potatoes and Onions

 Elevate Your Culinary Skills with a Flavorful Homestyle Dish

Indulge in a savory delight with our mouthwatering recipe for Pork Chops with Baby Potatoes and Onions. This simple yet flavorful dish is perfect for busy weeknights or casual gatherings. Packed with wholesome ingredients and seasoned to perfection, it's sure to become a family favorite in no time.


Ingredients

4 or 5 thin boneless pork chops

1 red onion

1 1/2 lb baby heirloom potatoes

3 tablespoons olive oil

2 tablespoons red wine vinegar

1/2 teaspoon rosemary

1/2 teaspoon parsley

1/2 teaspoon oregano

salt and pepper to taste


Tools

large skillet

knife

cutting board

measuring spoons

tongs or spoon


You know what we're going to say here, but we'll say it anyway: wash your veggies before you begin.


Chop your baby potatoes to half-inch wide chunks. You'll see in the photos we actually have some purple potatoes in the mix - we found "gemstone medley potatoes" in the store this week and decided to try them.They make a great visual pop, without altering the flavor. 


Drizzle the olive oil into the skillet and start the potatoes cooking on medium-low. We like to sprinkle them with a little salt at this stage, but you can omit the step if you prefer. Stir occasionally. 


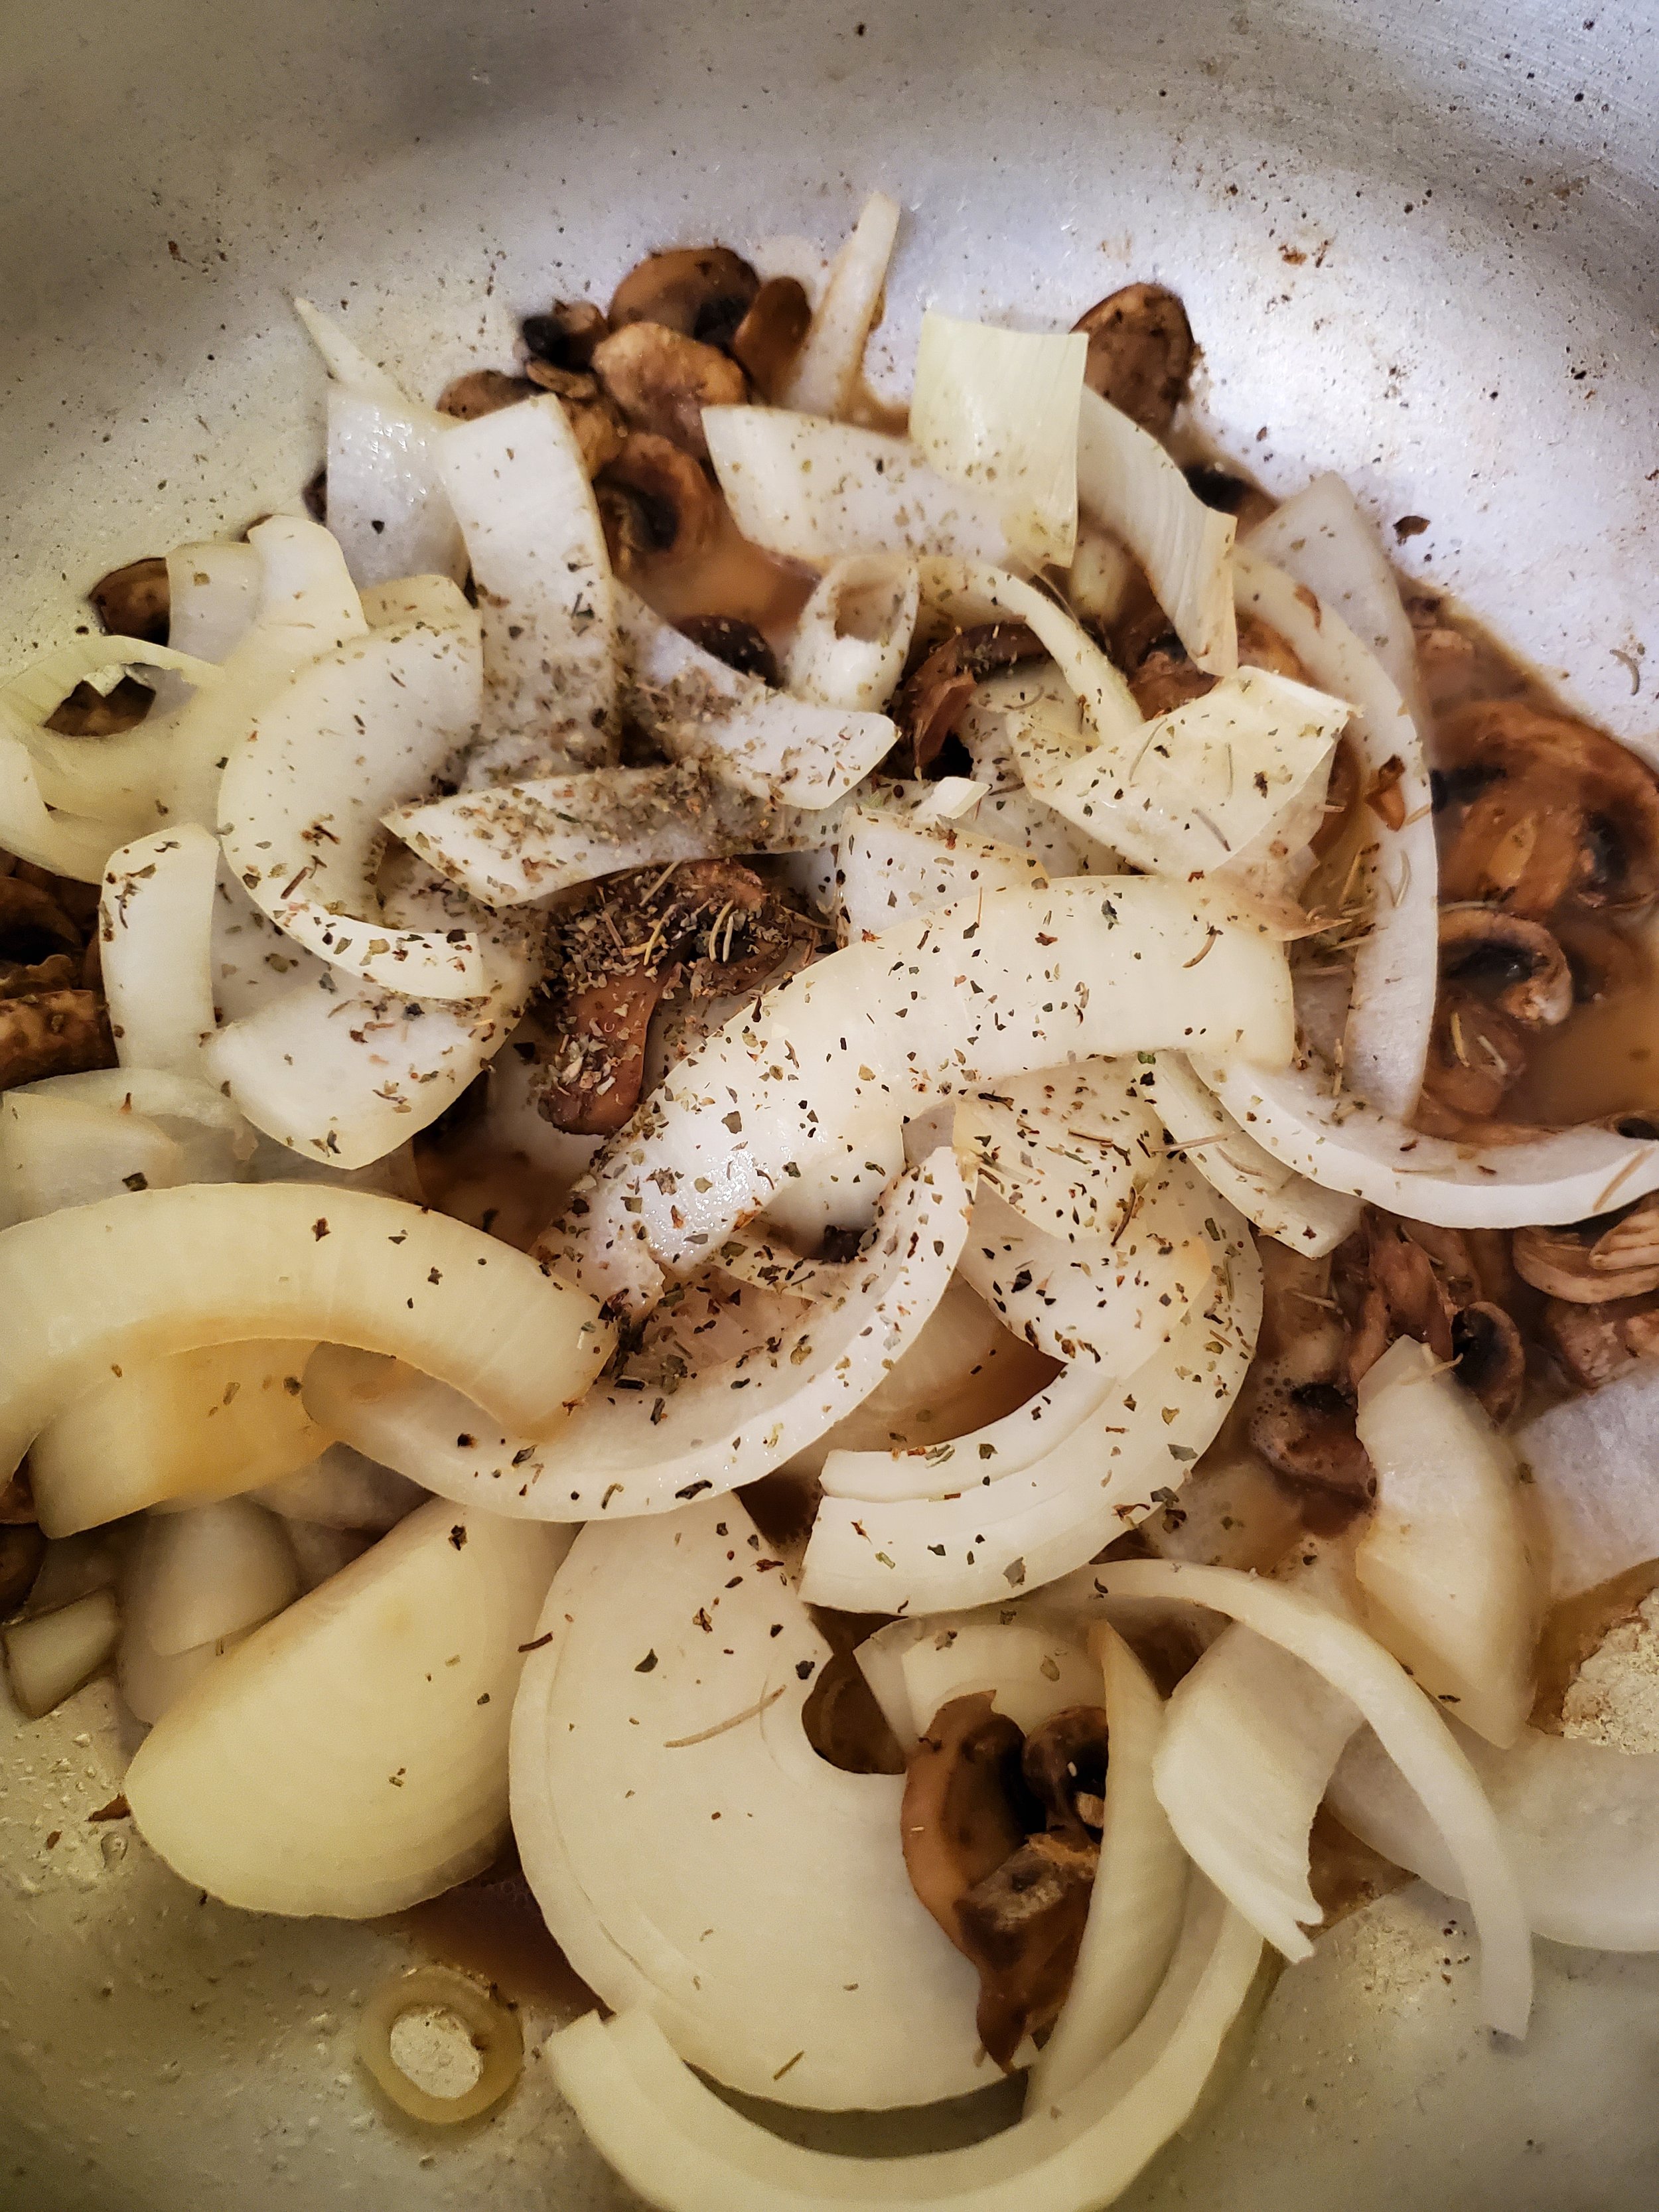
While the potatoes cook, slice your onion, the thinner, the better. Flip it into the skillet when you're done, and open up the package of pork chops.


Season your pork on both sides with the rosemary, oregano, salt, and pepper. You don’t need to crust it with spices, but a good dash of seasons is important. 


 Don't add it to the pan yet - those potatoes will take quite a while to cook, and the pork will most likely be done quickly. Just let it rest where it's at, and go stir the potatoes and onions.


Once the onions are translucent, you can add the pork to the skillet. Nudge the potato and onion mixture to one side of the skillet and lay the pork chops in the open half. Once they're down, try not to disturb them for three minutes. You can continue to stir the potatoes and onions occasionally during that time.


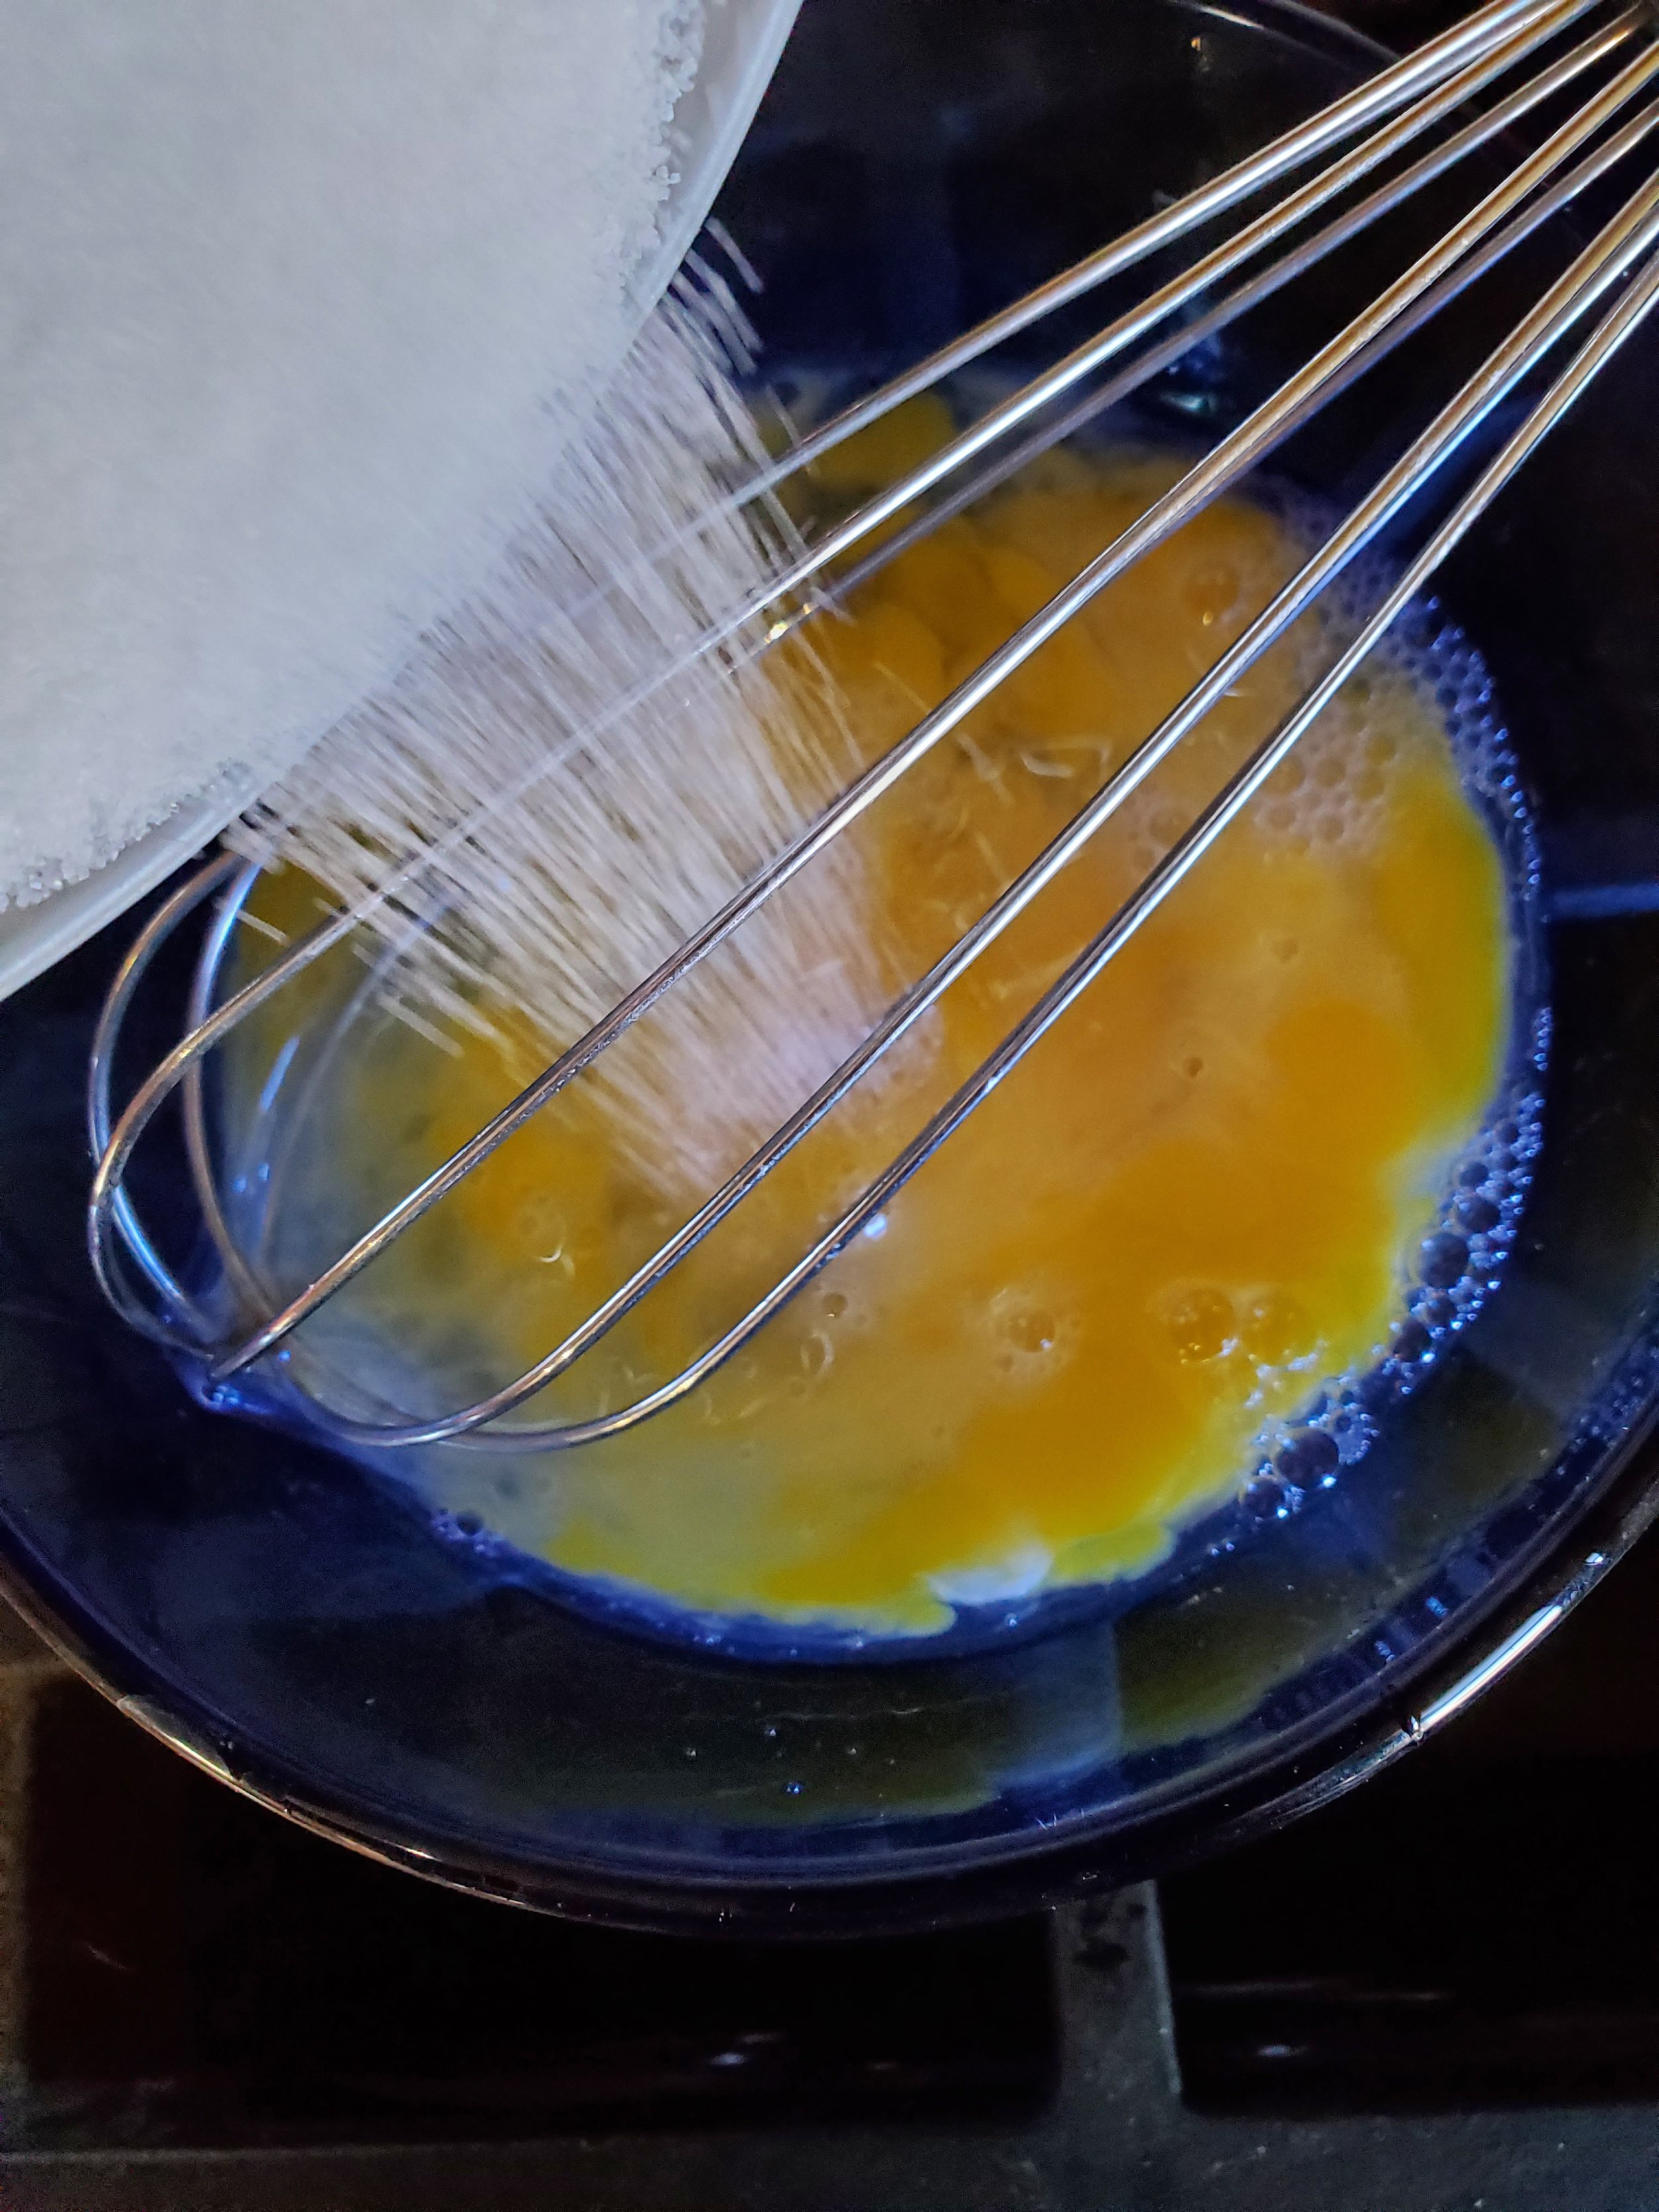
When your time has elapsed, flip the chops and let them cook through on the other side. Splash the pan with the red wine vinegar, add a little more salt and pepper, and give the potatoes and onions a stir again. Let everything simmer for a few more minutes until the pork is done.


If you're unsure whether or not the meat is done, you can grab a meat thermometer and check. The safe temperature is anything over 145 degrees, although we normally shoot for 155 or higher.


Assuming your pork chops have reached the safe temperature, go ahead and remove them to a plate to let them rest a few minutes while the potatoes finish up (stubborn things that they are). The potatoes are done when they spear easily with a fork.


Elevate your weeknight dinners with our delectable Pork Chops with Baby Potatoes and Onions recipe. Simple yet satisfying, this dish embodies comfort and flavor in every bite. Whether you're cooking for family or friends, it's sure to impress even the most discerning palates. So why wait? Treat yourself to a culinary delight that's as easy to make as it is delightful to devour. Enjoy!


When your kitchen appliances falter, it's more than just an inconvenience – it's a disruption to your daily life. Imagine the frustration of a dishwasher that refuses to clean or a refrigerator that can't keep your food cold. At Appliance Rescue Service, we understand the urgency of these situations. With our team of skilled technicians specializing in the repair of major appliances like washers, dryers, dishwashers, ovens, stoves, refrigerators, freezers, and ice makers, we're here to restore functionality to your kitchen. Our commitment to prompt, reliable service means you can trust us to diagnose and resolve issues efficiently so you can get back to enjoying the convenience your appliances provide.


Discover peace of mind with Appliance Rescue Service, your trusted partner in appliance repair. We specialize in the maintenance and restoration of major household appliances, including washers, dryers, dishwashers, ovens, stoves, refrigerators, freezers, and ice makers. With our team of skilled technicians, we deliver prompt and reliable service to ensure your appliances operate at peak performance. At Appliance Rescue Service, we understand the inconvenience of a malfunctioning appliance, which is why we prioritize efficiency and precision in every repair. Whether it's a noisy dishwasher, a malfunctioning refrigerator, or a faulty dryer, our experts have the knowledge and experience to diagnose and resolve issues promptly. We take pride in our commitment to customer satisfaction, striving to exceed expectations with every service call. With transparent pricing and honest assessments, you can trust us to provide cost-effective solutions tailored to your needs. Don't let appliance troubles disrupt your daily routine. Trust Appliance Rescue Service to keep your home running smoothly. Contact us today to schedule your next repair appointment and experience the difference firsthand.


Contact Page

Call Us : (214) 599-0055


Embracing Peach Fuzz: Pantone's 2024 Color Palette Unveiled

 From Celeb Endorsements to Home Palettes, Exploring the Versatility of Pantone's Choice


It's that time of year again when Pantone announces their color pick for 2024. This year, they've chosen a lovely, gentle tone called Peach Fuzz, and we are going to tell you all about it. 

The color is already being adopted by celebrities such as at Taylor Swift and The Rock, which means you can be sure to see it widely spread throughout the year.


Color of the Year 

Peach Fuzz is a soft and velvety peach color that Pantone says “ echoes our yearning for closeness and connection, a color radiant with warmth and modern elegance.”  


Peach Fuzz is less bold than Viva Magenta of last year, but that's intentional. Viva Magenta was supposed to evoke power and grace as our world emerged from the pandemic and had to grapple with social unrest all around. Peach Fuzz, though, reflects our need for calm and rest. To remind us of our connection to one another in a year that's already being rocked with war and rising tensions. 


According to Pantone's Leatrice Eiseman, “Peach Fuzz captures our desire to nurture ourselves and others. The velvety, gentle peach tone, whose all-embracing spirit enriches the mind, body, and soul. It is a shade which resonates with compassion, offers a tactile embrace, and effortlessly bridges the youthful with the timelessness.“ 


Pantone’s Way of Choosing the Colors 

2024 marks the 25th year of Pantone choosing their color of the year. According to Lori Pressman, the VP of Pantone Color Institute, “Color of the Year began as a way to engage the design community around the world in a conversation about color. “ Experts on color will look at more than just media. They look at travel destinations and technologies, fashion and design, movies and art. They look to see which colors are affecting the world at this moment in time. Which ones are rising in the cultural zeitgeist, and which ones are on a downward spiral?

Leaving news forecasting tools combined with color psychology to predict coming trends. They work together to narrow down their options to just one that they feel will set the tone for the year ahead.


Color Palettes 

While we will undoubtedly see more color palettes pop up throughout the year,  some of the ones that we are most interested in are monochrome, vintage '80s look, a beachy palette, and a more modern palette.


Monochrome is the most straightforward. You start by pairing peach fuzz with warm, buttery yellows, bright oranges, and soft pinks. This one is very warm and encouraging while also being soft.


The vintage '80s palette is one that already existed. Like many colors peaches have been popular in the past. While peach fuzz specifically might not have been highlighted in the '80s, it is still very reminiscent of that time.. So if you pair it with mauve, teal, ocher and seafoam green, not only do you get a nice '80s feeling but you also get a layered and detailed palette. 


The beachy palette It is one that your blogger is rather fond of. Pair peach fuzz with deep almost carmine reds and bright blues. It has a very beach town feeling to it. We can see this one working inside or outside as is common in many beach towns.


Finally, our modern palette. This one is really good for working with the minimalist decor. You start with peach fuzz, pair it with a warm gray, add in cinnabar, and crimson to bring in colors that would be on a natural peach. It's very dark but also rich and inviting without being overwhelming or decadent. 


Do you have any pallets that you are particularly excited by?


Where to use the color 


In years past we have made suggestions of specific rooms or ideas or even styles the best fit a color. However as you can tell from the pallets, there really isn't a place where peach fuzz wouldn't fit in. You could use it in your entryway, you could use it on the outside of your house. You could use it in your kitchen or you could use it in your bedroom. There isn't a place or a style that this color doesn't fit. 


Do you have anywhere specific that you are excited to use Peach Fuzz? 


Predictions from the community

Finally, we wanted to take a look at the predictions from around the community for what we might see in relation to this couple.

  • Soft diffuse colors 

  • Pastels, peaches, yellows, lilacs 

  • More tan focused warm toned looks, 

  • Continued influence from East Asian trends

  • A continuing rise of balletcore 

  • And a new surge of rococo styles


What about you? Where do you think this year's color will end up influencing trends?


As we embrace Pantone's 2024 color choice, Peach Fuzz, it's clear this gentle hue represents more than just a trend—it embodies our collective yearning for tranquility and connection. Whether it's resonating with celebrities or echoing through design, this color carries a message of compassion and timeless elegance.


We've explored its versatility across various palettes, from the warmth of monochrome to the nostalgic '80s vibes and even its suitability for modern minimalism or beachy aesthetics. It's a shade that transcends boundaries, fitting effortlessly into any space or style.


We're eager to hear your thoughts! Join us on our Facebook page to share your predictions and where you envision Peach Fuzz making its mark this year. Remember, no matter the color of your appliances, Appliance Rescue Service is here to assist. Reach out through our website or give us a call at ((214) 599-0055)—we're ready to help bring your vision to life.


Additional Reading
Viva Magenta: Color of the Year 2023 

Veri Peri: :The Color of 2022

Berry Bliss: A Delectable Mixed-Berry Clafouti Recipe

Explore the art of culinary rebellion with our unexpected twist on clafouti.


Picture this: a classic recipe, a cupboard full of mixed berries, and a touch of culinary rebellion. That's where our journey begins—a playful twist on tradition, a deviation from the expected.


In the realm of clafouti, cherries typically steal the show. But armed with fresh blueberries and a stash of thawed, drained mixed berries, we set out to create a berry-packed spectacle that dances to its own tune.


Here's to embracing the delightful unpredictability of the kitchen, where ingredient swaps and adventurous spirits collide. Join us as we uncover the charm of our mixed berry clafouti—a testament to the joy found in breaking culinary norms and reveling in the delightful surprises that grace our plates.


Ingredients

1 pound assorted berries

1/4 cup butter

4 whole eggs

1 cup granulated sugar

3/4 cup flour

2 teaspoons vanilla extract 

1 cup whole milk

Pinch salt


Tools

Large oven-safe baking dish

Mixing bowls

Measuring cups and spoons

Whisk or mixer


While a clafouti is traditionally made with cherries... guess who has no cherries? Us! So we decided to have a little fun with it and make a mixed berry clafouti.


We had some fresh blueberries on hand, and maybe a half cup or so of frozen mixed berries that we thawed and drained. If you're starting with all fresh, obviously, there's no need for that step, but you'll absolutely need to take the extra minute or two to wash your produce.


We chose to use a 2-quart round baking dish. That's not a hard rule - you can use whatever you have handy. If you use something less dense (say a large Pyrex dish), adjust your cook time down accordingly and check frequently. 


Once your ingredients are gathered and produce washed, grease the pan you plan to use. We used some butter, simply because it was already out for the rest of the recipe.


In a small dish, melt the quarter cup of butter and set it aside for now.


Beat the eggs, then add the pinch of salt and sugar together to the eggs. Whisk well. Once thoroughly combined, add about half of your flour and stir it in.


We started this recipe with a whisk but kind of made a mess... so we raided the cabinets and got out the hand mixer. We used it with only one beater and had a much easier time of things. We highly recommend using a hand mixer if available; your arm will thank you later.


Pour the melted butter into the mixture slowly, stirring constantly as you add. (This is where that hand mixer really shines.)


Measure out your milk - whole milk works best - and add just a little to the batter.


Go back to your flour and add the rest now. Try to avoid any big clumps of flour, that way you won't spend too much time trying to break them up. After the last of the flour is stirred in, you can add the rest of the milk.


The milk will look like it's trying to stay separate, but don't worry, you'll be able to get it mixed in shortly.


Once you've got your batter ready, dump your berries into the baking dish. Make sure they're an even layer, not all mounded up on one side. 


Pour the batter over the berries and resist the urge to stir. We know, we've been telling you to stir everything this time... and now we're telling you not to. It's unexpected. 


Stick the baking dish, uncovered, into the oven. Bake at 350 for an hour and ten minutes (again, that's for a deep round dish - start around 45 minutes for a shallower dish). Use the toothpick test to make sure it's done; if you're getting anything other than berry juice when you test, put it back for five more minutes at a time until you get a clean test.


Allow it to cool 20-30 minutes before attempting to serve.


Optional step: dust with powdered sugar before serving.


If this berry-filled escapade has nudged your curiosity or inspired your own kitchen rebellion, let it be a testament to the joy found in embracing culinary unpredictability. After all, the best recipes often emerge from a dash of creativity and a sprinkle of daring experimentation.


Now, while we revel in the delights of culinary exploration, let's not forget that a smoothly running kitchen often relies on trusty appliances. From the oven that breathes life into your culinary creations to the trusty fridge keeping ingredients fresh, Appliance Rescue Service stands by to ensure your kitchen runs seamlessly. We understand that just like in cooking, sometimes, a dash of expert care and maintenance can keep everything running like clockwork.


So, as you bid adieu to this berry-filled journey, remember that our team is here not just for recipes but also to rescue any hiccups in your appliance symphony. Whether it's a stove in need of some love or a dishwasher on strike, trust us to be your partners in appliance care and maintenance.


Ready to keep your kitchen humming? Schedule an appointment through our user-friendly website or give us a call at ((214) 599-0055). Let's ensure your appliances continue to be your kitchen's silent heroes, making way for more culinary escapades and delightful discoveries.


Additional Reading

Sweet Veggie Tropical Curry


Chocolate Raspberry Thumbprints


From Pantry to Pot: Wholesome Hunter's Stew for the Resourceful Cook

Embrace the joy of kitchen spontaneity with a recipe that celebrates resourcefulness and flavor.

Ever found yourself standing in the kitchen, contemplating dinner with a mix of ingredients that seem to be the last survivors in your pantry? Welcome to the land of culinary improvisation. Today’s star: a recipe that began with three forlorn chicken breasts, a can of petite diced tomatoes, and a handful of other odds and ends that somehow come together into something magical—a hearty, veggie-laden chicken soup that defies the ordinary.


So, grab your Dutch oven, gather those essential tools, and let's dive into a flavorful expedition where a splash of white wine, a heap of spices, and a generous dose of patience will transform these humble ingredients into a comforting masterpiece. We might bend a few rules along the way (who needs a meat thermometer, anyway?), but trust us, it’s all in the pursuit of flavor.


Ingredients:


3 chicken breasts or 6 chicken thighs, boneless and skinless

Large can petite diced tomatoes

1 onion, chopped

1/4 cup butter

1/2 lb white mushrooms, cut

1/4 cup white cooking wine

4 cups chicken broth

1/4 cup instant mashed potatoes

1 teaspoon marjoram

1 teaspoon parsley

1/2 teaspoon basil

1/2 teaspoon rosemary

Salt and pepper to taste


Tools:


Dutch oven 

Tongs

Serving spoon or ladle 

Measuring cups and spoons

Knife

Cutting board 

Can opener

Forks

Plates


We're going to break the pattern here and assume your produce has already been cleaned. Surely, by now, you're tired of us telling you to wash things...


Melt your quarter cup of butter in the Dutch oven over medium heat and drop the chicken in to brown a little. This recipe works better with chicken thighs, but when we shopped, there weren't any in stock. (We thought we were out of the age of shortages and supply issues, but what do we know?) So, instead of thighs, we just used the three sad, neglected chicken breasts we had left in the freezer.


It's important to note that you don't have to cook the chicken all the way through at this step. We'll be shoving it into the oven later on, so don't bother with the meat thermometer this time. We just want the outside to get a little color and flavor, since that will help build the base later on. 


Once the chicken begins to brown, use the tongs to pull it and set it to the side on a plate.


Toss the mushrooms, onions, and spices into the Dutch oven and put the lid on. Let them cook for four minutes or so, then lift the lid and stir. We ended up cooking them for closer to eight minutes, but we started with some pretty huge pieces of onion. You're using the onions as your marker for how long to cook everything, so if you want less time, chop your onions smaller. 


Once the onion is translucent, splash the cooking wine in. Let it simmer and reduce uncovered for two or three minutes, stirring occasionally.


Time to add the tomatoes and chicken broth. Don't drain the tomatoes. Just stir them in to make sure they're somewhat evenly distributed. Then, return the chicken to the pot, put the lid on, and move it all to the center rack in the oven.


Allow it to come up to temperature with the oven. Set it to 450, and then set a timer for three hours. At this point, you're free to find another task to take care of. 


When the timer goes off, move it back to the stove top. Take two forks, lift the chicken pieces out onto a plate, and let them cool down a little.


Sprinkle your quarter cup of instant mashed potatoes into the broth a little at a time, stirring gently to prevent the potato flakes from sticking to the veggies instead of melting into the broth. You want to thicken up the broth, not create a congealed mass. 


Go back to that chicken and shred it to bits, then stir it back into the pot.


You now have a veggie heavy, hearty chicken soup. Enjoy!


And there you have it—a robust, flavorful chicken soup born from a handful of ingredients and a dash of kitchen ingenuity. As you savor each spoonful, let this meal be a testament to the delicious possibilities that emerge when culinary creativity meets necessity.

Remember, while we revel in concocting delightful dishes, our kitchens rely on our appliances to bring these recipes to life. Should your stove, oven, or any major appliance find itself in need of a little TLC, ARS is here to ensure your culinary adventures never hit a snag. Whether it’s a simmering soup or a baking extravaganza, our team specializes in keeping your appliances in top shape so you can continue creating delicious moments.


Don’t let a malfunctioning appliance dampen your kitchen enthusiasm. Reach out to us today to schedule a maintenance appointment through our user-friendly website or by giving us a call at ((214) 599-0055). Let’s keep your kitchen humming smoothly, allowing you to focus on what you do best—crafting culinary wonders that warm the soul and delight the taste buds.


Until our next flavorful rendezvous, happy cooking!


Additional Reading
Healthy and Flavorful: A Caponata Recipe That You'll Love


Jalapeno Chicken Bowtie Pasta

Smoke Detector Checks: A Vital Winter Checklist

Unseen Guardians: Winter-Proofing Your Home Against Silent Threats

It's the holiday season, and that means, for us up here in the northern hemisphere, it's also the coldest part of the year. Heaters are turned on, people are bundled up in blankets and coats, and everyone is probably feeling a little drowsy with the sun rising later and setting earlier. But, it isn't all snow and hot cocoa - heaters, especially those using gas, present a twofold danger if they ever malfunction. We are, of course, talking about fire and carbon monoxide. 

Your house does have detectors, but there is no time like the present to make sure that those detectors are good to protect yourself and your family during the winter. So, what are the differences between smoke and CO detectors, what does each warn you of, and how can we make sure that our detectors warn us the moment there is danger?
Now, you may be asking, “aren't smoke detectors and carbon monoxide detectors the same thing?” and this is a perfectly valid question. Both are designed to tell you of a danger to your breathing, and warn you before it gets to a serious level. But, they warn you of two very different dangers that can be presented in the home.


Our first stop should be a quick familiarization on the danger here. For the uninitiated, carbon monoxide, or CO, is an invisible and odorless gas that is extremely dangerous to the human body. It is very commonly found as a byproduct of gas burning devices, such as water heaters, gas ovens, and most prevalent during the winter, any gas heating devices for your home. Now, most devices that use gas to generate heat have excellent methods of ensuring that no CO escapes into your home during operation. However, these devices can be damaged, be that by natural wear and tear or by some other means. Even a small leak in the exhaust of a gas oven can prove dangerous for the occupants of a home, so it is incredibly important to make sure that the people inside the home are kept safe.

Smoke presents a more obvious danger, as it is very visible, though the danger is similarly found in the risk of breathing it in. Thankfully, smoke is not present unless there is a fire somewhere in your home. But, the risk is still present - especially with heat sources in the home that may not have been on since last winter.

Of course, with either threat, safety is most easily found by keeping your detectors up-to-date and well-maintained. Due to the differences in design, though, your smoke detectors and your CO detectors have a few differences in their maintenance. We have a few tips for you to follow with either one, that way you can make sure your home and your family are protected in case of a fire, or a carbon monoxide leak.


Here are a few tips for you to remember with your CO detectors:

  • Keep them clean! Using a dry cloth to wipe any dust from the detector is an excellent way to make sure that they're able to detect the gas without being choked up by household dust.

  • Replace your batteries! As a device that is constantly on to constantly be on guard, the batteries in your CO detector can run out over time. Typically, it is advised that you should swap batteries twice a year. We advise, if you haven't had a chance to change batteries in a while, make sure to do so now so that you're in the best posture for safety.

  • Check their age! Like regular smoke detectors, CO detectors have components that begin degrading over time. Most devices have a lifespan of five years, and a device expiry date should be somewhere on the device. A good rule of thumb on this - if you can't remember when the device was installed, and you can't find a date on it, it's best to go ahead and have it replaced.

  • Make sure you can hear them! Carbon Monoxide detectors should always be in areas where you can easily hear the alarms - especially if you're sleeping when they go off. The greatest risk of CO poisoning comes when you are asleep. So, make sure the detectors are capable of waking you up so that they can keep you safe in case you have a dangerous leak in the home.


And here are some important tips to remember for your smoke detectors.

  • Cleaning is universal! Making sure your smoke detectors are clean of dust works pretty much the same as your CO detectors, so follow the same instructions we mentioned above and you should be golden.

  • Batteries are vital! Your smoke detectors may be hard-wired, but even then, you will still have battery backups. Regardless of what type of detector you have, you should swap batteries at least once a year.

  • Test them! Take some time to use the test function on your detectors. There should be a little button on the front, so try to go through and hit every detector in the home to make sure they are all functioning correctly. It is recommended that you do this once a month.

  • Check the age! Just like your CO detectors, smoke detectors have a certain limit to how long they can function correctly. Most smoke detectors last ten years, but it is always best to check your detector to make sure they are still in their functional years. If they are getting particularly old, it never hurts to replace them a little early.

As we revel in the joyous moments of the winter season, let's not overlook the essential guardians of our homes – the smoke and carbon monoxide detectors. Keeping these sentinels in pristine condition is not just a winter chore but a year-round responsibility for safeguarding our loved ones. At Appliance Rescue Service, while our focus is on maintaining and repairing major appliances, we understand the importance of every aspect that ensures your family's well-being. As you prepare for the winter season, trust us to handle the upkeep of your appliances, allowing you to focus on what truly matters – the comfort and security of your home. Visit our website or give us a call ((214) 599-0055) today to schedule an appointment. Let our dedicated team at ARS keep your household appliances in top shape, ensuring a cozy and worry-free winter for you and your loved ones.


Additional Reading


Why Is My Oven Making Weird Noises 

Halloween Horrors In Your Home?

10 Kitchen Hazards to Avoid this Holiday Season