Have you ever flicked through old photos or magazines and wondered 'who in the world thought that trend was a good idea?' We know we have, which is why this week we're taking a look at the kitchen trends of now and then, focusing on the design choices of the early 2000s. (We know, it's weird to us to think it was 20 years ago too.)
Mason Jar Decor

Lighting, candles, soaps, storage, mason jars have been everywhere and used for everything.
They were affordable, easy to come by and you could buy them in bulk. Not to mention once you were done with the food inside them, you might have to wait a while before you could fill them again, so you needed to use them for something, right? People got creative and found all sorts of ways to use these staple items. It was great! And then it became overwhelming. You couldn't pick up a magazine or open up Pinterest without seeing at least one 'innovative, new way to use mason jars!'
Fortunately a shift towards handmade wares seems to be growing, meaning that mason jars might have to move out of the spotlight.
Granite everywhere!
Backsplashes, counters, and anywhere else designers could put it. Granites are so busy when you have them all over your kitchen, and combined with the thick cuts, it led to kitchens feeling very dark and confining.
Fortunately, today's trend is all about marbles or smooth expanses of a single color. Both of which can be obtained with some contact paper.

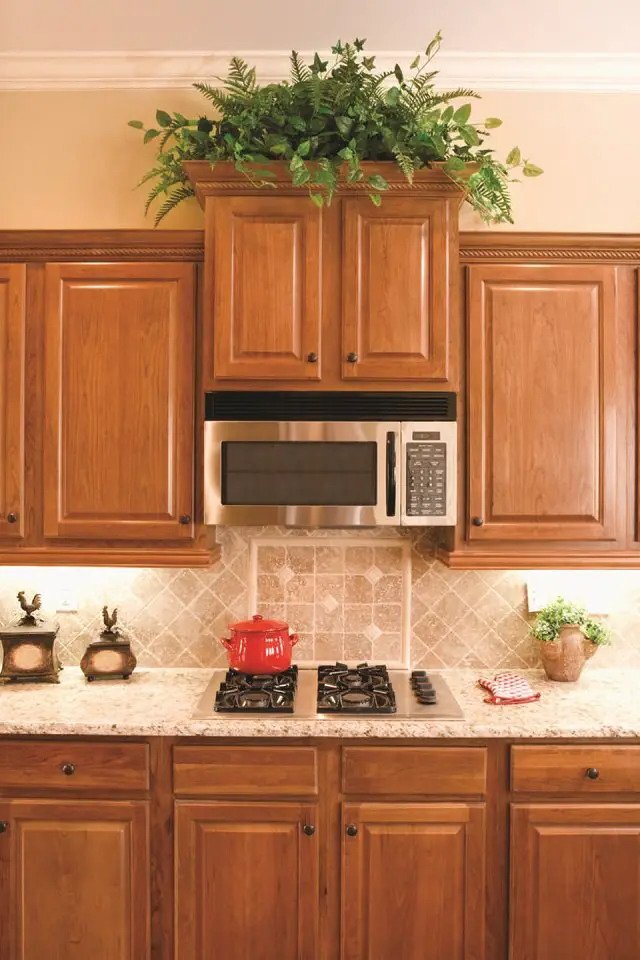
Ferns
Ferns were the plant in the 2000s and really, it’s not a terrible trend. They bring a lightness to a room if you take good care of them. Unfortunately, most people didn't. They're finicky plants and they do shed... a lot if you're not careful. So when succulents started to enter the spotlight in 2009 or so, ferns were ushered back into the offices and waiting rooms.
Stainless Steel Everything
Sure, most appliances come in stainless, but there’s no need to have it floor to ceiling. Which is what the 2000s did, even going so far as to have all of the appliances in one long line so that you had a wall of stainless steel when you stepped into a kitchen. Mix things up and check out different options! You can use contact paper to get wild or purchase ones that come in different colors like these gorgeous ones from SMEG.

Accent Walls
Can they be done right? Yes. Were they? Not really.
Ok, that's not fair. There were tons of magazines and interior designers that pulled off this look flawlessly. For the majority of us though, we'd try and use a cool color in a room full of warm furniture or vice versa and it just never worked the way it was supposed to!
This is still a trend surprisingly, but it's being done more cautiously. Instead of going with bold, eye catching colors people are choosing colors that already exist within their decor and using that for the accent.

Stark Black and White
This was a trend, and we’re not entirely sure why? It can be very disorienting to have everything in just two colors with no variation or places to rest the eyes.
It makes us think of high concept music videos or something, and really, we're glad this one has stayed in the past. Not to mention how difficult it is to keep stark blacks and whites clean!

‘Rustic’ Kitchens
Roosters and oil paintings, as far as the eye can see. It was a frightening time full of reds and yellows that didn’t really work well together. Rustic is a great aesthetic, and it can be utterly beautiful, but really, you can only have so many roosters in one kitchen. This one has stuck around surprisingly, but it's expanded out to include reclaimed woods, shiplap, and a broader range of colors.

Tuscan Kitchens
Our last one .. is hard for us to admit. Who wouldn't love to wake up in a villa in Italy? (Especially now that they're welcoming tourists back.) The problem wasn't that the design was bad, it was that it was reduced down to components, individual pieces that people would try to smash together without caring how they worked or why. It was boiled down to faux paintings, travertine tiles, more granite, and terra cotta floors. This reduction process left our kitchens feeling dark, gaudy and entirely tasteless.

Today's focus in the kitchen is on light, airy spaces. Windows dominate and everyone wants to have white EVERYTHING.Pendant lights and statement backsplashes add to the feeling, showing off your personality. Herringbone is taking over where subway tile previously reigned supreme, bringing in a twist to the world of tiling. How long will these trends last? We don't know, it's only the beginning of the decade after all.
Let us know what you think about trends of now and then in the comments here or over on our Facebook page, we'd love to hear from you!
If you're having trouble with some of your appliances you can reach out to us here or via phone ( (214) 599-0055) so we can help.