10 Surprising Accidents That Can Occur in Your Kitchen

We all know the common accidents that can happen in your kitchen, burns, cuts, falls, and fires. What about the uncommon ones though? Let’s go through some of the more surprising accidents that have happened within kitchens both personal and professional. We’re going to go on a path from the least dangerous to most. Fair warning, if you’re eating or have an active imagination but a weak stomach, you might not want to read this right now. 


live blue crab perched on ice

Live Crabs! 

According to Insider, Iron Chef Mashaharu Morimoto  once lost a live crab in his kitchen for four months. Apparently the frustrated crustacean managed to escape from a drawer in the sushi area and scuttle away. It was found later, alive and well when they were moving and cleaning several refrigerators in the kitchen. 


Tipped over Oven 

Children and pets are inventive in the best of cases. Look away for two seconds and they can get into anything. Having your oven tip over due to a child or pet climbing into the door is unfortunately far more common than any of us want to admit. 


Shattered Pyrex 

Believe it or not, pyrex dishes can break. A personal story here! Your beloved blogger’s brother attempted to clean a pyrex dish and ended up shattering it instead. He filled it with water and placed it on an electric stove with two burners on. The idea was to boil the water to make it easier to scrub clean. After several minutes of heat applied in this manner,  the pyrex dish shattered, exploding shards everywhere and boiling water coating the stove, counters and floor. Sadly, the original idea was misunderstood. He was meant to add already boiling water to the dish, while it was sitting on the counter.  In his defense, he was only 10. 

 
Moka coffee pot steaming slightly  on gas stove

Exploded Coffee Pot. 

Yup, during the research for our last post on how to clean coffee pots correctly, we found out that they can in fact explode. It looks so simple in the image to the left, but given the all metal design it can be surprisingly dangerous. While it’s not common for say drip or manual coffee makers, it is possible for ones that need to be used on a stove, such as a Moka pot or an old fashioned percolator. The blast produced by these has been known to give people concussions and break glass. 


Exploding Pressure Cooker 

Speaking of exploding, let’s talk pressure cookers. Unfortunately, there are people who don’t pay enough attention to directions when it comes to using these amazing tools. Or, it could just be that people get busy, or distracted by pets or small children. Both are viable answers. Either way, if you don’t pay enough attention to them, your pressure cooker can explode. The damage here can range from burning you and the people around you, to flat out explosion with the lid becoming implanted into your ceiling. Don’t believe us? Check out this Google search for ‘exploded pressure cooker.” 


Dancing + Utensils = Bleeding

Yup. We’ve all danced around in our kitchens while cooking, baking or decorating. Just make sure that if you do, you put down the things in your hands, or you might end up sending something flying at your friends or family.  (Your blogger still hasn’t gotten over an incident with a flying frozen water bottle.)


Magnets

We never would have thought of this one, but magnets apparently can be an issue. If your toddler is able to get their hands on two of them and swallow them, or your dog or cat for that matter, they can connect inside their bowels causing them to  trap and compress portions of the bowel wall. This can potentially lead to perforation, ischemia, sepsis and bowel obstructions. 


Everything prior to now was scary but would be survived, if they even resulted in injury.  These last three are questionable. Fortunately, they’re not something you’re likely to run into in your home kitchen. 

Again, we have to warn you that if you’re squeamish, you might want to come back at a later time.


Poor Construction

Three workers at a Church’s Chicken restaurant were sent to the hospital in 2016 for severe burns that required extensive surgeries and and skin grafts. Why? While at work a pit that was 5 feet deep opened in the floor underneath them and sent them tumbling down. A vat of boiling grease also fell in with them. 

 
dry ice in a glass bowl with smoke on table and floating off and around the dish

Power Outages and Dry Ice

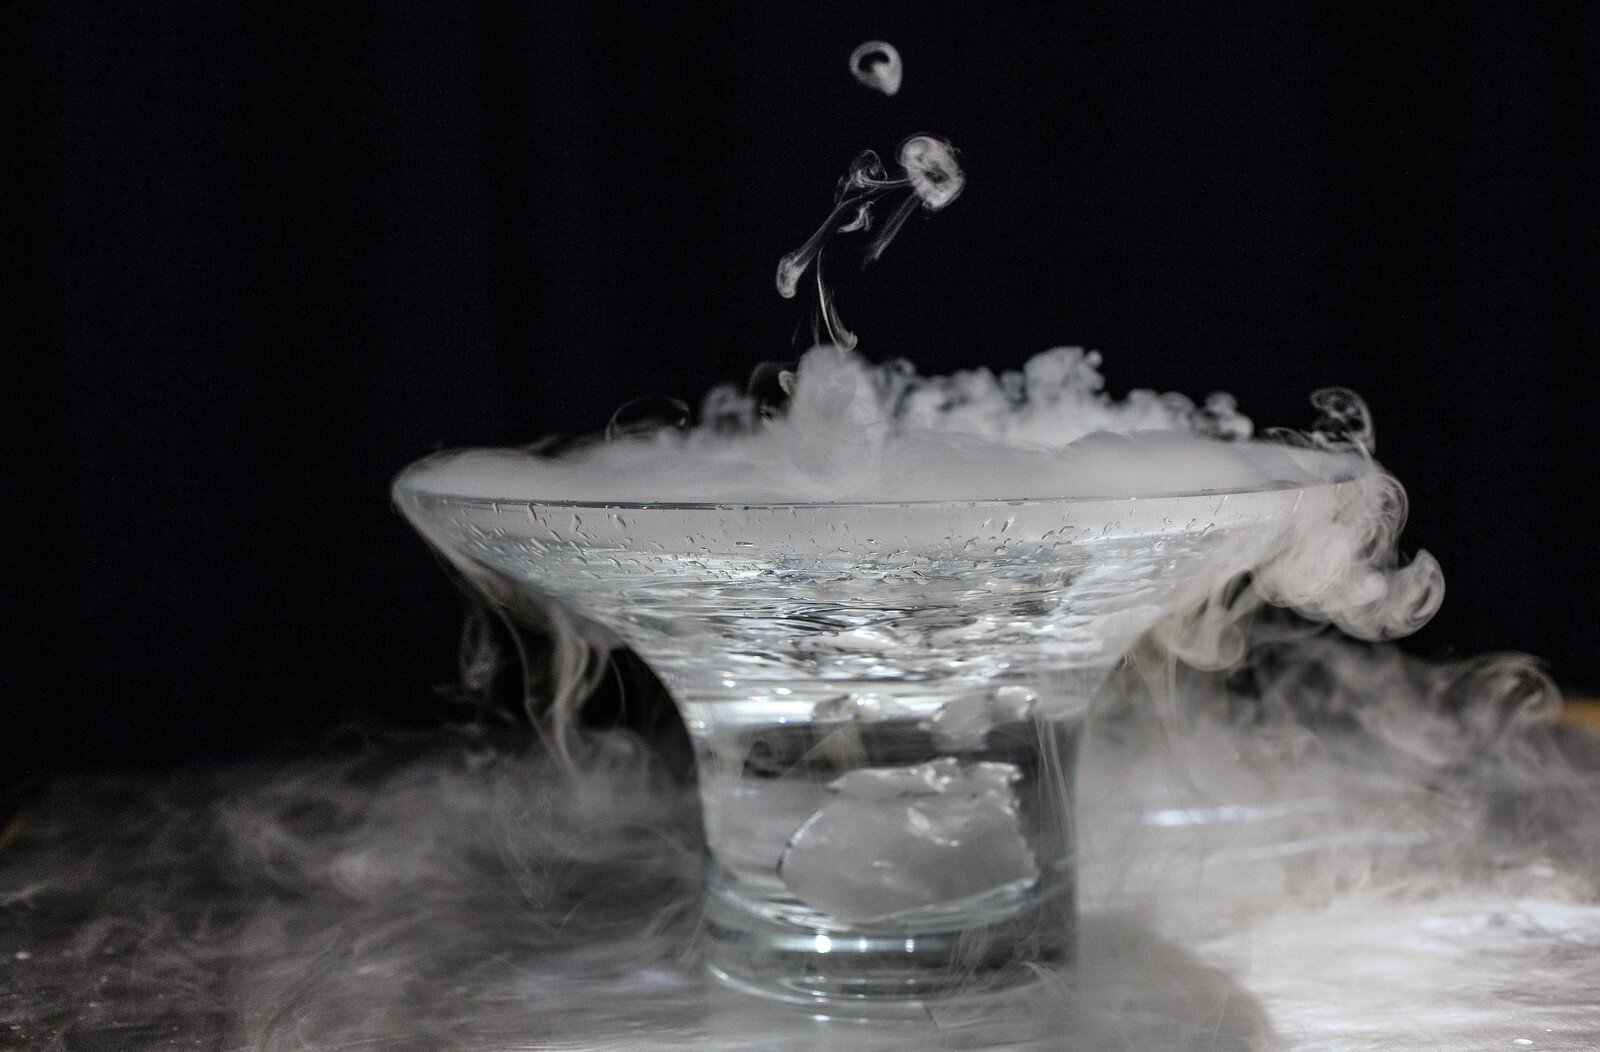
In 2012 a chef in Nashville was trapped in the walk-in refrigerator of his restaurant. He didn’t have his cell phone and he didn’t know that the emergency release on the door was broken. Earlier that same day the refrigerator had been filled with dry ice  due to a power outage. This meant that within the confined space, the fumes built up so quickly that he suffocated within minutes. 


Long sleeves


Yep, if you’ve worked in any type of a kitchen, you know that having trailing sleeves is a serious problem. Whether you’re getting sauce on your clothes, or tipping something over with them, they should always be rolled back. One woman learned this the hard way when her hand was pulled into a meat grinder. Fortunately her life was saved by one of her coworkers who rushed her to the hospital. 

Those are 10 strange and surprising accidents that can occur in a kitchen. It’s not meant to make you scared (after all, some of them can be amusing in retrospect) but instead to keep you aware of your surroundings when working in the kitchen.We hope that you found this post interesting and enlightening as well.  

If you have any questions or comments, feel free to post them below or over at our Facebook page. Alternatively, what are some of the weirdest mishaps you’ve had in your kitchen?

Remember, if something in your kitchen isn’t working right, the best thing is to have a technician come out and find what’s wrong. Whether it’s something as small as a light not working, or as large as a strange smell when you turn it on, set up an appointment and we’ll be happy to help. We want to help keep all of our clients in Allen and the surrounding areas safe. 

The History of Tile in 5 Stops

Look around your kitchen or bathrooms, or those in magazines, and you're likely to see tile of one variety or another. Used to bring color to a room, to draw your eye around a space, or just to create a stunning mosaic, tile is a versatile decorative art.  Today we're going on a tour around the world, exploring some of the oldest and most beautiful examples of ceramic tile work. We'll travel around the globe to Mesopotamia, Egypt, China, Rome and Byzantium.


Ancient Mesopotamia 12,000 BCE

Currently the oldest known glazed bricks (the predecessors to tiles) are those in the Elamite ziggurat of Chogha Zanbil. These date back to the 13th century bc. While they were 'only' glazed kiln fired bricks, it's still the oldest example of advanced pottery that archaeologists have found. An amazing example of this is the Ishtar gate that's been partially rebuilt at the Pergamon museum in Berlin. It's thought that the kiln fired bricks (an upgrade from sun-dried bricks) were developed as a protective outer coating for the more important buildings. Examples here include temples, gates, walls, and palaces. On top of being more easily decorated, kiln fired bricks were also extremely durable and made the structures stronger. (Just think how far we've come! From making buildings more durable to decorating our homes! Although those bricks would still be nice if you were building a custom outdoor kitchen. )


Egypt: 4,700 BCE

Photo Belongs to Hannah Pethen

Ancient Egypt is our next stop on this journey, as it's where tile work seems to have originated. The technique is called "faience," and it can be either translucent or opaque. Made of sand or crushed quartz, it was primarily used to bring shades of green, blue and turquoise to pieces. Tiles spread from being used to coat the homes and tombs of the wealthy to also being used for pottery and jewelry. (Of course the pieces were much smaller when they were used for the latter two.) We think these tiles would be amazing in the bathroom, and so soothing as well.


Rome: 200 BCE

In Rome we see something new: the concept of using multiple tiles to create a larger image, the mosaic. While this had been done before with pebbles and chips of stone, this is where mosaics started to be crafted out of tile.  Instead of every tile being carved and painted individually, smaller tiles were created to be brought together into great mosaics that covered the floors of the wealthy, or the public spaces across the empire. Known as opus vermiculatum, one of those that championed this art-form was Sorus of Pergamon , "whose work, especially his Drinking Doves mosaic, was much copied for centuries after." This was also the first time that colored grout was used to match the colors of tiles. Mosaics are still very popular today and can be utilized all over the home. Take a look around your home and consider where you might put a painting and then imagine a mosaic instead.


Byzantium: 400 CE

Photo Belongs to Pallas Web

Skipping forward in time and moving eastward geographically, we come to the Byzantine empire. Here, mosaics and tile work were elevated even further. They were used everywhere. From sacred spaces as the Egyptians had done, to covering public spaces as the Romans had, to using them to depict their rulers, such as Justinian I. Of course, no discussion of the artwork surrounding ceramic tiles would be complete without touching on the Hagia Sophia. The ceramic tiles there have been added to and preserved over the centuries and are truly a fine example of the beauty of tile. Here we combined the artistry of mosaics with the glazes and fine drawings from both China and Iran to create some of the most well known examples even today.


China: 2100 BCE

As we head to China we also head back in time. "It is believed that, like so much in building technology, the use of baked clay tiles stemmed from China." While using baked clay tiles might seem more humble than some of the other masterpieces we've seen, never doubt that even the most simple of objects was ornamented. Even the first examples of pottery drainage pipes had geometric patterns carved into them, according to records from the time. As the technology continued to advance, beautiful pieces were created such as the tile ends that are traditional in a Chinese roof.


With five stops we've traveled around the world and through history, seeing how we went from glazed bricks to thin tiles like we use today. Whether you're looking to do a tile backsplash in your kitchen, or a floor for your bathroom, consider the history of tile. It might help you bring some interest to your home in a way you hadn't thought of before. Or you can just appreciate how far humanity has come as you admire your new subway tile. 

Thank you for joining us on this trip! Did you find it interesting? Let us know over on our Facebook, we'd love to hear from you. 

Do you have another example of home decorating arts that we can explore? Tell us in the comments and we'll be happy to look into it. 

And remember, if your appliances are giving you trouble, or they've broken down, give us a call and we'll set you up with one of our technicians. We're rated one of the best in Plano for customer service and appliance repair and we want to be there for you. 

Lunch or Dinner, Falafel is fast and delicious!

Let’s face it, things are chaotic across the country right now, and many of us are looking for ways to make food go a bit further. What if I told you that you could get an easy lunch or dinner thrown together in less that 30 minutes of work? 

Not enough? What about the fact that it provides the same amount of protein and nutrients as a burger? 

And you get to fry it, and it stays healthy? 


Yes it does exist. This week’s recipe is for falafel. We found this recipe from Nourishing Days’ new book Traditional Meals for the Frugal Family. It’s a great book and teaches a variety of ways to get healthy food into your family, without a ton of prep work. 


Credit for this photo goes to Marco Verch

Credit for this photo goes to Marco Verch


Ingredients 

2 cups dried chickpeas, sprouted or soaked in water for 24 to 48 hours

1 large red onion, roughly chopped

1 small bunch of parsley

1 small bunch cilantro

2 tsp sea salt

1 tsp red pepper flakes

8 cloves garlic

2 ½ tsp ground cumin 

2 tsp baking powder

1 to 2 tbsp garbanzo bean flour

Lard, ghee or coconut oil for frying in

Wraps or bread 

A tangy sauce for topping 


Instructions

Start by draining and rinse the sprouted or soaked chickpeas and place them into a food processor. Add the onion, parsley, cilantro, salt, red pepper flakes, garlic and cumin. Pulse until everything is roughly chopped and well combined. Be SURE to stop before it begins to puree. It should be coarse and similar to bread crumbs in both size and texture. 


Scrape the mixture into a large bowl and sprinkle with the baking powder. Mix well. Test the consistency of the mixture by forming it into a walnut sized ball in your hands. It should be tacky and moist but should no longer stick to your hands. Add 1 to 2 tablespoons of flour, at the most,  if it is still too wet. Mix well to incorporate the flour, keeping in mind that the resting period will help the mixture absorb more moisture.


Cover your bowl with a plate or plastic wrap and refrigerate for at least 2 to 3 hours before frying. 


To fry: Place a 10-inch cast-iron skillet over medium heat and add enough of your frying medium to a depth of 1 inch in the pan.. Allow the medium to heat to roughly 375* F. 

You can test this by: 

Placing a tiny piece of the falafel mixture in the skillet and making sure it sizzles.

Flicking water on the surface of the oil to see if it sizzles. 

Using a thermometer. 


Scoop up about 2 tablespoons of the falafel mixture and loosely form an oval shape. Be careful not to compact the dough. You want to give it room to spread and form that signature fluffy interior. Carefully place  the mixture in the oil and repeat. (We suggest using a spatula. Your quirky blogger got splattered with oil at this stage after not being careful enough.)  Fill the pan but leave about ½ inches between the falafel. 


Continue to fry in batches until you have as many freshly fried falafel as you desire. Any remaining mixture can be refrigerated for up to 4 days or frozen. If you opt to freeze the mixture, make sure to squeeze all of the air out of the bag. Alternately, you can turn them into individual servings by making them into patties and wrapping them in wax paper before you place them into the storage bag. 


Serve the falafel in a wrap, a sandwich or atop a salad with sauce as  you please. 


Notes 

On Soaking 

When it comes to soaking, this is the fast and dirty method. This is the “shoot, I didn’t think about a meal for tomorrow when I was out shopping, what do I have on hand.” Easy, throw your chickpeas into a pot with enough water to cover them, and then another inch on top of that.  Let them soak overnight, rinse them once and then you’re good to go! (If you’ve really planned ahead, you can soak them for 48 hours, rinse after the first 24 hours and then once more before you use them.)


On Sprouting

When it comes to sprouting, there’s a couple of different reasons to do this. 

-It  adds more flavor if you let them sprout for a day or so.

- It goes from being a creamy texture to a more of a  vegetable flavor. 

-Its proven to be easier on your stomach and digestion. 


For this  what you’ll need is 2 cups of your grain or bean of choice (in the case of falafel, that’s going to be chickpeas)  

And water. Lots of water. 


Place your grains into a  ½  gallon sized jar or a bowl of equal size. Add 6 cups of water and let it soak for 12 hours. 


After 12 hours, drain and rinse the grains or beans. If you’re using a jar, put a fine mesh over your lid and rest your jar in a bowl at a 45* angle and allow the liquid to drain into the bowl. 


And that’s that!  We hope that you like this recipe as much as we did! If you are interested in more meals like this one, let us know over on our Facebook page. We love to hear from you and what you’re interested in. 


If you’re looking to continue working in the kitchen, and maybe using up some leftover bananas you have around, check out this post for banana bread


And last but not least, if any of your appliances are acting strangely, or are flat out broken, please reach out and schedule an appointment.  We want to help you and keep your home running smoothly. 

How Do They Do Laundry In Space

Have you ever thought about how laundry is done in space? 

 
astronaut in space, free floating without a tether
 

We hadn’t either until a client brought it up, wondering just how it is that astronauts deal with their dirty clothes in space. Digging into the material, we found that there’s a lot that goes into dealing with laundry, and none of it is what you think. 


At the moment, when astronauts go to the International Space Station, they bring clothes for their entire stay with them. With tours lasting up to six months, that can easily add up to 900 pounds of extra weight to the typical space launch!  And that’s for only six people. 


According to NASA the dirty clothing presents multiple problems. 

  • Where to store the dirty clothes

  • It’s still 900 pounds of weight 

  • Lint from the clothes can clog filters 

  • The SMELL.

And even though they’ve brought clothing, they can still end up wearing clothes for days on end before they can change.  Living in that way can spread germs, which actually multiply faster in space, and makes the astronauts susceptible to getting sick. 


Why Can’t They Do Laundry Like Us? 


Well, the short answer is that scientists and engineers, for all the amazing problems they /have/ solved, haven’t figured out how yet. 


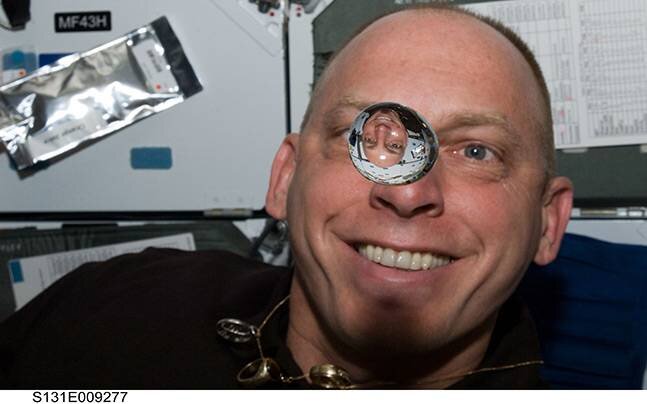
The longer answer is that gravity and how water works doesn’t let them. On Earth water flows and falls to follow gravity until it hits something it can stick to via water tension.  In space, while water tension still exists, the water floats around in globules till it hits something. You can imagine that having the water and clothes floating around in your washing machine would make things difficult. Since water weighs so much and costs even more to transport than the clothing, it doesn’t make much budgetary sense to find a way to do laundry.  (Water costs $10,000 per pound to get to the ISS! Talk about being worth your weight.) 


In order to ensure that they have ‘enough’ clothes astronauts have to wait a week in between changing their underwear and even longer before changing their outer clothes. How long do you think it’ll be before their clothes develop the ability to move on its own do you think? 

 
Astronaut with a water globule floating between him and the camera


What Do They Do Then? 


At the end of a long day, working out, studying space, and breaking ground for humanity, you want to change into clean clothes. As we’ve discussed though, astronauts only have a limited supply of clean clothes. So what are they supposed to do?


Astronauts have three options as of right now:  

They can wear the same clothes again

They can turn it into a fireball (our personal favorite) 

Use it to grow plants? 


So the first one is the most straight forward. Wake up the next day and wear the same clothes again. Repeat the process until you reach your next ‘clean clothes day’ and really celebrate when you do. Since the ISS is so  strictly monitored for temperature, the astronauts don’t sweat much, unless they’re doing their mandated workouts. 


Second up is the fireball! The majority of the shuttles that go to the ISS are non-reusable. The Russian Space Program sends up unmanned Progress shuttles that are only good for a one way trip.  This means that once they’ve made their trip up, they have to be disposed of in some fashion. What astronauts do is to load all of their trash, including their now (sentient?) clothing into the shuttle and sending it back to Earth. The course they set it on ensures that it burns up in the atmosphere rather than making it back to Earth whole. So the next time you see a shooting star, it might actually be a shooting shuttle? 


Last but not least is the curious experiment of one doctor, using his shorts to grow plants. Science Officer Don Pettit wanted to grow plants aboard the Shuttle to see what would happen. Unfortunately he didn’t have any soil. He took what he did have though, which was a pair of folded up underwear and ‘toilet paper’ to make a planter. “The toilet paper isn’t what we think of it consisted of two layers of coarsely woven gauze, 4 by 6 inches in dimension sewn together at the edges with a layer of brown tissue sandwiched in-between.” After solving a problem wherein the seeds were still too cold to germinate, Pettit managed to get both tomato and basil seeds to grow.  

 
Space Zuchinni.jpg
 

If these three methods aren’t appealing, we have to say we understand. Fortunately there are scientists who are looking to find ways to keep astronauts and their clothes cleaner for longer. 


If you have other questions about things are done in strange places, you might check out this post from our favorite guest writer Todd, Who In the World Repairs Appliances On A Plane?


Did you learn something new? Do you have more questions? Tell us on Facebook! We’d love to hear from you. If your washing machine here on Earth is busted, or any of your appliances,  make an appointment with one of our technicians today. We want to keep your home in tip top shape. 

Additional Reading

How To Hand Wash Your Clothes