What you want to know about speed ovens

The best of both worlds or too good to be true?


How often do you rush home after work fighting to try and figure out something that you can make that won't take all of your remaining free time and is still healthy? How often does that end up being a meal you toss into the microwave and choke down because it's been turned to mush, cardboard, or rubber? Would you believe us if we said that there was a way to cook without spending hours or eating cardboard afterwards? Today, we're talking about speed ovens. A speed oven is a relatively new type of appliance in the realm of cooking. What are they really, are they worth the hype, and how much would you be spending if you decided to put one in your kitchen.


What is a Speed Oven? 

Let's start off with what they are. Speed ovens combine a convection oven, a microwave, and if you choose, a grill element. They're supposed to be able to reduce the amount of time it takes to cook with a conventional oven, while also avoiding dehydration of food like a standard microwave. They take very little if any time to preheat, which is a drawback of most standard ovens.They often come with a variety of different pre-programmed modes or recipes to make things even easier.


A typical program for example would be baking. Most of us bake even if it is just around the holidays or special occasions. Something that would typically take you say an hour to bake in a normal oven would take roughly half the time using a speed oven. (Depending of course on the model.) This would be something wherein you would have 90% convection and 10% microwave. This innovative combination of different methods of cooking allows the speed oven to shorten the amount of time it takes to make your food. Some people swear by them, some people hate them. We think it's best to keep your manual nearby so that you can learn the different modes and cooking methods and make the best of this nifty appliance. 


Most of them are built and modeled after wall ovens. While some do come with the option to be freestanding, the larger majority of them are meant to be built into your existing cabinetry.


Who makes them? 

The three top speed ovens currently in the field in our opinion at least are made by Miele, Wolf, and Thermador. 


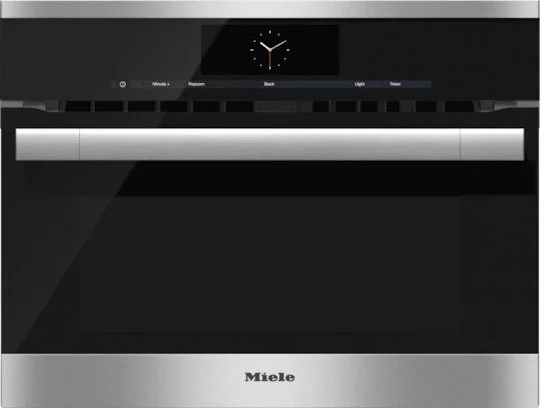
Miele H6700BM Built In Stainless Steel 24” ContourLine

1.52 Cu Ft

M Touch Intuitive Controls

19 Operating Modes

Rapid Preheat

Roast Probe

Over 100 MasterChef Menu Options

Comfort Swivel Handle

Clean Touch Steel

Stainless Steel 


Price: $ 3899


We think this model is best if you regularly host small dinner parties or cook just for your family. This is great for those of us that could use a hand in learning to make more of our ovens

The Miele ContourLine Speed oven, flush in the wall, with a silver handle, and  touch screen panel


Wolf SPO30CM/B/TH 30” Built In Speed

Dual Convection

10 Cooking Modes

All in One Oven Versatility

Astounding Capacity 1.6 Cu Ft 

Stylish 

Quick Start Controls

Gourmet Mode

Convection Mode

Quartz Broil Element

Keep Warm Mode

3.5 Watt LED Light 


Approximately $ 2580


The Wolf model is something we think best fits the hostess. You're regularly hosting large dinner parties or called on to bring baked goods for PTA meetings and your kids bake sales etc. You know your way around the kitchen and you need an oven that can keep up with you and your demanding life.

The Wolf Built In Speed Oven, flush in the wall of a matte grey kitchen.


Thermador MC30WP  30” Professional Series

1.6 Cu Ft

10 Microwave Power Levels

36 Cook Smart Auto Programs

2 Knobs

Kitchen Timer

Panel Lock

Touch Screen

Standard or Flush Install 


Rounding out our list is the Thermador. We include this one for the professional chef or Baker. You know what you're doing and how to do it and you need a tool that won't flinch at the amount of cooking you plan to do. The Thermador is built for professionals designed by professionals and is just what you're looking for.

The Thermador Speed Oven, with dual knobs  a touch panel and silver design.


So do you have any experience working with a speed oven? Do you think you would benefit from adding any of these to your kitchen? Let us know in the comments down below or over on our Facebook. We would love to hear from you. Although we hope that you've chosen a model that won't give you any issues.


 In the event that you have a speed oven and it's giving you trouble, we do service them. You can always reach out to us via our website or you can call ((214) 599-0055 ) and set up an appointment. We are here to keep  your home in tip top shape.


*Disclaimer: All images belong to their respective companies.

Wool Felted Dryer Balls - Are They Worth the Hype?

 They might be worth more than you expected.


Looking at that title you're probably wondering what are felted wool dryer balls and are we not talking about the stuff that gets caught in your lint trap? Nope!  We are talking today about the benefits both real and imaginary for dryer balls that you can make yourself.


 You've probably seen the commercial version of these in your local big box store or a DIY option on Pinterest. Felted wool dryer balls therefore are balls of wool; either wool yarn, unspun wool, wool batting, an upcycled wool sweater, that's been squished and fused together into roughly the size of a baseball. What matters here is that it is 100% wool without any acrylic or man-made materials in it. The reason for this is because the natural wool fiber has scales that, when wet,  will mesh and knit themselves together. Which is what you want in order to make a solid ball.  


On to what you really want to know about: what are they supposed to do?

On TV you'll probably have seen dryer balls touted as everything from alternatives to dryer sheets reducing your electricity bill by half lasting for years, the list goes on. What we can tell you is that there are many benefits to using wool dryer balls. They are not as extreme as you may see online or on TV but they certainly are benefits.

  • They are a viable alternative to dryer sheets that you can make on your own.

  • They don't leave any residue on your clothes or towels.

  • They reduce static cling.

  • Provided you use the recommended six balls for a load, they do reduce the amount of time and therefore energy needed to dry your laundry. They can also be used with auto-sensing dryers. 

  • All-wool dryer balls don't release plastic or rubber chemicals when heated as tennis balls and the commercial plastic variants do.

  • They soak up some of the moisture in your laundry and redistribute it evenly throughout the dryer to allow for a more even drying process. 

  • A well-made dryer ball will last roughly 5 years. You can tell that it's time to make or buy a new one when it has begun to pill or pull apart slightly.

Wool Dryer Balls.jpg


Those aren't just the benefits that are claimed but ones that we can say actually are legit. The reasons most people run into issues with using dryer balls, be they wool, plastic or tennis balls, is because they only use two or three in a load rather than six as is suggested. Using six dryer balls you are able to reduce your drying time by roughly 20% although this might not be the same for all dryers. We have to admit we can only test so many.


The next question many people ask is, “do they damage your dryer?” There is currently only one instance that we have found where they may injure your dryer. There are some older dryers whose inner drum is coated with paint. Those, when hit repeatedly by the dryer balls, will have the paint begin to chip and flake off. Given that that is meant to be a protective coating as well as appealing we don't advise using them in that case. For those of you with a stainless steel drum however we have yet to find any damage that is consistent with just using wool dryer balls.


Going into this we also wondered if they were a fire hazard. Due to the wet felting method that these particular wool balls are made with they do not shed as much as you might think. You do still need to empty out your lint trap and clean out your exhaust duct regularly, but a wool dryer ball isn't going to add to these things in any measurable amount. There is one trend though that we have to warn against, the use of essential oils. The scents that are used on dryer sheets are specially formulated so that they will not catch fire. Those are also the ones that are going to add residue into your towels and clothing though so it's a toss-up. The essential oils that you can purchase in the store and many people suggest adding to your dryer balls to make your clothes smell nice are not the same. These can and will ignite if left in a dryer long enough or if you've oversaturated the wool ball. So as October is fire safety month please do not use essential oils on your wool dryer balls. If you want to make your clothes and linen smell nice you might consider sachets or something similar to place in your cupboards.


The process for making your own wool dryer ball is more simple than you might think. Gather whatever material you're using and form it into a ball. Pack it tightly and then slide it into an old stocking, tie a knot tightly on either side. Then you wash the ball usually with another load of laundry on hot water and a cold rinse. You can run it through the dryer afterward if the ball feels dense enough. Otherwise, you can continue to wash on hot and then rinse on cold until it reaches that point. Since we haven't made these ourselves we're going to link you to another page that explains it in more depth.


So, those are the benefits of felted wool dryer balls. Did you learn anything new? Are you considering using them with your own dryer? Let us know in the comments below or over on our Facebook page. Don't forget if you're having any issues with your dryer or any of your other large appliances feel free to call or set up an appointment using our page. We want to keep your home running in tip-top shape. 

WD3.jpg

3 Front Loading Washers, Under $1000

 If you’re looking for the best buy which one is it? 

How do you know what goes into a good washer? Do you do research? Do you ask friends? Do you ask Facebook (haha). For us, we compare and contrast to see how models stack up against one another. This week we are taking a look at three different models under $1,000. We're going to walk you through what's the same and what's different between all three of them before we tell you which we think is the best bang for your buck. The contenders for this week are all front load washing machines. Our contenders are made by Electrolux, LG, and Samsung. The specific models are as follows: the Electrolux EFLW317TIW, the LG WM3400CW, and the Samsung WF45M5500AW

It’s Like Looking In a Mirror! 

(Ok, maybe not) 

Let's start off with what is the same - before we go seeing what makes these three washers so different. 

All three of them are energy star rated. 

All three of them are stackable. 

All three of them come with a one-year warranty. 

Their dimensions are almost the same at 39 inches high, 27 inches wide, and 31 inches deep, with Samsung being the only outlier at 35 inches deep instead. 

Not one of the three of them connects to Wi-Fi. (Which, if you've read our posts regarding the Internet of Things or how your Samsung fridge can be dangerous, this might be a good thing.)


Where Are The Washers Different? 

Energy Efficiency

How much energy does it take for these to do the ‘standard’ wash, consisting of a warm wash and a cold rinse? In energy efficiency, both the Samsung and the LG are highly rated, with the Electrolux lagging slightly behind. Given the current prices for electricity in Texas, this matters greatly to us in suggesting the best option for you. The LG’s rating is affected by their focus on Cold Wash technology, ensuring that cold water washes as well as warm does. 


Water Efficiency -

Their water efficiency is a mix of how much water they take to wash a standard load and how much water it wrings out afterwards. Both the Samsung and LG are given five stars; again the Electrolux lags behind a step at four.


Noise Rating -

This one is important for those of us who live in duplexes or split homes, or if you live in an apartment and have to supply your own washer. (Or if you’re just like our blogger and sensitive to loud sounds.)  Ratings are based on how loud the washers are during all three stages of a wash: fill, wash and spin. We do also recognize that the amount that a washer vibrates is going to affect how much noise it makes. Once again the Samsung and LG are tied at 4 stars out of a possible 5. Samsung has taken time to include ‘VRT Technology’ to reduce the amount their washer vibrates. LG, on the other hand, has engineered theirs for both vibration and noise with proprietary terms like “LoDecibel™ Quiet Operation” and “ TrueBalance™ Anti-Vibration System.” The Electrolux, though, only has two stars. Listening to this is not quite as bad as having nails on a chalkboard - but very surprising in terms of just how loud it can be. And that was without having a dryer stacked either above or below it.


Vibration -

This ranking was based on how much the machines vibrated without having any support underneath them or anything to muffle them. Once again, we see that the LG washer and the Samsung contender are tied at four stars. The Samsung boasts “an innovative tub design and special sensors [to] keep heavy loads balanced even at high spin speeds.” The Electrolux is rated at a respectable three stars, but combined with the noise score, you would be forgiven for thinking it's a much lower rating.

Bonus Features -

Those of us who have to deal with very professional workplaces know that dry cleaning bills can be a hassle, and they stack up quickly. Many different companies (not just the three reviewed here) are now offering steam options on their washers. However, out of the three washers reviewed in this post, the only one that does offer a steam option is the Samsung. 


Gentleness -

For us, this was a very important factor: how well do the washers treat your clothing? The Electrolux was only given one star. This is a machine that is going to rip your cottons apart - perhaps not feed it anything more delicate. The LG model was only given  three stars, which is actually it's lowest score out of every facet we’ve looked at. The Samsung washer rated the highest (AT ZYX STARS?) -  which we found surprising, given some of the earlier stats. Perhaps their vaunted ‘diamond drum design’ has done them some favors. 

Our second to last, but certainly most important to us, is customer satisfaction. We rated this based on how often you're going to have to repair the washer within the first five years, barring an extended warranty or service plan. LG has five stars. Given the amount of work that they put into their products, we aren't terribly surprised by this one. What did surprise us was that the Samsung and Electrolux both ranked at three stars. 

Last of all, let's take a look at price. The Electrolux is going for $765. The LG is going for $720. The Samsung is going for $910 at a sale price as of this writing..

Comparing all of these things, we feel that the LG is your best bet for a front loading washer. Based on all of the different numbers we’ve crunched here, we feel that it's a solid buy if you're looking to spend under $1,000 on your washer. Whether you're looking for a temporary model until you can afford the washer of your dreams or whether you're looking to furnish a rental property, the LG is a solid model. Its energy efficiency, water efficiency, noise level, vibration, and how it treats your clothing while still cleaning properly all make it a good bet.  Most important of all is the high customer satisfaction rating. Although it sounds counterintuitive, we here at Appliance Rescue Service want our readers and our patrons to have their homes running in tip-top shape. And if that means you don't have to call us because you've purchased a fantastic washer, then that's okay.

We feel that the Samsung is an acceptable secondary option - although given its current ratings, we don't feel that it's worth its price tag. If that comes down in the future, or if you might snap it up at a clearance event, then we might reconsider. 

Do you have any experience with these models? Do you disagree with our opinion? Would you like us to assess another characteristic next time? Let us know over on our Facebook or in the comments below because we'd love to hear from you. Don't forget: if your current washer is giving you trouble and you don't want to replace it, you can always give us a call. We'll help you get it back up and running. You can make an appointment on our web page or give us a call at (214) 599-0055.

Bringing In The Smells Of Fall

It’s finally here and now your home can smell like it! 


Summer took forever didn’t it? Thankfully fall is finally here and that means cooler temperatures are coming! While we’re waiting for said cooler temps though,  it might help if we make our homes smell like fall. It’ll keep us happy while waiting for the weather to catch up at least. After all, smell is a human’s most powerful sense. 


Rather than layering new smells over the old, let’s take a moment to clean up. New smells will eventually fade and then you’ll be left with the ones you were trying to disguise. 


Getting Rid of the Bad 


Rather than starting with the most obvious point, the kitchen, let’s go elsewhere.  

Have you checked the humidity levels in your home? While yes, we live in Texas, your home can still trap moisture, whether that’s from showers, cooking or even plants. Go through your home with a hygrometer to measure the humidity. For any rooms that feel damp or where the walls are noticeably damp to the touch, consider using a dehumidifier.  


What about wall-to-wall carpets? Not only is this trend in kitchens and bathrooms outdated, it can rap smells and moisture. A runner or strategically placed carpets can be great alternatives. Wall-to-wall is asking for trouble in these spots though. Start by laying down a layer of powder deodorizer and vacuuming that up. Then, if you want to make a change down the road you can put in hardwood or tile and some rugs. 


Lets move around the rest of the house even as we continue to look at soft surfaces. Couches, beds, linens and curtains. All are areas that trap smells. 

Wash what you can and spray what you can’t with a deodorizing spray. We’re going to suggest one with a neutral smell rather than a scent, this way you don’t overwhelm your nose later. 


Finally let’s move on to most obvious sources of bad smells. 

Garbage cans, diaper pails, litter boxes and pet beds and finally your garbage disposal

Empty them, scrub them, run vinegar through the disposal, and put a packet of silica gel at the bottom to absorb moisture and odor. 


Lie back and bask in the clean and neutral scent of your home! You’ve done the hard stuff, now let’s get to the fun part. 


… To Layer In The Good

Let’s start by opening up the windows. While this isn’t always possible during the day (we know we need our AC still,) if you can open them just an inch at night, you’ll get lots of benefits. Not only will you get a great  cross-breeze to cool your home, you’ll also bring in scents that will last most of the day. 

Some examples we’ve smelt in our neighborhood at this time of year include: 

-Woodsmoke

- Leaves

- Wind 

Those last two might sound very vague, but there’s a difference in them that only happens during fall. It’s an undefinable scent that if you know it, you’ll always pick up on it. 


From here let’s move on to building the scent of your home. We’ll start with a spray that you can use on your soft surfaces. 

If you have a specific scent that you love, why not carefully mist it throughout? (We say carefully because you want the smell to be pleasant and light, not ‘punch in the face’ overwhelming.)  This recipe can be scaled up or down, depending on how much area you have to cover. 

½ cup white vinegar

½ cup rubbing alcohol

1 tsp cornstarch

20 drops  of your favorite essential oil or blend. 


Note: Make sure to shake well before each use and test on a small area before spraying the full surface. 


Stove Top Potpourri 

Next up is a staple in the north, simmer pots. A simmer pot is a small pot of water that you put to low heat (hence ‘simmer’) with your own blend of spices or dried fruits mixed into the water. They’re a great way to bring a fantastic warmth to your home. You can leave them gently bubbling on the stove or even a radiator all day to release the spicy scent. Just make sure to check on it occasionally to top up the water. Burning a pot is not great for your stove. If that’s something you worry about, you can make use of a crockpot instead. 


Last stop, pull out the candles. 

So you have your base notes for your home, that's the light spray on your soft surfaces. Base notes bring depth to a scent, and in the case of your home these are the ones that are there all the time. You’ve got your mid notes, as the simmer pot, these are the ones that are warm and comforting. Now let's bring in the top notes, that bring spice and pop to your home with candles and scent diffusers. These are the ones that aren’t going to be there all the time and if you use too many you can overwhelm your home and your senses. 


Candles should be used sparingly, unless they’ve got a light scent,  in which case, have fun and enjoy the sparkle. 


When it comes to recipes for your simmer pot or using the essential oils, Pinterest is your friend. We’ve included our favorite recipes for each at t6he bottom that you can use as a starting point. 


Put all together you’ll have created a custom scent that’s unique to your home and creates a truly inviting and relaxing retreat away from the world. Are you excited for fall? Can you tell that we are? What is your favorite scent or mix of essential oils? Tell us down in the comments below or over on our Facebook, we’d love to try out some of your suggestions.  

If you need help with your stove, or any of your other major appliances, we’re here to help


Simmer Pot Recipe: 

6 whole cloves

6 star anise 

1 sliced apple

½ cup cranberries 

2 sticks of cinnamon 


Woodland Romp :

Use this for your spray or in a diffuser around your home. 

12 drops cypress

6 drops white fir

6 drops sandalwood

Welcome Autumn with Fall Fruit Bread

Welcoming in cooler weather with a baking spree.

Welcome to Autumn! 

While the first day of autumn is technically not until next week Tuesday, everyone else seems to already be on the fall flavors bandwagon. We're getting tired of lagging behind. If The-Big-Coffee-Chain-We-Cannot-Name can start offering pumpkin spice lattes in AUGUST, we’re sure we can give you a recipe based on in-season fall fruits a few days ahead of schedule.

We haven't offered you fine readers anything sweet lately in the recipe posts, and the collective sweet tooth is starting to make some noise around here. So this week's recipe is a fruit based dessert. Or maybe breakfast; we certainly won't tell anyone how or when to eat their baked goods.

If you're lucky enough to have an orchard nearby, head out and grab some fresh apples or pears! They're both in season right now, as are cranberries (which, unfortunately, only make their appearance in their dried form in this recipe). You might make it an adventure in cooking with the family. If not, it's fine to just pick up a few fresh fruits at the farmer's market or local grocery store. You can even get away with using canned goods for this recipe if you're short on time. But whichever kind of fruit you start with, you'll find yourself needing a food processor or blender.

This is a big batch recipe; it'll make a loaf for you and a loaf to give to your neighbor! Alternatively, keep it all for yourself - and if you and the family don't eat it all up right away, you can wrap the second loaf in foil and plastic and put it in the freezer for later.


Fall Fruit Bread

3 cups all-purpose flour

1 3/4 cup sugar

3 large eggs

1 tablespoon vanilla extract

1 tablespoon ground cinnamon

1 teaspoon baking soda

1 teaspoon baking powder

1 teaspoon salt

1/8 teaspoon ground cloves

1/4 teaspoon nutmeg

1 cup pureed apple (or unsweetened applesauce) *

2 cups pureed pear **

1/4 cup dried cranberries


* 2 large apples, or 3 medium apples

** 5 average pears, or two 14-oz cans of pear halves in juice or syrup, drained and rinsed

Let's start with the scariest part of this recipe: the purees. If you've started with fresh apples and pears, you'll have more steps than the folks who've opted for canned goods - but this is all part of the fun.

Bonus: if you're baking with kids, this can be a good teaching opportunity for fractions and conversions. Measure out your cut fruit to track your progress as you go.

Readers who have chosen to use canned goods should skip down to Step 4.

Step One:

Wash all of your fresh produce, please! Apples and pears sold in grocery stores often have a layer of food-grade wax that can complicate this recipe.

Step Two:

Core and slice your fresh apples and pears. Thinner slices will cook up quicker, but thicker slices are good for a chunkier texture. Whether or not you peel the fruit is also up to you - keep all the nutrients by leaving peels intact, or create a finer texture and uniform color by removing skin.

Step Three:

Toss all of your cut fruit into a pan and add just enough water to cover. Cook over medium heat 10-20 minutes, until pieces are tender.

Step Four:

Drain your fruit, either from the pan you've cooked it in or from the can it arrived in. Put all the apples (or applesauce) and pears into a blender or food processor. Blend until you've reached your desired consistency.

Step Five:

Sift together all of your dry ingredients. Whisk your eggs in a separate dish and add the eggs, fruit and vanilla extract to the dry ingredients slowly. Try to avoid over-mixing; an over-mixed batter makes a tougher, chewy cake. If your batter looks heavy, dense, or dry, you can add a tablespoon of water or milk at a time until it reaches normal cake batter consistency. Fold in your dried cranberries.

Step Six:

Grease two loaf pans and fill each to about 2/3 full. Avoid overfilling - an overfull loaf pan can create a nasty mess in your oven if the batter overflows while cooking. If you still have batter left over after filling two loaf pans, consider making a few muffins or a mini loaf.

Step Seven:

Bake at 325 degrees for 1 hour. You should not need to make any time or temperature adjustments for dark/nonstick pans versus glass or aluminum. Just make sure to test with the toothpick trick before removing the loaf pans from the oven - some loaves are a little picky and need slightly more time than others.

Make sure to let them cool at least ten minutes before attempting to turn them out. If you're working with silicone pans, you may need to let them cool completely before the loaves will release without crumbling.

Serve as it is, still warm from the oven - fresh baked goods are tough to resist. On the second day, we prefer to cut it into slabs, toast for a few minutes in the toaster oven and add a pat of butter and a dollop of jelly.

A warm kitchen, and the smell of something you've made at home, and the chance to share with people you care about are the best autumn memories you'll fall back on when the weather changes... But we'll probably still dream about the pumpkin spice drinks from big chain shops, too.

Don't forget if your current washer is giving you trouble and you don't want to replace it you can always give us a call and we'll help you get it back and running. You can place an appointment on our web page or give us a call at (214) 599-0055.