The Five Most Common Types of Clutterbugs

And How You Can Deal With Them…

Are you a clutterbug? Do you live with one? Are you tired of it? While there are deep psychological reasons for people being clutterbugs, there are still practical ways to deal with the clutter. The question is: what type of clutterbug are you dealing with? 


The Pack Rat

This clutterbug is the type to keep EVERYTHING. Stuffed in every available nook and cranny are the things they collect or keep because it’s useful. 

How to deal with this: 

Computers, boxes and other odd items stacked haphazardly.
  • Make a plan. Don’t just say “I’m going to tackle the living room today!” No. Break it down a) in a way that makes sense to you and b) is small enough you won’t get overwhelmed. 

  • Go slow. Again the point here is to make sure that you can emotionally tackle this not just physically. 

  • Consider the system of ‘Keep’, ‘Toss’, and ‘Donate.’

    • Keep - If you cannot part with it either because it’s useful or important. 

    • Toss - It’s broken and you don’t know how to repair it or don’t have time to learn how. 

    • Donate - You don’t want it or it’s not useful to you, but it could be useful to someone else. 
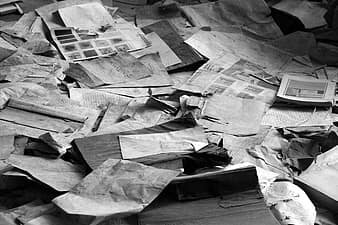
 

The ‘Archivist’ 

Letters, magazines, newspapers, books, all forms of the printed or written word are valued by this clutterbug. Their home is full of stacks and shelves. It may be sorted, it might not. 

How to deal with this: 

Stacks of letters and newspapers scattered

  • Sort by type. Start by figuring out how much of each item you have. Sometimes, seeing just how much of something you have makes it easier to select out what to keep. 

  • Cull out any duplicate items. Two of a book? A magazine? Set them aside either to recycle or donate. 

  • Scan it! Letters, magazines, newspapers, recipes etc. There are several different scanning apps that can be used to save and store material items against degradation or loss. (This blogger favors Evernote personally.) 

  • When it comes to books, if you’ve only read it once, put it aside to be donated. Why keep it if you don’t enjoy it? 


Landing Zones 

 These are the people who collect clutter in specific places. Maybe it’s a table near the entry door. Or a chair in the bedroom. Or the dining room table. It doesn’t matter, these spots are catch-alls. This type of clutterbug will drop the contents of their pockets or purse here, mail, clothes they want to wear later, etc. 

The best way to work with this is to: 

Purses hung on and around a rack.
  • Create ‘no fly zones’ or areas where things can’t be. 

  • Block those areas  with something. It could be a cute pillow, a tray or  a vase, something that clearly says ‘this is not a place to drop things.’ It’s just meant to be a trigger to help you change how you view that space. 

  • Include areas where it is ok to put things, but that you have to sort it out once a week. 


The Abundance Clutter 

This clutterbug isn’t what you might think. Their home is mostly clean. They don’t have obvious clutter. But if you go into the kitchen and open up their cabinets and pantry... That’s when the image changes.  This clutterbug buys things on sale that they don’t need. They buy surplus ‘just in case something happens.’ Six or seven of one type of chips. Boxes upon boxes of Rice a Roni, which lets just say you should NOT eat this way for months upon months. 

How to deal with this:

Pantry stuffed full of repeated materials.
  • Make a meal plan. Go through what you have already and decide what you can use soon, what you will use within a month or can store for 6. 

  • Go to the store next.  Ask yourself, will I eat this within the next 3 months? 3 months is a healthy middle ground between ‘saving for the future’ or ‘just in case’ and ‘buying only what you need for this week.” Buy only what you will use within that time period.

  • Check yourself before you go to the counter. Make sure that you haven’t grabbed more than what you need. 


Organizing Only When Things Are Messy

This is the type of clutterbug that leaves things slowly building up. One day at a time, until there isn’t any space left. Coffee cups, plates, mail, magazines, Everything! 

And it stays that way until one day they realize how messy everything is and they burst into a cleaning frenzy. 

Repeat ad nauseum. 

For some people this works just fine! For others it becomes far too much. Or it could be the spouse, friends or family of this clutterbug. 

How to deal with it: 

  • Dedicate 10 minutes a day to clear. Just pick up anything that you can and put it away. 

  • Dedicate time every week to sort through and put away other things that built up over the week, or to organize your home. 


So we ask you again, are you the clutterbug? Or are you the one living with the clutterbug. Either way we hope that we’ve helped you to see a way forward that doesn’t involve huge time commitments or trying to turn your personality inside out.

What about you? What are some techniques that you’ve found that work for you in corralling the clutter? Let us know on Facebook. Remember, we’re not just here to help you keep your home clean, but to also make sure that it runs smoothly. If you’ve recently found that one or more of your appliances aren’t working properly, feel free to reach out. You can call and schedule an appointment or  go to our website and schedule one there. 

Down Home Comfort with Sweet Tea-Brined Pork Chops and Red Pepper Relish

So good your guests won’t want to leave. 


This month’s first recipe is one that’s perfect for the dog days of summer. It doesn’t take much to prep and it’s easy to throw on a grill to cook. So many of us already drink sweet tea in the summer, we decided to try it in other uses as well. We came across this idea and after testing it out, it’s a winner!  Try out our Sweet Tea Brined Pork Chops and Red Pepper Relish.

Ingredients

8 orange pekoe tea bags*

1 cup sugar

6 bay leaves (preferably fresh)

1 Tbsp coriander seeds

6 bone-in center cut pork chops (2 inches thick; about 5 lbs total) 

3 red bell peppers, chopped

1 large vidalia onion, diced

2 Fresno chile peppers, seeded and chopped 

¼ cup apple cider vinegar

¼ cup apricot preserves

Freshly ground pepper

Kosher salt

Vegetable oil, for the grill 


-Make the brine: Bring 6 cups of water to a boil in a large pot. Turn off the heat and add the tea bas and let steep for 10 minutes. Discard teh tea bags. Stir in ¾ of a cup sugar, ½  cup salt, the bay leaves and coriander seeds. Cook over low heat, stirring consistently  until the sugar and salt are dissolved. Roughly 3 minutes.  Remove from the heat, pour into a  large heat proof pitcher and set the pot aside for the time being. Let the brine cool to room temperature, roughly 30 minutes. Refrigerate the brine until very cold, at least one hour.Pour the brine into the reserved pot and add the pork chops. Cover and refrigerate for at least 8 hours, or overnight. 


-Once the brine and pork is in the fridge, make the pepper relish. Put the bell peppers, onion and chilies in a food processor and pulse until broken down but not pureed. This should be 2 or 3 times on most food processors.  Transfer to a small saucepan and add the vinegar, preserves, the remaining ¼ cup of sugar and ¼ tsp of salt. Bring to a boil, then lower the heat and simmer until slightly reduced, but still juicy. Keep a close eye on it as time may vary based on time of year. It should take about 10 minutes. Remove from the heat, transfer to a serving bowl and refrigerate until you’re ready to serve. (You can make the relish up to a day ahead.) 


Preheat your grill to medium. Oil the grill grates lightly. Remove the pork chops from the brine and pat dry. Season the chops with salt and pepper. Grill, covered until well marked, roughly 14-16 minutes. If they get too dark, rotate them 90* . Flip the chops and cook, covered until well marked on the other side. Take a digital thermometer and insert it sideways into the center. It should register 145* and at that point it’s done. Transfer the pork to a cutting board and let it rest for 10 minutes. Serve with the relish. 


NOTES 

*Or the equivalent amount of loose leaf orange pekoe, if you’re willing to use it. 


So what is orange pekoe exactly? 

Rather than a flavor, orange pekoe is actually in reference to the quality of the tea. 


Tea leaves are picked from different heights on a plant for different purposes. The younger the leaf, or the higher it is on the plant, the more flavor it has. Another matter that goes into grading is how whole or broken a leaf is after it has been processed and dried. So an orange pekoe tea is made up of whole, young leaves. 


That’s not to say that the bagged tea you can pick up at your local store isn’t perfectly good tea. This is just the actual definition of an orange pekoe. So, no your pork isn’t going  to taste like oranges, unless you add some into the brine. 

Tea plant with leaves labeled based on the different tea grades.


Did you ever wonder what the difference was between a jam and a relish?

We did while making this recipe. A relish, according to Britannica, is a cooked and pickled vegetable or fruit preserve. It’s typically eaten with a bland food to bring flavor, but we can promise that’s not the case with this dish! 


Thank you very much for joining us for this recipe. We hope you enjoy cooking it as much as we did. Which was your favorite part? The tea brined pork or the relish? We’d love to hear from you over on our Facebook page. We want to see how yours turned out. 


If you found out that your stove or refrigerator weren’t working properly while you were making this, don’t hesitate to give us a call. 


Whether it’s your refrigerator or stove, your ice maker or your dryer, we fix appliances. And if all you want is to schedule a maintenance check? We can do that too. 


We look out for our clients in Allen and the surrounding areas and we want to keep your home running in tip top shape. 


Call us at ((214) 599-0055) or schedule an appointment on our website

4 Kits Your Home Needs

The Bare Bones For Your Home

We put together four kits that will get you through almost any situation. When you’re starting out somewhere new you don’t always have everything you need, or the funds to get it. Whether you’re a business exec moving to a new state or fresh out of college with your first apartment, you tend to pare down. Whether it’s a last minute get together, a broken outlet, or you cut yourself fixing said outlet, we’ve got you covered. 


Let’s talk about the most common type of kit first, the first aid kit. 

Ideally, you should have several around your home. This way in the event of injury you don’t have to go far for what you need. Some of these, like bandaids, are going to make sense. Others, like splint material will confuse many. “We live in the first world. Shouldn’t I just go to the hospital or call an ambulance?”

Well, ideally, yes. What if it’s a major holiday though? Or there’s rough weather, you can’t get out or it’s going to be a while until a paramedic can get to you? In those cases it’s better to have all of this on hand and know how to use it. 

One last one you might not have run into before is lavender essential oil. This can be used on burns and other small wounds, and is kept in many a metalworker’s kit. 


FIRST AID KIT 

Aloe vera gel

Medical Scissors

Nonadhesive dressing

Medical tape

Rolled gauze bandages

Splint material

Lavender oil 

Anti-inflamatory drugs

Anti-bacterial ointment

Ace bandages

Surgical scrub brush

Disinfectant wipes

Sterile compress

Selection of bandages

A first aid kit list
 

TOOL LIST

Next up is tools. This isn’t the type of stuff you get for Father’s day.  This is meant to be a “multipurpose, used everywhere around the house, if you don’t have the ‘right’ tool, see if one of the others will get the job done.” That sort of kit. (Not that we have any issues with the nicer or more specific tools, but this is a basics post. 


Screwdriver set - a mix of Philips and flat-heads, or even a multihead screwdriver. 

Tool box- Even if it’s a small kit, it's easier if you can keep everything together. 

Utility knife

Putty knife

Handsaw

Level

Adjustable wrench

Hammers - One 16 lb claw and a small mallet

Duct tape

Pliers - You can pick up a set with a channellock, needle nose and side cutting pretty easy. 

Flashlight

Stud finder

Socket set 

Tape measurer 

A list of basic tools you need around the home.- to fix anything.
 

The Kitchen

Moving into the kitchen, we have more tools, but this time, we’re focused on making food. While we love our specialty tools like our automatic pan stirrers, crepe pans and multi function blenders, in truth you don’t need them. We know, the horror. Really though, with these 10 tools and persistence, you can make any dish. Is it easy? Not always. But you’ll also have less clutter in your kitchen. 

10” Stainless Steel Skillet

Chef’s Knife

Measuring Spoons

Dry & Liquid Measuring cups

Cutting Board

Sheet Tray

8 Quart Heavy Pot

Peeler -  Either a Y peeler or a straight peeler will work. It’s up to you which you prefer. 

Large Spoon 

Fine Mesh 6” Sieve 

A list of basic kitchen tools you need to cook almost anything.
 

The Pantry

Moving on from the tools in the kitchen, you have basic supplies. We saved this list for two reasons: 

  1. It’s the longest

  2. It’s broken into 4 parts

The idea here is that by keeping all of these items regularly stocked in your home, you can put your hands on any of them when you need them. Last minute guests? No big deal, bulk up what you were already making for dinner. Your child has a bake sale that they only told you about now? Easy!

Things like fresh fruits, vegetables, dairy and meats aren’t included because they spoil at different rates, and everyone has different food needs. Adjust the lists as needed and as will work for you/your family. 

Common/ Dried Baking Herbs and Oils Freezer
Pasta Baking Soda Vegetable Oil Frozen Spinach
Tomato Sauce Baking Powder Coconut Oil Frozen Green Beans
Lentils Cornstarch Canola Oil Frozen Peas
Peanut Butter Brown Sugar Olive Oil Frozen Corn
Canned Soup White Sugar Dried Onion Frozen Carrots
Potatoes Shortening Whole Pepper Frozen Broccoli
Canned beans Chocolate Chips Garlic Powder
Rice Flour Basil
Canned Chicken Yeast Oregano
Mixed Nuts Cornmeal Dill
Cereals & Oatmeal Paprika
Canned Mushrooms Celery Seed
Canned Broth Sea Salt
Mixed nuts Cinnamon
Dried fruit Chili powder
Basil
Cayenne
Vanilla Extract
Cocoa Powder
Cumin

Common/Dried - These are the foods that will last and last and with just a  few you can throw together a delicious and filling meal.

Baking- These are the core ingredients for most baking recipes that you should always have on hand. 

Herbs and Oils - You don’t need a large amount of herbs in your cabinet in order to bring flavor to your dishes. With 16 spices you can evoke flavors and places all over the globe. (Although we get it if you want to add to your spices any time you can. We do the same.) 


Freezer- Easy to keep on hand, they don’t spoil and you can bulk up any meal  by adding them in, frozen veggies are the best! 

A list of items needed in your pantry, and a line of spoons with different ingredients on them

These four kits are ones we think are essential, but what about you? Do you think we missed some? Or just an item or two? Let us know in the comments below or over on our Facebook. We’d love to hear from you. 


While we talked about the whole home this time, don’t forget that we’re also here for your appliances needs. If your  appliances are acting up, or you want to schedule a maintenance check, feel free to reach out via phone or our appointment page. We want to help all of our clients in Carrollton and the surrounding areas.

The full set of all four lists so you can purchase all of them in one shopping trip.

Painting New Spaces

Walls don’t need all the color!


Have you ever thought of painting all of your home? Not just the walls, but everything. The whole idea about a home is that it’s meant to reflect you. So why should you limit that to the walls? Who is to say that it has to be one solid color either? There are so many other areas that can be painted, even if it’s just adding small details that add to how your home looks and feels. Floors, ceilings, stairs, what’s stopping you from trying one of them? Here’s a few other places you could add a splash of color to to change the mood. 


Make Your Ceiling Stand Out

Surprisingly most people will paint their ceilings white and leave it at that. If they’re really daring, might continue the color of the room across the ceiling and that’s it. 

But… why? 

It used to be that you would paint your walls white and then paint the ceilings in different colors or designs, or even whole murals. This not only showed your wealth, but it meant that eyes were drawn upwards, and it gave a room a much brighter feel by leaving the walls painted white.

-You could paint patterns of stars, clouds or waves across your ceiling, using stencils or freehand, to bring either interest or peace to a room. 

-Consider using either a contrasting or complimentary color to bring attention to it, without making it overbearing. 


The Floor is Lava! 

Ok perhaps not, but depending on what you have as a floor material in a child’s room, it could be very entertaining  to paint their floor as a multitude of games and have an area rug that covers it 90% of the time. 

-Alternatively  no one said the paint in question had to be permanent. That opens up all sorts of possibilities  from encouraging messages to wild patterns that you’re testing out, workouts or game areas. The only limit here is what you’re willing to come up with. 


Paint the Walls Red! 

Or green, or purple or whatever the Pantone color of the year is. We didn’t say we were only talking about new places right? You’re right. We’ve been painting our walls for eons. What if we told you there’s a way to paint your home whatever color you wanted, even if you’re renting? More interested? There is now paintable, removable wallpaper. Yep, it takes more time than painting straight off, but the exchange is worth it. You can do so much more! 

  • Test one color at a time in a room to find which one you like, without having ugly watches on the wall. Just paint a strip and hang it. 

  • Change your walls every season! Are you the type to go all out, moving furniture and changing out slipcovers with every season? Why not give your walls the same amount of love? 

  • What about for a party? You could easily put up some paper and paint it specifically for the party, or have the attendees write messages all over the wall, depending on what it is. 

  • Paint your apartment that bold red you want, and don’t lose your security deposit over it! 


Step It Up

Yup. You knew this one was coming right? Whether you paint the tread or the riser,both are great spots to bring something new. 

-You can paint patterns going up the stairs, on the tread. 

-Paw prints, encouraging messages, family memories. They’ve all been done. 

-You can use the riser to paint a picture that only shows if you’re looking up the stair way.  If your walls are full of pictures already, this is a viable space! 

Stairs with stary night landscape.jpg

-Or you could reference things that matter to you or your family, like favorite books, sports, games, history etc. 

This is a seriously underutilized part of the home when it comes to painting! (Check out some of these great examples that we found though!) 


You could even get fancy and mix and match ideas, like putting the removable wallpaper on the stair risers so that you can change them out over time. 


So, are you looking at things in your home differently? Wondering how you could add color to your world? Let us know either in the comments below or on our Facebook.  We want to see where you’re adding color to your life. 


Don’t forget that if your appliances are acting up, or you’d like to schedule a maintenance check, you can do that by calling us or creating an appointment. We want to work with you and all of our customers in the Plano area to keep your home running smoothly. 

How to Work with An Interior Designer : Kitchen Redesign Part 4

Or, how to find the right person for redoing your kitchen that isn’t you.

If you’re looking to redo your kitchen, but don’t want to do it yourself, who do you call? An interior designer! Welcome to our final post in our kitchen redesign series. As promised we are looking at the following questions: 


What is the difference between a renovator and an interior designer? 

What do they want you to know? 

How do you make the relationship a happy one? 

At what point can you say “I don’t like it” and how do you do it? 

Can you ask them to do the upstairs bedroom while they’re at it? 

How do you say thank you after the job is done? 


What is the difference between a renovator, an interior decorator and an interior designer? 

A renovator is someone who will follow the design you give them, exactly as you give it to them, but you have to provide resources, plans, and make sure that everything is on spec and to your plans. 

An interior decorator is someone who makes improvements to how things look, but not to the structure of a space.  They typically work alone. 

An interior designer is a licensed professional who can manage projects that involve construction and architecture. They’ll oversee the project and all subcontractors, keep things running on a timeline, as well as making suggestions for designs that you hadn’t considered. 

Magazine cut outs, fabric samples, color possibilities


What do they want you to know? 

A quick run down of the 6 biggest things interior designers wished we all knew before working with them. 

Even if we don’t live in the same city, we can probably still work together. 

It’s not easy! We have to go through an in-depth and rigorous education and training process like any other pro. 

We can use all sorts of tech on the cutting edge to help you see what your new space will look like. 

It doesn’t matter whether you want a single room or the entire home redone, we can do it. 

We can make sure your project conforms to building codes and safety standards. 

We typically can’t share our pricing and product sources with you. 


How do you make the relationship a happy one? 

Before you pick a  designer, interview several of them. Somewhere around 5-6 is a good idea. You want to find someone not only that you get on with, but also who fits your budget and has a style that meshes with yours. 

Ask questions. Ask all the questions you have. They can’t answer them if you don’t ask them. 

Once you have decided on the designer you want to work with, start as you mean to go on. This is someone who is going to be in your home for months. You’re going to become very well acquainted with them. Be friendly, be open and don’t forget to speak up. 

- If you don’t like something, tell them. It’s best to say this at the beginning of the process when you’re choosing materials and putting together a list of ideas and plans, but you need to say it. Remember, you’re the one that has to live with any choices made. 

- Make sure you have a budget and are fully prepared to spend all of it. 

- Present a united front. If you have housemates, you need to all agree on what the space is going to look like. 

- Have realistic expectations.  Miracles can be done, but there are limits. 

- Show off what you like and what you don’t. Explain why. The emotions, thoughts and experiences you attach to shapes, colors and textures go a long way towards how you will interact with a space. Magazines, Pinterest boards, swatches of color, all of these work.  Your designer needs to know both sides of what you like and don’t so that they can do their best by you and not bring in an element you despise. Which brings us to.. 

Two women chatting next to a window

At what point can you say “I don’t like it” and how do you do it? 

The best time to do this is in the beginning, during the planning phase as we said. However, if something has come up during the process that your discussions missed, or you didn’t think of, don’t be afraid to say it. Be polite, be firm, and keep to the point. Whether it’s a motif, a color, the pairing between materials, whatever. Your designer isn’t a mind reader and they won’t know unless you tell them. 


Can you ask them to do the upstairs bedroom while they’re at it? 

The answer here is going to depend entirely on the designer in question. 

You’ll want to approach it has you have everything else to this point, politely and with curiosity, honestly expressing how much you’re enjoying working with them. Provided you mean after the current project is done, you might get a few different answers. 

  • “No? You contracted me for this project and I’m booked for a while afterwards.” 

  • “I’d love to, let’s get it in writing though.” 

And here you’d have to go back through the discussion and selection process that you did at the beginning. 

  • “Let’s see how we both feel after the job is done.” 


How do you say thank you after the job is done? 

While the most common way is to just say ‘thank you’ , there is something better. Tell your friends! Heck, tell your enemies if you have any. The more you brag and show off your newly redesigned kitchen, the more you help their reputation. The better their reputation, the more clients they’ll get. Trust us, they’ll be just as happy as you are at that point. 


Thank you for joining us for this post and for this series! We hope that we’ve been able to answer the questions you’ve had about remodeling your kitchen. If you have further questions, feel free to pose them to us in the comments below or over on our Facebook page. 

And if you have any issues with your appliances, please let us know. You can call or set up an appointment over on our page. We want to help keep your home running smooth.