Or, 4 Different Jams You Can Make From Your Garden
This week we’re talking about 4 different canning recipes. The harvest from our gardens are starting to come in, so it’s time to put them to use. Given how strange the weather was this year, it’s probably a good idea to store up as much as we can.
First off, why canning? Why not freeze drying or dehydrating?
Canning is a long used method of preserving harvests so that you can have fruits, vegetables, even full meals safe all through winter.
Freeze drying and dehydrating are both expensive and more complicated than canning is, and can only be applied to certain foods.
Canning means your harvest doesn’t have to be composted if you get more than you can eat before it spoils.
You save money by canning your own foods, especially if you opt to trade some of what you’ve grown with neighbors or friends who raised different plants.

So what is canning?
Canning, whether you use the water bath method or a pressure canner*, is a way to preserve foods in sealed jars. You place the foods into sterilized jars and heat them to a temperature that kills microorganisms. This is for two reasons.
To keep the food from spoiling.
It drives the air out, which causes a vacuum seal as it cools.
*A pressure canner is not the same as a pressure cooker.
The Two Methods
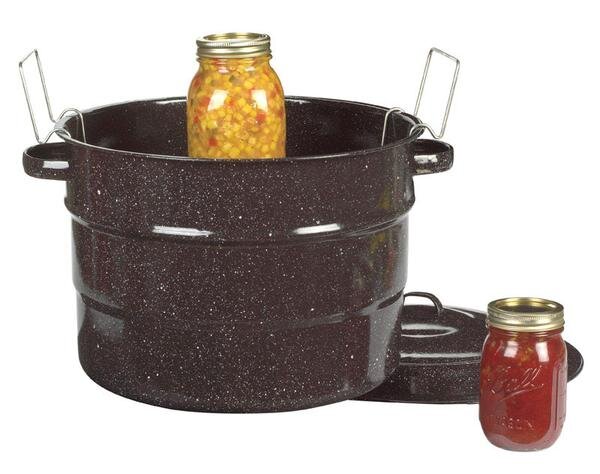
- Boiling Water Bath
Just like it sounds. In this one you cover the jars of food with water and bring it to a boil ( 212* at sea level) and cook it for a set amount of time.
- Pressure Canning
Jars of food are placed in a special pressure cooker in 2-3 inches of water. The lid is locked on and the temperature is raised to 240*F.
The two different methods are used for different foods, based on their acidity.
The boiling water bath is great for fruits, jams, jellies and tomatoes because they have a higher acidity.
Pressure canning on the other hand is for use with low acidity foods like meats, vegetables, seafood and poultry. The pressure canner method not only kills bacteria but it kills the spores of botulinum that loves meats and vegetables. While the organism can’t live past 212*F, the spores that they produce can. The pressure canner is the only way to get the food hot enough to kill them off before they can grow inside the low acidity foods.
Fortunately for us, all four of our recipes this week are foods that can be canned using the water bath method.
Spiced Pear Jam
8 cups peeled, finely chopped pear, (should be 5 ½ pounds)
4 cups sugar
1 tsp ground cinnamon
¼ tsp ground cloves
Bring all ingredients to a boil in a dutch oven, stirring constantly. Reduce heat, simmer, stirring occasionally 2 hours or until thickened. Skim off foam with a metal spoon.
Pour immediately into hot jars, leaving ¼ inch headspace; wipe jar rims. Cover at once with metal lids, and screw on bands.
Process in a boiling water bath 10 minutes
Store in a refrigerator up to 3 weeks or freeze up to 1 year. Thaw in refrigerator when ready to use.
Should yield 5 half pints.
Fruity Preserves
1 (20 oz) can crushed pineapple in juice, undrained
4 granny smith apples, peeled and chopped
2 Tbsps grated orange rind
3 oranges, peeled, seeded and chopped
3 lemonds, peeled and chopped
4 cups of sugar
Bring all ingredients to ao boil in a dutch oven, stirring constantly. Reduce heat and simmer, stirring occasionally 1 ½ to 2 hours or until thickened. Remove from heat and skim off foam with a metal spoon.
Pour immediately into hot jars, leaving ¼ inch head space; wipe jar rims. Cover at once with metal lids and screw on bands.
Process in a boiling water bath, 10 minutes.
Store in a refrigerator up to 3 weeks or freeze up to 1 year. Thaw in refrigerator when ready to use.
Yields 6 half pints
Tri-Berry Lemon Jam
1 cup crushed strawberries about 1 pint
1 cup crushed blueberries about 1 pound
1 cup crushed raspberries about ¾ pint
1 Tbsp grated lemon rind
2 ¼ cups sugar, divided
1 (1 ¾ ounce) package powdered pectin
Combine the first 5 ingredients in a large bowl. Combine ¼ cup sugar and pectin in a small bowl. Gradually add pectin mixture to fruit mixture, stirring vigorously. Let stand 30 minutes, stirring every 10 minutes.
Stir in remaining 2 cups sugar gradually until no longer grainy.
Pour into containers, leaving ½ inch headspace. Cover with lids; chill 24 hours. Store in a refrigerator up to 3 weeks or freeze up to 1 year. Thaw in refrigerator when ready to use.
Yields 4 half pints
Tomato Preserves
3 pounds of tomatoes, peeled and diced
4 cups sugar
¼ cup lemon juice
1 (6 ounce) package strawberry gelatin
Bring first 3 ingredients to a boil in a Dutch oven, stirring constantly. Boil, stirring occasionally, 0 minutes. Remove from heat and stir in gelatin until dissolved.
Pour into containers, leaving ¼ inch head space and cover with lids; cool 1 hour. Chill 24 hours. Store in refrigerator for 3 weeks or freeze for up to a year. Thaw in refrigerator when ready to use.
Should yield 5 half pints

Remember, even if your garden wilted (like our blogger’s) you can pick all of this up at your local grocery store or farmers market.
We hope you liked this week’s post, be sure to let us know in the comments or over on Facebook. Do you already know how to can foods? Do you have a favored recipe?
And if you’re living in the Allen area and your appliances are acting up, you can always call or use our website to set up an appointment. We want to help.