Down Home Comfort with Sweet Tea-Brined Pork Chops and Red Pepper Relish

So good your guests won’t want to leave. 


This month’s first recipe is one that’s perfect for the dog days of summer. It doesn’t take much to prep and it’s easy to throw on a grill to cook. So many of us already drink sweet tea in the summer, we decided to try it in other uses as well. We came across this idea and after testing it out, it’s a winner!  Try out our Sweet Tea Brined Pork Chops and Red Pepper Relish.

Ingredients

8 orange pekoe tea bags*

1 cup sugar

6 bay leaves (preferably fresh)

1 Tbsp coriander seeds

6 bone-in center cut pork chops (2 inches thick; about 5 lbs total) 

3 red bell peppers, chopped

1 large vidalia onion, diced

2 Fresno chile peppers, seeded and chopped 

¼ cup apple cider vinegar

¼ cup apricot preserves

Freshly ground pepper

Kosher salt

Vegetable oil, for the grill 


-Make the brine: Bring 6 cups of water to a boil in a large pot. Turn off the heat and add the tea bas and let steep for 10 minutes. Discard teh tea bags. Stir in ¾ of a cup sugar, ½  cup salt, the bay leaves and coriander seeds. Cook over low heat, stirring consistently  until the sugar and salt are dissolved. Roughly 3 minutes.  Remove from the heat, pour into a  large heat proof pitcher and set the pot aside for the time being. Let the brine cool to room temperature, roughly 30 minutes. Refrigerate the brine until very cold, at least one hour.Pour the brine into the reserved pot and add the pork chops. Cover and refrigerate for at least 8 hours, or overnight. 


-Once the brine and pork is in the fridge, make the pepper relish. Put the bell peppers, onion and chilies in a food processor and pulse until broken down but not pureed. This should be 2 or 3 times on most food processors.  Transfer to a small saucepan and add the vinegar, preserves, the remaining ¼ cup of sugar and ¼ tsp of salt. Bring to a boil, then lower the heat and simmer until slightly reduced, but still juicy. Keep a close eye on it as time may vary based on time of year. It should take about 10 minutes. Remove from the heat, transfer to a serving bowl and refrigerate until you’re ready to serve. (You can make the relish up to a day ahead.) 


Preheat your grill to medium. Oil the grill grates lightly. Remove the pork chops from the brine and pat dry. Season the chops with salt and pepper. Grill, covered until well marked, roughly 14-16 minutes. If they get too dark, rotate them 90* . Flip the chops and cook, covered until well marked on the other side. Take a digital thermometer and insert it sideways into the center. It should register 145* and at that point it’s done. Transfer the pork to a cutting board and let it rest for 10 minutes. Serve with the relish. 


NOTES 

*Or the equivalent amount of loose leaf orange pekoe, if you’re willing to use it. 


So what is orange pekoe exactly? 

Rather than a flavor, orange pekoe is actually in reference to the quality of the tea. 


Tea leaves are picked from different heights on a plant for different purposes. The younger the leaf, or the higher it is on the plant, the more flavor it has. Another matter that goes into grading is how whole or broken a leaf is after it has been processed and dried. So an orange pekoe tea is made up of whole, young leaves. 


That’s not to say that the bagged tea you can pick up at your local store isn’t perfectly good tea. This is just the actual definition of an orange pekoe. So, no your pork isn’t going  to taste like oranges, unless you add some into the brine. 

Tea plant with leaves labeled based on the different tea grades.


Did you ever wonder what the difference was between a jam and a relish?

We did while making this recipe. A relish, according to Britannica, is a cooked and pickled vegetable or fruit preserve. It’s typically eaten with a bland food to bring flavor, but we can promise that’s not the case with this dish! 


Thank you very much for joining us for this recipe. We hope you enjoy cooking it as much as we did. Which was your favorite part? The tea brined pork or the relish? We’d love to hear from you over on our Facebook page. We want to see how yours turned out. 


If you found out that your stove or refrigerator weren’t working properly while you were making this, don’t hesitate to give us a call. 


Whether it’s your refrigerator or stove, your ice maker or your dryer, we fix appliances. And if all you want is to schedule a maintenance check? We can do that too. 


We look out for our clients in Allen and the surrounding areas and we want to keep your home running in tip top shape. 


Call us at ((214) 599-0055) or schedule an appointment on our website

All’s Well That Jams Well

Or, 4 Different Jams You Can Make From Your Garden


This week we’re talking about 4 different canning recipes. The harvest from our gardens are starting to come in, so it’s time to put them to use. Given how strange the weather was this year, it’s probably a good idea to store up as much as we can. 


First off, why canning? Why not freeze drying or dehydrating? 

Canning is a long used method of preserving harvests so that you can have fruits, vegetables, even full meals safe all through winter. 

Freeze drying and dehydrating are both expensive and more complicated than canning is, and can only be applied to certain foods. 

Canning means your harvest doesn’t have to be composted if you get more than you can eat before it spoils. 

You save money by canning your own foods, especially if you opt to trade some of what you’ve grown with neighbors or friends who raised different plants. 


Shelves of jarred foods in all different colors.

So what is canning? 

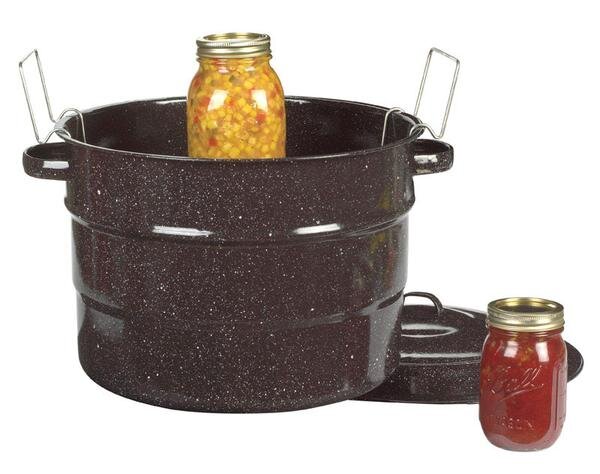
Canning, whether you use the water bath method or a pressure canner*, is a way to preserve foods in sealed jars.  You place the foods into sterilized jars and heat them to a temperature that kills microorganisms. This is for two reasons. 

  1. To keep the food from spoiling. 

  2. It drives the air out, which causes a vacuum seal as it cools. 

*A pressure canner is not the same as a pressure cooker


The Two Methods

- Boiling Water Bath 

Just like it sounds. In this one you cover the jars of food with water and bring it to a boil ( 212* at sea level) and cook it for a set amount of time. 

- Pressure Canning

Jars of food are placed in a  special pressure cooker in 2-3 inches of water. The lid is locked on and the temperature is raised to 240*F. 

The two different methods are used for different foods, based on their acidity. 

The boiling water bath is great for fruits, jams, jellies and tomatoes because they have a higher acidity. 

Pressure canning on the other hand is for use with low acidity foods like meats, vegetables, seafood and poultry. The pressure canner method not only kills bacteria but it kills the spores of botulinum that loves meats and vegetables. While the organism can’t live past 212*F, the spores that they produce can. The pressure canner is the only way to get the food hot enough to kill them off before they can grow inside the low acidity foods. 


Fortunately for us, all four of our recipes this week are foods that can be canned using the water bath method. 


Spiced Pear Jam

8 cups peeled, finely chopped pear,  (should be 5 ½ pounds)

4 cups sugar

1 tsp ground cinnamon 

¼ tsp ground cloves

Bring all ingredients to a boil in a dutch oven, stirring constantly. Reduce heat, simmer, stirring occasionally 2 hours or until thickened. Skim off foam with a metal spoon. 

Pour  immediately  into hot jars, leaving ¼ inch headspace; wipe jar rims. Cover at once with metal lids, and screw on bands. 

Process in a boiling water bath 10 minutes 

Store in a refrigerator up to 3 weeks or freeze up to 1 year. Thaw in refrigerator when ready to use. 

Should yield 5 half pints. 


Fruity Preserves

1 (20 oz) can crushed pineapple in juice, undrained

4 granny smith apples, peeled and chopped

2 Tbsps grated orange rind

3 oranges, peeled, seeded and chopped

3 lemonds, peeled and chopped

4 cups of sugar

Bring all ingredients to ao boil in a dutch oven, stirring constantly. Reduce heat and simmer, stirring occasionally 1 ½ to 2 hours or until thickened. Remove from heat and skim off foam with a metal spoon. 

Pour immediately into hot jars, leaving ¼ inch head space; wipe jar rims. Cover at once with metal lids and screw on bands. 

Process in a boiling water bath, 10 minutes. 

Store in a refrigerator up to 3 weeks or freeze up to 1 year. Thaw in refrigerator when ready to use. 

Yields 6 half pints 


Tri-Berry Lemon Jam 

1 cup crushed strawberries about 1 pint

1 cup crushed blueberries about 1 pound

1 cup crushed raspberries about ¾ pint

1 Tbsp grated lemon rind

2 ¼ cups sugar, divided 

1 (1 ¾ ounce) package powdered pectin 

Combine the first 5 ingredients in a  large bowl. Combine ¼ cup sugar and pectin in a small bowl. Gradually add pectin mixture to fruit mixture, stirring vigorously. Let stand 30 minutes, stirring every 10 minutes. 

Stir in remaining 2 cups sugar gradually until no longer grainy. 

Pour into containers, leaving ½ inch headspace. Cover with lids; chill 24 hours. Store in a refrigerator up to 3 weeks or freeze up to 1 year. Thaw in refrigerator when ready to use. 


Yields 4 half pints 


Tomato Preserves

3 pounds of tomatoes, peeled and diced

4 cups sugar

¼ cup lemon juice

1 (6 ounce) package strawberry gelatin

Bring first 3 ingredients to a boil  in a Dutch oven, stirring constantly. Boil, stirring occasionally, 0 minutes. Remove from heat and stir in gelatin until dissolved. 

Pour into containers, leaving ¼ inch head space and cover with lids; cool 1 hour. Chill 24 hours. Store in refrigerator for 3 weeks or freeze for up to a year.  Thaw in refrigerator when ready to use. 


Should yield 5 half pints


Remember, even if your garden wilted (like our blogger’s) you can pick all of this up at your local grocery store or farmers market. 


We hope you liked this week’s post, be sure to let us know in the comments or over on Facebook. Do you already know how to can foods? Do you have a favored recipe? 


And if you’re living in the Allen area and your appliances are acting up, you can always call or use our website to set up an appointment. We want to help. 

Beat the Heat With This Spicy And Sweet Set of Ribs

Sweet and Spicy BBQ Ribs 


Welcome to this month’s first recipe, all about sweet and spicy ribs. Texas is known for its grilling, right? With the heatwave that’s melting us, we wanted to get out of the kitchen and work outside where there’s hopefully going to be a breeze.  So we went digging and found this great recipe tucked into the back of the recipe book that sounded perfect to share. It’s even got a delicious side of grilled (or broiled) peaches to pair with it and tame some of the heat. 


4 pounds  pork spareribs

½ cup chili sauce

½ cup hoisin sauce

¼ cup packed brown sugar

¾ tsp ground allspice

½ tsp hot pepper sauce

4 medium size ripe peaches

2 Tbsps peach preserves


Grilled pairs of ribs - Photo credit goes to Joshua Bousel

About 2 hours before serving or a day ahead 

Take your rack of ribs and cut them into two-rib portions. This means you won’t be fighting as much for space later, and they’re easier to flip with tongs. 

Put an 8-quart saucepot over high heat, add in the ribs, and enough water to cover. Bring it to a boil. Put a lid on top of that and turn the heat down to a simmer. Leave that there for an hour to get the meat tender. 

Using tongs, remove teh ribs from the saucepot and put them on a platter. 

If you plan to grill right away, go start the barbecue. If you’re cooking the ribs later, put them in the fridge covered in foil. 


About 1 hour before serving 

Prepare your outdoor grill, remember, coals need at least 30 minutes to heat fully. Meanwhile, mix chili sauce, hoisin sauce, sugar, allspice and hot pepper sauce.  (If you want to check out how to make your own chili or hot pepper sauces, check out the notes below.) 

Cook your ribs over medium heat, 15 to 20 minutes to heat them through. Brush with the sauce frequently during the last 10 minutes to keep them from charring. (Unless you’re like our bloggers and prefer a bit of char on your ribs. Then just be careful.) 


Cut all of the peaches in half and discard the pits. Grill the peach halves with ribs, turning and brushing them with preserves until hot and browned. This should take roughly 5 minutes. Remove ribs and peaches from the grill, transferring to a platter and enjoy.


When you’re done and it’s time to clean  up, throw your grill grates into the dishwasher for an easier cleanup. 


If you can’t grill, due to weather or what have you, try broiling your ribs. 

Start off by precooking the ribs and prepping the sauce same as we did above. 

Roughly 30 minutes before you want to serve, preheat the broiler. Arrange the ribs on a rack in the broiling pan and brush with the sauce. Broil ribs 5 to 7 inches from the heat for 20 minutes, turning and brushing with remaining sauce every 5 minutes. 


Remove the ribs from the broiler and transfer them to the platter. 


Grab your peaches, and just like above, cut them all in half, chucking out the pits. Place peach halves with the cut side up on the rack in the broiling pan. Brush the peaches with preserves and broil for 5 minutes.  


Transfer the peaches to the platter with the ribs and enjoy a sweet and hot treat. 


Let us know what you think over on our Facebook page! We’d love to hear from you and how your ribs turned out! 


If this isn’t your thing, we have something completely different coming out in two weeks, so be sure to check back then. 


Remember, if your appliances are giving you trouble, or if you just want someone to give them a once over, give us a call. We want to help keep your home running in tip top shape. 

Call ((214) 599-0055) 

Set an appointment online.


Notes: 

We know that most people don’t like to go and make their own chili and hot pepper sauces. It’s a lot of work after all. For those of you that do though, these recipes are for you. Please let us know how they turn out! 


Chili sauce

Check out this recipe straight from Ball’s own Fresh Preserving site. This recipe is a classic and with good reason! The flavor is rich and complex and goes great anywhere you’d typically throw in chili sauce (and even a few places you hadn’t considered yet.) 

The ingredient list looks like this 16 cups chopped cored peeled tomatoes (about 16 medium)

6 onions, chopped

6 green bell peppers, seeded and chopped

`2 red bell peppers, seeded and chopped

2 cups white vinegar

1 cup lightly packed brown sugar

1 clove garlic, finely chopped

1 Tbsp. freshly grated or drained bottled horseradish, optional

1 Tbsp. celery salt

1 Tbsp. mustard seeds

1 Tbsp. salt

1 tsp. ground allspice

1 tsp. ground cinnamon

1 tsp. ground mace or nutmeg

1/4 tsp. ground clove


Hot Pepper Sauce 

If you’re looking to make your own hot sauce, a great place to start is at Wholefully. Her ingredient list looks like this. 

1 1/2 pounds peppers of your choosing (a mix of sweet peppers and hot peppers), tops/stems removed, halved

6 cloves garlic, peeled

4 cups filtered water

4 teaspoons sea salt

1/3 cup apple cider vinegar

1 tablespoon honey or maple syrup, optional


If on the other hand you’re an aficionado and want to go a step further you can take a look at this guide we found that takes you from the very beginning, through multiple different recipes and up to creating your own business if you’re so inclined. That is over at Chili Pepper Madness

Creole Bread Pudding Souffle

This week we needed something sweet to round out the month. Let’s face it, June has been a long month. Creole Bread Pudding Souffle was just what the doctor ordered.  You can make it for an event or you can save it all for yourself. We certainly did. 


Ingredients 

½ cup butter, softened

1 cup sugar

5 large eggs

2 cups whipping or heavy cream

1 Tbsp vanilla extract

⅛ tsp ground cinnamon

¼ cup raisins (optional) 

12 slices French bread (1-inch thick) 


1 Tbsp butter

1 ½ tsp sugar

6 large eggs, separated

½ cup sugar

½ cup powdered sugar, sifted 


Whiskey Sauce 


The night before, slice your bread and lay it out on a baking sheet in your oven. Don't turn the oven on, don't cover the bread. You want to give the bread time to become a little stale so that it absorbs the mixture without disintegrating into it. 


Using an electric mixer, beat your 1/2 cup of butter at medium speed. Slowly add 1 cup of sugar beating well. The sugar should be fully incorporated before you begin to add the eggs one at a time. Once the eggs are fully beaten in, add cream, vanilla, cinnamon, and raisins (if desired.) Lightly grease a 13 by 9 by 2 pan, preferably a clear casserole dish. 


Remove your bread from the oven, and transfer the slices to mixture, laying them flat; let them stand for 10 minutes. Flip the slices over and let them sit for another 10 minutes.  During this time, set your oven to 350*F to preheat. 

Cover the pan with aluminum foil and place into a larger shallow pan. Pour hot water into the larger pan to a depth of 1 inch. Transfer the entire thing to the oven and bake for 40 minutes. Remove the aluminum foil and bake for an additional 10 minutes.


Place 2 1/2 cups of the baked bread mixture into a large bowl and set to the side. Reserve the remainder for something else. (We think it's an easy breakfast if you reheat it, or  a quick  dessert if you throw on any remaining whiskey sauce.) 


Grease a 1 1/2 quart souffle dish with 1 Tbsp butter; coat the sides and bottom with 1 1/2 Tbsp sugar and set it to the side. 


Combine egg yolks with  1/2 cup sugar in the top of a double boiler; place over simmering water and beat at high speed with an electric mixer for 4 minutes or until the mixture thickens. (You can do this section by hand if you want to, but your wrists will hurt after.) Add the yolk mixture to the bread that you reserved and beat at medium speed until smooth.  Set aside, and take the time to preheat your oven up to 375*F. 


Beat your egg whites at high speed with an electric mixer until foamy. Slowly add powdered sugar, beating until stiff peaks form; fold the egg whites into a bread mixture. Pour this into your prepared souffle dish. Bake the entire thing for 40 minutes at 375*F. 

Serve warm with whiskey sauce. 


Whiskey Sauce

1 cup sugar

1 cup whipping cream or heavy cream

⅛ tsp ground  cinnamon

1 Tbsp butter

1 ½ cornstarch 

¼ cup water

1 Tbsp bourbon 


Combine sugar, whipping cream, cinnamon, and butter into a heavy saucepan. Cook over medium heat until the sugar dissolves, stirring often. In a separate dish, combine the cornstarch and water, then pour into the cream mixture and bring to a boil, stirring constantly. Keep it at a boil for 1 minute. Remove from heat and stir in the bourbon. Serve warm. 

Be careful while making the whiskey sauce as melted sugar is ridiculously hot and burns like mad if you manage to get it on you.


NOTES 

When talking about egg whites, 'foaminess'  and 'stiff peaks' what are we talking about?  Foamy egg whites should be slightly opaque, mostly made of liquid but with some bubbles. Stiff peaks on the other hand are when you can pull your whisk out of the mixture and have it form a little mountain top, that doesn't fall over once you fully remove the whisk.  Still confused? Check out this page from The Spruce


Bourbon can be bought in small bottles from your local liquor store if you don't want to buy a large bottle just for one recipe. 

three different types of bourbon in their very different bottles.


Let us know what you thought of the recipe over on our Facebook page, we would love to hear from you.  Or show us pictures, that would be awesome too! You can also leave a comment if you have any questions about the recipe, ideas for future recipes or questions that you have about your appliances at home. 


On that note, if you are having issues with your appliances, and Youtube hasn't been helpful (let's face it, they're not often) you can call us at (). Or you can set up an appointment and we'll have one of our technicians come out to help you. 

Credit for this photo goes to Louisiana Cookin’


Try Eggs Creole for Sunday Brunch

Welcome back everyone! With summer just around the corner, we wanted foods that make us think of lazy summer mornings. We went digging through our family recipe books and found this week’s recipe for Eggs Creole. 


Ingredients

3 ¾ cups water

¾ cups  regular grits, uncooked

1 cup diced smoked sausage - ¼ inch pieces

¼ cup shredded Cheddar cheese

2 Tbsp butter

¼ tsp salt

¼ cup all-purpose flour

1 large egg, beaten

1 Tbsp milk

¾ cup Italian-seasoned breadcrumbs

Vegetable oil

Poached Eggs

Creole Sauce

Instructions


-Bring your  water to a boil in a large saucepan; then gradually stir in grits and return to a boil. 

-Cover, reduce heat, and simmer, stirring occasionally, 10 minutes or until done. (Where done here means: the grits are soft and tender, and ‘feel’ different when you stir a spoon through them. ) 

-Remove the pot from the heat; stir in sausage, Cheddar, butter and salt. Spoon into a lightly greased 13 x 9 x 2 inch pan, pressing firmly and smoothing the surface. Cover and chill for 24 hours. 


-Turn grits out onto wax paper. Cut out 12 (2 ½ inch) rounds with a biscuit cutter, reserving remaining grits for other uses. 

-Sprinkle the rounds with flour, a light dusting, not a thick coat. 

-Combine egg and milk; dip rounds into egg mixture and dredge in breadcrumbs. 


-Pour oil to a depth of 1 inch into a large, heavy skillet. Fry the grits rounds in hot oil over medium-high heat 1-2 minutes on each side or until lightly browned. Drain on paper towels. -Place 2 rounds on each plate; top each with a poached egg and Creole sauce. Serve immediately. 


Poached eggs 

Not sure how to poach an egg? Here’s how the process works. 

-Start by checking how fresh your eggs are. The fresher they are, the better they will hold together. You can see how to do this over at The Kitchn


-Next up, grab a pot with tall straight sides, and fill it with 3 inches of water. 

-Set your water to boil and add a mild vinegar to the water, for example rice wine. It won’t flavor the egg, but it does help it to stick together. 

-Wait until you see tiny bubbles at the bottom of your pot,but not a full roiling boil. Now reduce the heat low enough that you’ll keep that simmer going. 


-Now crack your egg into a bowl or a ladle and slip it gently into the water. 

-Leave it in the water for 2 minutes if you want the yolk to be still runny, or 3 minutes for a firmer yolk. Timing is crucial, so a timer on your phone or stove would be helpful. 

-Using a slotted spoon remove the egg from the water and set it to the side. 

-Repeat the process with the remaining eggs. 


Creole Sauce

1 medium onion, cut into thin strips

1 medium green pepper, cut into thin strips

2 stalks celery, cut into thin strips

2 cloves garlic minced

1 bay leaf

2 Tbsp butter 

2 tsp paprika 

2 medium tomatoes, diced

1 cup tomato juice

1 ½ tsp Worcestershire sauce

1- 1 ½ Tbsp hot sauce

1 ½ Tbsp cornstarch

½ cup water


Cook the onion, pepper, celery, garlic and the bay leaf in butter in a large skillet over medium-high heat, stirring constantly, until vegetables are tender-crisp. Stir in paprika, tomatoes, tomato juice, Worcestershire, and the hot sauce; simmer for 5 minutes or until moisture is reduced by one-fourth. 

Combine the cornstarch and water, whisking rapidly. Stir into sauce and return to a boil, stirring constantly. Boil, stirring constantly for 1 minute. Remove from heat. Remove and discard bay leaf. Serve warm. 


Notes 

If you don’t have any Italian-seasoned breadcrumbs on hand, you can make your own. 

This video from Alton Brown over at the Food Network is our favorite way of doing it. (And not just because he’s amusing to watch!) 


What do you think about this week’s recipe? Let us know over at our Facebook page, we’re eager to know what you think. Or if you have any suggestions for themes or recipes you want us to check out, let us know in the comments! We’re always interested in hearing from you. 


Don’t forget, if you have any problems with your appliances, you can always give us a call ((214) 599-0055) or set up an appointment with one of our technicians.  We care about our clients in Garland and the surrounding areas, and if you need assistance with your appliances, we want to help.