Don't Let Your Dryer Become a Fire Hazard

Discover the Top Causes and Solutions 

 Is your dryer a ticking time bomb in your home? While we often take our appliances for granted, the reality is that a dryer left unchecked can pose a serious fire hazard. From lint buildup to overloaded loads, there are numerous factors that can turn your laundry routine into a nightmare. In this article, we'll delve into the common causes of dryer fires and provide practical tips on how you can prevent them. Don't let your dryer become a fire risk – read on to safeguard your home and family.


What Can Cause Your Dryer To Catch Fire? 

There are many, many variables that can cause a dryer fire. Electrical components, high heat, a lack of maintenance, combustible materials, faults in the equipment, and even freak accidents. 


Dryer fires are not as uncommon though as we might wish. It's so easy for us to ignore small signs that end up with big impact.


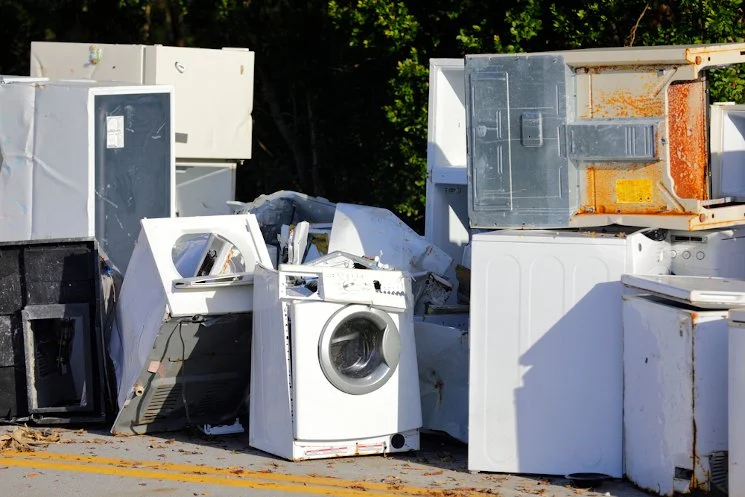
Courtesy of Atomic Dragon

 One of the biggest causes of dryer fires is due to lint buildup. This can be around the dryer frame, in the ducting, or even in the lint catch. If you do any camping, you might see people suggesting this lint as a way to start campfires. That gives you an idea of just how flammable and dry this material is. It's the bits of fluff and debris from your clothes as the dryer tumbles them and then dried out over and over until all that's necessary is a spark.


Your dryer can also catch fire if it is being overloaded consistently. We're not saying that the one time that you need to go and overload it is going to be the instance when everything catches fire. But if you're doing it consistently, your dryer will begin to struggle and grind, and possibly spark.


A fire can also happen if your dryer cannot breathe properly. If you have it boxed in with stuff on all sides or you have it pressed up against the wall, then the vents get clogged and the heat has nowhere to go except inside the dryer. All too easily, that becomes clothing overheating or that lint that we mentioned, and things catch fire.


Clothes being soaked in chemicals or oils are also a source. If you've ever worked in a kitchen or a shop, you know that you constantly need hand towels. To wipe up spills, to dry your hands off, to clean something. Now imagine somebody's distracted, and they toss them into the dryer because you need these right now, and you don't have time to wash them. We all know it, but chemicals and oils do not belong in your dryer. They will combust due to the heat.


You can also have a fire occur if the outlet isn't properly matched to the dryer plug. If you are trying to run a dryer on a standard house plug it can cause the outlet to spark because the dryer is pulling too much electricity through it.


There are also things that simply should not go into your dryer. A good example would be sneakers. Anything that is made of foam, plastic, or rubber does not belong in your dryer. These things can easily melt and combust.


One thing we do want to point out, though is that many people will point to the type of dryer being an issue. Talking about how a gas dryer is more dangerous than an electric. In fact according to the National Fire Protection Association, 78% of dryer fires are electric dryers. So while we will not say that gas dryers are completely safe, we will say that you should do your own research and consideration.


How You Can Prevent A Dryer Fire

The short answer for fire prevention is; to do the opposite of everything we listed up top.


If you want the longer and more in-depth version though, let's break it down.


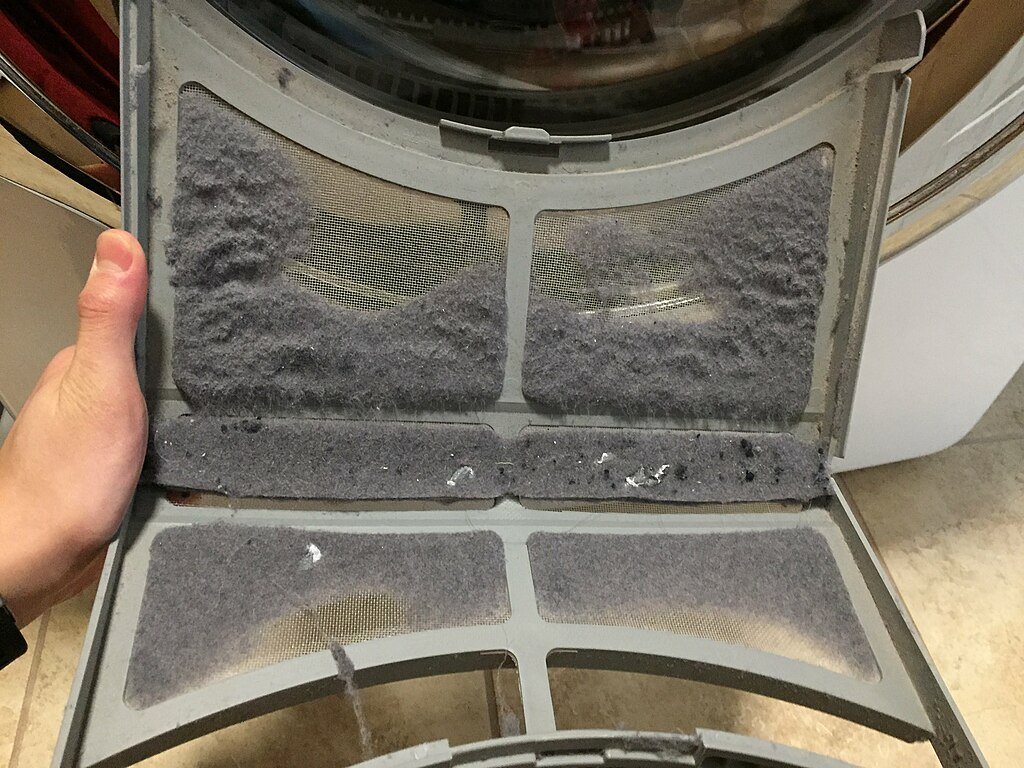
Always make sure to clean the lint filter and screens after every cycle. Then, once a week or so, you can run a wet cloth around the inside of the drum and pick up anything that hasn't made it through. This cuts off one of the biggest causes of dryer fires before it has a chance to accumulate .


Courtesy of Rick Harp

You should also hire a professional once a year to clean out the ducts and vents for your dryer. Although the filters catch most things, they don't catch everything. Some of that is going to go and get stuck in the ducting of the dryer, and it is as much a danger there as it is if it gets stuck inside the filter.


Don't put items made of foam, rubber, or plastic in your dryer. Yes, it might be faster to dry your sneakers in the dryer. But your dryer is not made for that. Yes we have covered dryers with specialized attachments to handle them. But that's the point, they are specialized features with that in mind to keep your dryer safe. Plastic is just straight out. 


Don't overload your dryer with wet clothing. Your dryer is not meant to handle as much weight as we all think. About 2/3 of the way full is as much as you should ever be doing. 1/2 is better. And yes, that does mean that you'll be doing more loads of laundry but it also means you'll be preserving your dryer for much longer.


Keep the area around your dryer free of clutter. Whether it's boxes, toys, cleaning materials, just don't. Give your dryer room to breathe and, more importantly, to cool off.


Handle chemical and oil stains with care. If you are working on your car or frying lots of food in the kitchen, always pre-treat your clothes and wash them as thoroughly as possible before you ever put them near your dryer. More importantly, make sure to double-check the stain before you put it into the dryer. If it's not out after the first run through the wash, nothing says it has to go in the dryer. You can absolutely put it back into the wash or take it into your bathroom to give it another soak or a scrub by hand, which sure it's not fun, but again, this is less about fun and more about preventing fires.


What To Do If Your Dryer Catches On Fire


Heaven forbid that you ever encounter a fire in your dryer or near the electrical outlet, or in the venting, this is what you should do.


First off, stay as calm as possible. You can handle this. Even if handling this is calling in the professionals


Switch off your dryer if you can, either at the power switch or at the breaker. 


Whatever you do, don't open the door to the dryer, as that's only going to feed oxygen to the flame. It will also release toxic gases into the air and your face.

Next up, grab your fire extinguisher, as we've mentioned in other posts you should ideally have one in your laundry room. An ABC fire extinguisher, is one that you can pull the pin, point at the base of the flames, and spray from side to side. Make sure that you get the back of the unit, if possible, as well.

Remove anything from near the dryer that could be an accelerant. 

If that's not possible, evacuate the room, close the door, and call your fire department. 


Extra Benefit Of Taking Care Of Your Dryer! 

If treated properly, a dryer is a wonderfully useful appliance to have in your home, and compared to other sources, a dryer fire is rather uncommon. So, by making sure that you take care of your dryer, your dryer can take care of you. The additional benefit of regularly maintaining your dryer is a reduced utility bill. When your dryer can breathe properly it can dry clothes faster, and that means that you get more laundry done using less electricity. It also means that your dryer lasts longer.

Ultimately, dryer fires are just as destructive as any other fire type in the home. The good news is that you can prevent them. Be cautious and take care of your dryer; not only does it keep your dryer running longer, but it also keeps your home safe. 


Don't wait for a disaster to strike. Schedule a yearly reminder to inspect your dryer's vents and ducts for any blockages. Additionally, educate yourself about the signs of dryer malfunction and take prompt action if you notice any irregularities. Your diligence could prevent a potential fire hazard in your home.

If your dryer is struggling despite following the maintenance tips we've suggested, give us a call. We will work with you to determine the issue and get your dryer running properly again. While we don't handle lint removal or duct cleaning, we can diagnose any electrical or mechanical issues that it might be having.


At Appliance Rescue Service our goal is to keep your home running smoothly. You can reach out to us via our website or by giving us a call ((214) 599-0055) and we will work with you to find a time and date that fits your needs to send our technicians your way. 


Additional Reading


What is the Most Energy Efficient Clothes Dryer?

Places to Avoid: The Paw Version! 


Cooking Up Comfort: The Perfect Recipe for Ham Bone Soup

 Crafting a Flavorful and Nourishing Dish from Kitchen Scraps

After Easter dinner, everybody who bought a bone-in ham is left looking at the bone, wondering what on Earth to do with it.

Some people offer it to the family dog. While the dog will undoubtedly be overjoyed, this is not a wise move; the bone has been cooked at least twice now and is in no condition for a canine companion to chew on. Please don't do this. Your dog will be sad in the short term, but s/he can have a little piece of ham and cheer right up.

Some people just shrug and toss it in the trash. In our opinion, too many people take this approach. Even if you've carved it clean, it's much too valuable to simply dispose of it. Instead, try making a ham bone soup.


Ingredients:

Obviously, the ham bone

whatever odd chunks of ham you have left lying about

30 cups water

1/2 pound carrots

1 onion

2 stalks celery

2 potatoes

1 bag frozen corn

1 can cannellini beans, rinsed and drained

1/2 teaspoon fennel seed

1/2 teaspoon rubbed sage

1/2 teaspoon marjoram

1/2 teaspoon ground mustard powder

1 teaspoon paprika

1 tablespoon hot sauce of choice

2 tablespoons tomato basil seasoning

salt and pepper, to taste

Tools:

Seriously huge stock pot, with lid

Long-handled spoon

Sieve or slotted spoon

Knife

Vegetable peeler

Cutting board

Tongs

Measuring cups and spoons 

We started with a 23 pound whole bone in ham, so this recipe is written under the assumption you also have an egregiously large ham bone on hand. Feel free to pare it down as necessary if you bought a more manageable ham, say about 5-8 pounds. Also, knowing there was a soup to be made, we didn't exactly put a lot of effort into carving the ham off the bone. We wanted plenty of meat in the soup.

Take a big pot. No, not that one you use all the time. Go bigger. As big as you can without having to get a whole other camp burner or something outside.

Plop that ham bone in there, and toss in whatever odd pieces are left on the carving board or serving plate. There are always shreds and chunks and juices left, so just make sure no one scrapes the plate into the trash before you get going on this soup.

We added 30 cups of water (just a little shy of two gallons) and that about half covered the ham bone. Set the burner high enough to get the water at least simmering. Put the lid on the pot and get ready to wait. You'll have at least half an hour before the next step. We want the bone to sit and simmer for a while, and release all the flavor into the water.

We weren't in a hurry, so we got it up to a good boil, reduced to a simmer, covered the pot again and let it go for about six hours. This is not necessary, as you'll get loads of flavor in about a third of that. We just had the time, so we allowed it to cook forever.

However long you want to let the bone simmer, have a fine mesh sieve or big slotted spoon handy. The next step is filtering out the super fatty pieces.

Once you feel the bone has simmered long enough, remove it from the pot. We used tongs, but needed two sets to accomplish it (again, big ham bone, deep pot). Set the bone on a serving plate or big cutting board - whatever you have that can accommodate it. If there's still meat left on the bone, give it a tug with the tongs or shred it off with a fork. Set it aside to go back into the pot. Scoop or strain out the big chunks in the broth, discard the pieces that are all or mostly fatty, and set the good stuff on the plate or board. Once you've gotten out as much of the fat as you feel you need to, add the meat but not the bone back to the pot and stir.

Now we can season and add all the other good stuff. (You may see in the photos that we didn't do this straining and sorting step before adding veggies. This was an oops. Having eight million tiny pieces of vegetables really complicated the process.) 

We know you know this already, but please wash your produce!

When cutting vegetables, we save the onion for last and stick it in the fridge or freezer while we work on everything else. Cold onions stink less than warm onions, and some of us get exceptionally teary around onions.

We started with the carrots and cut them into rough chunks, then scraped the cutting board into the soup before moving on to the celery in much the same fashion. Chop it all to whatever size you prefer.

The carrots went in unpeeled, but the potatoes needed to be peeled in our opinion. This is entirely optional and at your discretion. But in our case, the potatoes were peeled and cubed and lobbed into the soup, then the whole bag of frozen corn followed. The beans can be rinsed and added to the soup pot here too. Give it all a stir to combine.

Last, the onion. Assuming you've tried the fridge/freezer trick, fish it out of the fridge, peel the outer layers, rough chop and add to the soup. We do this as quickly as possible because, well, tears. If you're one of the unaffected, cool, take your time. The rest of us: good luck.

Now we get to add seasonings. Fennel, sage, marjoram and paprika are absolute musts in our opinion. Hot sauce, tomato-basil and mustard are what we chose to round out the flavor. The fun part about making food is making creative edits. If you have something you prefer, go for it! 

Feel free to share ideas over on our Facebook page. 

One of the great things about this recipe is just how easily it can be portioned out and frozen for the future. You can choose to do this at the stage after separating out the fatty bits, or after cooking all the veggies. The first will give you a stock you can use as the base for other foods, while the latter will give you a quick meal you can heat up as needed.

What about in the event your freezer is broken or malfunctioning though? That’s when you come to us. Appliance Rescue Service is here to help get your home running smoothly, whether it’s a freezer that won’t stay cold or a stove that won’t stay hot. Our main goal is to get your home running smoothly again.
Website
Office ((214) 599-0055) 

Additional Reading

Want some other options for soups? Check out these options from our archive.


From Pantry to Pot: Wholesome Hunter's Stew for the Resourceful Cook

Ladle Love: Wholesome Potato Leek Soup Recipe

New England Clam Chowder To Keep You Warm

Test Your Refrigerator IQ: True or False Signs Your Fridge Needs a Tune-Up

Learn to Decode Your Fridge's Messages and Keep It Running Smoothly 

  • True! If your food is going bad much faster than is normal, it means h that your refrigerator isn't keeping cold enough. It can also mean that the refrigerant needs to be recharged or your compressor might have failed.

  • False! If your refrigerator is looking more like the inside of a glacier, you've got a problem. Rapid and excessive icing can mean a couple of different issues, but all of them mean that your refrigerator needs a maintenance check. It can be that the thermometer is dead. It can also be that the defrost function is dying. Finally it can show that your compressor is malfunctioning, although this less common than our first two problems.

  • True! It is normal for your fridge to vibrate a little every now and then, as long as it doesn't get excessive or start causing the whole thing to move.

  • False! If you've got puddles forming inside of your refrigerator, it means that your door seal has gone bad and is letting in outside moisture.

  • False once more. The catch here is that while modern refrigerators are quiet, they're not yet completely silent, especially not if you have an ice maker or water line in your fridge. Those will typically thump or click when they're working. If however it's very loud, with scraping or thumping noises, that's when you need to be more concerned.

Courtesy of Jennair

  • While this is geared towards modern refrigerators, if you've tracked your power use to your refrigerator, you might have a damaged component. If your fridge is unable to keep its temperature regulated it's going to be drawing down more and more power trying to keep cool.

  • True! The thermometer in the fridge may jumpstart the compressor to drop the temperature right when the fridge is opened to make sure everything stays cool even with the warm outside air coming in.

  • True! If you're noting that your refrigerator isn't just warm but hot, it can be a serious issue. While refrigerators generate a little heat, the engine should never be hot enough to hurt. This warning sign can indicate a serious issue with the coils that are used to transfer heat away from the fridge. Repair is needed ASAP for this one.

  • False! But you knew that one, right? While most often this will be water leaking out due to a blown hose, it can be something more serious leaking out.

  • If it's buzzing CONSISTENTLY your compressor is struggling with something.

  • False. Unless you're storing nail polish remover in your fridge, it shouldn't smell like that. If that's not the case, it is a huge issue because it means that the refrigerant is leaking and you need to have it looked at immediately.

  • False, but nice try.

    If your doors won't stay shut, and it's not because something is blocking it, it means that the rubber seal around the door has worn out.

  • True! Buzzing occasionally isn’t something to worry about. Your fridge will make noises occasionally. It’s usually the start or end of a compression cycle, and not to worry about.

  • False! Most fridges let out heat near the ground, so if you feel some warmth by your feet when standing in front of the fridge, that is normal.

How did you do? Let us know over on our Facebook page, and you can brag to your friends. 


If you’ve realized that you know these signs because your refrigerator is acting up, we’ll be happy to help.. You can reach out to us via our website or by giving us a call at 

((214) 599-0055). 


Additional Reading
Navigating the Frigidaire Refrigerator Recall


Elevate Your Culinary Experience: The Quad Door Refrigerator Advantage


Demystifying Refrigerator Types: Choosing the Perfect Fit for Your Home


37 Reasons To Have Your Appliances Maintained Regularly

Versatile and Delicious: Creamy Chicken and Veggies

Simple Ingredients, Spectacular Results

Transforming leftover chicken into a weeknight meal has never been easier! Say hello to this week’s recipe of creamy chicken and veggies. It’s the ultimate solution for a hassle-free weeknight dinner. It’s a great way to use a previous night’s chicken dinner, toss in the vegetables you have in your fridge and a handful of pantry staples to make an endlessly variable recipe.  It’s a delicious mix of flavors and textures, that’s quick to throw together and can feed a hungry family. Whether you’re looking to mix up your leftovers or just needing a comforting meal that comes together easily, this is the recipe for you. 


Ingredients:


2 cooked chicken breasts

2 tablespoons olive oil 

2 tablespoons minced garlic

1 green bell pepper 

Large can of diced tomato, drained

1/4 cup heavy whipping cream 

1 tablespoon white cooking wine

1/2 teaspoon dried basil

1 teaspoon dried oregano 

1 teaspoon dried parsley

1/2 teaspoon dried thyme

1/2 teaspoon dried rosemary

Black pepper and salt to taste 


Tools:

Measuring cups and spoons 

Large heavy-bottomed skillet

Colander

Can opener 

Cutting board

Knife

Spoon

Forks 


As always, please let your first step be to wash your produce!


Once clean, take the knife and cutting board and chop your bell pepper, discarding all the rib and seeds.


Take a can opener to your can of diced tomatoes (feel free to use fire roasted, or low sodium, or whatever tomatoes you have around! The point is to use stuff you have on hand, so don't fret if you don't have plain diced tomatoes).  Flip the can into the colander to drain. It'll take a while to finish dripping, so consider moving on to another task. Either assign a little helper to watch the tomatoes or just check back on them later. Don't press them, though; you want them to retain some moisture for creating the sauce.


Next up, let's get to the chicken - drop it on the cutting board and use a pair of forks to shred it to your desired size. We went with fairly large chunks, but you can change it up. 


Add the oil to the pan and turn the burner up to medium-low. As the oil heats, add your garlic and cook until fragrant. This usually only takes a couple minutes.


Increase the heat to medium. Splash in the cooking wine, then add your peppers, tomatoes, and chicken. Give everything a stir, then allow it to simmer while you measure your basil, oregano, parsley, thyme and rosemary into the pan. Add salt and pepper at this stage if you'd like, then stir again so no one gets a mouth full of just spices later.


Once the peppers begin to soften up, you're good to measure in the heavy whipping cream. Stir thoroughly. Sometimes it takes some elbow grease to get the cream to incorporate fully.


Allow to simmer, uncovered, without increasing the heat, for at least ten minutes before serving. In the event you'd like a heavier sauce, simmer over low heat until the sauce reduces to the consistency you prefer.


Serve over rice, or over pasta, or with a roll, or just by itself. One of the great things about this recipe is that you can use the recipe with almost any grain or side that you have available or want to throw in. 


If you opt to make this recipe, let us know on our Facebook page! We want to know how you mix it up, what you add in and what you pair it with. With how versatile this recipe is, we want to see what you do with it!

On the other hand, if you’re struggling with your stove, be it electric, gas, or induction, that’s an entirely different problem and we can help. At Appliance Rescue Service, we can service any type of stove you might have. Whether you’re struggling a stove that won’t light, or it’s cutting out during use, we can help. We service every model of stove, and every manufacturer, be it foreign or domestic. If your stove is malfunctioning, we want to help.

You can reach out to us via our contact page or by giving us a call at ((214) 599-0055). We’ll work with you to set up an appointment that works for your schedule and send out one of our experienced technicians. They’ll diagnose the problem and explain what’s going on before they let you know whether they can fix it then and there or need to order in parts. From there, we’ll let you decide what you want to do. At Appliance Rescue Service, our goal is to get your home running smoothly again; whether you’re in Dallas, McKinney or Richardson, we’re here for you.


Additional Reading

Get Your Protein with This Buddha Bowl 


Jalapeno Chicken Bowtie Pasta


Unveiling the Secrets of Appliance Recycling

Maximizing Benefits for You and the Environment

Is your home plagued by the sight of old appliances gathering dust in the corners of your garage? Do you often wonder what to do with them when it's time to upgrade to newer models? Fear not, for we have uncovered a treasure trove of options for recycling your old appliances. Let's dive into the world of appliance recycling and explore the myriad possibilities that await.


Options for Recycling Old Appliances:

When it comes to recycling old appliances, you're not short on options. Here are some avenues you can explore:


1. Local Recycling Programs:

Many utility companies offer appliance recycling services, sometimes with incentives like refunds or waivers. Some states have government programs for appliance recycling, making it easy to dispose of your old appliances responsibly.


2. Retailer Pickup Services:

Some retailers provide pickup services for old appliances when you purchase new ones. Two retailers that specifically offer this service are Lowes & Home Depot. Both allow for you to opt in when you purchase a new appliance and have it delivered. There are also services that offer to haul away your appliances for you that you’ll find when researching disposal centers. Before choosing one though, make sure you look into how they handle hazardous materials. 


3. Disposal Centers:

If you have the means to transport your old appliances, you can take them to disposal centers yourself. Make sure to confirm acceptance of specific appliances and inquire about hazardous material handling before dropping them off. 


Accessing Recycling Options:

If you aren’t sure of what’s in your area, or what’s easiest, you can reach out to your local utility company to learn about more options. You can also use Earth911.com to learn more about local recycling programs using your zip code. 

Benefits of Recycling Appliances:

Recycling your old appliances doesn't just clear up space in your home—it also comes with several environmental and economic benefits:


1. Environmental Protection:

Recycling reduces landfill waste and prevents hazardous substances from entering the environment, contributing to a cleaner planet. (for more on that one, you can check out part two!)  

2. Energy Efficiency:

Recycling old appliances can lead to reduced energy consumption compared to using less efficient models, helping conserve valuable resources.

3. Resource Conservation:

By recycling metals and plastics from appliances, we reduce the need for virgin materials, conserving natural resources for future generations.

Emphasizing the Hidden Treasure of Recycling:

When you recycle your old appliances, you're not just getting rid of them—you're unlocking valuable materials and contributing to sustainability. Appliances contain valuable metals like copper, aluminum and steel that can be melted down and reused for new products.

This reuse helps to create a more sustainable future by reducing resource consumption, and means that new materials odn’t have to be dug up or synthesized. Instead of using fuel to dig up and then process and ship new materials, old ones can be reused. Which means you’re making an environmental impact on your own, and as part of your community. 


Incentives and Rewards:

Recycling your old appliances can also come with some enticing incentives and rewards:

1. Financial Incentives:

Some utility companies offer refunds, waivers, or cash for participating in appliance recycling programs, giving you a little extra incentive to do your part for the environment. You can keep an eye on their social media, your local newspaper or give them a call to learn more about how that might work. 


2. Environmental Impact:

Recycling appliances contributes to reducing greenhouse gas emissions and protecting the ozone layer, highlighting the environmental benefits of participation.

By exploring these options and understanding the benefits of appliance recycling, you can play a vital role in creating a cleaner, more sustainable future for generations to come. So, don't let those old appliances collect dust any longer—recycle them and make a positive impact on the world!


Resources: 

City of Dallas Drop-Off Locations: The City of Dallas operates several drop-off locations for recycling various materials, including appliances. You can visit the City of Dallas website or contact their Sanitation  department for more information on locations and accepted items. https://dallascityhall.com/departments/sanitation/pages/brush_and_bulky.aspx 


Earth911.com: Earth911.com is a useful resource for finding recycling centers and drop-off locations near your area. You can use their website to search for recycling options specific to Dallas, Texas, by entering your zip code and the type of material you want to recycle.


Local Utility Companies: Utility companies in the Dallas area may offer appliance recycling services or participate in government-sponsored recycling programs. Contact your utility provider to inquire about any recycling initiatives they may have and how you can participate. 


Community Recycling Events: Keep an eye out for community recycling events or collection drives in the your area. These events are often organized by local municipalities or environmental organizations and may include opportunities to recycle appliances.


Remember to inquire about any fees, requirements, or restrictions associated with recycling appliances at these locations. Additionally, always make sure to properly prepare appliances for recycling by removing any hazardous materials or fluids and following any guidelines provided by the recycling facility.


Did any of the various benefits catch your attention? Share your thoughts with us on our Facebook page!


Remember, there are few situations with major appliances that we can't resolve. At Appliance Rescue Service, we're committed to providing our best, whether it's through routine maintenance checks or repairing your appliances. If you're not ready to give up on fixing your appliance, rest assured, neither are we. Get in touch with us via our contact page or give us a call ((214) 599-0055).