Smart Appliances or Bamboozling Buzzwords?

Are we closer to having smart homes, or are we being bamboozled by useless technology upgrades? 

Smart homes, homes that can do everything for us, making our lives more comfortable and focused. We’ve been dreaming about homes like Eureka’s SARAH, The McFly House, and Tony Stark’s mansion for decades. And as technology continues to speed up, we are getting closer. While we aren’t quite at the point of having living room travelators a la the Jetsons, we do have robot vacuums. We’ve also got people who are already trying to figure out how to imitate JARVIS from the Iron Man movies, and he can tell you if a guest has shown up. 

Jetsons.jpg
 

So what is a smart home? 

According to the masses, a smart home is “a home automation system will control lighting, climate, entertainment systems, and appliances. It may also include home security, such as access control and alarm systems.”


A smart appliance then is one you connect to your phone or tablet for better control convenience and information. Then you can control it either by voice command or the push of a button. 

Smart Appliance Examples

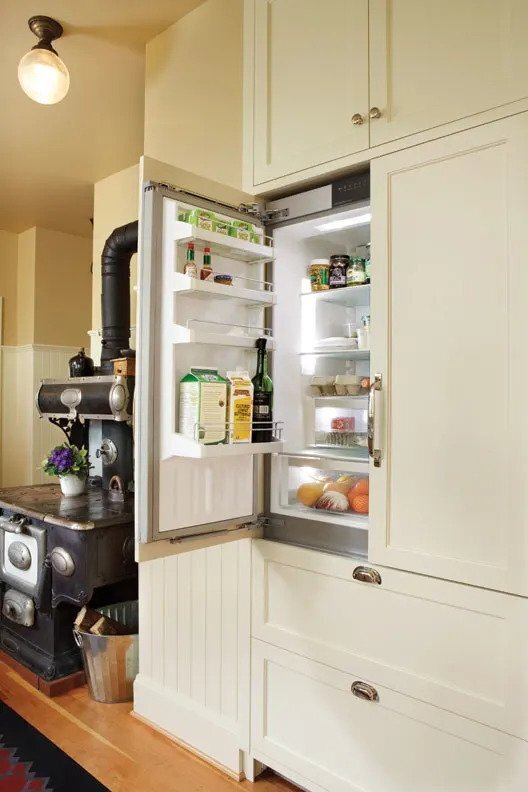
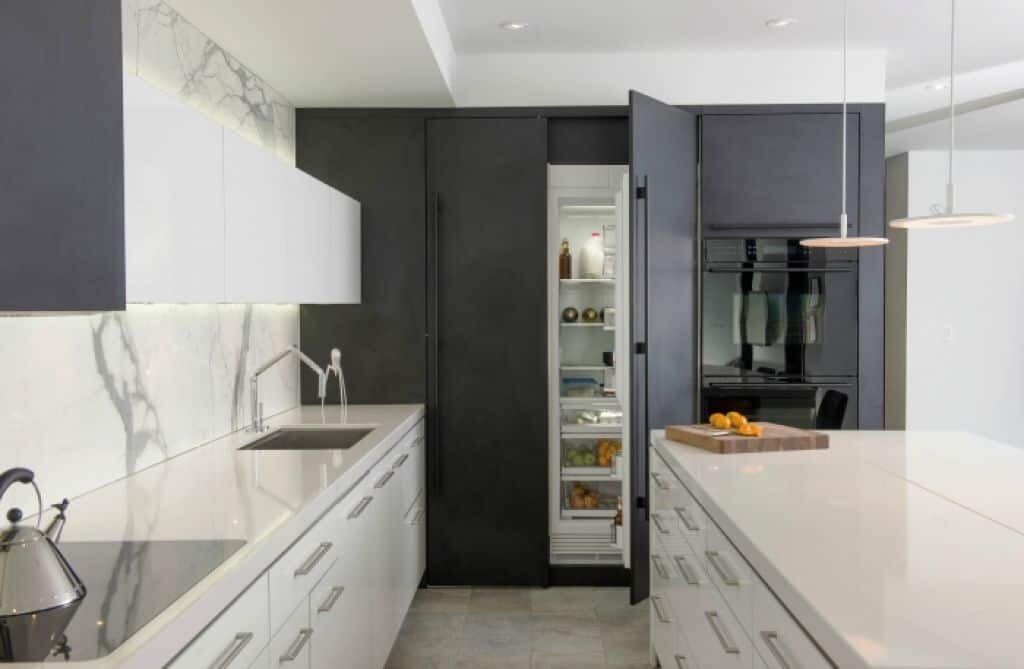
 Refrigerators that let you know when you’re out of something. 

 Thermostats that remember what temperature you prefer at night

 Security systems that let you check in on your kids and see if you remembered to lock the door before you left. 

So a smart home is a collection of appliances, systems, lighting, and heating that can all be controlled from a central point. What’s the problem then? Why are we all holding off on diving into the future we’ve wanted.

Well, because we’re still in the infancy stage of smart homes. Not all smart appliances are useful, not all of them do what they claim to do, and really do we need a remote start for our washing machines? Why do we need 24-hour delays on crockpots? (No one wants salmonella, thanks for trying.) Last but not least, shouldn’t an appliance be good at the primary function before we add on extra ones? Sadly, as we’ve discussed before, that’s not always the case. 

Manufacturers are still figuring out what we need in appliances and what will actually get used. We’re also still figuring out the legality around devices that can share our information and whether they should or not.

Not all smart appliances are bad, though. Some of them are remarkable at both doing what they’re supposed to do AND using smart features. 

Let's take a look at the Nest Learning Thermostat and the Amazon Basics Microwave. Both do what they are meant to do while still giving us a glimpse into the future. 


The Nest Learning Thermostat has an Auto-Schedule feature that learns your daily heating and cooling temperatures and times during the first week of use and creates a schedule based on your preferences. You can make adjustments along the way or create your own schedule, but it's a nice option for those who don't want to be bothered to program their thermostat.  

Nest Learning.jpg
 

The Amazon Basics Microwave, on the other hand, costs just as much as a standard microwave, doesn’t connect to an app, and doesn’t have any superfluous functions. Instead, it takes a typical microwave and connects it to Amazon’s Alexa. This means that if you’re across the house, you can tell Alexa to cook something for you, while you’re still working. Neither of these are ground shaking improvements, but they do what a smart appliance is supposed to, making your life that little bit easier. 

Now, others are also good at what they do while still being smart, these are just two that we wanted to highlight. 

How to Tell the Difference:

Which brings us into, if there are good smart appliances and bad ones, how do you tell the differences? 

According to HGTV, there are 4 key things you should look for when you’re designing a smart home, or buying a new smart appliance. 

  • Are there good reviews? 

    • Unless you’re getting paid for it, do you really want to be the first person to find out if it works? No. Do research ahead of time and don’t get talked into buying something you didn’t intend to. 

  • Is there a proven support department? 

    • If it has issues connecting to your wi-fi, if it gets hacked, or it gives you an error message you don’t understand, you want to be able to get help you can count on. 

  • Does it connect to other devices you own?

    • Always double check (heck, triple check) that your new device will hook up to the OS on your command tool (be it phone, tablet, or computer). You don’t want to buy 3 different systems just to run everything in your house. Also, make sure that the appliance connects to the other devices you already own. If you’re looking to have two systems work together, you need to make sure they can connect in the first place.

  • Does it have features you’ll actually use? 

    • So what if that coffee maker can froth milk in 20 seconds? If you drink your coffee black, it’s irrelevant. The same goes for smart appliances. Don’t be lured in by features you have no use for. 

Now, you can still have the best of both worlds. It is possible to make your home smarter without having to purchase all new appliances. 

Some Examples Are 

 Smart Bulbs

Phillips Hue Lightbulg.jpg

  By screwing a smart bulb in place, you can get control over almost any lamp. This means that not only can you get the benefits of it, but you can keep the mid-century lamp that your great-grandmother gave you as well. The catch here is that you need to double-check the wiring in the lamp to make sure that it is intact and insulated. Since the bulbs will have current running through them at all times, the wiring needs to be up to handling that. 


 Smart Switches 


  If you have lots of lights, skip the bulbs and go for the switch. Some smart switches even have dimmers. 

Wemo Smart Switch.jpg
 

 Smart Plugs

 
Smart plug.jpg

  Have you ever left a space heater on when you left the house and had to go all the way home when you realized it? Or wanted to wake up to a fresh pot of coffee without having to get a complicated programmable pot? 

  This is where smart plugs come in. Think of the infuriating clock timers that people use for Christmas lights. A smart plug is like that, but actually reliable. They are even able to monitor power usage and let you know how many times something is turned on and off. If you’re interested in some of the ways people have used smart devices, check out this article over Forward Thinking Home. 


Now you can get that bit closer to Tony Stark’s mansion without breaking the bank. And while you save up the money to get new appliances, maybe the manufacturers will actually make them smarter, and still, work. 

Thanks for checking out our post this week, we hope that you enjoyed it. If you did, or if you have any questions or comments, please let us know over at our Facebook page. We’d love to hear from you. 


Don’t forget, even smart appliances still need regular maintenance! Schedule an appointment today with one of our technicians to make sure that your home of the future is running smoothly.

Monkey Bread, Monkey Brains, Pull-Apart Bread, It All Tastes Good!

Welcome to this week’s recipe post! We’re digging into one of our blogger’s favorite and most versatile recipes, Monkey Bread! This recipe is so versatile you could easily make it for every meal in a day. (Although whether that’s particularly healthy is something we’ll leave to you to decide. ;) ) 


Monkey bread as a sweet dessert  has actually been around in the US for only a short period of time. Prior to that it was a treat known to Hungarian families as arany galuska or “ golden dumplings.” However, we said only the sweet version. The savory version of this dish has been in America, since 1884 when it was known as “Finger Rolls”. 


“Common names for pieces of dough baked together in a pan include bubble bread, bubble loaf, jumble bread, pull-apart bread, pinch-me cake, pluck-it cake, monkey puzzle bread, monkey brains, and monkey bread..Despite the name, there are no primates in this bread. According to conventional lore, the fanciful term comes from its appearance – pieces of dough placed next to and on top of each other, the baked bread said to resemble a barrel of monkeys. .”   

 
Gooey, Delicious Monkeybread, this is a treat for all ages.

Gooey, Delicious Monkeybread, this is a treat for all ages.


Ingredients 

½ cup granulated sugar

2 tsp ground cinnamon

3 cans (12 oz each) refrigerated biscuit dough

8 Tbsp or 1 stick butter

1 cup packed light brown sugar 


Instructions

Preheat the oven to 350* F. Then grease a 12-cup Bundt or tube pan with butter, oil or cooking spray.  


In a medium bowl, whisk together the granulated sugar and cinnamon. 


Cut each of your biscuit rounds into 4 quarters and dunk them in the cinnamon sugar, making sure all sides are coated. Layer the wedges in the prepared pan. Make sure not to press them together too tightly or you’ll have some difficulty pulling them apart later. (and that would just defeat the fun.) 


In a small saucepan, melt the butter over low heat. Add the brown sugar and continue  stirring until melted. 


Pour your sauce over the dough, making sure to spread it evenly. 


Bake until golden brown, 45-55 minutes. If you see the monkey bread beginning to brown too quickly, cover it with foil. 


Let the bread cool in the pan for 5 minutes, then invert onto a plate. 


Best served warm so that it’s nice and gooey. 


Tips 


The Bundt pan or tube pan is needed so that the heat spreads evenly through all of the dough and cooks rather than leaving the center balls raw. 


You can also make this the night before, and stop after you’ve poured the sauce over the bread. Then place it in your fridge overnight, allowing the dough to soak up the sauce further. This also allows for an easy treat the next morning, without need for lots of prep. 


The base idea of this recipe, taking biscuit dough and layering it, can be used in SO many different ways. People have come up with all sorts of sweet and savoury ideas. We collected some of our favorites to give you ideas on what can be done with this nifty recipe. 


From Celebrating Sweets we have  a Caramel Pecan Monkey Bread. Caramel + Pecans. We cannot wait to make this one in our own kitchens! 


Over at Dessert Now, Dinner Later they’ve got a delicious looking recipe for Apple Fritter Monkey Bread


And for our final sweet recipe, we’ve got a Baklava Monkey Bread recipe from the Happier Homemaker that has us absolutely drooling.  Baklava! But in tiny pull apart pieces! This one is also closer to the original Hungarian arany galuska given the walnuts. 


Moving over to the savory side of things we’ve got recipes for every meal you can think of.

Breakfast? Try Focus Recipe’s Sausage, Egg and Cheese recipe. 


Need a snack? Try Little Dairy on the Prairie’s Cheesy Bacon Ranch recipe. (That name is so cute!) 


Are you looking for dinner or something easy for a game night? Check out this recipe from The Girl Who Ate Everything for a Pizza Monkey Bread.


Looking for something fast, easy and still nice enough to serve to your boss? Check out  this recipe from Five Heart Home for Savory Herb & Cheese Monkey Bread. 


Wrapping It Up

 Thanks for checking out our recipe this week! Let us know what versions you’ve tried down below. Now that we know how versatile this recipe is, we want to hear from you just how many varieties you’ve tried. 


And remember, if something is going on with any of your appliances  we want to help. Whether it’s some of our posts here on the site, or needing a trained technician to take a look, Appliance Rescue Service is here for you.

Teaching Your Kids Kitchen Safety

Whether you learned early how to cook, or later in life, as parents, we want our kids to learn how to feed themselves. Whether it’s so they can make their own lunches, so they can learn essential skills or build memories with us. All of these things come from learning how to cook. All things need a framework though. For learning to cook in the kitchen, that means learning kitchen safety. 

“But how do you teach them that!?” you might be grumbling at your computer screen. It’s ok, we get it.  

When it comes to teaching kids safety in the kitchen, you need to set clear rules so the process is enjoyable for both of you. You will have to remind them of them from time to time, that’s normal. What’s more, fun is when they get to turn the tables and remind you! 

Here’s a quick, bulleted list, before we dig into each one. 

  • Listen. Listen. Listen. 

  • Roll-up sleeves and tie back hair. 

  • Always wash your hands. 

  • Always ask an adult before cooking.

  • Clean as you go. 

  • Practice good knife safety. 

  • Ask Before You Lick. 

  • Separate Raw and Cooked foods

  • Cook foods to the proper temperature. 

  • If you get hurt, tell an adult right away. 

  • When you’re done, turn off the oven and all other appliances before you leave the kitchen. 

Listen. Listen. Listen. 

 Cooking with kids is a great way to build active listening skills and practice following directions. “My kids get so excited to get started that we often talk about ‘Listening Before You act’ says Natalie of SuperHealthy Kids.  They get so excited, and it’s hard, we get it! It’s important to stress to kids that taking the time to listen and follow directions can change if the recipes turns out well or not. 

Roll Up Sleeves and Tie Back Hair 

 This one feels like a ‘well duh’ to us, but to your little one, not so much. Teaching them to do this every time before they start to cook will build a life long habit. Just as important, it means you’re less likely to have hair in your food, or stains on their clothes! 

Always Wash Your Hands 

 We should all be washing their hands front and back, between the fingers and under our nails. If we don’t teach our kids, who will? You can also remind them to think about all the things they’ve touched and ask if it’s something they want in their food. 

Always Ask An Adult Before You Cook

 Again, this seems like an obvious rule, but as our kids become more confident and independent, they’ll want to ask less. It’s important to ask though so that even if they’re the one doing all the work, there is someone there in case they get hurt. 

Clean As You Go

 This one is a somewhat divisive point. Some people clean as they go, and others will put everything in the sink until the cooking is done. The biggest reason you shouldn’t leave everything till the end is to prevent slips and falls. The second reason is that if you’re us, you don’t have a lot of sink or counter space. Washing as you go means that you don’t have to fight to get counter space, worry about things falling out of the sink, or have little elbows knocking things off. 

Practice good knife safety. 

 Technically speaking, we could do an entire post about proper knife safety. (And maybe we will!) the most important things to keep in mind are these though. 

 - When teaching your kids to use knives, work with them, stay patient, and expect that it’s going to take many repetitions before they get the hang of it. 

 - You can start by letting them use plastic to-go knives, move them up to kid-friendly plastic knives, and then eventually (preferably not before they 8 or so) you can upgrade them to kitchen and chef knives. 

 -Always carry knives point down. 

 -When you set down a knife, it should be flat and away from the edge of the cutting board or the surface it’s on. 

 -Your hand should be on top and the knife on bottom when you’re gripping the handle. 

 - If your knife is moving, your eyes should be down. If the food moves, your knife should be down. 

  This one is phrased so that it’s easy to remember, but it might take a bit more explaining for your kids. The idea is that if you’re using a knife, your eyes should be focused on what you’re doing. If you take your eyes off what you’re doing, the knife should stop moving. If the food is moving (i.e., if you’re taking it somewhere else in the kitchen), the knife should be laid down. 

Ask Before You Lick

 We know the dangers of the kitchen. Raw meats, cleaners, raw eggs, etc. Kids don’t though, and cake batter, sauces, and the like are tempting for little chefs. So make sure that they always ask before they lick something. 


Separate Raw and Cooked Foods

 Just like the above, this is one kids aren’t going to think about. It’s our job to teach them that you cannot put cooked food back on the same plate that raw foods were on.

- If you get hurt, tell an adult right away. 


-When you’re done, turn off the oven and all other appliances before you leave the kitchen. 


Thanks for joining us this week, we hope to see you back next week where we’ll be discussing smart gadgets. How smart are they? 

If you have comments, questions, or pictures to share, check us out over on Facebook! We’d love to hear from you. 

Remember, one of the most essential steps for working in your kitchen is knowing that all of your appliances are working correctly. If yours are having issues, or even if you’re not sure, schedule an appointment today. We want to help you keep you and your family safe. 

Easy Ways To Hide Your Appliances

Do you ever get tired of your appliances or appliances in general? What about other necessary fixtures around your house? The way they look, or the fact that they never seem to change? We know we do, and we know that some of our clients do as well. This week we’re taking a look at different ways you can change the look of your appliances and how they fit into your kitchen. 


There are three different ways so far that we’ve found to change your appliances.


Exchange It

The first method is the most straight forward. You can get rid of the appliances you have and exchange them for alternate models that will fit with what you already have. This might involve buying specially built appliances. However, you won’t have to worry about messing up the decor you’ve spent time building your dream kitchen. So while not the most cost-effective, this one can be the easiest. 

  • Some companies offer refrigerated drawers rather than a full fridge, which is what is going on here. It looks fantastic, and you can keep everything close to hand. We think it would work best if you have a larger kitchen, though, or perhaps a hanging rack for your pots and pans? 

  • This one is definitely custom. Not only are you working with what you already have around you, but you’re building a shelf that will pop out only when you need it. It can also still be used for storing baked goods.  

  • What are the panels under your sink for? Can anyone honestly think of a reason, other than decoration? These tiny drawers solve that issue by giving you somewhere to store your sponges that are easy to clean and hide away when you’re done. 

  • We cannot tell you the number of times we’ve smacked our elbows on the knife block, or a hand or a plate. You get the picture. By creating a small sliding drawer at the end of your countertop, you add more storage space to your counter, and you don’t have to worry about smacking the knife block.


Work Around It

The second method is to have custom cabinetry (or something similar) that is built around the appliance. Depending on how handy you are with tools, you can either do this yourself or have someone else build them for you. These aim to blend the appliance into what you already have, making it, so they don’t stand out. Again, cost is a factor, though, because you’re working to build around or with what you have.

  • Do routers count as appliances? We’re not sure given how everything is connected to the internet these days, but we can all agree that they are undoubtedly ugly. Why should you have to look at them then? Cover them up by making them look like something else, like this row of books, for example. 

  • Bamboo screens are one option; you can also use other types of screens, such as fully wooden ones or fabric ones to hide things, such as washers, dryers, radiators, etc.

  • This company will create a drop-down section within your counter where the appliances hide until they’re needed. Definitely a custom piece. 

  • Built-in refrigerator that perfectly matches the surrounding cabinetry. If you look closely, you can see how it’s been affixed to the refrigerator doors without having to alter the fridge itself in any fashion. 

  • This one is a little bit of using what you already have and a bit of custom cabinetry to leave your kitchen clutter-free when you aren’t using them. 

  • This refrigerator has been cleverly disguised to look like an icebox. This one definitely can be done, but it’s going to take a bit of ingenuity to make it work. 

  • All three of these are the same basic concept. Taking a cabinet you already have and adding something to it so that it serves the purpose of keeping your appliances out of the way, while still easily accessible. Each one is slightly different, but that goes to show how versatile this idea can be. 

  • Adorable tiny custom box for your mixer? Check. 

  • Can we all agree that breaker boxes are atrocious? What are you supposed to do if it’s inside your home in a critical room, though? Or if you’re looking to refurbish your garage into a new room?  Build a custom box around it and make it not stand out. 

  • Continuing on with creating custom cabinets, why not hide your cat’s litter box? Give them somewhere quiet to go to the bathroom, as well as keeping you from having to smell it all the time.

  • Other than the stove, do you see any appliances in this shot? This is all custom cabinetry built around the fridge, dishwasher, and any others that the owner has. Even the oven appears to have been covered over. 


Cover It

The third method is for those of us who aren’t /quite/ in love with our kitchen or need a change of pace. Maybe you’re like me, and committing to just one way of looking isn’t your thing? Or you want to test out a change before you make it more permanent? Try some of these alterations and see how they work for you! 

  • While this one isn’t exactly changing the outside appearance of what you have, it is hiding it away within what you already have, i.e., one of your cabinets. Having a trash can that stays out of the way? Provided it’s on heavy-duty rollers, yes, please. 

  • This is the perfect way to update your home, whether you own it or rent. This particular version is moisture and steam resistant, too, which means it’s excellent for your kitchen or bathroom. 

  • This one doesn’t just have to be done with doorknobs or faucets. You could also do this with the hardware for cabinets, or the handles on your appliances. 

  • Granite paint kits are fantastic. However, they can also be easily damaged if you don’t seal them right or choose the wrong one. Make sure that you do your research beforehand so that your hard work will last for years to come. 

  • This kitchen is an excellent example of creating a panel that sticks to the front of an appliance, in this case, the dishwasher, as well as reusing a space to make something new. 

  • Both of these continue on the trend of creating a panel that covers the appliance to blend in, without needing a custom cabinet around it. 

  • All of these are using different materials to go and give your appliances a makeover. Whether it’s electrical tape, paint or cling film, you can get all sorts of ideas by looking on the internet. 

  • When it’s not in use, why have your tv just sitting there? Why not hide it and have a beautiful piece of artwork instead? 

  • Cords are a fact of life with electronics. But who says they have to be ugly? You can use cord wraps like these, or get inventive and use painters tape to create your own designs. 

  • Plain doors are the worst in this blogger’s opinion. They need depth! Fortunately, it’s surprisingly easy to do that with just a bit of paint and masking tape. 


Thanks for joining us this week!  If you have other ways to disguise an appliance or update their look, let us know in the comments below or over at our Facebook page. 

A Valentine's Treat- Butterscotch Pretzel Pie

With  Valentine’s Day coming up we thought we’d go a slightly different route to the normal “chocolate everywhere!” Not that we don’t love chocolate, but it’s nice to have variety in the kitchen, right? This week we’re putting together a butterscotch pretzel pie. You can make this as a surprise for someone or you can make it with them for a sweet way to spend time together. 

 
Baking supplies and tools
 

Ingredients 

Crust

¾ cup pretzel crumbs

¾ cup graham cracker crumbs 

2 Tbsp granulated sugar

6 Tbsp (or ¾ stick) butter, melted


For the crust, you can alter amounts of pretzel to graham cracker crumbs if you want the crust sweeter or saltier. 

Filling 

¾ cup packed dark brown sugar

¼ cup cornstarch

Pinch of salt

3 large egg yolks- room temperature

2 cups of whole milk

2 Tbsp cold butter, cut into small chunks

2 tsp vanilla extract

Topping

1 cup cold heavy cream

3 Tbsp granulated sugar 

Chocolate shavings 


Instructions

Preheat the oven to 350


Making the Crust:

In a medium bowl combine the pretzel crumbs, graham cracker crumbs, granulated sugar, and melted butter until they form an evenly moist, crumbly mix. Press the mixture evenly onto first the bottom and then up the sides of a 9-inch pie plate. Starting with the bottom is to make sure there aren’t any air pockets later. Bake until the crust is fragrant and firm, 8-10 minutes. Set aside to cool, although not in the fridge,  or things will get soggy. 


Making the Filling: 

In a medium bowl, whisk together the brown sugar, cornstarch, and salt. Add the egg yolks and ½ the cup of milk, whisking thoroughly to combine. 

In a large saucepan, bring the remaining 1 ½ cups milk to a boil over medium-high heat. Remove the pan from the heat. Whisking constantly, very slowly add the hot milk into the egg mixture. It should be a thin ribbon while you’re pouring. Keep whisking constantly so that you don’t scramble the eggs.  

Pour the entire mixture back into the pan. 

Cook over medium heat, stirring constantly until the mixture comes to a boil and thickens, roughly 3-5 minutes. Remove from the heat and whisk in the butter and vanilla until smooth. 

Pour the filling into the cooled pie crust and smooth the surface with a small spatula. Cover the surface entirely with plastic wrap to prevent a skin from forming. Make sure the plastic wrap is right up against the filling. 


Place the pie in the fridge until thoroughly cooled and set, at least 2 hours. 


Just before serving, make the topping.: In the bowl of an electric mixer fitted with the whisk attachment or using a handheld mixer, whip the cream and granulated sugar at medium-high sped to form soft peaks. 

Spread the whipped cream over the pie, shave chocolate over the pie and serve. Be prepared for people to be coming after you for the recipe afterwards, this pie is sweet, delicious and absolutely amazing. 


Tips 

When it comes to making crumbs, your best bet is to get two gallon size ziplock bags. The first one will almost certainly get torn apart by the salt and the sharp edges of the pretzels, while the second will keep the crumbs from getting all over your counter.  Pour in two cups of pretzels and mash with a rolling pin, or with a mallet. 


If you’re short on time, you can get away with using a premade graham cracker crust, but it won’t taste quite the same. Because of how sweet the filling is, the salt from the pretzels balances things out. What you can do though to add that is a sprinkling of sea salt over the topping before you add the whipped cream. 


When it comes to brown sugar, you need to work in stages. Fill the measuring cup you’re using and then scrape it off with a knife to level it. Now use your fingers or the back of a spoon to pack down the sugar. You should have roughly half of what you started with. Repeat until you have the amount you need. 


When you’re adding in the milk to the egg mixture you’re tempering the eggs. If you ensure that your eggs are at warm temperature before you start working with them, it will help to prevent them from scrambling when you add in the milk.  If you want to learn more about tempering you can check out here.   You can watch the full episode, or start at 2:17 to learn just about tempering. 


Let us know how your recipe turns out, we’d love to hear from you over on our Facebook page. 


And if you’re looking to learn more about how we can help you with your appliances, please let us know


Adapted From: Paula Deen’s Southern Cooking Bible.