cleaning

Ways to Update Your Bathroom, and Ways You Shouldn’t

Some of these were great and some didn’t make sense

We just survived Black Friday and like many of you, we were looking at all of the articles shouting about the greatest products for your home. But, have you ever really thought about the items? Or do you  just scroll past? This week we’re taking a look at a popular article over on Buzzfeed and giving our breakdown on whether or not we think you should add these to your bathroom. We’re looking at this article, so if you want to check it out before we get to it, have at it! 


Before we get started, this is our rating system. We did a rating of 1-10, with 1 “Being no way am I buying this” and 10 being “absolutely, you should get it”.


1. 1 - NO, these look beautiful for about a week before the hot water makes them lose their shine. They also don’t hold everything that you need if you have a household of more than 1 person. 

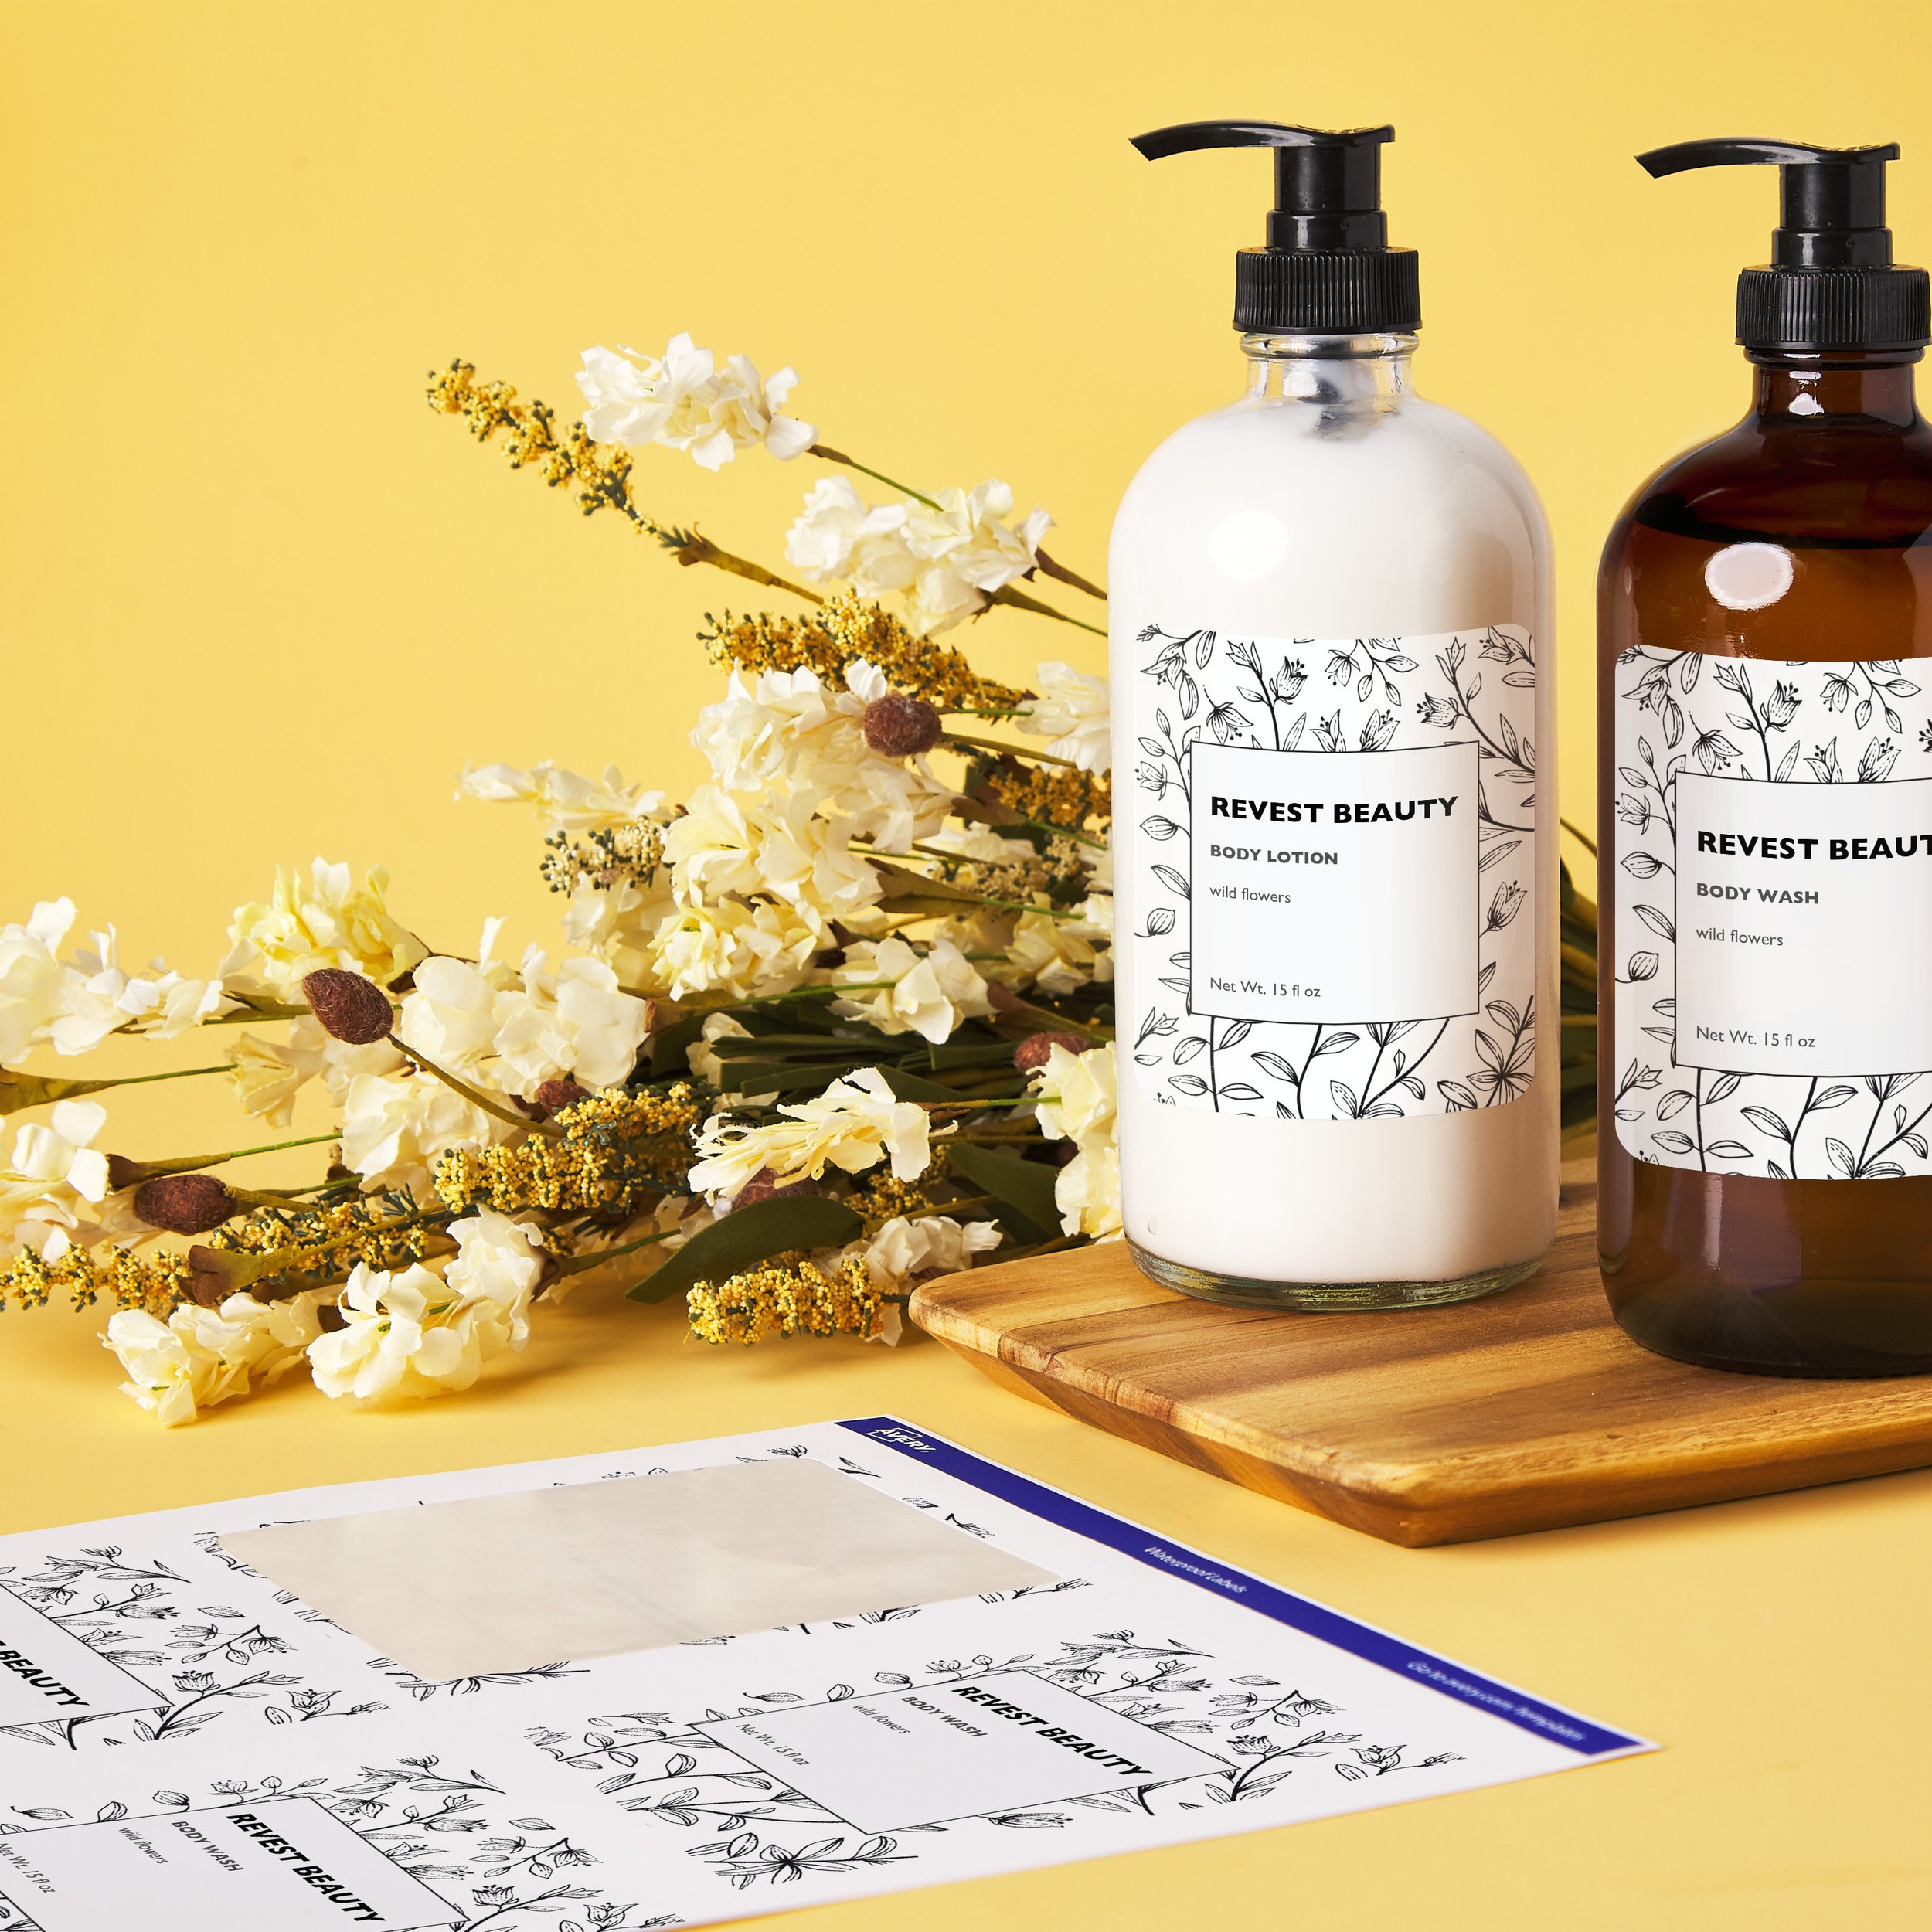
2. 5 - We are split on this one because, on one hand, you can DIY this look for yourself much more easily, BUT if the bamboo lids fit with your current decor, it’s an easy purchase. 

3. 1 - We have been warned to absolutely NOT do this, as it will actually ruin the finish on your tub. If you turn a normal cleaning into an attachment that’s one thing. The brushes that are designed for your drill though, are typically made with metal or wood in mind and will ruin your lovely tub. 

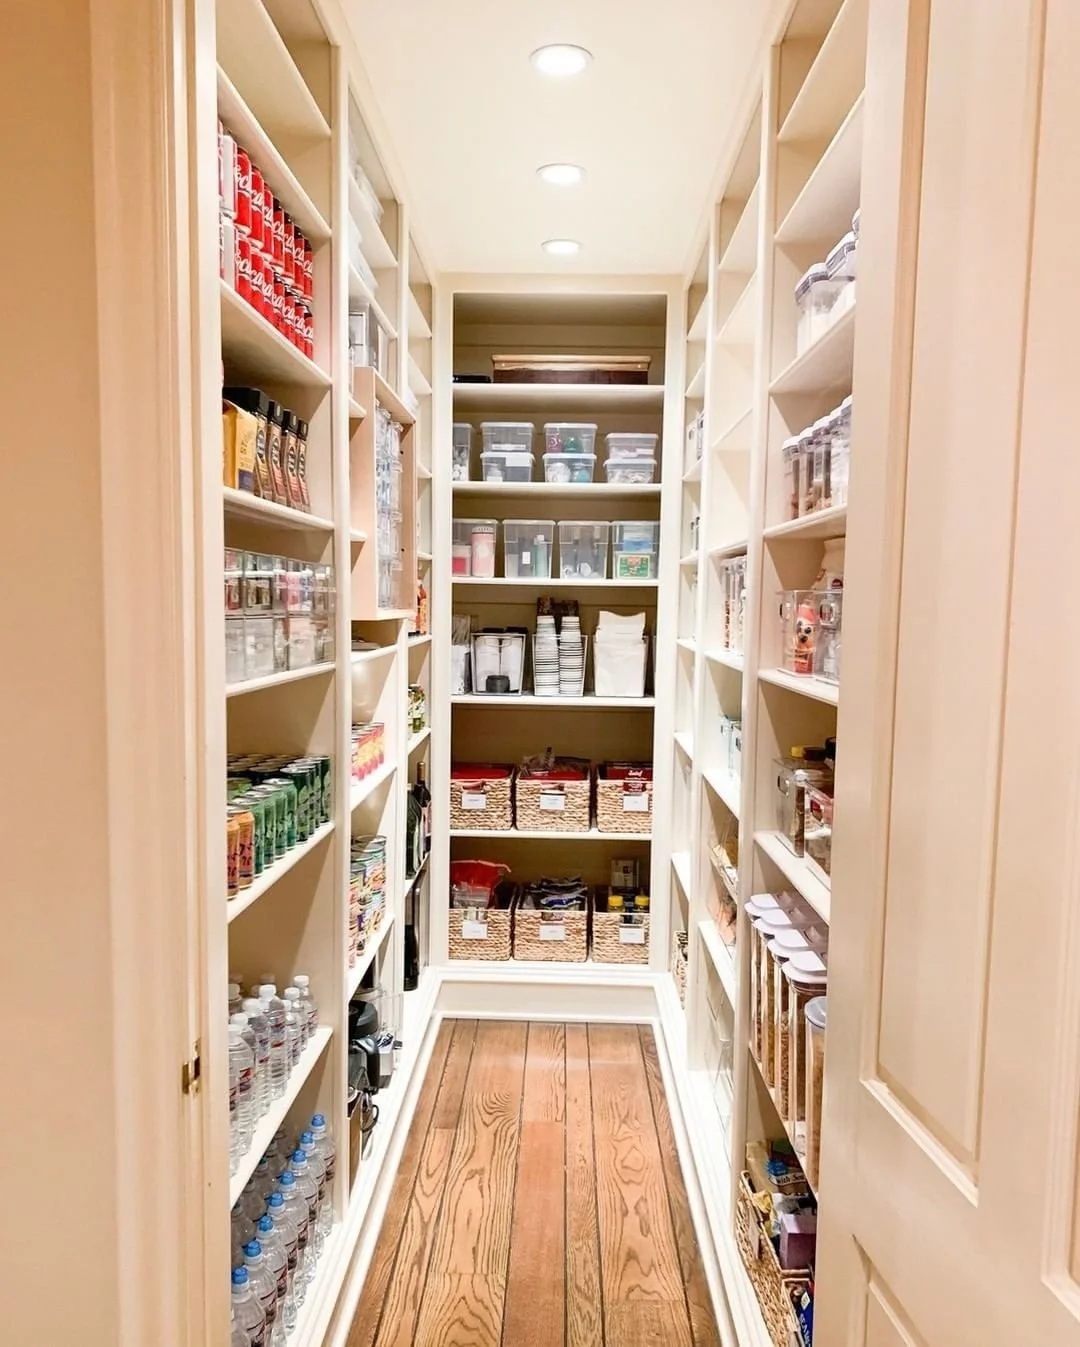
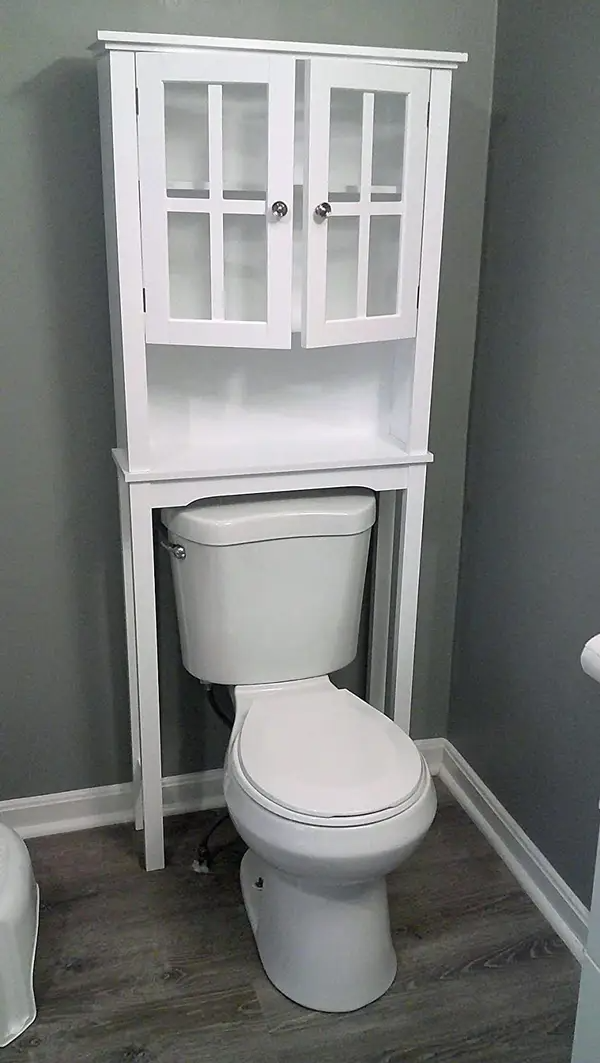
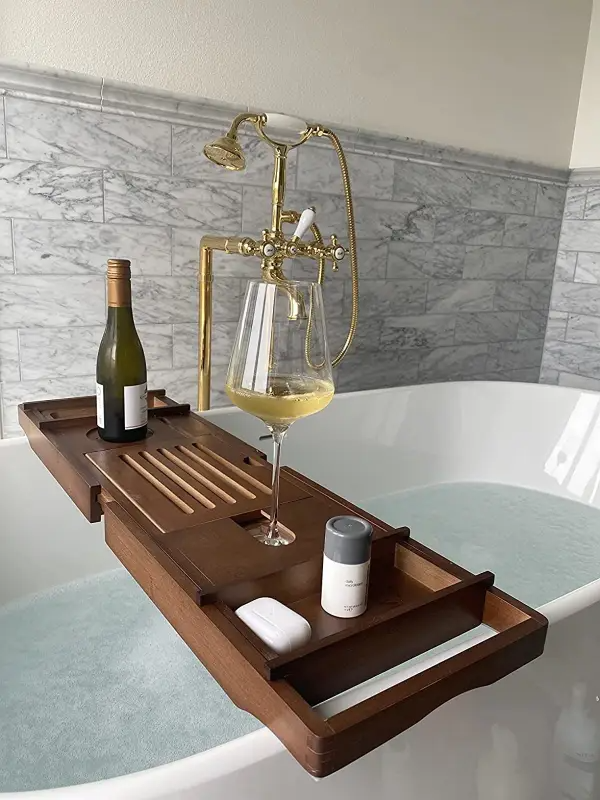
4. 10 - Utilize that vertical space! Poor design choices of homes often leave us with large gaps of useless space, so we love finding ways to solve that issue. 

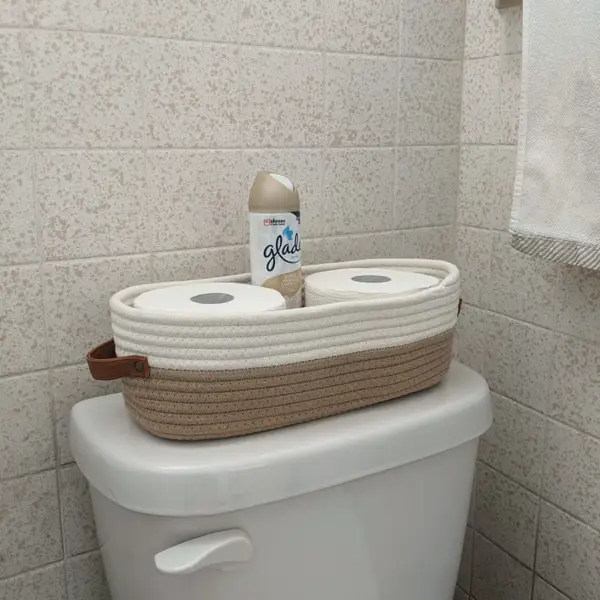
5. 10 -  We love the idea. 

6. 6 -  Definitely useful if you choose the right one, but there are also definite possibilities of smacking your head against it. 

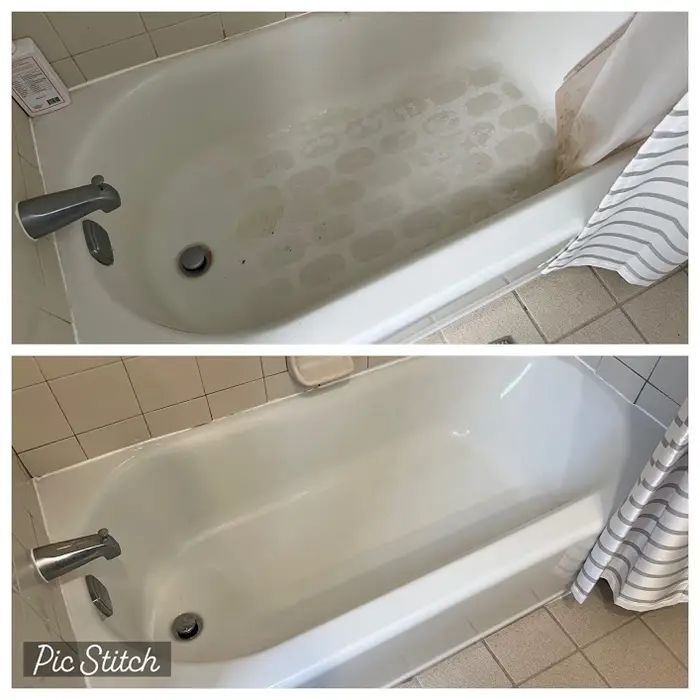
7. 10 -  Verified cleaning products are always a win in our book! 

8.  7 -  Bubble baths are a definite win as far as we are concerned, but we will say that with smaller tubs, such as builder grade, we will caution a need for awareness of your space so that you don’t tip it over or get hurt trying to get in or out of the tub. 

9. 1 - WHY? What is the purpose? 

10. 10 -  We’re not really concerned about the look of this one, but for ease of access and cleaning, we are all over it. 

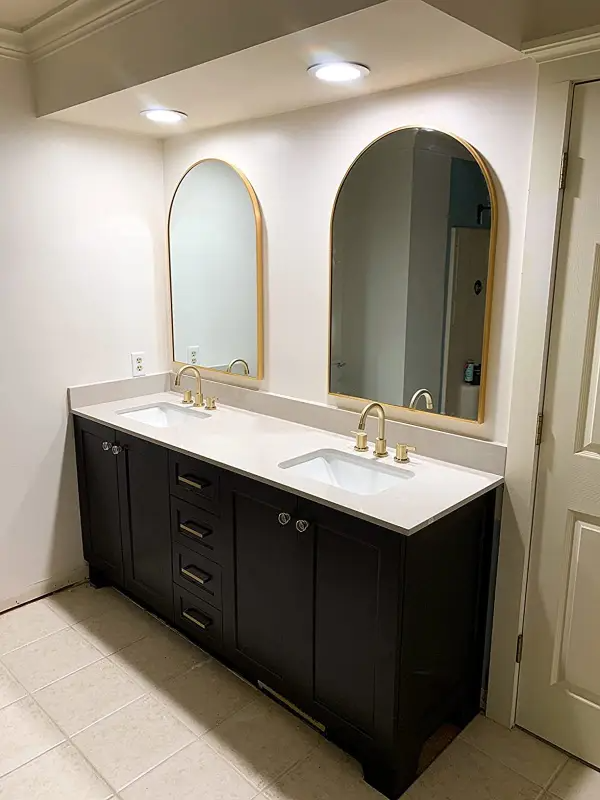
11. 10 - Not only does adding mirrors make a room feel more expansive, but it also makes it ~breathe~ more. 

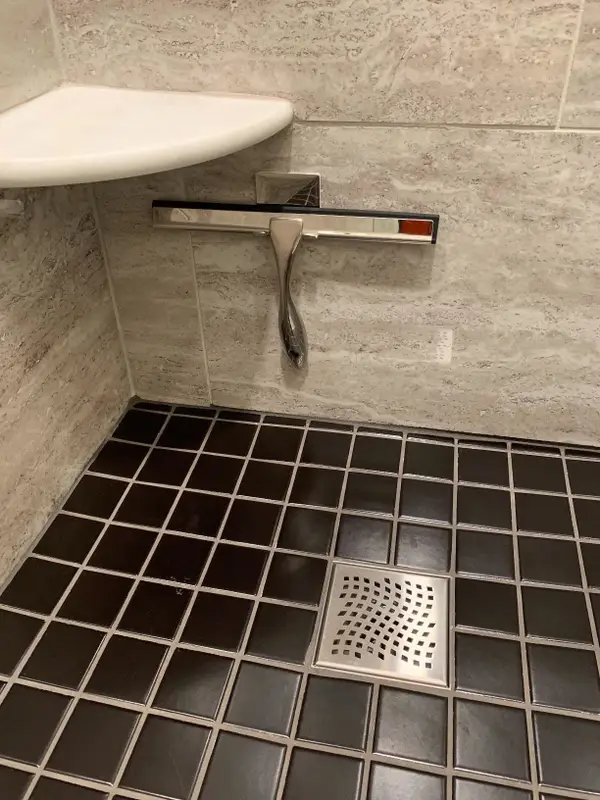
12. 10 - Although not relevant to making your bathroom more organized, luxurious, or even magazine worthy, a squeegee is very useful for getting it clean. 

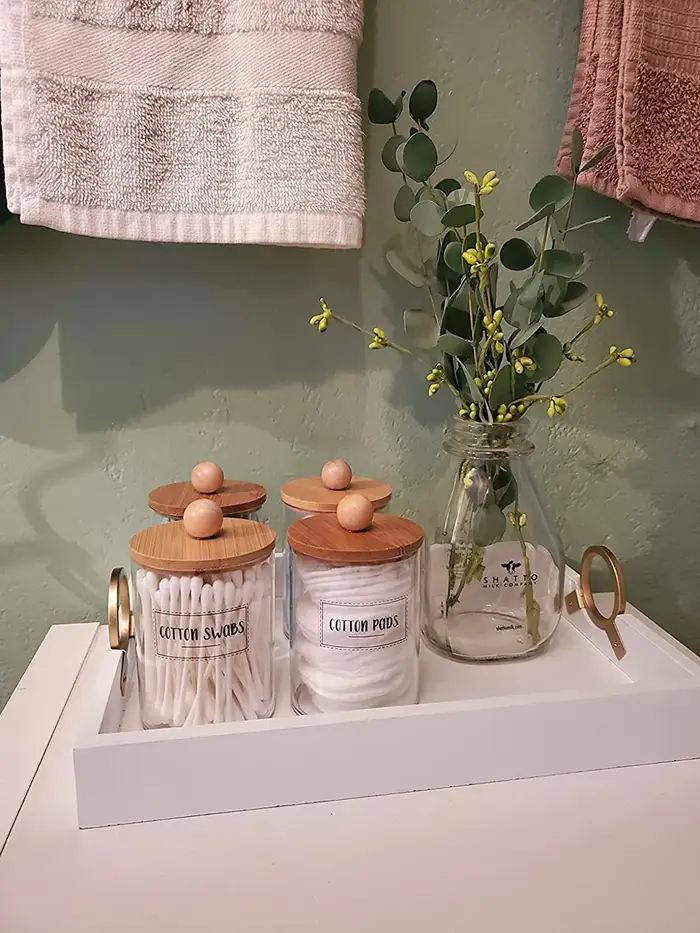
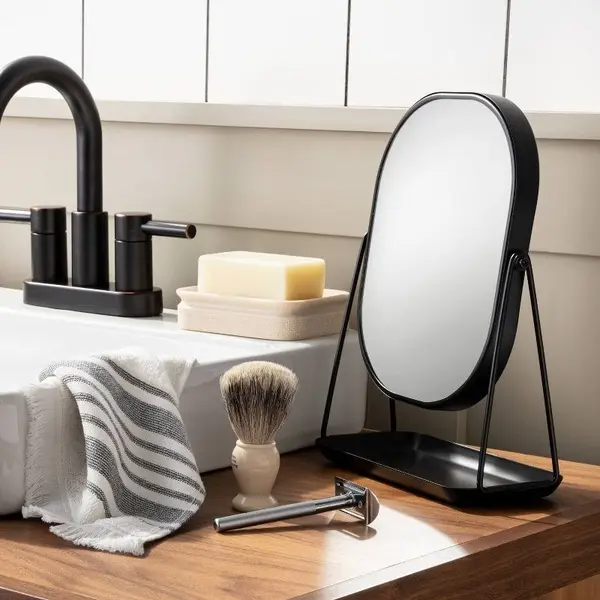
13. 10 - Dead useful for getting ready in the morning. 

14. 2 - It’s pretty, so it gets a point, but… why?

15. 10 - We absolutely agree on this one for several reasons. Your light fixture absolutely affects the way the rest of the room looks. The clarity of the light or how diffuse it is will also reflect on the space and how you use it. 

16. 8 - We love the idea of this one, but we won’t say it’s a need, more of a next step up for the look of your bathroom. 

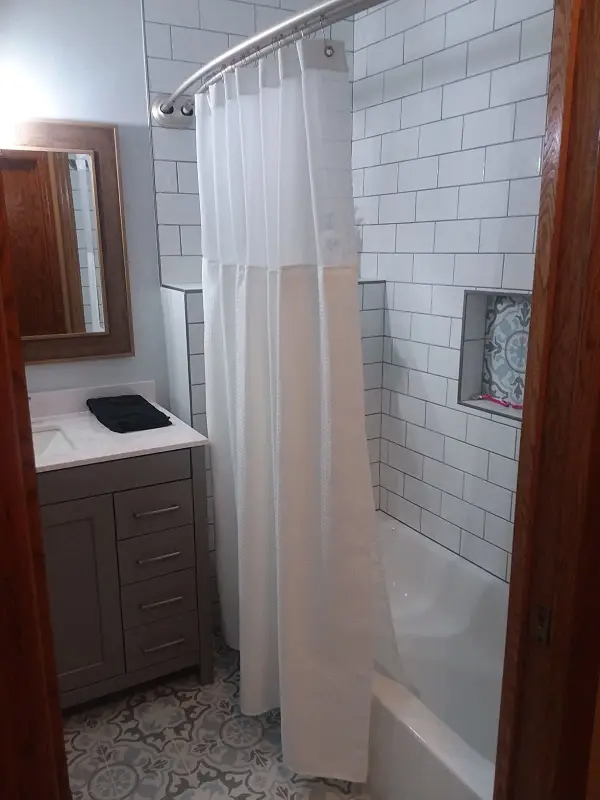
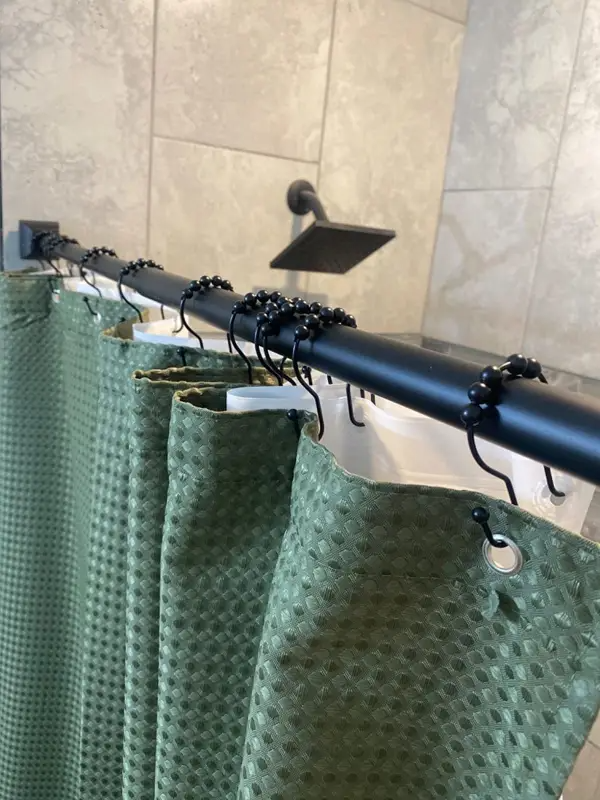
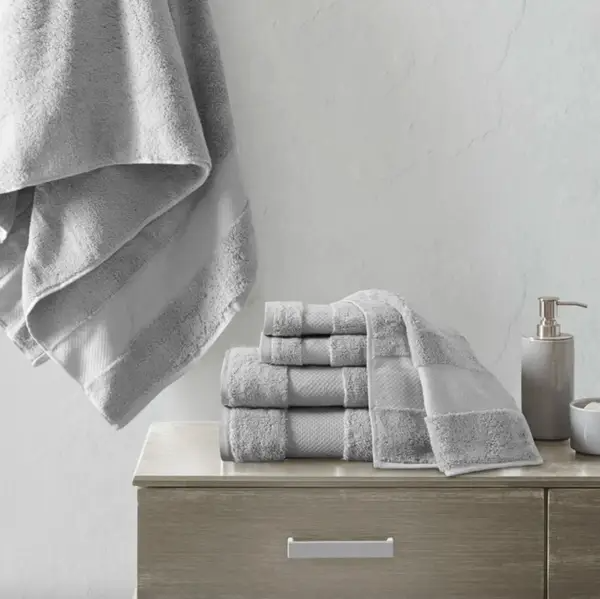
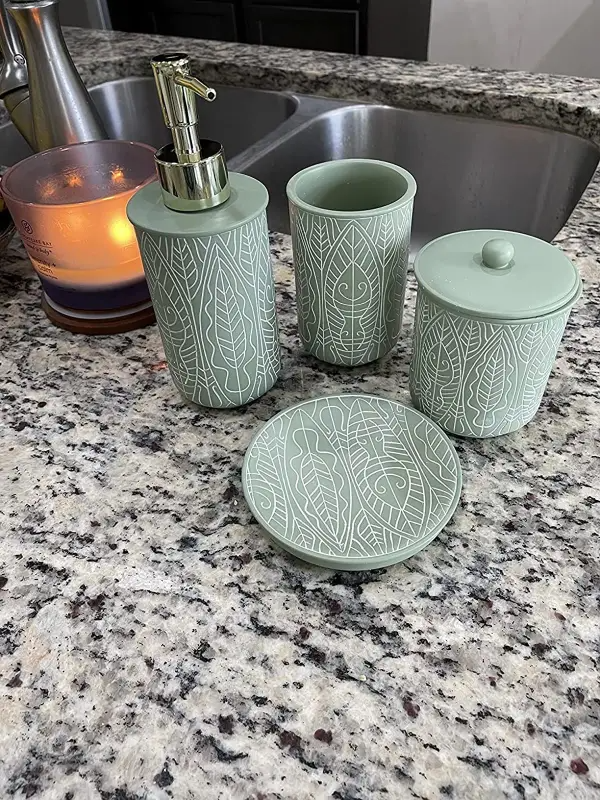
17. 5 - Having a  set in your bathroom can absolutely tie everything together. But pastels? No. 

 18. No. We’re not even dignifying this one with a rating. Instead, we suggest a simple tray or a tiered system that will actually make use of the counter space that it sits on. 

19. 3 - Peel and stick tile is great for the kitchen, and we have sung its praises many times in the past. But in the bathroom, it is too likely to be damaged by humidity and water from the bath/shower and will need to be replaced frequently. If you’re up for that challenge, we so go for it, but be aware of what you’re signing up for. 


20- 23  10 All of them do what they say, and are great for cleaning


24. 8 - This is very tiny, and might not work for all bathrooms, but we do appreciate what it does and how well it does it. 

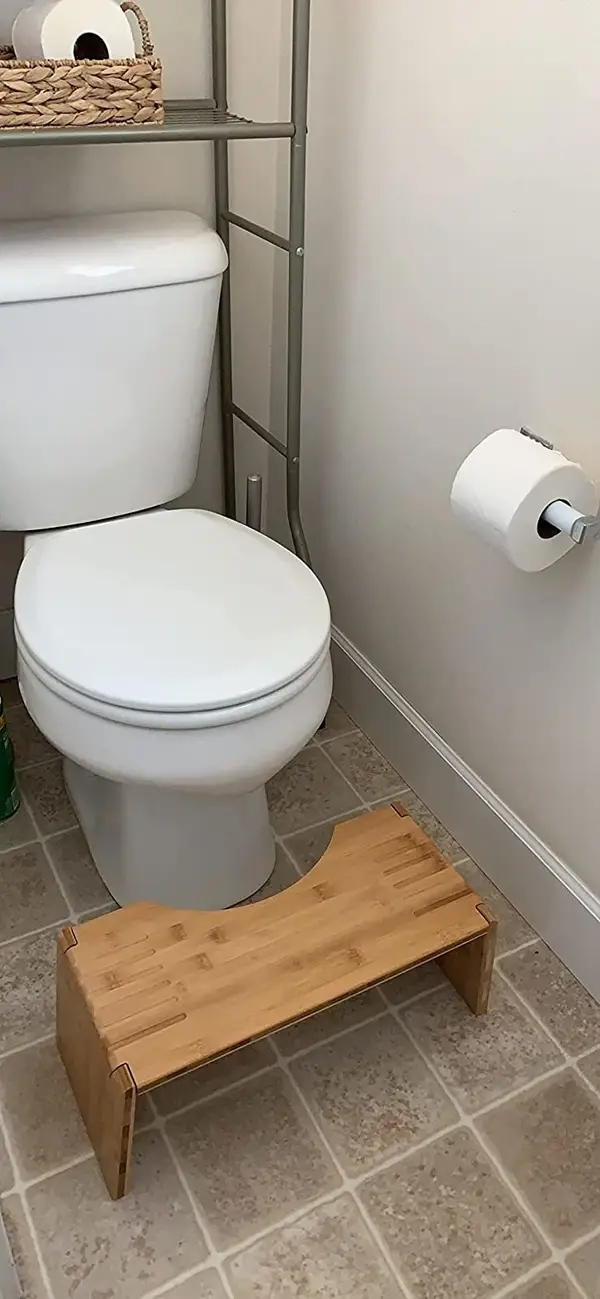
25.  7 - Cute, good for aesthetic but is small and easy to trip over. 

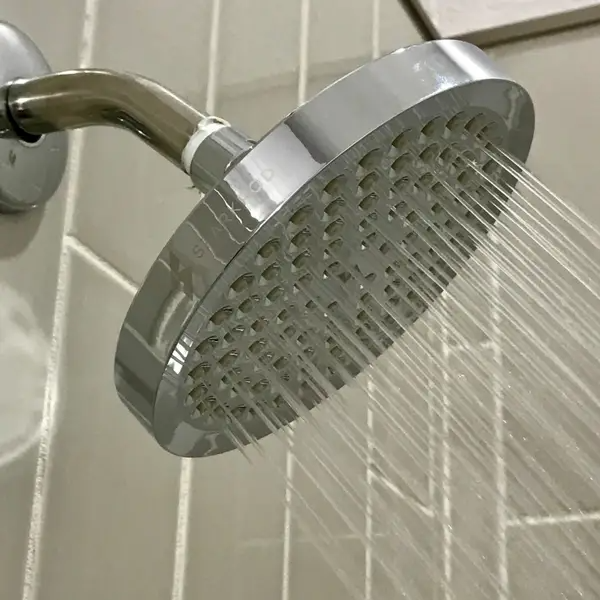
26. 8 - Definitely a luxurious upgrade to your shower experience, but we do prefer having options for the pressure that this waterfall shower head doesn’t seem to supply. 

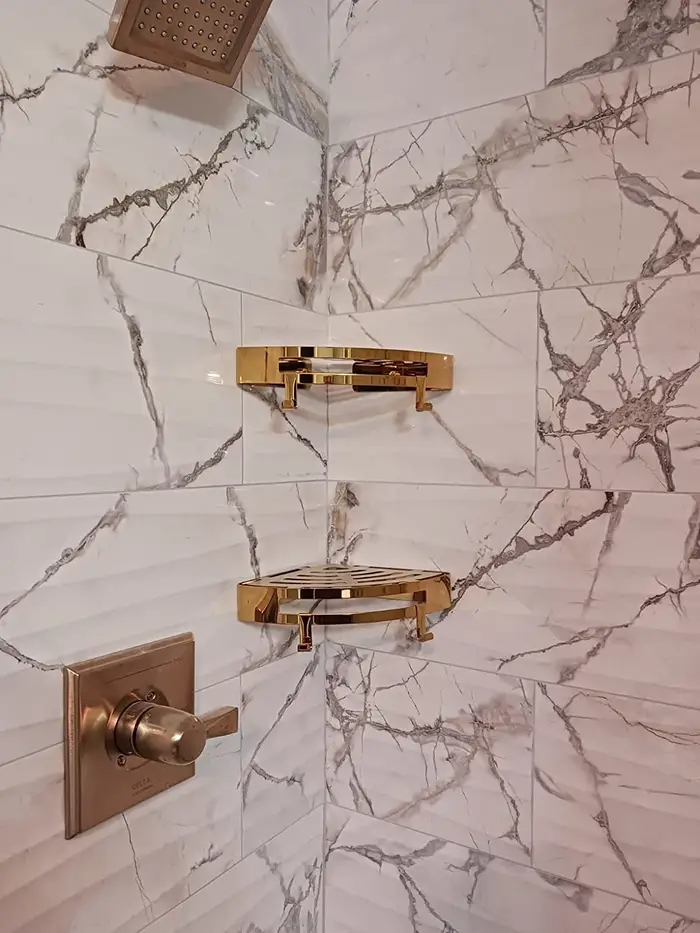
27. 5 - Although definitely very useful, we would argue that this has little to nothing to do with aesthetic or looking like your bathroom is more spalike or luxurious. 

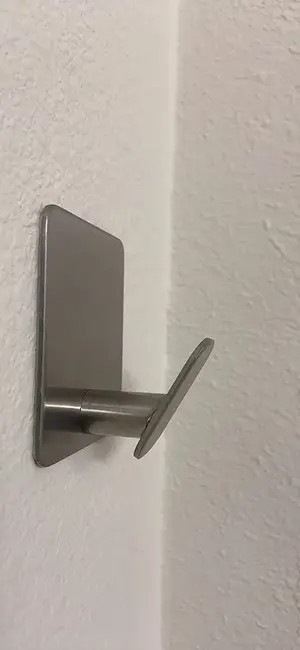
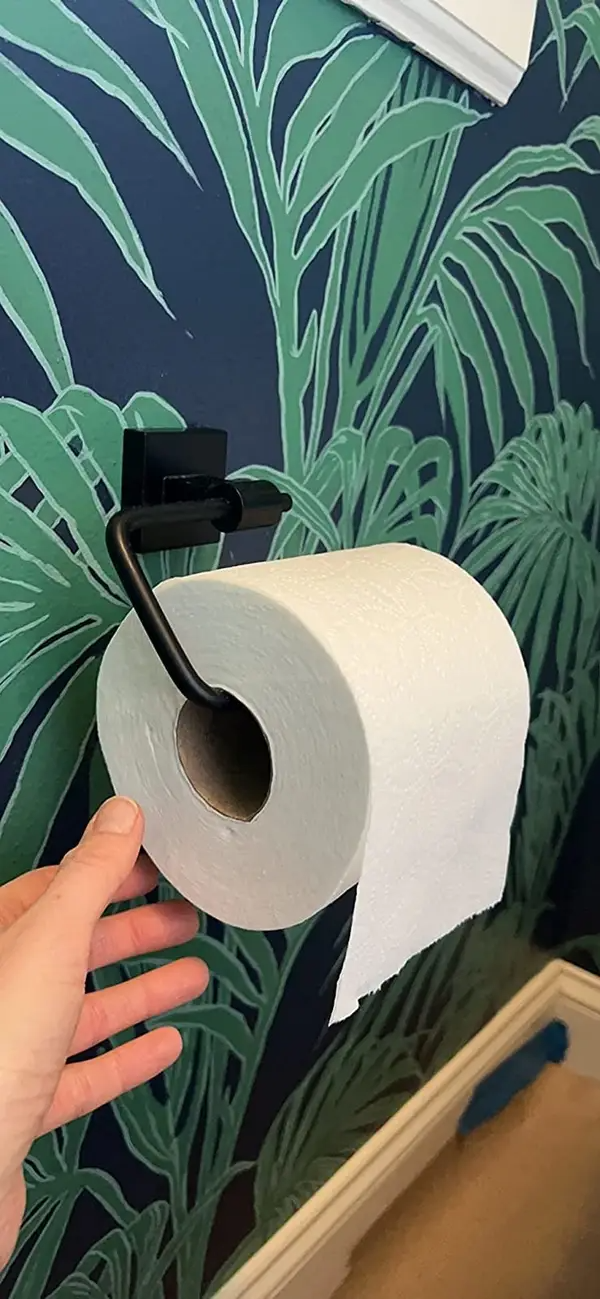
28. 6 - Much like the peel-and-stick tiles, this one can quickly deteriorate due to the humidity of the room. However, if you choose the right adhesive, you’ll gain the balance between “Sticky enough to stay on the wall for years to come” and “So sticky that it will peel off the paint AND the drywall when you want to replace it for something else.” 

29.  5 -This one just seems like a given to us? 

30. 10 - Mix it up with different colors, and we love this one. 

31.  15. For our final one, this is definitely one to round out the article on, as it is absolutely a fantastic way to finish any shower. If you’ve got the space in your bathroom for this, go for it. You will absolutely thank yourself later. 


With that we have finished out this article and we want to know what you think! Reach out to us on our Facebook page or in the comments below! We’d love to hear from you on what you agree or disagree with. 


If you’ve got issues with your major appliances and you found our blog by accident, no worries! Check over at this link and that’ll take you straight to our contact page. Or if you’d rather talk to us directly, you can give us a call at ((214) 599-0055). At Appliance Rescue Service, we’re here to help you get your home running smoothly. 


This is all in the interest of fun and discussion, and we don’t have anything against Buzzfeed or the author of the article. 

Clearing Out Clutter

How to take all the clutter down.

Table of Contents

Groups

Labels

Give It A Home 

Cunning Storage Solutions

How many times a month do you end up looking around your house and wondering where all of this clutter came from? For us, it's about once a week. Especially after the last two years of living in quarantine, it's a bit much! It's time to start cleaning and busting that clutter. We've got three 'general' tips that can and should be applied everywhere in your home. Then we'll take a look at different areas of your home where you can sneakily hide things that no one will suspect. Let's get started and get clutter busting. 

Group Like With Like

Technically speaking, this is all grouped together.

Photo by Dimitry Anikin from Pexels

When it comes to keeping things organized, you want to group like with like. Books with books, dishes with dishes, pop tarts with pop tarts. (We can't be the only ones whose children insist on having every flavor.) This root concept is really simple, and the great news is that it doesn't have to make sense to anyone but you and your household. (We're adding that caveat because getting kids to use a system they don't understand is surprisingly difficult.) Having everything together means that when you want something, it's easier to find it. So long as it's with other things "like it" you'll know where you need to go. 

So, think about how you sort things. Do you have games, books, and out-of-season sweaters all together on one shelving unit? Could you separate them out so that your clothes go elsewhere, leaving the books and games together as 'entertainment' and the sweaters go with other clothes? This is just us though. 

Labels

This one can be intimidating to start, but once you're going, it's easy to maintain. We'll break it down with you to give you some ideas of how you can use labels to make your life easier. Once it's complete you're under self-applied pressure to keep everything on forward momentum to maintain the system. We'll also point out that labels don't have to be just boring black letters on a white strip of paper. You can get very creative with how you want your labels to look dependant on where you're using them. 

  -Kitchen

In the kitchen, you might consider labeling which shelf is for what inside of your refrigerator. Think about all of those pictures you seem in home decor magazines with the perfectly organized fridges. 

- Pantry

Yup, your pantry can be labeled too. Start by sorting things out (there's that 'like with like' concept again.) Then group it together. Some things to consider might be labelling surplus flour, sugar, types of beans etc. Or if you keep a lot of canned goods, you might attach a  note that the newest cans should go at the back.  This one really is only limited by how in depth you want to go. (Your Blogger is dreaming about the day she has a pantry large enough to warrant this.) 

- Laundry

When you have a large family, or a large closet, you almost always end up with different types of detergent for different purposes. Why not label them? 

- Living room

Yup, you can label your living room too. Break down your DVD collection between "kid friendly" vs " Not" for when you have family over. Or you could seaparate out the different games into different cabinets. 

- Bathroom

Does your SO have towels that are only theirs? Or maybe you have a set of towels that you want to keep for when guests come, and keep your kids from using? Label where you keep them. You could also apply a sorting and labeling system to the underside of your sink, keeping things from getting lost or shoved in haphazardly. 

-Bedrooms 

Whether it's your space or your child's space, labels can be very useful. We advise talking about a system before you implement it into your kids room though, this way they know what you're expecting. 

Not only means you know exactly what you’re looking at, they also make it easier to find what you’re looking for. Begone clutter!

Give It A Home

That last point leads right into another key organizing concept. Remember how we were talking about having your books and your sweaters together? Take a look at that same idea, and takes a closer look at why you're putting things in certain places. Do you always put on your comfy sweater while you're reading? Or maybe you come in the front door and go straight for your mugs to pour yourself a cup of tea, and you end up with your keys and mail on the counter. These are 'homes' that we unintentionally create for things. 

Instead of unintentionally doing it. try to do it intentionally. If you know you're going to go straight for the tea, consider putting a mail sorter and a basket underneath. This way when you come in, you can sort your mail, have a spot for your keys, AND still stick to your routine. 


For this concept you want to look at what routines you already have that you're willing to change and those that you're not. If you have other areas that you have clutter collecting that you're /not/ happy with, you need to start by understanding /why/ it keeps landing there before you can change it. Would putting a hamper in the bathroom save you from socks all over the floor? What about putting a tray for drinks in the fridge to keep from losing them behind leftovers? Or putting out of season clothing in clear bins so that you can know what you have in between seasons? So grab a pen and paper and check out where you have clutter piles and why they might be there. 

This beautiful pantry from Good Housekeeping is our dream. Look at how organized everything is!

Cunning Storage Solutions

How many places can we find to store things? The answer? Many. SO many. 

Mind the Gap! 

There are two options here, depending on how you're looking at things. A gap that exists already, say around furniture, behind door or above things. Or you might be looking at floorboards and the bottoms of cabinets. 

Do your cabinets go all the way down to the floor, or is there a gap where they rise about 3 inches? There are kits that can turn that into storage. It's great for stashing cutting boards, cookie sheets and cooling racks, as well as any strangely shaped plates you might not want to keep in the 'normal' cabinets.

You can also make use of the space between your cabinets and appliances, unless you're already reveling in a smooth, no-gap kitchen. If you're not though, consider having a custom built, pull out cabinet.


Watch it Stud! 

Behind your bathroom mirror is a great place to turn into a storage area. Some of us already have pop out cabinets, but many of you prefer the look of a flat mirror. Fortunately, you can carve out a space in between the studs and turn that into a set of shelves to get things off of your counters. 

Or you might take a look a full length mirror or piece of art that you have elsewhere in your home and do the same thing elsewhere. 


Doors Go Both Ways

 Look at your doors. Can you hang an organizer on the back of them? Whether you're creating an organizer (thank you Command Strips) or you have one already picked out from Crate & Barrel, doors are a great spot to store things and keep them off the floor.  


Use Space Wisely

We mentioned it before, but putting extra organization into cabinets is very useful. Whether that's stackable boxes or open sided bins, there's all sorts of ways to maximize the space within your cabinets that you might not have thought of. The same concept can be applied to drawers. The most common idea is using a silverware tray so that all of your silverware is sorted "like to like." (There it is again!) 

Avoid this! Put our tips to good use, and bust that clutter!

Photo by Andrea Piacquadio from Pexels

Are you starting to look at your home a bit differently? What about the open spaces versus the piles of clutter? Let us know over on our Facebook page, we'd love to hear from you. :) 

If you're here not because you need to declutter but because your appliances have gone on the fritz, we can help! Head on over to our contact page and we'll work with you to set up a time that works for you or you can call us at ((214) 599-0055 )! 


Additional Reading

Getting Your Home Clean, Month By Month

Making Cleaning More Fun

10 Crazy Dupes For Household Cleaning Supplies

Organizing Your Fridge For Efficiency And Safety

Decluttering The Kitchen

The Five Most Common Types Of Clutterbugs


How and Why You Should Clean Your Washing Machine

No, Really, Your Washing Machine Needs This.


No, Really, Your Washing Machine Needs This.


Table of Contents:

Why You Should Clean Your Washing Machine

How To Clean Your Washing Machine

It's a common myth that your washing machine cleans itself as it cleans your clothes. Unfortunately, it is just that. A myth. As your washing machine gets everything else clean, it can build up dirt, detergent, and hard water residue. So, how do you fix that, and what happens if you don't? 

Why You Should Clean Your Washing Machine (Ie what happens if you don't.) 

Sure it makes sense. If you're constantly washing things in it, the washing machine should be kept clean. Buuut that's sadly not how it works, at least not any more than your towels always being clean because you use them to dry yourself off when you're clean. With every wash cycle, your washing machine rinses away dirt, grime, and detergent.  That dirt has to go somewhere, right? If you don't clean your washing machine regularly all of that grime can build up inside the machine, as well as mildew. Yup, mildew. 

Have you ever opened your washer after several days only to have it smell wet and rank? A smell that's somewhere between long rotted leaves and a wet dog. That's caused by leaving your front-loading machine closed in between washes. The tight seal on the door means that the drum can't dry out completely, so mildew and mold can begin to grow inside the drum.  (And no, just running a new wash won't wash away the mold, sadly. A front-loading machine doesn't fill up all the way in comparison to a top-loading machine.) 

Built up mildew on the agitator, the soap dish, the top of the drum and the bleach dish

The ick on the agitator is mildew, the top of the drum is dirt, and at the chlorine tray is just floating debris.
Photo Courtesy of Practically Functional

How To Clean Your Washing Machine 

Fortunately, there are easy ways to solve the problems in both of these cases. 

If you're looking to remove the moldy smell, all you need to do is do an empty cycle of your machine, with an extra rinse, using a half cup of bleach and no detergent. This will kill any mildew inside of the drum and sterilize the entire thing. 

If you're trying to get rid of dirt, detergent residue, and hard water, on the other hand, you're going to need to go a bit more in-depth.  

- Start by grabbing anything you can that's easily removable. Take that to your sink, grab an old toothbrush, some white vinegar, and some dishsoap. Mix up a quick solution and allow the parts to soak in it while you go back to your washer. 

- Use a cloth, the toothbrush, and the vinegar to scrub all of the crevices inside the machine. Throw on a podcast or an audiobook while you're doing this, it'll make life easier. 

- If your front-loading machine has a rubber gasket, make sure you get that cleaned too, but use a clean cloth instead of the toothbrush. You don't want to accidentally damage it, or pull it away from its seal. 

Dirt and mildew built up in the gasket of the front loading washer

-Many machines will have a trap that's meant to catch debris, hair, pet fur and other things. Consult your manual, or the manufacturer's website to find out where it is for your model.  Once you've found it, empty it, soak it in white vinegar and then gently scrub with a toothbrush to get it clean again. 

-Once you've done all of that, rinse the small parts with clean, cool water, dry them off and replace them into the machine. Next, pour four cups of white vinegar into your washer's tub while it's empty.  Run that on the longest and hottest wash cycle, without adding anything to it. No detergent, no clothing, nada. Once the cycle is finished running, take a soft sponge (so one without a rough side to it) and clean the inside of the washer. Then run another cycle with just water to remove any of the leftover vinegar. 

Once you've gotten your washing machine clean for the first time, make sure to get yourself into the habit of doing it once a month. After the first time it's much easier, and you won't have to do as much work. Like many of the other home tips we offer, these types of preventative maintenance are best done on a regular schedule so that you don't end up having to rush to fix a major problem. 

Thank you for coming to hang out with us this week! What is the strangest thing you've ever had happen with your washing machine? Tel us in the comments below, or over on our Facebook page. As always, we'd love to hear from you. 


If your washing machine has gone past the point of "it just needs a good scrubbing" it might be time to call in a professional. Fortunately, we can help. Whether you live in Allen, Copeland, or Dallas, Appliance Rescue Service has you covered. Just head over to our contact page or give us a call at ((214) 599-0055) to set up an appointment time that works for you. 


How Cleaning Your Fridge Can Keep It Cool

For When Your Fridge Isn’t Doing Its Job


Have you ever wondered why your refrigerator fails to do its job? When you open up the fridge and you just find ice built up on the butter, but then the condiments on the door are almost room temperature? What about opening your freezer and finding that your ice cream is now soft-serve? We’ve all had it happen. The most common reason is that your fridge is facing one of three issues. It’s packed too tight, the vents inside are dirty or the condenser coils are blocked or dirty. 


Table of Contents

Sections of Your Refrigerator

Cleaning Your Refrigerator 

Links 


Sections of Your Refrigerator 

Let’s start off with a quick intro to the different parts of your refrigerator that actually make it, you know, work. This is the stuff most of us don’t look at, but it’s important if you want to figure out how and why things aren’t working right. 

Compressor

Your compressor is where everything starts. You can find it at the back or bottom of your refrigerator. The compressor pressurizes the liquid refrigerant before it pumps it through the system, turning it into a vapor.  It's now a hot gas! 

Condenser Coil

Your condenser coils will be located on either the back or bottom of your refrigerator, usually hidden behind a grille if it's on the bottom. The refrigerant condenses into a liquid inside the pipes and releases heat that gets pushed into the outside air. So now it's still high pressure, but in a liquid state. 

Expansion Device

The expansion device is located in between the two sets of coils. It acts as a barrier between the condenser coil and the evaporator coil. On one side, the refrigerant is in a liquid state at high pressure. On the other, is a low pressure area. The expansion device sucks the refrigerant from one side to the other, immediately boiling it and returning it to a vapor state, then flowing into the evaporator coils. 

Evaporator Coils

The evaporator coils  are where the actual cooling happens. The refrigerant absorbs heat from the surrounding air and releases cool air. Small vents on the inside of the freezer and refrigerator allow air to move from the freezer and into the fridge. 

Main-parts-of-Refrigerator.jpg


Cleaning Your Refrigerator

Now that you know what the different sections are, you might see that only a small section is available to access, that's the condenser coils, either underneath or behind the fridge. You might think that your refrigerator only needs to be cleaned once in a blue moon. In fact, you should consider cleaning it on a regular basis, especially if you have pets that traverse the kitchen. 


Inside

Start the process by emptying everything out from your fridge and freezer. If you want to, you can allow your fridge to defrost while you're at this.  Make sure to place everything into a cooler or on the counters while you move on. 

Now remove all of your shelves and drawers that can be taken out. (This is one of the reasons we recommend purchasing refrigerators that have moveable shelves and drawers. It makes everything easier to clean and sort.) Important note: Before you clean the different pieces, you need to allow the shelves to come up to room temperature. If you don't, the sudden shock can cause the glass or plastic to shatter. No one wants that mess.

Go ahead and scrub everything down using a mix of warm water and dish soap, carefully drying it with a clean cloth.  Take a moment to find the vents that are inside your fridge and freezer and take a close look at them. These are where the cooling air is forced through from the evaporator coils. Make sure that the vents aren't obstructed by any dust, grime or other detritus. You can also go ahead and give them a quick scrub while you have everything cleared out from your refrigerator. 

Let's take a look back at the contents of your fridge. Are things covered in spilled condiments or last week's noodles? Give everything a quick wipe down, making sure to dry it thoroughly.  Once you're done with that,  consider how to best use the space within your fridge. Nothing says you need to do it the way the manufacturer or magazines show. The two rules we tend to go by are a) can we easily find what we need, and b) are the vents remaining unblocked. If the answers to both of these are yes, you're good. 


Outside

Once the inside of your refrigerator is sorted, let's turn to the outside. Start by grabbing some cleaner that's relevant to what your refrigerator is cased in, be it stainless steel or cabinetry. Use a damp cloth and wipe it down. Make sure to use a non-abrasive sponge if there's anything that is sticky or gross. Rinse off the outside with clean, cool water, and quickly dry with a soft cloth. (This is especially important if your refrigerator is stainless steel so that you don't have any water spots or discoloration.) As a final step, if you have stainless steel, grab some polish and go with the grain to bring it back to a shine. 


Condenser Coils

Before you decide to start messing with your condenser coils, make sure to check over your Use & Care Manual. Some makers prefer for only a certified technician to clean the coils. If that's not the case let's get things taken care of. Start by unplugging or disconnecting your refrigerator.  Once that's done you can safely locate your condenser coils either on the back or base of your refrigerator. If they are on the bottom, they'll be behind a decorative grille.  Now use a vacuum cleaner with an extendable attachment and a soft brush. Once you've got everything gathered up, replace the grille and carefully bring your refrigerator forward. Sweep and vacuum behind and under the fridge, making sure to clean your brush as needed. 


And that's it! You've cleaned your refrigerator from top to bottom and reorganized it. Hopefully, this should help it 'breathe' more easily and keep everything nice and cold. If that hasn't solved it, you can reach out to us via Facebook, our website, or by calling us at ((214) 599-0055). We're here to help keep your home in shape, and that's especially important during the peak of summer!  If this did help your refrigerator and freezer work, please let us know that too! 


Links to Other Articles 

Want to learn more about buying your ideal refrigerator? This is the article you want. 

What about organizing your fridge to keep things fresher, longer? Check out this article


Decluttering The Kitchen

How do you get from Clutter to Clean?


Clutter. Everyone gets it. You let things go for a little while, people give you gifts, things come as free bonuses when you order something and before you know it your countertop is buried. So what do you do about it? How are you supposed to get your kitchen organized when there’s all of this stuff? 

You know you want to organize your kitchen., but you’re not quite sure what that looks like. The answer then is to back up and look at the idea you have. 


When you close your eyes, what do you see? Do you envision a series of open cabinets showing off the beautiful dishes or tools  you’ve collected? Or do you want clean minimal lines with everything hidden away behind paneling unless you’re working there? What about a kitchen that’s so organized you can lay your hands on anything within 30 seconds? Which one appeals most to you? 


You’re here to declutter, so the question is, how? How does this idea mesh with paring down the mountains of stuff in your kitchen? 


The Aesthetic - 

 If you said you wanted to focus on highlighting different aspects of your kitchen, this is for you. Think about how everything in your ideal kitchen fits together. Pick the cabinets you want to use as your display. Start there and arrange what you’re showing off to their best advantage. Now, are you going to have no cabinet doors? Or would you rather go with glass? Once you have that done, move around the kitchen from there, keeping in mind that everything should point back towards that central display.  How do you want your countertops to look?  If you want to move things off your counters, consider how you can use vertical spaces. What can you hang from your ceiling or on the walls?  If you’re going for everything being open cabinets, we suggest looking at boxes and baskets that coordinate for storing all of the smaller things that you need day to day, ingredients, pans and the like. 

modern-kitchen-with-black-cabinets-and-open-shelving.jpg


The Minimalist - 

Here you’re looking to have everything hidden away and neat. So your best bet is to start by paring down and repurposing drawers. Start by going through everything in your kitchen. Could it be better served by storing it elsewhere? Do you actually need that little ceramic palm tree that Aunt Katie picked up when she was in the Bahamas? Once you’ve pared down as far as you can, go back and sort things into groups. Now let’s take a look at your drawers. One of the things that storing everything away means is repurposing the drawers you have into new and useful shapes. This can be everything from creating a custom knife block inside of a drawer, to having a smaller drawer set inside of a second one to maximize the use of the space. There's a lot of ‘dead’ space in traditional cabinets that you can put to use if you get creative. 


The Utilitarian -

Much like the Minimalist, you’re going to want to start by paring down. If it doesn’t serve a purpose, donate it. If it’s out of date, get rid of it. Now that you have that done, you’re going to think about how you use your kitchen. Do you have one spot that you always use for working on and another for plating? Do you have an island in your kitchen that you use just for entertaining guests and mixing drinks? Think about these things and organize around them. Taking two of our examples, your work area and an entertaining area. You’d want to arrange things so that your mixing bowls, knives, and cutting mats were at your prep area, while your glasses and drink supplies were where you entertain guests. The name of the game is keeping things at hand for different areas. Much like the Minimalist, it might behoove you to look into custom storage, but unlike them, you can also put your countertop or vertical space to use the way the Aesthetic can. (In our opinion, this is the best of both worlds, but that’s just us!) 

organized kitchen in white with jars of pantry staples along one wall


Now that we’ve taken a  look at your kitchen and how to make it fit what you want, go get it! Remember, the easiest way to go about this is to picture the end and work your way backwards. 

Where do you fit in? Are you an Aesthetic or a Utilitarian? What about a Minimalist? Let us know in the comments below or over on our Facebook page. Or you can send us a picture of your ideal kitchen! We’d love to see! 

If on the other hand you’re here because something in your kitchen is broken, we’re still here for you! Appliance Rescue Services is the best appliance service in McKinney and the surrounding area because we care about YOU, our clients. If one of your major appliances isn’t working right, we want to hear about it. You can call us at (214)-599-0055 or visit our website to make an appointment. We want to help keep your home running smoothly