The Bare Bones For Your Home
We put together four kits that will get you through almost any situation. When you’re starting out somewhere new you don’t always have everything you need, or the funds to get it. Whether you’re a business exec moving to a new state or fresh out of college with your first apartment, you tend to pare down. Whether it’s a last minute get together, a broken outlet, or you cut yourself fixing said outlet, we’ve got you covered.
Let’s talk about the most common type of kit first, the first aid kit.
Ideally, you should have several around your home. This way in the event of injury you don’t have to go far for what you need. Some of these, like bandaids, are going to make sense. Others, like splint material will confuse many. “We live in the first world. Shouldn’t I just go to the hospital or call an ambulance?”
Well, ideally, yes. What if it’s a major holiday though? Or there’s rough weather, you can’t get out or it’s going to be a while until a paramedic can get to you? In those cases it’s better to have all of this on hand and know how to use it.
One last one you might not have run into before is lavender essential oil. This can be used on burns and other small wounds, and is kept in many a metalworker’s kit.
FIRST AID KIT
Aloe vera gel
Medical Scissors
Nonadhesive dressing
Medical tape
Rolled gauze bandages
Splint material
Lavender oil
Anti-inflamatory drugs
Anti-bacterial ointment
Ace bandages
Surgical scrub brush
Disinfectant wipes
Sterile compress
Selection of bandages

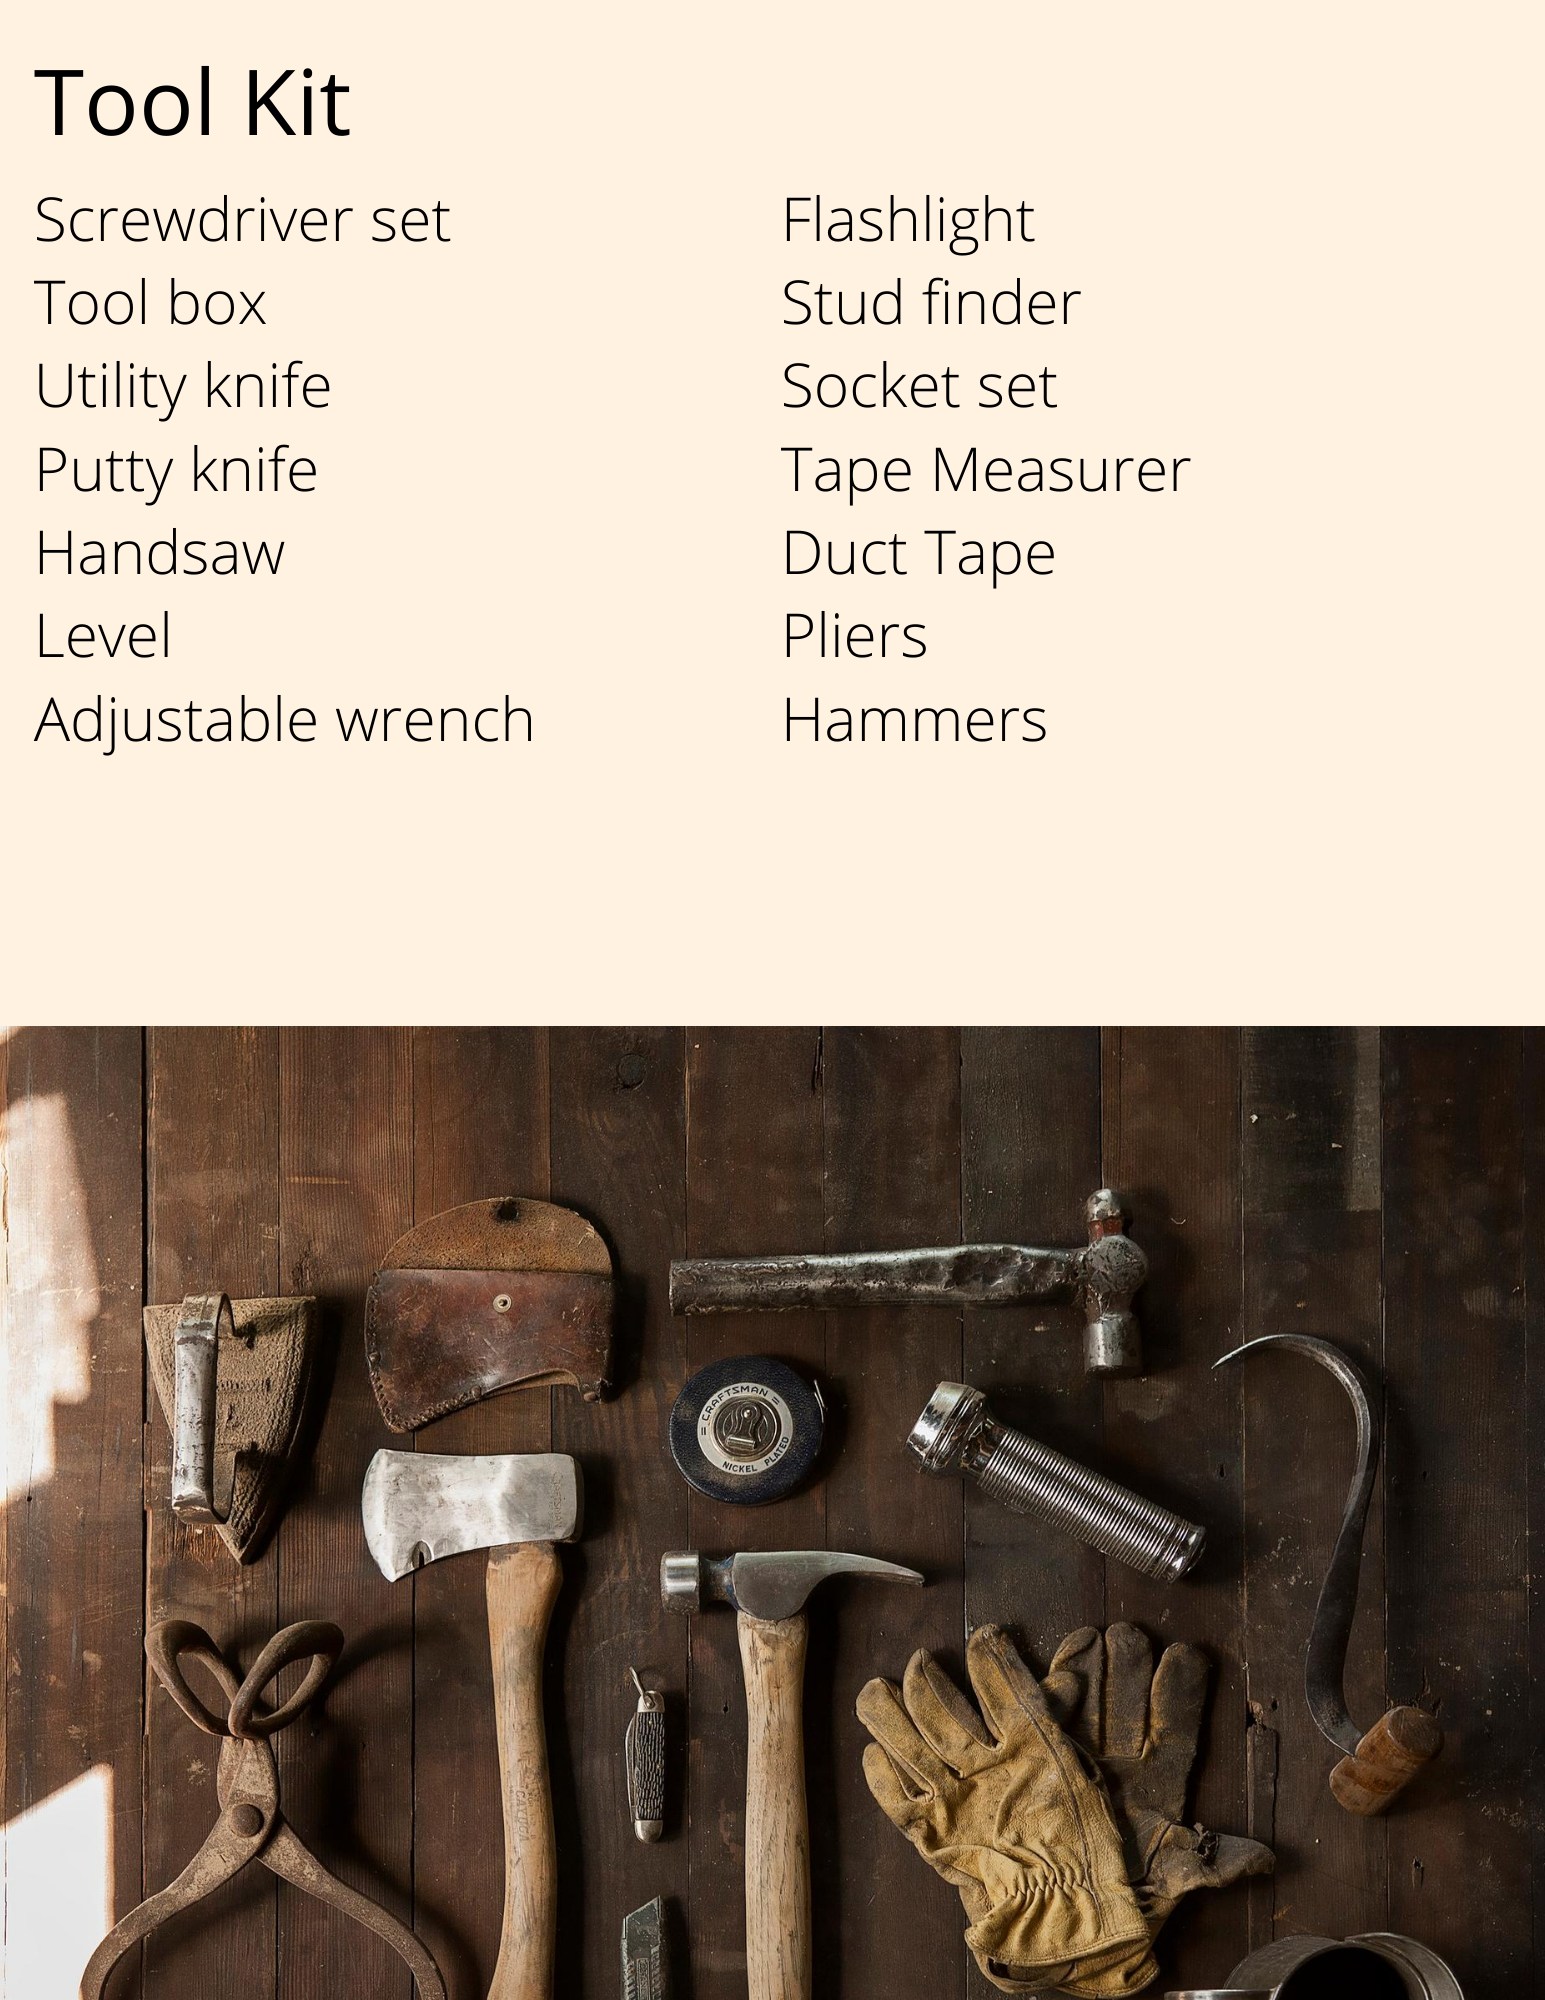
TOOL LIST
Next up is tools. This isn’t the type of stuff you get for Father’s day. This is meant to be a “multipurpose, used everywhere around the house, if you don’t have the ‘right’ tool, see if one of the others will get the job done.” That sort of kit. (Not that we have any issues with the nicer or more specific tools, but this is a basics post.
Screwdriver set - a mix of Philips and flat-heads, or even a multihead screwdriver.
Tool box- Even if it’s a small kit, it's easier if you can keep everything together.
Utility knife
Putty knife
Handsaw
Level
Adjustable wrench
Hammers - One 16 lb claw and a small mallet
Duct tape
Pliers - You can pick up a set with a channellock, needle nose and side cutting pretty easy.
Flashlight
Stud finder
Socket set
Tape measurer
The Kitchen
Moving into the kitchen, we have more tools, but this time, we’re focused on making food. While we love our specialty tools like our automatic pan stirrers, crepe pans and multi function blenders, in truth you don’t need them. We know, the horror. Really though, with these 10 tools and persistence, you can make any dish. Is it easy? Not always. But you’ll also have less clutter in your kitchen.
10” Stainless Steel Skillet
Chef’s Knife
Measuring Spoons
Dry & Liquid Measuring cups
Cutting Board
Sheet Tray
8 Quart Heavy Pot
Peeler - Either a Y peeler or a straight peeler will work. It’s up to you which you prefer.
Large Spoon
Fine Mesh 6” Sieve

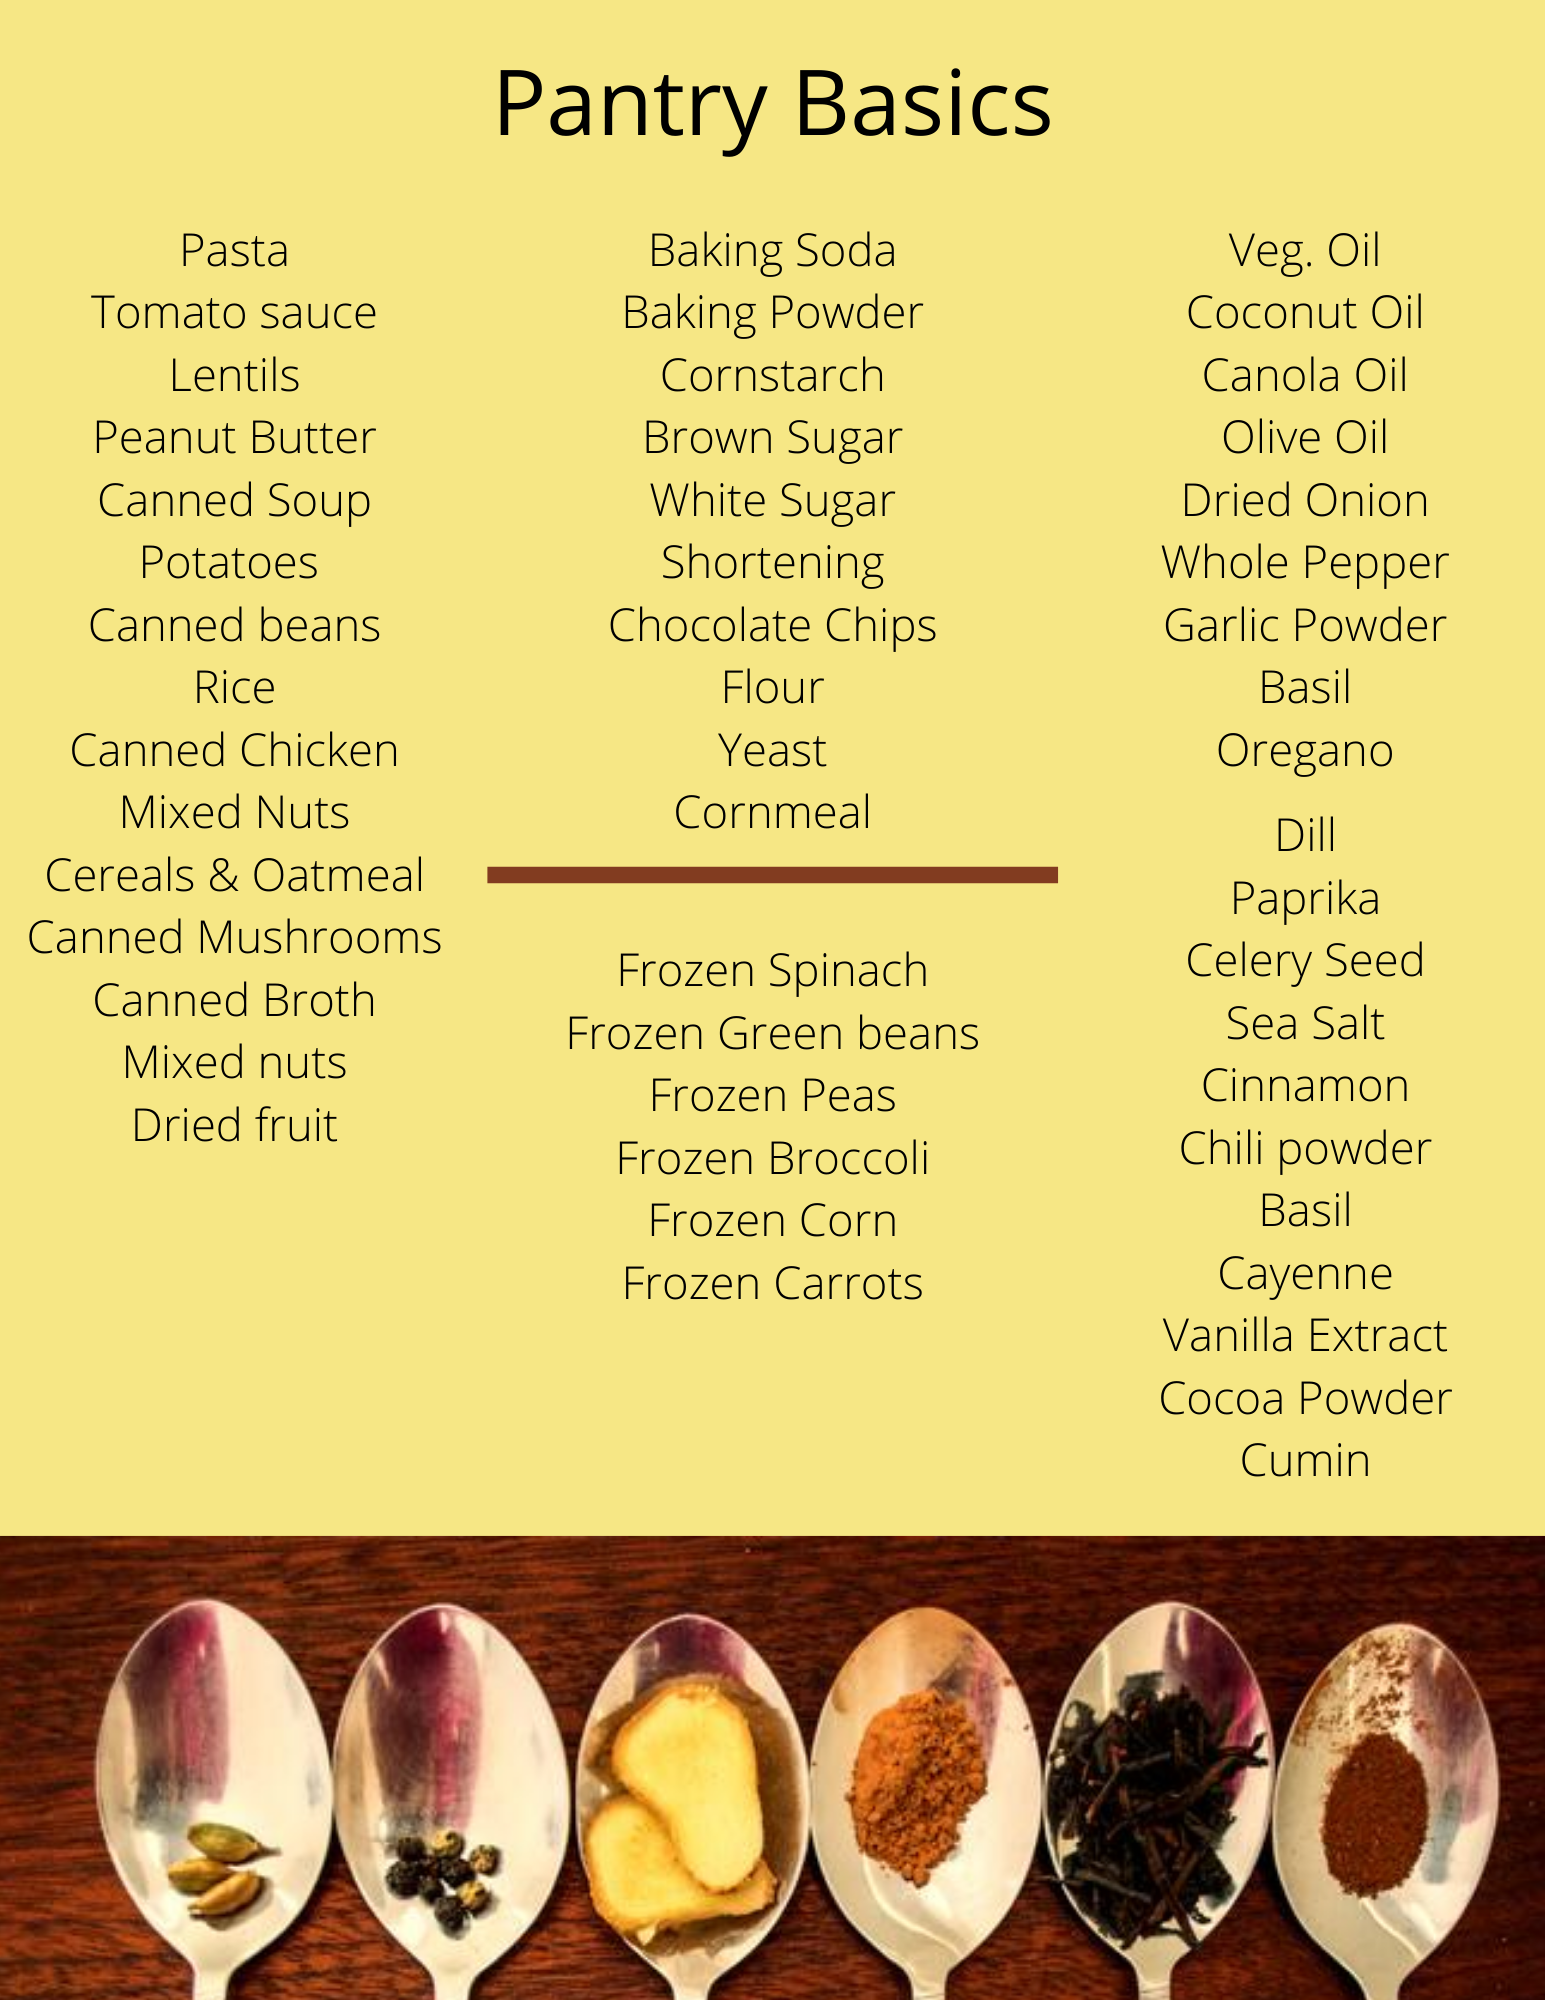
The Pantry
Moving on from the tools in the kitchen, you have basic supplies. We saved this list for two reasons:
It’s the longest
It’s broken into 4 parts
The idea here is that by keeping all of these items regularly stocked in your home, you can put your hands on any of them when you need them. Last minute guests? No big deal, bulk up what you were already making for dinner. Your child has a bake sale that they only told you about now? Easy!
Things like fresh fruits, vegetables, dairy and meats aren’t included because they spoil at different rates, and everyone has different food needs. Adjust the lists as needed and as will work for you/your family.
| Common/ Dried | Baking | Herbs and Oils | Freezer |
|---|---|---|---|
| Pasta | Baking Soda | Vegetable Oil | Frozen Spinach |
| Tomato Sauce | Baking Powder | Coconut Oil | Frozen Green Beans |
| Lentils | Cornstarch | Canola Oil | Frozen Peas |
| Peanut Butter | Brown Sugar | Olive Oil | Frozen Corn |
| Canned Soup | White Sugar | Dried Onion | Frozen Carrots |
| Potatoes | Shortening | Whole Pepper | Frozen Broccoli |
| Canned beans | Chocolate Chips | Garlic Powder | |
| Rice | Flour | Basil | |
| Canned Chicken | Yeast | Oregano | |
| Mixed Nuts | Cornmeal | Dill | |
| Cereals & Oatmeal | Paprika | ||
| Canned Mushrooms | Celery Seed | ||
| Canned Broth | Sea Salt | ||
| Mixed nuts | Cinnamon | ||
| Dried fruit | Chili powder | ||
| Basil | |||
| Cayenne | |||
| Vanilla Extract | |||
| Cocoa Powder | |||
| Cumin |
Common/Dried - These are the foods that will last and last and with just a few you can throw together a delicious and filling meal.
Baking- These are the core ingredients for most baking recipes that you should always have on hand.
Herbs and Oils - You don’t need a large amount of herbs in your cabinet in order to bring flavor to your dishes. With 16 spices you can evoke flavors and places all over the globe. (Although we get it if you want to add to your spices any time you can. We do the same.)
Freezer- Easy to keep on hand, they don’t spoil and you can bulk up any meal by adding them in, frozen veggies are the best!
These four kits are ones we think are essential, but what about you? Do you think we missed some? Or just an item or two? Let us know in the comments below or over on our Facebook. We’d love to hear from you.
While we talked about the whole home this time, don’t forget that we’re also here for your appliances needs. If your appliances are acting up, or you want to schedule a maintenance check, feel free to reach out via phone or our appointment page. We want to help all of our clients in Carrollton and the surrounding areas.