Beat the Heat: Preparing Your Texas Home for Summer

Essential Tasks to Keep Your Home Running Smoothly When the Heat Hits

Can you feel the warmth in the air? It's a sign that summer is already on its way! But before you start planning your vacation trip and weekend barbecues, your home needs to be prepared for the season too. There are plenty of tasks that you can do around the house to keep it cool and running smoothly during the hot months. Don't worry, though, we've got you covered. We'll guide you through each step so you can sit back, relax, and enjoy the summer season without any worries.


We've sorted the tasks by inside the home and outside the home; so that you can do each task as the weather allows.

Inside the House

Ceiling Fan Rotation

Make sure to change your ceiling fan rotation Courtesy of eak_kkk

This one is relatively simple. As the year changes, you can benefit from changing the rotational direction of your fan. During the summer, it's best to have your fan turning counterclockwise. This pushes the cool air down towards the floor and helps you stay cool.


Plumbing Checks 

Check Valves And Hoses

The valves and hoses for your washing machine, and your interior and exterior faucets all have connection points that can become loose and even break. As we are heading into summer and you're doing more you want to go ahead and check on these this way you catch any trouble before it starts. You will almost certainly need a professional to make any major changes, but just checking and finding trouble spots is something you can absolutely do on your own.


Inspect Your Pipes

As we all know, summer in Texas is ridiculously hot and dry. Unfortunately, that heat and lack of moisture can cause your pipes to deteriorate and crack. That can then cause the pipes to leak or, in a worst-case scenario, burst. So before you start forcing hundreds of gallons of water through your pipes, it's better to check on any and all of them that you can get to and catch any problems beforehand.


Insulate Your Home 

The amount of work insulation usually requires Courtesy of justynkalp

Your home's insulation is essential for keeping you comfortable in both hot and cold weather. However, if you are unsure about the quality of insulation in your home or wish to enhance the existing insulation, several options are available. Checking the insulation in your attic and walls is crucial for ensuring your home is properly insulated. However, most of us hesitate to pull down sheetrock to check the insulation. Fortunately, there are alternative options available. One of the best options is an additive that can be mixed with paint and applied to roofs, interior, and exterior walls. Although it does not replace the need for proper insulation, it has proven to make a significant difference in energy efficiency, according to testing.


Swap Out Shades For Curtains 

If you haven't already done it, we highly advise swapping out your winter shades for lighter summer curtains. Whether this means lighter in just color, or lighter in color and material is up to you. Being able to open your windows and let the breeze pour in is helpful for lowering your electric bill.


Fridge

The seasons are turning, which means it is the next time you need to clean out behind your fridge. It might not be the most glamorous task, but your fridge will most certainly appreciate being able to breathe properly. As always, make sure that you tend to the coils and any built-up dust or debris, and move your fridge back into proper alignment so that airflow can circulate around it. 


Make sure that you're using a vacuum with a soft brush attachment. You don't want to use water back here as that can damage electrical components, and then you will have a very pretty and oversized box rather than a fridge.


Now that you've tended to the outside of your fridge let's check out the inside. You'll want to closely examine the seals on your refrigerator door all the way around, first by eye and then by hand. You want to ensure that there aren't any spots that are damaged and that the seal doesn't need to be replaced. Once you've checked that out, the next step is to grab a washcloth, some warm water, and soap so that you can clean out any stickiness or debris from the seal. Making sure that your doors can close and seal properly ensures that the fridge can maintain its temperature accurately. Taking care of your fridge like this ensures a much longer and happier life on the part of your appliance.

Washer And Dryer 

Your washer and dryer need to have the seals checked, just like we did with your refrigerator. Again, you want to check by eye and then by hand for any signs of debris damage or, in the case of your washer, mold. For your dryer, you want to make sure that there isn't any accumulated lint in and around the seal. 


Since the air is already warm during summer, you will want to address the settings on your dryer for summertime. It is not uncommon for dryers to catch fire from being turned up too high. While you're at it, you should also have the filters checked and cleaned by a professional to get rid of any built-up lint. At the same time, having someone look at your washing machine filters and drains would be a good step to roll into the same call.

Now that we've done the inside of the home, let's head outside and see what we can find.


Outside the House 

Clean Gutters 

It's been a while since we pointed it out, but having your gutters cleaned at least twice a year is extremely important. If your gutters are still jammed full from winter leaves, you can easily have cracks and leaks begin to form under and around them. With time those will begin to damage your home. 


Repair Siding 

If you have wood siding or shingles, now is a great time to check for post-winter rot. You can also check for dirt or mold that might have built up during the spring and winter rains.You can also look for and repair any damaged areas, faded stain, or chipped paint.

Inspect the Roof

A roof that has become damaged over time due to winter rot. Courtesy of congerdesign

Now, we're not suggesting that you do any roof repair yourself. Between the potential for a fall and the heat, we don't think many of us would want to go up. Instead, grab your binoculars and head across the street to take a look around at your roof. You will be looking for any cracked, curling, or missing shingles on your roof. And while you're at it, you want to make sure that there isn't any damaged or missing flashing. Keep a close look on your chimneys, your pipes or any skylights that you have. Just like with the valves and hoses, if you already know where to point a professional, then youve already solved part of the problem. 


Clean The Grill 

When you've got a cooler day, you might as well open up the grill and give it a good cleaning. Most of us love cooking on the grill during the summer, whether it's for family events or just regular weeknight dinners, grills are a uniquely summertime tool. To that end, make sure you go over everything. Not just to clean it, but to make sure that the connections are still in one piece. If there are any wires or pipes, check to see that nothing has been chewed on, or destroyed by the elements. Essentially, you want to go over any piece that could break and make sure it's functioning properly and then go over any piece that can be dirty and clean it before you light your grill for the first time. 


Summer heat and way too hot in Frisco texas by Stux

As summer approaches, it's time to get your home ready for the heat and outdoor fun. From ceiling fan adjustments to grill cleanings, we've got you covered with these essential tips to ensure your home stays cool and comfortable all season long. But if you ever find yourself in need of professional assistance with your appliances, Appliance Rescue Service is just a call away. Whether it's a malfunctioning refrigerator or a faulty dryer, our team is here to help keep your home running smoothly. Don't hesitate to reach out for expert maintenance and repair services. Enjoy your summer worry-free with Appliance Rescue Service by your side.


Call: (214) 599-0055
Website 


Additional Reading
Kitchen Safety 101: Protecting Your Little Ones at Home

Organizing Your Home Before the Holiday Daze

 Halloween Horrors In Your Home?

Kitchen Safety 101: Protecting Your Little Ones at Home

Beyond Baby Gates: Safeguarding Every Corner of Your Kitchen

Babies are chaotic. When they start learning how to move their limbs, they will grab everything they possibly can and kick everything within reach. Once they gain mobility, it is an all-out war between you and the baby. No matter how much you love them, trying to keep them safe is difficult because safety is not a concept they understand. Therefore, your job is to baby-proof your entire home against anything they can get up to. That's where this week's article comes in. We are taking a look at your kitchen and the mischief your baby can find, whether you're looking or not.


Baby chewing on a utensil - Courtesy of Yan Krukau

Let's start when your baby is still non-mobile. At this point, you have to carry them everywhere. Unfortunately, they can still get hurt in your kitchen. All it takes is a kick or a flailing hand that grabs hold of a spoon and both you and the child are covered in something. If you're lucky, it's something that's cool or room temperature. If you're unlucky, it's something boiling, and you now have a burned baby.


You can prevent this by making sure pot handles, and utensils are turned towards the inside of your stove if you are working at the stove while holding your little one. You can also look for clips that will clip to the side of a pot and hold a spoon or spatula in place to keep little hands from grabbing and pulling. 


Another major issue is stove knobs. They click, they turn, and they push! To a baby, it's the best thing in the world whether they're in arms or crawling and standing on their own. To keep little ones from lighting themselves or anything on top of the stove on fire, there are a couple of different methods you can use. If it is a temporary issue, you can just remove the stove knobs. Most stove knobs will pop off of a central rod very easily for cleaning. Toss them all in a dish outside of baby reach, and you're good to go. Some families are perfectly happy doing this as a measure until the child is big enough to be left on their own; others aren't. Use it at your discretion. The next option is a cover. There are knob covers that will clip over the top of the knob and can be very easily opened when you need them, but they are a little more complicated than most babies can figure out.


And other than pulling at paper towel rolls or any hanging things, that's about it if your baby is in your arms.  But like all things, babies grow. 

Once your baby is mobile, you need to do more than just make it so they cannot push or pull things. Now, you need to be concerned with everything.  

Baby climbing over a baby gate Courtesy of Jep Gambardella

Most people will start with the straightforward baby gate. If a baby can't get into the kitchen, they can't cause problems. You also don't have to baby-proof anything else within the kitchen. However, your blogger would like to point out a number of children in her acquaintance who figured out how to climb over baby gates at a far more rapid pace than is usually thought possible. So, in the interest of keeping your particular small human safe, we advise considering further steps. The baby gate should be the first line of defense but not the only line.


What about cabinets and drawers? As your child starts to explore, like we mentioned, they'll want to pull on things. At first it might be simply a matter of pulling as they figure out how to get up and things accidentally coming open. But very quickly, that turns into repeating to see if they can do it a second time. And once they've figured out the precise mechanism of it, they'll want to keep doing it because there are things hidden behind the door or drawer. There are latches that can be attached to your drawers and your cabinets. These are great for keeping small children out. Some varieties have clips, some varieties have magnets, some varieties are the DIY version, and just have a rubber band. Take your pick. Our point here is just to keep your child out of pots, pans, food boxes, and cleaning supplies that might be on their level. These latches can also work on your refrigerator. The model you have will inform you how best to apply them. 


As a side note, if you have the space, we advise moving your cleaning supplies entirely out of reach of small children. While many of us store our cleaning supplies under the kitchen sink, even cabinet latches are capable of failing. Given the poisonous nature of most cleaning supplies better to keep them entirely out of reach.

Baby getting into a drawer Courtesy of PNW Production

The next thing to consider is the oven door. Whether you have a stove and oven combo or an oven that stands on its own, the door handle for an oven is a great place for little hands to reach and grab and then use it to lever themselves up into a standing position. Once again, the latches that we mentioned earlier are a great way to keep the oven from being opened. However many of them still have a small amount of give to them. While this is acceptable for a cabinet, an oven that is on can easily lead to burns if little fingers get in between. Another option to double up protection is to put high-backed chairs in front of the oven. If they can't get to the oven, they can't open it. 


Finally, understand that no amount of baby-proofing will stop the force of nature that is a baby. The best thing that you can do is to prevent what you can and stay aware of your child or make sure that somebody is paying attention once they gain mobility. If this isn't an option, consider setting up a separate area enclosed within the kitchen so that you can keep an eye on your little one without them getting out.


As we conclude this guide to baby-proofing your kitchen, we hope you've found valuable insights to create a safer environment for your little ones. Remember, a secure home is a happy home.


If you have additional baby-proofing tips or want to share your experiences, join the conversation on our Facebook page.


It's essential to recognize that malfunctioning kitchen appliances pose a threat not only to babies but to everyone in the household. Vigilance and regular maintenance are key to preventing accidents.


At Appliance Rescue Service, we understand the importance of a functional and safe kitchen. For all your major appliance repair needs, reach out to us at (214) 599-0055 or visit our website. We're here to ensure your appliances are in top-notch condition, promoting a secure and comfortable home for you and your loved ones.

Thank you for entrusting us with your appliance care. Stay safe and secure!


Additional Reading

10 Kitchen Hazards to Avoid this Holiday Season

Why Does My Oven Keep Flipping the Circuit Breaker? 

Bugs of Summer: Fleas, Lice, Ticks and Bed Bugs

The Kitchen Gift-Giving Guide: From Laughs to Lessons, What Not to Wrap

From Melting Splatter Guards to Rubbery Eggs—Avoiding Disastrous Presents


Welcome, fellow gift-givers and kitchen explorers! This guide is your ticket to steering clear of kitchen gift disasters. We'll navigate through the treacherous terrain of poorly designed gadgets, criminally single-use wonders, and items that should come with a "Handle with Extreme Caution" label. Get ready to dodge the banana slicers as we delve into the world of ill-advised kitchen presents!


Poor Choices

Our first category looks at some of the gifts that are just poor choices. Either because they’re poorly designed, or they don’t match the needs of the recipient, these gifts just don’t work. 


Frywall 10

Courtesy of Amazon & Frywall Store

     Starting us off strong, let’s look at a Frywall 10. It might have been seen on Shark Tank, but the production of this invention leaves much to be desired. Even if you remove the splatter guard when you aren’t at the pan, it still melts after a few uses, as one giftee notes. “The idea is great, and it certainly kept grease from splattering, but after two uses, holes started to form, and now it seems to be completely breaking down.” If the gift you want to give somebody is known for breaking down after only two uses it's not worth the money you paid for it. Read the reviews to make sure that you aren't getting scammed, and your giftee isn't either.


Pots/Pans/ Knives 

Just, don’t. For the sake of the home chef in your life, don’t gift it to them, except under 1 very specific instance. If they have been talking constantly about wanting a particular knife or pot set. Then and only then should you try this one. Chefs and cooks alike are just like any other artist. They find tools they like, and they don’t want to shift away from them. They don’t want to try something new, or the latest invention because they know what they have and how it works. Save yourself the heartache, and offer to get them a subscription box they love instead. 


Margaritaville Mixer 

Although we love a good margarita or other mixed drink, it doesn't work unless the giftee regularly throws parties or is training to be a bartender. These mixers can make a ton of margaritas, and with a bit of tinkering, you can use them for other drinks. But you can't use them for literally anything else. If you want to get something similar, try out a NutriBullet or a top-tier blender that can handle ice and various other kitchen jobs like pureeing fruits and vegetables. This way, you're not inciting somebody to alcoholism.


3 Pot Crockpot Buffet

Make sure you know how much space your giftee has. This is one where the idea can be very sweet, but if you’re giving it to someone who doesn’t cook, doesn’t host parties, or doesn’t have a ton of space? We can guarantee it’s not going to get much use. 


Sodastream

Everyone wants to be healthy. Most of us even know that drinking soda all of the time isn't great for us. The market’s trend toward flavored waters over the past 2 to 3 years shows just how much money there is to be made in this arena. And Sodastream is one of the first contenders to try and let you make your own drinks and flavors at home. Unfortunately, people have a lot to say about it.

Courtesy of SodaStream & Pepsi Co

“At first I thought this would be great. Less aluminum, less storage space and just the right amount of fizz. My first bottle lasted the required time for the amount of fizz I wanted. The second and third bottle, not so much. The second and third bottle require three times as many pumps and sometimes four times. I used to push it five times for a 1/2 second, now I am up 10-15 times for about a second each. Maybe my math isn't that good, but I know I am not getting the value out of the machine that I expected. After this bottle, I will return to the aluminum cans and add the cans to the recycling bin.”


One Use (If That) 

Our second category are those gifts you see in stores marked “As Seen on Tv!” and have exactly ONE (1) use, if they’re lucky. They languish in drawers and cabinets, never being used because they take too much time, space, or attention when you can do better with less. 


Microwave Egg Cooker

Courtesy of HSN

You’ve probably seen some variations of these that claim to make a perfectly delicious egg in half the time it would take in a pan on TV. Except they don’t. Not really. The egg leaks, or (as is most often) it tastes rubbery and gross. Unless you’re gifting it to someone with no sense of taste, we don’t advise this one. 


“All In One Breakfast Sandwich Maker” 

Another tool that claims to make it all in one, we all know what breakfast sandwich this is trying to knock off. As shiny as it looks though a) it only allows for one type of sandwich, and b) it comes with numerous flaws. As one user pointed out,

 “The point of it is to place the top and bottom of the English muffin in the machine to get toasted, then crack the egg into the centre area with a "removable floor" so that the egg drops down onto the lower bun once it's cooked. The problem is (a) that I don't want to automatically drop the egg, because I want to butter the ******* english muffins and (b) there is too much of a gap between the walls of the egg section and the removable floor, so the egg partially runs out and drops raw onto the lower half of the english muffin, or down the sides and makes a mess.”

Cleaver Cutter Scissor 

Picture a set of scissors with a very very small cutting board attached. Ideally you are going to use this to slice paper thin pieces of vegetable, or your herbs as you're prepping dinner. In reality? You're lucky if you don't cut yourself.

People consistently cite that not only is it dull on arrival, but additionally that it doesn’t work worth a damn, and that you’re better off spending the same amount of money on a knife. 


Mr. Sneezy Egg Separator

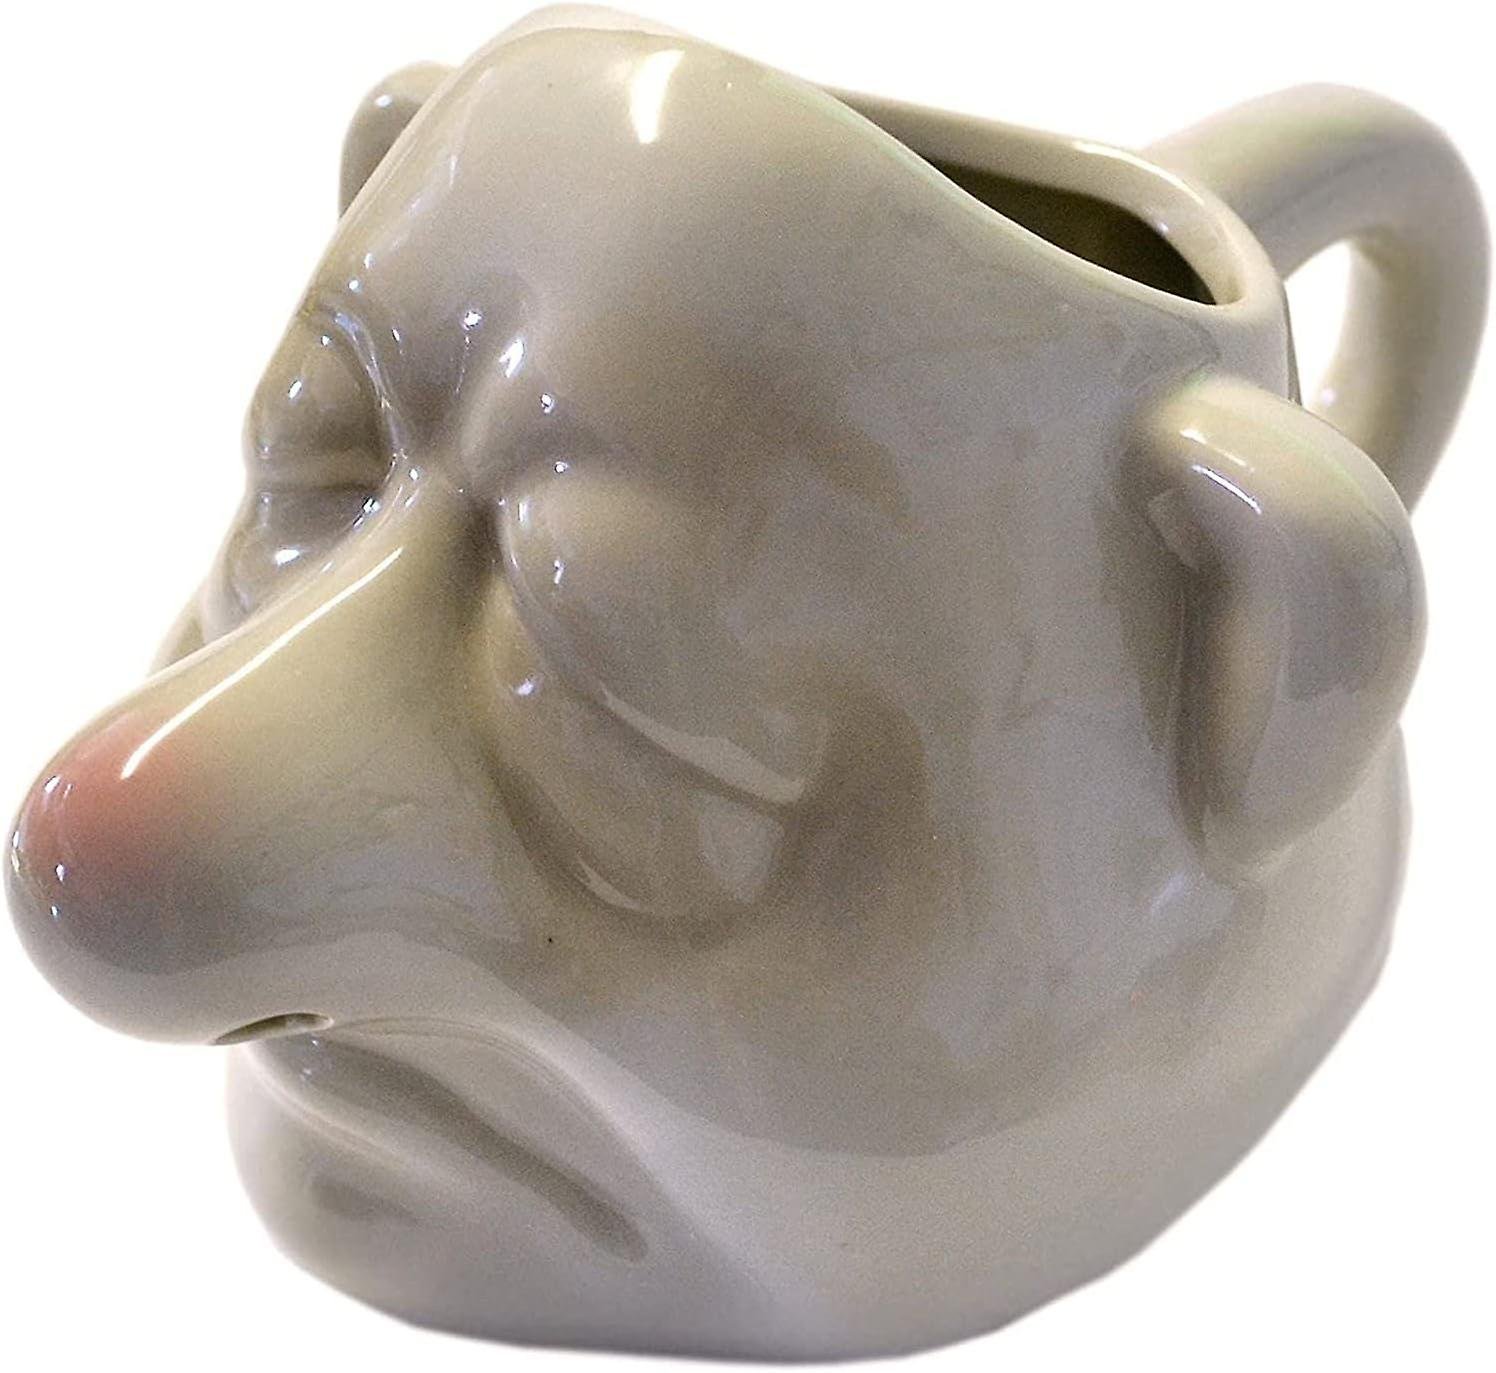
We're not sure if you've seen this one. It looks simultaneously hilarious and disgusting when you see it in person or in action. You have a head of a man with a large head that is primarily made up of nose. You crack the egg inside the cup and the egg white drip out through his nose.


We understand the concept. We understand why it exists. There are dozens if not hundreds of recipes that ask for you to separate your yolks from your whites. But this? This is just unsanitary. Not only does it only have one use, but it is extraordinarily difficult to get every nook and cranny inside of that deformed head properly clean. You're better off watching a 2-minute YouTube video on how to separate your yolks and your whites by hand then using this. So unless you want to chance giving someone a bacterial infection under the guise of offering a funny gift, you better avoid this one.


Pizza Scissors

As usual our description first. Unfortunately this name pretty much describes it. This is very similar to the supposed vegetable cutters we mentioned before, and is a triangular plate attached to a pair of scissors. In theory this is meant to help you cut a slice of pizza more easily. In reality no matter which type of pizza is your favorite, this is just insulting.


Banana Slicer 

Courtesy of Amazon

Our final woefully useless tool for this section Is the banana slicer. This one is flat out useless. Most bananas don't even fit this mold perfectly so you end up having to cut them with a knife and by the time you've done that you might as well use the same knife to cut the rest of the banana. Additionally why would you gift anyone this? We've seen reports of people getting these as gifts, and they weren't toddlers. This is just a very large go jump off a cliff if you give this to somebody as a gift because you obviously do not like them.

Flat Out Dangerous

Our final category is fortunately very small. These are gifts that are dangerous due to poor design. They’re gifts that can and have hurt people, even when using them properly. 


Easy Bake Ovens

Courtesy of Hasbro

Every child who loves to bake has for at least a moment clamored for an easy bake oven. Your blogger certainly did. And if you didn't, then you knew somebody who did have one. Did you know the number of people who have gotten hurt using one though? Or adults for that matter? The numbers have been high enough that the maker Hasbro has had to recall them at least once and has completely redesigned them from the ground up at least twice during the lifetime of the toy. 

And the problem isn't people not paying attention or not following instructions. It's always been a matter of design and fingers getting caught where they shouldn't trying to put the little pans in or pull them out.


Mortar and Pestle Made of Fragile Materials like Ceramic or Glass

In theory this could be one of the better gifts on this list. You want to spoil somebody you love by getting them a tool that they need for making the best sauces and grinding their own spices. You want to show them how much you love them by getting them something beautiful. Unfortunately for you, glass and ceramic and other fragile materials no matter how beautiful do not belong in this case. A mortar and pestle is meant to crush and grind herbs and spice. Do you know what glass on ceramic are remarkably bad at over time? Grinding and crushing things! Glass and ceramic will look pretty but as soon as they're put to the test they begin to chip and break and will eventually shatter which means somebody is getting an ER visit if they're lucky.


Grandma’s Hand Mixer From The Dark Ages

“This  was used by your great-grandmother to make her famous gingerbread!” 

How many times have you heard that? It's great when it's a recipe that's passed down. What's less great is when you hand over a 30-plus-year-old piece of electronics that hasn't been properly tested or insured that it's still works safely. Please do not give old electronics unless you know that a it's going to have sentimental value to the person your gifting it to and b it's not going to light their kitchen on fire.


Fondoodler

Our last one is one that checks all of the boxes. It's a difficult tool. It wasn't properly thought out during the design process. And worst of all it is definitely dangerous. Do you like fondue? Do you like drawing with your food? How about combining those things into this epic nightmare called the fondoodler. Rather than paraphrasing what somebody else has said though, we're going to share this hilarious and horrifying tale from user vengefultacos over on Reddit.

  “ My wife got me a fondoodler. Want a quick snack

Cut up some cheese (has to be exactly the right type to get the correct consistency)

Stuff said cheese into the barrel of the fondoodler. The barrel is round. You cut your cheese into a round tube, right? No? OK, it's square peg in round hole time

Wait a while for the thing to heat up and melt some cheese.


Courtesy of Dot Brand

Finally, you can squirt out molten cheese which may or may not stick to the cracker, and may or may not push the cracker around. If you decide to hold the cracker steady, recall that the tip of the Fondoodler is REALLY *******HOT.

After a few minutes of squirting cheese, you're done. Now go clean the congealed cheese out of the tube and tip.”


And there you have it, folks! Remember, while we've had a good laugh (and perhaps a cringe or two) exploring these ill-fated kitchen gifts, the lessons extend beyond these specific items. These tips, dripping with sarcasm and genuine advice, serve as your survival guide for gift-giving in the kitchen realm. So, next time you're eyeing that questionable kitchen gadget, think twice, and consider the recipient's needs and the practicality of the gift.


Got some horror stories of kitchen gift-giving gone wrong? Let's chat about it on our Facebook page! Share your tales of disastrous gifts and join the conversation on what not to give this holiday season.


Before you dive into the holidays headfirst, we'd like to throw in a friendly reminder: when it comes to your major appliances, before, during, and after the festive chaos, Appliance Rescue Service has your back! From reviving misbehaving ovens to saving fridges on the fritz, we’re here for you. So, while you're out there conquering your holiday shopping, remember, that there's always a lifeline for your appliances!


Contact Us
Call: (214) 599-0055

Bugs of Summer: Fleas, Lice, Ticks and Bed Bugs

Can Your Washer & Dryer Get Rid of These Pests? 


One of the things we always love about summer is going out and exploring. New experiences, new cities, new friends and new foods! We even love bringing back souvenirs. What we don’t like to bring back are tiny bitey things that nest in our clothes, our bed or our hair. Fleas, lice, ticks and bed bugs are some of the worst travel companions you can pick up in the summer. While most of us take precautions, sometimes those precautions fail, and you wind up having to get rid of one or many of the little bugs. 


For many of us the first answer is to toss everything into hot water in the washer and then run it through the dryer. But is that always the best answer? Let’s take a look together. 

Courtesy of  Egor Kamelev


Can Your Washer or Dryer Kill Fleas?

Fleas are six-legged wingless creatures that will go after your pets if given half a chance. They love to live in warm, humid areas that are mostly undisturbed. So your pet and their bedding is ideal! An adult female can lay as many as 50 eggs in a single day, and live up to 100 days when left alone. While they won’t live on humans, they can jump up to 13 inches, which means they can easily transfer to you and start to bite on you as well as your pet. 

What are you to do then? Will showering yourself and your pet then throwing all of your soft goods into the washer and dryer solve the problem? No, but it is a good place to start. The hot water in your washer will clean the bugs and any eggs out of your clothes, bedding and all the rest. If you’ve just gotten home from travelling and noticed the problem, go ahead and wash everything you took with you on your trip, and give your pet a good combing and treatment with a flea dip.  If you’re lucky, you’ve caught the problem in time and don’t have anything else to worry about. 


If that doesn’t solve the problem, or if it’s been a few days and you’re just noticing the issue, plus “flea dirt” around the house, you’ll need to kick things up. Start with the same steps as before, wash everything, and especially your pet. Now start on a deep clean. Take your pets outside  and  move all of your furniture around. This gets rid of any hidden areas and exposes them to light and the vacuum you’re going to be grabbing. Now vacuum down everything. If you can’t wash it, vacuum it. When you’re done, either throw away the bag or thoroughly clean the container. Vacuuming is more than just cleaning in this case, you’re also attacking any larvae that are in their coocoons. The  cocoons are resistant to insecticides, so now you can go back through your home and spray things down with the appropriate pet and human safe chemicals, knowing that you’ve gotten rid of them. 

You will need to repeat these steps every other day, for at least 10 days, possibly up to a month, in order to get rid of the infestation, depending on the severity. Make sure to wash your pet’s bedding every week as well. 


Short answer: No, your washer and dryer alone won’t kill all of your fleas, but it will cut out a large portion of the problem. 


Can Lice Be Killed By Your Washer or Dryer? 

Lice - Courtesy of Egor Kamelev 

Lice are another six-legged menace. Lice, unlike fleas, don’t jump. You don’t have to worry about them leaping from person to person, but you do need to worry about them crawling. It’s why lice can go through an elementary school or daycare like wildfire. Fortunately, the CDC has said that head lice don’t survive for long off the human head. 


So, if you had one of the children in your life accidentally bring lice into your home, are you to get rid of it? In this case? Yes, your washer and dryer can kill almost everything.

If the issue is restricted to the bed, this will be the easiest scenario. Start by stripping the bed, down to the bare mattress. Toss everything that can be washed directly into the washer and run it on hot water and then high heat for at least 45 minutes. If it’s something delicate, like that embroidered case from your great-grandmother? It’s ok, just toss it into the dryer and run it for 45 minutes. The heat is what is going to kill the louse and the nits. Everything that can go through one of these two steps can be used immediately afterward. 


Anything that cannot be washed or dried on high heat, stuff it into a garbage bag. These are going to sit for 10 days.  


This is, unfortunately, going also to include your mattress, but you’ll need to do one more step before that. Take your vacuum and go carefully over every inch of it. Any creases, folds or other places that a louse can hide or burrow need to be gone over before you put it into the bag.


After 10 days, you can vacuum everything again and hopefully have gotten rid of your very unwelcome guests. If not, repeat the process as needed, and inspect other soft surfaces around your home as the potential cause of the re-infestation. 

Short Answer: Yes! Your washer and dryer can kill lice, although it shouldn’t be the only step you take in getting rid of them. 

Will Your Washer or Dryer Kill Ticks? 

Ticks Courtesy of Erik Karits

For those of you who regularly venture outdoors, we hear you. We know ticks are *technically* around all year. However, they do tend to be the *most* active between April and September. While these 8 legged beasties can carry some dangerous diseases, you don’t have to confine yourself inside during the warmer months, even in Texas. You can protect yourself, your pets and your home rather easily. Fortunately, most of them cannot survive and reproduce indoors, according to experts.  So your goal is how to get rid fo them if you have you have brought one or more in with you. 

To start with, check yourself and your pets as soon as you get home. Look under arms and legs, behind ears (or inside them for your fuzzy friends), inside your belly button, between your legs and in your hair.  After that, hit the showers. If you’ve been to an area that you know is likely to have ticks, but they didn’t latch on, a shower is a great way to get rid of them. 


What about your clothes, though? For that, toss them in the dryer first on a high heat setting for at least 10 minutes. The high heat not only kills the ticks, it also kills off any young. Since ticks prefer areas with high humidity, not only will they not like the inside of your home, they really won’t like your dryer. If you went camping, you should be able to check the labels and do the same to your backpacks and gear as well.  From here you can wash your clothing as normal and pack away your outdoor gear like you usually would.  


Short Answer: Yes! Your dryer can kill any ticks in your clothing or camping gear, although it should still be paired with prep-work before you go out and careful checks once you come home.  


Are Bed Bugs Killed In Your Washer or Dryer? 

Bed Bugs  Courtesy of  Pixabay

Our final pest is bed bugs. Just thinking about staying in a hotel with them is enough to make you shiver. And don’t think that just because you prefer the nicest hotels means you’re safe. It’s not agree that very few cases of outbreaks are coming from hotels, the vintage ottoman you just picked up, might be a different matter.  Many items like clothing, boxes and secondhand furniture can be a source of bed bug infestations, as they enjoy hiding anywhere people are.  

That’s why it’s not how clean your house is that is going to protect you, it’s being careful about treating things that come into your home. 


If you or someone in your home is waking up with bitchy red bites, especially under their clothes, it could be bed bugs. 

Your first step is going to be to call professionals. Not only do you need to confirm that it’s bed bugs, but you also need to squash the problem as quickly as possible. The longer you wait, the more the bugs can spread within your home, and if you wait too long, outside of it. 

Make sure to get written estimates from anyone you’re considering. They should be licensed experts, able to offer you a written plan of what pesticides they intend to use, what traps or heat treatments and how they’ll use it. While you can purchase over the counter pesticides, they are dangerous to use without proper guidance and it’s unlikely that you’ll be successful on your own. 

When talking to a company, ask all of the questions. A good company will answer them, and a company that won’t answer or tries to pressure you into setting an appointment, is a company you can weed out.  Always ask them about their success rater and if their treatment comes with a guarantee. If it doesn’t, or if they say you don’t need one, that’s another company weeded out of consideration. 

While you’re waiting on the professionals, there’s still plenty you can do, unless you want to burn everything and start from scratch as one of our team suggested. 

Start by sorting anything that’s infested, bedding or clothing, into clean plastic bags. Sort them based on how they need to be washed, and also include a dry-clean only pile.  Then wash and dry everything at the hottest temperature the material can handle. 

While some bugs will die thanks to a dip in your washer, it’s going to be the dryer that kills them. You’ll need at least 60 minutes in the dryer to get rid of them when it comes to the items that you can wash. 

After they’re dried, put everything into fresh clean bags, and do not remove them until the infestation is successfully eliminated.


Thoroughly vacuum everything. Rugs, floors, furniture, beds, any and all cracks and crevices. By cutting down on your existing population, you’re cutting down on the number that can bite you or repopulate. After you’re done vacuuming, put all of the bags or debris into a tightly sealed bag and put it into an outside garbage bin. 


Now it’s time to search all of your furniture. Again, you’re looking for cracks, crevasses, or places that don’t otherwise see much light, like the sides of your mattress or behind the headboard. Don’t forget about inside the beds as well. Look for black stains, blood and fecal matter from the 8 legged biters, discarded skins and the bugs themselves. 


When the professionals have come and done their thing, follow any and all directions that they have, and enjoy having your home free of pests again. 


Short Answer: Nope. Washing alone will not get rid of a bed bug infestation. However it is a very important step in the process. 


Have you encountered any of these summer bugs? How did you handle getting rid of them? Did we miss a step? Let us know over on our Facebook Page. 


Three out of four of our summer bugs can be killed in the washer and dryer, but what if your washer or dryer aren’t functioning properly? That is where we come in. While we can’t protect you from fleas, ticks, bed bugs or lice, Appliance Rescue Service can ensure that your washer and dryer are working properly. You can call us ((214) 599-0055) or go to our contact page to set up an appointment that works with your schedule. We’ll work with you to find the best time to send one of our experts to diagnose and solve the issue. At Appliance Rescue Service, getting your home running smoothly is our priority. 

Building a Tea Garden 101

What It Is, What It Could Be, And Why In the World Would You Even Want One?

Have you ever looked at a box of tea in the store and thought, "I could do that better"? Or maybe you opened up the tea bag when you got home and saw that it was only a tiny amount of chamomile and a much larger amount of mint. Or maybe you're just a curious sort, and you want to know how to mix your own tea blends. That's where this week's post comes on; we're taking a look at the first step to answering those questions, which is growing your own tea garden. We'll walk you through what you need to consider, the benefits that there are, which plants are good for a tea garden, and some of the important things to keep in mind as you harvest and store your tea.


Deciding What Type Of Plants You Want in Your Tea Garden

Naturally, the first thing you have to look at is what type of plants are you going to grow? Well, we won't go too deeply into this section; these are questions that you should consider as you do research.


What type of garden do you want? 

    Annual or perennial? 

Do you want plants that you need to grow from seed every year? Or would you rather grow one's where you plant them once and reap a harvest for years to come?


Indoor, in containers, or in a plot?

How do you want to grow your plants? Do you love having them scattered throughout your home? Do you only have a porch and so you need to grow them in containers? Or do you have a garden in your yard that you can dedicate to this? Or are you going to go for broke and turn the entirety of your yard into a tea garden?


    To treat specific issues? 

Do you want to treat specific issues? Do you want to grow plants for a singular purpose or would you rather experiment and see what you can come up with?


Benefits To Growing Your Own Tea

All right so you've done your research, and now you can grow your own tea. What are the benefits though? After all that's a lot of work when you can just as easily go out and purchase it at Whole Foods or Central Market.


  Gifts Galore

      Let's start off with the low-hanging fruit; you will never run out of gifts for people. Whether it's the overabundance of mint, or knowing precisely which plants to mix together when someone has had a rough day and needs a pick me up, having your own tea garden is a never-ending source of gifts and ideas. If you're willing to throw in a little extra work, you can even take the plants you've already harvested and turn them into skin care products, soaps, candles, or even potpourri. All from the same garden and the work you've already put in. 


  Treat Some Health Issues At Home

     While we will never say that you should treat everything on your own or that you should not go to a doctor, sometimes a doctor will recommend you over-the-counter medicine or a day of rest.  For those days? Mint and Ginger is great for soothing your stomach. Sage and licorice root are great for a sore throat, although maybe not together. And a cup of chamomile tea is fantastic when you've had a rough week.


Important note: Please do not take anything herein as medical advice, and always make sure to speak to a medical practitioner before taking any teas in conjunction with medicines you have been prescribed.


  Help Pollinators For Your Garden And Those Around You

      By growing your own tea garden, you provide food for the natural pollinators in your area doing so means that not only will your garden flourish, but so will those for miles around you. It is one small way that you can help take care of your community without having to do anything extra. 


Blend Your Own

In our opinion, one of the best benefits for growing your own tea garden? You get to blend your own teeth. If you're in the mood to experiment you can try adding a little extra to a recipe and see how that affects the flavor. Or you might substitute in rose hips instead of lavender to give a blend something different. You don't have to trust that you'll like precisely what's in a box and then potentially end up with a box of tea that you don't like. If you don't like what's in one bag of tea, write down the recipe you used and what you didn't like about it and next time you can do it better.


Plants for Your Tea Garden 


Before we dig into these, we want to point out that while we are providing the botanical names for these plants, there are varieties. Whether you want to grow one plant or many of them, please do more research into them talk to other gardeners and, especially those that grow their own tea, to learn more about the plants for your own safety and health.  


Roman chamomile

Official Name: Chamaemelum nobile
What it’s used for: Roman chamomile has been used to treat nausea, heartburn, gas, vomiting, and anxiety. It has also been used to ease the discomfort of swollen gums.


Mint - For any variety of mint, make sure that you keep it contained somehow. This might be growing it in a planter, or keeping it well away from anything and surrounded by concrete, or you can even let it grow inside and away from any other plants or dirt. Mint is one of the hardest plants that there is and if there is a tiny bit of dirt around it it will send out runners and set up an entirely new patch before you can say 'boo.'

Official Name: Mentha ×piperita
What it’s used for: Peppermint specifically has been used to treat upset stomach, digestion, help with anxiety, and also treat headaches brought on by stress.


Roses

There are many different varieties of roses that are edible, and you’ll want to choose one that has a very strong aroma, as that means the flavor will be stronger.
What it’s used for: Rose hips are often used to treat stomach issues and are high in antioxidants.


Lavender

Official Name: lavandula angustifolia
What it’s used for: Lavender is used to help reduce stress and anxiety, which has also been shown to help you fall asleep at night. It also helps to boost the mood and alleviate symptoms of mild depression, according to preliminary studies from 


Elderberries -Technically speaking, elderberry is a shrub, and you should keep that in mind when it comes to planning out your garden; you don't want to leave the amount of space for a plant like rosemary and end up with a tree.

Official Name: Sambucus nigra
What it’s used for: Elderberry tea is packed with anti-inflammatory properties and has often been used in treating not only the cold and flu but also in reducing swelling, joint pain, and muscle aches.


Milk thistle - Milk thistle is another one that you need to keep carefully contained. Much like mint, make sure that you plan out ahead of time how you're going to do that.

Official Name: silybum marianum
What it’s used for: Milk thistle has often been used for protecting and strengthening the liver and for aiding in managing diabetes. 


Lemon balm -  It''s best to harvest lemon balm right after the flowers have grown and bloomed.

Official Name: Melissa officinalis
What it’s used for: Lemon balm has long been used to reduce stress and anxiety, to improve the appetite, and to help with sleep.


Ginger - For ginger, it's not the plant that you want; although the flowers are lovely, it is the root. You can slice or grate it for making teas.

Official Name:  Zingiber officinale
What it’s used for: Ginger has long been used to aid with nausea and vomiting, to help with the pain of osteoarthritis, and also to help treat colds and cold-like symptoms.a


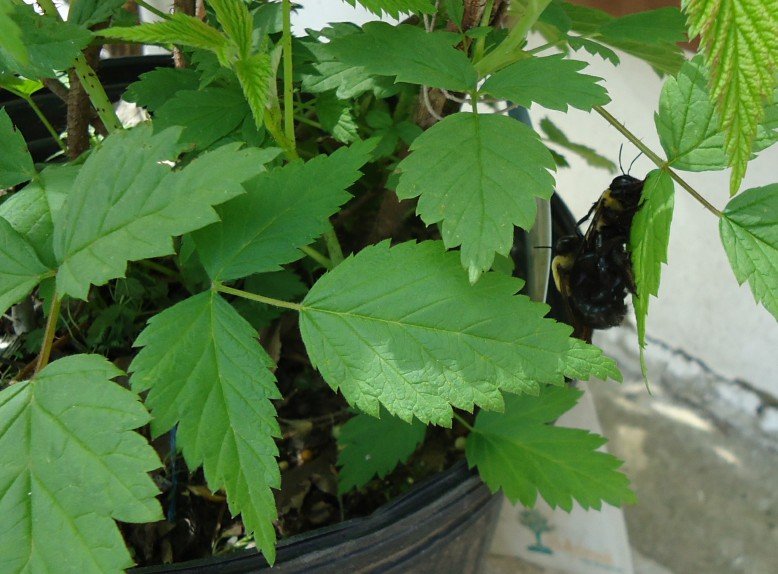
Raspberry - with raspberry, you get a two-for-one deal. Not only can you harvest your own raspberries and enjoy the fruit, but you can also harvest and utilize the leaves for tea.

Official Name: Rubus idaeus
What it’s used for: Raspberry leaf tea is packed with antioxidants, relieves mouth ulcers and sore throats, alleviates inflammatory conditions such as conjunctivitis, and aids in menstrual cramping.


Dandelions - Two very important notes when it comes to dandelions. The first is to make sure that you are purchasing true dandelions and not some of their relatives. Not because they are poisonous but simply because they will not have any of the benefits or the taste profile. The second point is that you should harvest the dandelions as soon as the flowers bloom and are fully open for the first time. You can use the flowers, the stems, the leaves, and the roots. But if you don't want them to take over everything in your yard, and your neighbor's yard, and their neighbors' yard, you need to get them before the little white fuzz balls pop up.

Official Name: Taraxacum officinale
What it’s used for: Dandelion leaves act as a diuretic and are also used to stimulate the appetite. Dandelion flowers have antioxidant properties and are being researched as possibly helping the immune system. Dandelion root is used to detoxify both the liver and the gallbladder.


Echinacea

Official Name:  Echinacea purpurea

What it’s used for: Echinacea is used to boost the bodi’s immune system and reduce both the symptoms and duration of the common cold and flu.


Thyme 

Official Name: Thymus vulgaris
What it’s used for: Thyme is able to lower the heart rate in people with high blood pressure and is theorized to help lower cholesterol. It also is used as a natural cough remedy and helps to boost your immunity.


St.John's wort

Official Name: Hypericum perforatum
What it’s used for:  St John's Wort has been extensively studied in its aid with mild to moderate depression.


Catmint

Official Name: Nepeta cataria
What it’s used for: Catmint is another herb that has been used to help the stomach with diarrhea, gas, and cramps. It is said to relieve muscle spasms in the digestive system. Catmint has also been shown to reduce anxiety, nervousness, and restlessness. It is also shown to make people drowsy and should be used with caution for that reason.


Valerian

Official Name: Valeriana officinalis
What it’s used for: Valerian is an herb that people have used for many years to treat insomnia, depression, anxiety, and headaches.


Harvesting And Preparing Your Plants

Before we close out, let's take a quick look at how to go about harvesting and preparing your plants.

-in most cases, unless otherwise noted, you are going to be harvesting herbs before they flower. When herbs are first growing, they put all of their energy into growing the leaves, and so that is when the herbs are at their peak. Once the plant has flowered, it is now diverting that energy toward growing seeds.


- You'll want to cut herbs at mid-morning. You don't want dew on them, but you also don't want them to get too hot as they would in the afternoon and have the oils pulled deeper into the plant. 

- Air dry your herbs to preserve the oils within.


- Keep your herbs stored in airtight containers, in a dry area, and away from the sun. There are all sorts of lovely apothecary-style bottles that you can use to store your herbs after they've tried. The thing to keep in mind if you use those is to paint the outside black and then stencil on what the plant is within. Allowing light to come into contact with the plants will degrade them over time and prevent you from getting the best cup of tea that you can.


- Mix your tea a few bags at a time, rather than mixing everything at once. Doing this in small batches ensures that if you don't like how something turned out, you don't have to throw away an entire harvest of a plant. Instead, you just note down the ratios you used and reconsider for next time.

- This brings us to our final point, keep a tea journal. Whether you are using tea to assist with ailments or working to find the ideal blend for every person in your life, keeping careful notes is important. You might find that you didn't add enough bergamot, and so you didn't get the citrusy flavor that you wanted. For this, you'd want to up the amount or add in a secondary plant that would support that flavor. Or you might notice that using mullein left you feeling hungover the day after; for that you would want to know exactly how much you would use in a cup and how long you had seeped it so that you could decrease the amount. Just like many other activities involving experimentation keeping a tea journal is both useful and rewarding. 


What did you think? Are you hastily grabbing for some graph paper to chart out your garden? Or maybe you're thinking of growing a few container plants first to see just how much you like it? Let us know over on our Facebook page.


If you're reading this post because you needed a cup of tea after your dishwasher flooded, we can help. We won't be offering plants, though. Instead, we'll work with you to set a date and time when one of our skilled technicians can come over and diagnose the problem. You can give us a call at ((214) 599-0055) or reach out to us via our contact page.